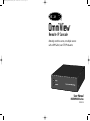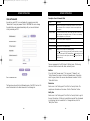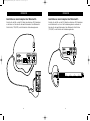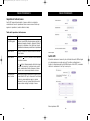
1
P74238ea_F1DE101G-man.qxd
28-04-2003
09:33
Page 1
En
Fr
OmniView
™
De
Nl
Remote IP Console
Console IP distante
IP-Fernbedienungskonsole
Remote IP Console
Consola IP de control remoto
Console remota IP
Es
It
Remotely control a server, or multiple servers with a KVM Switch, over TCP/IP networks
Contrôlez un ou plusieurs serveurs à distance grâce à un Switch KVM sur des réseaux TCP/IP
Einen oder mehrere Server per Masterswitch über TCP/IP-Netzwerke fernsteuern
Voor het op afstand bedienen van een of meer servers met een KVM-switch, via TCP/IP netwerken
Controle a distancia un servidor o múltiples servidores con un conmutador KVM a través de redes TCP/IP
Per controllare a distanza un server o diversi server dotati di switch KVM tramite le reti TCP/IP
User Manual - ENTERPRISE Series
Manuel de l’utilisateur - Série ENTREPRISE
Benutzerhandbuch - Enterprise-Serie
Handleiding - ENTERPRISE Series
Guía de instalación rápida - Serie Enterprise
Manuale dell’utente - Serie ENTERPRISE
F1DE101G
P74238ea_F1DE101G-man.qxd
28-04-2003
09:33
Page 2
OmniView
Remote IP Console
™
Remotely control a server, or multiple servers
with a KVM Switch, over TCP/IP networks
User Manual
ENTERPRISE Series
F1DE101G
P74238ea_F1DE101G-man.qxd
28-04-2003
09:33
Page 4
TABLE OF CONTENTS
Overview
Introduction . . . . . . .
Package Contents . . . .
Feature Overview . . . . .
Equipment Requirements
Specifications . . . . . . .
RIPC Diagrams . . . . . .
.
.
.
.
.
.
.
.
.
.
.
.
.
.
.
.
.
.
.
.
.
.
.
.
.
.
.
.
.
.
.
.
.
.
.
.
.
.
.
.
.
.
.
.
.
.
.
.
.
.
.
.
.
.
.
.
.
.
.
.
.
.
.
.
.
.
.
.
.
.
.
.
.
.
.
.
.
.
.
.
.
.
.
.
.
.
.
.
.
.
OVERVIEW
.
.
.
.
.
.
.
.
.
.
.
.
.
.
.
.
.
.
.
.
.
.
.
.
.
.
.
.
.
.
.
.
.
.
.
.
.
.
.
.
.
.
.
.
.
.
.
.
.
.
.
.
.
.
.
.
.
.
.
.
.
.
.
.
.
.
.
.
.
.
.
.
.
.
.
.
.
.
.
.
.
.
.
.
.
.
.
.
.
.
.
.
.
.
.
.
.
.
.
.
.
.
.1
.1
.2
.3
.4
.5
Installation
Hardware Installation . . . . . . . . . . . . . . . . . . . . . . . . . . . . . . . . . . .6
Initial Network Configuration . . . . . . . . . . . . . . . . . . . . . . . . . . . . .12
Using your RIPC
Prerequisites . . . . . . . . . .
Log Into the RIPC . . . . . .
Main Screen . . . . . . . . . .
Log Out from the RIPC . . .
Control Host Remote Access
.
.
.
.
.
.
.
.
.
.
.
.
.
.
.
.
.
.
.
.
.
.
.
.
.
.
.
.
.
.
.
.
.
.
.
.
.
.
.
.
.
.
.
.
.
.
.
.
.
.
.
.
.
.
.
.
.
.
.
.
.
.
.
.
.
.
.
.
.
.
.
.
.
.
.
.
.
.
.
.
.
.
.
.
.
.
.
.
.
.
.
.
.
.
.
.
.
.
.
.
.
.
.
.
.
.
.
.
.
.
.
.
.
.
.
.
.
.
.
.
.
.
.
.
.
.
.
.
.
.
.
.
.
.
.
.
.
.
.
.
.
.
.
.
.
.15
.16
.17
.18
.18
Security
Ports & Protocols . . . . . . . . . . . . . . . . . . . . . . . . . . . . . . . . . . . . .23
Firewall . . . . . . . . . . . . . . . . . . . . . . . . . . . . . . . . . . . . . . . . . . .24
Certificate Management . . . . . . . . . . . . . . . . . . . . . . . . . . . . . . . .25
Network Settings Menu
Remote Access Settings .
Users & Passwords . . . . .
Serial Port . . . . . . . . . .
Keyboard/Mouse Settings
KVM Switches . . . . . . . .
.
.
.
.
.
.
.
.
.
.
.
.
.
.
.
.
.
.
.
.
.
.
.
.
.
.
.
.
.
.
.
.
.
.
.
.
.
.
.
.
.
.
.
.
.
.
.
.
.
.
.
.
.
.
.
.
.
.
.
.
.
.
.
.
.
.
.
.
.
.
.
.
.
.
.
.
.
.
.
.
.
.
.
.
.
.
.
.
.
.
.
.
.
.
.
.
.
.
.
.
.
.
.
.
.
.
.
.
.
.
.
.
.
.
.
.
.
.
.
.
.
.
.
.
.
.
.
.
.
.
.
.
.
.
.
.
.
.
.
.
.
.
.
.
.
.
.
.
.
.
.28
.30
.32
.34
.35
Appendix A
Update Firmware . . . . . . . . . . . . . . . . . . . . . . . . . . . . . . . . . . . . .37
RIPC Video Modes . . . . . . . . . . . . . . . . . . . . . . . . . . . . . . . . . . . .37
Hot Key Table . . . . . . . . . . . . . . . . . . . . . . . . . . . . . . . . . . . . . . .38
Introduction
Congratulations on your purchase of this Belkin OmniView ENTERPRISE Series
Remote IP Console (the RIPC). Our diverse line of KVM solutions exemplifies the
Belkin commitment to delivering high-quality, durable products at a reasonable
price. Designed to give you control of your computer or KVM switch from
anywhere around the world through any web browser, the RIPC can be easily
configured to accommodate your existing LAN setup, large or small.
Belkin has designed and developed the RIPC with the server administrator in
mind. The result is a powerful, yet easy-to-install and -use remote solution that
surpasses all other solutions with advanced features and functionality.
This manual will provide all the details you’ll need about the RIPC, from
installation to operation and troubleshooting, in the unlikely event of a problem.
Thank you for purchasing the OmniView ENTERPRISE Series Remote IP Console. We
appreciate your business and are confident that you will soon see for yourself why
over 1 million Belkin OmniView products are in use worldwide.
Package Contents
•
•
•
•
•
•
•
•
One OmniView ENTERPRISE Series Remote IP Console
One PS/2 cable kit
One 5V DC, 2000mA power supply
User Manual
Quick Installation Guide
Registration Card
Rack-mount bracket with screws
One DB9 cable
Glossary . . . . . . . . . . . . . . . . . . . . . . . . . . . . . . . . . . . . . . . . . . . .39
FAQs . . . . . . . . . . . . . . . . . . . . . . . . . . . . . . . . . . . . . . . . . . . . . .40
Troubleshooting . . . . . . . . . . . . . . . . . . . . . . . . . . . . . . . . . . . . . . .41
Information . . . . . . . . . . . . . . . . . . . . . . . . . . . . . . . . . . . . . . . . . .42
1
P74238ea_F1DE101G-man.qxd
28-04-2003
09:33
Page 2
OVERVIEW
OVERVIEW
Feature Overview
Equipment Requirements
Capacity for one digital user support
Hardware Requirements
Allows one digital user access to control a computer or KVM via web browser.
•
•
•
•
•
•
•
•
Web-browser compatibility
The RIPC can be accessed from any computer that is running Microsoft®
Internet Explorer Version 5.5 or higher. No proprietary software is needed.
0U rack-mountable
The RIPC is compact enough to position on your desktop, behind another
device, or attached to the side of your server rack to take up 0U space.
User-defined hot keys
User-defined hot keys simulate keystrokes on the remote system that cannot
be generated locally.
Flash upgrades
OmniView ENTERPRISE Series Remote IP Console (included)
PS/2 cable kit (included)
5V DC, 2000mA power supply (included)
Keyboard, monitor, and mouse
Connection to network using 10/100Base-T Ethernet port (RJ45)
CAT5e crossover cable
CAT5e straight-through cable
Rack-mount bracket with screws (included, for rack-mount install option)
Software Requirements
• Microsoft Internet Explorer 5.5 and above
• Servers running Windows® NT®, 2000, and XP
Flash upgrades allow you to obtain the latest firmware updates for your RIPC.
These updates ensure that your RIPC continues to work with the latest devices
and computers. Firmware upgrades are free for the life of the RIPC. Visit
belkin.com for upgrade information and support.
LED display
Located on the face of the RIPC, the LED display provides an easy way for you
to monitor the status of your connection, link, and activity.
Video resolution
With an 117MHz bandwidth, the RIPC is able to support video resolutions of up
to 1280x1024@60Hz. To preserve signal integrity and obtain the best results,
use Belkin video cables.
Web-based advanced user interface
You can set up the RIPC’s functions easily through your web browser, without
having to install additional software onto the computer. There are no disks to
install or keep track of and you can make changes and perform setup functions
from any computer on the network, quickly and easily.
2
3
P74238ea_F1DE101G-man.qxd
28-04-2003
09:33
Page 4
OVERVIEW
Specifications
OVERVIEW
RIPC Diagrams
Part Number: F1DE101G
Power: 5V DC, 2000mA
Connection LED
Network Connection: 10/100Base-T connection (standard RJ45 connector)
Keyboard Emulation: PS/2
Mouse Emulation: PS/2
Connection
Monitors Supported: Supports all VESA graphics modes, and text modes
Remote IP Console
Max. Resolution: 1280x1024@60Hz
Link / Activity
Bandwidth: 117MHz
Keyboard Input: 6-pin miniDIN (PS/2)
Mouse Input: 6-pin miniDIN (PS/2)
Link/Activity LED
Computer/KVM Ports: 1
VGA Port: 15-pin HDDB type
Power Jack
LED Indicators: 2
Serial 02 Port
Enclosure: Metal enclosure
LAN Port
Console
VGA Port
CPU/KVM
VGA Port
console
CPU/KVM
Dimensions: 1.75 x 5.7 x 7 inches (43.1 x 144.7 x 177mm)
Weight: 1.8 lbs. (800g)
Operating Temp: 32° to 104° F (0~40° C)
Serial 02
power
Storage Temp: 104° to 167° F (40~75° C)
Humidity: 0-80% RH, non-condensing
Serial 01
reset
LAN
Maximum Altitude: 10,000 feet
Warranty: 1 year
Serial 01 port
Reset Button
Console
Keyboard Port
Console
Mouse Port
Note: Specifications are subject to change without notice.
4
CPU/KVM
Keyboard Port
5
CPU/KVM
Mouse Port
P74238ea_F1DE101G-man.qxd
28-04-2003
09:33
Page 6
INSTALLATION
INSTALLATION
Hardware Installation
1. Power down your server or KVM Switch.
Installing the RIPC into a Server Rack
2. Connect your PS/2 type keyboard and mouse to the appropriate PS/2
“Console” ports.
The RIPC includes mounting brackets for installation in 19-inch racks.
1. Attach the included bracket to the top or bottom of the RIPC with the
provided Phillips screws.
2. Mount the RIPC to the rack.
Note: Mounting screws for the rack are not included. Please use the specified screws
from your rack’s manufacturer.
*** Cautions and Warnings ***
Before attempting to connect anything to the RIPC or your computer(s),
please ensure that all your computer equipment and devices are powered off.
Belkin Corporation is not responsible for damage caused by your failure to do so.
Serial 02
power
console
Serial 01
LAN
reset
F10
F11
HOME
PG UP
PG DN
HELP
CAPS
`
F9
num
lock
1
2
3
4
5
6
7
9
8
-
0
=
delete
]
[
P
CPU/KVM
cap
lock
pg up
=
/
7
8
9
4
5
6
1
2
3
-
+
K
L
;:
ESC
return
'"
shift
PC
^
clt
<
alt
OPT
+
>
0
3. Take the video cable that is attached to your VGA monitor and connect it to
the “Console” port.
6
7
P74238ea_F1DE101G-man.qxd
28-04-2003
09:33
Page 8
INSTALLATION
INSTALLATION
Connecting the Computer or KVM
Connecting the Computer or KVM
Using the provided PS/2 cable kit, connect one end of the VGA and PS/2
cables to your server. Connect the other end to the “CPU/KVM” ports on the
back of the RIPC.
Using the provided PS/2 cable kit, connect one end of the VGA and PS/2
cables to the RIPC on the KVM Switch. Connect the other end to the
“CPU/KVM” ports on the back of the RIPC.
Serial 02
power
Serial 01
console
reset
CPU/KVM
LAN
Serial 02
power
Serial 01
console
CPU/KVM
LAN
reset
console
bank
select
USB
flash
daisy chain IN
CPU 01/02
CPU 03/04
CPU 05/06
CPU 07/08
1 2 3 4
reset
8
PS/2
daisy chain OUT
90-264 VAC. 47-63 Hz
9
P74238ea_F1DE101G-man.qxd
28-04-2003
09:33
Page 10
INSTALLATION
INSTALLATION
Powering Up the RIPC
Initial Network Configuration
1. Connect the included power supply unit into an available power outlet.
1. Using a RJ45 crossover cable, connect one end to the computer and the
other end to the port labeled “Network”.
2. Attach the barrel plug into the power jack located on the rear of the RIPC
to the power unit.
Serial 02
power
Serial 01
console
reset
CPU/KVM
LAN
Serial 02
power
Serial 01
console
reset
CPU/KVM
LAN
2. Set the IP address on your computer to be in the same range as 1.2.3.4
(example: 1.2.3.6).
3. Open the Microsoft® Internet Explorer web browser.
4. Enter the IP address “1.2.3.4”.
5. Enter the default login name “administrator”.
3. Turn on your KVM Switch. If you do not have a KVM Switch, please proceed
with powering up your computers.
6. Enter the default password “belkin”.
10
11
P74238ea_F1DE101G-man.qxd
28-04-2003
09:33
Page 12
INSTALLATION
INSTALLATION
Initial Network Configuration
Remote Access
7. Under Setting &
Configurations, click on
“Network”. (Note: Uncheck
“DHCP” check box.)
Remote Access is a Java™ applet that displays the redirected screen, keyboard,
and mouse of the remote host system to which the RIPC is attached. The web
browser used for accessing the RIPC must supply a Java Runtime Environment,
version 1.1 or higher. Remote Access will perform in much the same way from
a remote location as if you were sitting directly in front of the computer itself.
You will be able to use the keyboard and mouse in the usual way, however, the
remote system will react to keyboard and mouse actions with a slight delay.
The length of the delay depends on the bandwidth of the line over which you
are connected to the RIPC. Open the applet by choosing the appropriate link
in the navigation frame of the HTML.
8. Enter the desired network
settings and click on
“Apply Changes” to save
new network settings.
Bottom Part of the Remote Access Applet
The Remote Access Applet offers the following features:
Auto adjust button
If the video displayed is of bad quality or distorted in some way, press this
button and wait a few seconds while the RIPC adjusts for the best possible
video quality.
Sync
Choose this option in order to synchronize the local with the remote
mouse cursor.
Video settings
9. Reset the local IP address settings on the computer used for configuration
of the RIPC.
Connecting the RIPC to the Network
This opens a new window with elements to control the RIPC’s video settings.
You can change some values related to brightness and contrast of the picture
displayed, which may improve the video quality. It is also possible to revert to
the default settings for all video modes or only the current one.
Connect the RIPC to the network using a straight-through RJ45 Category 5
network cable.
13
12
P74238ea_F1DE101G-man.qxd
28-04-2003
09:33
Page 14
INSTALLATION
USING YOUR RIPC
Configuration via serial
Prerequisites
On a computer that has HyperTerminal Services software installed, connect the
provided DB9 serial cable by attaching one end to your computer and the
other end to the port labeled “Serial 1” on the RIPC.
Open the HyperTerminal software and use the following parameters:
The RIPC features an embedded operating system and applications that offer a
variety of standard user interfaces. The information following will describe
their use in detail. All of the interfaces are accessed using the
TCP/IP protocol, and can be used over either the built-in Ethernet adapter
or the modem.
Serial line parameters
The following interfaces are supported:
Parameter
Value
Bits/second
115200
Data bits
8
Parity
No
Stop bits
1
Flow Control
None
HTTP/HTTPS: The most complete access is provided by an embedded web
server and the RIPC’s environment can be controlled by a standard web
browser. Depending on the web browser, you can access the RIPC’s card using
the unsecured HTTP protocol or, if the browser supports it, the encrypted
HTTPS protocol. We recommend use of HTTPS whenever possible.
Telnet: A standard telnet client can be used to access an arbitrary device
connected to one of the RIPC’s serial ports via a terminal mode.
You will now be able to set your networking configuration on the RIPC.
In order to use the Remote Access window of your managed host system, the
browser must include a Java Runtime Environment, version 1.1 or higher.
However, even if the used browser has no Java support, such as is the case on
small handheld devices, you can still maintain your remote host system using
the administration forms displayed by the browser itself.
We recommend the following browsers for an unsecured connection to
the RIPC:
Microsoft Internet Explorer version 5.5 or higher on Windows 98, Me, 2000,
and XP
Netscape® Navigator® 7.0 or Mozilla 1.0 on Windows 98, Me, 2000, XP, Linux®
and other UNIX®-like operating systems
In order to access the remote host system using a securely encrypted
connection, you need a browser that supports the HTTPS protocol. Strong
security is only assured if you are using key length of 128 bits. Many older
browsers do not have a strong 128-bit encryption algorithm due to former
export regulations of US authorities. Internet Explorer 5.0, which is included in
Windows Me and 2000, supports a key length of only 56 bits. You can read
about the key length of Internet Explorer under the menu points “?” and
“Info”. The dialog box displays a hyperlink that leads you to information on
upgrading your browser to a state-of-the-art encryption scheme.
14
15
P74238ea_F1DE101G-man.qxd
28-04-2003
09:33
Page 16
USING YOUR RIPC
USING YOUR RIPC
We recommend the following browser for a secured connection to the RIPC:
Microsoft Internet Explorer version 5.5 or higher on Windows 98, Me, 2000,
and XP
Netscape Navigator 7.0 or Mozilla 1.0 on Windows 98, Windows Me, 2000, XP,
Linux, and other UNIX-like operating systems
Note: Be sure to change the administrator-user password immediately after you
have installed and accessed your RIPC for the first time.
Main Screen
After a successful login, the RIPC will present its main screen frames (see
Figure below).
Internet Explorer Showing the Encryption Length
Log Into the RIPC
Start your web browser and direct it to the address of your RIPC configured
during installation.
The home button brings you instantly to the home page from one of the
administration menu points. The logout button logs you out of the RIPC; it
terminates the current session and will require you to re-enter your user name
and password to log in again later.
Note: The RIPC will prompt you for a password automatically if there is no
administration activity for 30 minutes.
To establish an unsecured connection, you must enter the following into the
address line of your browser:
http://192.168.1.22/
For a secure connection, you must enter:
https://192.168.1.22/
The RIPC has a built-in administrator-user that has permission to administrate
your system:
Login name
administrator
Password
Belkin
The RIPC’s Home Menu Window
16
17
P74238ea_F1DE101G-man.qxd
28-04-2003
09:33
Page 18
USING YOUR RIPC
Log Out from the RIPC
USING YOUR RIPC
Control Host Remote Access
connection to be made, i.e. if you are working over a private internal network
your NAT (Network Address Translation) firewall settings must be configured
accordingly. In other words, if the RIPC is connected to your local network
environment and your connection to the Internet is over a proxy server only,
failure to configure NAT correctly will make it very unlikely that the Remote
Access will be able to establish the connection. This is because web proxies
are not capable of relaying the RFB protocol.
The Remote Access is the redirected screen, keyboard, and mouse of the
remote host system the RIPC controls.
If you are unsure about this issue, please consult your network administrator
for an appropriate network environment.
Initiating Remote Access causes a pop-up window to appear that replicates the
screen of your host system. Remote Access will perform in much the same way
from a remote location as if you were sitting directly in front of the computer
itself. You will be able to use the keyboard and mouse in the usual way,
however, the remote system will react to keyboard and mouse actions with a
slight delay. The length of the delay depends on the bandwidth of the line over
which you are connected to the RIPC.
Remote Access window attempts to display the remote screen at its optimal
size, so that it may resize to match the remote screen initially, as well as
following a change of the remote screen’s resolution. You can always resize the
Remote Access window using your local window system.
This link logs out the current user and presents a new login screen. An
automatic logout will occur if there is no admin activity for a period of 30
minutes—following a prompt for re-entry of the password.
A control bar on the lower part of the Remote Access window houses a control
bar that displays Remote Access status and lets you adjust its settings. The
following table defines the Remote Access control options:
Control
Description
Options
Scaling
Remote Access Window Showing a Windows 2000 Desktop Screen
Note: You can circumvent communication issues between the local and remote
keyboards by adjusting the keyboard of your remote system to the same mapping as
that of your local one.
For example, if you are using a German administration system but your host
system uses a U.S. English keyboard layout, special keys on the German
keyboard will no longer function according to the local program, but will
recreate that of their U.S. English counterpart.
The Remote Access Java applet tries to establish its own TCP connection to the
RIPC. Its protocol is not HTTP or HTTPS, but another protocol called RFB
(Remote Frame Buffer Protocol). Currently RFB tries to establish a connection
to port number 443. Your local network environment must allow this
18
Options
Mouse Handling
Options
Allows you to scale down the Remote Access. You can still use
the mouse and keyboard, however, the scaling algorithm will not
preserve all display details.
The submenu for mouse handling offers two options for
synchronizing the local and the remote mouse pointers.
Opens a panel for changing the RIPC’s video settings.
Video Settings
Hot Keys
Special button keys to send the defined key combinations to the
remote system.
KVM Keys
If defined in KVM Port Settings, you can switch the current KVM
port by sending the appropriate hot key to the KVM switch.
Read Option
Toggles the read-only mode on and off. If the Monitor mode check
box is selected, the Remote Access will not accept any local input
for either keyboard or mouse. The symbol indicates whether or not
monitor mode is currently active.
Auto Adjust
Starts the auto adjustment procedure to determine the settings
for best visual quality of the current image being displayed on
the RIPC.
19
P74238ea_F1DE101G-man.qxd
28-04-2003
09:33
Page 20
USING YOUR RIPC
USING YOUR RIPC
Remote Access Options
Single (Direct) Mouse Mode
The Remote Access title bar displays information about the incoming (In:) and
outgoing (Out:) network traffic. If you are using the compressed encoding,
both compressed and uncompressed incoming traffic will be indicated.
If all synchronization options fail, it is still possible to work with the remote
mouse by selecting the single-mouse mode, using the image button. If
activated, all mouse movements are transmitted directly to the host, so you
can adjust the host mouse settings to less extreme values, or work in this
mode if mouse acceleration is turned off. In this mode all synchronization
options perform a fast sync.
Remote Access Title Bar
Limitations of the Mouse Synchronization
Power Management Unit
This provides a Java applet that enables the telnet protocol to open a
connection to the RIPC. Its main use is the pass-through option for serial port
1, however, it also allows you to connect with a standard Telnet client. Telnet
access must be enabled in the security settings.
RIPC Mouse Synchronization
The RIPC addresses a common KVM-device challenge, which is the synchronization
between the local and remote mouse cursors. To do so, it uses an intelligent
synchronization algorithm.
There are three ways to re-synchronize local and remote mouse signals:
Fast Sync
The fast synchronization is used to correct a temporary, but fixed skew. Choose
the option using the Remote Access options menu or, if you defined a mouse
synchronization hot key sequence, use it.
Sync Detect
While the intelligent algorithm works fine for common cases, there are some
special limitations, which may prevent the synchronization from working
properly:
Special Mouse Driver
These are mouse drivers that influence the synchronization process leading to
desynchronized mouse pointers. If this happens, make sure you don’t use a
special vendor-specific mouse driver on your host system.
Badly Adjusted Picture
For intelligent sync to work, a correctly adjusted picture is necessary. Use the
auto-adjustment function or the manual correction in the Video Settings panel
to set up the picture.
Active Desktop
Check to see whether you have the Active Desktop feature of Microsoft
Windows enabled. If so, do not use a plain background; be sure to use some
kind of wallpaper. You can also disable the Active Desktop entirely.
If the sync doesn’t work, or if the mouse settings have been changed on the
host system, use the intelligent re-synchronization. This method takes longer
than the fast synchronization and can be accessed with the appropriate item
in the Remote Access option menu. The intelligent synchronization requires a
correctly adjusted picture. Use the auto-adjustment function or the manual
correction in the Video Settings panel to set up the picture.
20
21
P74238ea_F1DE101G-man.qxd
28-04-2003
09:33
Page 22
USING YOUR RIPC
SECURITY
Video Settings
Ports & Protocols
The RIPC features a panel to set up the
following video options, available in the
Remote Access Options menu.
Force HTTPS
If this option is enabled, access to the Web front-end is only possible using an
HTTPS connection. The RIPC won’t work on the HTTP port for incoming
connections.
Note: Brightness and contrast controls
affect all modes and KVM ports globally;
the other settings are changed specifically
for each mode on each KVM port.
HTTPS Port
Port number at which the HTTPS server is set to. If left unused or open, the
default value will be used.
HTTP Port
Video Settings Panel
Horizontal Offset: Use the left and right buttons to move the picture in a
horizontal direction while this option is selected.
Vertical Offset: Use the left and right buttons to move the picture in a
vertical direction while this option is selected.
Port number at which the RIPC’s HTTP server is set to. If left unused or open,
the default value will be used.
Telnet Port
Port number at which the RIPC’s Telnet server is set to. If left unused or open,
the default value will be used.
Reset this Mode: Resets mode-specific settings to their factory defaults.
Reset all Modes: Resets all settings to their factory defaults.
Save Changes: Saves changes permanently.
Undo Changes: Restores last settings.
Ports & Protocols Menu
22
23
P74238ea_F1DE101G-man.qxd
28-04-2003
09:33
Page 24
SECURITY
SECURITY
Firewall
Certificate Management
IP access control parameters
The RIPC uses the SSL protocol
for any encrypted network traffic
between itself and a connected
client. During connection
establishment, the RIPC has to
expose its identity to a client
using a cryptographic certificate.
Parameter
Description
Enable Firewall
Enables access control based on IP source addresses.
Default Policy
This option controls arriving IP packets that don’t match any of the
configured rules. They can be accepted or dropped.
Note: If you set this to DROP and you have no ACCEPT rules configured, access
to the Web over LAN is disabled. To enable access again, you can change the
security settings via modem or ISDN dial-in or by temporarily disabling IP
access control with the initial configuration procedure.
Rule Number
This should contain the number of a rule for which the following commands
will apply. This field will be ignored, in case of appending a new rule.
IP/Mask
Specifies the IP address or IP address range for which the rule applies.
Examples (the number concatenated to an IP address with a ‘/’ is the
number of valid bits that will be used of the given IP address):
192.168.1.22 or 192.168.1.22/32 matches the IP address 192.168.1.22
192.168.1.0/24 matches all IP packets with source addresses from
192.168.1.0 to 192.168.1.255
0.0.0.0/0 matches any IP packet
Firewall Settings Menu
24
SSL Certificate Request
Parameter
Description
Common name
This is the network name of the RIPC once it is installed in the
user’s network.
Organizational unit
This field is used for specifying to which department within an
organization the RIPC belongs.
Organization
The name of the organization to which the RIPC belongs.
Locality/City
The city where the organization is located.
State/Province
The state or province where the organization is located.
Country
The country where the organization is located. This is the
two-letter ISO code, e.g. US for the USA.
Challenge Password
Some certification authorities require a challenge password to
authorize later changes on the certificate (e.g. revocation of the
certificate). The minimal length of this password is four characters.
Confirm Challenge Password
Confirmation of the Challenge Password.
E-mail
The e-mail address of a security contact person that is responsible
for the RIPC.
Key length
This is the length of the generated key in bits. 1024 bits are supposed
to be sufficient for most cases. Larger keys may result in slower
response time of the RIPC during connection establishment.
25
P74238ea_F1DE101G-man.qxd
28-04-2003
09:33
Page 26
SECURITY
SECURITY
Certificate Request Required Information
SSL Certificate Signing Request
However, it is possible to generate and install a new certificate that is unique
for a particular card. In order to do that, the RIPC is able to generate a
new cryptographic key and the associated Certificate Signing Request that
needs to be certified by a certification authority (CA). A certification
authority verifies that you are who you claim you are and signs and issues
a SSL certificate to you.
Note: If you destroy the CSR on the RIPC, there is no way to get it back! If you
delete it by mistake, repeat the three steps.
The following steps are necessary to create and install the RIPC’s
SSL certificate:
1. Create a SSL Certificate Signing Request using the panel shown in the
Figure below (Security Settings
SSL Settings
Create your own SSL
certificate). Fill out a number of fields that are explained in the table
above. Once this is done, click “Create CSR” which will initiate the
Certificate Signing Request generation. The CSR can be downloaded to
your administration machine with the “Download CSR” button
(see Figure below).
2. Send the saved CSR to a CA for certification. You will get the new
certificate from the CA after a traditional authentication process.
3. Upload the certificate to the RIPC using the Upload panel as shown in the
Figure below.
Settings & Configuration Network
Network Settings Parameters
Parameter
Description
IP address
IP address in the usual dot notation.
Subnet mask
The net mask of the local network.
Gateway IP address
The gateway of the network.
1. DNS Server IP
IP address of the primary Domain Name Server in dot notation. This
option may be left empty, however, the RIPC won’t be able to perform
name resolution.
2. DNS Server IP
IP address of the secondary Domain Name Server in dot notation. It
will be used in case the Primary DNS Server can’t be contacted.
Enable Power
Management Unit
If this option is enabled, access over the Power Management Unit is
possible. For this reason, to ensure the best level of security, we
recommend you disable this parameter.
(Note: Changing the network settings of the RIPC might result in lost connections.
If you change the settings remotely, be sure all the values are correct so that you
will still be able to access the RIPC.)
26
27
P74238ea_F1DE101G-man.qxd
28-04-2003
09:33
Page 28
NETWORK SETTINGS MENU
Remote Access Settings
NETWORK SETTINGS MENU
Remote Access Options Table
While some parameters can be changed while Remote Access is running, others
must be set in the Remote Access settings prior to activating it.
Control
Description
Transmission Encoding
The Transmission Encoding setting allows you to change the
image-encoding algorithm that is used to transmit the video data
to the Remote Access window. With these settings, it is possible to
optimize the speed of the remote screen depending on the number
of parallel users and the bandwidth of the connection line
(Modem, ISDN, DSL, LAN, etc.).
Normal: The Standard Encoding algorithm, well-suited for many
parallel users in a LAN environment. Typical applications generate
traffic of up to 15Kbps.
Compressed: The data stream between the RIPC and the Remote
Access window will be additionally compressed to save bandwidth.
The compression encoding is suited for a modem or ISDN
environment. However, since the compression takes processing time
on the RIPC itself, this encoding shouldn’t be used when many
parallel users want to access the RIPC at the same time.
Use Sun's Java
Browser Plug-In
Instructs the web browser of your administration system to use the
JVM (Java Virtual Machine) of Sun Microsystems. The JVM in the
browser is used to run the code for the Remote Access window,
which is actually a Java applet. If you check this box for the first
time on your administration system and the appropriate Java
plug-in is not already installed on your system, it will be
downloaded and installed automatically. However, in order to make
the installation possible, you still need to answer the according
dialogs with “YES”. The download volume is around 11MB. The
advantage of downloading Sun’s JVM lays in providing a stable and
identical Java Virtual Machine across different platforms. The
Remote Access software is optimized for this JVM version and offers
wider range of functionality when run in Sun’s JVM. (Hint: If you
are connected over a slow connection to the Internet, you can also
pre-install the JVM on your administration machine. The software is
available on the CD that is delivered along with the RIPC.)
Mouse Hot Key
Allows specifying a hot key combination that starts either the
mouse synchronization process if pressed in Remote Access, or is
used to leave the single mouse mode. The key codes are listed in
Appendix C.
User-Defined Hot Keys
User-defined hot keys simulate keystrokes on the remote system
that cannot be generated locally.
Remote Access Settings
Note: Click on “Append” for the changes to take effect.
28
29
P74238ea_F1DE101G-man.qxd
28-04-2003
09:33
Page 30
NETWORK SETTINGS MENU
Users & Passwords
NETWORK SETTINGS MENU
Description Users & Passwords Table
Upon delivery, each RIPC is pre-configured with a supervisor user called
“administrator” having the password “belkin”. IMPORTANT: Be sure to change
the administrator-user password immediately after you have installed and
initially accessed your RIPC.
Field
Description
Existing Users
Select an existing user for modification or deletion. Once a user has
been selected, click the “Lookup User” button to see complete user
information.
New User Name
In order to create a new user, enter a new login name in this field. The
new name must not already exist as user. If it does, an error message
will be displayed on top of the panel.
Full User Name
This is the full name of the login user.
Password
The password for the user name. It must be at least four characters long.
Confirm Password
Confirmation of the password above.
Group
Assign this user to one of the following groups:
super
users in this group have every possible permission to control
the host system and the RIPC; administrators
users assigned to this
group can control the host system; and users
this group has view
permissions only.
The user management of the RIPC allows 25 different users. The following
sections will describe how to add, delete, and modify users.
Add User
Fill out the fields “New user name”, “Full user name”, “Password”, and
“Confirm Password” as shown in the Users & Passwords panel. Alternatively,
select the group of which the new user should become a member. Click the
“Create User” button.
User & Passwords Panel
The Figure above shows the User & Passwords panel of the RIPC’s front end. Its
use will be described in the table below and in the following text.
Delete User
Select a user in the “Existing users” field. Click the “Lookup” button. The
complete user information will be shown. Click the “Delete User” button.
Modify User
Select a user in the “Existing users” field. Click the “Lookup” button to get all
the user’s information. All fields can be modified as required. The old password
is not displayed, but can be modified. If all changes are done, click the
“Modify User” button.
30
31
P74238ea_F1DE101G-man.qxd
28-04-2003
09:33
Page 32
NETWORK SETTINGS MENU
Serial Port
The RIPC’s Serial Settings allow you to specify which devices are connected to
the serial port and how to use them. The options are listed and described in
the table below.
Serial Port Settings Table
Function
Description
Modem
Allows access to the RIPC via modem; see Modem
Settings below, for details.
Port Access
via Telnet
Using this option, it is possible to connect an arbitrary
device to the serial port and access it (assuming it
provides terminal support) via Telnet. Select the
appropriate options for the serial port and use the
Telnet unit or a standard Telnet client to connect to
the RIPC.
Serial Port Settings Menu
Modem Settings
The RIPC offers remote access using a telephone line in addition to the
standard access over the built-in Ethernet adapter. The modem needs to be
connected to the RIPC’s serial interface.
32
NETWORK SETTINGS MENU
Logically, connecting to the RIPC using a telephone line means nothing more
than building up a dedicated point-to-point connection from your RIPC
computer to the RIPC. In other words, the RIPC acts as an Internet Service
Provider (ISP) to which you can dial in. The connection is established using
the Point-to-Point Protocol (PPP). Before you connect to the RIPC, be sure to
configure your RIPC computer accordingly. For example, on Windows operating
systems, you can configure a dial-up network connection, which defaults to
the right settings like PPP.
The modem settings are part of the Serial Settings panel (see Serial Port
Settings Menu).
Modem Options Table
Parameter
Description
Serial Line Speed
The speed at which the RIPC communicates with
the modem. Most modems today support the default
value of 115200bps. If you are using an old modem
and experience problems, try to reduce this speed.
Modem Init String
The initialization string used by the RIPC to
initialize the modem. The default value will work with
all current standard modems directly connected to a
telephone line. If you have a special modem or the
modem is connected to a local telephone switch that
requires a special dial sequence in order to establish a
connection to the public telephone network, you can
change this setting by giving a new string. Refer to
the modem’s manual about the AT command syntax.
Client IP Address
This IP address will be assigned to your RIPC computer
during the PPP handshake. Since it is a
point-to-point IP connection, virtually every IP address
is possible but you must make sure it is not interfering
with the IP settings of the RIPC and your RIPC
computer. The default value will work in most cases.
33
P74238ea_F1DE101G-man.qxd
28-04-2003
09:33
Page 34
NETWORK SETTINGS MENU
NETWORK SETTINGS MENU
Keyboard/Mouse Settings
The RIPC supports different keyboard and mouse models. The panel
shown in the Keyboard/Mouse Settings Menu is used to adjust settings
(see table below).
Keyboard/Mouse Options Table
Control
Description
Targeted KVM Port
Selects the KVM port to which the settings made below
will be applied. Choosing “Update” will display the
current values for this port and select it for alteration
of its settings.
Keyboard Model
Selects the keyboard model used on the remote
host system.
Mouse Mode
Automatic
uses the automatic mouse
synchronization process;
1: n
enacts direct scaling of mouse movements
between the local and the remote pointer, so you can
move the mouse even if it’s not entirely synchronous.
Reset Mouse/
Keyboard Emulation
Keyboard/Mouse Settings Menu
KVM Switches
It is possible to select the number of ports used by the connected KVM switch,
and you may assign each port a name. In order to provide KVM port switching
through the RIPC, key combinations have to be defined for the ports.
This option will reset the RIPC’s keyboard and
mouse emulation for the host system. Use it if the
keyboard or mouse seem to react irrationally. It’s just
like pulling out the keyboard and mouse connectors
and plugging them in again.
KVM Settings Menu
34
35
P74238ea_F1DE101G-man.qxd
28-04-2003
09:33
Page 36
NETWORK SETTINGS MENU
APPENDIX A
The syntax to define a new hot key is as follows:
Update Firmware
< keycode > [+| - [_] < keycode >]*
For example: Ctrl-Ctrl-A-Enter
or Ctrl+A-*1-Enter
Flash upgrades allow you to obtain the latest firmware updates for your RIPC.
These updates ensure that your RIPC continues to work with the latest devices
and computers. Firmware upgrades are free for the life of the RIPC. Visit
belkin.com for upgrade information and support.
Multiple key codes can be concatenated with a + or a - sign. The + sign builds
key combinations; all keys will be pressed until a - sign or the end of the
combination is encountered. In this case, all pressed keys will be released in
reversed sequence. So the - sign builds single, separate key presses and
releases. The _ (underscore) inserts a pause of user-definable length; more
than one _ (underscore) may be concatenated. The duration of a single pause
is set in milliseconds, using the appropriate option on the KVM settings page.
See Hot Key Table for a list of key codes that can be used as hot keys.
If the settings are correct, the KVM port can be switched using the KVM
switching matrix on the RIPC’s home page. The RIPC uses separate mouse
synchronization settings and video settings for each port.
Note: It is still possible to apply KVM key combinations through Remote Access for
switching KVM ports, however, in this case video and mouse synchronization settings
will be shared among the ports and may unintentionally be exchanged for one of
those ports.
Firmware
This section contains a summary of information about this RIPC and its current
firmware, and allows you to reset the RIPC. This information is made available
under the Maintenance Panel Menu.
Firmware Upload Menu
RIPC Video Modes
Table B.1 lists the video modes the RIPC supports. Please use only these
modes, and do not use custom video settings. If you do, your RIPC may not be
able to detect them.
Table B.1 Unit Video Modes
Resolution (x,y)
Refresh Rates (Hz)
640x350
70, 85
640x400
56, 70, 85
640x480
60, 67, 72, 75, 85, 90, 100, 120
720x400
70, 85
800x600
56, 60, 70, 72, 75, 85, 90, 100
832x624
75
1024x768
60, 70, 72, 75, 85, 90, 100
1152x864
75
1152x870
75
1152x900
66, 76
1280x960
60
1280x1024
60
Maintenance Panel Menu
36
37
P74238ea_F1DE101G-man.qxd
28-04-2003
09:33
Page 38
APPENDIX A
GLOSSARY
The Hot Key Table shows the key codes used to defines keystrokes. Please note
that these key codes do not necessarily represent key characters that are used
on international keyboards. They name a key on a standard 104-key PC
keyboard with U.S. English language mapping. However, most modifier keys
and other alphanumeric keys used for hot key purposes in application programs
are on an identical position, no matter what language mapping you are using.
Some of the keys have aliases also, meaning they can be named by two key
codes (separated by comma in the table).
ACPI
A specification that enables the operating system to implement
power management and system configuration.
ATX
Advanced Technology Extended: A particular specification of a
motherboard introduced by Intel® in 1995.
DHCP
Dynamic Host Configuration Protocol: Protocol for dynamically
assigning IP configurations in local networks.
DNS
Domain Name System: Protocol used to locate computers on the
Internet by their name.
FAQ
Frequently Asked Question
HTTP
Hypertext Transfer Protocol: The protocol used between web
browsers and servers.
HTTPS
Hyper Text Transfer Protocol Secure: Secure version of HTTP.
LED
Light Emitting Diode
MIB
Management Information Base: Describes the structure of the
management information that can be accessed via SNMP.
PS/2
The PS/2 device interface was developed by IBM® and is used by
many mice and keyboards.
SNMP
Simple Network Management Protocol: A widely used network
monitoring and control protocol.
SSL
Secure Socket Layer: Encryption technology for the Internet used
to provide secured data transmissions.
SVGA
Super VGA: A refinement of Video Graphics Array (VGA) that
provides increased pitch and resolution performance.
UTP
Unshielded Twisted Pair: A cable with two conductors twisted as a
pair and bundled within the same outer PVC covering.
Hot Key Table
For these commands…
Tilde
Minus
Equals
Semicolon
Apostrophe
Less than
Comma
Period
Slash
Backspace
Tab
Left bracket
Right bracket
Enter
Caps Lock
Back slash
Left Shift, Shift
Right Control
Right Shift
Left Control or Control
Left Alt or Alt
Space Bar
Escape
F1
F2
F3
F4
F5
F6
F7
F8
F9
F10
…type these characters
TILDE
- or MINUS
= or EQUALS
;
’
< or LESS
,
.
/ or SLASH
BACK SPACE
TAB
[
]
ENTER
CAPS LOCK
\ or BACK SLASH
LSHIFT or SHIFT
RCTRL
RSHIFT
LCTRL or CTRL
LALT or ALT
SPACE
ESCAPE or ESC
F1
F2
F3
F4
F5
F6
F7
F8
F9
F10
For these commands…
F11
F12
Print Screen
Scroll Lock
Break
Insert
Home
Page Up
Delete
End
Page Down
Up arrow
Left arrow
Down arrow
Right arrow
Number Lock
0 on number pad
1 on number pad
2 on number pad
3 on number pad
4 on number pad
5 on number pad
6 on number pad
7 on number pad
8 on number pad
9 on number pad
Addition sign on number pad
Division sign on number pad
Multiplication sign on number pad
Minus sign on number pad
Enter on number pad
Windows
Menu
38
…type these characters
F11
F12
PRINTSCREEN
SCROLL LOCK
BREAK
INSERT
HOME
PAGE UP
DELETE
END
PAGE DOWN
UP
LEFT
DOWN
RIGHT
NUM LOCK
NUMPAD0
NUMPAD1
NUMPAD2
NUMPAD3
NUMPAD4
NUMPAD5
NUMPAD6
NUMPAD7
NUMPAD8
NUMPAD9
NUMPADPLUS or NUMPAD PLUS
NUMPAD/
NUMPADMUL or NUMPAD MUL
NUMPADMINUS or NUMPAD MINUS
NUMPADENTER
WINDOWS
MENU
39
P74238ea_F1DE101G-man.qxd
28-04-2003
09:33
Page 40
FAQs
Does the RIPC work with Belkin OmniView ENTERPRISE Series
KVM Switches?
TROUBLESHOOTING
The remote mouse doesn’t work or is not synchronous.
Make sure the mouse settings match the mouse model.
Yes, it does.
The video quality is bad or the picture is grainy.
Does the RIPC work with non-Belkin KVM switches?
Yes, the RIPC works with non-Belkin PS/2 KVM switches, however, be advised
that degradation in performance may result if a lesser-quality KVM switch is
used.
Try to correct the brightness and contrast settings until they are out of a range
where the picture looks grainy. Use the auto adjustment feature to correct a
flickering video.
Login fails.
Use the administrator account to log in and make sure your user name and
password are correct.
What operating systems does the RIPC support?
The RIPC supports Windows NT, 2000, and XP.
Can I use my RIPC with operating systems that are not based on Microsoft
Windows?
Yes, you can use your RIPC with other platforms, however, only the keyboard
and video are supported.
The Remote Access window can’t connect to the RIPC.
A firewall may be preventing access. Make sure the TCP port numbers 443 or 80
are open for incoming TCP connection establishments.
No connection can be established to the RIPC.
Check to ensure that the network connection is working in general (ping the
IP address of the RIPC). If not, check network hardware.
Is the RIPC powered on? Check whether the IP address of the RIPC and all
other IP-related settings are correct.
Does the RIPC put any strain on the servers?
No, the RIPC is a 100% hardware solution that does not require any additional
software installed on servers.
Verify that all the IP infrastructure of your LAN, such as routers, etc., is
correctly configured. Without a ping functioning, the RIPC will not work.
Special key combinations, e.g. ALT+F2, ALT+F3 are intercepted by the
RIPC’s system and not transmitted to the host.
Create a hot key command for this special function.
In the browser the RIPC pages are inconsistent or chaotic.
Make sure your browser cache settings are correct. Be especially careful that
the cache settings are NOT set to “never check for newer pages”. Otherwise,
the RIPC pages may be loading from your browser cache and not from the card.
40
41
P74238ea_F1DE101G-man.qxd
28-04-2003
09:33
Page 42
INFORMATION
FCC Statement
DECLARATION OF CONFORMITY WITH FCC RULES FOR
ELECTROMAGNETIC COMPATIBILITY
We, Belkin Corporation, of 501 West Walnut Street, Compton, CA 90220, declare under our sole
responsibility that the product:
F1DE101G
to which this declaration relates:
Complies with Part 15 of the FCC Rules. Operation is subject to the following two conditions: (1) this
device may not cause harmful interference, and (2) this device must accept any interference received,
including interference that may cause undesired operation.
CE Declaration of Conformity
We, Belkin Corporation, declare under our sole responsibility that the product F1DE101G, to which this declaration
relates, is in conformity with Emissions Standard EN55022 and with Immunity Standard EN55024, LVP EN61000-3-2,
and EN61000-3-3.
ICES
This Class B digital apparatus complies with Canadian ICES-003. Cet appareil numérique de la classe B est conforme á la
norme NMB-003 du Canada.
Belkin Corporation Limited Five-Year Product Warranty
Belkin Corporation warrants this product against defects in materials and workmanship for its warranty period. If a defect is
discovered, Belkin will, at its option, repair or replace the product at no charge provided it is returned during the warranty
period, with transportation charges prepaid, to the authorized Belkin dealer from whom you purchased the product. Proof of
purchase may be required.
This warranty does not apply if the product has been damaged by accident, abuse, misuse, or misapplication; if the product
has been modified without the written permission of Belkin; or if any Belkin serial number has been removed or defaced.
THE WARRANTY AND REMEDIES SET FORTH ABOVE ARE EXCLUSIVE IN LIEU OF ALL OTHERS, WHETHER ORAL OR WRITTEN, EXPRESSED
OR IMPLIED. BELKIN SPECIFICALLY DISCLAIMS ANY AND ALL IMPLIED WARRANTIES, INCLUDING, WITHOUT LIMITATION, WARRANTIES
OF MERCHANTABILITY AND FITNESS FOR A PARTICULAR PURPOSE.
No Belkin dealer, agent, or employee is authorized to make any modification, extension, or addition to this warranty.
BELKIN IS NOT RESPONSIBLE FOR SPECIAL, INCIDENTAL, OR CONSEQUENTIAL DAMAGES RESULTING FROM ANY BREACH OF
WARRANTY, OR UNDER ANY OTHER LEGAL THEORY, INCLUDING BUT NOT LIMITED TO, LOST PROFITS, DOWNTIME, GOODWILL,
DAMAGE TO OR REPROGRAMMING, OR REPRODUCING ANY PROGRAM OR DATA STORED IN OR USED WITH BELKIN PRODUCTS.
Some states do not allow the exclusion or limitation of incidental or consequential damages or exclusions of implied
warranties, so the above limitations of exclusions may not apply to you. This warranty gives you specific legal rights, and
you may also have other rights that vary from state to state.
42
P74238ea_F1DE101G-man.qxd
28-04-2003
09:33
Page 44
OmniView
Console IP distante
™
Contrôlez un ou plusieurs serveurs à distance
grâce à un Switch KVM sur des réseaux TCP/IP
belkin.com
Belkin Corporation
501 West Walnut Street
Compton • CA • 90220 • USA
Tel: +1 310.898.1100
Fax: +1 310.898.1111
Belkin Components, Ltd.
Express Business Park
Shipton Way • Rushden • NN10 6GL
United Kingdom
Tel: +44 (0) 1933 35 2000
Fax: +44 (0) 1933 31 2000
Belkin Components B.V.
Starparc Building • Boeing Avenue 333
1119 PH Schiphol-Rijk • The Netherlands
Tel: +31 (0) 20 654 7300
Fax: +31 (0) 20 654 7349
Belkin Gmbh
Hanebergstrasse 2 •
80637 München • Germany
Tel: +49 (0) 89 143 4050
Fax: +49 (0) 89 143 405100
Belkin, Ltd.
7 Bowen Crescent • West Gosford
NSW 2250 • Australia
Tel: +61 (0) 2 4372 8600
Fax: +61 (0) 2 4372 8603
Belkin Tech Support
US: +1 310.898.1100 ext. 2263
+1 800.223.5546 ext. 2263
Europe: 00 800 223 55 460
Australia: 1800 666 040
P74238
© 2003 Belkin Corporation. All rights reserved. All trade names are
registered trademarks of respective manufacturers listed.
Manuel de l’utilisateur
Série ENTREPRISE
F1DE101G
P74238ea_F1DE101G-man.qxd
28-04-2003
09:33
Page 46
TABLE DES MATIÈRES
Présentation
Introduction . . . . . . . . .
Contenu . . . . . . . . . . . .
Présentation des fonctions
Configuration requise . . . .
Spécifications . . . . . . . . .
Illustration de la CIPD . . .
.
.
.
.
.
.
.
.
.
.
.
.
.
.
.
.
.
.
.
.
.
.
.
.
.
.
.
.
.
.
.
.
.
.
.
.
.
.
.
.
.
.
.
.
.
.
.
.
.
.
.
.
.
.
.
.
.
.
.
.
.
.
.
.
.
.
.
.
.
.
.
.
.
.
.
.
.
.
PRÉSENTATION
.
.
.
.
.
.
.
.
.
.
.
.
.
.
.
.
.
.
.
.
.
.
.
.
.
.
.
.
.
.
.
.
.
.
.
.
.
.
.
.
.
.
.
.
.
.
.
.
.
.
.
.
.
.
.
.
.
.
.
.
.
.
.
.
.
.
.
.
.
.
.
.
.
.
.
.
.
.
.
.
.
.
.
.
.
.
.
.
.
.
.
.
.
.
.
.
.
.
.
.
.
.
.1
.1
.2
.3
.4
.5
Installation
Installation du matériel . . . . . . . . . . . . . . . . . . . . . . . . . . . . . . . . .6
Configuration réseau initiale . . . . . . . . . . . . . . . . . . . . . . . . . . . . .12
Utilisation de la CIPD
Éléments préalables . . . . . . . . . . . .
Connexion à la CIPD . . . . . . . . . . . .
Écran principal . . . . . . . . . . . . . . .
Déconnexion de la CIPD . . . . . . . . .
Contrôle de l’accès à l’hôte à distance
.
.
.
.
.
.
.
.
.
.
.
.
.
.
.
.
.
.
.
.
.
.
.
.
.
.
.
.
.
.
.
.
.
.
.
.
.
.
.
.
.
.
.
.
.
.
.
.
.
.
.
.
.
.
.
.
.
.
.
.
.
.
.
.
.
.
.
.
.
.
.
.
.
.
.
.
.
.
.
.
.
.
.
.
.
.
.
.
.
.
.
.
.
.
.
.
.
.
.
.
.
.
.
.
.
.
.
.
.
.
.15
.16
.17
.18
.18
Sécurité
Ports et protocoles . . . . . . . . . . . . . . . . . . . . . . . . . . . . . . . . . . .23
Pare-feu . . . . . . . . . . . . . . . . . . . . . . . . . . . . . . . . . . . . . . . . . .24
Gestion des certificats . . . . . . . . . . . . . . . . . . . . . . . . . . . . . . . . .25
Menu « Network Settings » (Paramètres réseau)
Paramètres d’accès à distance . . . . . . . . . . . . . . .
« Users & Passwords » (Utilisateurs et mots de passe)
Port série . . . . . . . . . . . . . . . . . . . . . . . . . . . . .
Paramètres clavier/souris . . . . . . . . . . . . . . . . . .
Switches KVM . . . . . . . . . . . . . . . . . . . . . . . . . .
.
.
.
.
.
.
.
.
.
.
.
.
.
.
.
.
.
.
.
.
.
.
.
.
.
.
.
.
.
.
.
.
.
.
.
.
.
.
.
.
.
.
.
.
.
.
.
.
.
.
.
.
.
.
.
.
.
.
.
.
.28
.30
.32
.34
.35
Annexe A
Mise à jour du micrologiciel . . . . . . . . . . . . . . . . . . . . . . . . . . . . . .37
Modes vidéo de la CIPD . . . . . . . . . . . . . . . . . . . . . . . . . . . . . . . .37
Tableau des raccourcis clavier . . . . . . . . . . . . . . . . . . . . . . . . . . . . .38
Glossaire . . . . . . . . . . . . . . . . . . . . . . . . . . . . . . . . . . . . . . . . . . . .39
Introduction
Merci d’avoir choisi cette console IP distante OmniView série ENTREPRISE de
Belkin (la CIPD). Notre gamme variée de solutions KVM vous montre comment
Belkin s’engage à fournir des produits de grande qualité, résistants, à un prix
étudié. Conçue pour contrôler votre ordinateur ou Switch KVM où que vous
soyez dans le monde via un simple navigateur Web, la CIPD peut être
facilement configurée pour s’adapter à votre LAN existant, qu’il soit grand ou
petit.
Belkin a conçu et développé la CIPD en pensant aux administrateurs de
serveurs. Le résultat est une solution distante puissante, facile à installer et
à utiliser qui supplante toutes les autres solutions grâce à ses fonctions
évoluées.
Ce manuel vous donnera tous les détails dont vous aurez besoin sur la CIPD,
de l’installation et du fonctionnement jusqu’au dépannage, dans le cas peu
probable où vous rencontreriez un problème.
Merci d’avoir choisi la console IP distante OmniView série ENTREPRISE. Merci
de votre confiance. Nous sommes certains que vous allez vite constater
pourquoi plus d’un million d’OmniView de Belkin sont utilisés dans le monde.
Contenu
•
•
•
•
•
•
•
•
Une console IP distante OmniView série ENTREPRISE
Un kit de câbles PS/2
Un bloc d’alimentation 5 V CC, 2 000 mA
Manuel de l’utilisateur
Guide d’installation rapide
Carte d’enregistrement
Dispositif de montage dans une baie et vis
Un câble DB9
Foire aux questions . . . . . . . . . . . . . . . . . . . . . . . . . . . . . . . . . . . .40
Dépannage . . . . . . . . . . . . . . . . . . . . . . . . . . . . . . . . . . . . . . . . . .41
Informations . . . . . . . . . . . . . . . . . . . . . . . . . . . . . . . . . . . . . . . . .42
1
P74238ea_F1DE101G-man.qxd
28-04-2003
09:33
Page 2
PRÉSENTATION
PRÉSENTATION
Présentation des fonctions
Configuration requise
Prise en charge d’un utilisateur numérique
Permet à un utilisateur numérique de contrôler un ordinateur ou un KVM en
utilisant un navigateur Web.
Matériel
Compatibilité des navigateurs Web
Il est possible d’accéder à la CIPD depuis tout ordinateur utilisant Microsoft® Internet
Explorer version 5.5 ou ultérieure. Aucun logiciel propriétaire n’est nécessaire.
Possibilité de montage dans une baie 0U
La CIPD est suffisamment compacte pour être placée sur votre bureau, derrière
un autre périphérique ou fixée sur un côté de votre baie de serveur et ainsi
occuper un espace de 0U.
Raccourcis clavier définis par l’utilisateur
Les raccourcis clavier définis par l’utilisateur simulent des frappes sur le
système distant qui ne peuvent pas être générées localement.
Mises à niveau par mémoire Flash
La mise à niveau par mémoire Flash vous permet d’obtenir les mises à jour du
micrologiciel les plus récentes pour votre CIPD. Elles vous permettent de vous
assurer que l’appareil pourra continuer à fonctionner avec des périphériques et
des ordinateurs récents. Les mises à niveau du micrologiciel sont gratuites
pour toute la durée de vie de la CIPD. Accédez au site belkin.com pour obtenir
des informations de mise à niveau ainsi que de l’aide.
•
•
•
•
•
•
•
•
Console IP distante OmniView série ENTREPRISE (fournie)
Kit de câbles PS/2 (fourni)
Bloc d’alimentation 5 V CC, 2 000 mA (fourni)
Clavier, moniteur et souris
Connexion au réseau à l’aide d’un port Ethernet 10/100Base-T (RJ45)
Câble inverseur CAT5e
Câble intermédiaire CAT5e
Dispositif de montage dans une baie avec vis (fourni avec l’option
d’installation dans une baie)
Logiciels
• Microsoft Internet Explorer 5.5 ou supérieur
• Serveurs sous Windows® NT®, 2000 et XP.
Témoins lumineux
Sur la face avant de la CIPD, les témoins lumineux constituent une méthode
facile de surveiller le statut de la connexion, de la liaison ainsi que de l’activité.
Résolution vidéo
Grâce à une bande passante de 117 MHz, la CIPD accepte des résolutions vidéo
pouvant aller jusqu’à 1280x1024 à 60 Hz. Pour préserver l’intégrité du signal et
obtenir les meilleurs résultats possibles, utilisez de préférence des câbles vidéo Belkin.
Interface utilisateur évoluée basée sur le Web
Vous pouvez configurer facilement les fonctions de la CIPD en vous servant de
votre navigateur Web sans devoir installer de logiciel supplémentaire sur
l’ordinateur. Aucun disque à installer ou surveiller. Vous pouvez même apporter
des modifications et effectuer les fonctions de configuration sur tout
ordinateur du réseau, rapidement et en toute simplicité.
2
3
P74238ea_F1DE101G-man.qxd
28-04-2003
09:33
Page 4
PRÉSENTATION
Spécifications
PRÉSENTATION
Illustration de la CIPD
Référence : F1DE101G
Alimentation : 5 V CC 2 000 mA
Témoin de connexion
Connexion réseau : connexion 10/100Base-T (connecteur RJ45 standard)
Émulation de clavier : PS/2
Émulation de souris : PS/2
Moniteurs pris en charge : prend en charge tous les modes graphiques VESA
ainsi que les modes texte
Résolution maximum : 1280 x 1024 à 60 Hz
Connection
Remote IP Console
Link / Activity
Bande passante : 117 MHz
Entrée clavier : 6 broches miniDIN (PS/2)
Entrée souris : 6 broches miniDIN (PS/2)
Témoin Liaison/Activité
Ports ordinateur/KVM : 1
Port VGA : type HDDB 15 broches
Fiche d’alimentation
Témoins lumineux : 2
Port série 02
Boîtier : métal
Port LAN
Port VGA de
la console
Port VGA
UC/KVM
console
CPU/KVM
Dimensions : 43,1 x 144,7 x 177 mm
Poids : 800 g
Température de fonctionnement : 0 à 40° C
Serial 02
power
Température de stockage : 40 à 75° C
Humidité : 0 à 80 % d’humidité relative sans condensation
Serial 01
Altitude maximum : 3000 mètres
reset
LAN
Garantie : 1 an
Port série 01
Remarque : Ces spécifications sont sujettes à modification sans préavis.
4
Bouton de
réinitialisation
Port clavier de
la console
Port clavier de
l’UC/KVM
Port souris de
la console
5
Port souris de
l’UC/KVM
P74238ea_F1DE101G-man.qxd
28-04-2003
09:33
Page 6
INSTALLATION
INSTALLATION
Installation du matériel
1. Mettez votre serveur ou Switch KVM hors tension.
Installation de la CIPD dans une baie de serveur
2. Branchez le clavier et la souris PS/2 sur les ports « Console » PS/2
appropriés.
La CIPD est livrée avec des fixations de montage qui conviennent à
l’installation dans une baie 19 pouces.
1. Fixez le dispositif sur le haut ou le bas de la CIPD avec les vis cruciformes
fournies.
2. Montez la CIPD dans la baie.
Remarque : Les vis de fixation pour la baie ne sont pas livrées. Veuillez utiliser
celles spécifiées par le fabricant de votre baie.
*** Avertissements ***
Avant de brancher quoi que ce soit sur la CIPD ou les ordinateurs, assurez-vous
qu’ils sont bien tous hors tension. Belkin Corporation n’est pas responsable des
dommages causés dans le cas où vous ne le feriez pas.
Serial 02
power
console
Serial 01
LAN
reset
F10
F11
HOME
PG UP
PG DN
HELP
CAPS
`
F9
num
lock
1
2
3
4
5
6
7
9
8
-
0
=
delete
]
[
P
CPU/KVM
cap
lock
pg up
=
/
7
8
9
4
5
6
1
2
3
-
+
K
L
;:
ESC
return
'"
shift
PC
^
clt
<
alt
OPT
+
>
0
3. Saisissez le câble vidéo relié au moniteur VGA et branchez-le sur le port
« Console ».
6
7
P74238ea_F1DE101G-man.qxd
28-04-2003
09:33
Page 8
INSTALLATION
INSTALLATION
Branchement de l’ordinateur ou du KVM
Branchement de l’ordinateur ou du KVM
À l’aide du kit de câbles PS/2 fourni, branchez l’une des extrémités des câbles
VGA et PS/2 sur le serveur. Branchez l’autre extrémité sur les ports « CPU/KVM »
à l’arrière de la CIPD.
À l’aide du kit de câbles PS/2 fourni, branchez l’une des extrémités des câbles
VGA et PS/2 sur la CIPD du Switch KVM. Branchez l’autre extrémité sur les
ports « CPU/KVM » à l’arrière de la CIPD.
Serial 02
power
Serial 01
console
reset
CPU/KVM
LAN
Serial 02
power
Serial 01
console
CPU/KVM
LAN
reset
console
bank
select
USB
flash
daisy chain IN
CPU 01/02
CPU 03/04
CPU 05/06
CPU 07/08
1 2 3 4
reset
8
PS/2
daisy chain OUT
90-264 VAC. 47-63 Hz
9
P74238ea_F1DE101G-man.qxd
28-04-2003
09:33
Page 10
INSTALLATION
INSTALLATION
Alimentation de la CIPD
Configuration réseau initiale
1. Branchez le bloc d’alimentation fourni sur une prise secteur libre.
1. Branchez une extrémité d’un câble inverseur RJ45 sur l’ordinateur et l’autre
sur le port « Network » (Réseau).
2. Raccordez la fiche cylindrique à la prise d’alimentation située à l’arrière de
le CIPD afin d’alimenter l’unité.
Serial 02
power
Serial 01
console
reset
CPU/KVM
LAN
Serial 02
power
Serial 01
console
reset
CPU/KVM
LAN
2. Définissez l’adresse IP de l’ordinateur dans la même plage que 1.2.3.4
(exemple : 1.2.3.6).
3. Ouvrez le navigateur Web Microsoft® Internet Explorer.
4. Entrez l’adresse IP « 1.2.3.4 ».
5. Entrez le nom d’utilisateur par défaut « administrator ».
3. Allumez le Switch KVM. Si vous n’en avez pas, passez à l’alimentation des
ordinateurs.
6. Entrez le mot de passe par défaut « belkin ».
10
11
P74238ea_F1DE101G-man.qxd
28-04-2003
09:33
Page 12
INSTALLATION
INSTALLATION
Configuration réseau initiale
Remote Access
7. Dans la section « Setting
& Configurations »
(Paramètres et
configurations), cliquez
sur « Network » (Réseau).
(Remarque :
Désélectionnez la case
« DHCP ».)
Remote Access est une applet Java™ qui permet d’afficher l’écran, le clavier et
la souris redirigés du système hôte distant auquel la CIPD est reliée. Le
navigateur Web utilisé pour l’accès à la CIPD doit être équipé de Java Runtime
Environment version 1.1 ou ultérieure. Remote Access permet d’utiliser votre
ordinateur de la même façon que vous soyez directement devant ou que vous
soyez à un emplacement distant. Vous pourrez utiliser le clavier et la souris de
la façon habituelle. Toutefois, le système distant réagira à leurs actions avec
un léger retard. Le retard dépend de la bande passante de la ligne avec
laquelle vous vous connectez à la CIPD. Pour ouvrir l’applet, choisissez le lien
approprié dans le cadre de navigation HTML.
8. Entrez les paramètres
réseau souhaités, puis
cliquez sur « Apply
Changes » (Appliquer les
modifications) pour les
enregistrer.
Partie inférieure de l’applet Remote Access
L’applet Remote Access propose les fonctions suivantes :
Bouton d’ajustement automatique
Si la vidéo affichée est de mauvaise qualité ou déformée d’une façon ou d’une
autre, appuyez sur ce bouton et attendez quelques secondes. La CIPD effectue
les ajustements nécessaires pour obtenir un affichage de meilleure qualité.
Sync
Choisissez cette option pour synchroniser le curseur de la souris local avec
celui de la souris distante.
9. Réinitialisez l’adresse IP de l’ordinateur utilisé pour la configuration de la
CIPD.
Connexion de la CIPD au réseau
Connectez la CIPD au réseau à l’aide d’un câble réseau RJ45 intermédiaire
Catégorie 5.
Video settings (Paramètres vidéo)
Ceci ouvre une nouvelle fenêtre contenant des éléments permettant de
contrôler les paramètres vidéo de la CIPD. Vous pouvez modifier certaines
valeurs liées à la luminosité et au contraste de l’image affichée et ainsi
améliorer la qualité vidéo. Il est également possible de rétablir les paramètres
par défaut de tous les modes vidéo ou uniquement de celui en cours.
13
12
P74238ea_F1DE101G-man.qxd
28-04-2003
09:33
Page 14
INSTALLATION
Configuration via le port série
Un ordinateur où le logiciel HyperTerminal Services est installé permet de
connecter le câble série DB9 fourni en branchant l’une de ses extrémités sur
l’ordinateur et l’autre sur port « Serial 1 » (Série 1) de la CIPD.
Lancez le logiciel HyperTerminal et utilisez les paramètres suivants :
Paramètres de ligne série
UTILISATION DE LA CIPD
Éléments préalables
La CIPD contient un système d’exploitation incorporé ainsi que des applications
qui présentent tout un éventail d’interfaces utilisateur standard. Les
informations qui suivent décrivent leur utilisation en détail. L’accès à toutes
les interfaces se fait par l’intermédiaire du protocole TCP/IP. Elles peuvent être
utilisées via l’adaptateur Ethernet intégré ou le modem.
Les interfaces suivantes sont prises en charge :
Paramètre
Valeur
Bits/seconde
115 200
Bits de données
8
Parité
Non
Bits d’arrêt
1
Contrôle du flux
Aucun
HTTP/HTTPS : l’accès le plus complet est fourni par un serveur Web incorporé.
L’environnement de la CIPD peut être contrôlé grâce à un navigateur Web standard.
Selon le navigateur utilisé, vous pouvez accéder à la carte de la CIPD en vous
servant du protocole HTTP non sécurisé ou, si le navigateur le permet, le protocole
HTTPS crypté. Nous vous conseillons d’utiliser ce dernier autant que possible.
Telnet : il est possible d’utiliser un client telnet standard pour accéder à un
périphérique quelconque connecté à l’un des ports série de la CIPD via un
mode terminal.
Vous voilà prêt à établir la configuration réseau sur la CIPD.
Pour utiliser la fenêtre Remote Access du système hôte géré, le navigateur doit
être équipé de Java Runtime Environment, version 1.1 ou ultérieure. Toutefois,
même si le navigateur que vous utilisez ne prend pas le Java en charge
(comme c’est le cas pour les petits terminaux de poche), vous pouvez toujours
contrôler le système hôte distant en vous servant des formulaires
d’administration affichés dans le navigateur.
Nous vous recommandons d’utiliser les navigateurs suivants si vous
établissez une connexion non sécurisée avec la CIPD :
Microsoft Internet Explorer version 5.5 ou ultérieure sous Windows 98, Me,
2000 et XP
Netscape® Navigator® 7.0 ou Mozilla 1.0 sous Windows 98, Me, 2000, XP,
Linux® et autres systèmes d’exploitation similaires à UNIX®
Pour pouvoir accéder au système hôte distant en vous servant d’une connexion
sécurisée cryptée, vous devez utiliser un navigateur prenant en charge le
protocole HTTPS. Il est uniquement possible d’assurer un niveau élevé de
sécurité si vous utilisez une longueur de clé de 128 bits. Les anciens navigateurs
ne disposent pas d’un algorithme de cryptage 128 bits puissant compte tenu des
précédents règlements d’exportation des autorités américaines. Internet Explorer
5.0, fourni avec Windows Me et 2000, prend uniquement en charge une longueur
de clé de 56 bits. Vous pourrez obtenir des informations sur la longueur de clé
utilisée par Internet Explorer dans les menus « ? » et « Info ». La boîte de
dialogue affiche un lien hypertexte qui vous permet d’accéder à des informations
sur la mise à niveau de votre navigateur grâce à un cryptage de pointe.
14
15
P74238ea_F1DE101G-man.qxd
28-04-2003
09:33
Page 16
UTILISATION DE LA CIPD
UTILISATION DE LA CIPD
Nous vous recommandons d’utiliser les navigateurs suivants si vous établissez
une connexion sécurisée avec la CIPD :
Microsoft Internet Explorer version 5.5 ou ultérieure sous Windows 98, Me,
2000 et XP
Netscape Navigator 7.0 ou Mozilla 1.0 sous Windows 98, Windows Me, 2000,
XP, Linux et autres systèmes d’exploitation similaires à UNIX
Remarque : N’oubliez pas de changer le mot de passe de l’administrateur
immédiatement après avoir installé la CIPD et y avoir accédé pour la première fois.
Écran principal
Après une connexion réussie, la CIPD affiche les cadres de l’écran principal
(voir l’illustration ci-dessous).
Longueur du cryptage indiquée dans Internet Explorer
Le bouton « home » (Accueil) vous amène instantanément à la page d’accueil
depuis l’un des points du menu d’administration. Le bouton de déconnexion
permet de vous déconnecter de la CIPD. Il met un terme à la session en cours.
Vous devrez entrer à nouveau votre nom d’utilisateur et votre mot de passe
pour pouvoir vous connecter ultérieurement.
Connexion à la CIPD
Remarque : La CIPD affiche une invite de mot de passe automatiquement si aucune
activité d’administration n’a lieu pendant 30 minutes.
Ouvrez votre navigateur Web et indiquez l’adresse de votre CIPD configurée lors
de l’installation.
Pour établir une connexion non sécurisée, vous devez saisir les éléments
suivants dans la barre d’adresse du navigateur :
http://192.168.1.22/
Pour une connexion sécurisée, entrez :
https://192.168.1.22/
La CIPD est équipée d’un adminstrateur-utilisateur intégré qui a le droit
d’administrer votre système :
Nom d’utilisateur
administrator
Mot de passe
Belkin
Fenêtre du menu d’accueil de la CIPD
16
17
P74238ea_F1DE101G-man.qxd
28-04-2003
09:34
Page 18
UTILISATION DE LA CIPD
Déconnexion de la CIPD
UTILISATION DE LA CIPD
Ce lien vous permet de déconnecter l’utilisateur en cours et d’afficher un
nouvel écran de connexion. Une déconnexion automatique a lieu si aucune
activité d’administration n’a lieu pendant 30 minutes (suivant une invite de
nouvelle saisie du mot de passe).
doivent être configurés en conséquence. En d’autres termes, si la CIPD est
connectée à votre environnement réseau local et si votre connexion à Internet
se fait uniquement par un serveur proxy, si vous ne configurez pas
correctement le NAT, Remote Access aura peu de chances d’établir la
connexion. Ceci est dû au fait que les proxy Web sont incapables de relayer le
protocole RFB.
Contrôle de l’accès à l’hôte à distance
Si vous n’êtes pas certain de ce point, prenez conseil auprès de votre
administrateur réseau qui vous indiquera l’environnement approprié.
Remote Access correspond à l’écran, au clavier et à la souris redirigés du
système hôte distant que la CIPD contrôle.
La fenêtre de Remote Access essaye d’afficher l’écran distant à sa taille optimale.
Il est donc possible qu’elle soit redimensionnée pour correspondre à l’écran
distant de départ et après un changement de résolution. Vous pouvez toujours
redimensionner la fenêtre Remote Access en utilisant votre système local.
Le lancement de Remote Access permet d’afficher une fenêtre qui est la copie
de l’écran de votre système hôte. Remote Access permet d’utiliser votre
ordinateur de la même façon que vous soyez directement devant ou que vous
soyez à un emplacement distant. Vous pourrez utiliser le clavier et la souris de
la façon habituelle. Toutefois, le système distant réagira à leurs actions avec
un léger retard. Le retard dépend de la bande passante de la ligne avec
laquelle vous vous connectez à la CIPD.
Fenêtre Remote Access avec le bureau de Windows 2000
Remarque : Vous pouvez éviter les problèmes de communication entre les claviers
local et distant en choisissant pour le clavier du système distant la même
répartition des touches que sur le clavier local.
Par exemple, si vous utilisez un système d’administration allemand, mais que
votre système hôte utilise une disposition de clavier américain, les touches
spéciales du clavier allemand ne fonctionneront plus selon le programme local,
mais exécuteront les fonctions du clavier américain.
L’applet Java Remote Access tente d’établir sa propre connexion TCP à la CIPD.
Son protocole n’est ni HTTP ni HTTPS, mais un autre protocole appelé RFB
(Remote Frame Buffer Protocol). Actuellement, RFB tente d’établir une
connexion sur le port 443. Votre environnement réseau local doit autoriser
l’établissement de cette connexion, c’est-à-dire que si vous utilisez un réseau
interne privé, les paramètres du pare-feu NAT (Network Address Translation)
18
Une barre de contrôle située dans la partie inférieure de la fenêtre Remote
Access contient une autre barre de contrôle qui, elle, affiche le statut de
Remote Access et vous permet d’ajuster ses paramètres. Le tableau suivant
indique les options de contrôle de Remote Access :
Contrôle
Description
Options
Scaling
(Mise à l’échelle)
Permet de réduire l’échelle de Remote Access. Vous pouvez
continuer à utiliser la souris et le clavier, mais l’algorithme de mise
à l’échelle ne conservera pas tous les détails de l’affichage.
Options
Mouse Handling
(Gestion de la souris)
Le sous-menu de gestion de la souris propose deux options de
synchronisation des pointeurs des souris locale et distante.
Options
Video settings
(Paramètres vidéo)
Ouvre une boîte de dialogue qui permet de modifier les paramètres
vidéo de la CIPD.
Hot Keys
(Raccourcis clavier)
Touches spéciales qui permettent d’envoyer les associations de
touches définies au système distant.
KVM Keys (Touches KVM)
Si elles sont définies dans les paramètres du port KVM, vous pouvez
changer le port KVM en cours en envoyant le raccourci approprié au
Switch KVM.
Read Option
(Option de lecture)
Active ou désactive le mode de lecture uniquement. Si la case
« Monitor mode » (Mode moniteur) est cochée, Remote Access
n’acceptera pas d’entrée locale au niveau du clavier ou de la souris.
Le symbole indique si le mode moniteur est actif ou non.
Lance la procédure d’ajustement automatique qui déterminera les
paramètres qui permettront d’obtenir la meilleure qualité visuelle
de l’image actuellement affichée sur la CIPD.
Auto Adjust
(Ajustement automatique)
19
P74238ea_F1DE101G-man.qxd
28-04-2003
09:34
Page 20
UTILISATION DE LA CIPD
UTILISATION DE LA CIPD
Options de Remote Access
La barre de titre de Remote Access affiche des informations sur les
transmissions réseau entrantes (In:) et sortantes (Out:). Si vous utilisez le
codage compressé, les transmissions entrantes compressées et non compressées
seront indiquées.
Mode « Single (Direct) Mouse » (Une souris directe)
Si toutes les options de synchronisation échouent, il est toujours possible
d’utiliser la souris distante. Pour cela, sélectionnez le mode à une souris grâce
à son icône. Si vous l’activez, tous les mouvements de souris sont transmis
directement à l’hôte. Vous pouvez ainsi ajuster les paramètres de la souris de
l’hôte en choisissant des valeurs inférieures ou utiliser ce mode si
l’accélération de la souris est désactivé. Dans ce mode, toutes les options de
synchronisation effectuent une synchronisation rapide.
Barre de titre de Remote Access
Unité de gestion de l’alimentation
Fournit une applet Java qui permet au protocole telnet d’ouvrir une connexion
avec la CIPD. Son usage principal est l’option d’intercommunication du port
série 1. Cependant, elle vous permet également de vous connecter avec un
client Telnet standard. L’accès par Telnet doit être activé dans les paramètres
de sécurité.
Synchronisation de la souris de la CIPD
La CIPD représente une gageure habituelle pour les KVM, à savoir la
synchronisation entre les curseurs des souris locale et distante. Pour ce faire,
elle utilise un algorithme de synchronisation intelligent.
Il existe trois méthodes pour re-synchroniser les signaux des souris locale
et distante :
Fast Sync (Synchronisation rapide)
Ce type de synchronisation est utilisé pour corriger un décalage temporaire,
mais fixe. Pour choisir cette option, utilisez le menu des options de Remote
Access ou, si vous avez défini une séquence de touches pour la
synchronisation de la souris, servez-vous-en.
Limites de la synchronisation de la souris
Bien que l’algorithme intelligent fonctionne parfaitement dans les cas
habituels, il existe certaines limites qui risquent d’empêcher le bon
fonctionnement de la synchronisation :
Pilote de souris spécial
Certains pilotes de souris influencent le processus de synchronisation, ce qui
conduit à une désynchronisation des pointeurs. Si cela se produit, assurez-vous
que vous n’utilisez pas de pilote de souris spécial propre à un fabricant sur
votre système hôte.
Image mal réglée
Pour que la synchronisation intelligente fonctionne, il est nécessaire d’avoir
une image correctement réglée. Utilisez la fonction d’ajustement automatique
ou la correction manuelle de la boîte de dialogue « Video Settings »
(Paramètres vidéo) pour configurer l’image.
Active Desktop
Vérifiez si la fonction Active Desktop de Microsoft Windows est activée. Si tel
est le cas, n’utilisez pas un arrière-plan uni, mais plutôt un papier peint. Vous
pouvez également désactiver Active Desktop.
Sync Detect (Détection de la synchronisation)
Si la synchronisation ne fonctionne pas ou si les paramètres de la souris ont
été modifiés sur le système hôte, utilisez la re-synchronisation intelligente.
Cette méthode demande plus de temps que la synchronisation rapide. Vous
pouvez l’obtenir en choisissant l’élément approprié dans le menu des options
de Remote Access. La synchronisation intelligente nécessite une image
correctement ajustée. Utilisez la fonction d’ajustement automatique ou la
correction manuelle de la boîte de dialogue « Video Settings » (Paramètres
vidéo) pour configurer l’image.
20
21
P74238ea_F1DE101G-man.qxd
28-04-2003
09:34
Page 22
UTILISATION DE LA CIPD
Video settings
(Paramètres vidéo)
SÉCURITÉ
« Ports & Protocols » (Ports et protocoles)
Force HTTPS (Forcer HTTPS)
Si cette option est activée, l’accès à l’interface Web est uniquement possible
en utilisant une connexion HTTPS. La CIPD ne fonctionnera pas sur le port
HTTP pour les connexions entrantes.
Le menu des options de Remote Access
vous permet d’accéder à la boîte de
dialogue de configuration des options
vidéo de la CIPD.
HTTPS Port (Port HTTPS)
Numéro de port sur lequel est défini le serveur HTTPS. S’il n’est pas utilisé ou
s’il est ouvert, la valeur par défaut est employée.
Remarque : Les paramètres de luminosité
et de contraste ont un effet sur tous les
modes et ports KVM. Les autres paramètres
doivent être modifiés spécifiquement pour
chaque mode sur chaque port KVM.
HTTP Port (Port HTTP)
Numéro de port sur lequel est défini le serveur HTTP de la CIPD. S’il n’est pas
utilisé ou s’il est ouvert, la valeur par défaut est employée.
Boîte de dialogue des paramètres vidéo
Horizontal Offset (Décalage horizontal) : si vous choisissez cette option,
servez-vous des boutons gauche et droite pour déplacer l’image
horizontalement.
Telnet Port (Port Telnet)
Numéro de port sur lequel est défini le serveur Telnet de la CIPD. S’il n’est pas
utilisé ou s’il est ouvert, la valeur par défaut est employée.
Vertical Offset (Décalage vertical) : si vous choisissez cette option, servezvous des boutons gauche et droite pour déplacer l’image verticalement.
Reset this Mode (Réinitialiser ce mode) : permet de rétablir les valeurs par
défaut des paramètres propres au mode.
Reset all Modes (Réinitialiser tous les modes) : permet de rétablir les
valeurs par défaut de tous les paramètres.
Save Changes (Enregistrer les modifications) : permet d’enregistrer
définitivement les modifications.
Undo Changes (Annuler les modifications) : rétablit les derniers paramètres.
Menu « Ports & Protocols » (Ports et protocoles)
22
23
P74238ea_F1DE101G-man.qxd
28-04-2003
09:34
Page 24
SÉCURITÉ
SÉCURITÉ
Pare-feu
Gestion des certificats
Paramètres de contrôle d’accès IP
Paramètre
Description
Enable Firewall
(Activer le pare-feu)
Permet le contrôle de l’accès en fonction d’adresses IP source.
Default Policy
(Stratégie par défaut)
Cette option contrôle les paquets IP entrants qui ne correspondent
à aucune des règles configurées. Ils peuvent être acceptés ou refusés.
La CIPD utilise le protocole SSL
pour les transmissions réseau
cryptées entre elle-même et un
client connecté. Lors de
l’établissement de la connexion,
la CIPD doit indiquer son
identité à un client en se servant
d’un certificat de cryptage.
Remarque : Si vous avez choisi l’option « DROP » (Refuser) et qu’aucune
règle « ACCEPT »(Accepter) n’est configurée, l’accès au Web par le LAN est
désactivé. Pour l’activer à nouveau, vous pouvez modifier les paramètres
de sécurité via des appels entrants par modem ou RNIS ou en désactivant
temporairement le contrôle d’accès IP en utilisant la procédure de
configuration initiale.
Demande de certificat SSL
Rule Number
(Numéro de règle)
Doit contenir le numéro d’une règle à laquelle s’appliqueront les
commandes suivantes. Si vous ajoutez une nouvelle règle, ce champ
sera ignoré.
IP/Mask (IP/Masque)
Indique l’adresse IP ou la plage d’adresses IP à laquelle la règle
s’applique. Exemples (le numéro concaténé à une adresse IP avec un
« / » correspond au nombre de bits valides de l’adresse IP donnée qui
sera utilisé) :
192.168.1.22 ou 192.168.1.22/32 correspond à l’adresse IP
192.168.1.22
192.168.1.0/24 correspond à tous les paquets IP dont les adresses
source vont de 192.168.1.0 à 192.168.1.255
0.0.0.0/0 correspond à n’importe quel paquet IP
Paramètre
Description
Common name (Nom commun) Il s’agit du nom réseau de la CIPD une fois installée sur le
réseau de l’utilisateur.
Organizational unit
(Unité organisationnelle)
Ce champ permet de spécifier à quel service d’une entreprise la
CIPD appartient.
Organization (Organisation)
Nom de l’entreprise à laquelle la CIPD appartient.
Locality/City (Localité/Ville)
Ville où se trouve l’entreprise.
State/Province (État/Province) État ou province où se trouve l’entreprise.
Country (Pays)
Pays où se trouve l’entreprise. Il s’agit du code ISO à deux
lettres (US pour États-Unis, par exemple).
Challenge Password
(Vérifier le mot de passe)
Certains organismes de certification exigent la vérification du
mot de passe pour autoriser les modifications ultérieures du
certificat (comme sa révocation, par exemple). Le mot de passe
doit contenir au minimum quatre caractères.
Menu « Firewall Settings » (Paramètres du pare-feu)
Confirm Challenge Password Confirmation de la vérification du mot de passe.
(Confirmer la vérification du
mot de passe)
E-mail
Adresse électronique de la personne chargée de la sécurité de la CIPD.
Key length (Longueur de la clé) Longueur de la clé générée en bits. 1024 bits doivent suffire
dans la majorité des cas. Des clés plus longues risquent de
générer des temps de réponse plus lents de la part de la CIPD
lors de l’établissement de la connexion.
24
25
P74238ea_F1DE101G-man.qxd
28-04-2003
09:34
Page 26
SÉCURITÉ
SÉCURITÉ
Informations requises pour la demande de certificat
Demande de signature de certificat SSL
Cependant, il est possible de générer et d’installer un nouveau certificat propre
à une carte particulière. Pour ce faire, la CIPD peut générer une nouvelle clé
cryptographique ainsi que la demande de signature de certificat associée qui
doit être agréée par une autorité d’homologation. Cette dernière vérifie que
vous êtes bien qui vous prétendez être. Ensuite, elle signe et émet un
certificat SSL pour vous.
Remarque : Si vous détruisez la DSC de la console, vous ne pourrez plus la récupérer !
Si vous l’effacez par mégarde, répétez les trois étapes de la procédure.
La procédure suivante est nécessaire pour créer et installer le certificat
SSL de la CIPD :
1. Créez une demande de signature de certificat SSL en utilisant la page indiquée
dans l’illustration ci-dessous . Pour cela, utilisez « Security Settings »
(Paramètres de sécurité)
« SSL Settings » (Parmètres SSL)
« Create
your own SSL certificate » (Créer votre propre certificat SSL). Renseignez les
champs qui vous ont été expliqués dans le tableau ci-dessus. Une fois cette
opération effectuée, cliquez sur « Create CSR » (Créer une DSC) pour
commencer la génération de la demande de signature de certificat. La DSC
peut être téléchargée sur votre poste d’administration grâce au bouton
« Download CSR » (Télécharger la DSC) (voir l’illustration ci-dessous).
2. Envoyez la DSC à l’autorité d’homologation pour obtenir la certification.
Vous obtiendrez un nouveau certificat de cette autorité après le processus
d’authentification habituel.
3. Téléchargez le certificat sur la CIPD en utilisant la page « Upload »
(Télécharger) indiquée dans l’illustration ci-dessous.
Paramètres et configuration du réseau
Paramètres réseau
Paramètre
Description
IP address (Adresse IP)
Adresse IP selon la notation normale avec points.
Subnet mask
Masque réseau du réseau local.
(Masque de sous-réseau)
Gateway IP address
(Adresse IP de la
passerelle)
Passerelle du réseau.
1. DNS Server IP
(IP du serveur DNS)
Adresse IP du serveur de nom de domaine principal selon la notation
avec points. Cette option peut rester vide. Toutefois, la CIPD ne pourra
pas résoudre les noms.
2. DNS Server IP
(IP du serveur DNS)
Adresse IP du serveur de nom de domaine secondaire selon la notation
avec points. Elle sera utilise au cas ou le serveur DNS principal ne
pourrait pas être contacté.
Enable Power
Si cette option est activée, l’accès par l’unité de gestion de
(Activer l’alimentation) l’alimentation est possible. C’est la raison pour laquelle, de manière à
assurer un niveau de sécurité élevé, nous vous conseillons de
désactiver ce paramètre.
(Remarque : Le fait de changer les paramètres réseau sur la CIPD risque
d’occasionner des pertes de connexion. Si vous modifiez les paramètres à distance,
assurez-vous que toutes les valeurs sont correctes de manière à pouvoir continuer à
accéder à la CIPD.)
26
27
P74238ea_F1DE101G-man.qxd
28-04-2003
09:34
Page 28
MENU « NETWORK SETTINGS » (PARAMÈTRES RÉSEAU)
Paramètres d’accès à distance
Alors qu’il est possible de modifier certains paramètres lorsque Remote Access
est en cours d’exécution, d’autres doivent être définis avant de l’activer.
MENU « NETWORK SETTINGS » (PARAMÈTRES RÉSEAU)
Tableau des options de Remote Access
Contrôle
Description
Transmission Encoding
Le paramètre « Transmission Encoding » (Codage de la transmission)
vous permet de changer l’algorithme de codage de l’image utilisé
pour transmettre les données vidéo à la fenêtre de Remote Access.
Il vous permettent d’optimiser la vitesse de l’écran distant selon le
nombre d’utilisateurs parallèles et de la bande passante de la ligne
de connexion (modem, RNIS, ADSL, LAN, etc.).
Normal : l’algorithme de codage standard est tout à fait adapté à de
nombreux utilisateurs parallèles dans un environnement LAN. Les
applications habituelles génèrent du trafic pouvant aller jusqu’à 15 Kbps.
Compressed (Compressé) : le flux de données entre la CIPD et la
fenêtre de Remote Access sera compressé pour économiser la bande
passante. Le codage avec compression est adapté à un environnement
de modem ou RNIS. Toutefois, étant donné que la compression utilise
du temps de traitement sur la CIPD elle-même, ce codage ne doit pas
être utilisé lorsque de nombreux utilisateurs parallèles souhaitent
accéder simultanément à la CIPD.
(Codage de la
transmission)
Use Sun’s Java Browser
Plug-In
(Utiliser le plug-in du
navigateur Java de Sun)
Paramètres d’accès à distance
Mouse Hot Key
Indique au navigateur Web de votre système d’administration d’utiliser la
machine virtuelle Java (JVM) de Sun Microsystems. La JVM du navigateur
est utilisée pour exécuter le code de la fenêtre Remote Access puisque
cette dernière est, en fait, une applet Java. Si vous cochez cette case
pour la première fois sur votre système d’administration et que le plug-in
Java approprié n’est pas encore installé sur votre système, il sera
automatiquement téléchargé et installé. Cependant, pour que
l’installation soit possible, vous devez tout de même répondre « YES »
(Oui) aux différentes boîtes de dialogue. Le volume à télécharger est
d’environ 11 Mo. L’avantage de télécharger la JVM de Sun est de fournir
une machine virtuelle Java stable et identique sur différentes platesformes. Le logiciel Remote Access est optimisé pour cette version de la
JVM et offre un plus grand choix de fonctions lorsqu’il est exécuté sur la
machine virtuelle Java de Sun. (Astuce : Si vous utilisez une connexion
lente pour accéder à Internet, vous pouvez également pré-installer la
JVM sur votre système d’administration. Le logiciel est disponible sur le
CD fourni avec la CIPD.)
(Raccourci souris)
Permet de spécifier des associations de touches pour démarrer le
processus de synchronisation de la souris si vous les utilisez dans
Remote Access. Vous pouvez également les utiliser pour quitter le
mode à une souris. Les codes de clé sont répertoriés dans l’annexe C.
Raccourcis clavier
définis par l’utilisateur
Les raccourcis clavier définis par l’utilisateur simulent des frappes
sur le système distant qui ne peuvent pas être générées localement.
Remarque : Cliquez sur « Append » (Ajouter) pour que le changement soit pris en compte.
28
29
P74238ea_F1DE101G-man.qxd
28-04-2003
09:34
Page 30
MENU « NETWORK SETTINGS » (PARAMÈTRES RÉSEAU)
« Users & Passwords » (Utilisateurs et mots de passe)
Lorsque vous la recevez, la CIPD est pré-configurée avec un superviseur appelé
« administrator » ayant pour mot de passe « belkin ». IMPORTANT : N’oubliez
pas de changer le mot de passe de l’administrateur immédiatement après avoir
installé la CIPD et y avoir accédé pour la première fois.
Page « User & Passwords » (Utilisateurs et mots de passe)
L’illustration ci-dessus montre la page « User & Passwords » (Utilisateurs et
mots de passe) de la CIPD. Son utilisation est décrite dans le tableau cidessous ainsi que dans le texte qui suit.
30
MENU « NETWORK SETTINGS » (PARAMÈTRES RÉSEAU)
Tableau Description des utilisateurs et des mots de passe
Champ
Description
Existing Users
(Utilisateurs existants)
Choisissez un utilisateur existant que vous souhaitez modifier ou
supprimer. Une fois sélectionné, cliquez sur le bouton « Lookup User »
(Rechercher l’utilisateur) afin d’afficher des informations sur cet utilisateur.
New User Name
(Nom du nouvel
utilisateur)
Pour créer un utilisateur, entrez un nouveau nom dans ce champ.
Il ne doit pas s’agir d’un nom d’utilisateur existant. Si c’est le cas,
un message d’erreur apparaît dans la partie supérieure de la fenêtre.
Full User Name
(Nom d’utilisateur complet)
Il s’agit du nom complet de l’utilisateur.
Password
(Mot de passe)
Mot de passe correspondant au nom d’utilisateur et devant comporter au
moins quatre caractères.
Confirm Password
(Confirmer le mot de passe)
Confirmation du mot de passe ci-dessus.
Group (Groupe)
Affecte cet utilisateur à l’un des groupes suivants :
super
Les utilisateurs de ce groupe disposent de tous les droits
pour contrôler le système hôte et la CIPD ; administrators
Les
utilisateurs affectés à ce groupe peuvent contrôler le système hôte ;
et users
Ce groupe a uniquement un droit d’affichage.
La gestion des utilisateurs de la CIPD autorise 25 utilisateurs différents. Les
sections suivantes décrivent la méthode à employer pour ajouter, supprimer et
modifier des utilisateurs.
Ajout d’un utilisateur
Renseignez les champs « New user name » (Nom du nouvel utilisateur),
« Full user name » (Nom d’utilisateur complet), « Password » (Mot de passe) et
« Confirm Password » (Confirmer le mot de passe) comme indiqué sur la page
« Users & Passwords » (Utilisateurs et mots de passe). Vous pouvez également
sélectionner le groupe auquel doit appartenir l’utilisateur. Ensuite, cliquez sur
le bouton « Create User » (Créer l’utilisateur).
Suppression d’un utilisateur
Sélectionnez un utilisateur dans le champ « Existing users » (Utilisateurs
existants). Cliquez sur le bouton « Lookup » (Rechercher). Les informations
complètes sur l’utilisateur apparaissent. Ensuite, cliquez sur le bouton « Delete
User » (Supprimer l’utilisateur).
Modification de l’utilisateur
Sélectionnez un utilisateur dans le champ « Existing users » (Utilisateurs
existants). Cliquez sur le bouton « Lookup » (Rechercher) afin d’obtenir toutes
les informations concernant cet utilisateur. Tous les champs peuvent être
modifiés selon vos besoins. L’ancien mot de passe n’est pas affiché, mais il
peut être modifié. Si toutes les modifications sont terminées, cliquez sur le
bouton « Modify User » (Modifier l’utilisateur).
31
P74238ea_F1DE101G-man.qxd
28-04-2003
09:34
Page 32
MENU « NETWORK SETTINGS » (PARAMÈTRES RÉSEAU)
Port série
Les paramètres série de la CIPD vous permettent d’indiquer les périphériques
connectés au port série et comment les utiliser. Les options sont répertoriées
et décrites dans le tableau ci-dessous.
Tableau Paramètres du port série
Fonction
Description
Modem
Permet d’accéder à la CIPD via un modem. Pour plus
d’informations, reportez-vous à la section « Paramètres
du modem » ci-dessous.
Port Access via
Telnet (Accès au
port via Telnet)
Cette option vous permet de vous connecter à tout
périphérique branché sur le port série et d’y accéder
(s’il permet la prise en charge de terminal) via Telnet.
Choisissez les options adaptées au port série et utilisez
l’unité Telnet ou un client Telnet standard pour vous
connecter à la CIPD.
MENU « NETWORK SETTINGS » (PARAMÈTRES RÉSEAU)
Logiquement, la connexion à la CIPD par la ligne téléphonique revient à établir
une connexion poste à poste depuis l’ordinateur jusqu’à la CIPD. En d’autres
termes, la CIPD joue le rôle d’un fournisseur d’accès à Internet (FAI) auquel il
est possible d’accéder à distance. La connexion est établie grâce au protocole
PPP (Point-to-Point Protocol). Avant de pouvoir vous connecter à la CIPD, vous
devez vous assurer que l’ordinateur de la CIPD est correctement configuré. Par
exemple, sous Windows, vous pouvez configurer une connexion d’accès réseau
à distance dont les valeurs par défaut correspondent aux paramètres qui
conviennent (comme PPP).
Les paramètres du modem font partie de la page des paramètres série
(reportez-vous à la section du menu des paramètres du port série).
Tableau des options du modem
Paramètre
Description
Serial Line Speed
(Vitesse de la
ligne série)
Vitesse à laquelle la CIPD communique avec le modem.
La plupart des modems d’aujourd’hui prennent en charge
une valeur par défaut de 115 200 bps. Si vous utilisez un
modèle ancien et que vous rencontrez des problèmes,
réduisez cette vitesse.
Modem Init String
Chaîne d’initialisation utilisée par la CIPD pour initialiser
(Chaîne d’initialisation le modem. La valeur par défaut fonctionne avec tous les
du modem)
modems standard actuels directement connectés à une
ligne téléphonique. Si vous disposez d’un modem spécial
ou si le modem est connecté à un commutateur
téléphonique local qui exige une séquence de
numérotation spéciale pour établir la connexion au
réseau téléphonique public, vous pouvez changer ce
paramètre et entrer une nouvelle chaîne. Reportez-vous
au mode d’emploi du modem pour connaître la syntaxe de
la commande AT.
Menu Serial Port Settings
(Paramètres du port série)
Paramètres du modem
La CIPD permet un accès distant en utilisant une ligne téléphonique en plus de
l’accès standard par l’intermédiaire de la carte Ethernet intégrée. Le modem
doit être connecté à l’interface série de la CIPD.
32
Client IP Address
Cette adresse IP est attribuée à votre console IP distante
(Adresse IP du client) pendant l’établissement de liaison PPP. Étant donné qu’il
s’agit d’une connexion IP poste à poste, il est possible
d’utiliser pratiquement n’importe quelle adresse IP. Vous
devez toutefois vous assurer qu’elle est conforme aux
paramètres IP de la CIPD et de son ordinateur. La valeur
par défaut fonctionne dans la majorité des cas.
33
P74238ea_F1DE101G-man.qxd
28-04-2003
09:34
Page 34
MENU « NETWORK SETTINGS » (PARAMÈTRES RÉSEAU)
MENU « NETWORK SETTINGS » (PARAMÈTRES RÉSEAU)
Paramètres clavier/souris
La CIPD prend en charge différents modèles de claviers et de souris. La page
indiquée dans le menu « Keyboard/Mouse Settings » (Paramètres clavier/souris)
permet d’ajuster les paramètres (voir tableau ci-dessous).
Tableau de soptions clavier/souris
Contrôle
Description
Targeted KVM Port
(Port KVM ciblé)
Permet de sélectionner le port KVM auquel les
paramètres ci-dessous seront appliqués. Choisissez
« Update » (Mettre à jour) pour afficher les valeurs en
cours de ce port et le sélectionner en vue de modifier
ses paramètres.
Keyboard Model
(Modèle de clavier)
Permet de choisir le modèle de clavier utilisé sur le
système hôte distant.
Mouse Mode
(Mode souris)
Automatic (Automatique)
utilise le processus de
synchronisation automatique de la souris
1: n
permet la mise à l’échelle directe des
mouvements de la souris entre le pointeur local et le
pointeur distant de manière à pouvoir déplacer la
souris même si elle n’est pas parfaitement synchrone.
Reset Mouse/
Keyboard Emulation
(Réinitialiser
l’émulation
souris/clavier)
Cette option permet de réinitialiser l’émulation du
clavier et de la souris de la CIPD pour le système
hôte. Servez-vous-en si le clavier ou la souris semble
ne pas se comporter normalement. Cette opération
équivaut à débrancher les connecteurs du clavier et
de la souris et de les brancher à nouveau.
Menu « Keyboard/Mouse Settings » (Paramètres clavier/souris)
Switches KVM
Il est possible de choisir le nombre de ports utilisés par le Switch KVM
connecté. Vous pouvez même leur attribuer des noms. Pour pouvoir effectuer
une permutation des ports KVM via la CIPD, vous devez définir des associations
de touches pour les ports.
Menu « KVM Settings » (Paramètres KVM)
34
35
P74238ea_F1DE101G-man.qxd
28-04-2003
09:34
Page 36
MENU « NETWORK SETTINGS » (PARAMÈTRES RÉSEAU)
La syntaxe qui permet de définir un nouveau raccourci clavier est la suivante :
< code touche > [+| - [_] < code touche >]*
Par exemple : Ctrl-Ctrl-A-Entrée
ou Ctrl+A-*1-Entrée
Vous pouvez concaténer plusieurs codes de touches avec un signe « + » ou un signe
« - ». Le signe « + » permet de réaliser des associations de touches. Il sera
nécessaire d’appuyer sur toutes les touches jusqu’à ce que vous parveniez à un
signe « - » ou à la fin de la combinaison. Dans ce cas, toutes les touches sur
lesquelles vous avez appuyé devront être relâchées dans l’ordre inverse. Le signe
« - » permet donc de créer une demande d’appui sur une touche distincte et de la
relâcher. Le signe « _ » (souligné) permet d’insérer une pause d’une certaine durée
(qui peut être définie par l’utilisateur). Plusieurs signes « _ » (souligné) peuvent
être concaténés. La durée d’une pause se définit en millisecondes grâce à l’option
appropriée sur la page des paramètres KVM. Reportez-vous au tableau des raccourcis
clavier pour obtenir la liste des codes de touches à utiliser comme raccourcis.
Si les paramètres sont corrects, le port KVM peut être permuté à l’aide de la
matrice de permutation KVM de la page d’accueil de la CIPD. Cette dernière utilise
des paramètres de synchronisation de souris et vidéo différents pour chaque port.
Remarque : Il demeure possible d’appliquer des combinaisons de touches KVM via
Remote Access pour passer d’un port KVM à un autre. Toutefois, dans ce cas, les
paramètres de synchronisation de la vidéo et de la souris seront partagés par les
différents ports et risquent d’être échangés pour l’un de ces ports.
ANNEXE A
Mise à jour du micrologiciel
La mise à niveau par mémoire Flash vous permet d’obtenir les mises à jour du
micrologiciel les plus récentes pour votre CIPD. Elles vous permettent de vous
assurer que l’appareil pourra continuer à fonctionner avec des périphériques et
des ordinateurs récents. Les mises à niveau du micrologiciel sont gratuites
pour toute la durée de vie de la CIPD. Accédez au site belkin.com pour obtenir
des informations de mise à niveau ainsi que de l’aide.
Menu « Firmware Upload » (Téléchargement du micrologiciel)
Modes vidéo de la CIPD
Le tableau B.1 répertorie les modes vidéo pris en charge par la CIPD.
Veuillez utiliser exclusivement ces modes (pas de paramètre vidéo personnalisé).
Si vous le faisiez, la CIPD risquerait de ne pas les détecter.
Tableau B.1 Modes vidéo de l’unité
Micrologiciel
Cette section contient le récapitulatif des informations concernant la CIPD et
son micrologiciel et vous permet, en outre, de la réinitialiser. Vous trouverez
ces informations dans le menu « Maintenance ».
Menu « Maintenance »
36
Résolution (x,y)
Taux de rafraîchissement (Hz)
640x350
70, 85
640x400
56, 70, 85
640x480
60, 67, 72, 75, 85, 90, 100, 120
720x400
70, 85
800x600
56, 60, 70, 72, 75, 85, 90, 100
832x624
75
1024x768
60, 70, 72, 75, 85, 90, 100
1152x864
75
1152x870
75
1152x900
66, 76
1280x960
60
1280x1024
60
37
P74238ea_F1DE101G-man.qxd
28-04-2003
09:34
Page 38
ANNEXE A
GLOSSAIRE
Le tableau Raccourcis clavier vous indique les codes de touches utilisés pour
définir des frappes. Notez qu’ils ne représentent pas nécessairement des
caractères utilisés sur les claviers internationaux. Le nom de la touche
correspond à un clavier PC 104 touches avec disposition pour les États-Unis.
Toutefois, la majorité des touches de modification et autres touches
alphanumériques utilisées comme raccourcis dans des programmes se trouvent
au même emplacement, quel que soit la langue de votre clavier. Certaines
touches ont des alias, ce qui signifie qu’elles peuvent être désignées par deux
codes (séparés par une virgule dans le tableau).
Tableau des raccourcis clavier
Pour ces commandes…
Tilde
Moins
Égal
Point virgule
Apostrophe
Inférieur à
Virgule
Point
Barre oblique
Touche de rappel arrière
Tabulation
Crochet gauche
Crochet droit
Entrée
Verr Maj
Barre oblique inverse
Maj gauche, Maj
Ctrl droit
Maj droit
Ctrl gauche ou Ctrl
Alt gauche ou Alt
Barre d’espacement
Échap
F1
F2
F3
F4
F5
F6
F7
F8
F9
F10
…entrez ces caractères
TILDE
- ou MINUS
= ou EQUALS
;
‘
< ou LESS
,
.
/ ou SLASH
BACK SPACE
TAB
[
]
ENTER
CAPS LOCK
\ ou BACK SLASH
LSHIFT ou SHIFT
RCTRL
RSHIFT
LCTRL ou CTRL
LALT ou ALT
SPACE
ESCAPE ou ESC
F1
F2
F3
F4
F5
F6
F7
F8
F9
F10
Pour ces commandes…
F11
F12
Imprimer écran
Arrêt défil
Pause
Inser
Début
Pg préc
Suppr
Fin
Pg suiv
Flèche vers le haut
Flèche vers la gauche
Flèche vers le bas
Flèche vers la droite
Verr Num
0 du pavé numérique
1 du pavé numérique
2 du pavé numérique
3 du pavé numérique
4 du pavé numérique
5 du pavé numérique
6 du pavé numérique
7 du pavé numérique
8 du pavé numérique
9 du pavé numérique
Signe d’addition du pavé numérique
Signe de division du pavé numérique
Signe de multiplication du pavé numérique
Signe moins du pavé numérique
Touche Entrée du pavé numérique
Windows
Menu
38
…entrez ces caractères
F11
F12
PRINTSCREEN
SCROLL LOCK
BREAK
INSERT
HOME
PAGE UP
DELETE
END
PAGE DOWN
UP
LEFT
DOWN
RIGHT
NUM LOCK
NUMPAD0
NUMPAD1
NUMPAD2
NUMPAD3
NUMPAD4
NUMPAD5
NUMPAD6
NUMPAD7
NUMPAD8
NUMPAD9
NUMPADPLUS ou NUMPAD PLUS
NUMPAD/
NUMPADMUL ou NUMPAD MUL
NUMPADMINUS ou NUMPAD MINUS
NUMPADENTER
WINDOWS
MENU
ACPI
Spécification qui permet au système d’exploitation de mettre en
œuvre la gestion de l’alimentation et la configuration du système.
ATX
Advanced Technology Extended : spécification particulière de carte
mère introduite par Intel® en 1995.
DHCP
Dynamic Host Configuration Protocol : protocole permettant
d’attribuer, de façon dynamique, des configurations IP dans de
nouveaux réseaux.
DNS
Domain Name System : protocole utilisé pour rechercher des
ordinateurs par leur nom sur Internet.
FAQ
Foire aux questions
HTTP
Hypertext Transfer Protocol : protocole utilisé entre les navigateurs
Web et les serveurs.
HTTPS
Hyper Text Transfer Protocol Secure : version sécurisée du
protocole HTTP.
LED
Light Emitting Diode (témoin lumineux)
MIB
Management Information Base décrit la structure des informations
de gestion auxquelles il est possible d’accéder via SNMP.
PS/2
L’interface de périphérique PS/2 a été développée par IBM®. Elle
est employée par de nombreux modèles de souris et de claviers.
SNMP
Simple Network Management Protocol : protocole de surveillance et
de contrôle réseau très utilisé.
SSL
Secure Socket Layer : technologie de cryptage pour Internet
utilisée afin d’assurer des transmissions de données sécurisées.
SVGA
Super VGA : Amélioration du VGA (Video Graphics Array) qui fournit
un meilleur pas et une meilleure résolution.
UTP
Unshielded Twisted Pair : câble avec deux conducteurs torsadés en
une paire et rattachés sur la même fiche PVC.
39
P74238ea_F1DE101G-man.qxd
28-04-2003
09:34
Page 40
Foire aux questions
La CIPD fonctionne-t-elle avec les Switches KVM OmniView série
ENTREPRISE de Belkin ?
Oui.
DÉPANNAGE
La souris distante ne fonctionne pas ou n’est pas synchrone.
Assurez-vous que les paramètres de la souris correspondent au modèle de
souris utilisé.
La qualité vidéo est mauvaise ou l’image est granuleuse.
La CIPD fonctionne-t-elle avec des Switches KVM d’une autre marque que
Belkin ?
Oui, avec d’autres Switches KVM PS/2. Toutefois, vous devez savoir que les
performances risquent d’être dégradées si vous utilisez un Switch KVM de
qualité inférieure.
Quels sont les systèmes d’exploitation pris en charge par la CIPD ?
La CIPD prend en charge Windows NT, 2000 et XP.
Puis-je utiliser ma CIPD avec des systèmes d’exploitation qui ne sont pas
basés sur Microsoft Windows ?
Oui, vous pouvez l’utiliser avec d’autres plates-formes mais uniquement le
clavier et la vidéo sont pris en charge.
La CIPD impose-t-elle une charge sur les serveurs ?
Non, la CIPD est une solution 100 % matérielle qui ne nécessite pas
d’installation de logiciel sur les serveurs.
Corrigez la luminosité et le contraste jusqu’à ce que l’image ne soit plus
granuleuse. Servez-vous de la fonction d’ajustement automatique pour corriger
le scintillement de la vidéo.
Échec de connexion.
Utilisez le compte d’administrateur pour vous connecter et assurez-vous que le
nom d’utilisateur et le mot de passe sont corrects.
La fenêtre Remote Access ne parvient pas à se connecter à la CIPD.
Il est possible qu’un pare-feu en empêche l’accès. Assurez-vous que les
numéros de ports TCP 443 ou 80 sont ouverts pour permettre l’établissement
des connexions TCP entrantes.
Impossible de se connecter à la CIPD.
Vérifiez que la connexion réseau fonctionne en général (effectuez un ping sur
l’adresse IP de la CIPD). Sinon, vérifiez le réseau lui-même (matériel).
La CIPD est-elle sous tension ? Vérifiez si l’adresse IP de la CIPD et tous les
autres paramètres liés à l’adresse IP sont corrects.
Vérifiez que toute l’infrastructure IP du LAN comme les routeurs et autres, est
correctement configurée. Si le ping ne fonctionne pas, la CIPD ne fonctionnera
pas.
Les combinaisons de touches spéciales comme ALT+F2, ALT+F3 sont
interceptées par le système de la CIPD et ne sont pas transmises à l’hôte.
Créez une commande par raccourcis clavier pour cette fonction spéciale.
Dans le navigateur, les pages de la CIPD sont incohérentes et chaotiques.
Assurez-vous que les paramètres de cache sont corrects. Portez une attention
toute particulière à ce que les paramètres ne soient PAS défini sur « never
check for newer pages » (ne jamais vérifier s’il existe une version plus récente
des pages). Sinon, les pages de la CIPD pourraient être chargées depuis le
cache de votre navigateur et pas de la carte.
40
41
P74238ea_F1DE101G-man.qxd
28-04-2003
09:34
Page 42
INFORMATIONS
Déclaration FCC
DÉCLARATION DE CONFORMITÉ À LA RÉGLEMENTATION FCC
EN MATIÈRE DE COMPATIBILITÉ ÉLECTROMAGNÉTIQUE
Nous, Belkin Corporation, sis au 501 West Walnut Street , Compton CA, 90220, États-Unis, déclarons sous notre
seule responsabilité que le produit
F1DE101G
auquel se réfère la présente déclaration :
est conforme aux normes énoncées à l’alinéa 15 de la réglementation FCC. Le fonctionnement est assujetti
aux deux conditions suivantes : (1) cet appareil ne peut pas provoquer d’interférence nuisible et (2) cet
appareil doit accepter toute interférence reçue, y compris des interférences pouvant entraîner un
fonctionnement non désiré.
Déclaration de conformité CE
Nous, Belkin Corporation, déclarons que le produit F1DE101G auquel se rapporte la présente déclaration, a été élaboré dans
le respect des normes d’émissions EN55022 ainsi que des normes d’immunité EN55024, LVP EN61000-3-2 et EN61000-3-3 en
vigueur.
ICES
This Class B digital apparatus complies with Canadian ICES-003. Cet appareil numérique de la classe B est conforme à la
norme NMB-003 du Canada.
Garantie limitée de cinq ans du produit de Belkin Corporation
Belkin Corporation garantit ce produit contre tout défaut matériel ou de fabrication pendant toute sa période de garantie.
Si l’appareil s’avère défectueux, Belkin le réparera ou le remplacera gratuitement, à sa convenance, à condition que le
produit soit retourné, port payé, pendant la durée de la garantie, au dépositaire Belkin agréé auprès duquel le produit a été
acheté. Une preuve d’achat peut être exigée.
La présente garantie est caduque si le produit a été endommagé par accident, abus, usage impropre ou mauvaise
application, si le produit a été modifié sans autorisation écrite de Belkin, ou si un numéro de série Belkin a été supprimé
ou rendu illisible.
LA GARANTIE ET LES VOIES DE RECOURS SUSMENTIONNÉES FONT FOI EXCLUSIVEMENT ET REMPLACENT TOUTES LES AUTRES,
ORALES OU ÉCRITES, EXPLICITES OU IMPLICITES. BELKIN REJETTE EXPRESSÉMENT TOUTES LES GARANTIES IMPLICITES, Y
COMPRIS MAIS SANS RESTRICTION, LES GARANTIES AFFÉRENTES À LA QUALITÉ LOYALE ET MARCHANDE ET À LA POSSIBILITÉ
D’UTILISATION À UNE FIN DONNÉE.
Aucun dépositaire, représentant ou employé de Belkin n’est habilité à apporter des modifications ou adjonctions à la
présente garantie, ni à la proroger.
BELKIN N’EST PAS RESPONSABLE DES DOMMAGES SPÉCIAUX, DIRECTS OU INDIRECTS, DÉCOULANT D’UNE RUPTURE DE
GARANTIE, OU EN VERTU DE TOUTE AUTRE THÉORIE JURIDIQUE, Y COMPRIS MAIS SANS RESTRICTION LES PERTES DE
BÉNÉFICES, TEMPS D’ARRÊT, FONDS DE COMMERCE, REPROGRAMMATION OU REPRODUCTION DE PROGRAMMES OU DE DONNÉES
MÉMORISÉS OU UTILISÉS AVEC DES PRODUITS BELKIN OU DOMMAGES CAUSÉS À CES PROGRAMMES OU À CES DONNÉES.
Certains pays ne permettent pas d’exclure ou de limiter les dommages accidentels ou consécutifs ou les exclusions de
garanties implicites, de sorte que les limitations d’exclusions ci-dessus ne s’appliquent pas dans votre cas. La garantie vous
confère des droits légaux spécifiques. Vous pouvez également bénéficier d’autres droits qui varient d’un pays à l’autre.
42
P74238ea_F1DE101G-man.qxd
28-04-2003
09:34
Page 44
OmniView
IP-Fernbedienungskonsole
™
Einen oder mehrere Server per Masterswitch
über TCP/IP-Netzwerke fernsteuern
belkin.com
Belkin Corporation
501 West Walnut Street
Compton • CA • 90220 • États-Unis
Tél. : +1 310.898.1100
Fax : +1 310.898.1111
Belkin Components, Ltd.
Express Business Park
Shipton Way • Rushden • NN10 6GL
Royaume-Uni
Tél. : +44 (0) 1933 35 2000
Fax : +44 (0) 1933 31 2000
Belkin Components B.V.
Starparc Building • Boeing Avenue 333
1119 PH Schiphol-Rijk • Pays-Bas
Tél. : +31 (0) 20 654 7300
Fax : +31 (0) 20 654 7349
Belkin Gmbh
Hanebergstrasse 2 •
80637 München • Allemagne
Tél. : +49 (0) 89 143 4050
Fax : +49 (0) 89 143 405100
Belkin, Ltd.
7 Bowen Crescent • West Gosford
NSW 2250 • Australie
Tél. : +61 (0) 2 4372 8600
Fax : +61 (0) 2 4372 8603
Support technique Belkin
États-Unis : +1 310.898.1100 poste 2263
+1 800.223.5546 poste 2263
Europe : 00 800 223 55 460
Australie : 1800 666 040
P74238
© 2003 Belkin Corporation. Tous droits réservés. Toutes les raisons commerciales
sont des marques déposées de leurs fabricants respectifs.
Benutzerhandbuch
Enterprise-Serie
F1DE101G
P74238ea_F1DE101G-man.qxd
28-04-2003
09:34
Page 46
INHALTSVERZEICHNIS
Übersicht
Einführung . . . . . . . . . . . . . . . . .
Packungsinhalt . . . . . . . . . . . . . .
Merkmale . . . . . . . . . . . . . . . . . .
Systemvoraussetzungen . . . . . . . .
Technische Daten . . . . . . . . . . . .
Fernbedienungskonsolen-Diagramme
.
.
.
.
.
.
.
.
.
.
.
.
.
.
.
.
.
.
.
.
.
.
.
.
.
.
.
.
.
.
.
.
.
.
.
.
.
.
.
.
.
.
ÜBERSICHT
.
.
.
.
.
.
.
.
.
.
.
.
.
.
.
.
.
.
.
.
.
.
.
.
.
.
.
.
.
.
.
.
.
.
.
.
.
.
.
.
.
.
.
.
.
.
.
.
.
.
.
.
.
.
.
.
.
.
.
.
.
.
.
.
.
.
.
.
.
.
.
.
.
.
.
.
.
.
.
.
.
.
.
.
.
.
.
.
.
.
.
.
.
.
.
.
.
.
.
.
.
.
.1
.1
.2
.3
.4
.5
Installation
Hardwareinstallation . . . . . . . . . . . . . . . . . . . . . . . . . . . . . . . . . . .6
Ausgangskonfiguration des Netzwerks . . . . . . . . . . . . . . . . . . . . . . .12
Verwenden der Fernbedienungskonsole
Systemvoraussetzungen . . . . . . . . . . . .
Anmelden an die Fernbedienungskonsole
Hauptfenster . . . . . . . . . . . . . . . . . .
Abmelden von der Fernbedienungskonsole
Steuern von “Remote Access” am Host . .
....
....
....
...
....
.
.
.
.
.
.
.
.
.
.
.
.
.
.
.
.
.
.
.
.
.
.
.
.
.
.
.
.
.
.
.
.
.
.
.
.
.
.
.
.
.
.
.
.
.
.
.
.
.
.
.
.
.
.
.
.
.
.
.
.
.
.
.
.
.
.
.
.
.
.
.
.
.
.
.
.
.
.
.
.
.15
.16
.17
.18
.18
Sicherheit
Schnittstellen und Protokolle . . . . . . . . . . . . . . . . . . . . . . . . . . . . .23
Firewall . . . . . . . . . . . . . . . . . . . . . . . . . . . . . . . . . . . . . . . . . . .24
Zertifikatverwaltung . . . . . . . . . . . . . . . . . . . . . . . . . . . . . . . . . . .25
Menü “Netzwerkeinstellungen”
Fernzugriffseinstellungen . . .
Benutzer und Kennwörter . . .
Serielle Schnittstelle . . . . . .
Tastatur-/Mauseinstellungen .
Masterswitches . . . . . . . . . .
.
.
.
.
.
.
.
.
.
.
.
.
.
.
.
.
.
.
.
.
.
.
.
.
.
.
.
.
.
.
.
.
.
.
.
.
.
.
.
.
.
.
.
.
.
.
.
.
.
.
.
.
.
.
.
.
.
.
.
.
.
.
.
.
.
.
.
.
.
.
.
.
.
.
.
.
.
.
.
.
.
.
.
.
.
.
.
.
.
.
.
.
.
.
.
.
.
.
.
.
.
.
.
.
.
.
.
.
.
.
.
.
.
.
.
.
.
.
.
.
.
.
.
.
.
.
.
.
.
.
.
.
.
.
.
.28
.30
.32
.34
.35
Anhang A
Aktualisieren der Firmware . . . . . . . . . . . . . . . . . . . . . . . . . . . . . . .37
Fernbedienungskonsolen-Videomodi . . . . . . . . . . . . . . . . . . . . . . . . .37
Befehlstastentabelle . . . . . . . . . . . . . . . . . . . . . . . . . . . . . . . . . . .38
Glossar
. . . . . . . . . . . . . . . . . . . . . . . . . . . . . . . . . . . . . . . . . . . .39
Fragen und Antworten . . . . . . . . . . . . . . . . . . . . . . . . . . . . . . . . . .40
Fehlerbehebung . . . . . . . . . . . . . . . . . . . . . . . . . . . . . . . . . . . . . . .41
Einführung
Wir beglückwünschen Sie zum Kauf dieser OmniView Enterprise IPFernbedienungskonsole von Belkin! Unsere vielfältige Reihe an MasterswitchLösungen zeigt die hohen Qualitätsansprüche, die Belkin an sich stellt. Der
Name Belkin steht für hochwertige, dauerhafte Produkte zu einem
angemessenen Preis. Die Konsole gibt Ihnen die Möglichkeit, Ihren Computer
oder Masterswitch jederzeit an jedem Standpunkt weltweit mit einem StandardBrowser zu steuern. Sie lässt sich problemlos in ein bestehendes lokales
Netzwerk einbinden, unabhängig von der Größe Ihres LAN.
Bei der Entwicklung der Konsole stand der Serveradministrator im Mittelpunkt
des Konzepts. Das Ergebnis ist eine leistungsstarke, aber leicht zu installierende
und benutzerfreundliche Lösung, die die konkurrierenden Modelle durch
fortschrittliche Merkmale und durchdachte Funktionalität in den Schatten stellt.
Dieses Handbuch enthält alle Informationen, die Sie für Ihr Belkin Gerät
benötigen: von der Installation über die Bedienung bis zur Fehlerbehebung,
sollte einmal ein Problem auftreten.
Wir bedanken uns für den Kauf dieser OmniView Enterprise IPFernbedienungskonsole. Wir hoffen, Sie zu unseren zufriedenen Stammkunden
zählen zu können. In kurzer Zeit werden Sie selbst sehen, warum weltweit über
1 Million Belkin OmniView Produkte pro Jahr zum Einsatz kommen.
Packungsinhalt
•
•
•
•
•
•
•
•
1 OmniView Enterprise IP-Fernbedienungskonsole
1 PS/2-Kabelgarnitur
1 Netzteil (5 V DC, 2000 mA)
Benutzerhandbuch
Installationsanleitung
Registrierkarte
Rack-Halterungen mit Befestigungsschrauben
1 DB9-Kabel
Rechtliche Hinweise . . . . . . . . . . . . . . . . . . . . . . . . . . . . . . . . . . . .42
1
P74238ea_F1DE101G-man.qxd
28-04-2003
09:34
Page 2
ÜBERSICHT
ÜBERSICHT
Merkmale
Systemvoraussetzungen
Unterstützung für einen digitalen Benutzer
Ermöglicht den Zugriff durch einen digitalen Benutzer zur Steuerung eines
Computers oder Masterswitch über den Webbrowser.
Hardwareanforderungen
Webbrowser-Kompatibilität
Die Fernbedienungskonsole kann von jedem Computer mit Microsoft® Internet
Explorer Version 5.5 oder höher angesprochen werden. Spezielle Software wird
nicht benötigt.
Rack-Befestigung: 0 Montageeinheiten
Die Fernbedienungskonsole ist so kompakt, dass sie auf dem Schreibtisch oder
hinter einem anderen Gerät Platz findet und sogar seitlich am Serverrack
angebracht werden kann, wo sie keine Montageeinheit beansprucht.
Benutzerdefinierte Tastaturbefehle
Benutzerdefinierte Tastaturbefehle simulieren Tastenfolgen auf dem entfernten
System, die nicht lokal erzeugt werden können.
• OmniView Enterprise IP-Fernbedienungskonsole (enthalten)
• PS/2-Kabelgarnitur (enthalten)
• Netzteil (5 V DC, 2000 mA), enthalten
• Tastatur, Bildschirm, Maus
• Netzwerkverbindung über 10/100Base-T Ethernet-Schnittstelle (RJ45)
• CAT5e Kreuzkabel
• 1:1 verdrahtetes CAT5e-Kabel
• Rack-Halterungen mit Befestigungsschrauben (zur Montage im Rack, enthalten)
Softwareanforderungen
• Microsoft Internet Explorer 5.5 (oder höher)
• Server mit Windows® NT®, 2000 oder XP
Flash-Aktualisierung
Mit einer Flash-Aktualisierung sorgen Sie dafür, dass auf Ihrer
Fernbedienungskonsole stets die aktuellste Firmware läuft. Dadurch gewährleisten
Sie, dass sich Ihre Fernbedienungskonsole mit den neuesten Geräten und
Computern gut verträgt. Die Firmware-Aktualisierungen können Sie während der
gesamten Lebensdauer der Fernbedienungskonsole kostenlos abrufen.
Informationen zur Aktualisierung und Support erhalten Sie unter www.belkin.com.
LED-Anzeige
Die LED-Anzeige befindet sich auf der Fernbedienungskonsolen-Vorderseite und bietet
eine klare Übersicht über den Status von Verbindungen, Verknüpfungen und Aktivität.
Bildschirmauflösung
Bei einer Bandbreite von 117 MHz kann die Fernbedienungskonsole
Auflösungen bis zu 1280 x 1024 bei 60 Hz unterstützen. Um die
Signalintegrität zu gewährleisten und bestmögliche Ergebnisse zu erzielen,
empfehlen wird Ihnen Videokabel von Belkin.
Webgestützte Erweiterte Benutzeroberfläche
Sie können die vielseitigen Funktionen der Fernbedienungskonsole
bedienerfreundlich mit Ihrem Browser einstellen, ohne zusätzliche Software auf
dem Computer zu installieren. Es müssen also keine Installations-CDs eingelegt
werden. Alle Änderungen und Konfigurierungen können Sie einfach und schnell
an einem beliebigen Computer im Netzwerk vornehmen.
2
3
P74238ea_F1DE101G-man.qxd
28-04-2003
09:34
Page 4
ÜBERSICHT
Technische Daten
ÜBERSICHT
Fernbedienungskonsolen-Diagramme
Teilenummer: F1DE101G
Stromversorgung: 5 V DC, 2000 mA
Verbindungsanzeige
Netzwerkanbindung: 10/100Base-T-Anschluss (standardmäßige RJ45Schnittstelle)
Tastaturemulation: PS/2
Mausemulation: PS/2
Connection
Unterstützte Monitore: Unterstützt alle VESA-Grafikmodi sowie Textmodi
Maximale Bildschirmauflösung: 1280 x 1024 / 60 Hz
Remote IP Console
Link / Activity
Bandbreite: 117 MHz
Tastatureingang: MiniDIN 6polig (PS/2)
Mauseingang: MiniDIN 6polig (PS/2)
Computer-/Masterswitch-Schnittstellen: 1
Verbindung/Aktivität
VGA-Schnittstelle: HDDB 15polig
Netzteilanschluss
Serielle
Konsole: VGASchnittstelle 02
LAN-Schnittstelle Schnittstelle
LED-Anzeigen: 2
Gehäuse: Metallgehäuse
CPU/Masterswitch
VGA-Schnittstelle
Abmessungen: 43,1 x 144,7 x 177 mm
Gewicht: 800 g
Betriebstemperatur: 0 - 40°C (32 - 104°F)
Serial 02
power
console
CPU/KVM
Lagertemperatur: 40 - 75°C (104 - 167°F)
Relative Luftfeuchtigkeit: 0 bis 80%, nicht-kondensierend
Serial 01
Maximale Höhe: 3000 m
Garantie: 1 Jahr
Hinweis: Unangekündigte technische Änderungen jederzeit vorbehalten.
4
Serielle
Schnittstelle 01
reset
LAN
Rücksetztaste
Konsole: Tastatur- CPU/MasterswitchTastaturschnittstelle
schnittstelle
CPU/MasterswitchKonsole:
Mausschnittstelle Mausschnittstelle
5
P74238ea_F1DE101G-man.qxd
28-04-2003
09:34
Page 6
INSTALLATION
INSTALLATION
Hardwareinstallation
1. Fahren Sie den Server oder Masterswitch herunter.
Einbau der Fernbedienungskonsole in einen Server-Rack:
2. Verbinden Sie die PS/2-Tastatur und die PS/2-Maus mit den entsprechenden
PS/2-Schnittstellen im Bereich “CONSOLE” (Konsole).
Die Fernbedienungskonsole enthält Halterungen für den Einbau in ein 19”-Rack.
1. Befestigen Sie die enthaltene Halterung mit den beiliegenden
Kreuzschlitzschrauben oben oder unten an der Fernbedienungskonsole.
2. Befestigen Sie die Fernbedienungskonsole am Rack.
Hinweis: Die Befestigungsschrauben für das Rack sind nicht enthalten.
Bitte verwenden Sie die vom Rack-Hersteller angegebenen Schrauben.
*** Warnhinweise ***
Vor dem Anschluss von Geräten an die Fernbedienungskonsole oder den/den
Computer(n) muss sichergestellt werden, dass alle Computer und Geräte
abgeschaltet sind. Belkin Corporation übernimmt keine Haftung für Schäden,
die durch eingeschaltete Geräte entstehen.
Serial 02
power
console
Serial 01
LAN
reset
F10
F11
HOME
PG UP
PG DN
HELP
CAPS
`
F9
num
lock
1
2
3
4
5
6
7
9
8
-
0
=
delete
]
[
P
CPU/KVM
cap
lock
pg up
=
/
7
8
9
4
5
6
1
2
3
-
+
K
L
;:
ESC
return
'"
shift
PC
^
clt
<
alt
OPT
+
>
0
3. Schließen Sie das Bildschirmkabel Ihres VGA-Monitors an die
Grafikschnittstelle im Bereich “Console” an.
6
7
P74238ea_F1DE101G-man.qxd
28-04-2003
09:34
Page 8
INSTALLATION
INSTALLATION
Anschließen an einen Computer oder Masterswitch
Anschließen an einen Computer oder Masterswitch
Schließen Sie das VGA- und das PS/2-Kabel des enthaltenen PS/2-Kabelsatzes
an den Server an. Verbinden Sie das zweite Kabelende mit den MasterswitchSchnittstellen (“CPU/KVM”) an der Rückseite der Fernbedienungskonsole.
Schließen Sie das VGA- und das PS/2-Kabel des enthaltenen PS/2-Kabelsatzes
an den Masterswitch an, der mit der Fernbedienungskonsole verbunden ist.
Verbinden Sie das zweite Kabelende mit den Masterswitch-Schnittstellen
(“CPU/KVM”) an der Rückseite der Fernbedienungskonsole.
Serial 02
power
Serial 01
console
reset
CPU/KVM
LAN
Serial 02
power
Serial 01
console
CPU/KVM
LAN
reset
console
bank
select
USB
flash
daisy chain IN
CPU 01/02
CPU 03/04
CPU 05/06
CPU 07/08
1 2 3 4
reset
8
PS/2
daisy chain OUT
90-264 VAC. 47-63 Hz
9
P74238ea_F1DE101G-man.qxd
28-04-2003
09:34
Page 10
INSTALLATION
INSTALLATION
Hochfahren der Fernbedienungskonsole
Ausgangskonfiguration des Netzwerks
1. Schließen Sie das enthaltene Netzteil an eine freie geerdete Netzsteckdose an.
1. Schließen Sie ein RJ45 Kreuzkabel an den Computer und an die Schnittstelle
“Network” (Netzwerk) an.
2. Stecken Sie den runden Stecker in den Netzanschluss an der Rückseite der
Fernbedienungskonsole, um sie mit dem Netz zu verbinden.
Serial 02
power
Serial 01
console
reset
CPU/KVM
LAN
Serial 02
power
Serial 01
console
reset
CPU/KVM
LAN
2. Stellen Sie eine IP-Adresse auf Ihrem Computer ein, die zum selben
Bereich wie 1.2.3.4 gehört (z.B. 1.2.3.6).
3. Öffnen Sie den Webbrowser Microsoft® Internet Explorer.
4. Geben Sie die IP-Adresse “1.2.3.4” ein.
5. Geben Sie den Standardbenutzernamen “administrator” ein.
3. Schalten Sie den Masterswitch ein. Wenn Sie keinen Masterswitch besitzen,
fahren Sie jetzt Ihre Computer hoch.
6. Geben Sie das Standardkennwort “belkin” ein.
10
11
P74238ea_F1DE101G-man.qxd
28-04-2003
09:34
Page 12
INSTALLATION
INSTALLATION
Ausgangskonfiguration des Netzwerks
Fernzugriff über “Remote Access”
7. Klicken Sie im Bereich
“Setting & Configurations”
(Einstellung und
Konfiguration) auf
“Network” (Netzwerk).
(Hinweis: Deaktivieren Sie
das Kontrollkästchen
“DHCP”).
Remote Access ist ein Java™ Applet, das den Bildschirm, die Tastatur und die
Maus des umgeleiteten entfernten Hostsystems an der Fernbedienungskonsole
darstellt, mit dem sie verbunden ist. Der Webbrowser für den Zugriff auf die
Fernbedienungskonsole muss eine Java Laufzeitumgebung (Version 1.1 oder
höher) bereitstellen. Mit Remote Access lässt sich ein entferntes System
praktisch so steuern, als säßen Sie selbst am betreffenden Computer. Sie gehen
mit der Tastatur und der Maus auf die gewohnte Weise um. Allerdings wird das
entfernte System auf die Tastatur- und Mausaktionen etwas verzögert
reagieren. Die Länge der Verzögerung hängt von der Bandbreite der Leitung ab,
die Sie mit der Fernbedienungskonsole verbindet. Öffnen Sie das Applet, indem
Sie in der HTML-Navigationsleiste auf den entsprechenden Link klicken.
8. Geben Sie die
gewünschten Netzwerkeinstellungen ein, und
klicken Sie auf “Apply
Changes” (Änderungen
übernehmen), um sie
zu speichern.
Unterer Teil des Applets Remote Access
Das Applet Remote Access bietet die folgenden Funktionen:
Auto Adjust (Einstellautomatik)
Wenn das angezeigte Bild verzerrt oder auf andere Weise schlecht ist, klicken
Sie auf die Schaltfläche “Automatic Adjust” (Einstellautomatik). Nach einigen
Sekunden stellt die Fernbedienungskonsole die bestmögliche Bildqualität ein.
Sync
Mit dieser Option synchronisieren Sie den lokalen mit dem entfernten
Mauscursor.
9. Setzen Sie die lokalen IP-Adresseinstellungen des Computers zurück, mit
dem Sie die Fernbedienungskonsole konfiguriert haben.
Anschließen der Fernbedienungskonsole an das Netzwerk
Schließen Sie die Fernbedienungskonsole mit einem 1:1-verdrahteten RJ45
Cat 5 Netzwerkkabel an das Netzwerk an.
Video settings (Videoeinstellungen)
Mit dieser Option öffnen Sie ein neues Fenster mit Steuerelementen für die
Videoeinstellungen der Fernbedienungskonsole. Sie können bestimmte Werte
einstellen, die sich auf die Helligkeit und den Kontrast des angezeigten Bilds
auswirken und dadurch die Bildqualität verbessern. Außerdem können Sie die
Standardeinstellungen für alle Videomodi oder den aktuellen Videomodus
wiederherstellen.
13
12
P74238ea_F1DE101G-man.qxd
28-04-2003
09:34
Page 14
INSTALLATION
Serielle Konfigurierung
Schließen Sie das beiliegende serielle DB9-Kabel an einen Computer, auf dem
die HyperTerminal-Dienste installiert sind, und an die serielle Schnittstelle 1
der Fernbedienungskonsole an.
Öffnen Sie HyperTerminal, und stellen Sie die folgenden Parameter ein:
Serielle Übertragungsparameter
Parameter
Wert
Bit/Sekunde
115200
Datenbits
8
Parität
keine
Stoppbits
1
Flusskontrolle
keine
VERWENDEN DER FERNBEDIENUNGSKONSOLE
Systemvoraussetzungen
Die Fernbedienungskonsole ist mit einem Betriebssystem und Anwendungen
ausgestattet, die eine Reihe von standardmäßigen Benutzeroberflächen
beinhalten. Im folgenden wird ihre Nutzung im einzelnen beschrieben. Alle
Oberflächen sind über das TCP/IP-Protokoll zugänglich und können über den
integrierten Ethernet-Adapter oder das Modem abgerufen werden.
Die folgenden Oberflächen werden unterstützt:
HTTP/HTTPS: Der umfangreichste Zugriff wird durch einen integrierten
Webserver bereitgestellt. Die Umgebung der Fernbedienungskonsole kann durch
einen Standard-Webbrowser gesteuert werden. Je nach Webbrowser können Sie
die Fernbedienungskonsolen-Karte über das nicht gesicherte HTTP-Protokoll
oder, soweit vom Browser unterstützt, über das verschlüsselte HTTPS-Protokoll
ansteuern. Wir empfehlen Ihnen, möglichst HTTPS zu verwenden.
Telnet: Mit einem Telnet-Standardclient können Sie über einen Terminal-Modus
ein frei gewähltes Gerät ansteuern, das mit einer seriellen Schnittstelle der
Fernbedienungskonsole verbunden ist.
Jetzt können Sie Ihre Netzwerkkonfiguration auf der Fernbedienungskonsole
fortsetzen.
Voraussetzung für die Nutzung des Remote Access Fensters an Ihrem
verwalteten Hostsystem ist ein Browser mit Java Laufzeitumgebung (Version
1.1 oder höher). Wenn der genutzte Browser Java nicht unterstützt (wie zum
Beispiel bei kleineren Handhelds), können Sie Ihr System jedoch mit den
Verwaltungsformularen verwalten, die vom Browser selbst angezeigt werden.
Für die nicht gesicherte Verbindung mit der Fernbedienungskonsole
empfehlen wir die folgenden Browser:
Microsoft Internet Explorer Version 5.5 oder höher unter Windows 98, ME, 2000
und XP
Netscape® Navigator® 7.0 oder Mozilla 1.0 unter Windows 98, ME, 2000, XP,
Linux® sowie weiteren UNIX®-Derivaten
Für den Zugriff auf das entfernte Hostsystem über eine gesicherte, verschlüsselte
Verbindung benötigen Sie einen Browser, der das HTTPS-Protokoll unterstützt.
Hohe Sicherheit kann nur mit Schlüsseln mit einer Länge von 128 Bit erzielt
werden. Viele ältere Browser bieten aufgrund früherer US-Ausfuhrbestimmungen
keine 128 Bit Verschlüsselungsalgorithmen. Der Internet Explorer 5.0, der in
Windows ME und 2000 enthalten ist, unterstützt lediglich Schlüssellängen bis zu
56 Bit. Weitere Informationen zur Schlüssellänge des Internet Explorer finden Sie
unter den Menüoptionen “?” und “Info”. Das Dialogfeld enthält einen Hyperlink
zu Informationen, die Ihnen zeigen, wie Sie Ihren Browser mit einem
Verschlüsselungssystem auf dem neuesten Stand der Technik ausstatten.
14
15
P74238ea_F1DE101G-man.qxd
28-04-2003
09:34
Page 16
VERWENDEN DER FERNBEDIENUNGSKONSOLE
VERWENDEN DER FERNBEDIENUNGSKONSOLE
Für die sichere Verbindung mit der Fernbedienungskonsole empfehlen wir die
folgenden Browser:
Microsoft Internet Explorer Version 5.5 oder höher unter Windows 98, ME,
2000 und XP
Netscape® Navigator® 7.0 oder Mozilla 1.0 unter Windows 98, Windows ME,
2000, XP, Linux® sowie weiteren UNIX®-Derivaten
Hinweis: Sie sollten das Kennwort des Administrators sofort nach der Installation
beim ersten Zugriff auf die Fernbedienungskonsole ändern.
Hauptfenster
Nach erfolgreicher Anmeldung zeigt die Fernbedienungskonsole ihre HauptFrames an (siehe Abbildung unten).
Internet Explorer: Anzeige der Verschlüsselungslänge
Mit der Schaltfläche “Home” gelangen Sie von einem Adminstrator-Menüpunkt
aus zurück auf die Startseite. Mit der Abmeldeschaltfläche melden Sie sich von
der Fernbedienungskonsole ab. Sie beendet die aktuelle Sitzung. Wenn Sie sich
später wieder anmelden möchten, müssen Sie Ihren Benutzernamen und Ihr
Kennwort erneut eingeben.
Anmelden an die Fernbedienungskonsole
Hinweis: Nach 30 Minuten ohne Administratoraktivität fordert Sie die
Fernbedienungskonsole automatisch zur Eingabe eines Kennworts auf.
Starten Sie Ihren Webbrowser, und rufen Sie die FernbedienungskonsolenAdresse auf, die sie bei der Installation eingestellt haben.
Um eine ungesicherte Verbindung herzustellen, müssen Sie folgendes in die
Adresszeile des Browsers eingeben:
http://192.168.1.22/
Für eine sichere Verbindung geben Sie folgendes ein:
https://192.168.1.22/
In der Fernbedienungskonsole ist ein Benutzer mit Administratorbefugnissen
voreingestellt, der Ihr System verwalten kann:
Anmeldename
administrator
Kennwort
Belkin
Hauptmenü-Fenster der Fernbedienungskonsole
16
17
P74238ea_F1DE101G-man.qxd
28-04-2003
09:34
Page 18
VERWENDEN DER FERNBEDIENUNGSKONSOLE
Abmelden von der Fernbedienungskonsole
Mit diesem Link melden Sie den aktuellen Benutzer ab und öffnen ein neues
Anmeldefenster. Nach 30 Minuten ohne Administratoraktivität werden Sie
automatisch angemeldet. Danach erscheint eine Kennwortabfrage.
Steuern von “Remote Access” am Host
Remote Access stellt den Bildschirm, die Tastatur und die Maus des
umgeleiteten entfernten Hostsystems dar, das von der Fernbedienungskonsole
gesteuert wird.
Beim Start von Remote Access erscheint ein Popup-Fenster, das den Bildschirm
des Hostsystems nachbildet. Mit Remote Access lässt sich ein entferntes
System praktisch so steuern, als säßen Sie selbst am betreffenden Computer.
Sie gehen mit der Tastatur und der Maus auf die gewohnte Weise um.
Allerdings wird das entfernte System auf die Tastatur- und Mausaktionen etwas
verzögert reagieren. Die Länge der Verzögerung hängt von der Bandbreite der
Leitung ab, die Sie mit der Fernbedienungskonsole verbindet.
VERWENDEN DER FERNBEDIENUNGSKONSOLE
Address Translation, Netzwerkadressübersetzung) Ihrer Firewall entsprechend
konfiguriert werden. Wenn Ihre Fernbedienungskonsole mit der lokalen
Netzwerkumgebung verbunden ist und die Verbindung zum Internet nur über
einen Proxyserver möglich ist, kann Remote Access die Verbindung
normalerweise nur dann herstellen, wenn das NAT korrekt konfiguriert ist. Das
liegt daran, dass Web-Proxys das RFB-Protokoll nicht weitermelden können.
Wenn Sie nicht sicher wissen, wie Sie die Netzwerkumgebung einrichten
müssen, wenden Sie sich bitte an Ihren Netzwerkadministrator.
Remote Access versucht, den entfernten Bildschirm im Programmfenster in
optimaler Größe abzubilden. Daher kann es nach dem Start zu einer Änderung
der Bildgröße und dann zur einer veränderten Auflösung des entfernten
Bildschirms kommen. Sie können die Größe des Remote Access Fensters stets
mit Ihrem lokalen Windows System einstellen.
Unten im Remote Access Fenster befindet sich eine Steuerleiste, die den Status
von Remote Access anzeigt. Außerdem können Sie mit der Steuerleiste die
Remote Access Einstellungen festlegen. Die folgende Tabelle schlüsselt die
Steueroptionen von Remote Access auf:
Steuerung
Beschreibung
Options (Optionen)
Scaling
(Skalierung)
Ermöglicht es, Remote Access zu verkleinern. Sie können die Maus
und die Tastatur weiterhin nutzen. Allerdings bleiben bei der
Skalierung nicht alle Bilddetails erhalten.
Options (Optionen)
Das Untermenü für die Mausverarbeitung enthält zwei Optionen für
die Synchronisierung des lokalen und des entfernten Mauszeigers.
Mouse Handling
(Mausverarbeitung)
Remote Access-Fenster mit entferntem Windows 2000 Desktop Bildschirm
Hinweis: Sie können Kommunikationsprobleme zwischen der lokalen und der
entfernten Tastatur vermeiden, indem Sie auf dem entfernten und dem lokalen
System dieselbe Tastenbelegung einstellen.
Wenn Sie zum Beispiel mit einem deutschen Verwaltungssystem arbeiten, aber
auf dem Hostsystem ein amerikanisches Tastenlayout eingestellt ist,
funktionieren die Umlaute nicht wie vom lokalen Programm vorgesehen; die
Tasten erzeugen die Zeichen der amerikanischen Tastenbelegung.
Das Java-Applet Remote Access versucht, eine eigene TCP-Verbindung zur
Fernbedienungskonsole einzurichten. Es verwendet weder das HTTP- noch das
HTTPS-Protokoll, sondern das Protokoll RFB (Remote Frame Buffer). Derzeit
versucht RFB, eine Verbindung zu Port 443 herzustellen. Ihre lokale
Netzwerkumgebung muss diese Verbindung zulassen. Wenn Sie also mit einem
privaten internen Netzwerk arbeiten, müssen die NAT-Einstellungen (Network
18
Options (Optionen)
Video Settings
(Videoeinstellungen)
Öffnet ein Bedienfeld, in dem Sie die Videoeinstellungen der
Fernbedienungskonsole ändern können.
Hot Keys (Tastaturbefehle) Spezielle Tasten, mit denen Sie die eingestellten
Tastenkombinationen an das entfernte System senden können.
KVM Keys
(Masterswitch-Tasten)
Soweit in den Masterswitch-Schnittstelleneinstellungen festgelegt,
können Sie die aktuelle Masterswitch-Schnittstelle wechseln, indem
Sie die entsprechende Tastenkombination an den Masterswitch senden.
Read Option
(Schreibschutzoption)
Aktiviert bzw. deaktiviert den Schreibschutz. Wenn das Kontrollkästchen
Monitor mode (Überwachungsmodus) aktiviert ist, akzeptiert Remote
Access keine lokalen Eingaben mit der Tastatur oder Maus. Das Symbol
zeigt an, ob der Überwachungsmodus derzeit aktiv ist.
Auto Adjust
(Einstellautomatik)
Startet die Einstellautomatik für die optimale Anzeige des aktuellen
Bilds, das von der Fernbedienungskonsole dargestellt wird.
19
P74238ea_F1DE101G-man.qxd
28-04-2003
09:34
Page 20
VERWENDEN DER FERNBEDIENUNGSKONSOLE
VERWENDEN DER FERNBEDIENUNGSKONSOLE
Remote Access Optionen
Die Titelleiste von Remote Access zeigt Informationen zum eingehenden (“In:”)
und ausgehenden (“Out:”) Netzwerk-Datenverkehr an. Wenn Sie mit
Komprimierung arbeiten, wird sowohl der komprimierte als auch der
unkomprimierte Eingangsverkehr angegeben.
Single Mouse Mode (Einzelmaus-Direktmodus)
Wenn alle Synchronisierungsoptionen fehlgeschlagen sind, können Sie dennoch
mit der entfernten Maus arbeiten. Hierzu müssen Sie den Einzelmausmodus mit
der entsprechenden Symbolschaltfläche auswählen. Soweit aktiviert, werden
alle Mausbewegungen direkt an den Host übertragen. Auf diese Weise können
Sie die Hostmaus-Einstellungen auf weniger extreme Werte einstellen oder in
diesem Modus arbeiten, wenn die Mausbeschleunigung abgeschaltet ist. In
diesem Modus führen Sie mit allen Synchronisierungsoptionen eine
Schnellsynchronisierung durch.
Remote Access Titelleiste
Power Management Unit (Energieverwaltung)
Hierdurch öffnen Sie ein Java-Applet, mit dem das Telnet-Protokoll eine
Verbindung zur Fernbedienungskonsole öffnen kann. Sie dient hauptsächlich als
Durchlassoption für die serielle Schnittstelle 1, kann jedoch auch zur
Verbindung mit einem Telnet-Standardclient genutzt werden. Der Telnet-Zugriff
muss in den Sicherheitseinstellungen aktiviert werden.
RIPC Mouse Synchronization (Fernbedienungskonsolen-Maussynchronisierung)
Die Fernbedienungskonsole spricht ein gängiges Problem bei der MasterswitchGeräteverbindung an, nämlich die Synchronisierung zwischen dem lokalen und
dem entfernten Mauscursor. Dies wird über einen intelligenten
Synchronisierungsalgorithmus erzielt.
Zur Resynchronisierung zwischen dem lokalen und dem entfernten
Maussignal gibt es drei Möglichkeiten:
Fast Sync (Schnellsynchronisierung)
Mit der Schnellsynchronisierung beheben Sie einen vorübergehenden, aber
festen Zeitversatz. Diese Option steht im Remote Access Menü “Options”
(Optionen) zur Verfügung und kann ggf. auch mit der Tastatur aufgerufen
werden, wenn Sie einen entsprechenden Tastenbefehl eingestellt haben.
Sync Detect (Synchronisierungsermittlung)
Wenn die Synchronisierung nicht funktioniert oder die Mauseinstellungen auf
dem Hostsystem geändert wurden, verwenden Sie die intelligente
Resynchronisierung. Diese Methode dauert länger als die
Schnellsynchronisierung und kann mit dem entsprechenden Menübefehl im
Remote Access Menü “Options” (Optionen) gewählt werden. Für die intelligente
Synchronisierung ist ein korrekt eingestelltes Bild erforderlich. Richten Sie das
Bild mit der Einstellautomatik oder der manuellen Korrektur im Bedienfeld
“Video Settings” (Videoeinstellungen) ein.
20
Grenzen der Maussynchronisierung
Der intelligente Algorithmus arbeitet im Normalfall problemlos und fehlerfrei.
Es sind jedoch gewisse Beschränkungen zu beachten, die eine korrekte
Synchronisierung verhindern können:
Spezieller Maustreiber
Bestimmte Maustreiber beeinflussen den Synchronisierungsprozess und
unterbinden damit ein synchrones Verhalten der Mauszeiger. Wenn dies der Fall
ist, stellen Sie sicher, dass Sie keinen speziellen, herstellerspezifischen
Maustreiber auf dem Hostsystem verwenden.
Mangelhaft eingestelltes Bild
Für die intelligente Synchronisierung ist ein korrekt eingestelltes Bild
erforderlich. Richten Sie das Bild mit der Einstellautomatik oder der manuellen
Korrektur im Bedienfeld “Video Settings” (Videoeinstellungen) ein.
Active Desktop
Überprüfen Sie, ob die Windows Funktion Active Desktop aktiviert ist. Ist dies
der Fall, verwenden Sie keinen leeren Hintergrund, sondern wählen Sie ein Bild
als Desktop-Hintergrund aus. Alternativ hierzu können Sie den Active Desktop
ganz deaktivieren.
21
P74238ea_F1DE101G-man.qxd
28-04-2003
09:34
Page 22
VERWENDEN DER FERNBEDIENUNGSKONSOLE
Video Settings
(Videoeinstellungen)
SICHERHEIT
Schnittstellen und Protokolle
Force HTTPS (HTTPS erzwingen)
Wenn diese Option aktiviert ist, ist der Zugriff auf die Weboberfläche nur bei
einer HTTPS-Verbindung möglich. Die Fernbedienungskonsole funktioniert bei
eingehenden Verbindungen nicht am HTTP-Port.
Die Fernbedienungskonsole verfügt über
ein Bedienfeld, in dem die folgenden
Videooptionen eingerichtet werden
können, die im Remote Access Menü
“Options” (Optionen) zur Verfügung
stehen.
Hinweis: Die Helligkeits- und
Kontrasteinstellungen gelten allgemein für
alle Modi und Masterswitch-Schnittstellen;
die anderen Einstellungen werden einzeln
für jeden Modus an der jeweiligen
Masterswitch-Schnittstelle eingestellt.
HTTPS Port (HTTPS-Port)
Die Portnummer, auf die der HTTPS-Server eingestellt ist. Wenn kein
bestimmter Wert eingestellt ist, gilt der Standardwert.
Bedienfeld “Video Settings”
(Videoeinstellungen)
Horizontal Offset (Horizontalabstand): Wenn diese Option ausgewählt ist,
können Sie das Bild mit der linken und rechten Pfeilschaltfläche horizontal
verschieben.
HTTP Port (HTTP-Port)
Die Portnummer, auf die der HTTP-Server der Fernbedienungskonsole eingestellt
ist. Wenn kein bestimmter Wert eingestellt ist, gilt der Standardwert.
Telnet Port (Telnet-Port)
Die Portnummer, auf die der Telnet-Server der Fernbedienungskonsole
eingestellt ist. Wenn kein bestimmter Wert eingestellt ist, gilt der
Standardwert.
Vertical Offset (Vertikaler Abstand): Wenn diese Option ausgewählt ist,
können Sie das Bild mit der linken und rechten Pfeilschaltfläche vertikal
verschieben.
Reset this Mode (Modus zurücksetzen): Setzt die modusspezifischen
Einstellungen auf die Werkseinstellungen zurück.
Reset all Modes (Alle Modi zurücksetzen): Setzt alle Einstellungen auf die
Werkseinstellungen zurück.
Save Changes (Änderungen speichern): Speichert die Änderungen permanent.
Undo Changes (Änderungen rückgängig): Stellt die letzten Einstellungen
wieder her.
Menü “Ports & Protocols” (Schnittstellen und Protokolle)
22
23
P74238ea_F1DE101G-man.qxd
28-04-2003
09:34
Page 24
SICHERHEIT
SICHERHEIT
Firewall
Zertifikatverwaltung
IP-Zugriffskontrollparameter
Der gesamte verschlüsselte
Netzwerkverkehr zwischen der
Fernbedienungskonsole und einem
verbundenen Client wird über das
SSL-Protokoll abgewickelt. Während
des Verbindungsaufbaus muss sich
die Fernbedienungskonsole
gegenüber dem Client mit Hilfe
eines Verschlüsselungszertifikats
ausweisen.
Parameter
Beschreibung
Enable Firewall
(Firewall aktivieren)
Aktiviert die Zugriffskontrolle auf der Basis der IP-Quelladressen.
Default Policy
(Standardregel)
Diese Option kontrolliert eingehende IP-Pakete, die mit keiner
konfigurierten Regel übereinstimmen. Sie können angenommen oder
verworfen werden.
Hinweis: Wenn Sie die Option “Drop” (Verwerfen) wählen, aber keine
Annahmeregeln (“Accept”) konfiguriert haben, ist der Webzugang per LAN
deaktiviert. Sie können den Zugang wieder ermöglichen, indem Sie die
Sicherheitseinstellungen über Modem oder ISDN-DFÜ verändern oder die IPZugriffskontrolle mit der Initialisierungskonfigurierung vorübergehend
deaktivieren.
Anforderung des SSL-Zertifikats
Rule Number
(Regelnummer)
Hier müsste die Nummer einer Regel stehen, für die die folgenden
Befehle gelten. Das Feld wird ignoriert, wenn eine neue Regel
angehängt wird.
Parameter
Beschreibung
Common name (Eigenname)
Der Name der Fernbedienungskonsole im Netzwerks nach der
Installation im Benutzernetzwerk.
IP/Mask (IP/Maske)
Legt die IP-Adresse oder den IP-Adressbereich fest, für die/den die
Regel gilt. Beispiele (die Zahl nach dem Schrägstrich an der IPAdresse gibt die Anzahl der genutzten gültigen Bits aus der
angegebenen IP-Adresse an):
192.168.1.22 oder 192.168.1.22/32 entspricht der IP-Adresse 192.168.1.22
192.168.1.0/24 entspricht allen IP-Paketen mit einer Quelladresse
zwischen 192.168.1.0 und 192.168.1.255
0.0.0.0/0 entspricht allen IP-Paketen
Organizational unit
(Abteilung)
In diesem Feld wird die Abteilung des Betriebs eingetragen, zu
der die Fernbedienungskonsole gehört.
Organization (Betrieb/Firma) Der Name des Betriebs, dem die Fernbedienungskonsole gehört.
Locality/City (Ort)
Der Ort, an dem sich der Betrieb befindet.
State/Province (Staat,
Bundesland oder Provinz)
Der Staat bzw. das Bundesland, in dem sich der Betrieb befindet.
Land
Das Land, in dem sich der Betrieb befindet. Hier wird die
internationale, aus zwei Buchstaben bestehende ISO-Kennung
eingetragen, zum Beispiel US für die USA.
Challenge Password
(Verifiziertes Kennwort)
Bestimmte Zertifizierungsstellen verlangen ein verifiziertes
Kennwort, das zur Autorisierung von späteren Änderungen am
Zertifikat erforderlich ist (zum Beispiel zur Aufhebung des
Zertifikats). Das Kennwort besteht aus mindestens vier Zeichen.
Menü “Firewall Settings” (Firewall-Einstellungen)
Confirm Challenge Password Hier muss das verifizierte Kennwort zur Bestätigung nochmals
(Verifiziertes Kennwort
eingegeben werden.
bestätigen)
24
E-mail (E-Mail-Adresse)
Die E-Mail-Adresse des Sicherheitsbetrauten, der als Ansprechpartner
für die Fernbedienungskonsole verantwortlich ist.
Key length (Schlüssellänge)
Die Länge des erzeugten Schlüssels, angegeben in Bit. 1024 Bit
sollten normalerweise ausreichen. Größere Schlüssel führen beim
Verbindungsaufbau zu längeren Ansprechzeiten der
Fernbedienungskonsole.
25
P74238ea_F1DE101G-man.qxd
28-04-2003
09:34
Page 26
SICHERHEIT
SICHERHEIT
Benötigte Informationen für die Zertifikatsanforderung
Anforderung der SSL-Zertifikatbescheinigung
Allerdings kann ein neues Zertifikat erzeugt und installiert werden, das nur für
eine bestimmte Karte gilt. Hierzu kann die Fernbedienungskonsole einen neuen
Schlüssel und die zugehörige Zertifikat-Bescheinigungsanforderung generieren,
die von einer Zertifizierungsstelle (ZS) bestätigt werden muss. Die betreffende
Zertifizierungsstelle prüft Ihre Identität nach und stellt Ihnen dann ein SSLZertifikat aus.
Hinweis: Wenn die ZA auf der Fernbedienungskonsole verloren geht, kann sie nicht
wiederhergestellt werden! Wenn Sie sie versehentlich löschen, wiederholen Sie die
drei Schritte.
Die folgenden Schritte sind zur Erstellung und Installierung des SSLZertifikats für die Fernbedienungskonsole erforderlich.
1. Erstellen Sie mit dem in der folgenden Abbildung gezeigten Bedienfeld eine
Bescheinigungsanforderung für ein SSL-Zertifikat (Optionen “Security Settings”
[Sicherheitseinstellungen] > “SSL Settings” [SSL-Einstellungen] > “Create your
own SSL certificate” [Eigenes SSL-Zertifikat erstellen]). Füllen Sie die Felder
aus, die in der nachfolgenden Tabelle erläutert werden. Klicken Sie danach auf
“Create CSR” (ZA erstellen). Dadurch wird die Bescheinigungsanforderung
generiert. Die Zertifikat-Bescheinigungsanforderung kann mit der Schaltfläche
“Download CSR” (ZA herunterladen) in Ihren Verwaltungscomputer geladen
werden (siehe Abbildung unten).
2. Senden Sie die gespeicherte Zertifikat-Bescheinigungsanforderung zur
Zertifizierung an eine Zertifizierungsstelle. Nach einem herkömmlichen
Authentifizierungsverfahren erhalten Sie von dort das neue Zertifikat.
3. Laden Sie das Zertifikat im Bedienfeld “Upload” (Hochladen) in die
Fernbedienungskonsole, wie in der nachstehenden Abbildung gezeigt.
26
Einstellungs- und Konfigurationsnetzwerk
Netzwerkeinstellungen
Parameter
Beschreibung
IP address (IP-Adresse)
IP-Adresse in der üblichen URL-Schreibweise (domäne.xyz).
Subnet mask
(Subnet Mask)
Die Netzwerkmaske des lokalen Netzwerks.
Gateway IP address
(Gateway-IP-Adresse)
Das Gateway des Netzwerks.
1. DNS Server IP
(DNS-Server-IP)
IP-Adresse des primären DNS-Servers in der URL-Namensgebung.
Diese Option kann leer gelassen werden; allerdings kann die
Fernbedienungskonsole dann keine URL-Namen auflösen.
2. DNS Server IP
(DNS-Server-IP)
IP-Adresse des sekundären DNS-Servers in der URL-Namensgebung.
Sie wird genutzt, wenn kein Kontakt zum primären DNS-Server
zustande kommt.
Enable Power
Management Unit
(Energieverwaltung
aktivieren)
Wenn diese Option aktiviert ist, kann auf die Energieverwaltung
zugegriffen werden. Um ein möglichst hohes Sicherheitsniveau zu
gewährleisten, empfehlen wir daher, diesen Parameter zu
deaktivieren.
(Hinweis: Wenn die Netzwerkeinstellungen der Fernbedienungskonsole geändert
werden, kann dies zum Verbindungsabbruch führen. Wenn Sie die Einstellungen
entfernt bearbeiten, stellen Sie daher sicher, dass alle Werte korrekt sind, so dass
Sie weiterhin auf die Fernbedienungskonsole zugreifen können.)
27
P74238ea_F1DE101G-man.qxd
28-04-2003
09:34
Page 28
MENÜ “NETZWERKEINSTELLUNGEN”
Fernzugriffseinstellungen
MENÜ “NETZWERKEINSTELLUNGEN”
Tabelle der Remote Access Optionen
Einige Parameter können noch während der Ausführung von Remote Access
geändert werden. Andere Einstellungen müssen konfiguriert werden, bevor
Remote Access aktiviert wird.
Steuerelement
Beschreibung
Transmission Encoding
(Übertragungskodierung)
Mit dieser Einstellung können Sie den Bildkodierungsalgorithmus
wechseln, mit dem die Bilddaten in das Remote Access Fenster
übertragen werden. Damit können Sie die Geschwindigkeit des
entfernten Bildschirms je nach der Zahl der parallel angemeldeten
Benutzer und der Bandbreite der Verbindungsleitung (Modem, ISDN,
DSL, LAN usw.) optimieren.
Normal (Normal): Der Standardkodierungsalgorithmus, der sich gut
für zahlreiche parallel angemeldete Benutzer in einer LAN-Umgebung
eignet. Typische Anwendungen erzeugen einen Datenverkehr bis zu
15 Kbit/s.
Compressed (Komprimiert): Der Datenfluss zwischen der
Fernbedienungskonsole und dem Remote Access Fenster wird
zusätzlich komprimiert, um Bandbreite zu sparen. Die
Komprimierungskodierung eignet sich für eine Modem- oder ISDNUmgebung. Da die Komprimierung jedoch Verarbeitungszeit auf der
Fernbedienungskonsole selbst kostet, sollte sie nicht verwendet
werden, wenn zahlreiche Benutzer gleichzeitig auf die
Fernbedienungskonsole zugreifen möchten.
Use Sun's Java Browser
Plug-In (Sun JavaPlugin verwenden)
Weist den Webbrowser Ihres Verwaltungssystems an, die Java Virtual
Machine (JVM) von Sun Microsystems zu verwenden. Die JVM im Browser
führt den Code im Remote Access Fenster aus, das eigentlich ein Java
Applet ist. Wenn Sie dieses Kontrollkästchen auf Ihrem Verwaltungssystem
zum ersten Mal markieren und das entsprechende Java Plugin noch nicht
installiert ist, wird es automatisch heruntergeladen und installiert. Damit
die Installation möglich wird, müssen Sie noch die entsprechenden
Dialogfelder mit “YES” (Ja) bestätigen. Die heruntergeladene Datenmenge
umfasst ca. 11 MB. Der Vorteil der heruntergeladenen JVM von Sun liegt
darin, dass über unterschiedliche Plattformen hinweg eine stabile und
einheitliche Java Virtual Machine ausgeführt wird. Die Software Remote
Access ist für diese JVM-Version optimiert und bietet bei einer Ausführung
in der JVM von Sun eine größere Bandbreite an Funktionen. (Tipp: Wenn
Ihr Internet-Zugang hierzu nicht schnell genug ist, können Sie die JVM
auf dem Verwaltungscomputer vorinstallieren. Die Software steht auf der
CD zur Verfügung, die zur Fernbedienungskonsole mitgeliefert wird.)
Mouse Hot Key
Ermöglicht die Festlegung einer Tastenkombination, mit der (bei
Betätigung unter Remote Access) entweder die Maussynchronisierung
gestartet oder der Einzelmausmodus beendet wird. Die Tastencodes
werden in Anhang C aufgelistet.
Fernzugriffseinstellungen
(Maustastenbefehl)
User-Defined Hot Keys
(Benutzerdefinierte
Tastenbefehle)
Benutzerdefinierte Tastenbefehle simulieren Tastenfolgen auf dem
entfernten System, die nicht lokal erzeugt werden können.
Hinweis: Klicken Sie auf “Append” (Umsetzen), um die Änderungen in Kraft zu setzen.
28
29
P74238ea_F1DE101G-man.qxd
28-04-2003
09:34
Page 30
MENÜ “NETZWERKEINSTELLUNGEN”
Benutzer und Kennwörter
MENÜ “NETZWERKEINSTELLUNGEN”
Bedienfeld für Benutzer und Kennwörter
Werkseitig ist auf jeder Fernbedienungskonsole ein Supervisor (Administrator)
namens “administrator” eingerichtet, der das Kennwort “belkin” besitzt.
Wichtig: Sie sollten das Kennwort des Supervisors sofort nach der Installation
beim ersten Zugriff auf die Fernbedienungskonsole ändern.
Option
Existing Users
(Bestehende Benutzer)
Beschreibung
Wählen Sie einen bestehenden Benutzer aus, um ihn zu bearbeiten oder
zu löschen. Nach der Auswahl klicken Sie auf die Schaltfläche “Lookup
User” (Benutzer nachschlagen), um die Benutzerdaten zu vervollständigen.
New User Name
(Neuer Benutzername)
Um einen neuen Benutzer zu erstellen, geben Sie in dieses Feld den
gewünschten Anmeldenamen ein. Der neue Name darf noch nicht als
Benutzer vorhanden sein. Andernfalls erscheint eine Fehlermeldung
oben auf dem Bedienfeld.
Full User Name
Dies ist der vollständige Name des Benutzers.
(Vollständiger Benutzername)
Bedienfeld “User & Passwords” (Benutzer und Kennwörter)
Die obige Abbildung zeigt das Bedienfeld für Benutzer- und Kennwort auf der
Benutzeroberfläche der Fernbedienungskonsole. Die Bedienung können Sie der
unten gezeigten Tabelle und dem nachfolgenden Text entnehmen.
30
Password (Kennwort)
Das Kennwort für den Benutzernamen. Es muss aus mindestens vier
Zeichen bestehen.
Confirm Password
(Kennwort bestätigen)
Hier muss das Kennwort zur Bestätigung nochmals eingegeben werden.
Group (Gruppe)
Weisen Sie diesen Benutzer einer der folgenden Gruppen zu:
super
Die Benutzer in dieser Gruppe besitzen jede mögliche
Befugnis zur Kontrolle des Hostsystems und der Fernbedienungskonsole;
administrators
die Benutzer dieser Gruppe können das
Hostsystem kontrollieren; und users
diese Gruppe hat nur die
Anzeigeberechtigung inne.
Die Benutzerverwaltung der Fernbedienungskonsole lässt 25 verschiedene
Benutzer zu. Im folgenden wird beschrieben, wie Sie Benutzer hinzufügen,
löschen und bearbeiten.
Benutzer hinzufügen
Füllen Sie die Felder “New user name” (Neuer Benutzername), “Full user name”
(Vollständiger Benutzername), “Password” (Kennwort) und “Confirm Password” (Kennwort
bestätigen) aus, wie im Bedienfeld “Users & Passwords” (Benutzer und Kennwörter)
gezeigt. Alternativ hierzu können Sie die Gruppe auswählen, zu der der neue Benutzer
gehören soll. Klicken Sie auf die Schaltfläche “Create User” (Benutzer erstellen).
Benutzer löschen
Wählen Sie im Feld “Existing users” (Vorhandene Benutzer) einen Benutzer aus.
Klicken Sie auf die Schaltfläche “Lookup” (Nachschlagen). Die vollständigen
Benutzerinformationen werden angezeigt. Klicken Sie auf die Schaltfläche
“Delete User” (Benutzer löschen).
Benutzer bearbeiten
Wählen Sie im Feld “Existing users” (Vorhandene Benutzer) einen Benutzer aus.
Klicken Sie auf die Schaltfläche “Lookup” (Nachschlagen). Die vollständigen
Benutzerinformationen werden angezeigt. Alle Felder können nach Bedarf
bearbeitet werden. Das alte Kennwort wird nicht angezeigt, kann aber geändert
werden. Wenn Sie alle Änderungen vorgenommen haben, klicken Sie auf die
Schaltfläche “Modify User” (Benutzer bearbeiten).
31
P74238ea_F1DE101G-man.qxd
28-04-2003
09:34
Page 32
MENÜ “NETZWERKEINSTELLUNGEN”
Serielle Schnittstelle
In den seriellen Einstellungen der Fernbedienungskonsole geben Sie an, welche
Geräte mit der seriellen Schnittstelle verbunden sind und wie sie genutzt
werden. In der nachfolgenden Tabelle werden die Optionen aufgelistet und
beschrieben.
Einstellungen der seriellen Schnittstelle
Funktion
Beschreibung
Modem
Ermöglicht den Zugriff auf die Fernbedienungskonsole per
Modem. Weitere Einzelheiten hierzu finden Sie unten unter
“Modemeinstellungen”.
Port Access via
Telnet
(Schnittstellenzugriff
über Telnet)
Mit dieser Option können Sie ein beliebiges Gerät an die
serielle Schnittstelle anschließen und über Telnet darauf
zugreifen. (Das Gerät muss hierzu Terminal-Support bieten.)
Wählen Sie die betreffenden Optionen für die serielle
Schnittstelle aus, und stellen Sie mit dem Telnet-Gerät oder
einem Telnet-Standardclient die Verbindung zur
Fernbedienungskonsole her.
Menü “Serial Port Settings”
(Serielle Schnittstelleneinstellungen)
Modemeinstellungen
Die Fernbedienungskonsole bietet neben ihrem Standardzugang über den
integrierten Ethernet-Adapter Zugriff über die Telefonleitung. Das Modem muss
an die serielle Schnittstelle der Fernbedienungskonsole angeschlossen werden.
32
MENÜ “NETZWERKEINSTELLUNGEN”
Technisch gesehen ist die Fernbedienungskonsolen-Verbindung über die
Telefonleitung nichts anderes als eine dezidierte Punkt-zu-Punkt-Verbindung
zwischen dem Fernbedienungskonsolen-Computer und der Fernbedienungskonsole.
Die Fernbedienungskonsole dient hier als Internet-Provider (ISP), zu dem Sie eine
Einwählverbindung aufbauen. Die Verbindung wird über das PPP-Protokoll
hergestellt. Bevor Sie die Verbindung zur Fernbedienungskonsole herstellen,
müssen Sie den Fernbedienungskonsolen-Computer entsprechend konfigurieren.
Auf Windows Systemen zum Beispiel können Sie eine DFÜ-Verbindung einrichten,
die die benötigten Einstellungen wie PPP bereits standardmäßig enthält.
Die Modemeinstellungen werden im Bedienfeld “Serial Settings” (Serielle
Einstellungen) festgelegt, das über das Menü “Serial Port Settings” (Serielle
Schnittstelleneinstellungen) zugänglich ist.
Modemoptionen
Parameter
Beschreibung
Serial Line Speed
(Serielle
Verbindungsrate)
Die Geschwindigkeit, in der die Fernbedienungskonsole
mit dem Modem kommuniziert. Die meisten Modems
unterstützen heutzutage den Standardwert 115200 Bit/s.
Wenn Sie ein älteres Modem nutzen und es zu Problemen
kommt, setzen Sie die eingestellte Rate herab.
Modem Init String
(ModemInitialisierungszeichenfolge)
Die Zeichenfolge, mit der die Fernbedienungskonsole das
Modem initialisiert. Der vorgegebene Wert eignet sich für
alle Standardmodems, die direkt an eine Telefonleitung
angeschlossen sind. Wenn Sie ein spezielles Modem
verwenden oder das Modem an eine Telefonanlage
angeschlossen ist, das für die Durchschaltung zum Amt
eine spezielle Wahlsequenz benötigt, können Sie die
Zeichenfolge anpassen. Informationen zur AT-Befehlssyntax
finden Sie im Modemhandbuch.
Client IP Address
(Client-IP-Adresse)
Diese IP-Adresse wird Ihrem Konsolen-Computer beim PPPQuittungsaustausch zugewiesen. Da es sich um eine reine
Punkt-zu-Punkt-Verbindung handelt, kann praktisch jede
IP-Adresse außer der Adresse der Fernbedienungskonsole
oder des Fernbedienungskonsolen-Computers gewählt
werden. Normalerweise kann der vorgegebene Wert
übernommen werden.
33
P74238ea_F1DE101G-man.qxd
28-04-2003
09:34
Page 34
MENÜ “NETZWERKEINSTELLUNGEN”
MENÜ “NETZWERKEINSTELLUNGEN”
Tastatur-/Mauseinstellungen
Die Fernbedienungskonsole unterstützt unterschiedliche Tastatur- und
Mausmodelle. Auf dem Bedienfeld, das im Menü “Keyboard/Mouse Settings”
(Tastatur-/Mauseinstellungen) gezeigt wird, legen Sie die entsprechenden
Einstellungen fest (siehe Tabelle unten).
Tastatur-/Mausoptionen
Steuerelement
Beschreibung
Targeted KVM Port
(Angesprochener
Masterswitch-Port)
Wählt den Masterswitch-Port aus, auf den die unten
gewählten Einstellungen angewendet werden. Mit
“Update” (Aktualisieren) zeigen Sie die geltenden
Werte für diesen Port an und wählen ihn zur
Bearbeitung seiner Einstellungen aus.
Keyboard Model
(Tastaturmodell)
Stellt die Tastatur ein, die auf dem entfernten
Hostsystem verwendet wird.
Mouse Mode
(Mausmodus)
Automatic (Automatisch)
legt die automatische
Synchronisierung der Maus fest;
1: n
aktiviert die direkte Umsetzung der
Mausbewegung zwischen dem lokalen und dem
entfernten Mauszeiger, so dass Sie die Maus in jedem
Fall bewegen können; allerdings ist die
Mausbewegung nicht immer völlig synchron.
Reset Mouse/
Keyboard Emulation
(Maus-/Tastaturemulation
zurücksetzen
Menü Keyboard/Mouse Settings (Tastatur-/Mauseinstellungen)
Masterswitches
Sie können festlegen, wie viele Ports vom angeschlossenen Masterswitch
genutzt werden, und jedem Port einen Namen zuweisen. Damit die
Masterswitch-Ports über die Fernbedienungskonsole durchgeschaltet werden
können, muss für jeden Port eine Tastenkombination festgelegt werden.
Mit dieser Option setzen Sie die Tastatur- und
Mausemulation der Fernbedienungskonsole für das
Hostsystem zurück. Nutzen Sie sie, wenn das Tastaturoder Mausverhalten fehlerhaft erscheint. Sie wirkt in
etwa wie der Herausziehen und Wiedereinstecken der
Maus- und Tastaturstecker.
Menü KVM Settings (Masterswitch-Einstellungen)
34
35
P74238ea_F1DE101G-man.qxd
28-04-2003
09:34
Page 36
MENÜ “NETZWERKEINSTELLUNGEN”
Tastenbefehle werden über folgende Syntax definiert:
< Taste > [+| - [_] < Taste >]*
Zum Beispiel: Strg-Strg-A-Eingabe
oder Strg+A-*1-Eingabe
Mehrere Tasten können mit Plus- oder Minuszeichen aneinandergereiht werden.
Mit dem Pluszeichen werden Tastenkombinationen gebildet; alle Tasten sind zu
drücken, bis die Kombination endet oder mit einem Minuszeichen abgeschlossen
wird. Alle gedrückten Tasten werden hier in umgekehrter Reihenfolge wieder gelöst.
Mit dem Minuszeichen werden einzelne, getrennte Tastenbetätigungen festgelegt.
Der Unterstrich (_) fügt eine Pause mit benutzerdefinierter Länge ein; es können
mehrere Unterstriche aneinandergereiht werden. Die Länge einer einzelnen Pause
wird in Millisekunden festgelegt. Hierzu dient die entsprechende Option auf der
Seite “KVM settings” (Masterswitch-Einstellungen). Die Tabelle “Tastenbefehle”
enthält eine Liste der Tasten, die als Befehlstasten genutzt werden können.
Wenn die Einstellungen korrekt sind, kann der Masterswitch-Port mit Hilfe der
Masterswitch-Schalttabelle auf der Fernbedienungskonsolen-Startseite geschaltet
werden. Die Synchronisierungs- und Videoeinstellungen werden für jeden Port
separat festgelegt.
Hinweis: Die Masterswitch-Tastenkombinationen können auch über Remote Access zum
Umschalten zwischen den Masterswitch-Ports genutzt werden; allerdings gelten in
diesem Fall für alle Ports dieselben Video- und Maussynchronisierungseinstellungen
und können versehentlich mit einem Port vertauscht werden.
Firmware
Im folgenden erhalten Sie einen Überblick über die Fernbedienungskonsole und
ihre aktuelle Firmware. Außerdem wird gezeigt, wie Sie die
Fernbedienungskonsole zurücksetzen. Die entsprechenden Informationen
werden im Menü “Maintenance Panel” (Wartungsoptionen) bereitgestellt.
Menü “Maintenance Panel” (Wartungsoptionen)
36
ANHANG A
Aktualisieren der Firmware
Mit einer Flash-Aktualisierung sorgen Sie dafür, dass auf Ihrer
Fernbedienungskonsole stets die aktuellste Firmware läuft. Dadurch gewährleisten
Sie, dass sich Ihre Fernbedienungskonsole mit den neuesten Geräten und
Computern gut verträgt. Die Firmware-Aktualisierungen können Sie während der
gesamten Lebensdauer der Fernbedienungskonsole kostenlos abrufen.
Informationen zur Aktualisierung und Support erhalten Sie unter www.belkin.com.
Menü “Firmware Upload” (Firmware einspeisen)
Fernbedienungskonsolen-Videomodi
In Tabelle B.1 werden die von der Fernbedienungskonsole unterstützten Videomodi
aufgelistet. Bitte verwenden Sie ausschließlich diese Modi, und verzichten Sie auf
selbst definierte Videoeinstellungen. Benutzerdefinierte Videoeinstellungen werden
von der Fernbedienungskonsole möglicherweise nicht erkannt.
Tabelle B.1 Videomodi
Auflösung (x,y)
Bildwiederholraten (Hz)
640x350
70, 85
640x400
56, 70, 85
640x480
60, 67, 72, 75, 85, 90, 100, 120
720x400
70, 85
800x600
56, 60, 70, 72, 75, 85, 90, 100
832x624
75
1024x768
60, 70, 72, 75, 85, 90, 100
1152x864
75
1152x870
75
1152x900
66, 76
1280x960
60
1280x1024
60
37
P74238ea_F1DE101G-man.qxd
28-04-2003
09:34
Page 38
ANHANG A
Die Befehlstastentabelle führt die Tastencodes auf, mit denen Sie
Tastenbetätigungen definieren. Bitte beachten Sie, dass die Tastenbelegungen
auf internationalen Tastaturen teilweise von den angegebenen Tasten
abweichen. Die Tabelle gilt für eine PC-Standardtastatur mit 104 Tasten und
US-amerikanischer Tastenbelegung. Allerdings befinden sich die meisten
Schalttasten und alphanumerischen Tasten, die in Anwendungsprogrammen als
Befehlstasten genutzt werden, unabhängig von der Sprache an denselben
Tastenpositionen. Bestimmte Tasten können zusätzlich durch eine Kombination
von zwei anderen Tasten ersetzt werden (in der Tabelle durch Komma getrennt).
GLOSSAR
ACPI
Spezifikation, die dem Betriebssystem die Energieverwaltung und
Systemkonfigurierung ermöglicht.
ATX
“Advanced Technology Extended”: Spezifikation für eine
Systemplatine, die 1995 von Intel® festgelegt wurde.
DHCP
“Dynamic Host Configuration Protocol”: Protokoll zur dynamischen
Zuweisung von IP-Konfigurationen in lokalen Netzwerken.
DNS
“Domain Name System”: Protokoll zur Ortung von Computern im
Internet anhand Ihres Namens.
FAQ
Häufig gestellte Fragen
HTTP
“Hypertext Transfer Protocol”: Das Protokoll für die Kommunikation
zwischen Browsern und Servern.
HTTPS
“Hyper Text Transfer Protocol Secure”: Die sichere, verschlüsselte
Version des HTTP-Protokolls.
LED
Abkürzung für “Light Emitting Diode” (Leuchtdiode).
MIB
“Management Information Base”: Beschreibt die Struktur der
Verwaltungsinformationen, auf die ein Zugriff über SNMP möglich ist.
PS/2
Die PS/2-Geräteschnittstelle wurde von IBM® entwickelt und wird
für zahlreiche Maus- und Tastaturmodelle genutzt.
SNMP
“Simple Network Management Protocol”: Ein weit verbreitetes
Protokoll zur Überwachung und Kontrolle von Netzwerken.
SSL
“Secure Socket Layer”: Verschlüsselungstechnik zur sicheren
Datenübertragung im Internet.
SVGA
“Super VGA”: Eine Verbesserung des VGA-Standards, der höhere
Farb- und Bildauflösungen möglich macht.
UTP
“Unshielded Twisted Pair” (Ungeschirmtes, verdrilltes
Leitungspaar): Kabel mit zwei Leitern, die miteinander verdrillt
sind und von demselben PVC-Mantel umschlossen werden.
Befehlstastentabelle
Befehl
Tilde
Minus
Gleichheitszeichen
Semikolon
Apostroph
Kleiner als
Komma
Punkt
Schrägstrich
Rücktaste
Tabulatortaste
Eckige Klammer auf
Eckige Klammer zu
Eingabe
Feststelltaste
Umgekehrter Schrägstrich
Linke Umschalttaste, Umschalt
Rechte Strg-Taste
Rechte Umschalttaste
Linke Strg-Taste oder Strg
Linke Alt-Taste oder Alt
Leertaste
Esc-Taste
F1
F2
F3
F4
F5
F6
F7
F8
F9
F10
Tastencode
TILDE
- oder MINUS
= oder EQUALS
;
‘
< oder LESS
,
.
/ oder SLASH
BACK SPACE
TAB
[
]
ENTER
CAPS LOCK
\ oder BACK SLASH
LSHIFT oder SHIFT
RCTRL
RSHIFT
LCTRL oder CTRL
LALT oder ALT
SPACE
ESCAPE oder ESC
F1
F2
F3
F4
F5
F6
F7
F8
F9
F10
Befehl
F11
F12
Drucktaste
Rollen-Taste
Pause-Taste
Einfügen
Pos1
Bild auf
Löschen
Ende
Bild ab
Pfeil-nach-oben
Pfeil-nach-links
Pfeil-nach-unten
Pfeil-nach-rechts
Num-Taste
0 auf dem numerischen Tastenfeld
1 auf dem numerischen Tastenfeld
2 auf dem numerischen Tastenfeld
3 auf dem numerischen Tastenfeld
4 auf dem numerischen Tastenfeld
5 auf dem numerischen Tastenfeld
6 auf dem numerischen Tastenfeld
7 auf dem numerischen Tastenfeld
8 auf dem numerischen Tastenfeld
9 auf dem numerischen Tastenfeld
Tastencode
F11
F12
PRINTSCREEN
SCROLL LOCK
BREAK
INSERT
HOME
PAGE UP
DELETE
END
PAGE DOWN
UP
LEFT
DOWN
RIGHT
NUM LOCK
NUMPAD0
NUMPAD1
NUMPAD2
NUMPAD3
NUMPAD4
NUMPAD5
NUMPAD6
NUMPAD7
NUMPAD8
NUMPAD9
Pluszeichen auf dem numerischen Tastenfeld
NUMPADPLUS oder NUMPAD PLUS
Divisionszeichen auf dem numerischen Tastenfeld NUMPAD/
Multiplikationszeichen auf dem numerischen Tastenfeld NUMPADMUL oder NUMPAD MUL
Minuszeichen auf dem numerischen Tastenfeld NUMPADMINUS oder NUMPAD MINUS
Eingabetaste auf dem numerischen Tastenfeld NUMPADENTER
Windows
WINDOWS
Menü
MENU
38
39
P74238ea_F1DE101G-man.qxd
28-04-2003
09:34
Page 40
FRAGEN UND ANTWORTEN
Kann diese Fernbedienungskonsole mit Masterswitches der Belkin
OmniView Enterprise-Serie kombiniert werden?
Ja, das ist möglich.
FEHLERBEHEBUNG
Die entfernte Maus funktioniert nicht oder arbeitet nicht synchron.
Stellen Sie sicher, dass die Mauseinstellungen mit dem genutzten Mausmodell
übereinstimmen.
Die Bildqualität ist schlecht, oder das Bild ist körnig.
Kann diese Fernbedienungskonsole mit Masterswitches oder KVMUmschaltern anderer Hersteller kombiniert werden?
Ja, diese Fernbedienungskonsole kann zusammen mit KVM-Umschaltern von
Drittherstellern genutzt werden. Allerdings kann es bei einer Kombination mit
minderwertigen Switches zu Leistungseinbußen kommen.
Welche Betriebssysteme werden von dieser Fernbedienungskonsole
unterstützt?
Die Fernbedienungskonsole unterstützt Windows NT, 2000 und XP.
Kann die Fernbedienungskonsole auch auf Windows-fremden Plattformen
eingesetzt werden?
Verändern Sie die Helligkeits- und Kontrasteinstellungen so, dass das Bild nicht
mehr körnig wirkt. Verwenden Sie die Einstellautomatik zur Korrektur von
flimmernden Bildern.
Die Anmeldung ist fehlgeschlagen.
Melden Sie sich mit dem Administratorkonto an, und stellen Sie sicher, dass
Benutzername und Kennwort korrekt eingegeben werden.
Das Remote Access Fenster stellt keine Verbindung zur
Fernbedienungskonsole her.
Möglicherweise verhindert eine Firewall den Zugriff. Stellen Sie sicher, dass die
TCP-Ports 443 und 80 für eingehende TCP-Verbindungen geöffnet sind.
Zur Fernbedienungskonsole kann keine Verbindung hergestellt werden.
Ja, das ist möglich. Allerdings werden dabei nur die Tastatur- und
Videofunktionen unterstützt.
Überprüfen Sie, ob die Netzwerkverbindung grundsätzlich funktioniert (senden
Sie einen Ping an die IP-Adresse der Fernbedienungskonsole). Falls nicht,
überprüfen Sie die Netzwerk-Hardware.
Belastet die Fernbedienungskonsole die Rechenleistung von Servern?
Ist die Fernbedienungskonsole eingeschaltet? Überprüfen Sie, ob die IP-Adresse
der Fernbedienungskonsole und alle weiteren IP-Einstellungen korrekt sind.
Nein, diese Fernbedienungskonsole ist eine reine Hardware-Lösung, für die
keinerlei Software auf den Servern installiert werden muss.
Stellen Sie sicher, dass die gesamte IP-Infrastruktur Ihres LAN, wie Router
usw., korrekt konfiguriert ist. Ohne Ping-Funktionalität funktioniert die
Fernbedienungskonsole nicht.
Bestimmte Tastenkombinationen wie ALT+F2 oder ALT+F3 werden vom
Fernbedienungskonsolen-System abgefangen und nicht an den Host
übertragen.
Erstellen Sie für diese spezielle Funktion einen Tastenbefehl.
Die Fernbedienungskonsolen-Seiten werden im Browser uneinheitlich oder
ungeordnet dargestellt.
Stellen Sie sicher, dass die Cache-Einstellungen des Browsers korrekt sind.
Stellen Sie vor allem sicher, dass die Option “Nie auf Veränderungen
überprüfen” NICHT aktiviert ist. Andernfalls kann es vorkommen, dass die
Fernbedienungskonsolen-Seiten aus dem Browser-Cache und nicht von der
Karte gelesen werden.
40
41
P74238ea_F1DE101G-man.qxd
28-04-2003
09:34
Page 42
RECHTLICHE HINWEISE
FCC-Erklärung
KONFORMITÄTSERKLÄRUNG ZUR EINHALTUNG DER FCC-BESTIMMUNGEN
ÜBER DIE ELEKTROMAGNETISCHE VERTRÄGLICHKEIT
Wir, Belkin Corporation, eine Gesellschaft mit Sitz in 501 West Walnut Street, Compton, CA 90220, USA, erklären
hiermit in alleiniger Verantwortung, dass dieser Artikel Nr.
F1DE101G
auf den sich diese Erklärung bezieht,
in Einklang mit Teil 15 der FCC-Regelungen steht. Der Betrieb unterliegt den beiden folgenden Bedingungen:
(1) Dieses Gerät darf schädigende Störungen nicht verursachen, und (2) dieses Gerät muss jedwede Störung
annehmen, einschließlich der Störungen, die einen unerwünschten Betrieb verursachen könnten.
CE-Konformitätserklärung
Wir, Belkin Corporation, erklären hiermit in alleiniger Verantwortung, dass der Artikel F1DE101G, auf den sich diese
Erklärung bezieht, in Einklang mit der Fachgrundnorm Störaussendung EN55022 und der Fachgrundnorm Störfestigkeit
EN55024 sowie LVP EN61000-3-2 und EN61000-3-3 steht.
ICES-Erklärung
Dieses digitale Gerät der Klasse B entspricht der kanadischen Norm ICES-003. Cet appareil numérique de la classe B est
conforme à la norme NMB-003 du Canada.
Fünfjährige Produktgarantie von Belkin Corporation
Belkin Corporation gewährleistet hiermit, dass dieses Produkt während des Garantiezeitraums keine Verarbeitungs- und
Materialfehler aufweist. Bei Feststellung eines Fehlers wird Belkin das Produkt nach eigenem Ermessen entweder kostenlos
reparieren oder austauschen, sofern es während des Garantiezeitraums ausreichend frankiert an den autorisierten BelkinHändler zurückgegeben wurde, bei dem es erworben wurde. Ein Kaufnachweis kann verlangt werden.
Diese Garantie erstreckt sich nicht auf die Beschädigung des Produkts durch Unfall, missbräuchliche, unsachgemäße oder
fehlerhafte Verwendung oder Anwendung. Ebenso ist die Garantie unwirksam, wenn das Produkt ohne schriftliche
Genehmigung durch Belkin verändert oder wenn eine Belkin-Seriennummer entfernt oder unkenntlich gemacht wurde.
Die vorstehenden Garantiebedingungen und Rechtsbehelfe schließen alle anderen Gewährleistungen und Rechtsbehelfe - ob
mündlich oder schriftlich, ausdrücklich oder konkludent - aus und treten an deren Stelle. Belkin übernimmt insbesondere
keinerlei konkludente Gewährleistungen, u.a. auch keine Gewährleistung der Eignung für einen bestimmten Zweck oder der
handelsüblichen Qualität.
Kein Händler, Bevollmächtigter bzw. Vertreter oder Mitarbeiter von Belkin ist befugt, diese Gewährleistungsregelung in
irgendeiner Weise abzuändern oder zu ergänzen.
Belkin haftet nicht für konkret besondere, durch Zufall eingetretene oder Folgeschäden aufgrund der Verletzung einer
Gewährleistung oder nach Maßgabe einer anderen Rechtslehre (u.a. für entgangene Gewinne, Ausfallzeiten, Geschäfts- oder
Firmenwerteinbußen bzw. die Beschädigung, Neuprogrammierung oder Wiederherstellung von Programmen oder Daten nach
Speicherung in oder Nutzung in Verbindung mit Belkin-Produkten).
Da in manchen Ländern der Ausschluss oder die Beschränkung der Haftung für durch Zufall eingetretene oder Folgeschäden
bzw. ein Ausschluss konkludenter Gewährleistungen nicht zulässig ist, haben die vorstehenden Beschränkungen und
Ausschlussregelungen für Sie möglicherweise keine Gültigkeit. Diese Garantie räumt Ihnen spezifische Rechte ein, die von
Land zu Land unterschiedlich ausgestaltet sind.
42
P74238ea_F1DE101G-man.qxd
28-04-2003
09:34
Page 44
OmniView
Remote IP Console
™
Voor het op afstand bedienen van een
of meer servers met een KVM-switch,
via TCP/IP netwerken
belkin.com
Belkin Corporation
501 West Walnut Street
Compton • CA • 90220 • USA
Tel: +1 310.898.1100
Fax: +1 310.898.1111
Belkin Components, Ltd.
Express Business Park
Shipton Way • Rushden • NN10 6GL
Großbritannien
Tel: +44 (0) 1933 35 2000
Fax: +44 (0) 1933 31 2000
Belkin Components B.V.
Starparc Building • Boeing Avenue 333
1119 PH Schiphol-Rijk • Niederlande
Tel: +31 (0) 20 654 7300
Fax: +31 (0) 20 654 7349
Belkin GmbH
Hanebergstrasse 2 •
80637 München • Deutschland
Tel: +49 (0) 89 143 4050
Fax: +49 (0) 89 143 405100
Belkin, Ltd.
7 Bowen Crescent • West Gosford
NSW 2250 • Australien
Tel: +61 (0) 2 4372 8600
Fax: +61 (0) 2 4372 8603
Belkin Kundendienst
USA +1 310.898.1100, Durchwahl: 2263
+1 800.223.5546, Durchwahl: 2263
Europa: 00 800 223 55 460
Australien: 1800 666 040
P74238
© 2003 Belkin Corporation. Alle Rechte vorbehalten. Alle Produktnamen
sind eingetragene Marken der angegebenen Hersteller.
Handleiding
ENTERPRISE Series
F1DE101G
P74238ea_F1DE101G-man.qxd
28-04-2003
09:34
Page 46
INHOUD
Overzicht
Inleiding . . . . . . . . . . . .
Inhoud verpakking . . . . .
Eigenschappen . . . . . . . .
Vereiste apparatuur . . . . .
Specificaties . . . . . . . . .
Indeling Remote IP console
.
.
.
.
.
.
.
.
.
.
.
.
.
.
.
.
.
.
.
.
.
.
.
.
.
.
.
.
.
.
.
.
.
.
.
.
.
.
.
.
.
.
.
.
.
.
.
.
.
.
.
.
.
.
OVERZICHT
.
.
.
.
.
.
.
.
.
.
.
.
.
.
.
.
.
.
.
.
.
.
.
.
.
.
.
.
.
.
.
.
.
.
.
.
.
.
.
.
.
.
.
.
.
.
.
.
.
.
.
.
.
.
.
.
.
.
.
.
.
.
.
.
.
.
.
.
.
.
.
.
.
.
.
.
.
.
.
.
.
.
.
.
.
.
.
.
.
.
.
.
.
.
.
.
.
.
.
.
.
.
.
.
.
.
.
.
.
.
.
.
.
.
.
.
.
.
.
.
.
.
.
.
.
.
.1
.1
.2
.3
.4
.5
Installeren
Hardware installeren . . . . . . . . . . . . . . . . . . . . . . . . . . . . . . . . . . .6
Initiële netwerkconfiguratie . . . . . . . . . . . . . . . . . . . . . . . . . . . . . .12
Gebruik van uw Remote IP console
Vereisten . . . . . . . . . . . . . . . . . . . . . . . . . .
Aanmelden bij de Remote IP console . . . . . . . .
Hoofdscherm . . . . . . . . . . . . . . . . . . . . . . .
Afmelden bij de Remote IP console . . . . . . . . .
Remote toegang (Remote Access) hostbesturing
.
.
.
.
.
.
.
.
.
.
.
.
.
.
.
.
.
.
.
.
.
.
.
.
.
.
.
.
.
.
.
.
.
.
.
.
.
.
.
.
.
.
.
.
.
.
.
.
.
.
.
.
.
.
.
.
.
.
.
.
.
.
.
.
.
.
.
.
.
.
.
.
.
.
.
.15
.16
.17
.18
.18
Beveiliging
Poorten en protocollen . . . . . . . . . . . . . . . . . . . . . . . . . . . . . . . . .23
Firewall . . . . . . . . . . . . . . . . . . . . . . . . . . . . . . . . . . . . . . . . . . .24
Certificaatbeheer . . . . . . . . . . . . . . . . . . . . . . . . . . . . . . . . . . . . .25
Menu netwerkinstellingen
Instellingen remote toegang .
Gebruikers en wachtwoorden .
Seriële poort . . . . . . . . . . .
Toetsenbord/muis instellingen
Kvm-switches . . . . . . . . . . .
.
.
.
.
.
.
.
.
.
.
.
.
.
.
.
.
.
.
.
.
.
.
.
.
.
.
.
.
.
.
.
.
.
.
.
.
.
.
.
.
.
.
.
.
.
.
.
.
.
.
.
.
.
.
.
.
.
.
.
.
.
.
.
.
.
.
.
.
.
.
.
.
.
.
.
.
.
.
.
.
.
.
.
.
.
.
.
.
.
.
.
.
.
.
.
.
.
.
.
.
.
.
.
.
.
.
.
.
.
.
.
.
.
.
.
.
.
.
.
.
.
.
.
.
.
.
.
.
.
.
.
.
.
.
.
.28
.30
.32
.34
.35
Bijlage A
Firmware bijwerken . . . . . . . . . . . . . . . . . . . . . . . . . . . . . . . . . . .37
Videomodi Remote IP console . . . . . . . . . . . . . . . . . . . . . . . . . . . .37
Tabel sneltoetsen . . . . . . . . . . . . . . . . . . . . . . . . . . . . . . . . . . . .38
Woordenlijst . . . . . . . . . . . . . . . . . . . . . . . . . . . . . . . . . . . . . . . . .39
FAQs . . . . . . . . . . . . . . . . . . . . . . . . . . . . . . . . . . . . . . . . . . . . . .40
Problemen oplossen . . . . . . . . . . . . . . . . . . . . . . . . . . . . . . . . . . . .41
Inleiding
Gefeliciteerd met uw aankoop van deze Belkin OmniView ENTERPRISE Series
Remote IP-console. Ons uitgebreide programma kvm-oplossingen bewijst de
inzet van Belkin om duurzame producten van hoge kwaliteit te leveren voor
een aantrekkelijke prijs. Deze Remote IP console stelt u in staat overal ter
wereld met elke webbrowser op uw computer of kvm-switch te werken. Daarbij
kunt u de console eenvoudig geschikt maken voor uw bestaande grotere of
kleinere LAN-setup.
Belkin heeft deze Remote IP console speciaal met het oog op de wensen van
de serverbeheerder ontwikkeld. Het resultaat is een krachtige en toch
gemakkelijk te installeren en te gebruiken remote oplossing die door zijn
geavanceerde eigenschappen en functionaliteit alle andere oplossingen
overtreft.
In deze handleiding vindt u gedetailleerde informatie over de Remote IP
console, vanaf de installatie tot en met de bediening en probleemoplossing voor het onwaarschijnlijke geval dat u met een probleem te maken krijgt.
Wij danken u hartelijk voor de aankoop van de OmniView ENTERPRISE Series
Remote IP console. Wij stellen uw vertrouwen zeer op prijs en ongetwijfeld
begrijpt u waarom er wereldwijd meer dan een miljoen Belkin OmniView
producten in gebruik zijn.
Inhoud verpakking
•
•
•
•
•
•
•
•
Een OmniView ENTERPRISE Series Remote IP-console
Een PS/2 kabelset
Een 5 VDC, 2000 mA voedingsadapter
Handleiding
Beknopte installatiehandleiding
Registratiekaart
Rekmontagebeugels met schroeven
Een DB9 kabel
Informatie . . . . . . . . . . . . . . . . . . . . . . . . . . . . . . . . . . . . . . . . . .42
1
P74238ea_F1DE101G-man.qxd
28-04-2003
09:34
Page 2
OVERZICHT
OVERZICHT
Eigenschappen
Vereiste apparatuur
Mogelijkheid voor ondersteuning van een digitale gebruiker
Geeft toegang aan één digitale gebruiker voor het besturen van een computer
of KVM-switch via een webbrowser.
Vereiste hardware
• OmniView ENTERPRISE Series Remote IP-console (bijgeleverd)
• PS/2 kabelset (bijgeleverd)
• 5 VDC, 2000 mA netvoedingsadapter (bijgeleverd)
• Toetsenbord, muis en monitor
• Verbinding met het netwerk via een 10/100Base-T Ethernet poort (RJ45)
• CAT5e crossover kabel
• CAT5e 1:1 (straight-through) kabel
• Rekmontagebeugel met schroeven (bijgeleverd voor eventuele installatie in
een rek)
Compatibiliteit met webbrowsers
De Remote IP console kan worden geopend met elke computer waarop
Microsoft® Internet Explorer versie 5.5 of hoger is geïnstalleerd. Er is geen
specifieke software nodig.
Geschikt voor montage in 0U-rek
De Remote IP console is zo compact dat hij eenvoudig op een bureaublad
achter een ander apparaat kan worden geplaatst. De console kan ook aan de
zijkant van uw serverrek worden gemonteerd en neemt dan nauwelijks ruimte in.
Door gebruiker gedefinieerde sneltoetsen
Door gebruiker gedefinieerde sneltoetsen simuleren toetsaanslagen op het
remote systeem die ter plaatse niet kunnen worden gegenereerd.
Vereiste software
• Microsoft Internet Explorer 5.5 of hoger
• Servers waarop Windows® NT®, 2000 of XP geïnstalleerd is
Flash upgrades
Dankzij flash-upgrades beschikt u altijd over de nieuwste firmware-updates voor
uw Remote IP console. Deze updates zorgen ervoor dat uw Remote IP console kan
blijven samenwerken met de nieuwste apparaten en computers. Deze firmwareupgrades zijn kostenloos verkrijgbaar tijdens de gehele levensduur van uw Remote
IP console. Ga naar belkin.com voor informatie over upgrades en ondersteuning.
Led display
Met het led-display aan de voorzijde van de Remote IP console kunt u in één
oogopslag de status van uw verbinding, koppeling en activiteit overzien.
Videoresolutie
De Remote IP console heeft een bandbreedte van 117 MHz en ondersteunt
videoresoluties tot 1280 x 1024 bij 60 Hz. Door gebruik te maken van Belkin
kabels bent u er zeker van dat de signaalintegriteit optimaal in stand blijft en
dat u het beste resultaat bereikt.
Geavanceerde web-gebruikersinterface
U kunt de functies van de Remote IP console gemakkelijk via uw webbrowser
instellen zonder dat u extra software op de computer moet installeren. U hoeft
geen disks te installeren of te controleren. U kunt met elke computer in het
netwerk snel veranderingen aanbrengen en setup-functies uitvoeren.
2
3
P74238ea_F1DE101G-man.qxd
28-04-2003
09:34
Page 4
OVERZICHT
Specificaties
OVERZICHT
Indeling Remote IP console
Typenummer: F1DE101G
Vermogen: 5 VDC, 2000 mA
Statusled Verbindingen
Netwerkverbinding: 10/100Base-T aansluiting (standaard RJ45 connector)
Toetsenbordemulatie: PS/2
Muisemulatie: PS/2
Monitorondersteuning: Ondersteunt alle VESA modi voor grafische
afbeeldingen en tekstmodi.
Maximale resolutie: 1280 x 1024 bij 60 Hz
Connection
Remote IP Console
Link / Activity
Bandbreedte: 117 MHz
Toetsenbordingang: MiniDIN (PS/2) zespolig
Muisingang: MiniDIN (PS/2) zespolig
Statusled
Koppeling/activiteit
Computer/kvm-poorten: 1
VGA-poort: Type HDDB vijftienpolig
Ingang voeding
Statusleds: 2
Seriële poort 02
Behuizing: Metalen kast
LAN poort
VGA poort
console
VGA poort
CPU/KVM
console
CPU/KVM
Afmetingen: 43 x 145 x 177 mm
Gewicht: 800 g
Bedrijfstemperatuur: 0~40 °C
Serial 02
power
Bewaartemperatuur: 40~75 °C
Vochtigheidsgraad: 0~80% relatieve vochtigheid niet-condenserend
Serial 01
Maximum hoogte: 3,3 km
reset
Garantie: Eén jaar
Seriële poort 01 Resetknop
LAN
Toetsenbordpoort Toetsenbordpoort
console
CPU/KVM
Let op: Er wordt een voorbehoud gemaakt voor wijzigingen in deze informatie.
4
Muispoort
console
5
Muispoort
CPU/KVM
P74238ea_F1DE101G-man.qxd
28-04-2003
09:34
Page 6
INSTALLEREN
INSTALLEREN
Hardware installeren
1. Schakel de stroomvoorziening van uw server of KVM-switch uit.
Remote IP console in een serverrek installeren
2. Sluit uw PS/2 toetsenbord en muis aan op de betreffende PS/2 ‘Console’
poorten.
De Remote IP console wordt geleverd met montagebeugels voor de installatie
in een 19-inch rek.
1. Bevestig de bijgeleverde beugel met de eveneens bijgeleverde
kruiskopschroeven aan de boven- of onderzijde van de Remote IP console.
2. Bevestig de Remote IP console aan het rek.
Let op: Bevestigingsschroeven voor het rek zijn niet bijgeleverd. Gebruik de
schroeven die de leverancier van het rek voorschrijft.
*** Waarschuwing ***
Zorg ervoor dat de stroomvoorziening van alle hierbij betrokken computers en
randapparaten is uitgeschakeld voordat u overgaat tot aansluiting van wat dan
ook op de remote IP console of uw computer(s). Als u dit nalaat is Belkin
Corporation niet aansprakelijk voor de daardoor ontstane schade.
Serial 02
power
console
Serial 01
LAN
reset
F10
F11
HOME
PG UP
PG DN
HELP
CAPS
`
F9
num
lock
1
2
3
4
5
6
7
9
8
-
0
=
delete
]
[
P
CPU/KVM
cap
lock
pg up
=
/
7
8
9
4
5
6
1
2
3
-
+
K
L
;:
ESC
return
'"
shift
PC
^
clt
<
alt
OPT
+
>
0
3. Neem de videokabel die aan uw VGA monitor is bevestigd en sluit deze aan
op de ‘Console’ poort.
6
7
P74238ea_F1DE101G-man.qxd
28-04-2003
09:34
Page 8
INSTALLEREN
INSTALLEREN
Computer of KVM-switch aansluiten
Computer of KVM-switch aansluiten
Sluit één einde van de VGA en PS/2 kabels van de bijgeleverde PS/2 kabelset
aan op uw server. Sluit het andere einde aan op de ‘CPU/KVM’ poorten aan de
achterzijde van de remote IP console.
Neem de bijgeleverde PS/2 kabelset en sluit één einde van de VGA en PS/2
kabels aan op de Remote IP console die met de KVM-switch is verbonden. Sluit
het andere einde aan op de ‘CPU/KVM’ poorten aan de achterzijde van de
Remote IP console.
Serial 02
power
Serial 01
console
reset
CPU/KVM
LAN
Serial 02
power
Serial 01
console
CPU/KVM
LAN
reset
console
bank
select
USB
flash
daisy chain IN
CPU 01/02
CPU 03/04
CPU 05/06
CPU 07/08
1 2 3 4
reset
8
PS/2
daisy chain OUT
90-264 VAC. 47-63 Hz
9
P74238ea_F1DE101G-man.qxd
28-04-2003
09:34
Page 10
INSTALLEREN
INSTALLEREN
Remote IP console inschakelen
Initiële netwerkconfiguratie
1. Sluit de bijgeleverde netvoedingsadapter aan op een aanwezig stopcontact.
1. Neem een RJ45 crossoverkabel en sluit het ene einde hiervan op de computer
aan en het andere einde op de poort met de aanduiding ‘Network’ (Netwerk).
2. Sluit de banaansteker aan op de voedingsingang (jack-type) aan de
achterkant van de Remote IP console om de unit van stroom te voorzien.
Serial 02
power
Serial 01
console
reset
CPU/KVM
LAN
Serial 02
power
Serial 01
console
reset
CPU/KVM
LAN
2. Stel het IP adres op uw computer in volgens hetzelfde systeem als 1.2.3.4
(bijvoorbeeld: 1.2.3.6).
3. Open de Microsoft® Internet Explorer webbrowser.
4. Vul het volgende IP-adres in: ‘1.2.3.4’.
5. Voer als standaard-aanmeldingsnaam ‘administrator’ (beheerder) in.
3. Schakel uw KVM-switch in. Als u geen KVM-switch hebt, ga dan verder met
het inschakelen van uw computers.
6. Voer als standaard-wachtwoord ‘belkin’ in.
10
11
P74238ea_F1DE101G-man.qxd
28-04-2003
09:34
Page 12
INSTALLEREN
INSTALLEREN
Initiële netwerkconfiguratie
Remote Access
7. Klik onder ‘Setting en
Configuraties’ (Instelling
en configuraties) op
‘Network’ (Netwerk). (Let
op: Maak het selectievakje
‘DHCP’ leeg.
Remote Access is een Java™ applet dat het doorgestuurde scherm, toetsenbord
en dito muis weergeeft van het remote hostsysteem waarmee de Remote IP
console is verbonden. De webbrowser waarmee de Remote IP console wordt
geopend moet een Java runtime-omgeving creëren, versie 1.1 of hoger. Remote
Access geeft op een remote locatie vrijwel hetzelfde beeld als wanneer u
tegenover de computer zelf plaats neemt. U kunt het toetsenbord en de muis
op dezelfde wijze gebruiken hoewel het remote systeem met enige vertraging
op acties van toetsenbord en muis reageert. De mate van vertraging is
afhankelijk van de bandbreedte van de lijn waarmee u met de Remote IP
console verbonden bent. Open de applet door de betreffende koppeling te
kiezen in het navigatieframe van het HTML document.
8. Voer de gewenste
netwerkinstellingen in en
klik op ‘Apply Changes’
(Wijzigingen toepassen)
om uw nieuwe
netwerkinstellingen op
te slaan.
Onderzijde van het Remote Access applet
Het Remote Access applet heeft de volgende mogelijkheden:
Automatische instelknop
Als de weergegeven video van slechte kwaliteit is of vervormd, druk dan op
deze knop en wacht een paar tellen zodat de Remote IP console zich op de
best mogelijke videokwaliteit kan instellen.
Sync
Door deze optie te kiezen synchroniseert u de lokale met de remote muiscursor.
9. Stel de lokale IP adresinstellingen op de computer die u hebt gebruikt voor
configuratie van de Remote IP console opnieuw in.
Remote IP console op het netwerk aansluiten
Video instellingen
Hiermee opent u een nieuw venster met elementen waarmee u de videoinstellingen
van de Remote IP console kunt besturen. Om de videokwaliteit te verbeteren kunt
u bepaalde waarden wijzigen die verband houden met de helderheid en het
contrast van het weergegeven beeld. Het is ook mogelijk alle videomodi of alleen
de huidige modus terug te zetten naar de standaard-instellingen.
Sluit de Remote IP console op het netwerk aan met een rechttoe-rechtaan
(straight-through) RJ45 Category 5 netwerkkabel.
13
12
P74238ea_F1DE101G-man.qxd
28-04-2003
09:34
Page 14
INSTALLEREN
Configuratie via serieel
Sluit op een computer, waarop HyperTerminal Services software is geïnstalleerd,
de bijgeleverde seriële DB9 kabel aan en wel door het ene kabeleinde op deze
computer aan te sluiten en het andere einde op de poort met de aanduiding
‘Serial 1’ van de Remote IP console.
Open de HyperTerminal software met gebruikmaking van de volgende
parameters:
Seriële lijnparameters
Parameter
Waarde
Bits/seconde
115200
Databits
8
Pariteit
Geen
Stop bits
1
Flow control
Geen
GEBRUIK VAN UW REMOTE IP CONSOLE
Vereisten
De Remote IP console beschikt over een geïntegreerd besturingssysteem en
toepassingen met een aantal verschillende standaard-gebruikersinterfaces.
De volgende informatie geeft een gedetailleerde beschrijving van de
gebruiksmogelijkheden. U kunt alle interfaces openen met het TCP/IP protocol.
Deze interfaces zijn beschikbaar via de ingebouwde Ethernet adapter of de modem.
De volgende interfaces worden ondersteund:
HTTP/HTTPS: Een ingebouwde webserver biedt de meest uitgebreide
toegangsmogelijkheden terwijl de omgeving van de Remote IP console door een
standaard-webbrowser kan worden bestuurd. Afhankelijk van de webbrowser
kunt u de kaart van de Remote IP console openen met het onbeveiligde HTTP
protocol of, als de browser dit ondersteunt, het gecodeerde HTTPS protocol. Wij
adviseren het gebruik van HTTPS als het maar enigszins mogelijk is.
Telnet: Met een standaard Telnet-cliënt kunt u elk willekeurig apparaat openen
dat via een terminalmodus op een van de seriële poorten van de Remote IP
console aangesloten is.
Nu kunt u de gewenste netwerkconfiguratie op de Remote IP console instellen.
Als u gebruik wilt maken van het Remote Access venster van uw managed
hostsysteem moet de browser een Java runtime-omgeving versie 1.1 of hoger
bevatten. Maar ook als de gebruikte browser zoals bij veel handheld apparaten
geen Java ondersteuning krijgt, kunt u toch uw remote hostsysteem in stand
houden met de beheersformulieren die de browser zelf weergeeft.
Wij adviseren de volgende browsers voor onbeveiligde verbindingen met de
Remote IP console:
Microsoft Internet Explorer versie 5.5 of hoger op Windows 98, Me, 2000 en XP
Netscape® Navigator® 7.0 of Mozilla 1.0 op Windows 98, Me, 2000, XP, Linux®
en andere UNIX®-achtige besturingssystemen.
Om toegang te krijgen tot het remote hostsysteem door middel van een veilig
gecodeerde verbinding hebt u een browser nodig die het HTTPS protocol
ondersteunt. Een afdoende beveiliging is alleen verzekerd als u een sleutel
gebruikt met een lengte van 128 bits. Veel oudere browsers hebben door vroegere
exportvoorschriften van de Amerikaanse overheid geen krachtig 128-bit encryptiealgoritme. Internet Explorer 5.0 dat in Windows Me en 200 is ingebouwd,
ondersteunt een sleutellengte van slechts 56 bits. U kunt meer te weten komen
over de sleutellengte van Internet Explorer onder de menu-onderdelen ‘?’ en ‘Info’.
Het dialoogvenster toont een hyperlink die naar informatie leidt over het
opwaarderen van uw browser naar een geavanceerd encryptieschema.
14
15
P74238ea_F1DE101G-man.qxd
28-04-2003
09:34
Page 16
GEBRUIK VAN UW REMOTE IP CONSOLE
GEBRUIK VAN UW REMOTE IP CONSOLE
Wij adviseren de volgende browsers voor een veilige verbinding met de Remote
IP console:
Microsoft Internet Explorer versie 5.5 of hoger op Windows 98, Me, 2000 en XP
Netscape Navigator 7.0 of Mozilla 1.0 op Windows 98, Windows Me, 2000, XP,
Linux en andere UNIX-achtige besturingssystemen.
Let op: Zorg dat u het wachtwoord voor beheerder-gebruiker wijzigt onmiddellijk
nadat u uw Remote IP console voor de eerste maal hebt geïnstalleerd en geopend.
Hoofdscherm
Nadat de aanmelding geaccepteerd is, toont de Remote IP console zijn
belangrijkste screenframes (zie onderstaande afbeelding).
Internet Explorer met aanduiding van encryptielengte
Vanuit het beheersmenu gaat u met de knop ‘Home’ rechtstreeks naar de
homepagina. Met de knop ‘Logout’ meldt u zich af bij de Remote IP console. Hierdoor
wordt tevens de huidige sessie beëindigd. Als u zich later opnieuw aanmeldt, bent u
verplicht uw gebruikersnaam en wachtwoord opnieuw in te voeren.
Aanmelden bij de Remote IP console
Let op: De Remote IP console vraagt u automatisch om een wachtwoord als er 30
minuten lang geen beheersactiviteit is geweest.
Start uw webbrowser en richt deze aan het adres van uw Remote IP browser
dat u tijdens de installatie hebt geconfigureerd.
Om een niet-beveiligde verbinding te maken, moet u het volgende in de
adresregel van uw browser invoeren:
http://192.168.1.22/
Voor een beveiligde verbinding voert u in:
https://192.168.1.22/
De remote IPO console heeft een ingebouwde beheerder-gebruiker met
toestemming om uw systeem te beheren.
Aanmeldingsnaam
administrator (beheerder)
Wachtwoord
Belkin
Home-menuvenster van de Remote IP console
16
17
P74238ea_F1DE101G-man.qxd
28-04-2003
09:34
Page 18
GEBRUIK VAN UW REMOTE IP CONSOLE
Afmelden bij de Remote IP console
Deze link meldt de huidige gebruiker af en presenteert een nieuw
aanmeldingsscherm. U wordt automatisch afgemeld als er gedurende 30
minuten na een verzoek om het wachtwoord opnieuw in te voeren geen
beheersactiviteit is geweest.
Remote Access voor hostbesturing
Remote Access is het doorgestuurde scherm, toetsenbord en de dito muis van
het remote hostsysteem dat de Remote IP console bestuurt.
Door het starten van Remote Access verschijnt een pop-up venster dat een
kopie is van het scherm van uw hostsysteem. Remote Access geeft op een
remote locatie vrijwel hetzelfde beeld als wanneer u tegenover de computer
zelf plaats neemt. U kunt het toetsenbord en de muis op dezelfde wijze
gebruiken hoewel het remote system op acties van toetsenbord en muis met
enige vertraging reageert. De mate van vertraging is afhankelijk van de
bandbreedte van de lijn waarmee u met de remote IP console verbonden bent.
GEBRUIK VAN UW REMOTE IP CONSOLE
instellingen van uw NAT (Network Address Translation) firewall in
overeenstemming daarmee geconfigureerd zijn. Stel nu dat de Remote IP
console verbonden is met uw locale netwerkomgeving terwijl uw verbinding
met het internet alleen via een proxyserver loopt, dan kan Remote Access door
het niet configureren van NAT de verbinding waarschijnlijk niet maken. Dit
komt doordat webproxies het RFB protocol niet kunnen doorgeven.
Als u twijfels hebt over dit onderwerp, vraag dan uw netwerkbeheerder om een
geschikte netwerkomgeving.
Het Remote Access venster probeert het remote scherm met zijn optimale
formaat weer te geven om het zoveel mogelijk bij zijn oorspronkelijke
afmetingen aan te passen en veranderingen van de beeldresolutie te kunnen
volgen. De afmetingen van het Remote Access venster kunt u met uw lokale
venstersysteem altijd opnieuw aanpassen.
In de stuurbalk onder in het Remote Access venster is een andere stuurbalk
beschikbaar die de status van Remote Access weergeeft en waarmee u de
instellingen ervan kunt bijstellen. De volgende tabel geeft een overzicht van
de besturingsmogelijkheden van Remote Access:
Besturing
Beschrijving
Opties
Hiermee kunt het formaat van Remote Access verkleinen. U kunt
de muis en het toetsenbord blijven gebruiken; het scaling
algoritme bewaart echter niet alle weergavedetails.
Scaling (Schalen)
Remote Access venster met Windows 2000 desktopscherm
Let op: U kunt communicatieproblemen tussen lokale en externe toetsenborden
voorkomen door het toetsenbord van uw externe systeem op dezelfde mapping af te
stellen als die van uw lokale toetsenbord.
Als u bijvoorbeeld een Duits beheersysteem gebruikt doch uw hostsysteem een
Amerikaans-Engelse toetsenbordlayout, functioneren de speciale toetsen op het
Duitse toetsenbord niet meer volgens het lokale programma maar neemt dit de
toetsindeling over van zijn Amerikaans-Engelse tegenhanger.
De Java Remote Access applet probeert zijn eigen TCP verbinding met de
remote IP console tot stand te brengen. Dit protocol is geen HTTP of HTTPS
maar een ander protocol met de naam RFB (Remote Frame Buffer protocol).
Momenteel probeert RFB een verbinding met poort nummer 443 tot stand te
brengen. Uw lokale netwerkomgeving moet deze verbinding mogelijk maken,
dat wil zeggen: als u via een eigen intern netwerk werkt moeten de
18
Options (Opties)
Mouse Handling
(Muisbesturing)
In het submenu voor muisbesturing vindt u twee opties voor het
synchroniseren van de lokale en externe muisaanwijzers.
Options (Opties)
Video Settings
(Video-instellingen)
Opent een scherm waarin u de video-instellingen van de externe
IP console kunt wijzigen.
Hot Keys (Sneltoetsen)
Speciale toetsen waarmee u de door u gedefinieerde
toetscombinaties naar het externe systeem kunt versturen.
KVM Keys (Kvm-toetsen)
Als u dit bij de kvm-poortinstellingen hebt bepaald, kunt u de
huidige kvm-poort omschakelen door de betreffende sneltoets
naar de kvm-switch te sturen.
Read Option (Leesoptie)
Schakelt de modus ‘Read Only’ (Alleen lezen) aan en uit. Als u het
selectievakje Monitor modus selecteert, accepteert Remote Access geen
enkele lokale datainvoer voor het toetsenbord of de muis. Het symbool
geeft aan of de Monitormodus momenteel wel of niet actief is.
Auto Adjust
(Automatisch instellen)
Start de procedure voor automatische regeling van de instellingen
voor een optimale kwaliteit van het momenteel op de externe IP
console weergegeven beeld.
19
P74238ea_F1DE101G-man.qxd
28-04-2003
09:34
Page 20
GEBRUIK VAN UW REMOTE IP CONSOLE
Remote Access Options (Remote Access opties)
De Remote Access titelbalk toont informatie over het binnenkomende (In:) en
uitgaande (Out:) netwerkverkeer. Als u de gecomprimeerde codering gebruikt,
wordt zowel het gecomprimeerde als het niet-gecomprimeerde binnenkomende
verkeer gesignaleerd.
Remote Access titelbalk
Unit voor energiebeheer
Deze levert een Java applet waarmee het Telnet-protocol een verbinding kan
openen met de Remote IP console. De belangrijkste toepassing ervan is de
pass-through optie voor seriële poort 1. Hiermee kunt u echter ook verbinding
maken met een standaard Telnet-cliënt. De toegang tot Telnet moet worden
geactiveerd in de instellingen voor beveiliging.
Muis van Remote IP console synchroniseren
De Remote IP console adresseert een common kvm-device challenge, ofwel de
synchronisatie tussen de lokale en de remote muiscursors. Hiervoor gebruikt
het een intelligent synchronisatie-algoritme.
Er zijn drie manieren om lokale en remote muissignalen opnieuw te
synchroniseren:
Fast Sync
De snelle synchronisatie wordt gebruikt om een tijdelijke maar vaste
verdraaiing te corrigeren. U kunt deze optie kiezen met het Remote Access
optiemenu of gebruiken als u een sneltoetscombinatie voor muissynchronisatie
hebt bepaald.
GEBRUIK VAN UW REMOTE IP CONSOLE
Rechtstreekse muismodus
Als andere synchronisatiemogelijkheden mislukken, kunt u altijd nog met de
remote muis werken door met de beeldknop de rechtstreekse muismodus te
selecteren. Als deze modus ingeschakeld is, worden alle muisbewegingen
rechtstreeks naar de host verstuurd waardoor u de instellingen van de hostmuis
kunt afstellen op minder extreme waarden of in deze modus kunt werken met
uitgeschakelde muisversnelling. In deze modus is het mogelijk bij alle
synchronisatie-opties een snelle synchronisatie uit te voeren.
Beperkingen van de muissynchronisatie
Terwijl het intelligente algoritme in normale gevallen uitstekend werkt, zijn er
toch specifieke beperkingen die een correcte synchronisatie in de weg staan.
Speciale muisdrivers
Sommige muisdrivers beïnvloeden de synchronisatieprocedure waardoor de
muisaanwijzers ontregeld worden. Als dit zich voordoet, zorg dan dat u geen
muisdrivers op uw hostsysteem gebruikt die specifiek voor een bepaald type
muis ontwikkeld zijn.
Slecht afgesteld beeld
Intelligente synchronisatie werkt alleen naar behoren als het beeld correct is
afgesteld. U kunt het beeld met de functie voor automatische beeldregeling
aanpassen of in het video-instelscherm met de hand corrigeren.
Actieve desktop
Controleer of de functie ‘Active Desktop’ van Microsoft Windows op uw systeem
is ingeschakeld. Is dat inderdaad het geval, gebruik dan geen vlakke
achtergrond maar een of ander behang (‘wallpaper’). U kunt de ‘Active Desktop’
ook helemaal uitschakelen.
Sync Detect
Gebruik de intelligente hersynchronisatie als de synchronisatie niet werkt of als
de muisinstellingen op het hostsysteem zijn gewijzigd. Deze methode neemt
meer tijd in beslag dan de snelle synchronisatie en u kunt hem openen met
het betreffende item in het Remote Access optiemenu. Intelligente
synchronisatie vraagt om een correct ingesteld beeld. U kunt het beeld met de
functie voor automatische beeldregeling aanpassen of met de hand corrigeren
in het video-instelscherm.
20
21
P74238ea_F1DE101G-man.qxd
28-04-2003
09:34
Page 22
GEBRUIK VAN UW REMOTE IP CONSOLE
BEVEILIGING
Video-instellingen
Poorten en protocollen
De Remote IP console beschikt over een
scherm voor het installeren van de
volgende video-opties die beschikbaar
zijn in met menu ‘Remote Access
Options’ (Opties voor remote toegang).
Force HTTPS (HTTPS forceren)
Als deze optie is ingeschakeld, is de toegang tot het web front-end alleen
mogelijk door middel van een HTTPS verbinding. Bij binnenkomende
verbindingen werkt de remote IP console niet op de HTTP poort.
HTTPS poort
Poortnummer waarop de HTTPS server is ingesteld. Als dit ongebruikt of open
blijft, wordt de standaard-waarde gebruikt.
Let op: De bedieningsknoppen voor
‘Brightness’ (Helderheid) en ‘Contrast’
beïnvloeden in het algemeen alle modi en
kvm-poorten; de overige instellingen
moeten specifiek voor elke modus op elke
kvm-poort worden gewijzigd.
HTTP poort
Poortnummer waarop de HTTP server van de Remote IP console is ingesteld. Als
dit ongebruikt of open blijft, wordt de standaard-waarde gebruikt.
Video-instelscherm
Horizontal Offset (Horizontale afwijking): Als u deze optie selecteert, kunt
u het beeld met de linkse en rechtse knoppen in horizontale richting
verschuiven.
Telnet poort
Poortnummer waarop de Telnet server van de Remote IP console is ingesteld.
Als dit ongebruikt of open blijft, wordt de standaard-waarde gebruikt.
Vertical Offset (Verticale afwijking): Als u deze optie selecteert, kunt u het
beeld met de linkse en rechtse knoppen in verticale richting verschuiven.
Reset this Mode (Deze modus resetten): Mogelijkheid om modus-afhankelijke
instellingen terug te zetten naar de standaard-instelling.
Reset all Modes (Alle modi resetten): Mogelijkheid om alle modusafhankelijke instellingen terug te zetten naar de standaard-instelling.
Save Changes (Wijzigingen opslaan): Hierdoor worden wijzigingen permanent
opgeslagen.
Undo Changes (Wijzigingen annuleren): Herstelt de laatste instellingen.
Menu Poorten en protocollen
22
23
P74238ea_F1DE101G-man.qxd
28-04-2003
09:34
Page 24
BEVEILIGING
BEVEILIGING
Firewall
Certificaatbeheer
Parameters voor het IP toelatingsbeleid
De Remote IP console gebruikt
het SSL protocol voor al het
gecodeerde netwerkverkeer
tussen zichzelf en cliënten
waarmee verbinding is gemaakt.
Bij het maken van verbindingen
moet de Remote IP console zijn
identiteit kenbaar maken aan
cliënten die gebruik maken van
een cryptografisch certificaat.
Parameter
Beschrijving
Enable Firewall
Schakelt het toelatingsbeleid in dat is gebaseerd op IP bronadressen.
(Firewall inschakelen)
Default Policy
(Standaard-beleid)
Rule Number
(Regelnummer)
IP/Mask (IP/Masker)
Deze optie neemt aangekomen IP pakketten in behandeling die aan
geen van de geconfigureerde regels voldoen. Deze kunnen worden
geaccepteerd of verworpen.
Let op: Als u dit instelt op ‘DROP’ (Verwerpen) terwijl u voor ‘ACCEPT’
(Toelaten) geen regels hebt geconfigureerd, is de toegang tot het internet
via LAN uitgeschakeld. Om de toegang opnieuw in te schakelen kunt u de
beveiligingsinstellingen via de modem of ISDN lijnverbinding wijzigen door
met de oorspronkelijke configuratieprocedure het IP toelatingsbeleid tijdelijk
uit te schakelen.
Dit moet het nummer van een regel bevatten waarop de volgende
opdrachten van toepassing zijn. Dit veld wordt genegeerd wanneer een
nieuwe regel wordt toegevoegd.
Specificeert het IP adres of de reeks IP adressen waarvoor de regel geldt.
Voorbeelden (het nummer gekoppeld aan een IP adres met een ‘/’ duidt op
het aantal geldige bits dat van het gegeven IP adres zal worden gebruikt):
192.168.1.22 of 192.168.1.22/32 komt overeen met het IP adres
192.168.1.22
192.168.1.0/24 komt overeen met alle IP pakketten met bronadressen
van 192.168.1.0 tot 192.168.1.255
0.0.0.0/0 komt overeen met alle IP pakketten
SSL certificaatverzoeken
Parameter
Beschrijving
Common name (Naam)
Dit is de netwerknaam van de Remote IP console nadat deze in
het netwerk van de gebruiker is geïnstalleerd.
Organizational unit (Afdeling) Dit veld wordt gebruikt om aan te geven tot welke afdeling
binnen een organisatie de Remote IP console behoort.
Organization (Organisatie)
Naam van de organisatie waartoe de Remote IP console behoort.
Locality/City (Plaats)
Plaats waar de organisatie is gevestigd.
State/Province (Staat/Provincie) Staat of provincie waar de organisatie is gevestigd.
Country (Land)
Land waarin de organisatie is gevestigd. Dit is de uit twee
letters bestaande ISO code, bijv. US voor USA.
Challenge Password
(Identiteitswachtwoord)
Sommige keuringsinstanties vereisen een identiteitswachtwoord
om latere wijzigingen van het certificaat goed te keuren
(bijvoorbeeld herroeping van het certificaat). Dit wachtwoord
moet een minimale lengte hebben van vier tekens.
Confirm Challenge Password
Bevestiging van het identiteitswachtwoord.
Firewall instellingsmenu
(Identiteitswachtwoord bevestigen)
24
E-mail
E-mailadres van een met de beveiliging belaste contactpersoon
die voor de externe IP console verantwoordelijk is.
Key length (Sleutellengte)
Dit is de lengte in bits van de gegenereerde sleutel. In de
meeste gevallen wordt 1024 bits voldoende geacht. Grotere
sleutels kunnen bij het tot stand brengen van verbindingen een
tragere reactie van de externe IP console veroorzaken.
25
P74238ea_F1DE101G-man.qxd
28-04-2003
09:34
Page 26
BEVEILIGING
Vereiste informatie bij aanvraag van certificaten
U kunt echter een nieuw certificaat genereren en installeren dat uniek is voor
een bepaalde kaart. Hiertoe kan de Remote IP console een nieuwe
cryptografische sleutel en het daaraan verbonden ‘Certificate Signing Request’
(Verzoek ondertekening certificaat) genereren dat door een officiële
certificeringsinstantie (Certification Authority ofwel CA) moet worden
goedgekeurd. Een certificeringsinstantie heeft tot taak uw identiteit te
controleren en is bevoegd om u een gewaarmerkt SSL-certificaat toe te kennen.
Ga als volgt te werk om het SSL-certificaat van de Remote IP console aan
te maken en te installeren.
1. Maak een ‘SSL Certificate Signing Request’ (Verzoek om ondertekening van een SSLcertificaat) aan met het scherm in de onderstaande afbeelding (Security Settings
SSL Settings
Create your own SSL certificate). Vul de velden in die in de
bovenstaande tabel zijn toegelicht. Hierna klikt u op ‘Create CSR’ (CSR aanmaken)
waardoor de aanmaak van een ‘Certificate Signing Request’ (Verzoek om
ondertekening van een certificaat) wordt gestart. Met de knop ‘Download CSR’ (CSR
downloaden) kan het CSR worden gedownload naar uw beheersysteem (zie
onderstaande afbeelding).
2. Verstuur de opgeslagen CSR naar een officiële certificeringsinstantie (CA)
voor certificering. Na de gebruikelijke controleprocedure ontvangt u van de
certificeringsinstantie het nieuwe certificaat.
3. Upload het certificaat met het hieronder afgebeelde uploadscherm naar de
Remote IP console.
BEVEILIGING
SSL Certificate Signing Request (Verzoek ondertekening
SSL certificaat)
Let op: Als u het CSR op de Remote IP console vernietigt, kunt u het op geen enkele
wijze herstellen! Als u het per ongeluk wist, herhaal dan de drie stappen.
Instellingen- en configuratienetwerk
Parameters voor netwerkinstellingen
Parameter
Beschrijving
IP address (IP adres)
IP adres in de gebruikelijke puntnotatie.
Subnet mask
(Subnetmasker)
Netmasker van het lokale netwerk.
Gateway IP address
(IP adres gateway)
Gateway van het netwerk.
1. DNS Server IP
(IP DNS server)
IP adres van de primaire domeinnaamserver in puntnotatie. Deze optie
kan blanco worden gelaten; de externe IP console zal echter geen
name-resolution kunnen uitvoeren.
2. IP DNS server
IP adres van de secundaire domeinnaamserver in puntnotatie. Deze
wordt gebruikt als geen contact kan worden gemaakt met de primaire DNS.
Enable Power
(Voeding inschakelen)
Als deze optie is ingeschakeld, is toegang mogelijk via de Power
Management Unit (Voedingsregeling). Met het oog op maximale
beveiliging adviseren wij u deze parameter uit te schakelen.
(Let op: Door de netwerkinstellingen van de Remote IP console te wijzigen, kunnen
de verbindingen worden verbroken. Als u de instellingen op afstand wijzigt, zorg er
dan voor dat alle waarden correct zijn zodat de toegang tot de Remote IP console
voor u open blijft.
26
27
P74238ea_F1DE101G-man.qxd
28-04-2003
09:34
Page 28
MENU NETWERKINSTELLINGEN
Remote Access instellingen
MENU NETWERKINSTELLINGEN
Tabel voor Remote Access opties
U kunt sommige parameters wijzigen terwijl Remote Access wordt uitgevoerd.
Andere moet u echter in de Remote Access instellingen vastleggen voordat u
het systeem inschakelt.
Besturing
Beschrijving
Transmission Encoding
(Transmissiecodering)
Met de instelling voor transmissiecodering kunt u het algoritme voor
beeldcodering wijzigen dat wordt gebruikt voor het oversturen van
de videodata naar het Remote Access venster. Met deze instellingen
kunt u de snelheid van het externe beeldscherm optimaliseren
afhankelijk van het aantal parallelle gebruikers en de bandbreedte
van de lijnverbinding (Modem, ISDN, DSL, LAN enzovoort).
Normal (Normaal): Het standaard-coderingsalgoritme dat zich
uitstekend leent voor veel parallelle gebruikers in een LAN omgeving.
De meeste toepassingen genereren dataverkeer van totaal 15 Kbps.
Compressed (Gecomprimeerd): Om bandbreedte te sparen wordt de
datastroom tussen de Remote IP console en het Remote Access venster
extra gecomprimeerd. De compressiecodering is geschikt voor een
modem of ISDN omgeving. Omdat deze compressie echter
verwerkingstijd op de Remote IP console zelf in beslag neemt, verdient
het aanbeveling deze codering niet te gebruiken wanneer veel parallelle
gebruikers tegelijk toegang wensen tot de externe IP console.
Use Sun's Java Browser
Geeft de webbrowser van uw beheersysteem opdracht de JVM (Java
Virtual Machine) van Sun Microsystems te gebruiken. De JVM in de
browser wordt gebruikt om de code uit te voeren voor het Remote
Access venster dat in feite een Java applet is. Als u dit vakje voor de
eerste maal op uw beheersysteem inschakelt en de betreffende Java
plug-in niet al op uw systeem is geïnstalleerd, wordt deze automatisch
gedownload en geïnstalleerd. Om de installatie echter mogelijk te
maken, moet u de overeenkomstige dialoogvensters wel met ‘YES’ (Ja)
beantwoorden. Het downloadvolume is ongeveer 11 MB. Het voordeel
van het downloaden van de JVM van Sun bestaat hieruit dat er een
stabiele en identieke Java Virtual Machine over verschillende platforms
regeert. De Remote Access software is voor deze JVM versie
geoptimaliseerd en biedt een grotere functionaliteit wanneer deze in de
JVM van Sun wordt uitgevoerd. (Wenk: Als u via een trage verbinding
met het internet bent verbonden, kunt u de JVM ook vooraf op uw
beherende computer installeren. De software is beschikbaar op de cdrom die samen met de externe IP console aan u is geleverd.)
Plug-In (Gebruik Java
browser plug-in van
Sun)
Remote Access instellingen
Mouse Hot Key
(Sneltoets voor muis)
Biedt de mogelijkheid een sneltoetscombinatie te specificeren die
de synchronisatieprocedure voor de muis start als deze in Remote
Access wordt aangeslagen maar kan ook worden gebruikt om de
modus met één muis te verlaten. In bijlage C is een overzicht van
de sleutelcodes opgenomen.
(Door gebruiker
gedefinieerde
sneltoetsen)
Door gebruiker gedefinieerde sneltoetsen simuleren toetsaanslagen
op het externe systeem die ter plaatse niet kunnen worden
gegenereerd.
Let op: Klik op ‘Append’ (Toevoegen) waardoor de wijziging van kracht wordt.
28
29
P74238ea_F1DE101G-man.qxd
28-04-2003
09:34
Page 30
MENU NETWERKINSTELLINGEN
Users & Passwords (Gebruikers en wachtwoorden)
Bij aflevering is elke Remote IP console voorgeconfigureerd met een
supervisor-gebruiker met de naam ‘administrator’ (beheerder) aan wie
het wachtwoord ‘belkin’ is toegekend. BELANGRIJK: Zorg ervoor dat u het
wachtwoord voor beheerder-gebruiker wijzigt onmiddellijk nadat u uw Remote
IP console voor de eerste maal hebt geïnstalleerd en geopend.
MENU NETWERKINSTELLINGEN
Beschrijving tabel Users & Passwords (Gebruikers en wachtwoorden)
Veld
Beschrijving
Existing Users
(Bestaande gebruikers)
U kunt een bestaande gebruiker selecteren en deze wijzigen of wissen.
Wanneer een gebruiker is geselecteerd, klikt u op de knop ‘Lookup User’
(Gebruiker bekijken) om de volledige informatie over de gebruiker te bekijken.
New User Name
(Nieuwe
gebruikersnaam)
Om een nieuwe gebruiker aan te maken, voert u in dit veld een nieuwe
aanmeldingsnaam in. De nieuwe gebruikersnaam mag nog niet gebruikt zijn.
Is dat wel het geval dan verschijnt bovenaan het scherm een foutmelding.
Full User Name
(Volledige
gebruikersnaam)
Dit is de volledige naam van de aangemelde gebruiker.
Password (Wachtwoord) Wachtwoord voor de gebruikersnaam. Dit moet een lengte hebben van
ten minste vier tekens.
Confirm Password
Bevestiging van het bovenstaande wachtwoord.
(Wachtwoord bevestigen)
Group (Groep)
Wijs deze gebruiker aan een van de volgende groepen toe: super
gebruikers in deze groep hebben volledige toestemming om het hostsysteem
en de Remote IP console te beheren. administrators
gebruikers die aan
deze groep zijn toegewezen kunnen het hostsysteem besturen;
en gebruikers
deze groep heeft alleen toestemming tot bekijken.
Het gebruikersbeheer van de Remote IP console staat 25 verschillende gebruikers
toe. De volgende paragrafen beschrijven hoe u gebruikers toevoegt, wist en wijzigt.
Users & Passwords Panel (Scherm Gebruikers en wachtwoorden)
De bovenstaande afbeelding toont het scherm Gebruikers en wachtwoorden van
het front-end van de Remote IP console. Het gebruik ervan wordt beschreven
in de volgende tabel en met de bijbehorende tekst.
Gebruiker toevoegen
Vul de volgende velden in: ‘New user name’ (Nieuwe gebruikersnaam), ‘Full user
name’ (Volledige gebruikersnaam), ‘Password’ (Wachtwoord) en ‘Confirm Password’
(Wachtwoord bevestigen). U kunt ook de groep selecteren waarvan de nieuwe
gebruiker lid moet worden. Klik op de knop ‘Create User’ (Gebruiker aanmaken).
Gebruiker wissen
Selecteer een gebruiker in het veld ‘Existing Users’ (Bestaande gebruikers).
Klik op de knop ‘Lookup’ (Bekijken). De volledige informatie over de gebruiker
wordt getoond. Klik op de knop ‘Delete User’ (Gebruiker wissen).
Gebruiker wijzigen
Selecteer een gebruiker in het veld ‘Existing Users’ (Bestaande gebruikers).
Klik op de knop ‘Lookup’ (Bekijken) om alle informatie over de gebruiker te
zien. Alle velden kunnen naar behoefte worden gewijzigd. Het oude
wachtwoord wordt niet weergegeven maar kan gewijzigd worden. Als u klaar
bent met wijzigen, klikt u op de knop ‘Modify User’ (Gebruiker wijzigen).
30
31
P74238ea_F1DE101G-man.qxd
28-04-2003
09:34
Page 32
MENU NETWERKINSTELLINGEN
Seriële poort
Met de seriële instellingen van de Remote IP console kunt u opgeven welke
apparaten met de seriële poort zijn verbonden en hoe u ze gebruikt. De
onderstaande tabel bevat een overzicht en een beschrijving van de
verschillende keuzemogelijkheden.
Tabel instellingen seriële poort
Functie
Beschrijving
Modem
Geeft toegang tot de Remote IP console via de modem;
zie voor meer informatie Modeminstellingen hieronder.
Port Access via
Telnet
(Poorttoegang
via Telnet)
Met deze optie is het mogelijk een willekeurig apparaat
met de seriële poort te verbinden en deze via Telnet te
openen (mits de terminal wordt ondersteund). Selecteer
de betreffende opties voor de seriële poort en gebruik
de Telnet unit of een standaard Telnet cliënt om
verbinding te maken met de remote IP console.
Menu seriële poortinstellingen
Modeminstellingen
Naast de standaard-toegang via de ingebouwde Ethernet adapter kan de remote
IP console via een telefoonverbinding op afstand worden geopend. De modem
moet aangesloten zijn op de seriële interface van de Remote IP console.
32
MENU NETWERKINSTELLINGEN
Kortom, het tot stand brengen van een verbinding met de Remote IP console
via een telefoonlijn betekent niets minder dan het opbouwen van een
specifieke vastelijnverbinding tussen de computer van uw Remote IP console
en de Remote IP console. Met andere woorden, de Remote IP console fungeert
als internetserviceprovider (ISP) die u kunt bellen. De verbinding komt tot
stand met het Point-to-Point Protocol (PPP). Zorg ervoor dat u de computer
van uw Remote IP console correct configureert voordat u met de Remote IP
console verbinding maakt. Op Windows besturingssystemen kunt u bijvoorbeeld
een inbelnetwerkverbinding configureren die standaard op de juiste
instellingen als PPP is ingesteld.
De modeminstellingen vormen een onderdeel van het scherm voor seriële
instellingen (zie het menu Seriële poortinstellingen).
Tabel voor modemopties
Parameter
Beschrijving
Serial Line Speed
Snelheid waarmee de Remote IP console met de modem
(Snelheid seriële lijn) communiceert. De meeste modems ondersteunen
tegenwoordig de standaard-snelheid van 115200 bps.
Probeer deze snelheid te verlagen als u een oudere
modem gebruikt en problemen ontmoet.
Modem Init String
(Initialisatiestring
modem)
Door de Remote IP console gebruikte initialisatiestring
voor het opstarten van de modem. De standaard-waarde
is geschikt voor alle huidige standaard-modems die
rechtstreeks op een telefoonlijn zijn aangesloten. Als u
een speciale modem hebt of een modem die verbonden is
met een lokale telefoonswitch die een speciale
belvolgorde vraagt om een verbinding met de openbare
telefoonnet tot stand te brengen, dan kunt u deze
instelling wijzigen door een nieuwe string in te geven. Zie
de handleiding van de modem voor de AT opdrachtensyntaxis.
Client IP Address
(IP adres cliënt)
Dit IP adres wordt tijdens de PPP handshake aan de
computer van uw Remote IP console toegewezen. Omdat
het een point-to-point IP verbinding betreft, is vrijwel
elk IP adres mogelijk. Wel moet u ervoor zorgen dat dit
niet interfereert met de IP instellingen van de Remote
IP console en de computer van de Remote IP console.
Meestal is de standaard-waarde voldoende.
33
P74238ea_F1DE101G-man.qxd
28-04-2003
09:34
Page 34
MENU NETWERKINSTELLINGEN
MENU NETWERKINSTELLINGEN
Toetsenbord/muis instellingen
De Remote IP console ondersteunt verschillende typen toetsenborden en
muizen. U kunt de instellingen in het scherm in het menu voor
toetsenbord/muisinstellingen aanpassen (zie de onderstaande tabel).
Tabel voor toetsenbord/muisopties
Besturing
Beschrijving
Targeted KVM Port
(Kvm-doelpoort)
Selecteert de kvm-poort waarop de hieronder gemaakte
instellingen worden toegepast. Door ‘Update’
(Bijwerken) te kiezen, geeft u de huidige waarden voor
deze poort weer en selecteert u deze voor wijziging van
de betreffende instellingen.
Keyboard Model
(Model toetsenbord)
Selecteert het model toetsenbord dat in gebruik is op
het remote hostsysteem.
Mouse Mode
Automatic
schakelt de (Muismodus) automatische
muissynchronisatieprocedure in;
1: n
bepaalt de rechtstreekse verschaling van de
muisbewegingen tussen de lokale en de remote
muisaanwijzer; u kunt de muis dus bewegen ook als
deze niet volledig gesynchroniseerd is.
Reset Mouse/
Keyboard Emulation
(Muis/toetsenbordemulatie resetten)
Deze optie zet de emulatie terug van het toetsenbord
en de muis van de Remote IP console voor het
hostsysteem. Maak hiervan gebruik als het toetsenbord
of de muis niet controleerbaar reageren. Vergelijkbaar
met het ontkoppelen en weer aansluiten van de
connectoren van het toetsenbord en de muis.
Menu Toetsenbord/muis instellingen
KVM-switches
U kunt het aantal poorten selecteren dat de aangesloten KVM-switch gebruikt
en aan elke poort een naam toekennen. Als u kvm-poorten via de Remote IP
console wilt kunnen overschakelen, moet u voor deze poorten bepaalde
toetscombinaties ingeven.
Menu KVM-instellingen
34
35
P74238ea_F1DE101G-man.qxd
28-04-2003
09:34
Page 36
MENU NETWERKINSTELLINGEN
De syntaxis voor het definiëren van een nieuwe sneltoets is de volgende:
< toetscode > [+| - [_] < toetscode >]*
Bijvoorbeeld: Ctrl-Ctrl-A-Enter
of Ctrl+A-*1-Enter
Meerdere toetscodes kunnen met een + of een – teken worden samengevoegd.
Toetscombinaties worden opgebouwd met het + teken; alle toetsen worden
ingedrukt totdat een – teken of het einde van de combinatie verschijnt. In dit
geval worden alle ingedrukte toetsen in omgekeerde volgorde vrijgegeven. Het –
teken bouwt dus enkelvoudige afzonderlijke toetsdrukken en vrijgaven op. Het _
(onderstrepingsteken) voegt een pauze in met een lengte die de gebruiker zelf kan
bepalen; het is mogelijk meerdere __ (onderstrepingstekens) aaneen te schakelen.
De duur van één pauze wordt in milliseconden aangegeven met de betreffende
optie op de pagina voor kvm-instellingen. Zie de tabel Sneltoetscombinaties voor
een overzicht van toetscodes die als sneltoets in aanmerking komen.
Als de instellingen correct zijn, kan de KVM-poort worden overgeschakeld met de KVMschakelmatrix op de homepage van de Remote IP console. De Remote IP console
gebruikt voor elke poort afzonderlijke instellingen voor muissynchronisatie en video.
Let op: Het blijft mogelijk via Remote Access KVM-toetscombinaties te gebruiken
voor het overschakelen van KVM-poorten. In dit geval echter worden de instellingen
voor video en muissynchronisatie tussen de poorten onderling gedeeld en deze
kunnen onbedoeld bij een van die poorten worden verwisseld.
BIJLAGE A
Firmware bijwerken
Dankzij flash-upgrades beschikt u voor uw Remote IP console altijd over de
nieuwste firmware-updates. Deze updates zorgen ervoor dat uw Remote IP console
kan blijven samenwerken met de nieuwste apparaten en computers. Deze firmwareupgrades zijn kostenloos verkrijgbaar tijdens de gehele levensduur van uw Remote
IP console. Ga naar belkin.com voor informatie over upgrades en ondersteuning.
Uploadmenu voor firmware
Videomodi Remote IP console
Tabel B.1 bevat een overzicht van de videomodi die door de Remote IP console
worden ondersteund. Wij adviseren u met nadruk alleen deze modi te gebruiken
en niet de aangepaste video-instellingen. Doet u dat wel dan zal uw Remote IP
console ze waarschijnlijk niet kunnen herkennen.
Tabel B.1 Videomodi unit
Firmware
Dit hoofdstuk bevat een samenvatting van informatie over deze Remote IP
console en zijn huidige firmware waarmee u de Remote IP console kunt
resetten. Deze informatie is beschikbaar in het menu van het
onderhoudsscherm (Maintenance Panel Menu).
Maintenance Panel Menu (Menu onderhoudsscherm)
36
Resolutie (x,y)
Herhalingsfrequenties (Hz)
640x350
70, 85
640x400
56, 70, 85
640x480
60, 67, 72, 75, 85, 90, 100, 120
720x400
70, 85
800x600
56, 60, 70, 72, 75, 85, 90, 100
832x624
75
1024x768
60, 70, 72, 75, 85, 90, 100
1152x864
75
1152x870
75
1152x900
66, 76
1280x960
60
1280x1024
60
37
P74238ea_F1DE101G-man.qxd
28-04-2003
09:34
Page 38
BIJLAGE A
WOORDENLIJST
De tabel Sneltoetsen geeft een overzicht van de toetscodes die worden gebruikt
voor het definiëren van toetsaanslagen. Deze toetscodes geven niet per definitie
de toetstekens weer die op internationale toetsenborden worden gebruikt. Zij
hebben betrekking op de toetsen van een standaard pc-toetsenbord met een
omvang van 104 toetsen en met de Amerikaans-Engelse taaltoewijzing
(‘mapping’). De meeste modificatietoetsen en andere alfanumerieke toetsen die
voor sneltoetsen in applicatieprogramma’s worden gebruikt bevinden zich op een
vaste plaats ongeacht de taaltoewijzing die u gebruikt. Sommige toetsen hebben
synoniemen, dat wil zeggen dat zij door twee toetscodes (in de tabel door een
komma gescheiden) kunnen worden benoemd.
Tabel sneltoetsen
Voor deze commando’s…
Tilde
Min-teken
Is gelijk aan-teken
Puntkomma
Apostrof
Kleiner dan
Komma
Punt
Schuine streep
Backspace
Tab
Rechte haak links
Rechte haak rechts
Enter
Caps Lock
Back slash
Links Shift, Shift
Control rechts
Shift rechts
Control links of Control
Alt links of Alt
Spatiebalk
Escape
F1
F2
F3
F4
F5
F6
F7
F8
F9
F10
…typt u deze tekens
TILDE
- of MINUS
= of EQUALS
;
’
< of LESS
,
.
/ of SLASH
BACK SPACE
TAB
[
]
ENTER
CAPS LOCK
\ of BACK SLASH
LSHIFT of SHIFT
RCTRL
RSHIFT
LCTRL of CTRL
LALT of ALT
SPACE
ESCAPE of ESC
F1
F2
F3
F4
F5
F6
F7
F8
F9
F10
Voor deze commando’s…
F11
F12
Print Screen
Scroll Lock
Break
Insert (Invoegen)
Home
PageUp (PgUp)
Delete (Wissen)
End (Einde)
PageDown (PgDn)
Pijl-Op
Pijl naar links
Pijl-Neer
Pijl naar rechts
Number Lock (NumLk)
0 op numeriek toetsenblok
1 op numeriek toetsenblok
2 op numeriek toetsenblok
3 op numeriek toetsenblok
4 op numeriek toetsenblok
5 op numeriek toetsenblok
6 op numeriek toetsenblok
7 op numeriek toetsenblok
8 op numeriek toetsenblok
9 op numeriek toetsenblok
Plusteken op numeriek toetsenblok
Deelteken op numeriek toetsenblok
Maalteken op numeriek toetsenblok
Minteken op numeriek toetsenblok
Enter op numeriek toetsenblok
Windows
Menu
38
…typt u deze tekens
F11
F12
PRINTSCREEN
SCROLL LOCK
BREAK
INSERT
HOME
PAGE UP
DELETE
END
PAGE DOWN
UP
LEFT
DOWN
RIGHT
NUM LOCK
NUMPAD0
NUMPAD1
NUMPAD2
NUMPAD3
NUMPAD4
NUMPAD5
NUMPAD6
NUMPAD7
NUMPAD8
NUMPAD9
NUMPADPLUS of NUMPAD PLUS
NUMPAD/
NUMPADMUL of NUMPAD MUL
NUMPADMINUS of NUMPAD MINUS
NUMPADENTER
WINDOWS
MENU
ACPI
Open industrienorm die het besturingssysteem in staat stelt
energiebeheer en systeemconfiguratie te implementeren.
ATX
Advanced Technology Extended: Speciale specificatie voor
moederborden, in 1995 door Intel® geïntroduceerd.
DHCP
Dynamic Host Configuration Protocol: Protocol voor het dynamisch
toewijzen van IP configuraties in lokale netwerken.
DNS
Domain Name System: Protocol dat wordt gebruikt om computers
met hun naam op het internet te localiseren.
FAQ
Frequently Asked Question ofwel Veel Gestelde Vraag.
HTTP
Hypertext Transfer Protocol: Protocol dat tussen webbrowsers en
servers wordt gebruikt.
HTTPS
Hyper Text Transfer Protocol Secure: Beveiligde versie van http.
LED
Light Emitting Diode ofwel lichtgevende diode.
MIB
Management Information Base: Beschrijft de structuur van de
managementinformatie die via SNMP kan worden geopend.
PS/2
Het PS/2 apparateninterface werd ontwikkeld door IBM® en wordt
door veel muizen en toetsenborden gebruikt.
SNMP
Simple Network Management Protocol: Een veel gebruikte taal
(protocol) voor het beheer van netwerken en de daarop
aangesloten eenheden.
SSL
Secure Sockets Layer: Encryptietechnologie voor het internet,
gebruikt voor het beveiligen van dataverkeer.
SVGA
Super VGA: Verbeterde vorm van Video Graphics Array (VGA) die
een verbeterde detaillering en groter scheidend vermogen mogelijk
maakt.
UTP
Unshielded Twisted Pair: Kabel met twee paarsgewijs gevlochten
geleiders die één mantel van pvc kunststof zijn gebundeld.
39
P74238ea_F1DE101G-man.qxd
28-04-2003
09:34
Page 40
FAQs
Kan ik de Remote IP console gebruiken in combinatie met Belkin
OmniView ENTERPRISE Series KVM-switches?
Ja dat kan.
PROBLEMEN OPLOSSEN
De remote muis werkt niet of is niet synchroon.
Zorg ervoor dat de muisconfiguratie overeenkomt met het gebruikte muistype.
De beeldkwaliteit is slecht of het beeld is korrelig.
Kan ik de Remote IP console gebruiken in combinatie met niet door
Belkin geleverde KVM-switches?
Ja dat kan. U kunt de Remote IP console inderdaad samen met niet door
Belkin geleverde PS/2 KVM-switches gebruiken. U moet echter rekening houden
met verminderde prestaties als u KVM-switches van mindere kwaliteit gebruikt.
Probeer de beeldhelderheid en het contrast zo te corrigeren dat het korreleffect
uit het beeld verdwijnt. Met de functie voor automatische beeldregeling kunt u
een flikkerend beeld veelal goed corrigeren.
Het aanmelden (‘inloggen’) lukt niet.
Gebruik de beheerdersaccount om u aan te melden en zorg ervoor dat uw
gebruikersnaam en wachtwoord kloppen.
Welke besturingssystemen worden door de Remote IP console
ondersteund?
Het Remote Access venster kan geen verbinding krijgen met de Remote IP
console.
De Remote IP console ondersteunt Windows NT, 2000 en XP.
Mogelijk staat een brandmuur (‘firewall’) de toegang in de weg. Zorg ervoor dat
de TCP poortnummers 443 of 80 geopend zijn voor binnenkomende TCP
verbindingsactiviteiten.
Kan ik mijn Remote IP console gebruiken met besturingssystemen die niet
op Microsoft Windows zijn gebaseerd?
Met de Remote IP console kan geen verbinding worden gemaakt.
Ja dat kan. U kunt de Remote IP console ook voor andere platforms gebruiken
met deze beperking dat alleen het toetsenbord en video worden ondersteund.
Controleer of de netwerkverbinding als zodanig in orde is (ping het IP adres
van de Remote IP console). Zo niet, controleer dan de netwerkhardware.
Is de Remote IP console belastend voor de servers?
Is de Remote IP console ingeschakeld? Controleer of de IP adressen van de
Remote IP console en van alle andere aan IP gerelateerde instellingen correct
zijn.
Dat is niet het geval. De Remote IP console is een 100% hardware-oplossing
die niet vereist dat extra software op de servers wordt geïnstalleerd.
Controleer of de hele IP infrastructuur van uw LAN zoals routers en dergelijke
correct is geconfigureerd. Als u niet kunt pingen, werkt de Remote IP console
niet.
Speciale toetscombinaties als ALT+F2 en ALT+F3 worden door de computer
van de Remote IP console onderschept en niet naar de host doorgestuurd.
Maak voor deze speciale functie een sneltoetscommando aan.
De pagina’s van de Remote IP console zijn in de browser niet consistent of
zelfs chaotisch.
Zorg ervoor dat de cache-instellingen van uw browser in orde zijn. Let er
vooral op dat de cache-instellingen NIET zijn ingesteld op ‘never check for
newer pages’. Anders worden de pagina’s van de Remote IP console vanaf de
browser-cache binnengehaald en niet van de kaart.
40
41
P74238ea_F1DE101G-man.qxd
28-04-2003
09:34
Page 42
INFORMATIE
FCC verklaring
VERKLARING VAN CONFORMITEIT MET DE FCC-VOORSCHRIFTEN
VOOR ELEKTROMAGNETISCHE COMPATIBILITEIT
Wij, Belkin Corporation, gevestigd 501 West Walnut Street, Compton, CA 90220, Verenigde Staten van Amerika,
verklaren hierbij dat wij de volledige verantwoordelijkheid aanvaarden dat het product met het typenummer:
F1DE101G
waarop deze verklaring betrekking heeft,
voldoet aan paragraaf 15 van de FCC-voorschriften. Het gebruik ervan is onderworpen aan de beide volgende
voorwaarden: (1) dit apparaat mag geen schadelijke storingen veroorzaken en (2) dit apparaat dient alle
hierop inwerkende storingen te accepteren waaronder begrepen storingen die een niet gewenste werking
kunnen veroorzaken.
CE-verklaring van Conformiteit
Wij, Belkin Corporation, verklaren hierbij dat wij de volle verantwoordelijkheid aanvaarden dat het product met het
typenummer F1DE101G, waarop deze verklaring van toepassing is, voldoet aan de emissienorm EN55022 en aan de
immuniteitsnormen EN55024, LVP EN61000-3-2 en EN61000-3-3.
ICES
Dit apparaat van Klasse B voldoet aan de voorschriften van de Canadese ICES-003.
Belkin Corporation verleent op dit product vijf jaar
beperkte garantie
Belkin Corporation garandeert dit product gedurende de garantieperiode voor zover het materiaal- en fabricagefouten
betreft. Als een defect aan het licht komt, zal Belkin het product naar eigen goeddunken kosteloos repareren of vervangen
mits het product binnen de garantieperiode portvrij wordt geretourneerd aan de erkende Belkin dealer van wie u het
product hebt gekocht. Het vertonen van een aankoopbewijs kan worden verlangd.
Deze garantie geldt niet indien het product is beschadigd door een ongeval, door opzettelijk of onopzettelijk misbruik
en/of door onjuiste toepassing hetzij door wijziging van het product zonder uitdrukkelijke schriftelijke toestemming van
Belkin dan wel door verwijdering of verminking van een Belkin serienummer.
DE BOVENGENOEMDE GARANTIE EN MAATREGELEN SLUITEN ALLE ANDERE UIT, MONDELING DAN WEL SCHRIFTELIJK,
UITDRUKKELIJK OF IMPLICIET. BELKIN VERWERPT MET NAME ELKE EN ALLE IMPLICIETE GARANTIE(S), ONVERKORT
MEEGEREKEND GARANTIES INZAKE COMMERCIËLE TOEPASSINGEN EN/OF GESCHIKTHEID VOOR EEN BIJZONDER DOEL.
Geen door Belkin aangestelde of namens Belkin handelende wederverkoper, tussenpersoon of werknemer is gemachtigd deze
garantie op welke wijze dan ook te wijzigen, uit te breiden of aan te vullen.
BELKIN IS NIET AANSPRAKELIJK VOOR BIJZONDERE, BIJKOMENDE OF VERVOLGSCHADE ONTSTAAN DOOR
GARANTIEVERBREKING VAN WELKE AARD OOK OF UIT HOOFDE VAN ENIG ANDER JURIDISCH BEGINSEL, MET INBEGRIP VAN
MAAR NIET BEPERKT TOT BEDRIJFSSTILSTAND, VERLIES VAN WINST OF GOODWILL, BESCHADIGING HETZIJ
HERPROGRAMMERING OF REPRODUCTIE VAN ENIG PROGRAMMA OF VAN DATA OPGESLAGEN IN OF GEBRUIKT IN SAMENHANG
MET BELKIN PRODUCTEN.
Sommige staten verbieden de uitsluiting of beperking van incidentele of vervolgschade of de uitsluiting van impliciete
garanties in welk geval de hierboven vermelde beperkingen of uitsluitingen wellicht niet op u van toepassing zijn. Deze
garantie verleent u specifieke wettelijke rechten en wellicht hebt u andere rechten die van staat tot staat verschillen.
42
P74238ea_F1DE101G-man.qxd
28-04-2003
09:34
Page 44
OmniView
Consola IP de control remoto
™
Controle a distancia un servidor o múltiples
servidores con un Conmutador KVM a través de
redes TCP/IP
belkin.com
Belkin Corporation
501 West Walnut Street
Compton • CA • 90220 • USA
Tel: +1 310.898.1100
Fax: +1310.898.1111
Belkin Components, Ltd.
Express Business Park
Shipton Way • Rushden • NN10 6GL
Verenigd Koninkrijk
Tel: +44 (0) 1933 35 2000
Fax: +44 (0) 1933 31 2000
Belkin Components B.V.
Starparc Building • Boeing Avenue 333
1119 PH Schiphol-Rijk • Nederland
Tel: +31 (0) 20 654 7300
Fax: +31 (0) 20 654 7349
Belkin Gmbh
Hanebergstrasse 2 •
80637 München • Duitsland
Tel: +49 (0) 89 143 4050
Fax: +49 (0) 89 143 405100
Belkin, Ltd.
7 Bowen Crescent • West Gosford
NSW 2250 • Australië
Tel: +61 (0) 2 4372 8600
Fax: +61 (0) 2 4372 8603
Belkin technische helpdesk
USA: +1-310.898.1100 toestel 2263
+1 800.223.5546 toestel 2263
Europa: 00 800 223 55 460
Australië: 1800 666 040
P74238
© 2003 Belkin Corporation. Alle rechten voorbehouden. Alle handelsnamen
zijn gedeponeerde handelsmerken van de betreffende rechthebbenden.
Guía de instalación rápida
Serie Enterprise
F1DE101G
P74238ea_F1DE101G-man.qxd
28-04-2003
09:34
Page 46
ÍNDICE DE CONTENIDOS
Generalidades
Introducción . . . . . . . . . . . . . .
Contenido del paquete . . . . . . . .
Esquema general de características
Requisitos de los equipos . . . . . .
Especificaciones . . . . . . . . . . . .
Diagramas de la RIPC . . . . . . . . .
.
.
.
.
.
.
.
.
.
.
.
.
.
.
.
.
.
.
.
.
.
.
.
.
.
.
.
.
.
.
.
.
.
.
.
.
.
.
.
.
.
.
.
.
.
.
.
.
.
.
.
.
.
.
GENERALIDADES
.
.
.
.
.
.
.
.
.
.
.
.
.
.
.
.
.
.
.
.
.
.
.
.
.
.
.
.
.
.
.
.
.
.
.
.
.
.
.
.
.
.
.
.
.
.
.
.
.
.
.
.
.
.
.
.
.
.
.
.
.
.
.
.
.
.
.
.
.
.
.
.
.
.
.
.
.
.
.
.
.
.
.
.
.
.
.
.
.
.
.
.
.
.
.
.
.1
.1
.2
.3
.4
.5
Instalación
Instalación del hardware . . . . . . . . . . . . . . . . . . . . . . . . . . . . . . . .6
Configuración inicial de red . . . . . . . . . . . . . . . . . . . . . . . . . . . . . .12
Utilización de su RIPC
Requisitos previos . . . . . . . . . .
Acceso a la RIPC . . . . . . . . . . .
Pantalla principal . . . . . . . . . .
Salida de la RIPC . . . . . . . . . . .
Acceso remoto al host de control
.
.
.
.
.
.
.
.
.
.
.
.
.
.
.
.
.
.
.
.
.
.
.
.
.
.
.
.
.
.
.
.
.
.
.
.
.
.
.
.
.
.
.
.
.
.
.
.
.
.
.
.
.
.
.
.
.
.
.
.
.
.
.
.
.
.
.
.
.
.
.
.
.
.
.
.
.
.
.
.
.
.
.
.
.
.
.
.
.
.
.
.
.
.
.
.
.
.
.
.
.
.
.
.
.
.
.
.
.
.
.
.
.
.
.
.
.
.
.
.
.
.
.
.
.
.15
.16
.17
.18
.18
Seguridad
Puertos & protocolos . . . . . . . . . . . . . . . . . . . . . . . . . . . . . . . . . .23
Firewall . . . . . . . . . . . . . . . . . . . . . . . . . . . . . . . . . . . . . . . . . . .24
Gestión de certificados . . . . . . . . . . . . . . . . . . . . . . . . . . . . . . . . .25
Menú de ajustes de red
Ajustes de acceso remoto
Usuarios & contraseñas . .
Puerto serie . . . . . . . . .
Ajustes de teclado/ratón .
Conmutadores KVM . . . .
.
.
.
.
.
.
.
.
.
.
.
.
.
.
.
.
.
.
.
.
.
.
.
.
.
.
.
.
.
.
.
.
.
.
.
.
.
.
.
.
.
.
.
.
.
.
.
.
.
.
.
.
.
.
.
.
.
.
.
.
.
.
.
.
.
.
.
.
.
.
.
.
.
.
.
.
.
.
.
.
.
.
.
.
.
.
.
.
.
.
.
.
.
.
.
.
.
.
.
.
.
.
.
.
.
.
.
.
.
.
.
.
.
.
.
.
.
.
.
.
.
.
.
.
.
.
.
.
.
.
.
.
.
.
.
.
.
.
.
.
.
.
.
.
.
.
.
.
.
.
.28
.30
.32
.34
.35
Anexo A
Actualización del firmware . . . . . . . . . . . . . . . . . . . . . . . . . . . . . .37
Modos de vídeo de la RIPC . . . . . . . . . . . . . . . . . . . . . . . . . . . . . .37
Tabla de teclas de acceso directo . . . . . . . . . . . . . . . . . . . . . . . . . .38
Glosario
. . . . . . . . . . . . . . . . . . . . . . . . . . . . . . . . . . . . . . . . . . .39
Preguntas más frecuentes
. . . . . . . . . . . . . . . . . . . . . . . . . . . . . .40
Introducción
Felicidades por la compra de esta Consola IP de control remoto OmniView de la
serie ENTERPRISE de Belkin (la RIPC). Nuestra amplia línea de soluciones KVM
da muestra del compromiso de Belkin por suministrar productos duraderos de
alta calidad a un precio competitivo. Diseñada para proporcionarle el control
de su ordenador o conmutador KVM desde cualquier parte del mundo a través
de un navegador de Internet, la RIPC puede ser configurada de forma sencilla
para adaptarse a su LAN existente, ya sea grande o pequeña.
Belkin ha diseñado y desarrollado la RIPC teniendo en cuenta el administrador
de servidores. El resultado es una solución de gestión a distancia potente, fácil
de instalar y utilizar, que supera a todas las demás soluciones con propiedades
y funcionalidad avanzadas.
El presente manual le ofrece todos los detalles que necesita acerca de la RIPC,
desde la instalación y el funcionamiento, hasta la resolución de problemas para
el improbable caso de que se presenten dificultades.
Gracias por adquirir la Consola IP de control remoto OmniView de la serie
ENTERPRISE. Sabemos valorar su negocio y estamos convencidos de que pronto
podrá apreciar por usted mismo por qué se emplean más de 1 millón de
productos OmniView de Belkin en todo el mundo.
Contenido del paquete
•
•
•
•
•
•
•
•
Una Consola IP de control remoto OmniView de la serie ENTERPRISE
Un juego de cables PS/2
Una fuente de alimentación de 5V CC, 2.000mA
Manual del usuario
Guía de instalación rápida
Tarjeta de registro
Engarces para montaje en bastidor con tornillos
Un cable DB9
Resolución de problemas . . . . . . . . . . . . . . . . . . . . . . . . . . . . . . . . .41
Información . . . . . . . . . . . . . . . . . . . . . . . . . . . . . . . . . . . . . . . . .42
1
P74238ea_F1DE101G-man.qxd
28-04-2003
09:34
Page 2
GENERALIDADES
GENERALIDADES
Esquema general de características
Requisitos de los equipos
Capacidad de soporte para un usuario digital
Permite el acceso de un usuario digital para controlar un ordenador o KVM a
través de un navegador de Internet.
Requisitos de hardware
Compatibilidad con navegadores de Internet
Es posible acceder a la RIPC desde cualquier ordenador que tenga incorporada
la versión 5.5 del Microsoft® Internet Explorer o una superior. No se precisa
software patentado.
Posibilidad de montaje en bastidor 0U
La RIPC es lo suficientemente compacta como para ser colocada sobre su
escritorio, detrás de otro dispositivo o unida al lateral de su bastidor de
servidores para ocupar un espacio 0U.
Teclas de acceso directo personalizadas
Las teclas de acceso directo personalizadas simulan combinaciones de teclas en
el sistema remoto que no pueden ser generadas de forma local.
•
•
•
•
•
•
•
•
Consola IP de control remoto OmniView de la serie ENTERPRISE (adjunta)
Juego de cables PS/2 (adjunto)
Fuente de alimentación de 5V CC, 2.000mA (adjunta)
Teclado, monitor y ratón
Conexión a la red empleando un puerto Ethernet 10/100Base-T (RJ45)
Cable de cruce CAT5e
Cable directo CAT5e
Engarce de montaje en bastidor con tornillos (incluido, para la opción de
montaje en bastidor)
Requisitos de software
• Microsoft Internet Explorer 5.5 y posterior
• Servidores con Windows® NT®, 2000 y XP
Actualizaciones por flash
Las actualizaciones por flash le permiten obtener las últimas actualizaciones de
firmware para su RIPC. Estas actualizaciones garantizan que su RIPC continuará
funcionando con los dispositivos y ordenadores más modernos. Las actualizaciones
de firmware son gratuitas durante toda la vida útil de la RIPC. Visite la página
belkin.com para obtener información y asistencia sobre actualizaciones.
Indicadores LED
Situados en la parte frontal de la RIPC, los indicadores LED le proporcionan
una forma sencilla de controlar el estado de su conexión, vínculo y actividad.
Resolución de vídeo
Con un ancho de banda de 117MHz, la RIPC está capacitada para soportar
resoluciones de vídeo de hasta 1280x1024@60Hz. Para preservar la integridad
de la señal y obtener los mejores resultados, utilice cables de vídeo de Belkin.
Interfaz de usuario avanzada mediante el navegador de Internet
Puede configurar las funciones avanzadas de la RIPC de forma sencilla a través
de su navegador de Internet, sin necesidad de instalar software adicional en su
ordenador. No es preciso instalar discos y puede efectuar cambios y llevar a
cabo funciones de configuración desde cualquier ordenador de la red de forma
rápida y sencilla.
2
3
P74238ea_F1DE101G-man.qxd
28-04-2003
09:34
Page 4
GENERALIDADES
Especificaciones
GENERALIDADES
Diagramas de la RIPC
Número de pieza: F1DE101G
Alimentación: 5V CC, 2.000mA
LED de Conexión
Conexión de red: Conexión 10/100Base-T (conector RJ45 estándar)
Emulación de teclado: PS/2
Emulación de ratón: PS/2
Monitores soportados: soporta todos los modos gráficos VESA y modos de texto
Connection
Remote IP Console
Resolución máx.: 1280x1024@60Hz
Link / Activity
Ancho de banda: 117MHz
Entrada de teclado: miniDIN de 6 patillas (PS/2)
Entrada de ratón: miniDIN de 6 patillas (PS/2)
Puertos para ordenador/KVM: 1
LED de Vínculo/Actividad
Puerto VGA: tipo HDDB de 15 patillas
Indicadores LED: 2
Toma de alimentación eléctrica
Carcasa: carcasa de metal
Puerto serie 02
Puerto VGA de
consola
Puerto LAN
Puerto VGA de
CPU/KVM
Dimensiones: 1,75 x 5,7 x 7 pulgadas (43,1 x 144,7 x 177mm)
Peso: 1.8 lbs. (800g)
Temperatura de funcionamiento: de 32° a 104° F (0~40° C)
Temperatura de almacenamiento: de 104° a 167° F (40~75° C)
Serial 02
power
console
CPU/KVM
Humedad: 0-80% HR, no condensada
Altitud máxima: 10.000 pies
Serial 01
reset
LAN
Garantía: 1 año
Atención: Las especificaciones pueden ser objeto de modificación sin previo aviso.
4
Puerto para
teclado de
CPU/KVM
Puerto para el
Puerto para ratón
ratón de consola
de CPU/KVM
Puerto para el
Puerto serie 01 Botón de reinicio teclado de consola
5
P74238ea_F1DE101G-man.qxd
28-04-2003
09:34
Page 6
INSTALACIÓN
INSTALACIÓN
Instalación del hardware
1. Apague su servidor o Conmutador KVM.
Instalación de la RIPC en un bastidor de servidores
2. Conecte sus teclado y ratón tipo PS/2 a los puertos de “Console” (Consola)
PS/2 correspondientes.
La RIPC incluye engarces de montaje para la instalación en bastidores de 19
pulgadas.
1. Coloque el engarce adjunto en la parte superior o inferior de la RIPC con
ayuda de los tornillos Phillips adjuntos.
2. Monte la RIPC en el bastidor.
Atención: no se incluyen tornillos para el bastidor. Utilice los tornillos especificados
por el fabricante de su bastidor.
*** Precauciones y advertencias ***
Antes de intentar conectar algo a la RIPC o a su(s) ordenador(es), asegúrese
de que todo su equipamiento informático y dispositivos se encuentren
apagados. De no hacerlo así, Belkin Corporation no se responsabilizará de los
posibles daños que puedan producirse.
Serial 02
power
console
Serial 01
LAN
reset
F10
F11
HOME
PG UP
PG DN
HELP
CAPS
`
F9
num
lock
1
2
3
4
5
6
7
9
8
-
0
=
delete
]
[
P
CPU/KVM
cap
lock
pg up
=
/
7
8
9
4
5
6
1
2
3
-
+
K
L
;:
ESC
return
'"
shift
PC
^
clt
<
alt
OPT
+
>
0
3. Tome el cable de vídeo que se encuentra conectado a su monitor VGA e
insértelo en el puerto “Console” (Consola).
6
7
P74238ea_F1DE101G-man.qxd
28-04-2003
09:34
Page 8
INSTALACIÓN
INSTALACIÓN
Conexión del Ordenador o KVM
Conexión del Ordenador o KVM
Utilizando el juego de cables PS/2 adjunto, conecte un extremo de los cables
PS/2 y VGA a su servidor. Conecte el otro extremo a los puertos “CPU/KVM” de
la parte posterior de la RIPC.
Utilizando el juego de cables PS/2 adjunto, conecte un extremo de los cables
PS/2 y VGA a los puertos para la RIPC del Conmutador KVM. Conecte el otro
extremo a los puertos “CPU/KVM” de la parte posterior de la RIPC.
Serial 02
power
Serial 01
console
reset
CPU/KVM
LAN
Serial 02
power
Serial 01
console
CPU/KVM
LAN
reset
console
bank
select
USB
flash
daisy chain IN
CPU 01/02
CPU 03/04
CPU 05/06
CPU 07/08
1 2 3 4
reset
8
PS/2
daisy chain OUT
90-264 VAC. 47-63 Hz
9
P74238ea_F1DE101G-man.qxd
28-04-2003
09:34
Page 10
INSTALACIÓN
INSTALACIÓN
Encendido de la RIPC
Configuración inicial de red
1. Conecte la fuente de alimentación adjunta a una salida de corriente
disponible.
1. Utilizando un cable de cruce RJ45, conecte un extremo al ordenador y el
otro extremo al puerto con la etiqueta “LAN” (Red).
2. Inserte el enchufe cilíndrico en la toma de corriente (“Power”) situada en la
parte posterior de la RIPC para proporcionar alimentación a la unidad.
Serial 02
power
Serial 01
console
reset
CPU/KVM
LAN
Serial 02
power
Serial 01
console
reset
CPU/KVM
LAN
2. Establezca la dirección IP en su ordenador para que se encuentre en el
mismo rango que 1.2.3.4 (por ejemplo: 1.2.3.6).
3. Abra el navegador de red Microsoft® Internet Explorer.
4. Introduzca la dirección IP “1.2.3.4”.
5. Introduzca el nombre de acceso por defecto “administrator”
(administrador).
3. Encienda su Conmutador KVM. Si no dispone de un Conmutador KVM,
proceda a encender sus ordenadores.
10
6. Introduzca la contraseña por defecto “belkin”.
11
P74238ea_F1DE101G-man.qxd
28-04-2003
09:34
Page 12
INSTALACIÓN
INSTALACIÓN
Configuración inicial de red
Acceso remoto
7. En “Setting &
Configurations” (Ajuste
y configuraciones), haga
clic en “Network” (Red).
(Atención: elimine la
marca del recuadro de
selección “DHCP”.)
El acceso remoto (“Remote Access”) es un applet de Java™ que muestra la
pantalla, teclado y ratón redireccionados del sistema de host remoto al que se
encuentra conectada la RIPC. El navegador de Internet utilizado para el acceso
a la RIPC deberá suministrar un entorno de ejecución Java (“Java Runtime
Environment”), versión 1.1 o superior. El acceso remoto proporcionará un
rendimiento exactamente igual desde una ubicación remota al obtenido
manejando directamente el propio ordenador. Dispondrá de la capacidad de
utilizar el teclado y el ratón de la forma habitual; sin embargo, el sistema
remoto reaccionará con un ligero retraso ante las acciones sobre estos dos
dispositivos. El tiempo de retardo dependerá del ancho de banda de la línea a
través de la cual se encuentre conectado a la RIPC. Abra el applet
seleccionando el vínculo apropiado del cuadro de navegación del HTML.
8. Introduzca los ajustes de
red deseados y haga clic
en “Apply Changes”
(Aplicar cambios) para
guardar los nuevos
ajustes de red.
Parte inferior del applet de acceso remoto
El applet de acceso remoto (“Remote Access”) ofrece las siguientes
propiedades:
Botón de regulación automática (“Auto adjust”)
Si la imagen mostrada es de mala calidad o está distorsionada de alguna
forma, pulse este botón y espere algunos segundos mientras que la RIPC es
regulada para obtener la mejor calidad de imagen posible.
9. Restablezca los ajustes de dirección IP local en el ordenador empleado para
la configuración de la RIPC.
Conexión de la RIPC a la red
Conecte la RIPC a la red utilizando el cable de red directo Category 5 RJ45.
Sincronización (“Sync”)
Seleccione esta opción para poder sincronizar el cursor del ratón local con el
del ratón remoto.
Ajustes de vídeo (“Video settings”)
Esta opción abre una nueva ventana con elementos que permiten controlar los
ajustes de vídeo de la RIPC. Podrá modificar algunos valores relacionados con
el brillo y el contraste de la imagen mostrada con el fin de mejorar la calidad
de la misma. Asimismo, es posible retornar a los ajustes por defecto para todos
los modos de vídeo o sólo para el modo actual.
13
12
P74238ea_F1DE101G-man.qxd
28-04-2003
09:34
Page 14
INSTALACIÓN
Configuración vía serie
En un ordenador que tenga instalado el software de servicios de hiperterminal
(“HyperTerminal Services”), conecte el cable serie DB9 suministrado insertando
un extremo a su ordenador y el otro extremo al puerto denominado “Serial 1”
(Serie 1) de la RIPC.
Abra el software de HyperTerminal y utilice los siguientes parámetros:
UTILIZACIÓN DE SU RIPC
Requisitos previos
La RIPC incorpora un sistema operativo y aplicaciones que ofrecen una amplia
variedad de interfaces de usuario estándar. La información presentada a
continuación describe su utilización en detalle. El acceso a todas las interfaces
se lleva a cabo utilizando el protocolo TCP/IP, y pueden ser empleadas bien a
través del adaptador de Ethernet incorporado, o bien a través del módem.
Están soportadas las siguientes interfaces:
Parámetros de línea en serie
Parámetro
Valor
Bits/segundo (“Bits/second”)
115200
Bits de datos (“Data bits”)
8
Paridad (“Parity”)
No
Bits de parada (“Stop bits”)
1
Control del flujo (“Flow control”)
Nunca
Ahora dispondrá de la capacidad de establecer su configuración de red en la RIPC.
HTTP/HTTPS: El acceso más completo es proporcionado por un servidor de
Internet incorporado y el entorno de la RIPC puede ser controlado por un
navegador de red estándar. Dependiendo del navegador de Internet, podrá
acceder a la tarjeta de la RIPC utilizando el protocolo no seguro HTTP o, si el
navegador lo permite, el protocolo encriptado HTTPS. Recomendamos el empleo
de HTTPS siempre que sea posible.
Telnet: Es posible emplear un cliente telnet estándar para acceder a un
dispositivo aleatorio conectado a uno de los puertos serie de la RIPC a través
de un modo de terminal.
Con el fin de utilizar la ventana de acceso remoto del sistema de host
gestionado por usted, el navegador deberá incluir un entorno de ejecución
Java (“Java Runtime Environment”), versión 1.1 o superior. Sin embargo,
incluso en el caso de que el navegador empleado no disponga de soporte para
Java, como sucede con los dispositivos de mano de pequeño tamaño, podrá
mantener su sistema de host remoto utilizando las formas de administración
mostradas por el propio navegador.
Recomendamos los siguientes navegadores para una conexión no segura a
la RIPC:
Microsoft Internet Explorer versión 5.5 o superior en Windows 98, Me, 2000 y XP
Netscape® Navigator® 7.0 o Mozilla 1.0 en Windows 98, Me, 2000, XP, Linux® y
otros sistemas operativos similares a UNIX®
Para poder acceder al sistema de host remoto utilizando una conexión con
seguridad por encriptación, necesitará un navegador que soporte el protocolo
HTTPS. Únicamente será posible garantizar una seguridad eleveda empleando una
longitud de clave de 128 bits. Muchos navegadores más antiguos no disponen de
un algoritmo de encriptación elevada de 128 bits debido a las antiguas
regulaciones de exportación de las autoridades de EE.UU.. El Internet Explorer
5.0, incluido en Windows Me y 2000, soporta una longitud de clave de tan sólo
56 bits. Puede obtener información acerca de la longitud de clave del Internet
Explorer en los puntos de menú “?” y “Info”. El cuadro de diálogo mostrará un
hipervínculo que muestra información acerca de las actualizaciones de su
navegador para obtener el más moderno esquema de encriptación.
14
15
P74238ea_F1DE101G-man.qxd
28-04-2003
09:34
Page 16
UTILIZACIÓN DE SU RIPC
UTILIZACIÓN DE SU RIPC
Recomendamos el siguiente navegador para una conexión segura a la RIPC:
Microsoft Internet Explorer versión 5.5 o superior en Windows 98, Me, 2000 y XP
Netscape Navigator 7.0 o Mozilla 1.0 en Windows 98, Windows Me, 2000, XP,
Linux y otros sistemas operativos similares a UNIX
Atención: Aegúrese de cambiar la contraseña de usuario-administrador inmediatamente
después de haber instalado la RIPC y de haber accedido por primera vez a la misma.
Pantalla principal
Una vez realizado el acceso correctamente, la RIPC presentará el entorno de su
pantalla principal (véase la figura de la parte inferior).
Indicación de la longitud de encriptación en el Internet Explorer
Acceso a la RIPC
Inicie su navegador de Internet e introduzca la dirección de su RIPC
configurada durante la instalación.
El botón de inicio (“Home”) le llevará inmediatamente a la página principal desde
uno de los puntos del menú de administración. El botón de salida (“Logout”) le
permite abandonar la RIPC; pone fin a la sesión actual y le solicitará volver a
introducir su nombre de usuario y contraseña para poder acceder más tarde.
Atención: La RIPC le solicitará una contraseña de forma automática en caso de no
existir actividad de administración durante 30 minutos.
Para establecer una conexión no segura, deberá introducir lo siguiente en la
barra de direcciones de su navegador:
http://192.168.1.22/
Para una conexión segura, deberá introducir:
https://192.168.1.22/
La RIPC dispone de una usuario-administrador incorporado que tiene permiso
para administrar su sistema:
Nombre de acceso
administrador
Contraseña
Belkin
La ventana del menú de inicio de la RIPC
16
17
P74238ea_F1DE101G-man.qxd
28-04-2003
09:34
Page 18
UTILIZACIÓN DE SU RIPC
Salida de la RIPC
Este vínculo (“Log-out”) propicia la salida del usuario actual y presenta una
nueva pantalla de acceso. En caso de que no se produzca ninguna actividad de
administración durante 30 minutos, se producirá la salida automática. A
continuación se solicitará una nueva introducción de la contraseña.
Acceso remoto al host de control
El acceso remoto (“Remote Access”) son la pantalla, teclado y ratón
redireccionados del sistema de host remoto que controla la RIPC.
Al iniciar el acceso remoto, aparecerá una pantalla que representa la pantalla de
su sistema de host. El acceso remoto proporcionará un rendimiento exactamente
igual desde una ubicación remota al obtenido manejando directamente el propio
ordenador. Dispondrá de la capacidad de utilizar el teclado y el ratón de la forma
habitual; sin embargo, el sistema remoto reaccionará con un ligero retraso ante
las acciones sobre estos dos dispositivos. El tiempo de retardo dependerá del
ancho de banda de la línea a través de la cual se encuentre conectado a la RIPC.
UTILIZACIÓN DE SU RIPC
deberán ser configurados de manera acorde. En otras palabras, si la RIPC está
conectada a su entorno de red local y su conexión a Internet se realiza sólo a través
de un servidor proxy, un error al configurar la NAT correctamente hará muy
improbable que el acceso remoto pueda establecer una conexión. Esto se debe a
que los proxys de red no son capaces de transmitir el protocolo RFB.
Si no se siente seguro sobre este aspecto, consulte con su administrador de
red acerca del entorno de red adecuado.
La ventana de acceso remoto intenta mostrar la pantalla remota en su tamaño
óptimo, de forma que es posible que adapte su tamaño inicialmente para
coincidir con el de la pantalla remota, así como después de un cambio en la
resolución de la pantalla remota. Usted podrá modificar en todo momento el
tamaño de la ventana de acceso remoto utilizando su sistema de ventana local.
Una barra de control en la parte inferior de la ventana de acceso remoto aloja una
barra de control que muestra el estado del acceso remoto y le permite regular sus
ajustes. La siguiente tabla define las opciones del control de acceso remoto:
Control
Descripción
Opciones (“Options”)
Le permite reducir la escala del acceso remoto. Podrá seguir
utilizando el ratón y el teclado, sin embargo, el algoritmo de
escala no conservará todos los detalles de la imagen.
Escala (“Scaling”)
Opciones (“Options”)
Manejo del ratón
(“Mouse Handling”)
Ventana de acceso remoto mostrando la pantalla del escritorio de Windows 2000
Atención: Podrá evitar problemas de comunicación entre los teclado local y remoto
regulando el teclado de su sistema remoto con la misma configuración que la de su
teclado local.
Por ejemplo, si está haciendo uso de un sistema de administración alemán, pero
su host emplea un diseño de teclado para inglés de EE.UU., determinadas teclas
del teclado alemán dejarán de funcionar en base al programa local, sino que
recrearán las funciones de la tecla homóloga en el teclado para inglés de EE.UU..
El applet de Java para acceso remoto trata de establecer su propia conexión TCP con
la RIPC. Su protocolo no es HTTP ni HTTPS, sino que se trata de un protocolo
diferente llamado RFB (Remote Frame Buffer Protocol, Protocolo de memoria de
imagen remota). El RFB actual trata de establecer una conexión con el número de
puerto 443. El entorno de su red local deberá permitir que se efectúe esta conexión,
es decir, si usted está trabajando a través de una red interna privada, los ajustes del
firewall de su NAT (Network Address Translation, Traducción de direcciones de red)
18
El submenú para el manejo del ratón ofrece dos opciones para
sincronizar los punteros de los ratones local y remoto.
Opciones (“Options”)
Ajustes de vídeo
(“Video Settings”)
Abre un panel para modificar los ajustes de vídeo de la RIPC.
Teclas de función directa
(“Hot Keys”)
Teclas especiales para enviar las combinaciones de teclas definidas
al sistema remoto.
Teclas KVM (“KVM Keys”)
Si está definido en los ajustes del puerto KVM, podrá conmutar el
actual puerto KVM enviando la tecla de función directa apropiada
al conmutador KVM.
Opción de lectura
(“Read Option”)
Enciende y apaga el modo de sólo lectura. Si el recuadro de
selección del modo de Monitor se encuentra marcado, el acceso
remoto no aceptará ninguna entrada local ni para el teclado ni
para el ratón. El símbolo indica si el modo de monitor se encuentra
o no activo actualmente.
Regulación automática
(“Auto Adjust”)
Inicia el procedimiento de regulación automática para determinar
los ajustes para la mejor calidad visual de la imagen que está
siendo mostrada en la RIPC actualmente.
19
P74238ea_F1DE101G-man.qxd
28-04-2003
09:34
Page 20
UTILIZACIÓN DE SU RIPC
Opciones de acceso remoto
La barra de título del acceso remoto muestra información sobre el tráfico de
red de entrada (“In:”) y de salida (“Out:”) . Si está utilizando la codificación
comprimida, se indicará el tráfico de entrada tanto comprimido como no
comprimido.
Barra de título del acceso remoto
Unidad de gestión de alimentación
Proporciona un applet de Java que permite al protocolo telnet abrir una
conexión con la RIPC. Su uso principal es la opción de transferencia para el
puerto serie 1, sin embargo, también le permite conectar con un cliente Telnet
estándar. El acceso con Telnet deberá ser activado en los ajustes de seguridad.
Sincronización de ratones de la RIPC
La RIPC efectúa un desafío habitual para dispositivos KVM, que es la
sincronización entre los cursores de los ratones local y remoto. Para hacerlo,
emplea un algoritmo de sincronización inteligente.
Existen tres formas de volver a sincronizar las señales del ratón local y el
ratón remoto:
Sincronización rápida (“Fast Sync”)
La sincronización rápida es empleada para corregir una divergencia temporal
pero fija. Seleccione la opción por medio del menú de opciones del acceso
remoto o, si ha definido una secuencia de función directa para la
sincronización, utilícela.
Detección de la sincronización (“Sync Detect”)
Si la sincronización no funciona, o si han sido modificados los ajustes del
ratón en el sistema de host, utilice la re-sincronización inteligente. Este
método precisa algo más de tiempo que la sincronización rápida y puede ser
iniciado a través del menú de opciones del acceso remoto. La sincronización
inteligente necesita una imagen correctamente regulada. Utilice la función de
regulación automática o la corrección manual en el panel de ajustes de vídeo
(“Video Settings”) para colocar la imagen.
20
UTILIZACIÓN DE SU RIPC
Modo de ratón único (directo)
Si fallan todas las opciones de sincronización, aún será posible trabajar con el
ratón remoto seleccionando el modo de ratón único, utilizando el botón de
imagen. Cuando está activado, todos los movimientos del ratón son
transmitidos directamente al host, de forma que puede regular los ajustes del
ratón del host en valores menos extremos, o trabajar en este modo si la
aceleración del ratón se encuentra apagada. En este modo todas las opciones
de sincronización llevan a cabo una sincronización rápida.
Limitaciones de la sincronización de ratones
Si bien el algoritmo inteligente funciona sin problemas en situaciones
normales, existen algunas limitaciones especiales que pueden impedir que la
sincronización funcione correctamente:
Controlador especial de ratón
Se trata de controladores de ratón que influyen en el proceso de
sincronización, provocando que los punteros de los ratones se encuentren
desincronizados. Si esto sucede, asegúrese de que no esté empleando un
controlador de ratón específico de un vendedor en su sistema de host.
Imagen con regulación deficiente
Para que funcione la sincronización inteligente, es necesario contar con una
imagen correctamente regulada. Utilice la función de regulación automática o
la corrección manual en el panel de ajustes de vídeo (“Video Settings”) para
colocar la imagen.
Escritorio activo
Compruebe si tiene activada la opción de escritorio activo (“Active Desktop”)
de Microsoft Windows. En caso afirmativo, no utilice un fondo plano; emplee
algún tipo de fondo decorado. Asimismo, puede desactivar por completo el
escritorio activo.
21
P74238ea_F1DE101G-man.qxd
28-04-2003
09:34
Page 22
UTILIZACIÓN DE SU RIPC
Ajustes de vídeo
(“Video Settings”)
SEGURIDAD
Puertos & protocolos
Exigir HTTPS (“Force HTTPS”)
Cuando se encuentra activada esta opción, el acceso al frontal de web sólo
será posible utilizando una conexión HTTPS. La RIPC no funcionará en el
puerto HTTP para conexiones entrantes.
La RIPC incorpora un panel para
configurar las siguientes opciones de
vídeo, disponibles en el menú de
opciones del acceso remoto.
Atención: Los controles de brillo
(“Brightness”) y contraste (“Contrast”)
afectan a todos los modos y puertos KVM
de forma global; el resto de ajustes son
modificados específicamente para cada
modo de cada puerto KVM.
Puerto HTTPS (“HTTPS Port”)
Número de puerto en el que está configurado el servidor HTTPS. Si se deja
inutilizado o abierto, se empleará el valor por defecto.
Panel de ajustes de vídeo
Compensación horizontal (“Horizontal Offset”): Utilice los botones de la
parte izquierda y derecha para desplazar una imagen en sentido horizontal
durante todo el tiempo que se mantenga seleccionada esta opción.
Puerto HTTP (“HTTP Port”)
Número de puerto en el que está configurado el servidor HTTP de la RIPC. Si se
deja inutilizado o abierto, se empleará el valor por defecto.
Puerto Telnet (“Telnet Port”)
Número de puerto en el que está configurado el servidor Telnet de la RIPC. Si
se deja inutilizado o abierto, se empleará el valor por defecto.
Compensación vertical (“Vertical Offset”): Utilice los botones de la parte
izquierda y derecha para desplazar una imagen en sentido vertical durante todo
el tiempo que se mantenga seleccionada esta opción.
Reiniciar este modo (“Reset this Mode”): Restablece los ajustes por defecto
de fábrica para un modo específico.
Reiniciar todos los modos (“Reset all Modes”): Restablece todos ajustes por
defecto de fábrica.
Guardar cambios (“Save Changes”): Guarda los cambios de forma permanente.
Deshacer cambios (“Undo Changes”): Restablece los ajustes precedentes.
Menú de Puertos & protocolos
22
23
P74238ea_F1DE101G-man.qxd
28-04-2003
09:34
Page 24
SEGURIDAD
SEGURIDAD
Firewall
Gestión de certificados
Parámetros de control del acceso IP
Parámetro
Descripción
Activar Firewall
(“Enable Firewall”)
Activa el control de acceso basado en direcciones IP de origen.
Política por defecto
(“Default Policy”)
Esta opción controla los paquetes IP entrantes que no coincidan
con ninguna de las normas configuradas. Éstos podrán ser
aceptados o rechazados.
La RIPC emplea el protocolo SSL
para todo tráfico de red
encriptado entre ella misma y un
cliente conectado. Durante el
establecimiento de la conexión,
la RIPC deberá descubrir su
identidad a un cliente empleando
un certificado criptográfico.
Atención: Si establece está opción en “DROP” (Eliminar) y no tiene
“ACCEPT” (Aceptar) las normas configuradas, el acceso a la red a
través de la LAN se encontrará desactivado. Para activar de nuevo
el acceso podrá modificar los ajustes de seguridad a través del
módem o de la línea ISDN, o desactivando temporalmente el
control de acceso IP con el procedimiento de configuración inicial.
Solicitud de certificado SSL
Número de norma
(“Rule Number”)
Aquí deberá estar contenido el número de una norma por la cual
se aplicarán las siguientes órdenes. Este campo será ignorado en
caso de agregar una nueva norma.
Parámetro
Descripción
Nombre común
(“Common name”)
Este es el nombre de red de la RIPC una vez que se encuentra
instalada en la red del usuario.
IP/Máscara
(“IP/Mask”)
Especifica la dirección IP o el rango de direcciones IP para el que
se aplica la norma. Ejemplo (el número encadenado a una dirección
IP por medio de un ‘/’ es el número de bits válidos que serán
empleados de la dirección IP proporcionada):
Unidad organizativa
(“Organizational unit”)
Este campo se emplea para especificar a qué departamento
pertenece la RIPC dentro de una organización.
192.168.1.22 o 192.168.1.22/32 se corresponde con la dirección IP
192.168.1.22
192.168.1.0/24 se corresponde con todos los paquetes IP con
direcciones origen desde 192.168.1.0 hasta 192.168.1.255
0.0.0.0/0 no se corresponde con ningún paquete IP
Localidad/Ciudad
(“Locality/City”)
La ciudad en la que se ubica la organización.
Estado/Provincia
(“State/Province”)
El estado en el que se ubica la organización.
País (“Country”)
El país en el que se ubica la organización. Se trata del código
ISO de dos letras, p. ej. US para EE.UU..
Contraseña de comprobación
(“Challenge Password”)
Algunas autoridades de certificación requieren una contraseña
de comprobación para autorizar posteriores modificaciones en el
certificado (p. ej. la revocación del certificado). La longitud
mínima de esta contraseña es de cuatro caracteres.
Confirmar contraseña de
comprobación (“Confirm
Challenge Password”)
Confirmación de la contraseña de comprobación.
E-mail
La dirección de e-mail de una persona de contacto de seguridad
que sea responsable de la RIPC.
Longitud de la clave
(“Key length”)
Se trata de la longitud en bits de la clave generada. Se supone
que 1024 bits son suficientes en la mayoría de los casos. Las
claves de mayor tamaño pueden provocar un tiempo de respuesta
más lento de la RIPC durante el establecimiento de la conexión.
Menú de ajustes de firewall
24
Organización (“Organization”) El nombre de la organización a la que pertenece la RIPC.
25
P74238ea_F1DE101G-man.qxd
28-04-2003
09:34
Page 26
SEGURIDAD
SEGURIDAD
Información necesaria para la solicitud del certificado
Solicitud de firma de certificado SSL
No obstante, es posible generar e instalar un certificado nuevo, exclusivo para
una tarjeta determinada. Con este fin, la RIPC está capacitada para generar
una nueva clave criptográfica y la solicitud de firma de certificado asociada
que deberá ser corroborada por una autoridad de certificación (CA). La
autoridad de certificación verificará que usted es quien dice ser y firmará y
emitirá un certificado SSL para usted.
Atención: Si destruye la CSR de la RIPC, ¡no habrá forma de recuperarla! Si la borra
por error, repita los tres pasos anteriores.
Ajustes & Configuración de red
Parámetros de ajustes de red
Parámetro
Descripción
Dirección IP (“IP address”)
Dirección IP con su formato habitual con puntos.
1. Cree una solicitud de firma de certificado SSL utilizando el panel mostrado en
la figura de la parte inferior (“Security Settings” [Ajustes de seguridad]
“SSL Settings” [Ajustes SSL]
“Create your own SSL certificate” [Crear su
propio certificado SSL]). Rellene la serie de campos que se explican en la
tabla posterior. Una vez realizados estos pasos, haga clic en “Create CSR”
(Crear solicitud de firma de certificado) y se iniciará la creación de la
solicitud de firma de certificado (CSR, Certificate Signing Request). La CSR
puede ser descargada en su equipo de administración con el botón “Download
CSR” (Descargar CSR) (véase la figura de la parte inferior).
Máscara de subred
(“Subnet mask”)
La máscara de red de la red local.
Dirección IP de gateway
[pasarela]
(“Gateway IP address”)
La gateway (pasarela) de la red.
1. IP del servidor DNS
(“DNS Server IP”)
Dirección IP del servidor de nombres de dominio (DNS, Domain
Name Server) en formato con puntos. Esta opción puede ser
dejada en blanco, sin embargo, la RIPC no será capaz de
efectuar la resolución del nombre.
2. Envíe la CSR almacenada a una CA para su certificación. Obtendrá el nuevo
certificado de la CA transcurrido el proceso habitual de autenticación.
2. IP del servidor DNS
(“DNS Server IP”)
Dirección IP del servidor de nombres de dominio (DNS, Domain
Name Server) secundario en formato con puntos. Será empleado
en el caso de que el servidor DNS primario no pueda ser contactado.
Activar la unidad de gestión
de la alimentación (“Enable
Power Management Unit”)
Si está opción se encuentra activada será posible el acceso a
través de la unidad de gestión de la alimentación. Por esta
razón, y con el fin de garantizar el más elevado nivel de
seguridad, recomendamos desactivar este parámetro.
Los siguientes pasos son necesarios para crear e instalar el certificado SSL
de la RIPC:
3. Cargue el certificado en la RIPC utilizando el panel de carga (“Upload”)
mostrado en la figura de la parte inferior.
(Atención: la modificación de los ajustes de red de la RIPC puede provocar la
pérdida de conexiones. Si modifica los ajustes a distancia, asegúrese de que todos
los valores sean correctos para poder seguir accediendo a la RIPC.)
26
27
P74238ea_F1DE101G-man.qxd
28-04-2003
09:34
Page 28
MENÚ DE AJUSTES DE RED
Ajustes de acceso remoto
MENÚ DE AJUSTES DE RED
Tabla de Opciones de acceso remoto
Si bien algunos parámetros pueden ser modificados mientras se encuentra
activado el acceso remoto, otros deberán ser configurados en los ajustes del
acceso remoto antes de activarlo.
Control
Descripción
Codificación de la
transmisión
(“Transmission
Encoding”)
El ajuste de codificación de la transmisión le permite modificar el
algoritmo de codificación de la imagen empleado para transmitir los
datos de vídeo a la ventana de acceso remoto (“Remote Access”). Con
estos ajustes es posible optimizar la velocidad de la pantalla remota
dependiendo del número de usuarios paralelos y del ancho de banda de
la línea de conexión (módem, ISDN, DSL, LAN, etc.).
“Normal”: el algoritmo de condificación estándar, apropiado para muchos
usuarios paralelos en un entorno de LAN. Las aplicaciones normales
generan un tráfico de hasta 15Kbps.
“Compressed” (Comprimido): el flujo de datos entre la RIPC y la ventana
de acceso remoto será comprimido de forma adicional para ahorrar ancho
de banda. La codificación de compresión es apropiada para un entorno
de módem o ISDN. No obstante, debido a que la compresión precisa un
tiempo de procesamiento en la propia RIPC, esta codificación no deberá
ser utilizada cuando muchos usuarios paralelos quieran acceder a la RIPC
al mismo tiempo.
Emplear el plug-in del
navegador Java de Sun
(“Use Sun's Java
Browser Plug-In”)
Ordena al navegador de Internet de su sistema de administración que
emplee la JVM (Java Virtual Machine, Máquina virtual de Java) de Sun
Microsystems. La JVM en el navegador se emplea para ejecutar el código
para la ventana de acceso remoto, que es en realidad un applet de Java.
Si marca este recuadro por primera vez en su sistema de administración y
el plug-in de Java apropiado aún no se encuentra instalado en su
sistema, será descargado e instalado automáticamente. Sin embargo, con
el fin de hacer posible la instalación, deberá hacer clic en “YES” (Sí) en
el cuadro de diálogo correspondiente. El volumen de la descarga es de
apropximadamente 11MB. La ventaja de descargar la JVM de Sun reside
el proporcionar una máquina virtual de Java estable e idéntica para
diferentes plataformas. El software del acceso remoto (“Remote Access”)
está optimizado para esta versión de JVM y ofrece una amplia gama de
funcionalidades cuando se ejecuta en la JVM de Sun. (Consejo: si está
conectado a Internet a través de una conexión lenta, también podrá
preinstalar la JVM es su equipo de administración. El software se
encuentra disponible en el CD suministrado conjuntamente con la RIPC.)
Tecla de función
directa de ratón
(“Mouse Hot Key”)
Permite especificar una combinación para una tecla de función directa
que inicia bien el proceso de sincronización de ratones si es pulsada en
acceso remoto, o bien es empleada para salir del modo de un solo ratón.
Los códigos de las teclas están especificados en el anexo C.
Teclas de acceso directo
personalizadas (“UserDefined Hot Keys”)
Las teclas de acceso directo personalizadas simulan combinaciones de
teclas en el sistema remoto que no pueden ser generadas de forma local.
Ajustes de acceso remoto
Atención: Haga clic en “Append” (Agregar) para que los cambios tengan efecto.
28
29
P74238ea_F1DE101G-man.qxd
28-04-2003
09:34
Page 30
MENÚ DE AJUSTES DE RED
Usuarios & contraseñas
MENÚ DE AJUSTES DE RED
Descripción de la tabla de Usuarios & Cotraseñas
En el momento del suministro, todas las RIPC se encuentran preconfiguradas
con un usuario supervisor llamado “administrator” (administrador) que tiene la
contraseña “belkin”. IMPORTANTE: Aegúrese de cambiar la contraseña de
usuario-administrador inmediatamente después de haber instalado la RIPC y de
haber accedido por primera vez a la misma.
Campo
Descripción
Usuarios existentes
Seleccione un usuario existente para su modificación o eliminación.
Una vez que ha sido seleccionado un usuario, haga clic en el botón
de “Lookup User” (Consultar usuario) para ver la información
completa sobre el mismo.
(“Existing Users”)
Nuevo nombre de usuario
(“New User Name”)
Con el fin de crear un nuevo usuario, introduzca en este campo un
nuevo nombre de acceso. El nuevo nombre no podrá existir ya como
usuario. En caso de existir, aparecerá un mensaje de error en la parte
superior del panel.
Nombre de usuario
completo (“Full User
Name”)
Este es el nombre completo del usuario de acceso.
Contraseña (“Password”) La contraseña para el nombre de usuario. Deberá contener al menos
cuatro caracteres.
Confirmar contraseña
Confirmación de la contraseña anterior.
(“Confirm Password”)
Grupo (“Group”)
Panel de Usuarios & contraseñas
La figura de la parte superior muestra el panel de “User & Passwords” (Usuarios
& Contraseñas) del frontal de la RIPC. Su empleo se describe en la tabla
presentada a continuación y el texto siguiente.
30
Asignar este usuario a uno de los siguientes grupos:
“super”
Los usuarios de este grupo disponen de todos los
permisos posibles para controlar el sistema de host y la RIPC;
“administrators” (administradores)
los usuarios asignados a este
grupo pueden controlar el sistema de host; y “users” (usuarios)
este grupo dispone tan solo de permisos de visualización.
La gestión de usuarios de la RIPC permite la existencia de 25 usuarios distintos.
Las siguientes secciones describen la forma de añadir, borrar y modificar usuarios.
Añadir usuario
Rellene los campos “New user name” (Nuevo nombre de usuario), “Full user
name” (Nombre de usuario completo), “Password” (Contraseña) y “Confirm
Password” (Conformar contraseña) mostrados en el panel de Usuarios &
Contraseñas. Como alternativa, seleccione el grupo del cual va a convertirse en
miembro el nuevo usuario. Haga clic en el botón “Create User” (Crear usuario).
Borrar usuario
Seleccione un usuario del campo de “Existing users” (Usuarios existentes). Haga
clic en el botón “Lookup” (Consultar). Se mostrará la información completa sobre
los usuarios. Haga clic en el botón “Delete User” (Borrar usuario).
Modificar usuario
Seleccione un usuario del campo de “Existing users” (Usuarios existentes). Haga
clic en el botón “Lookup” (Consultar) para obtener toda la información sobre el
usuario. Todos los campos pueden ser modificados como sea necesario. La antigua
contraseña no será mostrada, pero puede ser modificada. Una vez efectuados
todos los cambios, haga clic en el botón “Modify User” (Modificar usuario).
31
P74238ea_F1DE101G-man.qxd
28-04-2003
09:34
Page 32
MENÚ DE AJUSTES DE RED
Puerto serie
Los ajustes en serie de la RIPC le permiten especificar qué dispositivos están
conectados al puerto serie y cómo utilizarlos. Las opciones están incluidas en
una lista y descritas en la tabla presentada a continuación.
Tabla de ajustes de puertos serie
Función
Descripción
MENÚ DE AJUSTES DE RED
Lógicamente, la conexión con la RIPC utilizando una línea de teléfono supone tan
sólo el establecimiento de una conexión punto a punto exclusiva entre su ordenador
de RIPC y la RIPC. En otras palabras, la RIPC actúa como una proveedor de servicios
de Internet (ISP, Internet Service Provider) al que se puede acceder mediante la
línea de teléfono. La conexión es establecida utilizando el protocolo punto a punto
(PPP, Point-to-Point Protocol). Antes de conectar con la RIPC, asegúrese de
configurar el ordenador de RIPC de la forma correspondiente. Por ejemplo, en los
sistemas operativos Windows, puede configurar una conexión de red telefónica que
tienda por defecto a los ajustes correctos como PPP.
Módem (“Modem”)
Permite el acceso a la RIPC a través del módem; véase
el epígrafe Ajustes del módem para obtener más detalles.
Los ajustes del módem son parte del panel de ajustes serie (véase el menú de
ajustes de puertos serie [Serial Port Settings]).
Acceso al puerto a
través de Telnet
(“Port Access via
Telnet”)
Utilizando esta opción es posible conectar un dispositivo
aleatorio al puerto serie y acceder al mismo (suponiendo
que proporcione soporte a la terminal) a través de Telnet.
Seleccione las opciones apropiadas para el puerto serie y
emplee la unidad Telnet o un cliente Telnet estándar para
conectar con la RIPC.
Tabla de opciones del módem
Parámetro
Velocidad de la línea La velocidad a la que la RIPC se comunica con el módem.
en serie
La mayoría de módems soportan en la actualidad el valor
(“Serial Line Speed”) por defecto de 115200bps. Si está haciendo uso de un
módem antiguo y tiene problemas, pruebe a reducir esta
velocidad.
Secuencia de
inicialización del
módem (“Modem
Init String”)
Menú de ajustes de puertos serie
Ajustes del módem
Descripción
La secuencia de inicialización empleada por la RIPC
para inicializar el módem. El valor por defecto
funcionará con todos los módems estándar actuales
directamente conectados a la línea de teléfono. Si dispone
de un módem especial o si el módem está conectado a un
conmutador de teléfono local que requiera una secuencia
de marcado especial para establecer una conexión con la
red de teléfono pública, podrá modificar este ajuste
introduciendo una nueva secuencia. Consulte el manual
del módem acerca de la sintaxis de comandos AT.
Dirección IP del
Esta dirección IP será asignada a su ordenador de RIPC
cliente
durante el establecimiento de comunicación PPP.
(“Client IP Address”) Debido a que se trata de una conexión IP punto a punto,
es posible prácticamente cualquier dirección IP, pero
deberá asegurarse de que no interfiera con los ajustes
IP de la RIPC y de su ordenador de RIPC. El valor por
defecto funcionará en la mayoría de los casos.
La RIPC ofrece acceso remoto utilizando una línea de teléfono además del
acceso estándar a través del adaptador de Ethernet incorporado. El módem
precisa ser conectado a la interfaz en serie de la RIPC.
32
33
P74238ea_F1DE101G-man.qxd
28-04-2003
09:34
Page 34
MENÚ DE AJUSTES DE RED
MENÚ DE AJUSTES DE RED
Ajustes de teclado/ratón
La RIPC soporta diferentes modelos de teclado y ratón. El panel mostrado en el
menú de ajustes de teclado/ratón (“Keyboard/Mouse Settings”) es empleado
para regular los ajustes (véase la tabla de la parte inferior).
Tabla de opciones de teclado/ratón
Control
Descripción
Puerto KVM deseado
Selecciona el puerto KVM al que van a ser aplicados los
(“Targeted KVM Port”) ajustes realizados a continuación. Al seleccionar
“Update” (Actualizar) se mostrarán los valores actuales
para este puerto y será seleccionado para la modificación
de sus ajustes.
Modelo de teclado
(“Keyboard Model”)
Selecciona el modelo de teclado empleado en el sistema
de host remoto.
Modo de ratón
(“Mouse Mode”)
“Automatic” (Automático) Emplea el proceso automático
de sincronización de ratones;
“1: n” representa la escala directa de los movimientos
del ratón entre el puntero local y el puntero remoto, de
forma que pueda mover el ratón incluso y no está
perfectamente sincronizado.
Restablecer
emulación de ratón
/ teclado (“Reset
Mouse/ Keyboard
Emulation”)
Menú de ajustes de teclado/ratón
Conmutadores KVM
Es posible seleccionar el número de puertos empleados por el conmutador KVM
conectado y usted puede asignar un nombre a cada puerto. Con el fin de
permitir la conmutación de puertos KVM a través de la RIPC, será preciso
definir para los mismos las combinaciones de teclas.
Esta opción restablecerá la emulación del teclado y el
ratón de la RIPC para el sistema de host. Utilícela si el
teclado o ratón parecen reaccionar de forma irracional.
Es prácticamente como desconectar los enchufes del
teclado y el ratón y volver a conectarlos de nuevo.
Menú de ajustes KVM
34
35
P74238ea_F1DE101G-man.qxd
28-04-2003
09:34
Page 36
MENÚ DE AJUSTES DE RED
ANEXO A
La sintaxis para definir una nueva tecla de función directa es la siguiente:
< código de tecla > [+| - [_] < código de tecla >]*
Por ejemplo: Ctrl-Ctrl-A-Enter
o Ctrl+A-*1-Enter
Los códigos de múltiples teclas pueden ser encadenados con un signo + o -. El
signo + implica combinaciones de teclas; todas las teclas permanecerán
pulsadas hasta que se llegue a un signo – o al final de la combinación. En este
caso, todas las teclas pulsadas serán soltadas invirtiendo la secuencia de
pulsado. Por lo tanto, el signo – implica pulsaciones de teclas únicas,
independientes, y la acción de soltar las teclas pulsadas. El signo _ (subrayado)
inserta una pausa en la longitud definible por el usuario; es posible encadenar
más de un _ (subrayado). La duración de una única pausa se establece en
milisegundos, utilizando la opción apropiada de la página de ajustes KVM.
Consulte la tabla de teclas de función directa para obtener una lista de los
códigos de teclas que pueden ser empleados con teclas de función directa.
Si los ajustes son correctos, el puerto KVM podrá ser conmutado utilizando la matriz
de conmutación KVM de la página de inicio de la RIPC. La RIPC emplea ajustes de
sincronización del ratón y ajustes de vídeo independientes para cada puerto.
Atención: También es posible aplicar combinaciones de teclas KVM a través del
acceso remoto para conmutar puertos KVM, sin embargo, en este caso, los ajustes
de sincronización de vídeo y ratón serán compartidos entre los puertos y pueden ser
intercambiados de forma no intencionada para uno de dichos puertos.
Firmware
Esta sección contiene un resumen de información acerca de esta RIPC y su
firmware actual, y le permite reiniciar la RIPC. Esta información se encuentra
disponible a través del menú del panel de mantenimiento (“Maintenance Panel”).
Menú del panel de
mantenimiento
36
Actualización del firmware
Las actualizaciones por flash le permiten obtener las últimas actualizaciones de
firmware para su RIPC. Estas actualizaciones garantizan que su RIPC continuará
funcionando con los dispositivos y ordenadores más modernos. Las actualizaciones
de firmware son gratuitas durante toda la vida útil de la RIPC. Visite la página
belkin.com para obtener información y asistencia sobre actualizaciones.
Menú de cargar firmware
Modos de vídeo de la RIPC
La tabla B.1 enumera los modos de vídeo soportados por la RIPC. Utilice
exclusivamente estos modos y no utilice ajustes de vídeo personalizados. Si lo
hace, es posible que su RIPC no sea capaz de detectarlos.
Tabla B.1 Modos de vídeo de la unidad
Resolución (x,y)
Velocidades de actualización (Hz)
640x350
70, 85
640x400
56, 70, 85
640x480
60, 67, 72, 75, 85, 90, 100, 120
720x400
70, 85
800x600
56, 60, 70, 72, 75, 85, 90, 100
832x624
75
1024x768
60, 70, 72, 75, 85, 90, 100
1152x864
75
1152x870
75
1152x900
66, 76
1280x960
60
1280x1024
60
37
P74238ea_F1DE101G-man.qxd
28-04-2003
09:34
Page 38
ANEXO A
La tabla de teclas de función directa (“Hot Key”) muestra los códigos de teclas
utilizados para definir acciones a través de las teclas. Tenga en cuenta que estos
códigos de teclas no representan necesariamente los caracteres de teclas que se
emplean en teclados internacionales. Representan una tecla de un teclado de PC
estándar de 104 teclas con una asignación idiomática de inglés de EE.UU.. No obstante,
la mayoría de las teclas de modificación y otras teclas alfanuméricas empleadas para
crear funciones de acceso directo en los programas de aplicación se encuentran en
la misma posición, independientemente de la asignación idiomática que esté
empleando. Algunas de las teclas tienen también alias, lo que significa que pueden
ser nombradas por dos códigos de teclas (separadas por una coma en la tabla).
Tabla de teclas de función directa
Para estas órdenes…
Tilde
Menos
Igual
Punto y coma
Apóstrofe
Menor que
Coma
Punto
Barra oblicua
Retroceso
Tabulador
Paréntesis izquierdo
Paréntesis derecho
Intro
Bloq Mayús
Barra oblicua inversa
Shift izquierdo, Shift
Control derecho
Shift derecho
Control izquierdo o Control
Alt izquierdo o Alt
Barra de espacio
Salir
F1
F2
F3
F4
F5
F6
F7
F8
F9
F10
…teclee estos caracteres
TILDE
- o MINUS
= o EQUALS
;
‘
< o LESS
,
.
/ ou SLASH
BACK SPACE
TAB
[
]
ENTER
CAPS LOCK
\ o BACK SLASH
LSHIFT o SHIFT
RCTRL
RSHIFT
LCTRL o CTRL
LALT o ALT
SPACE
ESCAPE o ESC
F1
F2
F3
F4
F5
F6
F7
F8
F9
F10
Para estas órdenes…
F11
F12
Imprimir pantalla
Bloqueo desplazamiento
Pausa
Insertar
Inicio
Página anterior
Borrar
Final
Página siguiente
Flecha hacia arriba
Flecha hacia la izquierda
Flecha hacia abajo
Flecha hacia la derecha
Bloqueo números
0 en teclado numérico
1 en teclado numérico
2 en teclado numérico
3 en teclado numérico
4 en teclado numérico
5 en teclado numérico
6 en teclado numérico
7 en teclado numérico
8 en teclado numérico
9 en teclado numérico
Símbolo de suma en teclado numérico
Símbolo de división en teclado numérico
…teclee estos caracteres
F11
F12
PRINTSCREEN
SCROLL LOCK
BREAK
INSERT
HOME
PAGE UP
DELETE
END
PAGE DOWN
UP
LEFT
DOWN
RIGHT
NUM LOCK
NUMPAD0
NUMPAD1
NUMPAD2
NUMPAD3
NUMPAD4
NUMPAD5
NUMPAD6
NUMPAD7
NUMPAD8
NUMPAD9
NUMPADPLUS 0 NUMPAD PLUS
NUMPAD/
Símbolo de multiplicación en teclado numérico NUMPADMUL o NUMPAD MUL
Símbolo de resta en teclado numérico
NUMPADMINUS o NUMPAD MINUS
Intro en teclado numérico
NUMPADENTER
Windows
WINDOWS
Menú
MENU
38
GLOSARIO
ACPI
Una especificación que permite al sistema operativo poner en
práctica gestión de la alimentación y configuración del sistema.
ATX
Advanced Technology Extended (Tecnología avanzada extendida):
una especificación especial para una placa madre introducida por
Intel® en 1995.
DHCP
Dynamic Host Configuration Protocol (Protocolo de configuración
de host dinámico): protocolo para la asignación dinámica de las
configuraciones IP en redes locales.
DNS
Domain Name System (Sistema de nombres de dominio): protocolo
empleado para localizar ordenadores en Internet mediante su nombre.
FAQ
Frequently Asked Question (Pregunta frecuente)
HTTP
Hypertext Transfer Protocol (Protocolo de transferencia de
hipertexto): el protocolo empleado entro los navegadores de
Internet y los servidores.
HTTPS
Hyper Text Transfer Protocol Secure (Protocolo seguro de
transferencia de hipertexto): versión segura del HTTP.
LED
Light Emitting Diode (Diodo de emisión de luz)
MIB
Management Information Base (Base de información de gestión):
describe la estructura de la información de gestión a la que es
posible acceder a través del SNMP.
PS/2
Esta interfaz de dispositivos PS/2 fue desarrollada por IBM® y es
empleada para múltiples ratones y teclados.
SNMP
Simple Network Management Protocol (Protocolo simple de gestión
de red): un protocolo de control y supervisión de la red
ampliamente utilizado.
SSL
Secure Socket Layer (Capa de conexión segura): tecnología de
encriptación para Internet empleada para permitir transmisiones
seguras de datos.
SVGA
Super VGA: un perfeccionamiento del Video Graphics Array (VGA,
Matriz gráfica de vídeo) que proporciona un rendimiento superior
de puntos y resolución.
UTP
Unshielded Twisted Pair (Par trenzado sin blindaje): un cable con
dos conductores trenzados como un par y unidos dentro de la
misma cubierta exterior de PVC.
39
P74238ea_F1DE101G-man.qxd
28-04-2003
09:34
Page 40
PREGUNTAS MÁS FRECUENTES
¿Funciona la RIPC con los Conmutadores KVM OmniView de la serie
ENTERPRISE de Belkin?
Sí.
RESOLUCIÓN DE PROBLEMAS
La calidad de la imagen es mala o presenta niebla.
Pruebe corrigiendo los ajustes de brillo y contraste hasta que se encuentren
fuera del margen en el que la imagen se presenta con niebla. Utilice la
propiedad de regulación automática para corregir una imagen parpadeante.
¿Funciona la RIPC con conmutadores KVM que no sean de Belkin?
Sí, la RIPC funciona con conmutadores KVM PS/2 que no sean de Belkin; sin
embargo, debe saber que es posible que se produzca un empeoramiento del
rendimiento en caso de empleo un conmutador KVM de peor calidad.
Error de acceso.
Utilice la cuenta de administrador para acceder y asegúrese de que su nombre
de usuario y contraseña sean correctos.
¿Qué sistemas operativos soporta la RIPC?
La ventana de acceso remoto no puede conectar con la RIPC.
La RIPC soporta Windows NT, 2000 y XP.
Es posible que un firewall esté evitando el acceso. Asegúrese de que los
números de puerto TCP 443 o 80 estén abiertos para el establecimiento de la
conexión TCP entrante.
¿Puedo utilizar mi RIPC con sistemas operativos que no estén basados en
Microsoft Windows?
Sí, puede utilizar la RIPC con otras plataformas; no obstante, únicamente se
soportarán el teclado y el monitor.
¿Supone la RIPC algún tipo de requisito para los servidores?
No, la RIPC es una solución de 100% que no requiere ningún software adicional
instalado en los servidores.
El ratón remoto no funciona o no de forma sincronizada.
No es posible establecer la conexión con la RIPC.
Compruebe que la conexión de red esté funcionando en general (haga un ping
a la dirección IP de la RIPC). Si no, compruebe el hardware de red.
¿Está encendida la RIPC? Compruebe que la dirección IP de la RIPC y el resto
de ajustes relacionados con el IP sean correctos.
Compruebe que toda la infraestructura IP de su LAN, como enrutadores, etc.,
se encuentre correctamente configurada. Si no funciona un ping, la RIPC no
funcionará.
Asegúrese de que los ajustes del ratón coincidan con los del modelo de ratón.
Las combinaciones especiales de teclas como, por ejemplo, ALT+F2, ALT+F3
son interceptadas por el sistema de la RIPC y no son transmitidas al host.
Cree una orden de teclas de función directa para esta función especial.
En el navegador, las páginas de la RIPC carecen de consistencia o son caóticas.
Asegúrese de que los ajustes de la memoria caché de su navegador sean
correctos. Tenga especial cuidado de que los ajustes de la memoria caché NO
esté configurados en “never check for newer pages” (No buscar nunca páginas
más recientes). En caso contrario, es posible que las páginas de la RIPC se
carguen desde la memoria caché de su navegador y no desde la tarjeta.
40
41
P74238ea_F1DE101G-man.qxd
28-04-2003
09:34
Page 42
INFORMACIÓN
Declaración sobre interferencias de la FCC
(Comisión de comunicaciones de EEUU)
DECLARACIÓN DE CONFORMIDAD CON LAS NORMATIVAS DE
LA FCC SOBRE COMPATIBILIDAD ELECTROMAGNÉTICA
Nosotros, Belkin Corporation, con sede en 501 West Walnut Street, Compton, CA 90220 (EEUU), declaramos bajo
nuestra sola responsabilidad que el producto:
F1DE101G
a los que hace referencia la presente declaración:
cumple con la sección 15 de las normativas de la FCC. Su utilización está sujeta a las siguientes dos condiciones:
(1) este dispositivo no debe provocar interferencias nocivas y (2) este dispositivo debe aceptar cualquier
interferencia recibida, incluidas las interferencias que puedan provocar un funcionamiento no deseado.
Declaración de conformidad con la CE
Nosotros, Belkin Corporation, declaramos bajo nuestra sola responsabilidad que el producto F1DE101G, al que hace
referencia la presente declaración, está en conformidad con el Estándar de Emisiones EN55022, el Estándar de Inmunidad
EN55024, y LVD EN61000-3-2 y EN61000-3-3.
ICES
Este aparato digital de la clase B cumple con la norma canadiense ICES-003. Cet appareil numérique de la classe B est
conforme á la norme NMB-003 du Canada.
Garantía limitada de cinco años para los productos
de Belkin Corporation
Belkin Corporation proporciona para el presente producto una garantía de reparación gratuita, por lo que respecta a mano
de obra y materiales durante el periodo de garantía establecido. En el caso de presentarse un fallo, Belkin decidirá entre la
reparación del mismo o la sustitución del producto, en ambos casos sin costes, siempre que se devuelva durante el periodo
de garantía y con los gastos de transporte abonados al vendedor autorizado de Belkin en el que se adquirió. Es posible que
se solicite una prueba de compra.
Esta garantía perderá su validez en el caso de que el producto haya sido dañado de forma accidental, por abuso o empleo
erróneo del mismo; si el producto ha sido modificado sin la autorización por escrito de Belkin; o si alguno de los números
de serie de Belkin ha sido eliminado o deteriorado.
LA GARANTÍA Y RESTITUCIONES LEGALES ESTABLECIDAS EXPRESAMENTE EN EL PRESENTE ACUERDO SUSTITUYEN A TODAS LAS
DEMÁS, ORALES O ESCRITAS, EXPRESAS O IMPLÍCITAS. BELKIN RECHAZA DE MANERA EXPLÍCITA TODAS LAS DEMÁS GARANTÍAS
IMPLÍCITAS, INCLUYENDO, SIN LIMITACIÓN, LAS GARANTÍAS DE COMERCIABILIDAD Y DE IDONEIDAD PARA UN FIN ESPECÍFICO.
Ningún comerciante, agente o empleado de Belkin está autorizado a realizar ningún tipo de modificación, extensión o
alteración de la presente garantía.
BELKIN NO SE HARÁ EN NINGÚN CASO RESPONSABLE POR LOS DAÑOS IMPREVISTOS O CONSIGUIENTES RESULTANTES DE UN
INCUMPLIMIENTO DE LA GARANTÍA, O BAJO NINGUNA OTRA CONDICIÓN LEGAL, INCLUYENDO, PERO NO EXCLUSIVAMENTE, LOS
BENEFICIOS PERDIDOS, PERIODOS DE INACTIVIDAD, BUENA VOLUNTAD, DAÑOS DURANTE LA REPROGRAMACIÓN O
REPRODUCCIÓN DE CUALQUIERA DE LOS PROGRAMAS O DATOS ALMACENADOS EN O EMPLEADOS CON LOS PRODUCTOS BELKIN.
Algunas jurisdicciones no permiten la exclusión o limitación de los daños imprevistos o consecuentes ni las exclusiones de
las garantías implícitas, por lo que cabe la posibilidad de que las anteriores limitaciones de exclusiones no le afecten. Esta
garantía le proporciona derechos legales específicos y usted puede beneficiarse asimismo de otros derechos legales
específicos que varían entre las distintas jurisdicciones.
42
P74238ea_F1DE101G-man.qxd
28-04-2003
09:34
Page 44
OmniView
Console remota IP
™
Per controllare a distanza un server o diversi
server dotati di switch KVM tramite le reti TCP/IP
belkin.com
Belkin Corporation
501 West Walnut Street
Compton • CA • 90220 • EE.UU.
Tel: +1 310.898.1100
Fax: +1 310.898.1111
Belkin Components, Ltd.
Express Business Park
Shipton Way • Rushden • NN10 6GL
Reino Unido
Tel: +44 (0) 1933 35 2000
Fax: +44 (0) 1933 31 2000
Belkin Components B.V.
Starparc Building • Boeing Avenue 333
1119 PH Schiphol-Rijk • Holanda
Tel: +31 (0) 20 654 7300
Fax: +31 (0) 20 654 7349
Belkin Gmbh
Hanebergstrasse 2 •
80637 München • Alemania
Tel: +49 (0) 89 143 4050
Fax: +49 (0) 89 143 405100
Belkin, Ltd.
7 Bowen Crescent • West Gosford
NSW 2250 • Australia
Tel: +61 (0) 2 4372 8600
Fax: +61 (0) 2 4372 8603
Asistencia técnica de Belkin
EE.UU.: +1 310.898.1100 ext. 2263
+1 800.223.5546 ext. 2263
Europa: 00 800 223 55 460
Australia: 1800 666 040
P74238
©2003 Belkin Corporation. Todos los derechos reservados. Todos los nombres comerciales
son marcas registradas de los respectivos fabricantes enumerados.
Manuale dell’utente
Serie ENTERPRISE
F1DE101G
P74238ea_F1DE101G-man.qxd
28-04-2003
09:34
Page 46
INDICE
Descrizione generale
Introduzione . . . . . . . . .
Contenuto della confezione
Sintesi delle caratteristiche
Requisiti del sistema . . . .
Specifiche . . . . . . . . . . .
Schemi dell’unità RIPC . . .
.
.
.
.
.
.
.
.
.
.
.
.
.
.
.
.
.
.
.
.
.
.
.
.
.
.
.
.
.
.
.
.
.
.
.
.
.
.
.
.
.
.
.
.
.
.
.
.
DESCRIZIONE GENERALE
.
.
.
.
.
.
.
.
.
.
.
.
.
.
.
.
.
.
.
.
.
.
.
.
.
.
.
.
.
.
.
.
.
.
.
.
.
.
.
.
.
.
.
.
.
.
.
.
.
.
.
.
.
.
.
.
.
.
.
.
.
.
.
.
.
.
.
.
.
.
.
.
.
.
.
.
.
.
.
.
.
.
.
.
.
.
.
.
.
.
.
.
.
.
.
.
.
.
.
.
.
.
.
.
.
.
.
.
.
.
.
.
.
.
.
.
.
.
.
.
.
.
.
.
.
.
.
.
.
.
.
.
.1
.1
.2
.3
.4
.5
Installazione
Installazione dell’hardware . . . . . . . . . . . . . . . . . . . . . . . . . . . . . . .6
Configurazione iniziale della rete . . . . . . . . . . . . . . . . . . . . . . . . . .12
Utilizzo dell’unità RIPC
Requisiti fondamentali . . . .
Connessione all’unità RIPC . .
Schermata principale . . . . .
Sconnessione dall’unità RIPC
Control Host Remote Access .
.
.
.
.
.
.
.
.
.
.
.
.
.
.
.
.
.
.
.
.
.
.
.
.
.
.
.
.
.
.
.
.
.
.
.
.
.
.
.
.
.
.
.
.
.
.
.
.
.
.
.
.
.
.
.
.
.
.
.
.
.
.
.
.
.
.
.
.
.
.
.
.
.
.
.
.
.
.
.
.
.
.
.
.
.
.
.
.
.
.
.
.
.
.
.
.
.
.
.
.
.
.
.
.
.
.
.
.
.
.
.
.
.
.
.
.
.
.
.
.
.
.
.
.
.
.
.
.
.
.
.
.
.
.
.
.
.
.
.
.
.15
.16
.17
.18
.18
Protezione
Porte e protocolli . . . . . . . . . . . . . . . . . . . . . . . . . . . . . . . . . . . .23
Firewall . . . . . . . . . . . . . . . . . . . . . . . . . . . . . . . . . . . . . . . . . . .24
Gestione dei certificati . . . . . . . . . . . . . . . . . . . . . . . . . . . . . . . .25
Menu di impostazione rete
Impostazioni di Remote Access
Utenti e password . . . . . . . . .
Porta seriale . . . . . . . . . . . . .
Impostazioni tastiera/mouse . .
Switch KVM . . . . . . . . . . . . .
.
.
.
.
.
.
.
.
.
.
.
.
.
.
.
.
.
.
.
.
.
.
.
.
.
.
.
.
.
.
.
.
.
.
.
.
.
.
.
.
.
.
.
.
.
.
.
.
.
.
.
.
.
.
.
.
.
.
.
.
.
.
.
.
.
.
.
.
.
.
.
.
.
.
.
.
.
.
.
.
.
.
.
.
.
.
.
.
.
.
.
.
.
.
.
.
.
.
.
.
.
.
.
.
.
.
.
.
.
.
.
.
.
.
.
.
.
.
.
.
.
.
.
.
.
.
.
.
.
.
.28
.30
.32
.34
.35
Allegato A
Firmware di aggiornamento . . . . . . . . . . . . . . . . . . . . . . . . . . . . . .37
Modalità video dell’unità RIPC . . . . . . . . . . . . . . . . . . . . . . . . . . . .37
Tabella dei tasti di scelta rapida . . . . . . . . . . . . . . . . . . . . . . . . . . .38
Glossario . . . . . . . . . . . . . . . . . . . . . . . . . . . . . . . . . . . . . . . . . . .39
Domande frequenti
. . . . . . . . . . . . . . . . . . . . . . . . . . . . . . . . . . .40
Introduzione
Congratulazioni per aver acquistato questa console remota IP (l’unità RIPC)
OmniView Serie ENTERPRISE di Belkin. La nostra vasta gamma di soluzioni KVM
rappresenta in maniera esemplare l’impegno di Belkin a voler fornire prodotti
di alta qualità, durevoli e ad un prezzo ragionevole. Progettata per consentirvi
di controllare il vostro computer o switch KVM da qualsiasi luogo nel mondo,
attraverso qualsiasi browser web, questa unità RIPC può essere facilmente
configurata per essere inserita nella LAN esistente, grande o piccola che sia.
Belkin ha progettato e messo a punto questa unità RIPC pensando alle
esigenze di gestione del server. Il risultato è rappresentato da una soluzione di
controllo remoto potente e tuttavia facile da installare, in grado di superare
tutte le altre soluzioni con caratteristiche e funzioni avanzate.
Questo manuale contiene tutte le informazioni necessarie sull’unità RIPC,
dall’installazione, al funzionamento, fino all’eliminazione di eventuali anomalie,
nell’improbabile possibilità che si verifichi un problema.
Grazie per aver acquistato la Console Remota IP OmniView della Serie
ENTERPRISE. Sappiamo quanto sia importante per voi il vostro lavoro e siamo
certi che ben presto capirete da soli per quale motivo in tutto il mondo siano
utilizzati oltre un milione di prodotti OmniView Belkin.
Contenuto della confezione
•
•
•
•
•
•
•
•
Una console remota IP OmniView della Serie ENTERPRISE.
Un kit di cavi PS/2
Un alimentatore di corrente 5V DC, 2000mA
Manuale utente
Guida di installazione rapida
Cartolina di registrazione
Staffe di montaggio rack con rispettive viti
Un cavo DB9
Rilevazione e risoluzione delle anomalie . . . . . . . . . . . . . . . . . . . . . .41
Informazioni . . . . . . . . . . . . . . . . . . . . . . . . . . . . . . . . . . . . . . . . .42
1
P74238ea_F1DE101G-man.qxd
28-04-2003
09:34
Page 2
DESCRIZIONE GENERALE
DESCRIZIONE GENERALE
Sintesi delle caratteristiche
Requisiti del sistema
Supporto di un utente digitale
Consente ad un utente con accesso digitale di comandare un computer o uno
switch KVM tramite il browser web.
Requisiti hardware
Compatibilità con il browser web
Qualsiasi computer dotato di Microsoft® Internet Explorer versione 5.5 o superiore
è in grado di accedere all’unità RIPC. Non è necessario alcun software brevettato.
Possibilità di montaggio in rack salvaspazio
L’unità RIPC è sufficientemente compatta da poter essere appoggiata sulla
scrivania, dietro ad un’altra periferica o collegata sul lato del proprio rack
server con il minimo ingombro.
Tasti di accesso rapido definiti dall’utente
I tasti di accesso rapido simulano i tasti presenti sul sistema remoto e che non
possono essere generati a livello locale.
Aggiornamenti rapidi
Gli aggiornamenti rapidi consentono all’utente di disporre sempre dei più
recenti aggiornamenti per la propria unità RIPC. Questi aggiornamenti
garantiscono che l’unità RIPC possa funzionare anche con le periferiche ed i
computer più recenti. Gli aggiornamenti firmware sono gratuiti per tutta la
durata del prodotto. Per maggiori informazioni ed assistenza sugli
aggiornamenti, potete visitare il sito belkin.com.
•
•
•
•
•
•
•
•
Console Remota IP OmniView della Serie ENTERPRISE (fornita).
Kit di cavi PS/2 (fornito)
Alimentatore di corrente 5V DC, 2000mA (fornito)
Tastiera, monitor, e mouse
Connessione alla rete utilizzando la porta 10/100Base-T Ethernet (RJ45)
Cavo incrociato CAT5e
Cavo diretto CAT5e
Staffe di montaggio rack con rispettive viti (comprese per eventuale
installazione su rack)
Requisiti del sistema
• Microsoft Internet Explorer 5.5 e superiore
• Server con sistema operativo Windows® NT®, XP, e 2000.
Display dei LED
Posizionato sul lato anteriore dell’unità RIPC, il display dei LED offre un
metodo semplice per monitorare lo stato della propria connessione, del
collegamento e dell’attività.
Risoluzione video
Con una larghezza di banda di 117 MHz, questa unità RIPC è in grado di
supportare risoluzioni video per un massimo di 1280x1024 a 60Hz. Per
mantenere l’integrità del segnale ed ottenere i migliori risultati, vi consigliamo
di utilizzare i cavi video Belkin.
Interfaccia utente avanzata basata sul web
Tutte le funzioni dell’unità RIPC possono essere impostate facilmente tramite il
browser web, senza richiedere altro software. Non ci sono dischetti da installare
o da conservare e le funzioni di installazione possono essere modificate ed
eseguite in modo rapido e semplice da qualsiasi computer collegato in rete.
2
3
P74238ea_F1DE101G-man.qxd
28-04-2003
09:34
Page 4
DESCRIZIONE GENERALE
Specifiche
DESCRIZIONE GENERALE
Schemi dell’unità RIPC
Numero articolo: F1DE101G
Alimentazione: 5V DC, 2.000mA
LED di connessione
Connessione di rete: connessione 10/100Base-T (connettore standard RJ45)
Emulazione tastiera: PS/2
Emulazione mouse: PS/2
Monitor supportati: supporta tutti i modi grafici VESA ed i modi di testo
Connection
Remote IP Console
Risoluzione massima: 1280x1024 a 60Hz
Link / Activity
Larghezza di banda: 117 MHz
Entrata tastiera: 6-pin miniDIN (PS/2)
Entrata mouse: 6-pin miniDIN (PS/2)
Porte computer/KVM: 1
LED di indicazione collegamento/attività
Porta VGA: tipo 15-pin HDDB
Indicatori LED: 2
Jack di alimentazione
Alloggiamento: in metallo
Porta seriale 02
Porta VGA
CPU/KVM
Porta VGA
Console
Porta LAN
Dimensioni: 43,1 x 144,7 x 17,78 cm
Peso: 800g
Temperatura d’esercizio: da 0 a 40°
Temperatura di conservazione: da 40 a 75° C
Serial 02
power
console
CPU/KVM
Umidità: 0-80% RH, non condensante
Altitudine massima: 3000 metri
Serial 01
reset
LAN
Garanzia: 1 anno
Nota: le specifiche sono soggette a variazioni senza obbligo di preavviso.
Porta seriale 01
Pulsante di reset
Porta tastiera
console
Porta tastiera
CPU/KVM
Porta mouse
console
4
5
Porta mouse
CPU/KVM
P74238ea_F1DE101G-man.qxd
28-04-2003
09:34
Page 6
INSTALLAZIONE
INSTALLAZIONE
Installazione dell’hardware
1. Scollegare il server o disattivare lo switch KVM.
Installazione dell’unità RIPC in un rack di server:
2. Collegare la tastiera ed il mouse PS/2 alle rispettive porte per la “Console”.
L’unità RIPC viene fornita con alcune staffe regolabili ideali per il montaggio
su rack da 19 pollici.
1. Applicare la staffa fornita sul lato superiore ed inferiore dell’unità RIPC
utilizzando le viti Phillips fornite.
2. Montare l’unità RIPC sul rack.
Nota: le viti di montaggio per il rack non sono comprese. Utilizzare le viti specifiche
del produttore del rack.
*** Precauzioni ed avvertimenti ***
Prima di tentare di collegare qualsiasi periferica all’unità RIPC o al(ai)
computer, accertarsi che tutti gli apparecchi e le periferiche siano spenti.
La Belkin Corporation declina qualsiasi responsabilità per eventuali danni
causati da un mancato adempimento a queste indicazioni.
Serial 02
power
console
Serial 01
LAN
reset
F10
F11
HOME
PG UP
PG DN
HELP
CAPS
`
F9
num
lock
1
2
3
4
5
6
7
9
8
-
0
=
delete
]
[
P
CPU/KVM
cap
lock
pg up
=
/
7
8
9
4
5
6
1
2
3
-
+
K
L
;:
ESC
return
'"
shift
PC
^
clt
<
alt
OPT
+
>
0
3. Prendere il cavo video collegato al monitor VGA e collegarlo alla porta
“Console”.
6
7
P74238ea_F1DE101G-man.qxd
28-04-2003
09:34
Page 8
INSTALLAZIONE
INSTALLAZIONE
Collegamento al computer o allo switch KVM
Collegamento al computer o allo switch KVM
Utilizzando il kit di cavi PS/2 fornito, collegare un’estremità dei cavi VGA e
PS/2 al proprio server. Collegare l'altra estremità alle porte “CPU/KVM” previste
sul retro dell’unità RIPC.
Utilizzando il kit di cavi PS/2 fornito, collegare un’estremità dei cavi VGA e
PS/2 all’unità RIPC sullo switch KVM. Collegare l'altra estremità alle porte
“CPU/KVM” previste sul retro dell’unità RIPC.
Serial 02
power
Serial 01
console
reset
CPU/KVM
LAN
Serial 02
power
Serial 01
console
CPU/KVM
LAN
reset
console
bank
select
USB
flash
daisy chain IN
CPU 01/02
CPU 03/04
CPU 05/06
CPU 07/08
1 2 3 4
reset
8
PS/2
daisy chain OUT
90-264 VAC. 47-63 Hz
9
P74238ea_F1DE101G-man.qxd
28-04-2003
09:34
Page 10
INSTALLAZIONE
INSTALLAZIONE
Accensione dell’unità RIPC
Configurazione iniziale della rete
1. Collegare l’alimentatore ad una presa di alimentazione disponibile.
1. Utilizzando un cavo incrociato RJ45, collegare un’estremità al computer e
l’altra estremità alla porta contrassegnata con la dicitura “Network”.
2. Inserire la spina nella presa di alimentazione sul retro dell’unità RIPC per
alimentare l’unità.
Serial 02
power
Serial 01
console
reset
CPU/KVM
LAN
Serial 02
power
Serial 01
console
reset
CPU/KVM
LAN
2. Impostare l’indirizzo IP sul proprio computer in modo da farlo rientrare nella
stessa gamma 1.2.3.4 (per esempio: 1.2.3.6).
3. Aprire il browser web Microsoft® Internet Explorer.
4. Inserire l’indirizzo IP “1.2.3.4”.
5. Inserire il nome di login predefinito “administrator”.
3. Accendere lo switch KVM. Se non si disponesse di uno switch KVM,
procedere con l’accensione dei computer.
6. Inserire la password predefinita “belkin”.
10
11
P74238ea_F1DE101G-man.qxd
28-04-2003
09:34
Page 12
INSTALLAZIONE
INSTALLAZIONE
Configurazione iniziale della rete
Remote Access
7. In“Setting &
Configurations”
(Impostazione e
configurazioni), fare clic
su “Network” (Rete).
(Nota: disattivare la
casella “DHCP”).
Remote Access è un’applet Java™ che consente di visualizzare lo schermo, la
tastiera ed il mouse del sistema host remoto ai quali è collegata l’unità RIPC.
Il browser web utilizzato per accedere all’unità RIPC deve prevedere la presenza
del Java Runtime Environment, versione 1.1 o superiore. Il modulo Remote
Access consente di ottenere risultati molto simili a quelli ottenibili stando
seduti direttamente davanti al computer. Tastiera e mouse potranno essere
utilizzati come sempre, anche se il sistema remoto potrà reagire con un
leggero ritardo ai comandi di queste due periferiche. La durata del ritardo
dipenderà dalla larghezza di bando della linea attraverso la quale l’utente è
collegato all’unità RIPC. Aprire l’applet selezionando il link adatto dallo schema
di navigazione HTML.
8. Inserire le impostazioni
di rete desiderate e fare
clic su “Apply Changes”
(Esegui modifiche) per
salvare le nuove
impostazioni di rete.
Sezione inferiore dell’applet di Remote Access
L’applet di Remote Access ha le seguenti caratteristiche:
Pulsante di autoregolazione
Se la risoluzione video ottenuta fosse di qualità molto bassa o risultasse in
qualche modo distorta, premere il pulsante ed attendere alcuni secondi,
consentendo all’unità RIPC di eseguire le regolazioni necessarie per ottenere la
qualità video migliore possibile.
Sincronizzazione
Questa opzione consente di sincronizzare il cursore del mouse locale con quello
remoto.
9. Ripristinare le impostazioni locali dell’indirizzo IP sul computer utilizzato
per la configurazione dell’unità RIPC.
Collegamento dell’unità RIPC alla rete
Collegare l’unità RIPC alla rete usando un cavo diretto di rete RJ45 di
categoria 5.
Impostazioni video
Questa opzione consente di aprire una nuova finestra, dotata degli elementi
necessari per controllare le impostazioni video dell’unità RIPC. Alcuni valori
relativi alla luminosità e al contrasto dell’immagine visualizzata possono essere
modificati, migliorando in questo modo la qualità video. E’ possibile anche
tornare alle impostazioni standard per tutte le modalità video o soltanto per
quella corrente.
13
12
P74238ea_F1DE101G-man.qxd
28-04-2003
09:34
Page 14
INSTALLAZIONE
Configurazione tramite collegamento seriale
In un computer con installato il software HyperTerminal Services, collegare
un’estremità del cavo DB) seriale fornito al computer e l’altra estremità alla
porta contrassegnata con “Serial 1” sull’unità RIPC.
Aprire il software HyperTerminal ed utilizzare i seguenti parametri:
Parametri della linea seriale
Parametro
Valore
Bit/secondo
115200
Bit di dati
8
Parità
Nessuna
Bit di arresto
1
UTILIZZO DELL’UNITÀ RIPC
Requisiti fondamentali
Le funzioni dell’unità RIPC prevedono la presenza di un sistema operativo e di
alcune applicazioni integrate con diverse interfacce utente standard. Le
informazioni riportate di seguito descrivono la modalità di utilizzo in dettaglio.
E’ possibile accedere a tutte le interfacce tramite il protocollo TCP/IP, e le stesse
possono essere utilizzate o tramite una scheda Ethernet integrata o il modem.
Le interfacce supportate sono le seguenti:
HTTP/HTTPS: l’accesso più completo viene fornito da un server web integrato,
mentre l’ambiente dell’unità RIPC può essere controllato da un browser web
standard. In base al tipo di browser web utilizzato, si può accedere alla scheda
dell’unità RIPC utilizzando il protocollo HTTP non protetto oppure, se il
browser lo supporta, il protocollo HTTPS crittografato. E’ consigliabile utilizzare
sempre i protocolli HTTPS, dove possibile.
Telnet: per accedere ad una periferica arbitraria collegata ad una delle porte
seriali dell’unità RIPC tramite un terminale, è possibile utilizzare un client
standard telnet
Controllo di flusso Nessuno
A questo punto si è in grado di impostare la propria configurazione di rete
sull’unità RIPC.
Per utilizzare la finestra Remote Access del proprio sistema host, il browser
deve prevedere la presenza di un Java Runtime Environment, versione 1.1 o
superiore. Tuttavia, anche nel caso il browser utilizzato non avesse alcun
supporto Java, come nel caso di piccole periferiche palmari, si può continuare
comunque a gestire il proprio sistema host remoto tramite i modelli di gestione
visualizzati sul browser stesso.
E’ consigliabile utilizzare i seguenti browser nel caso si debba eseguire un
collegamento non protetto con l’unità RIPC.
Microsoft Internet Explorer versione 5.5 o superiore su Windows 98, Me, 2000 e XP
Netscape® Navigator® 7.0 o Mozilla 1.0 su Windows 98, Me, 2000, XP, Linux® e
altri sistemi operativi tipo UNIX®
Per accedere al sistema di host remoto utilizzato una connessione crittografata, è
necessario un browser in grado di supportare il protocollo HTTPS. Una protezione
sicura è garantita soltanto utilizzando una lunghezza di codice di 128 bit. A causa
di alcune regole antecedenti stabilite dalle autorità degli Stati Uniti, molti vecchi
browser non dispongono di un algoritmo di crittografia potente da 128 bit.
Internet Explorer 5.0, previsto in Windows Me e 2000, supporta una lunghezza
codice di soltanto 56 bit. Ulteriori informazioni sulla lunghezza del codice di
Internet Explorer sono riportate ai punti “?” e “Info”. La finestra di dialogo
visualizza un hyperlink che guida l’utente alle informazioni relative
all’aggiornamento del browser nell’ambito di uno schema di crittografia attuale.
14
15
P74238ea_F1DE101G-man.qxd
28-04-2003
09:34
Page 16
UTILIZZO DELL’UNITÀ RIPC
UTILIZZO DELL’UNITÀ RIPC
E’ consigliabile utilizzare il seguente browser nel caso si debba eseguire un
collegamento protetto con l’unità RIPC.
Microsoft Internet Explorer versione 5.5 o superiore su Windows 98, Me, 2000 e XP
Netscape Navigator 7.0 o Mozilla 1.0 su Windows 98, Windows Me, 2000, XP,
Linux, e altri sistemi operativi tipo UNIX
Nota: accertarsi di cambiare la password amministratore-utente immediatamente
dopo l’installazione o dopo la prima connessione all’unità RIPC.
Schermata principale
Una volta eseguito il login, saranno visualizzate le schermate principali
dell’unità RIPC (vedi figura in basso).
Visualizzazione della lunghezza della crittografia in Internet Explorer
Connessione all’unità RIPC
Avviare il proprio browser web ed indirizzarlo all’indirizzo dell’unità RIPC
configurato durante l’installazione.
Il pulsante “home” vi riporta istantaneamente alla pagine principale da uno
dei punti previsti nel menu di amministrazione. Il pulsante di logout consente
la sconnessione dell’unità RIPC, termina la sessione in corso e richiede
all’utente di inserire nuovamente nome utente e password quando vorrà
eseguire il login in un secondo momento.
Nota: l’unità RIPC richiede l’inserimento di una password automaticamente, nel caso
non si rilevi alcuna attività di amministrazione per 30 minuti.
Per impostare una connessione non protetta, digitare quanto segue nella barra
degli indirizzi del browser:
http://192.168.1.22/
Per una connessione protetta, digitare:
https://192.168.1.22/
L’unità RIPC è dotata di una combinazione integrata amministratore-utente cui
è concesso amministrare il vostro sistema.
Nome di login
administrator
Password
Belkin
La finestra del menu principale dell’unità RIPC
16
17
P74238ea_F1DE101G-man.qxd
28-04-2003
09:34
Page 18
UTILIZZO DELL’UNITÀ RIPC
Sconnessione dall’unità RIPC
Questo link consente all’utente attuale di disconnettersi e visualizza una nuova
schermata di connessione. In assenza di attività amministrativa per 30 minuti,
la sconnessione è automatica, segue quindi la richiesta di inserire nuovamente
la password.
Control Host Remote Access
Remote Access visualizza lo schermo, tastiera ed il mouse del sistema host
remoto controllati dall’unità RIPC.
L’avvio di Remote Access fa comparire una finestra che riproduce il contenuto
della schermata del sistema host. Remote Access consente di ottenere risultati
molto simili a quelli ottenibili stando seduti direttamente davanti al computer.
In questo modo, tastiera e mouse possono essere utilizzati come sempre,
anche se il sistema remoto potrebbe reagire ai comandi di tastiera e mouse
con un leggero ritardo. La durata di questo eventuale ritardo dipende dalla
larghezza di banda della linea attraverso la quale siete collegati all’unità RIPC.
UTILIZZO DELL’UNITÀ RIPC
conseguenza. In altre parole, se l’unità RIPC è collegata alla rete locale e la
connessione ad Internet è impostata soltanto tramite un server proxy, la
mancata configurazione corretta dei parametri NAT comporterà l’incapacità di
Remote Access impostare la connessione. Questo perché i proxy web non sono
in grado di gestire il protocollo RFB.
Se si avessero dei dubbi in merito, consultare il proprio amministratore di rete
per maggiori informazioni sull’impostazione di un ambiente di rete adeguato.
La finestra di Remote Access tenta di visualizzare lo schermo remoto nelle sue
dimensioni ottimali, consentendo un ridimensionamento fino alle misure dello
schermo remoto sia inizialmente, sia in seguito ad una variazione della
risoluzione dello schermo remoto. La finestra di Remote Access può essere
sempre ridimensionata utilizzando la propria finestra locale.
Una barra di controllo nel margine inferiore della finestra di Remote Access
ospita una barra di controllo che visualizza lo stato di Remote Access e
consente di regolarne le impostazioni. La seguente tabella descrive le opzioni
di controllo di Remote Access:
Comando
Descrizione
Opzioni:
Ridimensionamento
Consente di ridimensionare il Remote Access. Si possono ancora
utilizzare mouse e tastiera, ma l’algoritmo di ridimensionamento
non mantiene tutti i dettagli di visualizzazione.
Opzioni:
Il menu secondario per la gestione del mouse mette a disposizione
due opzioni per sincronizzare i puntatori locale e remoto del
mouse.
Gestione del mouse
Finestra di Remote Access con la schermata del desktop di Windows 2000
Nota: per evitare eventuali problemi di comunicazione tra le tastiere locale e
remota, la tastiera del sistema remoto può essere impostata in modo da avere la
stessa mappatura di quella locale.
Ad esempio, se si utilizza un sistema di gestione tedesco mentre il sistema
host utilizza il layout di una tastiera USA, i tasti speciali previsti sulla tastiera
tedesca non funzionano più come stabilito dal programma locale, bensì
riproducono le stesse funzioni della loro controparte USA.
L’applet Remote Access Java prova a stabilire la propria connessione TCP con
l’unità RIPC. Il suo protocollo non è HTTP o HTTPS, ma un protocollo diverso
chiamato RFB (Remote Frame Buffer Protocol). Attualmente, il protocollo RFB
cerca di stabilire una connessione con la porta numero 443. L’ambiente della
rete locale deve consentire l’esecuzione di tale connessione, ad es. se si sta
lavorando una rete interna privata, le impostazioni della propria protezione
firewall NAT (Network Address Translation) dovranno essere configurate di
18
Opzioni:
Impostazioni video
(Videoeinstellungen)
Apre una schermata per modificare le impostazioni video dell’unità
RIPC.
Tasti di scelta rapida
Si tratta di pulsanti speciali per inviare determinate combinazioni
di tasti al sistema remoto.
Tasti KVM
Se definiti nelle impostazioni della porta KVM, è possibile passare
alla porta KVM attuale inviando la propria combinazione di tasti di
scelta rapida allo switch KVM.
Opzione di lettura
Attiva o disattiva la modalità di sola lettura. Se è stata selezionata
la casella di spunta Monitor, Remote Access non viene accettato
nessun input locale né dalla tastiera, né dal mouse. Il simbolo
indica se il monitor sia attivo o meno.
Regolazione automatica
Avvia la procedura di regolazione automatica delle impostazioni
necessarie a garantire una migliore qualità visiva dell’immagine
attuale visualizzata dall’unità RIPC:
19
P74238ea_F1DE101G-man.qxd
28-04-2003
09:34
Page 20
UTILIZZO DELL’UNITÀ RIPC
Opzioni di Remote Access
La barra di intestazione di Remote Access visualizza una serie di informazioni
relative al traffico in entrata (in) e in uscita (out) della rete. Se si utilizza un
metodo di codifica compresso, sarà visualizzato tutto il traffico in entrata, sia
esso compresso o non compresso.
Barra di intestazione di Remote Access
Dispositivo di gestione corrente
Questo dispositivo prevede un’applet Java in grado di consentire al protocollo
telnet di aprire una connessione con l’unità RIPC. Il suo scopo principale è
consentire il passaggio per la porta seriale 1, ma consente anche di collegarsi
ad un cliente Telnet standard. L’accesso Telnet deve essere attivato nelle
impostazioni di protezione.
Sincronizzazione dell’unità RIPC con il mouse
L’unità RIPC soddisfa anche un’esigenza molto comune tra le periferiche KVM,
quella di sincronizzare il cursore del mouse locale con quello remoto. Per farlo,
si avvale di un algoritmo di sincronizzazione intelligente.
Esistono tre modi per risincronizzare i segnali del mouse locale e di quello
remoto:
Fast Sync
Si tratta di una modalità di sincronizzazione rapida utilizzata per correggere
un’eventuale distorsione provvisoria ma fissa. Selezionare quest’opzione
mediante il menu Remote Access oppure, nel caso sia stata definita una
sequenza di tasti di accesso rapido per la sincronizzazione dei mouse,
utilizzare quest’ultima.
Sync Detect
Se la sincronizzazione non dovesse funzionare o se le impostazioni del mouse
fossero state modificate nel sistema host, utilizzare la risincronizzazione
intelligente. Questo metodo richiede più tempo rispetto alla sincronizzazione
rapida e può essere attivato mediante la voce adatta nel menu delle opzioni di
Remote Access. La sincronizzazione intelligente richiede che l’immagine sia
regolata correttamente. Utilizzare la funzione di autoregolazione o la correzione
manuale nel pannello delle impostazioni video per impostare l’immagine.
20
UTILIZZO DELL’UNITÀ RIPC
Modalità a mouse singolo (diretto)
Se nessuna delle opzioni di sincronizzazione dovesse funzionare, è comunque
possibile lavorare con il mouse remoto selezionando la modalità a mouse
singolo ed il pulsante immagine. Se attivata, questa opzione fa in modo che
tutti i movimenti del mouse vengano trasmessi all’host, in modo da poter
impostare il mouse host su valori meno estremi o poter lavorare in questo
modo se l’accelerazione del mouse non è attiva. In questa modalità, tutte le
opzioni di sincronizzazione eseguono una sincronizzazione rapida.
Limiti della sincronizzazione del mouse
Nonostante l’algoritmo intelligente funzioni bene nella maggior parte dei casi,
esistono alcuni limiti specifici che possono impedire alla sincronizzazione di
funzionare correttamente.
Driver speciali per mouse
Si tratta di driver di mouse in grado di influire sul processo di sincronizzazione
che può compromettere la sincronizzazione dei mouse. In caso la
sincronizzazione venisse compromessa, accertarsi di non utilizzare alcun driver
per mouse speciale specifico del rivenditore sul proprio sistema host.
Cattiva regolazione dell’immagine
Perché la sincronizzazione intelligente possa funzionare, è necessario che
l’immagine sia regolata correttamente. Utilizzare la funzione di autoregolazione
o la correzione manuale nel pannello delle impostazioni video per impostare
l’immagine.
Active Desktop
Controllare se la funzione Active Desktop di Microsoft Windows è attiva. Se
così fosse, non utilizzare uno sfondo normale, ma accertarsi di utilizzare un
qualche disegno di fondo. La modalità Active Desktop può essere disattivata
anche completamente.
21
P74238ea_F1DE101G-man.qxd
28-04-2003
09:34
Page 22
UTILIZZO DELL’UNITÀ RIPC
PROTEZIONE
Impostazioni video
Porte e protocolli
L’unità RIPC prevede una schermata
nella quale eseguire le seguenti
impostazioni relative alle opzioni video
disponibili nel menu Opzioni di Remote
Access.
HTTPS obbligatorio
Se questa opzione è attiva, l’accesso al Web è possibile soltanto utilizzando
una connessione di tipo HTTPS. L’unità RIPC non funziona sulla porta HTTP per
le connessioni in entrata.
Porta HTTPS
Numero della porta in corrispondenza della quale è impostato il server HTTPS.
Se lasciata inutilizzata o aperta, viene utilizzato il valore standard.
Nota: luminosità e contrasto valgono per
tutte le modalità e le porte KVM; le altre
impostazioni vengono modificate
specificatamente per ogni modalità su
ciascuna porta KVM.
Schermata di impostazione video
Sfalsamento orizzontale: con i pulsanti sinistro e destro, spostare l’immagine
in direzione orizzontale con questa opzione selezionata.
Sfalsamento verticale: con i pulsanti sinistro e destro, spostare l’immagine in
direzione verticale con questa opzione selezionata.
Porta HTTP
Numero della porta in corrispondenza della quale è impostato il server HTTP
dell’unità RIPC. Se lasciata inutilizzata o aperta, viene utilizzato il valore
standard.
Porta Telnet
Numero della porta in corrispondenza della quale è impostato il server Telnet
dell’unità RIPC. Se lasciata inutilizzata o aperta, viene utilizzato il valore
standard.
Reset modalità: le impostazioni specifiche di una modalità vengono riportate
alle impostazioni standard.
Reset di tutte le modalità: tutte le impostazioni vengono riportate alle
impostazioni standard.
Salva modifiche: per salvare definitivamente le modifiche.
Annulla modifiche: per ripristinare le precedenti impostazioni.
Menu Porte e Protocolli
22
23
P74238ea_F1DE101G-man.qxd
28-04-2003
09:34
Page 24
PROTEZIONE
PROTEZIONE
Firewall
Gestione dei certificati
Parametri di controllo dell’accesso IP
L’unità RIPC utilizza il protocollo
SSL per qualsiasi tipo di traffico
crittografato con il client
collegato. Durante l’impostazione
della connessione, l’unità RIPC
deve esporre la propria identità
ad un client utilizzando un
certificato crittografico.
Parametro
Descrizione
Attiva protezione
Firewall
Abilita il controllo di accesso basato sugli indirizzi fonte IP
Linea di condotta
standard
Questa opzione controlla i pacchetti IP in arrivo che non corrispondono
alle regole configurate: possono essere accettati o respinti.
Nota: se si imposta questa funzione su DROP (respingi) o se non sono state
impostate le regole per ACCEPT (accetta), l’accesso al web tramite la rete
LAN viene disabilitato. Per avere di nuovo accesso, si possono modificare le
impostazioni di protezione via modem o mediante connessione ISDN; oppure
disattivando temporaneamente il controllo di accesso IP con la procedura di
configurazione iniziale.
Numero della regola
IP/Mask
Deve contenere il numero di una regola per la quale siano validi i
seguenti comandi. Questo campo viene ignorato nel caso si aggiunga
una nuova regola.
Specifica l’indirizzo IP o la gamma di indirizzi IP per il quali è valida la
regola in questione. Esempio (il numero concatenato ad un indirizzo IP
con ‘/’ corrisponde al numero di bit validi che saranno utilizzati per
l’indirizzo IP dato):
192.168.1.22 or 192.168.1.22/32 corrisponde all’indirizzo IP 192.168.1.22
192.168.1.0/24 corrisponde ai pacchetti IP con gli indirizzi di origine
compresi tra 192.168.1.0 e 192.168.1.255
0.0.0.0/0 corrisponde a qualsiasi pacchetto IP
Richiesta del certificato SSL
Parametro
Descrizione
Nome comune
Si tratta del nome di rete dell’unità RIPC una volta installata
sulla rete dell’utente.
Unità organizzativa
Questo campo viene utilizzato per specificare a quale reparto di
un’organizzazione appartiene l’unità RIPC.
Organizzazione
Il nome dell’organizzazione cui appartiene l’unità RIPC.
Località/Città
La città dove l’organizzazione ha la sua sede.
Stato/Provincia
Lo stato o la provincia dove l’organizzazione ha la sua sede.
Nazione
La nazione dove l’organizzazione ha la sua sede. Si tratta di un
codice ISO a due lettere, ad es. US per gli Stati Uniti.
Password di challenge
Alcune autorità di certificazione richiedono una cosi detta
“password di challenge”, una password specifica per autorizzare
eventuali variazioni successive del certificato (per es. revoca di
un certificato). La lunghezza minima di questa password è di
quattro caratteri.
Conferma password di
challenge
Conferma della password di challenge.
E-mail
L’indirizzo e-mail della persona di riferimento responsabile
dell’unità RIPC.
Lunghezza codice
Si tratta della lunghezza del codice generato in bit. 1024 bit
dovrebbero essere sufficienti nella maggior parte dei casi. Eventuali
codici più lunghi possono comportare un intervallo di risposta più
lento dell’unità RIPC durante l’impostazione della connessione.
Menu di impostazione della protezione Firewall
24
25
P74238ea_F1DE101G-man.qxd
28-04-2003
09:34
Page 26
PROTEZIONE
PROTEZIONE
Informazioni necessarie per la richiesta del certificato
Richiesta di sottoscrizione del certificato SSL
Tuttavia, è possibile generare ed installare un nuovo certificato unico per una
particolare scheda. Per farlo, l’unità RIPC è in grado di generare un nuovo
codice di crittografia e la Richiesta Sottoscrizione del Certificato che deve
essere certificata da un’apposita autorità. Un’autorità di certificazione ha il
compito di accertare l’identità dell’utente, oltre a sottoscrivere per questo ed
emettere un certificato SSL.
Nota: nel caso la CSR venisse distrutta sull’unità RIPC, non esiste modo per
ripristinarla! Se la si dovesse cancellare per sbaglio, eseguire di nuovo le tre
operazioni.
Le seguenti operazioni sono necessarie per creare ed installare il
certificato SSL dell’unità RIPC:
1. Creare una richiesta di certificazione (Certificate Signing Request) SSL
utilizzando la schermata riportata di seguito (Impostazioni di protezione,
impostazioni SSL, creazione del proprio certificato SSL). Compilare i campi
indicati nella tabella in alto. Fatto questo, fare clic su “Create CSR” per
avviare la generazione della Richiesta di Certificazione. La CSR può essere
scaricata nella macchina deputata all’amministrazione con il pulsante
“Download CSR) (vedi figura in basso).
2. Inviare la CSR salvata ad un’autorità per la certificazione. Al termine di un
tradizionale processo di autenticazione, l’utente riceverà un nuovo
certificato dall’autorità incaricata
3. Caricare il certificato nell’unità RIPC utilizzando la schermata di
caricamento illustrata nella figura in basso.
Impostazioni e configurazione della rete
Parametri di impostazione rete
Parametro
Descrizione
Indirizzo IP
Indirizzo IP con il consueto formato punteggiato.
Subnet Mask
Maschera della rete locale.
Indirizzo IP gateway:
Il gateway della rete.
1. IP server DNS
Indirizzo IP del server DNS primario con il consueto formato
punteggiato. Questa opzione può essere lasciata vuota, tuttavia,
l’unità RPC non sarà in grado di eseguire la risoluzione del nome.
2. IP server DNS
Indirizzo IP del server DNS secondario con il consueto formato
punteggiato. Viene utilizzato nel caso il Server DNS Primario
non possa essere contattato.
Attiva Alimentazione
Se questa opzione è attiva, l’accesso attraverso il Dispositivo di
Gestione corrente avviene tramite l’Unità di gestione. Per questo
motivo, per garantire il miglior livello di protezione, è
consigliabile disattivare questo parametro.
(Nota: la modifica delle impostazioni di rete dell’unità RIPC può comportare una
perdita dei collegamenti). Se queste impostazioni vengono modificate a distanza,
accertarsi che i valori siano corretti e di poter ancora accedere all’unità RIPC.)
26
27
P74238ea_F1DE101G-man.qxd
28-04-2003
09:34
Page 28
MENU DI IMPOSTAZIONE RETE
Impostazioni di Remote Access
Nonostante alcuni parametri possano essere modificati con Remote Access
attivo, altri devono essere impostati nelle impostazioni di Remote Access
prima di attivarlo.
MENU DI IMPOSTAZIONE RETE
Tabella delle opzioni di Remote Access
Comando
Descrizione
Codifica di trasmissione
L’impostazione di codifica di trasmissione consente di modificare
l’algoritmo di codifica dell’immagine utilizzato per trasmettere i dati
video alla finestra di Remote Access. Con queste impostazioni è
possibile ottimizzare la velocità dello schermo remoto in base al
numero di utenti paralleli e alla larghezza di banda della linea di
connessione (Modem, ISDN, DSL, LAN ecc.).
Normale: l’algoritmo di codifica standard, adatto a molti utenti
paralleli in un ambiente LAN. Le applicazioni tipiche generano un
traffico massimo di 15 Kbps.
Compresso: il flusso di dati tra l’unità RIPC e la finestra di Remote
Access viene ulteriormente compresso per risparmiare in termini di
larghezza di banda. La codifica di compressione è adatta ad un
modem o ad un ambiente ISDN. Tuttavia, poiché la compressione
sfrutta il tempo di elaborazione sull’unità RIPC stessa, questa
codifica non dovrebbe essere usata se molti utenti paralleli
desiderano accedere contemporaneamente all’unità RIPC.
Plug-in per browser
Java Sun
Indica al browser web del sistema di amministrazione di utilizzare la
JVM (Java Virtual Machine) della Sun Microsystems. La JVM è presente
nel browser utilizzato per lanciare il codice della finestra di Remote
Access, che corrisponde in effetti ad un’applet Java. Se questa casella
viene spuntata per la prima volta sul proprio sistema di amministrazione
e se il plug-in Java non è ancora stato installato nel sistema, esso verrà
scaricato ed installato automaticamente. Tuttavia, per consentire
l’installazione, è comunque necessario rispondere alle varie richieste con
“YES”. La quantità di dati da scaricare è di circa 11 MB. Il vantaggio di
scaricare la JVM Sun consiste nel poter disporre di una JVM stabile ed
identica in tutte le varie piattaforme. Il software Remote Access è
ottimizzato per questa versione di JVM ed offre una vasta gamma di
funzioni se fatto funzionare su una JVM Java. (Suggerimento: nel caso
si fosse collegati ad Internet tramite una connessione lenta, è possibile
anche preinstallare la JVM sulla propria macchina di amministrazione.
Il software è disponibile nel CD fornito insieme all’unità RIPC.)
Tasti di scelta
rapida mouse
Opzione che consente di specificare una combinazione di tasti di scelta
rapida in grado di avviare il processo di sincronizzazione se premuti nel
Remote Access, o che viene utilizzata per lasciare la modalità a mouse
singolo. I codici chiave sono elencati nell’allegato C.
Tasti di accesso rapido
definiti dall’utente
I tasti di accesso rapido simulano i tasti presenti sul sistema remoto
e che non possono essere generati a livello locale.
Impostazioni di Remote Access
Nota: fare clic su “Append” (Aggiungi) per rendere valide le modifiche eseguite.
28
29
P74238ea_F1DE101G-man.qxd
28-04-2003
09:34
Page 30
MENU DI IMPOSTAZIONE RETE
Utenti e password
MENU DI IMPOSTAZIONE RETE
Descrizione della tabella Utenti e password
Al momento della consegna, ogni unità RIPC è configurata con un sistema di
supervisione chiamato “amministratore” la cui password è “belkin”.
IMPORTANTE: accertarsi di cambiare la password amministratore-utente
immediatamente dopo aver installato e essersi collegati all’unità RIPC per la
prima volta.
Campo
Descrizione
Utenti esistenti
Scegliere un utente esistente da modificare o cancellare. Una volta
selezionato un utente, fare clic sul pulsante “Lookup User” per
vedere tutte le rispettive informazioni.
Nuovo nome utente
Per creare un nuovo utente, inserire un nuovo nome di login in
questo campo. Il nuovo nome non deve esistere già come utente.
Se dovesse esistere, in alto nello schermo compare un messaggio.
Nome utente completo
Si tratta del nome completo dell’utente di login.
Password
La password per il nome utente. Deve essere di almeno quattro caratteri.
Conferma password
Conferma della password di cui sopra.
Gruppo
Assegnare questo utente ad uno dei seguenti gruppi:
super
Gli utenti in questo gruppo hanno tutti i permessi per
controllare il sistema host e l’unità RIPC; administrators
gli
utenti assegnati a questo gruppo possono controllare il sistema host;
and users
questo gruppo può soltanto vedere.
La gestione degli utenti dell’unità RIPC consente di avere 25 utenti diversi. Le
sezioni di seguito descrivono come aggiungere, cancellare e modificare gli utenti.
Aggiunta di utenti
Compilare i campi “New user name” (Nome nuovo utente), “Full user name”
(Nome utente completo), “Password”, e “Confirm Password” (Conferma
Password) come indicato nella schermata Utenti e Password. In alternativa,
selezionare il gruppo del quale il nuovo utente deve diventare membro. Fare
clic sul pulsante “Create User” (Crea utente).
Schermata Utenti e password
La figura in basso illustra la schermata Utenti e Password dell’unità RIPC. Il
suo utilizzo è descritto nella tabella di seguito, nel testo seguente.
Cancellazione di un utente
Scegliere un utente dal campo “Existing users” (Utenti esistenti). Fare clic su
“Lookup” (Controlla). Vengono visualizzate tutte le informazioni relative
all’utente. Fare clic “Delete User” (Cancella utente).
Modifica di un utente
Scegliere un utente dal campo “Existing users” (Utenti esistenti). Fare clic su
“Lookup” (Controlla) per ottenere tutte le informazioni relative all’utente. Tutti
i campi possono essere modificati contemporaneamente. La password vecchia
non è visualizzata, ma può essere modificata. Una volta eseguite tutte le
modifiche, fare clic sul pulsante “Modify User” (Modifica utente).
30
31
P74238ea_F1DE101G-man.qxd
28-04-2003
09:34
Page 32
MENU DI IMPOSTAZIONE RETE
Porta seriale
Le impostazioni seriali dell’unità RIPC consentono di specificare quali
periferiche sono collegate alla porta seriale e come utilizzarle. Le opzioni sono
elencate e descritte nella tabella in basso.
Tabella delle impostazioni per la porta seriale
Funzione
Descrizione
Modem
Consente di accedere all’unità RIPC via modem, vedere
la sezione “Impostazioni Modem” di seguito per
maggiori dettagli.
Accesso alla porta
Telnet
Con questa opzione è possibile collegare qualsiasi via
periferica alla porta seriale ed accedere ad essa (a
condizione che preveda un supporto terminale) via
Telnet. Selezionare le opzioni adatte per la porta seriale
ed utilizzare l’unità Telnet o un client standard Telnet
per collegarsi all’unità RIPC.
Menu delle impostazioni per la
porta seriale
Impostazioni del modem
L’unità RIPC prevede la possibilità di accesso a distanza utilizzando una linea
telefonica in aggiunta all’accesso standard attraverso la scheda di rete Ethernet
integrata. Il modem deve essere collegato all’interfaccia seriale RIPC.
32
MENU DI IMPOSTAZIONE RETE
Logicamente, collegare l’unità RIPC utilizzando il telefono non significa altro
che impostare una connessione dedicata punto-a –punto dal computer con
funzioni RIPC all’unità RIPC. In altre parole, l’unità RIPC funge da provider
(ISP) con il quale collegarsi. La connessione viene impostata utilizzando il
protocollo Point-to-Point (PPP). Prima di collegare l’unità RIPC, accertarsi di
configurare il proprio computer RIPC come necessario. Per esempio; per i
sistemi operativi Windows, è possibile collegare una connessione di accesso
remoto che abbia di default le giuste impostazioni come PPP.
Le impostazioni del modem fanno parte del pannello delle Impostazioni Seriali
(vedi Menu delle Impostazioni della Porta Seriale).
Tabella delle opzioni modem
Parametro
Descrizione
Velocità della
linea seriale
La velocità con cui l’unità RIPC comunica con il modem.
La maggior parte dei modem oggi supporta il valore
predefinito di 115200 bps. Se si utilizza un modem
vecchio o nel caso si dovessero verificare dei problemi,
cercare di ridurre questa velocità.
Stringa di
inizializzazione
modem
La stringa di inizializzazione viene utilizzata dall’unità
RIPC per inizializzare il modem. Il valore predefinito
funzionerà per tutti i modem standard attuali collegati
direttamente ad una linea telefonica. Se si possiede un
modem speciale o se il modem è collegato ad uno
switch telefonico locale che richiede una speciale
sequenza di digitazione per stabilire la connessione con
la rete pubblica, queste impostazioni possono essere
modificate assegnando una nuova stringa. Per quanto
riguarda la sintassi dei comandi AT, vedere il manuale del
modem.
Indirizzo Client IP
L’indirizzo IP viene assegnato al computer RIPC durante lo
scambio di informazioni tramite il protocollo PPP. Poiché
si tratta di una connessione IP point-to-point, è
consentito indicare praticamente qualsiasi indirizzo IP, ma
è necessario accertarsi che questo non interferisca con le
impostazioni IP dell’unità RIPC e del computer RIPC. Il
valore predefinito funziona nella maggior parte dei casi.
33
P74238ea_F1DE101G-man.qxd
28-04-2003
09:34
Page 34
MENU DI IMPOSTAZIONE RETE
MENU DI IMPOSTAZIONE RETE
Impostazioni tastiera/mouse
L’unità RIPC supporta diversi modelli di mouse e tastiera. La schermata
visualizzata nel menu di impostazione tastiera e mouse viene utilizzata per
regolare le impostazioni (vedere la tabella in basso).
Tabella delle impostazioni tastiera/mouse
Comando
Descrizione
Porte KVM oggetto
Seleziona la porta KVM alla quale saranno applicate le
impostazioni eseguite di seguito. Scegliendo “Update”
(Aggiorna) si visualizzano i valori attuali per la porta
in questione da selezionare per modificare le impostazioni.
Modello tastiera
Seleziona il modello di tastiera utilizzato nel sistema
di host remoto.
Modalità Mouse
Automatico:
sfrutta il processo di sincronizzazione
automatica del mouse.
1: n
attiva il ridimensionamento diretto dei singoli
movimenti del mouse tra il puntatore locale e quello
remoto, consentendo all’utente di muovere il mouse
anche se non in maniera completamente sincrona.
Reset emulazione
mouse / tastiera
Menu Impostazioni tastiera/mouse
Switch KVM
E’ possibile selezionare il numero di porte utilizzate dallo switch KVM collegato
e si può assegnare un nome ad ogni porta. Per mettere a disposizione le
funzioni di commutazione della porta KVM attraverso l’unità RIPC, è necessario
stabilire le combinazioni di tasti per le varie porte.
Questa opzione azzera l’emulazione della tastiera e del
mouse dell’unità RIPC per il sistema host. Da utilizzare
se tastiera o mouse sembrano reagire in maniera
irrazionale. E’ come se i terminali della tastiera e del
mouse venissero scollegati e collegati di nuovo.
Menu impostazioni KVM
34
35
P74238ea_F1DE101G-man.qxd
28-04-2003
09:34
Page 36
MENU DI IMPOSTAZIONE RETE
ALLEGATO A
La sintassi per definire una combinazione di tasti di selezione rapida è la seguente:
Firmware di aggiornamento
< codice tasto > [+| - [_] < codice tasto >]*
Ad esempio: Ctrl-Ctrl-A-Invio
oppure Ctrl+A-*1-Invio
Gli aggiornamenti rapidi consentono all’utente di disporre sempre dei più recenti
aggiornamenti per la propria unità RIPC. Questi aggiornamenti garantiscono che
l’unità RIPC possa funzionare anche con le periferiche ed i computer più recenti. Gli
aggiornamenti firmware sono gratuiti per tutta la durata del prodotto. Per maggiori
informazioni ed assistenza sugli aggiornamenti, potete visitare il sito belkin.com.
Diversi codici possono essere concatenati con un segno + o -. Il segno + consente
combinare in sequenza i tasti, tutti i tasti saranno premuti fino a quando si
troverà un segno – alla fine della combinazione. In questo caso, tutti i tasti
premuti saranno lasciati nella sequenza inversa. Quindi, il segno – serve a premere
e rilasciare separatamente i tasti. Il segno _ (underscore) consente di inserire una
pausa della lunghezza definibile dall’utente ; si possono mettere in sequenza più di
un _ (underscore). La durata di una pausa singola viene impostata in millisecondi
utilizzando l’opzione adatta nella pagina delle impostazioni KVM. Vedere la tabella
delle sequenze di tasti di selezione rapida per vedere quali sono i codici che
possono essere utilizzati come tasti di scelta rapida.
Se le impostazioni sono corrette, la porta KVM può essere commutata, usando
la matrice di commutazione KVM, sulla porta principale dell’unità RIPC. L’unità
RIPC prevede l’impiego di impostazioni di sincronizzazione del mouse e del
video separate per ciascuna porta.
Menu di caricamento firmware
Nota: è ancora possibile applicare altre combinazioni di tasti KVM attraverso
Remote Access per passare da una porta KVM all’altra, tuttavia in questo caso
le impostazioni di sincronizzazione video e mouse verrebbero condivise tra le
porte e potrebbero venire scambiate accidentalmente per una di queste porte.
La tabella B.1 elenca le modalità video supportate dall’unità RIPC. Utilizzare
soltanto queste modalità e non utilizzare alcuna impostazione video personalizzata.
In caso contrario, l’unità RIPC potrebbe non essere in grado di rilevarle.
Firmware
Questa sezione contiene una sintesi delle informazioni su questa unità RIPC ed
il suo attuale firmware, oltre a come azzerare i parametri dell’unità RIPC.
Queste informazioni sono disponibili nel menu dedicato agli interventi di
manutenzione.
Modalità video dell’unità RIPC
Tabella B.1 Modalità video
Risoluzione (x,y)
Velocità di ripristino (Hz)
640x350
70, 85
640x400
56, 70, 85
640x480
60, 67, 72, 75, 85, 90, 100, 120
720x400
70, 85
800x600
56, 60, 70, 72, 75, 85, 90, 100
832x624
75
1024x768
60, 70, 72, 75, 85, 90, 100
1152x864
75
1152x870
75
1152x900
66, 76
1280x960
60
1280x1024
60
Menu di Manutenzione
36
37
P74238ea_F1DE101G-man.qxd
28-04-2003
09:34
Page 38
ALLEGATO A
La tabella dei tasti di selezione rapida visualizza i codici utilizzati per definire
i tasti premuti. E’ importante notare che questi codici non rappresentano
necessariamente i caratteri utilizzati nelle tastiere internazionali, ma fanno
riferimento ad una tastiera standard per PC da 104 tasti con mappatura USA.
Tuttavia, la maggior parte dei tasti di modifica ed altri tasti alfanumerici
utilizzati per le scelte rapide nei programmi applicati si trovano in posizione
identica, a prescindere dalla lingua di mappatura. Alcuni dei tasti hanno degli
alias, ovvero possono essere nominati con due codici diversi (separati da una
virgola nella tabella).
Tabella dei tasti di scelta rapida
Per questi comandi
Tilde
Meno
Uguale
Punto e virgola
Apostrofo
Minore di
Virgola
Punto
Slash
Indietro
Tabulazione
Parentesi sinistra
Parentesi destra
Invio
Caps Lock
Back slash
Shift sinistro, shift
Control destro
Shift destro
Control sinistro o Control
Alt sinistro o Alt
Barra spaziatrice
Esc
F1
F2
F3
F4
F5
F6
F7
F8
F9
F10
digitare questi caratteri
TILDE
- oppure MINUS
= oppure EQUALS
;
‘
< oppure LESS
,
.
/ oppure SLASH
BACK SPACE
TAB
[
]
ENTER
CAPS LOCK
\ oppure BACK SLASH
LSHIFT oppure SHIFT
RCTRL
RSHIFT
LCTRL oppure CTRL
LALT oppure ALT
SPACE
ESCAPE oppure ESC
F1
F2
F3
F4
F5
F6
F7
F8
F9
F10
Per questi comandi
F11
F12
Stamp
Bloc scorr
Interr
Insert
Home
Pagina su
Canc
Fine
Pagina giù
Freccia su
Freccia sinistra
Freccia giù
Freccia destra
Bloc num
0 sul tastierino numerico
1 sul tastierino numerico
2 sul tastierino numerico
3 sul tastierino numerico
4 sul tastierino numerico
5 sul tastierino numerico
6 sul tastierino numerico
7 sul tastierino numerico
8 sul tastierino numerico
9 sul tastierino numerico
digitare questi caratteri
F11
F12
PRINTSCREEN
SCROLL LOCK
BREAK
INSERT
HOME
PAGE UP
DELETE
END
PAGE DOWN
UP
LEFT
DOWN
RIGHT
NUM LOCK
NUMPAD0
NUMPAD1
NUMPAD2
NUMPAD3
NUMPAD4
NUMPAD5
NUMPAD6
NUMPAD7
NUMPAD8
NUMPAD9
Segno di addizione sul tastierino numerico
NUMPADPLUS o NUMPAD PLUS
Segno di divisione sul tastierino numerico
NUMPAD/
Segno di moltiplicazione sul tastierino numerico NUMPADMUL o NUMPAD MUL
Segno di sottrazione sul tastierino numerico
NUMPADMINUS o NUMPAD MINUS
Invio sul tastierino numerico
NUMPADENTER
Windows
WINDOWS
Menu
MENU
38
GLOSSARIO
ACPI
Si tratta di una specifica che consente al sistema operativo di
implementare la gestione dell’alimentazione e la configurazione di
sistema.
ATX
Advanced Technology Extended: una particolare specifica di una
scheda madre introdotta da Intel® nel 1995.
DHCP
Dynamic Host Configuration Protocol: protocollo per assegnare in
maniera dinamica le configurazioni IP nelle reti locali.
DNS
Domain Name System: protocollo utilizzato per trovare i computer
su Internet in base al loro nome.
FAQ
Domande frequenti
HTTP
Hypertext Transfer Protocol: il protocollo utilizzato tra browser e
server web.
HTTPS
Hyper Text Transfer Protocol Secure: versione protetta di HTTP.
LED
Diodo luminoso
MIB
Management Information Base: Descrive la struttura delle
informazioni di gestione cui si può accedere via SNMP.
PS/2
L’interfaccia PS/2 è una creazione di IBM® e viene utilizzata da
molti mouse e tastiere.
SNMP
Simple Network Management Protocol: un protocollo di
monitoraggio e controllo rete ampliamente diffuso.
SSL
Secure Socket Layer: tecnologia di crittografia per Internet,
utilizzata per offrire una trasmissione dei dati protetta.
SVGA
Super VGA: un livello avanzato della Video Graphics Array (VGA) in
grado di offrire migliori risultati a livello di pitch e risoluzione per
i monitor.
UTP
Unshielded Twisted Pair: un cavo dotato di due conduttori ritorti
in coppia e raccolti in una stessa guaina esterna in PVC.
39
P74238ea_F1DE101G-man.qxd
28-04-2003
09:34
Page 40
DOMANDE FREQUENTI
RILEVAZIONE E RISOLUZIONE DELLE ANOMALIE
L’unità RIPC funziona con gli switch KVM Belkin OmniView Serie ENTERPRISE?
Sì.
Il mouse remoto non funziona o non è sincronizzato.
Accertarsi che le impostazioni del mouse corrispondano al modello utilizzato.
L’unità RIPC funziona con gli switch KVM non Belkin?
Sì, l’unità RIPC funziona con gli switch KVM PS/2 di Belkin, tuttavia l’utente
deve sapere che l’impiego di uno switch KVM di qualità inferiore può
compromettere la qualità delle prestazioni.
Bassa qualità del video o l’immagine risulta sgranata.
Provare a correggere le impostazioni di luminosità e contrasto fino a farle
uscire dalla gamma prevista in corrispondenza dei punti dove l’immagine
risulta sgranata. Utilizzare la funzione di regolazione automatica per correggere
un eventuale sfarfallio dello schermo.
Quali sistemi operativi sono supportati dall’unità RIPC?
L’unità RIPC supporta Windows NT, 2000, e XP.
Il login non viene eseguito correttamente.
Utilizzare l’administrator account per eseguire il login, accertandosi che nome
utente e password siano corretti.
Posso utilizzare l’unità RIPC con i sistemi operativi non basati su Microsoft
Windows?
Sì, l’unità RIPC può essere utilizzata con altre piattaforme, tuttavia supporta
soltanto tastiere e monitor.
L’unità RIPC appesantisce il server?
No, l’unità RIPC è una soluzione hardware al 100% che non richiede
l’installazione di nessun altro software aggiuntivo sui server.
La finestra di Remote Access non si collega all’unità RIPC.
Una protezione firewall potrebbe impedire l’accesso. Accertarsi che i numeri di
porta 443 o 80 siano aperti per consentire una connessione TCP in entrata.
Impossibile stabilire una connessione con l’unità RIPC.
Accertarsi che la connessione di rete in generale funzioni (effettuare un ping
sull’indirizzo IP dell’unità RIPC). In caso contrario, controllare l’hardware di rete.
L’unità RIPC è accesa? Accertarsi che l’indirizzo IP dell’unità RIPC e tutte le
impostazioni IP siano corretti.
Accertarsi che tutta l’infrastruttura IP della rete LAN, tra cui router ecc., sia
configurata correttamente. Se la funzione di ping non funziona, l’unità RIPC
non funziona.
Alcune combinazioni di tasti speciali, ad es. ALT+F2, ALT+F3 vengono
intercettate dal sistema dell’unità RIPC e non sono trasmesse all’host.
Creare un comando di selezione rapida per questa funzione speciale.
Nel browser, le pagine RIPC sono inconsistenti e caotiche.
Accertarsi che le impostazioni cache del browser siano corrette. Accertarsi in
particolare che le impostazioni cache non siano impostate su “never check for
newer pages” (non cercare pagine più recenti). Altrimenti le pagine dell’unità
RIPC potrebbero venire caricate dal cache del browser e non dalla scheda.
40
41
P74238ea_F1DE101G-man.qxd
28-04-2003
09:34
Page 42
INFORMAZIONI
Dichiarazione FCC
DICHIARAZIONE DI CONFORMITÀ CON LE LEGGI FCC
PER LA COMPATIBILITÀ’ ELETTROMAGNETICA
Noi sottoscritti, Belkin Corporation, con sede al 501 West Walnut Street, Compton, CA 90220, dichiariamo sotto
la nostra piena responsabilità che il prodotto,
F1DE101G
cui questa dichiarazione fa riferimento:
è conforme all'art. 15 delle norme FCC. Le condizioni fondamentali per il funzionamento sono le seguenti:
(1) il dispositivo non deve causare interferenze dannose e (2) il dispositivo deve accettare qualsiasi
interferenza ricevuta, comprese eventuali interferenze che possano causare un funzionamento anomalo.
Dichiarazione di conformità CE
Noi sottoscritti, Belkin Corporation, dichiariamo sotto la nostra piena responsabilità che il prodotto F1DE101G, cui questa
dichiarazione fa riferimento, è realizzato in conformità allo Standard sulle Emissioni EN550022 e alla Norma di Immunità
EN550024, nonché agli standard LVP EN610003-2 e EN61000-3-3.
ICES
Questo apparecchio digitale di classe B è conforme allo standard canadese ICES-003. Cet appareil numérique de la classe B
conforme á la norme NMB-003 du Canada.
Garanzia limitata di cinque anni sul prodotto Belkin Corporation
Belkin Corporation garantisce che, per il periodo di validità della garanzia, questo prodotto non presenterà difetti di
materiale e lavorazione. Qualora venisse rilevata un’anomalia, Belkin provvederà, a propria discrezione, a riparare o
sostituire il prodotto gratuitamente, a condizione che sia restituito entro il periodo di garanzia, con le spese di trasporto
prepagate, al rivenditore Belkin autorizzato da cui è stato acquistato il prodotto. Potrebbe venire richiesta la prova di
acquisto.
Questa garanzia non sarà valida nel caso il prodotto sia stato danneggiato accidentalmente, per abuso, uso non corretto o
non conforme, qualora sia stato modificato senza il permesso scritto di Belkin, o nel caso il numero di serie Belkin fosse
stato cancellato o reso illeggibile.
LA GARANZIA ED I RIMEDI DI CUI SOPRA PREVALGONO SU QUALSIASI ALTRO ACCORDO, SIA ORALE O SCRITTO, ESPRESSO O
IMPLICITO. BELKIN DECLINA SPECIFICATAMENTE QUALSIASI OBBLIGO DI GARANZIA IMPLICITO COMPRESE, SENZA LIMITI, LE
GARANZIE DI COMMERCIABILITÀ O IDONEITÀ AD UN PARTICOLARE SCOPO.
Nessun rivenditore, agente o dipendente Belkin è autorizzato ad apportare modifiche, ampliamenti o aggiunte alla presente
garanzia.
BELKIN DECLINA QUALSIASI RESPONSABILITÀ PER EVENTUALI DANNI SPECIFICI, ACCIDENTALI, INDIRETTI DOVUTI AD
UN’EVENTUALE VIOLAZIONE DELLA GARANZIA O IN BASE A QUALSIASI ALTRA FORMA DI TEORIA LEGALE, COMPRESI, MA NON
SOLO, I CASI DI MANCATO GUADAGNO, INATTIVITÀ, DANNI O RIPROGRAMMAZIONE O RIPRODUZIONE DI PROGRAMMI O DATI
MEMORIZZATI O UTILIZZATI CON I PRODOTTI BELKIN.
Alcuni Stati non consentono l’esclusione o la limitazione dei danni accidentali o diretti, pertanto i limiti di esclusione di
cui sopra potrebbero non fare al caso vostro. Questa garanzia consente di godere di diritti legali specifici ed eventuali altri
diritti che possono variare di stato in stato.
42
P74238ea_F1DE101G-man.qxd
28-04-2003
09:34
Page 44
belkin.com
Belkin Corporation
501 West Walnut Street
Compton • CA • 90220 • USA
Tel: +1 310.898.1100
Fax: +1 310.898.1111
Belkin Components, Ltd.
Express Business Park
Shipton Way • Rushden • NN10 6GL
Regno Unito
Tel: +44 (0) 1933 35 2000
Fax: +44 (0) 1933 31 2000
Belkin Components B.V.
Starparc Building • Boeing Avenue 333
1119 PH Schiphol-Rijk • Paesi Bassi
Tel: +31 (0) 20 654 7300
Fax: +31 (0) 20 654 7349
Belkin Gmbh
Hanebergstrasse 2 •
80637 München • Germania
Tel: +49 (0) 89 143 4050
Fax: +49 (0) 89 143 405100
Belkin, Ltd.
7 Bowen Crescent • West Gosford
NSW 2250 • Australia
Tel: +61 (0) 2 4372 8600
Fax: +61 (0) 2 4372 8603
Assistenza tecnica Belkin
USA: +1 310.898.1100 est. 2263
+1 800.223.5546 est. 2263
Europa: 00 800 223 55 460
Australia: 1800 666 040
P74238
© 2003 Belkin Corporation. Tutti i diritti riservati. Tutti i nomi commerciali
sono marchi registrati dai rispettivi produttori elencati.
P74238ea_F1DE101G-man.qxd
28-04-2003
09:34
Page 46
belkin.com
Belkin Corporation
501 West Walnut Street
Compton • CA • 90220 • USA
Tel: +1 310.898.1100
Fax: +1 310.898.1111
Belkin Components, Ltd.
Express Business Park
Shipton Way • Rushden • NN10 6GL
United Kingdom
Tel: +44 (0) 1933 35 2000
Fax: +44 (0) 1933 31 2000
Belkin Components B.V.
Starparc Building • Boeing Avenue 333
1119 PH Schiphol-Rijk • The Netherlands
Tel: +31 (0) 20 654 7300
Fax: +31 (0) 20 654 7349
Belkin Gmbh
Hanebergstrasse 2 •
80637 München • Germany
Tel: +49 (0) 89 143 4050
Fax: +49 (0) 89 143 405100
Belkin, Ltd.
7 Bowen Crescent • West Gosford
NSW 2250 • Australia
Tel: +61 (0) 2 4372 8600
Fax: +61 (0) 2 4372 8603
Belkin Tech Support
US: +1 310.898.1100 ext. 2263
+1 800.223.5546 ext. 2263
Europe: 00 800 223 55 460
Australia: 1800 666 040
P74238ea
© 2003 Belkin Corporation. All rights reserved. All trade names are
registered trademarks of respective manufacturers listed.