1
Other functions
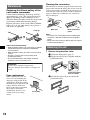
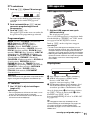
With the card remote commander
In step 3, to adjust the selected item, press <, M, ,
or m.
Changing the sound settings
Adjusting setup items — SET
Adjusting the sound
characteristics — BAL/FAD/SUB
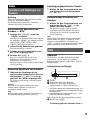
1
You can adjust the balance, fader, and subwoofer
volume.
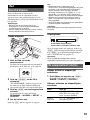
Press and hold the select button.
The setup display appears.
2
Press the select button repeatedly
until “BAL,” “FAD” or “SUB” appears.
The item changes as follows:
Press the select button repeatedly
until the desired item appears.
3
LOW*1 t MID*1 t HI*1 t
BAL (left-right) t FAD (front-rear) t
SUB (subwoofer volume)*2 t AUX*3
Rotate the volume control dial to
select the setting (example “ON” or
“OFF”).
4
Press and hold the select button.
The setup is complete and the display returns
to normal play/reception mode.
1
*1 When EQ3 is activated (page 13).
*2 When the audio output is set to “SUB”
(page 13).
“ATT” is displayed at the lowest setting, and can
be adjusted up to 20 steps.
*3 When AUX source is activated (page 14).
2
Rotate the volume control dial to
adjust the selected item.
After 3 seconds, the setting is complete and
the display returns to normal play/reception
mode.
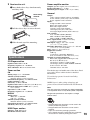
With the card remote commander
In step 2, to adjust the selected item, press <, M, ,
or m.
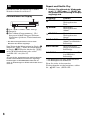
Customizing the equalizer curve
— EQ3
“CUSTOM” of EQ3 allows you to make your
own equalizer settings.
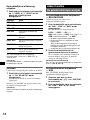
1
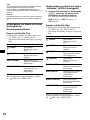
Select a source, then press (EQ3)
repeatedly to select “CUSTOM.”
2
Press the select button repeatedly
until “LOW,” “MID” or “HI” appears.
3
Rotate the volume control dial to
adjust the selected item.
The volume level is adjustable in 1 dB steps,
from –10 dB to +10 dB.
Repeat steps 2 and 3 to adjust the equalizer
curve.
To restore the factory-set equalizer curve,
press and hold the select button before the
setting is complete.
After 3 seconds, the setting is complete and
the display returns to normal play/reception
mode.
Tip
Other equalizer types are also adjustable.
Note
Displayed items will differ, depending on the source
and setting.
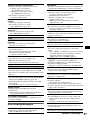
With the card remote commander
In step 3, to select the setting, press < or ,.
The following items can be set (follow the page
reference for details):
“z” indicates the default settings.
CLOCK-ADJ (Clock Adjust) (page 5)
CT (Clock Time)
To set “CT-ON” or “CT-OFF” (z) (page 9, 10).
BEEP
To set “BEEP-ON” (z) or “BEEP-OFF.”
AUX-A*1 (AUX Audio)
To turn the AUX source display “AUX-A-ON”
(z) or “AUX-A-OFF” (page 14).
A.OFF (Auto Off)
To shut off automatically after a desired time
when the unit is turned off.
– “A.OFF-NO” (z), “A.OFF-30S (Seconds),”
“A.OFF-30M (Minutes)” or “A.OFF-60M
(Minutes).”
SUB/REAR*1
To switch the audio output.
– “SUB-OUT” (z): to output to a subwoofer.
– “REAR-OUT”: to output to a power amplifier.
DEMO*1 (Demonstration)
To set “DEMO-ON” (z) or “DEMO-OFF.”
DIM (Dimmer)
To change the brightness of the display.
– “DIM-ON”: to dim the display.
– “DIM-OFF” (z): to deactivate the dimmer.
A.SCRL (Auto Scroll)
To scroll long displayed item automatically
when the disc/album/track is changed.
– “A.SCRL-ON” (z): to scroll.
– “A.SCRL-OFF”: to not scroll.
continue to next page t
13