1
Installation instructions
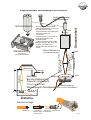
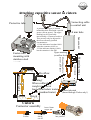
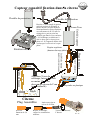
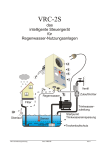
The complete control system consists of the control unit and the sensor unit.
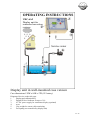
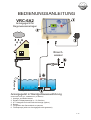
To help you with the installation, refer to the diagram of the system on the front page of these
operating instructions.
a. Installing the control unit
To find a suitable place for installation, use the following criteria:
The ambient temperature should be between 0 - 30 °C. The device should be splash-water
protected and not exposed to direct sunlight.
Properly suitable paces are: boiler room, basement laundry room, or a frost-proof garage.
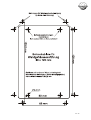
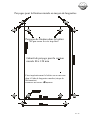
For this purpose, a drilling template is provided in the appendix.
Carefully open the lid of the control unit using a Phillips screwdriver. There are fixing holes
located on the back of the device. With the template to guide you, attach the device to the wall
using the screws and raw plugs included in the delivery. Please ensure that you do not fix the
screws too tightly – risk of deformation.
Battery operation
On delivery the display unit is set up for battery operation. A 9V battery pack is required for
this purpose. This is not included in the delivery.
After assembly, connect the battery pack to the plug provided and place on the base of the
device.
Then reclose the lid.
Using alkaline manganese batteries may provide several years of operation – depending on
the frequency of use.
Maintenance
The display unit (apart from battery replacement) is maintenance free, provided the
installation has been properly carried out.
Replacing batteries: to replace the battery, open the display unit using a Phillips screwdriver.
Remove the old 9V battery pack and replace with a new one.
Then reclose the display unit. Recalibration of the unit is not necessary.
Batteries are hazardous waste, so please dispose of used batteries responsibly!
The unit may also be operated using a 9V adaptor (optional – not included in delivery)
connected to the mains power supply:
Mains operation (for 9 - 12 V AC/DC adaptor)
The screw connection joint for the mains power supply adaptor is sealed with sealing plugs.
Replace these plugs with an M12 cable gland. Then guide the adaptor’s connecting cable into
the unit using this screw connection and fasten the clamps. In doing so, you do not need to
heed the polarity. The control unit will function perfectly well using both DC and AC voltage.
Should there be a plug attached to the end of your adaptor lead, then remove it.
Strip the strand ends and connect to the clamps provided.
Under no circumstances connect the adaptor to the sensor terminals (labelled on the
board)!
If you operate the unit using an adaptor, or do not use the unit over a long period of
time, make absolutely sure that the battery is removed!
16 / 36