1
EN
DE
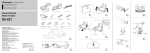
2.Detach the M4x5 screw below the timer lever.
3.Detach the fastening screws (2) of the connection
box cover on the lower end of the box, and remove
the cover of the connection box.
4.Reset the limit stop by pressing (with 7 kg force
if necessary) so that a clicking sound is heard.
See figure 11.
2.Lösen Sie die Schraube M4x5 unter dem Hebel der Zeitschaltuhr.
3.Lösen Sie die Sicherungsschrauben (2) der
Schaltergehäuseabdeckung am unteren Ende des
Gehäuses und entfernen Sie die Abdeckung des
Schaltergehäuses.
4.Der Begrenzer wird durch Druck in seine Funktionsstellung zurückgesetzt (bei Bedarf mit einer Kraft,
die 7 kg entspricht), im Begrenzer ist dann ein
Knacken zu hören. Siehe Abbildung 11.
3.6. Electric heater insulation resistance
3.6. Isolationswiderstand des
Elektrosaunaofens
When performing the final inspection of the electrical
installations, a “leakage“ may be detected when
measuring the heater’s insulation resistance. The
reason for this is that the insulating material of the
heating resistors has absorbed moisture from the
air (storage transport). After operating the heater
for a few times, the moisture will be removed from
the resistors.
Do not connect the power feed for the heater
through the RCD (residual current device)!
Bei der Endkontrolle der Elektroinstallationen kann
bei der Messung des Isolationswiderstandes ein
“Leck“ auftreten, was darauf zurückzuführen ist, daß
Feuchtigkeit aus der Luft in das Isolationsmaterial
der Heizwiderstände eingetreten ist (bei Lagerung
und Transport). Die Feuchtigkeit entweicht aus den
Widerständen nach zwei Erwärmungen.
Schalten Sie den Netzstrom des Elektrosaunaofens
nicht über den Fehlerstromschalter ein!
3.7. Replacing the heating elements
3.7. Ersetzen von Heizelementen
N
14
a
b
a
b
a
b
M
b0
a1
N
L1 L2
N
P
N
L1 L2
N
P
400V 2N~
400V 2N~
230V 1N~
b0
a
P
BC35
a1
b
b
a
a
N
2
L1 L2
N
P
230V 1N~
3
CONTROL OF HEATING (OPTIONAL)
STEUERUNG DER STROMHEIZUNG (WAHLWEISE)
L1 L2
b
b0
a1
N
1
b0
b0
a1
b0
a1
BC23
Heizelemente können ersetzt werden, ohne den Ofen
von der Wand zu nehmen:
•
Schalten Sie die Sicherungen aus.
•
Leeren Sie die Steine aus dem Ofen.
•
Entfernen Sie die Knöpfe der Zeitschaltuhr
und des Thermostats vom Bedienfeld an der
Vorderseite des Ofens.
•
Lösen Sie das Bedienfeld (3 Schrauben).
•
Lösen Sie die Kabel und die Wasserschutzplatte.
Die Befestigung der Heizelemente ist nun zu
sehen, wenn diese ersetzt werden können.
a1
2
M
1
CONTROL OF HEATING (OPTIONAL)
STEUERUNG DER STROMHEIZUNG (WAHLWEISE)
Replacing the heating elements can be done when
the heater remains attached to the wall:
•
Switch off fuses
•
Empty stones from the heater
•
Remove timer and thermostat knobs from the
front panel
•
Unfasten the front panel (3 screws)
•
Unfasten the cables and water protection plate
Fastening of the heating elements appears and
they can be replaced.
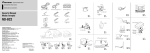
Figure 8.
Electrical connections
of heater BC
Abbildung 8.
Elektroanschlüsse des
Saunaofens BC