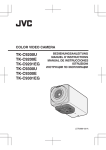
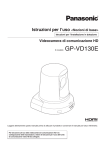
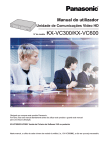
1
ENGLISH Operating Instructions <Basics> HD Communication Camera GP‑VD150E РУССКИЙ ESPAÑOL ITALIANO FRANÇAIS Model No. DEUTSCH Installation Instructions provided Before operating this product, please read the instructions carefully and save this manual for future use. For instructions on how to operate this HD Communication Camera and how to establish its settings, refer to the “Operations and Settings” manual (PDF file). Download the “Operations and Settings” manual from the home page given below. http://panasonic.net/psn/products/hdvc/resource/users_guides.html ENGLISH VERSION Safety precautions DO NOT REMOVE PANEL COVERS BY UNSCREWING. WARNING: TO PREVENT INJURY, THIS APPARATUS MUST BE SECURELY ATTACHED TO THE FLOOR IN ACCORDANCE WITH THE INSTALLATION INSTRUCTIONS. To reduce the risk of electric shock, do not remove the covers. No user serviceable parts inside. Refer servicing to qualified service personnel. WARNING: CAUTION: THIS APPARATUS MUST BE EARTHED TO REDUCE THE RISK OF FIRE OR SHOCK HAZARD AND ANNOYING INTERFERENCE, USE THE RECOMMENDED ACCESSORIES ONLY. To ensure safe operation, the three‑pin plug must be inserted only into a standard three‑pin power point which is effectively earthed through the normal household wiring. Extension cords used with the apparatus must have three cores and be correctly wired to provide connection to the earth. Wrongly wired extension cords are a major cause of fatalities. The fact that the apparatus operates satisfactorily does not imply that the power point is earthed or that the installation is completely safe. For your safety, if you are in any doubt about the effective earthing of the power point, please consult a qualified electrician. CAUTION: In order to maintain adequate ventilation, do not install or place this unit in a bookcase, built-in cabinet or any other confined space. To prevent risk of electric shock or fire hazard due to overheating, ensure that curtains and any other materials do not obstruct the ventilation. The socket outlet shall be installed near the equipment and easily accessible or the mains plug or an appliance coupler shall remain readily operable. WARNING: • TO REDUCE THE RISK OF FIRE OR ELECTRIC SHOCK, DO NOT EXPOSE THIS APPARATUS TO RAIN OR MOISTURE. • THE APPARATUS SHALL NOT BE EXPOSED TO DRIPPING OR SPLASHING AND THAT NO OBJECTS FILLED WITH LIQUIDS, SUCH AS VASES, SHALL BE PLACED ON THE APPARATUS. A warning that an apparatus with CLASS 1 construction shall be connected to a MAINS socket outlet with a protective earthing connection. indicates safety information. Information on Disposal for Users of Waste Electrical & Electronic Equipment (private households) This symbol on the products and/or accompanying documents means that used electrical and electronic products should not be mixed with general household waste. For proper treatment, recovery and recycling, please take these products to designated collection points, where they will be accepted on a free of charge basis. Alternatively, in some countries you may be able to return your products to your local retailer upon the purchase of an equivalent new product. Disposing of this product correctly will help to save valuable resources and prevent any potential negative effects on human health and the environment which could otherwise arise from inappropriate waste handling. Please contact your local authority for further details of your nearest designated collection point. Penalties may be applicable for incorrect disposal of this waste, in accordance with national legislation. For business users in the European Union If you wish to discard electrical and electronic equipment, please contact your dealer or supplier for further information. Information on Disposal in other Countries outside the European Union This symbol is only valid in the European Union. If you wish to discard this product, please contact your local authorities or dealer and ask for the correct method of disposal. 1 (E) Caution for AC Mains Lead FOR YOUR SAFETY PLEASE READ THE FOLLOWING TEXT CAREFULLY. This product is equipped with 2 types of AC mains cable. One is for continental Europe, etc. and the other one is only for U.K. Appropriate mains cable must be used in each local area, since the other type of mains cable is not suitable. FOR CONTINENTAL EUROPE, ETC. Not to be used in the U.K. FOR U.K. ONLY If the plug supplied is not suitable for your socket outlet, it should be cut off and appropriate one fitted. FOR U.K. ONLY How to replace the fuse 1. Open the fuse compartment with a screwdriver. This appliance is supplied with a moulded three pin mains plug for your safety and convenience. A 13 amp fuse is fitted in this plug. Should the fuse need to be replaced please ensure that the replacement fuse has a rating of 13 amps and that it is approved by ASTA or BSI to BS1362. Check for the ASTA mark or the BSI mark on the body of the fuse. If the plug contains a removable fuse cover you must ensure that it is refitted when the fuse is replaced. If you lose the fuse cover the plug must not be used until a replacement cover is obtained. A replacement fuse cover can be purchased from your local Panasonic Dealer. 2. Replace the fuse. Fuse IF THE FITTED MOULDED PLUG IS UNSUITABLE FOR THE SOCKET OUTLET IN YOUR HOME THEN THE FUSE SHOULD BE REMOVED AND THE PLUG CUT OFF AND DISPOSED OF SAFELY. THERE IS A DANGER OF SEVERE ELECTRICAL SHOCK IF THE CUT OFF PLUG IS INSERTED INTO ANY 13 AMP SOCKET. indicates safety information. 2 (E) ENGLISH Safety precautions Pursuant to at the directive 2004/108/EC, article 9(2) Panasonic Testing Centre Panasonic Service Europe, a division of Panasonic Marketing Europe GmbH Winsbergring 15, 22525 Hamburg, F.R. Germany 3 (E) Safety precautions .............................................................1 Installation ........................................................................18 EMC NOTICE FOR THE PURCHASER/USER OF THE APPARATUS ........................................................................3 When installing the unit on a desk .................................18 Before use ...........................................................................5 Connections ......................................................................20 Overview ..........................................................................5 Concerning HD Visual Communications System .............5 Connections with an HD Visual Communications System ..................................................................20 Concerning the Operating Instructions ............................5 Troubleshooting................................................................21 Concerning the wireless remote controller (optional accessory) .........................................................5 Appearance .......................................................................24 Trademarks and registered trademarks ...........................5 Specifications ...................................................................25 When mounting the unit on a tripod ...............................19 About copyright and licence .............................................5 Disclaimer of warranty......................................................5 Characteristics....................................................................6 Accessories ........................................................................7 Installation precautions .....................................................8 Operating precautions .....................................................10 Concerning the wireless remote controller (optional accessory) ....................................................12 Parts and their functions .................................................13 Camera unit ...................................................................13 Wireless remote controller (optional accessory) ............15 Setting the remote control IDs ........................................17 How the model’s Operating Instructions manuals are configured pp The manual of this HD communication camera (hereafter, “the unit”) is divided into two manuals: one is the <Basics> (this manual), and the other is the <Operations and Settings>. Before installing the unit, be sure to read the <Basics> to ensure that the unit is installed correctly. pp This manual explains how to install the unit. For details on how to operate the unit and select its settings, refer to the “Operating Instructions <Operations and Settings>” (PDF file). Download the “Operating Instructions <Operations and Settings>” from the home page given below. http://panasonic.net/psn/products/hdvc/resource/users_guides.html To read PDF files, you will need Adobe® Reader® which is available from Adobe Systems. 4 (E) ENGLISH Contents Before use pOverview pAbout copyright and licence pp This unit is a full HD camera integrated with a pan‑tilt head and featuring a 1/3‑type full HD MOS sensor and digital signal processor (DSP). Distributing, copying, disassembling, reverse compiling, reverse engineering, and also exporting in violation of export laws of the software provided with this unit are expressly prohibited. pp In addition to its optical 12 zoom lens, the unit comes with a 10 digital zoom to achieve high‑quality shooting that overflows with ambiance. pDisclaimer of warranty pp This unit is designed to be used exclusively with Panasonic HD visual communications system. Compatible HD visual communication units: KX‑VC300CX, KX‑VC300EX, KX‑VC600CX, KX‑VC600EX IN NO EVENT SHALL Panasonic Corporation BE LIABLE TO ANY PARTY OR ANY PERSON, EXCEPT FOR REPLACEMENT OR REASONABLE MAINTENANCE OF THE PRODUCT, FOR THE CASES, INCLUDING BUT NOT LIMITED TO BELOW: 1 ANY DAMAGE AND LOSS, INCLUDING WITHOUT LIMITATION, DIRECT OR INDIRECT, SPECIAL, CONSEQUENTIAL OR EXEMPLARY, ARISING OUT OF OR RELATING TO THE PRODUCT; pConcerning HD Visual Communications System 2 PERSONAL INJURY OR ANY DAMAGE CAUSED BY INAPPROPRIATE USE OR NEGLIGENT OPERATION OF THE USER; pp For descriptions of the panning, tilting, zooming, preset and other camera operations using an HD visual communication unit, refer to the operating instructions of the unit which is supported. 3 UNAUTHORIZED DISASSEMBLE, REPAIR OR MODIFICATION OF THE PRODUCT BY THE USER; 4 INCONVENIENCE OR ANY LOSS ARISING WHEN IMAGES ARE NOT DISPLAYED, DUE TO ANY REASON OR CAUSE INCLUDING ANY FAILURE OR PROBLEM OF THE PRODUCT; pConcerning the Operating Instructions pp For the purposes of this manual, the two KX‑VC300CX and KX‑VC300EX models are referred to as the “KX‑VC300” and the two KX‑VC600CX and KX‑VC600EX models are referred to as the “KX‑VC600”. 5 ANY PROBLEM, CONSEQUENTIAL INCONVENIENCE, OR LOSS OR DAMAGE, ARISING OUT OF THE SYSTEM COMBINED BY THE DEVICES OF THIRD PARTY; 6 LOSS OF REGISTERED DATA CAUSED BY ANY FAILURE. pConcerning the wireless remote controller (optional accessory) pp This unit can be operated remotely using a wireless remote controller (model AW‑RM50G) available as an optional accessory. It cannot be operated directly using the wireless remote controller of an HD visual communication unit. To purchase a wireless remote controller, contact your dealer. pTrademarks and registered trademarks pp HDMI, the HDMI Logo and High‑Definition Multimedia Interface are trademarks or registered trademarks of HDMI Licensing LLC in the United States and other countries. pp Adobe, Acrobat Reader, and Reader are either registered trademarks or trademarks of Adobe Systems Incorporated in the United States and/or other countries. 5 (E) Use of easy-to-operate wireless remote controller (optional accessory) is possible pp A wireless remote controller capable of operating up to four units can be used. It can easily be used to set the various functions or switch between them while viewing the menu screens. 1/3-type MOS sensor and high-performance 12 zoom lens featured pp A 1/3‑type full HD MOS sensor and DSP (digital signal processor) are incorporated. High‑quality pictures are obtained by video processing in many different kinds of ways. pp In addition to its optical 12 zoom lens, the unit comes with a 10 digital zoom to achieve high‑quality images that overflow with ambiance. pp A dynamic range stretch (DRS) function that compensates for overexposure and loss of dark detail and a new hybrid digital noise reduction (Hybrid DNR) function for minimizing image lag even in dark locations and shooting scenes clearly are incorporated to reproduce clean and clear images in a wide range of applications. Easy operation of unit enabled by its integration with a high-performance pan-tilt head unit pp Operations at the high speed of 90°/s pp Wide rotational angles with a panning range of ±100° and a tilting range of ±30° pp Quiet operation with noise levels of NC35 (normal speed) and NC40 (when preset) 6 (E) ENGLISH Characteristics Accessories Check that the following accessories are present and accounted for. Operating Instructions <Basics> (this manual) ................... 1 Power cables* (2 m) ............................................................ 2 Warranty ............................................................................. 1 AC adapter ......................................................................... 1 * Use the power cable that is suited to your locality. 7 (E) In addition to heeding the points presented in the “Safety precautions”, observe the following precautions as well. Do not install or use the unit in the following kinds of locations. pp On the surface of a wall (where the unit will be installed sideways and/or where the unit will be secured to the wall using a mounting bracket) pp On a ceiling (where the unit would be installed so that it is pointing downward) pp In locations (including places such as under the eaves of a building) where the unit would be directly exposed to rain or water pp In locations such as kitchens where there are high concentrations of steam and grease pp In outdoor locations or hot places where the temperature will exceed 40 °C pp In cold locations where the temperature will drop below 0 °C pp In locations where the humidity will exceed 85 % pp In locations where chemicals are used such as near swimming pools pp At sea, in coastal areas or in locations where corrosive gases are emitted pp In locations where radiation, X‑rays, or strong radio waves or magnetic fields are generated pp In locations where the unit would be subject to a great deal of vibration such as on board a vehicle or ship (this unit is not designed to be used in vehicles) pp In locations where the temperature is subject to sudden changes such as near the air outlet of an air conditioner or near a door which allows the outside air to come in Ensure that the installation work complies with the technical standards governing electrical equipment. This unit is for indoor use only. It cannot be used outdoors. Avoid installation in a location where the unit will be exposed to direct sunlight for extended periods or near a cooling or heating appliance. Otherwise, deformation, discoloration, malfunctioning and/or problems in operation may result. Operate the unit where it will not be splashed or sprayed by water. Use this unit on a flat and level surface. Do not install the unit on the surface of a wall, on a ceiling or in a location where the unit will end up being inclined at an angle. Note pp Do not hold the camera head while undertaking the installation work. Doing so may cause malfunctioning. OK NG What to avoid to ensure that the unit will perform stably over a prolonged period pp Using the unit for a prolonged period in a location with high temperature and humidity levels will cause its parts to deteriorate and shorten its service life. pp Ensure that a cooling unit or heating unit will not blow any air directly toward the installation location. Concerning the installation location Install the unit in a stable location which will not be susceptible to shaking. If the unit is installed in a location which is susceptible to shaking, this will cause the unit’s images to shake in turn. Install the unit after conferring in detail with your dealer. When the unit is no longer going to be used, do not leave it lying around, but be absolutely sure to dispose of it properly. When installing, transferring or disposing of the unit, be absolutely sure to hold it by its pedestal area. Problems may result if the camera head is held or rotated. Do not attach a filter, hood, extender or other parts to the unit. 8 (E) ENGLISH Installation precautions Installation precautions Grounding Before using the unit, check that the grounding wire has been fastened securely. Check the grounding resistance (less than 100 ) of the grounding terminal. When the power plug is to be converted into a 2‑pin plug for use, first consult with your dealer. Then use a plug adapter which is equipped with a grounding terminal, and be absolutely sure to connect this terminal to ground. In a case like this, be absolutely sure to make the connection to ground before proceeding to connect the power plug to the main power source. Similarly, before the ground connection is to be disconnected, be absolutely sure to disconnect the power plug from the main power source first. Use the dedicated AC adapter and power cable provided with the unit. Connect the AC adapter and power cable to the power inlet securely. The power cable supplied with this unit must always be used with this unit. The unit cannot be used with a power cable which is not supplied with the unit. Neither can the power cable supplied with the unit be used with any other device. Installing the AC adapter pp Do not place the AC adapter in direct contact with a floor or any other such surface. An extreme danger is posed by water pooling on the surface as a result of leaking rainwater or some other reason. Anchor the AC adapter securely to a surface on which no water, dust, etc. will collect. pp Secure the adapter firmly so that there will be no chance that it will fall off or fall down. Secure it using a strength which can withstand the mass (approx. 320 g) of the AC adapter. If there is a possibility of noise interference Either wire the cables so that the power cable (ceiling light cord) of AC 220 V or more, and the signal cable are placed at least 1 m apart. Alternatively run each cable through its own metal conduit. (The metal conduits must be grounded.) Install the accessory AC adapter near the main power outlet, and position it in such a way that its power plug can be plugged into and unplugged from the outlet easily. If the AC adapter is to be connected where dust collects, remove the dust and dirt from the power plug at regular intervals as a measure to prevent tracking. Radio signal interference If the unit is positioned near a TV or radio transmitting antenna or a strong electrical field or magnetic field (such as that generated by a motor, transformer or power lines), its images may be distorted and/or the images may be affected by noise. Power switch This unit does not have a power switch. The power turns on when its power plug is connected to a power outlet. When the power is turned on, the pan, tilt, zoom and focusing operations are performed. Before proceeding with maintenance, be absolutely sure to disconnect the power plug from the power outlet. When connecting the cables, ensure that the connector areas will not be subject to any load. Doing so may cause malfunctioning. Allowing the generated heat to escape This unit allows the heat generated inside to escape from its surfaces. Do not install the unit in a location where it will be surrounded by walls or other surfaces and where heat will be trapped. In addition, the heat is dissipated to the bottom panel which will warm up over time: This is normal and not indicative of any trouble. Connecting the power cable Be absolutely sure to connect the power cable of the AC adapter through a circuit breaker using one of the following methods. (1) Connect the power cable through a power control unit. (2) Connect the power cable to a circuit breaker in a power distribution panel with a contact distance of 3.0 mm or more. Use a circuit breaker which is capable of shutting off all the poles of the main power supply with the exception of the protective ground conductor. (3) Install the AC adapter near the power outlet, and connect it through the power plug. IMPORTANT pp The product name and its electrical ratings are marked on its bottom panel. 9 (E) Zooming and focusing When the focus is set manually, out‑of‑focusing may occur during zooming. After zooming, if necessary, either adjust the focus or set the focus to auto. When using the focus at the manual setting, proceed with zooming after setting the focus position at the Tele end where the focusing accuracy is higher. (However, if the distance from the unit to the subject is less than 1.5 m, the subject may shift out of focus at the Wide end.) If zooming is performed to the Tele end after having adjusted the focus at the Wide end, out‑of‑focusing may occur. Shoot under the proper lighting conditions. To produce pictures with eye‑pleasing colours, shoot under the proper lighting conditions. The pictures may not appear with their proper colours when shooting under fluorescent lights. Select the proper lighting as required. To ensure a stable performance in the long term Using the unit for prolonged periods in locations where the temperature and humidity levels are high will cause its parts to deteriorate, resulting in a reduction of its service life. (Recommended temperature: Max. 35 °C) Ensure that a cooling unit or heating unit will not blow any air directly toward the installation location. Concerning the zoom position when the power is turned on When the unit’s power is turned on, the zoom, focus and iris return to the positions they occupied immediately before the power was turned off. (This happens for the focus and iris when they were set manually.) However, this position may not be restored if, for instance, the power cable was disconnected during operation. Image persistence on the MOS sensor colour filters If parts of the MOS sensor are exposed continuously to spotlights or other bright lights, the colour filters inside the MOS sensor will deteriorate, and the parts concerned may become discolored. The discoloration may be noticeable when the direction of fixed monitoring is changed. Do not point the camera at strong lights. When parts of the MOS sensor are exposed to spotlights or other strong lights, blooming (a phenomenon where the edges of strong lights become blurred) may occur. Bright subject Operating temperature range Avoid using the unit in cold locations where the temperature drops below 0 °C or hot locations where the temperature rises above +40 °C since these temperatures downgrade the picture quality and adversely affect the internal parts. Concerning the HDMI interface standard This unit has been certified as HDMI‑compatible, but on rare occasions images may not be displayed depending on the HDMI device which has been connected to the unit. Blooming Concerning the colour reproduction of MOS sensors Depending on the colour tones of the subjects, the colour reproduction may deteriorate: This is normal and not indicative of any trouble. Turn off the power before connecting or disconnecting the cables. Always be sure to turn off the power before connecting or disconnecting the cables. What happens with high-brightness subjects Flare may occur if an extremely bright light source is pointed at the lens. In a case like this, change the angle or take some other remedial action. When using the automatic functions pp If “FullAuto” has been selected as the setting for Scene on the camera menu, for example, all the auto settings will be turned on, and manual operations will no longer be possible for some of the items. pp When using the ATW (auto tracking white adjustment) function under fluorescent lights, the white balance may var y. pp In some situations, it may be hard to focus at the auto setting. In cases like this, select the manual setting, and focus manually. pp The appropriate brightness may not be obtained when shooting bright objects using the auto settings for the gain and iris. In cases like this, set the shutter speed to manual, and adjust. 10 (E) ENGLISH Operating precautions Operating precautions Handle the unit carefully. Do not drop the unit or subject it to strong impact or vibration. Doing so may cause the unit to malfunction. When the unit is not in use Turn off the unit’s power when it is not in use. When the unit is no longer going to be used, do not leave it lying around, but be absolutely sure to dispose of it properly. Do not touch the optical system parts. The optical system parts are the very heart of the camera. Under no circumstances must they be touched. In the unlikely event that they have become dusty, remove the dust by using a camera blower or by wiping them gently with a lens cleaning paper. Do not allow foreign matter to make contact with the rotating parts. Otherwise, trouble may be caused. Keep the unit away from water. Avoid all direct contact with water. Otherwise, problems may occur. Maintenance Turn off the unit’s power before proceeding with maintenance. Otherwise, you may injure yourself. Wipe the surfaces using a soft dry cloth. Avoid all contact with benzine, paint thinners and other volatile substances, and avoid using these substances. Otherwise, the casing may become discolored. Do not turn the camera head by hand. Turning the camera head by hand may cause the unit to malfunction. Use the unit in an environment with minimal moisture and dust. Avoid using the unit in an environment with high concentration of moisture or dust since these conditions will damage the internal parts. Disposal of the unit When the unit has reached the end of its service life and is to be disposed of, ask a qualified contractor to dispose of the unit properly in order to protect the environment. 11 (E) Concerning the wireless remote controller (optional accessory) ENGLISH This unit can be operated by remote control using a wireless remote controller (model number: AW-RM50G) purchased separately. The unit cannot be operated directly using the wireless remote controller of an HD visual communication unit. Check out the following points before using the wireless remote controller. Consult your dealer concerning the purchase of a wireless remote controller. pp Operate the wireless remote controller from positions less than 6 m away from the unit. pp The wireless remote controller may not work when it is pointed from certain angles at the unit. From a place where the wireless remote controller signal light‑sensing area (hereafter, “light‑sensing area”) can be seen, point the signal transmission window of the wireless remote controller at the light‑sensing area, and operate the buttons. It may prove to be more difficult to operate the unit when the remote control is operated from behind the unit. pp If the unit is installed near fluorescent lights, plasma monitors or other such products or if the unit is exposed to sunlight, the effects of the light may make it impossible for the unit to be operated using the wireless remote controller. Be sure to follow the steps below for installation and use. • Take steps to ensure that the light‑sensing area will not be exposed to the light from fluorescent lights, plasma monitors or other such products or from the sun. • Install the unit away from fluorescent lights, plasma monitors and other such products. pp For about 10 minutes even after the batteries have been removed from the wireless remote controller, the selection of the operation to be performed (the [CAM1], [CAM2], [CAM3] or [CAM4] button which was pressed last) will remain stored in the memory. When a longer period of time elapses, however, the selection is reset to the status established when the [CAM1] button was pressed. 12 (E) Parts and their functions 1 Wireless remote controller signal light-sensing area pCamera unit Light sensors are located in two places at the front of the camera pedestal. 2 Status display lamp This lights in the following way depending on the status of the unit. Orange: When the standby status is established Green: When the power is on Red: When trouble has occurred in the unit Green and blinks twice: When a signal matched by the remote control ID has been received from the wireless remote controller (optional accessory) while the power is on Orange and blinks twice: When a signal which is not matched by the remote control ID has been received from the wireless remote controller (optional accessory) while the power is on 3 Camera head This rotates in the horizontal direction. 4 Lens unit This rotates in the up and down direction. <Rear panel> 5 IR ID switches [IRID] [CAM1] [CAM2] [CAM3] [CAM4] These are used to select the ID of the wireless remote controller (optional accessory). The IR ID switch settings “CAM1” to “CAM4” correspond to the [CAM1] to [CAM4] buttons on the wireless remote controller. 6 HDMI connector [HDMI] This is the HDMI video output connector. <Bottom panel> 7 Anti-theft wire mounting hole Use this hole to attach the wire bracket. 8 Service connector This connector is used only when maintenance is carried out. 9 DC IN connector [12V IN ] Connect the AC adapter supplied with the unit to this connector to supply the DC 12 V voltage to the unit. 13 (E) Parts and their functions ENGLISH : Threaded hole (thread: 1/4-20UNC) for mounting the camera Use this hole when mounting the camera on a tripod, etc. Service switches SW1 SW2 SW3 SW4 ON OFF The camera is used with all the switches at the OFF setting. 14 (E) Parts and their functions 3 MENU button pWireless remote controller (optional accessory) Each time this is pressed for at least 2 seconds, operation switches between displaying the unit’s menu and exiting the menu. When it is pressed quickly (for less than 2 seconds) while a menu is displayed, the setting change is cancelled. 4 CAM1 to CAM4 buttons These are used to select the units that are to be operated. Once a button has been selected, the unit corresponding to the selected button can be operated. 5 SET button If this button is pressed when one of the “Manual1 to 3” settings has been selected for “Scene” on the camera menu and the AWB A memory or AWB B memory has been selected by the white balance adjustment, the white balance is automatically adjusted and registered in the selected memory. 6 MODE button This is used for future expansion of the functions. It is not used at the present time. 7 GAIN buttons [OFF] [LOW] [HI] [AUTO] These are used to set the gain. The gain increase can be set in three steps using the [OFF], [LOW] and [HI] buttons. [LOW] is set to 9 dB, and [HI] is set to 18 dB. When the [AUTO] button is pressed, the AGC function is activated, and the gain is adjusted automatically depending on the light quantity. The maximum gain of the AGC function can be set using the menu. 8 Preset memory call buttons [1] to [12] These are used to call the information on the unit’s directions and other settings, which have been registered in the unit’s preset memories No.1 to No.12, and reproduce those settings. 1 ON/STANDBY button Each time this is pressed for at least 2 seconds, operation switches between turning on the unit’s power and establishing the standby status. Notes pp When operation is transferred to the STANDBY mode: The current pan‑tilt position is stored in the memory (as a POWER ON preset), and the camera moves so that it points toward the back. pp When operation is transferred to the POWER ON mode: The camera moves to the position which was stored in the memory (as a POWER ON preset) when operation was transferred to the STANDBY mode. 2 Signal transmission window 15 (E) Parts and their functions This is used when automatically adjusting the lens focus. This is used to register the settings in the preset memories. When a preset memory call button is pressed while the PRESET/LIMIT button is held down, the information on the unit’s current direction and other settings is registered in the call button. Preset memory call buttons [1] to [12] correspond to the unit’s No.1 to No.12 preset memories. M/FOCUS button This is used when manually adjusting the lens focus. The FOCUS buttons ([F] and [N]) are used when performing the actual adjustment. OPT buttons [ON] [OFF] These are used for future expansion of the functions. They are not used at the present time. : Pan-tilt buttons and menu operation buttons [] [] [] [] [] HOME button (1) These are used to change the unit’s direction. The unit is tilted in the up/down direction using the [] and [] buttons and panned in the left/right direction using the [] and [] buttons. The [] button does not work during tilting and panning. When the [] or [] and [] or [] buttons are pressed at the same time, the unit moves diagonally. When this is pressed for at least 2 seconds, the unit’s direction (panning or tilting) returns to the reference position. ZOOM buttons [T] [W] These are used to adjust the lens zoom. The zoom is adjusted in the wide‑angle using the [W] button and in the telephoto using the [T] button. (2) The buttons are used for menu operations when the unit displays the menus. Use the [], [], [] and [] buttons to select the menu items. When a selected item has a sub‑menu, the sub‑menu will be displayed by pressing the [] button. When the cursor is aligned with a particular item and the [] button is pressed on the setting menu at the bottom hierarchical level, the setting of the selected item blinks. When the [] button is pressed after the setting has been changed using the [], [], [] and [] buttons, the setting stops blinking, and the new setting is entered. With a regular menu, the new setting is reflected immediately after it has been changed if the change was made from the setting in the blinking status, but there are some menus (Scene, Format and Initialize) where it is reflected only after the [] button has been pressed, the blinking has stopped and the new setting has been entered. If the MENU button is pressed quickly (for less than 2 seconds) while the setting is in the blinking status, the change will be cancelled, and the setting selected prior to the change will be restored. FAST button This is used to change the movement speed at which the panning, tilting, zooming and focusing operations are performed to the high speed. Note pp The operating speed for panning and tilting when the preset memory settings have been called can be changed using the Preset Speed item of the camera menu. SLOW button This is used to change the movement speed at which the panning, tilting, zooming and focusing operations are performed to the low speed. A/IRIS button This establishes the setting for adjusting the lens iris automatically in line with the light quantity. M/IRIS button This establishes the setting for adjusting the lens iris manually. The IRIS + and IRIS – buttons are used when performing the actual adjustment. FOCUS buttons [F] [N] IRIS + button These are used to adjust the lens focus manually when the manual setting is established for the lens focus. The focus is adjusted in the far using the [F] button and in the near using the [N] button. This is used to adjust the lens iris in the opening direction. IRIS – button This is used to adjust the lens iris in the closing direction. 16 (E) ENGLISH A/FOCUS button 9 PRESET/LIMIT button Setting the remote control IDs The wireless remote controller (optional accessory) is capable of operating up to four units. IDs are used to set which units are selected when the [CAM1], [CAM2], [CAM3] and [CAM4] buttons on the wireless remote controller have been pressed. pp When using a multiple number of units, set a different remote control ID for each unit. pp When using one unit, set the remote control ID to “CAM1” unless the setting needs to be changed. Setting procedure Operate the IR ID switch on the units rear panel, and select “CAM1”, “CAM2”, “CAM3” or “CAM4” as the remote control ID. (See page 13) The IR ID switch settings “CAM1” to “CAM4” correspond to the [CAM1] to [CAM4] buttons on the wireless remote controller. (The factory setting is “CAM1”.) IR ID switches [CAM1] to [CAM4] buttons 17 (E) Installation ENGLISH 1 Connect the rear panel connectors. AC adaptor cable Video output cable pWhen installing the unit on a desk Place the unit flat on the surface. Notes pp Install the unit in a stable location which will not be susceptible to shaking. If the unit is installed in a location which is susceptible to shaking, this will cause the unit’s images to shake in turn. pp Take care not to allow the unit to fall or otherwise be damaged during installation. pp When carrying the unit, do not hold it by its head. pp Do not take hold of the camera head or rotate it. Doing so may cause malfunctioning. pp Take care not to pull the connected cables. Doing so may cause the unit to fall and/or it may result in injury. Ensure that the unit will not fall off. OK 18 (E) NG Installation pWhen mounting the unit on a tripod Use a highly stable tripod which can bear the weight of the camera mounted on it. Attach the tripod to the threaded hole for mounting the camera on the camera’s bottom panel. Place the tripod on a completely flat and level surface. Tighten the screw by hand to mount the tripod securely. Do not tighten the screw by rotating the camera body. Doing so may cause malfunctioning. Use screw for mounting the tripod that satisfy the following standard. Screw for mounting tripod (1/4-20UNC) 4.5 mm to 6 mm Notes pp pp pp pp Do not install the unit where people will be passing back and forth. When using the unit mounted on a tripod, do not put the tripod high above the floor level. Mount the unit securely so there is no looseness. Looseness may cause the unit to fall off and/or result in injuries. When the unit is going to be used for a prolonged period of time, take steps to ensure that the unit will not topple or fall over and that it will not fall off or fall down. After using the unit, restore the installation location to its original state without delay. 19 (E) pConnections with an HD Visual Communications System HD Communication Camera GP-VD150E HDMI signal HD Visual Communication Unit KX-VC300, KX-VC600 Wireless remote controller (optional accessory) AW-RM50G pp For descriptions of the panning, tilting, zooming, preset and other camera operations using an HD visual communication unit, refer to the operating instructions of the unit which is supported. 20 (E) ENGLISH Connections Troubleshooting qpOperation Symptom No power Cannot operate (common to wireless remote controller, HD Visual Communication Unit) Cannot operate using the wireless remote controller Cause and remedial action Reference pages pp Is the AC adapter securely connected to the AC outlet? ––– pp Is the power plug of the AC adapter connected properly? ––– pp When the unit is being operated by the wireless remote controller Also refer to the “Cannot operate using the wireless remote controller” item. ––– pp Is the power on? If the unit’s status display lamp is off or if it has lit up orange, it means that the unit’s power is not being supplied. <Operations and Settings> pp Has the correct unit to be operated been selected? <Operations and Settings> pp Have the remote control’s batteries run down or have the batteries been installed with their polarities reversed? If the status display lamp does not blink even when the wireless remote controller is operated near the wireless remote controller signal light‑sensing area, it means that the batteries have run down. Replace the batteries. ––– pp Is there a fluorescent light or plasma monitor near the unit and, if so, is the wireless remote controller signal light-sensing area exposed to its light? P.12 21 (E) qpVideo Symptom Cause and remedial action pp Has the unit been connected properly to the other connected devices? No pictures are displayed or the pictures are disturbed The menu screen is displayed Reference pages P.20 pp If the system is configured in such a way that the picture is also switched when the unit to be operated is selected, has the correct unit been selected? <Operations and Settings> pp Has the video signal setting been selected correctly? <Operations and Settings> pp Exit the menu. <Operations and Settings> pp Depending on the HDMI monitor you are using, you may experience one or more of the symptoms described below. It is difficult to view the menu screens • The resolution of the characters in the menu displays changes as the background image changes. • Depending on the edge enhancement setting established for the monitor, white lines appear in front of the black shadows of the menus. • Depending on the edge enhancement setting established for the monitor, the background colours may be superimposed onto the white parts of the menus. ––– pp Is the focus set to manual? Auto focusing is initiated as soon as the focus is set to auto. <Operations and Settings> pp In some situations, it may be hard to focus at the auto setting. In cases like this, select the manual setting, and focus manually. <Operations and Settings> No auto focusing The subject is not brought into focus during zooming when the manual setting is used for the focus Ring-shaped reflections appear in the four corners of the images Something is wrong with the colouring of the pictures pp Was the focus adjusted at the Tele end? First adjust the focus at the Tele end where the focusing accuracy is higher, and then proceed with the zooming. pp Under some operating conditions, it may be hard to bring subjects into focus. In such cases, use the focus at the auto setting. pp These are caused by the reflections of the light between the lens and the cover in front of the lens. Find a way of optimizing the position of the lighting relative to the position of the unit, and install and use the unit in a location where the reflections will not occur. ––– <Operations and Settings> ––– pp Activate the ATW (Auto tracking white adjustment) function. <Operations and Settings> pp In some situations, the proper colours may not be reproduced using the ATW function. In cases like this, proceed with the white balance adjustment. <Operations and Settings> 22 (E) ENGLISH Troubleshooting Troubleshooting Symptom The pictures are too light or too dark Cause and remedial action pp Either select the auto setting for the iris or select the manual setting and adjust the iris manually. Reference pages <Operations and Settings> pp The pictures may be dark if the video signal cables are too long because this will cause signal attenuation. ––– The subjects appear distorted pp If a subject has suddenly crossed in front of the camera, it may appear slightly distorted because this camera uses a MOS image sensor. This is normal and not indicative of any problem. ––– When the flash is fired during shooting, only the top or bottom of the screen becomes lighter pp With a MOS image sensor, the shooting timing differs slightly between the top left and bottom right of the screen. This means that when the flash is fired, the bottom of the screen will become lighter in the field concerned and the top will become lighter in the next field. This is normal and not indicative of any problem. ––– The brightness changes cyclically or the colours change, and horizontal stripes can be seen passing across the screen pp These phenomena (flicker) may occur under the illumination produced by fluorescent lighting, mercury bulbs or other types of discharge tubes. This is normal and not indicative of any problem. At a time like this, it is recommended that the electronic shutter speed be set to 1/120 in areas with a 60 Hz power line frequency or to OFF in areas with a 50 Hz power line frequency. <Operations and Settings> When fine lines or cyclical patterns are shot, flickering is seen or colouring is added to them pp This phenomenon occurs because the pixels are arranged systematically on each image sensor. It is noticeable when the spatial frequency of a subject and the pixel pitch are brought into proximity so change the camera angle or take other such action. ––– 23 (E) Appearance ENGLISH Unit: mm R7 150 75 73 24 (E) 1.5 47.7 115.9 175.5 4.9 Specifications Power requirements: DC 12 V 10 % (AC adapter provided) Current consumption: 1.0 A indicates safety information. p GENERAL p INPUT Ambient operating temperature: 0 °C to +40 °C Input connector: DC 12 V IN Storage temperature: –20 °C to +50 °C Allowable humidity ranges: 20 % to 90 % (no condensation) Mass: p OUTPUT Approx. 1.2 kg Dimensions (W D H): 150 148 177 mm Finish: Video output: Silver 25 (E) HDMI (HDMI connector) Specifications p FUNCTIONS AND PERFORMANCE Pan/tilt operation speed: Max. 90°/s or more [Camera unit] Imaging sensors: 1/3‑type Full‑HD MOS Lens: Motorized 12 zoom, f/1.6 to 2.0 (f=4.7 to 56.4 mm; 35 mm equivalent: 36.9 mm to 442.8 mm) Focus: Switching between auto and manual Focus distance: Entire zooming range: 1.5 m Wide end: 30 cm Panning range: ±100° Tilting range: ±30° p Depending on the pan or tilt position, the camera may be reflected in the image. Quietness: NC35 (normal speed), NC40 (when preset) Colour separation optical system: On‑chip colour filter system Minimum illumination: 3 lx (50 IRE, F1.6, +36 dB) Horizontal resolution: 850 TV lines Typ (Centre area) Gain selection: Auto, 0 dB, 3 dB, 6 dB, 9 dB, 12 dB, 15 dB, 18 dB Storage mode: 0 dB, 6 dB, 12 dB, 18 dB p AC adapter Electronic shutter speed: Step: 1/120, 1/250, 1/500, 1/1000, 1/2000, 1/4000, 1/10000 Synchro scan: 50.20 Hz to 538.51 Hz Gamma: Off, Normal (Low, Mid, High), Cinema White balance: AWB A, AWB B, ATW FullAuto, Manual1, Manual2, Manual3 Output format: HD 1080: 50i, SD 576: 50p AC 220 V to 240 V, 1.5 A, 50 Hz Output: DC 12 V, 2.5 A, 30 W p Optional accessories pp Wireless remote controller AW-RM50G (Manufactured by Panasonic) (Size “R6” or “LR6” dry battery 2, obtained separately) Chroma amount variability: 7 levels variability Scene file: Input: Mass and dimensions shown are approximate. Specifications are subject to change without notice. 26 (E) ENGLISH [Pan-tilt head unit] DEUTSCHEAUSGABE (GERMAN VERSION) Sicherheitshinweise Öffnen Sie nicht das Gerät AbschraubenvonGehäuseteilen. durch VORSICHT: NUR DAS EMPFOHLENE ZUBEHÖR VERWENDEN,UMDIEGEFAHRVONFEUERUND ELEKTRISCHEM SCHLAG SOWIE STÖRUNGEN AUSZUSCHALTEN. Zur Vermeidung von elektrischem Schlag darf das Gehäuse nicht geöffnet werden. Im Geräteinneren befinden sich keine Teile, die vom Benutzer gewartet werden können. Wartungs- und Reparaturarbeiten grundsätzlich autorisiertem Kundendienstpersonal überlassen. VORSICHT: Um eine ausreichende Belüftung zu gewährleisten, dieses Gerät nicht in einem Bücherregal, Einbauschrank oder an einem anderen engen Platz aufstellen. Sicherstellen, dassdieVentilationsöffnungenimGehäusenicht durchVorhängeoderandereMaterialienblockiert werden; anderenfalls besteht die Gefahr von elektrischem Schlag oder Feuer aufgrund von Überhitzung. WARNUNG: DIESESGERÄTMUSSGEERDETWERDEN Um sicheren Betrieb zu gewährleisten, darf der Drei-Stift-Stecker nur in eine standardmäßige Schutzkontakt-Steckdose eingesteckt werden, die über das normale Haushaltsnetz geerdet ist. Die mit dem Gerät verwendeten Verlängerungskabel müssen drei Adern aufweisen und korrekt verdrahtet sein, um eine einwandfreie Erdverbindung zu gewährleisten. Falsch verdrahtete Verlängerungskabel stellen eine Hauptursache für tödliche Unfälle dar. Die Tatsache, dass das Gerät zufrieden stellend arbeitet, bedeutet nicht, dass die Steckdose geerdet oder die Installation völlig sicher ist. Falls Sie Zweifel über die effektive Erdung der Steckdose haben, konsultieren Sie bitte zu Ihrer Sicherheit einen qualifizierten Elektriker. Die Steckdose sollte in der Nähe der Ausrüstung installiert werden und leicht zugänglich sein, oder der Netzstecker oder eine Gerätesteckvorrichtung sollten stets betriebsbereit sein. Eine Warnung, dass ein Apparat mit einer Konstruktion der KLASSE 1 an einer SchutzkontaktNetzsteckdose angeschlossen werden muss. WARNUNG: • U MBRAND-ODERSTROMSCHLAGGEFAHRZU REDUZIEREN, DARF DIESES GERÄT WEDER REGENNOCHNÄSSEAUSGESETZTWERDEN. • SETZEN SIE DAS GERÄT KEINEM TROPF- ODER SPRITZWASSER AUS, UND STELLEN SIE KEINE MIT FLÜSSIGKEITEN GEFÜLLTE GEGENSTÄNDE, WIE Z.B. VASEN, AUF DAS GERÄT. WARNUNG: UM VERLETZUNGEN ZU VERHÜTEN, MUSS DIESER APPARAT GEMÄSS DER INSTALLATIONSANLEITUNG SICHER AM BODEN BEFESTIGTWERDEN. ist die Sicherheitsinformation. 1 (G) DEUTSCH BenutzerinformationenzurEntsorgungvonelektrischenundelektronischenGeräten(privateHaushalte) Dieses Symbol auf Produkten und/oder begleitenden Dokumenten bedeutet, dass verbrauchte elektrische und elektronische Produkte nicht mit gewöhnlichem Haushaltsabfall vermischt werden sollen. Bringen Sie zur ordnungsgemäßen Behandlung, Rückgewinnung und Recycling diese Produkte zu den entsprechenden Sammelstellen, wo sie ohne Gebühren entgegengenommen werden. In einigen Ländern kann es auch möglich sein, diese Produkte beim Kauf eines entsprechenden neuen Produkts bei Ihrem örtlichen Einzelhändler abzugeben. Die ordnungsgemäße Entsorgung dieses Produkts dient dem Umweltschutz und verhindert mögliche schädliche Auswirkungen auf Mensch und Umgebung, die aus einer unsachgemäßen Handhabung von Abfall entstehen können. Genauere Informationen zur nächstgelegenen Sammelstelle erhalten Sie bei Ihrer Gemeindeverwaltung. In Übereinstimmung mit der Landesgesetzgebung können für die unsachgemäße Entsorgung dieser Art von Abfall Strafgebühren erhoben werden. FürGeschäftskundeninderEuropäischenUnion Bitte treten Sie mit Ihrem Händler oder Lieferanten in Kontakt, wenn Sie elektrische und elektronische Geräte entsorgen möchten. Er hält weitere Informationen für sie bereit. InformationenzurEntsorgunginanderenLändernaußerhalbderEuropäischenUnion Dieses Symbol ist nur in der Europäischen Union gültig. Bitte treten Sie mit Ihrer Gemeindeverwaltung oder Ihrem Händler in Kontakt, wenn Sie dieses Produkt entsorgen möchten, und fragen Sie nach einer Entsorgungsmöglichkeit. 2 (G) Inhalt Sicherheitshinweise...........................................................1 Installation.........................................................................17 VordemGebrauch..............................................................4 Bei Installation des Gerätes auf einem Tisch .................17 Übersicht ..........................................................................4 Bei Stativmontage des Gerätes .....................................18 Info zu HD-Sichtkommunikationssystem ..........................4 Anschlüsse.......................................................................19 Bezüglich der Bedienungsanleitung .................................4 Info zur drahtlosen Fernbedienung (Sonderzubehör) ......4 Verbindungen mit einem HD-Sichtkommunikationssystem ..........................19 Warenzeichen und eingetragene Warenzeichen..............4 Fehlersuche......................................................................20 Copyright und Lizenz .......................................................4 Maßzeichnungen..............................................................23 Haftungsausschluss .........................................................4 Technischedaten.............................................................24 Eigenschaften.....................................................................5 Zubehör...............................................................................6 Installationshinweise.........................................................7 VorsichtsmaßnahmenzumBetrieb...................................9 InfozurdrahtlosenFernbedienung (Sonderzubehör)..........................................................11 TeileundihreFunktionen................................................12 Kameraeinheit ................................................................12 Drahtlose Fernbedienung (Sonderzubehör)...................14 EinstellenderFernbedienungskennung........................16 KonfigurationsweisederBedienungsanleitungendesModells pp Die Anleitung dieser HD-Kommunikationskamera (im Folgenden “Gerät” genannt) ist in zwei Teile unterteilt: den Teil <Grundlagen> (vorliegende Anleitung) und den Teil <Bedienungsverfahren und Einstellungen>. Bitte lesen Sie vor der Installation des Gerätes den Teil <Grundlagen> durch, um korrekte Installation des Gerätes zu gewährleisten. pp Diese Anleitung erläutert die Installation des Gerätes. Um außerdem Einzelheiten zur Bedienung des Gerätes und zur Auswahl seiner Einstellungen zu erfahren, lesen Sie bitte die “Bedienungsanleitung <Bedienungsverfahren und Einstellungen>” (PDF-Datei). Laden Sie die “Bedienungsanleitung <Bedienungsverfahren und Einstellungen>” von der unten angegebenen Homepage herunter. http://panasonic.net/psn/products/hdvc/resource/users_guides.html Um PDF-Dateien zu lesen, benötigen Sie die Software Adobe® Reader®, die von Adobe Systems erhältlich ist. 3 (G) pÜbersicht pCopyrightundLizenz pp Dieses Gerät ist eine Full-HD-Kamera mit integriertem Schwenk-Neigekopf. Es ist mit einem 1/3-Zoll-FullHD-MOS-Sensor und Digitalsignalprozessor (DSP) ausgestattet. Verteilen, Kopieren, Zerlegen, Nacherstellen und Nachbauen der mit dem Gerät gelieferten Software, sowie auch deren Export unter Verletzung der Exportgesetze ist ausdrücklich verboten. pp Zusätzlich zum optischen 12-Zoom seines Objektivs verfügt das Gerät über einen 10-Digitalzoom, um hochwertige und stimmungsvolle Aufnahmen zu erzielen. pHaftungsausschluss pp Dieses Gerät ist für den ausschließlichen Einsatz mit Panasonic HD-Video-Konferenzsystemen ausgelegt. Kompatible HD-Video-Konferenzsysteme: KX-VC300CX, KX-VC300EX, KX-VC600CX, KX-VC600EX Panasonic Corporation IST UNTER ANDEREM IN KEINEM DER UNTEN AUFGEFÜHRTEN FÄLLE GEGENÜBER JURISTISCHEN PERSONEN ODER PERSONEN HAFTBAR, ES SEI DENN ES HANDELT SICH UM DEN ERSATZ ODER DIE ZUMUTBARE WARTUNG DES PRODUKTS: 1 SCHADENSANSPRÜCHE JEGLICHER ART, EINSCHLIESSLICH UND OHNE EINSCHRÄNKUNGEN UNMITTELBARER, MITTELBARER, ZUSÄTZLICHER, FOLGEODER ÜBER DEN VERURSACHTEN SCHADEN HINAUSGEHENDER SCHADENSANSPRÜCHE; pInfozu HD-Sichtkommunikationssystem pp Beschreibungen der Vorgänge Schwenken, Neigen, Zoomen, Vorwahl und anderer Kameraoperationen mithilfe eines HD-Video-Konferenzsystems entnehmen Sie bitte der Bedienungsanleitung des unterstützten Gerätes. 2 KÖRPERVERLETZUNGEN ODER SONSTIGE SCHÄDEN, DIE AUF DEN UNSACHGEMÄSSEN GEBRAUCH ODER DEN FAHRLÄSSIGEN BETRIEB DURCH DEN BENUTZER ZURÜCKZUFÜHREN SIND; pBezüglichder Bedienungsanleitung 3 UNZULÄSSIGES ZERLEGEN, REPARIEREN ODER VERÄNDERN DES PRODUKTS DURCH DEN BENUTZER; pp Für die Zwecke dieser Anleitung werden die beiden Modelle KX-VC300CX und KX-VC300EX mit “KX-VC300”, und die beiden Modelle KX-VC600CX und KX-VC600EX mit “KX-VC600” bezeichnet. 4 UNANNEHMLICHKEITEN ODER VERLUSTE, WENN BILDER AUS IRGENDWELCHEN GRÜNDEN ODER URSACHEN NICHT ANGEZEIGT WERDEN, EINSCHLIESSLICH EINES AUSFALLS ODER PROBLEMS DES GERÄTS; pInfozurdrahtlosen Fernbedienung(Sonderzubehör) 5 JEGLICHE STÖRUNGEN, MITTELBARE UNANNEHMLICHKEITEN, ODER VERLUSTE ODER SCHÄDEN, DIE SICH AUS DEM ZUSAMMENSCHALTEN DES SYSTEMS MIT GERÄTEN VON FREMDHERSTELLERN ERGEBEN; pp Dieses Gerät kann ferngesteuert werden. Dazu benötigen Sie eine drahtlose Fernbedienung (Modell AW-RM50G), die als Sonderzubehör erhältlich ist. Die Kamera kann nicht direkt mit der drahtlosen Fernbedienung eines HD-Video-Konferenzsystemens bedient werden. Wenden Sie sich zum Kauf einer drahtlosen Fernbedienung an Ihren Händler. 6 VERLUST AUFGEZEICHNETER DATEN AUFGRUND EINES AUSFALLS. pWarenzeichenund eingetrageneWarenzeichen pp HDMI, das HDMI-Logo und High-Definition Multimedia Interface sind Markenzeichen oder eingetragene Markenzeichen von HDMI Licensing LLC, in den Vereinigten Staaten und in anderen Ländern. pp Adobe, Acrobat Reader und Reader sind eingetragene Markenzeichen bzw. Markenzeichen von Adobe Systems Incorporated in den Vereinigten Staaten und/oder in anderen Ländern. 4 (G) DEUTSCH Vor dem Gebrauch Eigenschaften DerEinsatzeinerbedienerfreundlichenFernbedienung (Sonderzubehör)istmöglich pp Eine drahtlose Fernbedienung, die bis zu vier Geräte steuern kann, ist erhältlich. Sie ermöglicht eine bequeme Einstellung und Umschaltung der verschiedenen Funktionen mithilfe von Menübildschirmen. Ausstattungmit1/3-Typ-MOS-Sensorund leistungsstarkem12-Zoomobjektiv pp Ein 1/3-Zoll-Full-HD-MOS-Sensor und DSP (Digitalsignalprozessor) sind eingebaut. Durch viele verschiedene Bildverarbeitungsprozesse werden hochwertige Bilder geliefert. pp Zusätzlich zum optischen 12-Zoom seines Objektivs verfügt das Gerät über einen 10-Digitalzoom, um hochwertige und stimmungsvolle Aufnahmen zu erzielen. pp Eine Dynamic Range Stretch-Funktion (DRS), die Überbelichtung und Verlust von Dunkeldetail ausgleicht, und eine neue Hybrid-Digitalrauschunterdrückung (Hybrid DNR) für die Minimierung des Nachzieheffekts selbst an dunklen Orten und klares Aufnehmen von Szenen sind eingebaut, um saubere und klare Bilder in einem breiten Anwendungsbereich zu reproduzieren. EinfacheBedienungdesGerätesdurchIntegrationmit leistungsstarkerSchwenk-/Neigekopfeinheit pp Betrieb mit hoher Geschwindigkeit von 90°/s pp Große Arbeitswinkel mit einem Schwenkbereich von ±100° und einem Neigungsbereich von ±30° pp Leiser Betrieb mit Geräuschpegeln von NC35 (normale Geschwindigkeit) und NC40 (bei Voreinstellung) 5 (G) Zubehör Prüfen Sie nach, ob die folgenden Zubehörteile vollzählig vorhanden sind. Bedienungsanleitung <Grundlagen> (vorliegende Anleitung) .......................... 1 Netzkabel* (2 m) ................................................................. 2 Netzgerät ............................................................................ 1 Garantie .............................................................................. 1 DEUTSCH * Verwenden Sie ein für Ihren Standort geeignetes Netzkabel. 6 (G) Installationshinweise BeachtenSienebendenunter“Sicherheitshinweise”aufgeführtenPunktenauchdiefolgenden Vorsichtsmaßnahmen. VermeidenSiedieInstallationundBenutzungdes GerätesanfolgendenOrten. pp An einer Wand (wo das Gerät seitwärts montiert und/oder mit einer Montagehalterung an der Wand befestigt sein wird) pp An einer Decke (wo das Gerät so montiert sein würde, dass es nach unten gerichtet ist) pp An Orten (einschließlich Orte unter dem Dachvorsprung eines Gebäudes), wo das Gerät direkt Regen oder Wasser ausgesetzt wäre pp An Orten, wie z. B. Küchen, wo hohe Konzentrationen von Dampf und Fett vorhanden sind pp Im Freien oder an heißen Orten, wo die Temperatur 40 °C überschreitet pp An kalten Orten, wo die Temperatur unter 0 °C abfällt pp An Orten, wo die Luftfeuchtigkeit 85 % überschreitet pp An Orten, wo Chemikalien verwendet werden, wie z. B. in der Nähe von Schwimmbecken pp Am Meer, in Küstengegenden oder an Orten, an denen ätzende Gase abgegeben werden pp An Orten, an denen radioaktive Strahlen, Röntgenstrahlen, starke Funkwellen oder Magnetfelder erzeugt werden pp An Orten, wo das Gerät starken Vibrationen ausgesetzt wäre, wie z. B. an Bord eines Fahrzeugs oder Schiffs (dieses Gerät ist nicht für den Einsatz in Fahrzeugen ausgelegt) pp An Orten, die starken Temperaturschwankungen ausgesetzt sind, wie z. B. in der Nähe des Luftauslasses einer Klimaanlage oder einer Tür, durch die Außenluft einströmen kann AchtenSiedarauf,dassdieInstallationsarbeitden technischenStandardsfürElektrogeräteentspricht. DiesesGerätistnurfürInneneinsatzvorgesehen. Es kann nicht im Freien verwendet werden. Vermeiden Sie die Installation an einem Ort, wo das Gerät längere Zeit direktem Sonnenlicht ausgesetzt ist, oder in der Nähe eines Kühl- oder Heizgeräts. Anderenfalls kann es zu Verformung, Verfärbung, Funktionsstörungen und/oder Betriebsstörungen kommen. Benutzen Sie das Gerät an einem Ort, wo es nicht mit Wasser bespritzt oder besprüht wird. BenutzenSiediesesGerätaufeinerebenenund waagerechtenFläche. Montieren Sie das Gerät nicht an einer Wand, einer Decke oder einem Ort, wo es schräg geneigt sein wird. Hinweis pp Halten Sie nicht den Kamerakopf bei der Ausführung der Installationsarbeit. Anderenfalls kann es zu einer Funktionsstörung kommen. RICHTIG OK FALSCH NG Wasvermiedenwerdenmuss,umstabilenBetriebdes GerätesübereinenlangenZeitraumzugewährleisten pp Längere Benutzung des Gerätes an einem Ort mit hoher Temperatur und Luftfeuchtigkeit führt zu einer Verschlechterung seiner Teile und einer Verkürzung seiner Lebensdauer. pp Stellen Sie sicher, dass keine Luft von einem Kühl- oder Heizgerät direkt auf den Installationsort geblasen wird. InfozurWahldesInstallationsorts Installieren Sie das Gerät an einem stabilen Ort, der stoßunempfindlich ist. Wird das Gerät an einem stoßempfindlichen Ort installiert, kann es zu Zittern der vom Gerät aufgenommenen Bilder kommen. Installieren Sie das Gerät nach ausführlicher Rücksprache mit Ihrem Händler. WenndasGerätausgedienthat,werfenSieesnicht einfachweg,sondernentsorgenSieessachgerecht. HaltenSiedasGerätbeimInstallieren,Transportieren oderEntsorgennuramSockel. Probleme können auftreten, falls der Kamerakopf gehalten oder gedreht wird. BefestigenSiekeineTeile,wiez.B.Filter, Gegenlichtblende,Telekonverterusw.amGerät. 7 (G) Erdung Prüfen Sie vor der Benutzung des Gerätes, ob die Erdungsleitung einwandfrei befestigt worden ist. Überprüfen Sie den Erdungswiderstand (weniger als 100 ) der Erdklemme. Wenn der Netzstecker zum Gebrauch in einen 2-StiftStecker umgewandelt werden muss, konsultieren Sie zuerst Ihren Händler. Verwenden Sie dann einen Steckeradapter mit Erdklemme, und schließen Sie diese Klemme unbedingt an Erde an. Stellen Sie in einem solchen Fall unbedingt zuerst die Erdverbindung her, bevor Sie den Netzstecker an die Hauptstromquelle anschließen. Gleichermaßen muss zuerst der Netzstecker von der Hauptstromversorgung abgezogen werden, bevor die Erdverbindung getrennt wird. VerwendenSiedasmitdemGerätgeliefertededizierte NetzgerätundNetzkabel. Schließen Sie Netzgerät und Netzkabel sicher an den Stromeingang an. Verwenden Sie nur das mit diesem Gerät gelieferte Netzkabel. Das Gerät kann nicht mit einem anderen Netzkabel verwendet werden, das nicht im Lieferumfang des Gerätes enthalten ist. Ebensowenig kann das mit dem Gerät gelieferte Netzkabel mit anderen Geräten verwendet werden. InstallierendesNetzgerätes pp Stellen Sie das Netzgerät nicht so auf, dass es direkten Kontakt mit dem Boden oder einer anderen derartigen Fläche hat. Wasserpfützen auf der Bodenfläche, die durch eindringendes Regenwasser oder aus anderen Gründen entstehen, stellen eine äußerst große Gefahr dar. Verankern Sie das Netzgerät sicher auf einer Fläche, auf der sich kein Wasser, Staub usw. ansammeln kann. pp Befestigen Sie das Netzgerät sicher, um die Gefahr von Ablösen oder Herunterfallen auszuschließen. Befestigen Sie es mit einer Festigkeit, die dem Gewicht (ca. 320 g) des Netzgerätes standhält. FallsdieMöglichkeitvonStöreinstreuungbesteht Verlegen Sie die Kabel so, dass das Netzkabel (Deckenlampenkabel) von AC 220 V oder mehr und das Signalkabel mehr als 1 m Abstand haben. Verlegen Sie wahlweise jedes Kabel durch sein eigenes Metall-Isolierrohr. (Die Metall-Isolierrohre müssen geerdet werden.) Funksignalstörung Wird das Gerät in der Nähe einer Fernseh- oder Radiosendeantenne oder eines starken elektrischen oder magnetischen Felds (wie das von einem Elektromotor, einem Transformator oder einer Starkstromleitung erzeugte) positioniert, können seine Bilder verzerrt und/oder von Störeinstreuung beeinflusst werden. InstallierenSiedasmitgelieferteNetzgerätinderNähe einerNetzsteckdose,undpositionierenSieesso,dass seinNetzsteckerleichtindieSteckdosegestecktoder abgezogenwerdenkann. Soll das Netzgerät an einem Ort angeschlossen werden, an dem sich Staub ansammelt, entfernen Sie Staub und Schmutz in regelmäßigen Abständen vom Netzstecker, um Kriechwegbildung zu verhüten. AchtenSiebeimAnschließenderKabeldarauf,dass dieAnschlussbereichekeinerBelastungausgesetzt werden. Anderenfalls kann es zu einer Funktionsstörung kommen. Netzschalter Dieses Gerät besitzt keinen Ein-Aus-Schalter. Die Stromversorgung wird eingeschaltet, sobald sein Netzstecker an eine Netzsteckdose angeschlossen wird. Beim Einschalten der Stromversorgung werden Schwenken, Neigen, Zoomen und Fokussieren durchgeführt. Bevor Sie mit der Wartung beginnen, muss unbedingt zuerst der Netzstecker von der Netzsteckdose abgezogen werden. AbleitendererzeugtenWärme Dieses Gerät leitet die erzeugte Wärme über seine Oberflächen ab. Installieren Sie das Gerät nicht an einem Ort, wo es von Wänden oder anderen Flächen umgeben ist und die Wärme nicht entweichen kann. Außerdem wird die Wärme zur Bodenplatte abgeleitet, die sich im Laufe der Zeit erwärmt: Dies ist normal und kein Anzeichen für eine Störung. AnschließendesNetzkabels Schließen Sie das Netzkabels des Netzgerätes unbedingt über einen Leistungsschalter nach einer der folgenden Methoden an. (1) Schließen Sie das Netzkabel über ein Stromsteuergerät an. (2) Schließen Sie das Netzkabel an einen Leistungsschalter in einer Stromverteilertafel mit einem Kontaktabstand von mindestens 3,0 mm an. Verwenden Sie einen Leistungsschalter, der alle Pole der Hauptstromversorgung mit Ausnahme des Schutzleiters abschalten kann. (3) Installieren Sie das Netzgerät in der Nähe einer Netzsteckdose, und schließen Sie es mit dem Netzstecker an. WICHTIG pp DieBezeichnungdesProduktsundseine elektrischenDatensindaufderBodenplatte vermerkt. 8 (G) DEUTSCH Installationshinweise Vorsichtsmaßnahmen zum Betrieb ZoomenundFokussieren Bei manueller Fokuseinstellung kann Unschärfe während des Zoomens auftreten. Stellen Sie nach dem Zoomen nötigenfalls den Fokus ein, oder schalten Sie auf Autofokus um. Wenn Sie manuelle Fokussierung verwenden, fahren Sie mit dem Zoomen fort, nachdem Sie die Fokusposition am TeleAnschlag eingestellt haben, wo die Fokussiergenauigkeit größer ist. (Beträgt die Entfernung vom Gerät zum Motiv jedoch weniger als 1,5 m, kann das Motiv am Weitwinkel-Anschlag unscharf werden.) Wird Zoomen bis zum Tele-Anschlag durchgeführt, nachdem der Fokus am Weitwinkel-Anschlag eingestellt worden ist, kann Unschärfe auftreten. NehmenSieuntergeeigneten Beleuchtungsverhältnissenauf. Um Bilder mit angenehmen Farben zu erzeugen, nehmen Sie unter geeigneten Beleuchtungsverhältnissen auf. Beim Aufnehmen unter Leuchtstofflampenlicht erscheinen die Bilder eventuell nicht in korrekten Farben. Wählen Sie je nach Bedarf eine geeignete Beleuchtung. UmlangfristigeinestabileLeistungzugewährleisten Wird das Gerät längere Zeit an Orten mit hoher Temperatur und Luftfeuchtigkeit benutzt, verschlechtern sich seine Teile, was zu einer Verkürzung seiner Lebensdauer führt. (Empfohlene Temperatur: Max. 35 °C) Stellen Sie sicher, dass keine Luft von einem Kühl- oder Heizgerät direkt auf den Installationsort geblasen wird. BildnachleuchtenaufdenMOS-Sensor-Farbfiltern Falls Teile des MOS-Sensors ständig dem Licht von Scheinwerfern oder anderen hellen Leuchten ausgesetzt werden, verschlechtern sich die Farbfilter im MOS-Sensor, und die betreffenden Teile können verfärbt werden. Die Verfärbung kann erkennbar werden, wenn die Richtung der Festüberwachung geändert wird. RichtenSiedieKameranichtauf starkeLichtquellen. Wenn Teile des MOS-Sensors dem Licht von Scheinwerfern oder anderen starken Leuchten ausgesetzt werden, kann Blooming (ein Phänomen, bei dem die Ränder von starken Leuchten unscharf werden) auftreten. HellesObjekt InfozurZoompositionbeimEinschaltender Stromversorgung Wenn das Gerät eingeschaltet wird, werden Zoom, Fokus und Blende auf die Positionen zurückgestellt, die sie unmittelbar vor dem Ausschalten hatten. (Dies trifft für Fokus und Blende zu, wenn sie manuell eingestellt worden sind.) Diese Position wird jedoch eventuell nicht wiederhergestellt, wenn beispielsweise das Netzkabel während des Betriebs abgezogen wurde. Betriebstemperaturbereich Vermeiden Sie die Benutzung des Gerätes an kalten Orten, wo die Temperatur unter 0 °C sinkt, oder an heißen Orten, wo die Temperatur über +40 °C steigt, weil solche Temperaturen die Bildqualität verschlechtern und die Innenteile beeinträchtigen. Blooming InfozurFarbreproduktionvonMOS-Sensoren Je nach den Farbtönen der Motive kann sich die Farbreproduktion verschlechtern: Dies ist normal und kein Anzeichen für eine Störung. BezüglichdesHDMI-Schnittstellenstandards Dieses Gerät ist als HDMI-kompatibel bestätigt worden, aber in seltenen Fällen werden je nach dem an das Gerät angeschlossenen HDMI-Gerät eventuell keine Bilder angezeigt. AufnehmenvonsehrhellenObjekten Reflexlicht kann auftreten, wenn eine sehr starke Lichtquelle auf das Objektiv gerichtet wird. Ändern Sie in solchen Fällen den Winkel, oder ergreifen Sie eine andere Abhilfemaßnahme. SchaltenSievordemAnschließenoderAbtrennender KabeldieStromversorgungaus. Schalten Sie die Stromversorgung unbedingt aus, bevor Sie die Kabel anschließen oder abtrennen. BeiVerwendungderAutomatikfunktionen pp Wenn “FullAuto” als Einstellung für “Scene” im Kameramenü gewählt worden ist, werden beispielsweise alle automatischen Einstellungen eingeschaltet, und manuelle Operationen sind für manche Posten nicht mehr möglich. pp Wenn die ATW-Funktion (WeißabgleichNachregelautomatik) unter Leuchtstofflampenlicht verwendet wird, kann der Weißabgleich schwanken. pp In manchen Situationen kann das Fokussieren bei Automatikeinstellung schwierig sein. Wählen Sie in solchen Fällen die manuelle Einstellung, und fokussieren Sie manuell. pp Beim Aufnehmen von hellen Objekten mit den automatischen Einstellungen für Verstärkung und Blende wird möglicherweise nicht die korrekte Helligkeit erzielt. Nehmen Sie in solchen Fällen eine manuelle Einstellung der Verschlusszeit vor. 9 (G) Vorsichtsmaßnahmen zum Betrieb BehandelnSiedasGerätsorgfältig. Vermeiden Sie Fallenlassen des Gerätes oder Einwirkung starker Erschütterungen oder Vibrationen. Anderenfalls kann es zu einer Funktionsstörung des Gerätes kommen. DEUTSCH WenndasGerätnichtinGebrauchist Schalten Sie die Stromversorgung des Gerätes aus, wenn es nicht benutzt wird. Wenn das Gerät ausgedient hat, werfen Sie es nicht einfach weg, sondern entsorgen Sie es sachgerecht. VermeidenSieeineBerührungderOptikteile. Die Optikteile sind das Herz der Kamera. Unter keinen Umständen dürfen diese berührt werden. In dem unwahrscheinlichen Fall, dass sie staubig geworden sind, entfernen Sie den Staub mit einem Blasepinsel oder durch sanftes Abwischen mit Objektivreinigungspapier. KeineFremdkörpermitdenrotierendenTeilenin Berührungkommenlassen. Anderenfalls können Störungen verursacht werden. HaltenSiedasGerätvonWasserfern. Vermeiden Sie jeglichen direkten Kontakt mit Wasser. Anderenfalls können Probleme auftreten. Wartung Schalten Sie die Stromversorgung des Gerätes aus, bevor Sie Wartungsarbeiten durchführen. Anderenfalls können Sie sich verletzen. Wischen Sie die Oberflächen mit einem weichen, trockenen Tuch ab. Vermeiden Sie jeglichen Kontakt mit Benzin, Lackverdünnern und anderen leichtflüchtigen Substanzen und deren Benutzung. Anderenfalls kann das Gehäuse verfärbt werden. DrehenSiedenKamerakopfnichtvonHand. Durch Drehen des Kamerakopfes von Hand kann eine Funktionsstörung des Gerätes verursacht werden. BenutzenSiedasGerätineinerUmgebungmit minimalerFeuchtigkeitundStaub. Vermeiden Sie die Benutzung des Gerätes in einer Umgebung mit hoher Feuchtigkeits- oder Staubkonzentration, weil solche Bedingungen die Innenteile beschädigen. EntsorgungdesGerätes Wenn das Gerät das Ende seiner Lebensdauer erreicht hat und ausrangiert werden soll, beauftragen Sie einen Fachbetrieb mit der sachgerechten Entsorgung des Gerätes, um die Umwelt zu schützen. 10 (G) Info zur drahtlosen Fernbedienung (Sonderzubehör) DiesesGerätkannmiteinergetrennterhältlichen drahtlosenFernbedienung(Modellnummer:AW-RM50G) ferngesteuertwerden. DieKamerakannnichtdirektmitderdrahtlosen FernbedienungeinesHD-Video-Konferenzsystems bedientwerden. ÜberprüfenSiediefolgendenPunkte,bevorSiedie drahtloseFernbedienungbenutzen. KonsultierenSieIhrenHändlerbezüglichdesKaufs einerdrahtlosenFernbedienung. pp BenutzenSiediedrahtloseFernbedienungauseiner Entfernungvonwenigerals6mvomGerät. pp DiedrahtloseFernbedienungistu.U.unwirksam, wennsieauseinembestimmtenWinkelaufdasGerät gerichtetwird. Richten Sie das Signalübertragungsfenster der drahtlosen Fernbedienung von einem Punkt, von dem aus das Fernbedienungs-Lichtsensorfeld (im folgenden “Lichtsensorfeld” genannt) sichtbar ist, auf das Lichtsensorfeld, und betätigen Sie die Tasten. Die Bedienung des Gerätes kann sich als schwieriger erweisen, wenn die Fernbedienung hinter dem Gerät betätigt wird. pp FallsdasGerätinderNäheeinerLeuchtstofflampe, einesPlasmamonitorsoderandererderartiger ProdukteinstalliertoderdirektemSonnenlicht ausgesetztwird,könnendieEffektedesLichts eineSteuerungdesGerätesüberdiedrahtlose Fernbedienungunmöglichmachen. Beachten Sie unbedingt die folgenden Punkte für Installation und Gebrauch. • Ergreifen Sie Maßnahmen, um zu gewährleisten, dass der lichtempfindliche Bereich keinem Licht von Leuchtstofflampen, Plasmamonitoren oder anderen derartigen Produkten oder Sonnenlicht ausgesetzt wird. • Installieren Sie das Gerät in ausreichendem Abstand von Leuchtstofflampen, Plasmamonitoren und anderen derartigen Produkten. pp DieEinstellungderdurchzuführendenFunktion (derzuletztgedrücktenTaste[CAM1],[CAM2], [CAM3]oder[CAM4])bleibtetwa10Minutenlang gespeichert,selbstnachdemdieBatterienausder drahtlosenFernbedienungherausgenommenworden sind.NacheinerlängerenZeitspannewirddie EinstellungjedochaufdenZustandzurückgestellt, derbeimDrückenderTaste[CAM1]hergestelltwurde. 11 (G) Teile und ihre Funktionen pKameraeinheit 1Fernbedienungssignal-Lichtsensor Lichtsensoren befinden sich an zwei Stellen an der Vorderseite des Kamerasockels. Diese Lampe leuchtet je nach dem Status des Gerätes folgendermaßen auf. Orange: Wenn der Bereitschaftszustand aktiviert wird Grün: Wenn die Stromversorgung eingeschaltet ist Rot: Wenn eine Störung im Gerät aufgetreten ist GrünundzweimaligesBlinken: Wenn im eingeschalteten Zustand ein Signal von der drahtlosen Fernbedienung (Sonderzubehör) empfangen worden ist, das mit der Fernbedienungskennung übereinstimmt OrangeundzweimaligesBlinken: Wenn im eingeschalteten Zustand ein Signal von der drahtlosen Fernbedienung (Sonderzubehör) empfangen worden ist, das nicht mit der Fernbedienungskennung übereinstimmt 3Kamerakopf Dieser dreht sich in horizontaler Richtung. 4Objektiv-Einheit Diese kann nach oben und unten geschwenkt werden. 5SchalterIRID[IRID] <Rückwand> [CAM1] [CAM2] [CAM3] [CAM4] Diese Schalter dienen der Wahl der Kennnummer der drahtlosen Fernbedienung (Sonderzubehör). Die Einstellungen “CAM1” bis “CAM4” des IR ID-Schalters entsprechen den Tasten [CAM1] bis [CAM4] an der drahtlosen Fernbedienung. 6HDMI-Buchse[HDMI] Dies ist die HDMI-Video-Ausgangsbuchse. <Bodenplatte> 7MontagelochfürDiebstahlsicherungskabel Benutzen Sie dieses Loch zum Anbringen der Kabelhalterung. 8Wartungsanschluss Dieser Anschluss wird nur zur Durchführung von Wartungsarbeiten benutzt. 9Gleichstrom-Eingangsbuchse[12V IN ] Schließen Sie das mit dem Gerät gelieferte Netzgerät an diese Buchse an, um das Gerät mit 12 V Gleichstrom zu versorgen. 12 (G) DEUTSCH 2Statusanzeigelampe Teile und ihre Funktionen :Gewindebohrung(Gewinde:1/4-20UNC)für Kameramontage Benutzen Sie diese Bohrung, um die Kamera auf ein Stativ usw. zu montieren. ;Wartungsschalter SW1 SW2 SW3 SW4 ON OFF Die Kamera wird bei Stellung OFF aller Schalter benutzt. 13 (G) Teile und ihre Funktionen pDrahtloseFernbedienung (Sonderzubehör) 3TasteMENU Jedes Mal, wenn diese Taste mindestens 2 Sekunden lang gedrückt wird, wird zwischen Anzeigen und Schließen des Gerätemenüs umgeschaltet. Wird die Taste während der Anzeige eines Menüs kurz gedrückt (weniger als 2 Sekunden), wird die Einstellungsänderung aufgehoben. Diese Tasten dienen der Wahl der zu bedienenden Geräte. Wenn eine der Tasten gedrückt worden ist, kann das der gedrückten Taste entsprechende Gerät bedient werden. 5TasteSET Wird diese Taste gedrückt, wenn eine der Einstellungen “Manual 1 bis 3” für “Scene” im Kameramenü gewählt wurde und der Speicher AWB A oder AWB B durch die Weißabgleich-Einstellung gewählt worden ist, wird der Weißabgleich automatisch eingestellt und im gewählten Speicher registriert. 6TasteMODE Diese Taste ist zukünftigen Funktionserweiterungen vorbehalten. Vorläufig wird es nicht benutzt. 7TastenGAIN[OFF][LOW][HI][AUTO] Diese Tasten dienen der Verstärkungseinstellung. Die Verstärkungsanhebung kann in drei Stufen mit den Tasten [OFF], [LOW] und [HI] eingestellt werden. [LOW] wird 9 dB, und [HI] auf 18 dB eingestellt. Durch Drücken der Taste [AUTO] wird die automatische Verstärkungsregelung (AGC) aktiviert, und die Verstärkung wird in Übereinstimmung mit der Lichtmenge automatisch eingestellt. Die maximale Verstärkung der AGC-Funktion kann mit dem Menü eingestellt werden. 8Vorwahlspeicher-Abruftasten[1]bis[12] Diese Tasten dienen dem Abrufen der Informationen zu den Richtungen und anderen Einstellungen des Gerätes, die in den Vorwahlspeicherplätzen Nr. 1 bis Nr. 12 des Gerätes registriert worden sind, um diese Einstellungen zu reproduzieren. 1TasteON/STANDBY Jedes Mal, wenn diese Taste mindestens 2 Sekunden lang gedrückt wird, wird zwischen Einschalten des Gerätes und Aktivieren des Bereitschaftszustands umgeschaltet. Hinweise pp Wenn der Betrieb auf Bereitschaftsmodus umgeschaltet wird: Die aktuelle SchwenkNeige-Position wird gespeichert (als EinschaltVoreinstellung), und die Kamera bewegt sich so, dass sie nach hinten zeigt. pp Wenn der Betrieb auf Einschaltmodus umgeschaltet wird: Die Kamera bewegt sich zu der Position, die bei Umschaltung des Betriebs auf Bereitschaftsmodus (als Einschalt-Voreinstellung) gespeichert wurde. 2Signalübertragungsfenster 14 (G) DEUTSCH 4TastenCAM1bisCAM4 Teile und ihre Funktionen TasteA/FOCUS 9TastePRESET/LIMIT Diese Taste wird zur automatischen Einstellung des Objektivfokus verwendet. Diese Taste dient der Registrierung der Einstellungen in den Vorwahlspeicherplätzen. Wenn eine Vorwahlspeicher-Abruftaste lang gedrückt wird, während die Taste PRESET/LIMIT gedrückt gehalten wird, werden die Informationen über die aktuelle Richtung und andere Einstellungen des Gerätes unter der Abruftaste registriert. Die Vorwahlspeicher-Abruftasten [1] bis [12] entsprechen den Vorwahlspeicherplätzen Nr. 1 bis Nr. 12 des Gerätes. TasteM/FOCUS Diese Taste wird zur manuellen Einstellung des Objektivfokus verwendet. Die Tasten FOCUS ([F] und [N]) werden zur Durchführung der tatsächlichen Einstellung verwendet. TastenOPT[ON][OFF] :Schwenk-/NeigetastenundMenüfunktionstasten [][][][][] (1) Diese Tasten dienen zum Ändern der Richtung des Gerätes. Mit den Tasten [] und [] wird das Gerät nach oben/unten geneigt und mit den Tasten [] und [] nach links/rechts geschwenkt. Die Taste [] ist während des Neige- und Schwenkvorgangs funktionsunfähig. Wenn die Tasten [] oder [] und [] oder [] gleichzeitig gedrückt werden, bewegt sich das Gerät diagonal. Diese Tasten sind zukünftigen Funktionserweiterungen vorbehalten. Vorläufig werden sie nicht benutzt. TasteHOME Wenn diese Taste mindestens 2 Sekunden lang gedrückt wird, wird die Richtung (Schwenken oder Neigen) des Gerätes auf die Bezugsposition zurückgestellt. TastenZOOM[T][W] Diese Tasten dienen der Einstellung des Objektivzooms. Mit der Taste [W] wird das Objektiv in den Weitwinkelbereich gezoomt, und mit der Taste [T] in den Telebereich. (2) Die Tasten werden für Menüoperationen verwendet, wenn das Gerät die Menüs anzeigt. Benutzen Sie die Tasten [], [], [] und [], um die Menüposten auszuwählen. Wenn ein ausgewählter Posten ein Untermenü aufweist, wird das Untermenü durch Drücken der Taste [] angezeigt. Wenn der Cursor auf einem bestimmten Posten ruht und die Taste [] im Einstellungsmenü auf der untersten hierarchischen Ebene gedrückt wird, beginnt die Einstellung des ausgewählten Postens zu blinken. Wenn die Taste [] gedrückt wird, nachdem die Einstellung mit den Tasten [], [], [] und [] geändert worden ist, hört die Einstellung auf zu blinken, und die neue Einstellung wird eingegeben. Bei einem regulären Menü wird die neue Einstellung unmittelbar nach der Änderung reflektiert, sofern die Änderung der Einstellung im blinkenden Zustand vorgenommen wurde. Bei manchen Menüs (Scene, Format und Initialize) wird die neue Einstellung aber erst reflektiert, nachdem die Taste [] gedrückt worden ist, das Blinken aufgehört hat und die neue Einstellung eingegeben worden ist. Wird die Taste MENU kurz gedrückt (für weniger als 2 Sekunden), während sich die Einstellung im blinkenden Zustand befindet, wird die Änderung aufgehoben, und die vor der Änderung gewählte Einstellung wird wiederhergestellt. TasteFAST Diese Taste dient zum Umschalten der Bewegungsgeschwindigkeit, mit der die Vorgänge Schwenken, Neigen, Zoomen und Fokussieren durchgeführt werden, auf die hohe Geschwindigkeit. Hinweis pp Wenn die Vorwahlspeicher-Einstellungen aufgerufen worden sind, kann die Betriebsgeschwindigkeit für Schwenken und Neigen mit dem Posten “Preset Speed” des Kameramenüs geändert werden. TasteSLOW Diese Taste dient zum Umschalten der Bewegungsgeschwindigkeit, mit der die Vorgänge Schwenken, Neigen, Zoomen und Fokussieren durchgeführt werden, auf die niedrige Geschwindigkeit. TasteA/IRIS Damit wird die Einstellung für die automatische Blendensteuerung im Einklang mit der Lichtmenge festgelegt. TasteM/IRIS Damit wird die Einstellung für die manuelle Blendensteuerung festgelegt. Zur Durchführung der tatsächlichen Einstellung werden die Tasten IRIS + und IRIS – verwendet. ;TastenFOCUS[F][N] Diese Tasten dienen der manuellen Einstellung des Objektivfokus, wenn die manuelle Einstellung des Objektivfokus aktiviert ist. Mit der Taste [F] wird der Fokus im Fernbereich, und mit der Taste [N] im Nahbereich eingestellt. TasteIRIS+ Diese Taste dient zum Einstellen der Objektivblende in Öffnungsrichtung. TasteIRIS– Diese Taste dient zum Einstellen der Objektivblende in Schließungsrichtung. 15 (G) Einstellen der Fernbedienungskennung Die drahtlose Fernbedienung (Sonderzubehör) kann bis zu vier Geräte steuern. Durch Einstellung einer Kennnummer wird festgelegt, welches Gerät bei Betätigung der Taste [CAM1], [CAM2], [CAM3] oder [CAM4] an der drahtlosen Fernbedienung gewählt wird. DEUTSCH pp Wenn Sie mehrere Geräte benutzen, stellen Sie für jedes Gerät eine andere Fernbedienungskennung ein. pp Wenn Sie nur ein Gerät benutzen, setzen Sie die Fernbedienungskennung auf “CAM1”, es sei denn, die Einstellung muss geändert werden. Einstellverfahren Wählen Sie “CAM1”, “CAM2”, “CAM3” oder “CAM4” durch Betätigen des IR ID-Schalters an der Rückwand des Gerätes als Fernsteuerungs-Kennnummer. (Siehe Seite 12.) Die Einstellungen “CAM1” bis “CAM4” des IR ID-Schalters entsprechen den Tasten [CAM1] bis [CAM4] an der drahtlosen Fernbedienung. (Die Werkseinstellung ist “CAM1”.) IRID-Schalter Tasten[CAM1]bis[CAM4] 16 (G) Installation 1 SchließenSiedieKabelandieAnschlüssederRückwandan. Netzgerätekabel Video-Ausgangskabel pBeiInstallationdesGerätesaufeinemTisch StellenSiedasGerätflachaufdieOberfläche. Hinweise pp Installieren Sie das Gerät an einem stabilen Ort, der stoßunempfindlich ist. Wird das Gerät an einem stoßempfindlichen Ort installiert, kann es zu Zittern der vom Gerät aufgenommenen Bilder kommen. pp Achten Sie darauf, dass das Gerät während der Installation nicht herunterfällt oder anderweitig beschädigt wird. pp Halten Sie das Gerät beim Tragen nicht am Kopfteil. pp Unterlassen Sie Halten oder Drehen des Kamerakopfes. Anderenfalls kann es zu einer Funktionsstörung kommen. pp Achten Sie darauf, dass kein Zug auf die angeschlossenen Kabel ausgeübt wird. Anderenfalls kann das Gerät herunterfallen, und/oder es kann zu Verletzungen kommen. StellenSiesicher,dassdasGerätnichtherunterfällt. RICHTIG OK FALSCH NG 17 (G) Installation pBeiStativmontagedesGerätes Stativ-Befestigungsschraube(1/4-20UNC) 4,5mmbis6mm Hinweise pp Installieren Sie das Gerät nicht an einem Ort, an dem Personen vorbeigehen. pp Wenn Sie das Gerät auf ein Stativ montieren, stellen Sie das Stativ nicht hoch über dem Bodenniveau auf. pp Montieren Sie das Gerät sicher, so dass keine Lockerheit vorhanden ist. Lockerheit kann Herunterfallen des Gerätes verursachen und/oder zu Verletzungen führen. pp Soll das Gerät über einen langen Zeitraum benutzt werden, treffen Sie Maßnahmen, um sicherzustellen, dass es nicht umkippt, umfällt, sich löst oder herunterfällt. Versetzen Sie den Installationsort nach der Benutzung des Gerätes unverzüglich wieder in seinen Ausgangszustand zurück. 18 (G) DEUTSCH Benutzen Sie ein sehr stabiles Stativ, welches das Gewicht der darauf montierten Kamera tragen kann. Befestigen Sie das Stativ an der Gewindebohrung in der Bodenplatte der Kamera. Stellen Sie das Stativ auf eine vollkommen flache und ebene Fläche. Ziehen Sie die Schraube von Hand an, um das Stativ sicher zu montieren. Ziehen Sie die Schraube nicht durch Drehen des Kameragehäuses an. Anderenfalls kann es zu einer Funktionsstörung kommen. Die Stativ-Befestigungsschraube muss die folgende Norm erfüllen. Anschlüsse pVerbindungenmiteinemHD-Sichtkommunikationssystem HD-Kommunikationskamera GP-VD150E HDMI-Signal HD-Video-Konferenzsystem KX-VC300,KX-VC600 DrahtloseFernbedienung(Sonderzubehör) AW-RM50G pp Beschreibungen der Vorgänge Schwenken, Neigen, Zoomen, Vorwahl und anderer Kameraoperationen mithilfe eines HD-Video-Konferenzsystems entnehmen Sie bitte der Bedienungsanleitung des unterstützten Gerätes. 19 (G) Fehlersuche qpBetrieb KeinStrom Betriebnicht möglich(gemeinsam fürdrahtlose Fernbedienung, HD-VideoKonferenzsystem) Steuerungmit derdrahtlosen Fernbedienungnicht möglich UrsachenundAbhilfemaßnahmen Seitenverweise pp IstdasNetzgeräteinwandfreiandieNetzsteckdose angeschlossen? ––– pp IstderNetzsteckerdesNetzgeräteskorrektangeschlossen? ––– pp BeiSteuerungdesGerätesüberdiedrahtloseFernbedienung Nehmen Sie auch auf den Posten “Steuerung mit der drahtlosen Fernbedienung nicht möglich” Bezug. ––– pp IstdasGeräteingeschaltet? Falls die Statusanzeigelampe des Gerätes erloschen ist oder in Orange leuchtet, bedeutet dies, dass das Gerät nicht eingeschaltet ist. <Bedienungsverfahren und Einstellungen> pp IstdaskorrektezubedienendeGerätgewähltworden? <Bedienungsverfahren und Einstellungen> pp SinddieBatterienderFernbedienungerschöpftodermit vertauschtenPolaritäteneingelegt? Falls die Statusanzeigelampe des Gerätes nicht blinkt, selbst wenn die drahtlose Fernbedienung nahe am Lichtsensorfeld des Gerätes betätigt wird, bedeutet dies, dass die Batterien erschöpft sind. Wechseln Sie die Batterien aus. ––– pp BefindetsicheineLeuchtstofflampeodereinPlasmamonitorin derNähedesGerätes,undwennja,istdasLichtsensorfeldfürdie drahtloseFernbedienungdiesemLichtausgesetzt? Seite 11 20 (G) DEUTSCH Symptom Fehlersuche qpVideo Symptom UrsachenundAbhilfemaßnahmen pp IstdasGerätkorrektmitdenanderenangeschlossenenGeräten verbunden? Eswerdenkeine Bilderangezeigt,oder dieBildersindgestört DerMenübildschirm wirdangezeigt Seitenverweise Seite 19 pp WenndasSystemsokonfiguriertist,dassdasBildauch umgeschaltetwird,wenndiezubedienendeKameragewähltwird, istdaskorrekteGerätgewähltworden? <Bedienungsverfahren und Einstellungen> pp IstdieVideosignal-Einstellungkorrektgewähltworden? <Bedienungsverfahren und Einstellungen> pp BeendenSiedasMenü. <Bedienungsverfahren und Einstellungen> pp JenachdemverwendetenHDMI-Monitortretenmöglicherweise einesodermehrerederuntenbeschriebenenSymptomeauf. DieMenübildschirme sindschlechtablesbar Keineautomatische Fokussierung BeimZoomenerfolgt keineFokussierung, wenndieEinstellung fürmanuelle Fokussierung verwendetwird Ringförmige Reflexionen erscheinenindenvier EckenderBilder • Die Auflösung der Zeichen in den Menüanzeigen ändert sich mit dem Hintergrundbild. • Je nach der für den Monitor eingerichteten Konturenanhebungseinstellung erscheinen weiße Linien vor den schwarzen Schatten der Menüs. • Je nach der für den Monitor eingerichteten Konturenanhebungseinstellung können die Hintergrundfarben in die weißen Teile der Menüs eingeblendet werden. ––– pp IstdiemanuelleFokussierungaktiviert? Die automatische Fokussierung erfolgt, sobald der Autofokus aktiviert wird. <Bedienungsverfahren und Einstellungen> pp InmanchenSituationenkanndasFokussierenbei Automatikeinstellungschwierigsein. Wählen Sie in solchen Fällen die manuelle Einstellung, und fokussieren Sie manuell. <Bedienungsverfahren und Einstellungen> pp WurdederFokusamTele-Anschlageingestellt? Stellen Sie zuerst den Fokus am Tele-Anschlag ein, wo die Fokussiergenauigkeit größer ist, und führen Sie dann den Zoomvorgang aus. ––– pp UnterbestimmtenBetriebsbedingungenkanneineFokussierung aufdasMotivschwierigsein. Verwenden Sie in solchen Fällen die Autofokus-Einstellung. <Bedienungsverfahren und Einstellungen> pp DiesewerdendurchdieLichtreflexionenzwischendemObjektiv undderAbdeckungvordemObjektivverursacht.SuchenSie einenWeg,diePositionderBeleuchtungrelativzurPositiondes Geräteszuoptimieren,undinstallierenundbenutzenSiedas GerätaneinemOrt,andemkeineReflexionenauftreten. ––– pp AktivierenSiedieATW-Funktion(WeißabgleichNachregelautomatik). DieFärbungderBilder pp InmanchenSituationenwerdenbeiVerwendungderATWstimmtnicht FunktioneventuellnichtdiekorrektenFarbenreproduziert. Führen Sie in solchen Fällen den Weißabgleich durch. 21 (G) <Bedienungsverfahren und Einstellungen> <Bedienungsverfahren und Einstellungen> Symptom DasBildistzuhell oderzudunkel DieMotiveerscheinen verzerrt UrsachenundAbhilfemaßnahmen Seitenverweise pp WählenSieentwederdieautomatischeBlendensteuerung,oder aktivierenSiediemanuelleSteuerung,undstellenSiedieBlende manuellein. <Bedienungsverfahren und Einstellungen> pp DieBilderkönnendunkelsein,wenndieVideosignalkabelzulang sind,weildadurcheineSignalabschwächungverursachtwird. ––– pp FallseinObjektplötzlichdasKamerabilddurchkreuzt,kann esleichtverzerrterscheinen,weildieseKameraeinenMOSBildsensorverwendet. DiesistnormalundkeinAnzeichenfüreinProblem. ––– WennderBlitz pp BeieinemMOS-BildsensorweichtderAufnahmezeitpunktleicht währendder zwischendemoberenlinkenundunterenrechtenBereichdes Aufnahmeausgelöst Bildschirmsab.Dasbedeutet,dassbeiderBlitzauslösungdie wird,wirdnurdie untereHälftedesBildschirmsimbetreffendenHalbbildhellerwird obereoderuntere unddieobereHälfteimnächstenHalbbildhellerwird. HälftedesBildschirms DiesistnormalundkeinAnzeichenfüreinProblem. heller DieHelligkeitändert sichzyklisch,oder dieFarbenändern sich,undhorizontale Streifenwandernüber denBildschirm pp DiesePhänomene(Flimmern)könnenbeiBeleuchtungdurch Leuchtstofflampen,QuecksilberdampflampenoderandereArten vonEntladungsröhrenauftreten. DiesistnormalundkeinAnzeichenfüreinProblem. InsolchenFällenwirdempfohlen,dieelektronischeVerschlusszeit inGebietenmit60-Hz-Netzfrequenzauf1/120,oderinGebieten mit50-Hz-NetzfrequenzaufOFFzusetzen. Wennfeine Linienodersich pp DiesesPhänomentrittauf,weildiePixelaufjedemBildsensor wiederholende systematischangeordnetsind.Eswirderkennbar,wenndie OrtsfrequenzeinesMotivsundderPixelabstandeinander Musteraufgenommen angenähertwerden.ÄndernSiedaherdenKamerawinkel,oder werden,trittFlimmern treffenSieeineandereentsprechendeMaßnahme. auf,odereineFärbung wirdhinzugefügt 22 (G) ––– <Bedienungsverfahren und Einstellungen> ––– DEUTSCH Fehlersuche Maßzeichnungen Einheit:mm R7 150 75 73 23 (G) 1,5 47,7 115,9 175,5 4,9 Technische daten Quellenspannung: 12 V Gleichspannung 10 % (mitgeliefertes Netzgerät) Stromverbrauch: 1,0 A p ALLGEMEINES p EINGÄNG Betriebstemperatur: 0 °C bis +40 °C Eingäng-Buchse: Lagertemperatur: –20 °C bis +50 °C ZulässigeLuftfeuchtigkeitsbereiche: 20 % bis 90 % (Keine Kondensation) Gewicht: p AUSGÄNGE ca. 1,2 kg Abmessungen(BTH): 150 148 177 mm Gehäuse: DC 12 V IN Videoausgang: Silber 24 (G) HDMI (HDMI-Buchse) DEUTSCH ist die Sicherheitsinformation. Technische daten p FUNKTIONENUNDLEISTUNG [Schwenk-/Neigekopfeinheit] Schwenk-/Neigegeschwindigkeit: Max. 90°/s oder mehr [Kameraeinheit] Bildsensoren: 1/3-Typ-Full-HD-MOS Objektiv: Motorgetriebener 12-Zoom, f/1.6 bis 2.0 (f=4,7 bis 56,4 mm; 35-mm-Entsprechung: 36,9 mm bis 442,8 mm) Fokussierung: Umschaltung zwischen automatischer und manueller Fokussierung Fokussierabstand: Gesamter Zoombereich: 1,5 m Weitwinkel-Anschlag: 30 cm Schwenkbereich: ±100° Neigungsbereich: ±30° p Abhängig von der Schwenkoder Neigeposition wird u. U. die Kamera im Bild reflektiert. Laufruhe: NC35 (normale Geschwindigkeit), NC40 (bei Voreinstellung) p Netzgerät Farbtrennungsoptik: On-Chip-Farbfiltersystem MinimaleBeleuchtungsstärke: 3 lx (50 IRE, F1.6, +36 dB) Eingäng: 220 V bis 240 V Wechselstrom, 1,5 A, 50 Hz Horizontalauflösung: 850 TV-Zeilen Typ (Mittenbereich) Ausgänge: 12 V Gleichspannung, 2,5 A, 30 W Verstärkungswahl: Auto, 0 dB, 3 dB, 6 dB, 9 dB, 12 dB, 15 dB, 18 dB Speichermodus: 0 dB, 6 dB, 12 dB, 18 dB ElektronischeVerschlusszeiten: Step: 1/120, 1/250, 1/500, 1/1000, 1/2000, 1/4000, 1/10000 Synchro scan: 50,20 Hz bis 538,51 Hz Gamma: Off, Normal (Low, Mid, High), Cinema Weißabgleich: AWB A, AWB B, ATW p Sonderzubehör pp DrahtloseFernbedienungAW-RM50G (HergestelltvonPanasonic) (TrockenzellederGröße“R6”oder“LR6”2, getrennterhältlich) Farbsättigungsregelung: 7-Stufen-Regelung Szenendatei: FullAuto, Manual1, Manual2, Manual3 Ausgabeformat: HD 1080: 50i, SD 576: 50p Gewicht und Abmessungen sind ungefähre Werte. Änderungen der technischen Daten ohne Vorankündigung vorbehalten. 25 (G) DEUTSCH Notizen 26 (G) VERSIONFRANÇAISE (FRENCH VERSION) Consignes de sécurité Nepasdévisserlecouvercle. ATTENTION: Pour réduire tout risque d’électrocution, ne pas retirer le couvercle. Il ne se trouve à l’intérieur aucune pièce qui puisse être réparée par l’utilisateur. Confier toute réparation à un personnel qualifié. POUR ÉVITER TOUT RISQUE D’INCENDIE, DE CHOCS ÉLECTRIQUES OU D’INTERFÉRENCES, N’UTILISER QUE LES ACCESSOIRES RECOMMANDÉS. AVERTISSEMENT: ATTENTION: Cetappareildoitêtrereliéàlaterre. Pour assurer un fonctionnement en toute sécurité, la fiche trois broches ne doit être insérée que dans une prise trois broches standard qui est reliée à la terre efficacement par le système électrique domestique normal. Des rallonges utilisées avec l’appareil doivent comporter trois noyaux et être correctement raccordées pour assurer la connexion à la terre. Des rallonges mal reliées sont une cause majeure d’accidents mortels. Le fait que l’appareil fonctionne correctement ne signifie pas que le branchement électrique est relié à la terre ou que l’installation est complètement sûre. Pour votre sécurité, en cas de doutes sur la mise à la terre du branchement électrique, veuillez vous adresser à un électricien qualifié. Pour maintenir une bonne ventilation, ne pas installerniplacerl’appareildansuneétagère,un meuble encastré ni aucun endroit confiné. Pour éviter tout risque de choc électrique ou de feu dû à une surchauffe, vérifier qu’aucun rideau ni aucun autre matériau ne fait obstacle à la ventilation. La prise électrique doit être installée près de l’équipement et facilement accessible, sinon la fiche principale ou un coupleur doivent rester utilisables à tout moment. Un appareil avec une construction de CLASSE 1 doit être raccordé à une prise secteur avec une connexion à la terre sécurisée. AVERTISSEMENT: • P OURRÉDUIRELESRISQUESD’INCENDIEOU D’ÉLECTROCUTION, NE PAS EXPOSER CET APPAREILÀLAPLUIEOUÀL’HUMIDITÉ. • CET APPAREIL NE DOIT PAS ÊTRE EXPOSÉ À DES SUINTEMENTS OU DES ÉCLABOUSSURES, ET AUCUN OBJET REMPLI DE LIQUIDE, COMME UNVASE, NE DOIT ÊTRE POSÉDESSUS. AVERTISSEMENT: POUR ÉVITER TOUT RISQUE DE BLESSURES, L’APPAREIL DOIT ÊTRE SOLIDEMENT FIXÉ AU PLANCHER CONFORMÉMENT AUX INSTRUCTIONSD’INSTALLATION. Informations concernant la sécurité. 1 (F) FRANÇAIS Informationsrelativesàl’évacuationdesdéchets,destinéesauxutilisateursd’appareilsélectriqueset électroniques(appareilsménagersdomestiques) Lorsque ce symbole figure sur les produits et/ou les documents qui les accompagnent, cela signifie que les appareils électriques et électroniques ne doivent pas être jetés avec les ordures ménagères. Pour que ces produits subissent un traitement, une récupération et un recyclage appropriés, envoyez-les dans les points de pré-collecte désignés, où ils peuvent être déposés gratuitement. Dans certains pays, il est possible de renvoyer les produits au revendeur local en cas d’achat d’un produit équivalent. En éliminant correctement ce produit, vous contriburez à la conservation des ressources vitales et à la prévention des éventuels effets négatifs sur l’environnement et la santé humaine, pouvant être dus à la manipulation inappropriée des déchets. Veuillez contacter les autorités locales pour connaître le point de pré-collecte le plus proche. Des sanctions peuvent être appliquées en cas d’élimination incorrecte de ces déchets, conformément à la législation nationale. Utilisateursprofessionnelsdel’Unioneuropéenne Pour en savoir plus sur l’élimination des appareils électriques et électroniques, contactez votre revendeur ou fournisseur. Informationssurl’évacuationdesdéchetsdanslespaysnefaisantpaspartiedel’Unioneuropéenne Ce symbole n’est reconnu que dans l’Union européenne. Pour supprimer ce produit, contactez les autorités locales ou votre revendeur afin de connaître la procédure d’élimination à suivre. 2 (F) Table des matières Consignesdesécurité.......................................................1 Installation.........................................................................17 Avantutilisation..................................................................4 Installation de l’appareil sur un bureau ..........................17 Vue générale ....................................................................4 Montage de l’appareil sur un pied ..................................18 Au sujet des systèmes de communication vidéo HD .......4 Connexions.......................................................................19 En ce qui concerne le mode d’emploi ..............................4 Connexions avec un système de communication vidéo HD .................................19 Au sujet de la télécommande sans fil (accessoire optionnel) ......................................................4 Diagnosticdepanne........................................................20 Marques commerciales et marques commerciales déposées .........................................4 Aspectextérieur...............................................................23 Au sujet du droit d’auteur et de la licence ........................4 Fichetechnique................................................................24 Déni de la garantie ...........................................................4 Caractéristiques.................................................................5 Accessoires........................................................................6 Précautionsd’installation..................................................7 Précautionsd’utilisation....................................................9 Concernantlatélécommandesansfil (Accessoireoptionnel)................................................11 Lescommandesetleursfonctions................................12 Unité de caméra .............................................................12 Télécommande sans fil (Accessoire optionnel) .............14 Réglagedesidentificationsde commandeàdistance.................................................16 Organisationdesmodesd’emploidecemodèle pp La documentation de cette caméra de communication HD (ci-après dénommée “l’appareil”) est divisée en deux manuels : la partie intitulée <Les bases>, et la partie intitulée <Utilisation et réglages>. Avant d’installer l’appareil, prendre soin de lire <Les bases> pour assurer une installation correcte de l’appareil. pp Ce manuel explique la manière d’installer l’appareil. Par ailleurs, pour en savoir plus sur la manière d’utiliser l’appareil et de sélectionner ses réglages, se reporter au “Mode d’emploi <Utilisation et réglages>” (fichier PDF). Télécharger le “Mode d’emploi <Utilisation et réglages>” depuis la page d’accueil indiquée ci-dessous. http://panasonic.net/psn/products/hdvc/resource/users_guides.html Pour pouvoir lire les fichiers PDF, vous avez besoin du logiciel Adobe® Reader® qui est offert par Adobe Systems. 3 (F) Avant utilisation pAusujetdudroitd’auteuretde lalicence pVuegénérale pp Cette caméra Full HD intégrée avec une tête panoramique est dotée d’un capteur MOS Full HD de type 1/3 et d’un processeur de signal numérique (DSP). La distribution, la copie, le démontage, l’inversion en conformité, l’inversion d’ingénierie et également l’exportation en violation aux lois de l’exportation du logiciel fourni avec cet appareil sont formellement interdits. pp En plus de son zoom optique 12, l’appareil est muni d’un zoom numérique 10 permettant des prises de vues d’excellente qualité avec des ambiances exceptionnelles. pDénidelagarantie pp Cet appareil est conçu pour être utilisé exclusivement avec le système de communication vidéo HD Panasonic. Compatible avec les unités de communication vidéo HD : KX-VC300CX, KX-VC300EX, KX-VC600CX, KX-VC600EX pAusujetdessystèmesde communicationvidéoHD 1 TOUT DÉGÂT ET PERTE, Y COMPRIS SANS LIMITATION, DIRECT OU INDIRECT, SPÉCIAL, IMPORTANT OU EXEMPLAIRE, SURVENANT OU CONCERNANT LE PRODUIT; pp Pour obtenir une description des opérations de panoramique horizontal, panoramique vertical, zooming, préréglage et autres opérations de la caméra à l’aide d’une unité de communication vidéo HD, se reporter au mode d’emploi de l’unité compatible. 2 BLESSURE PERSONNELLE OU TOUT DÉGÂT CAUSÉS PAR UN USAGE NON APPROPRIÉ OU UNE UTILISATION NÉGLIGENTE DE L’UTILISATEUR; 3 DÉMONTAGE, RÉPARATION OU MODIFICATION NON AUTORISÉS DU PRODUIT EFFECTUÉS PAR L’UTILISATEUR; pEncequiconcernelemode d’emploi 4 INCOMMODITÉ OU TOUTE PERTE SURVENANT LORSQUE LES IMAGES NE SONT PAS AFFICHÉES DÛ À TOUTE RAISON OU CAUSE Y COMPRIS TOUTE PANNE OU PROBLÈME DU PRODUIT; pp Pour faciliter la lecture de ce mode d’emploi, les deux modèles KX-VC300CX et KX-VC300EX sont appelés “KX-VC300”, et les deux modèles KX-VC600CX et KX-VC600EX sont appelés “KX-VC600”. 5 TOUT PROBLÈME, INCOMMODITÉ IMPORTANTE OU PERTE OU ENDOMMAGEMENT, SURVENANT DU SYSTÈME COMBINÉ PAR LES APPAREILS DE TIERS; pAusujetdelatélécommande sansfil(accessoireoptionnel) 6 PERTES DE DONNÉES ENREGISTRÉES PROVOQUÉES PAR UNE PANNE. pp Cet appareil peut être piloté à distance par une télécommande sans fil (modèle AW-RM50G) disponible en option. Il ne peut pas être exploité directement par la télécommande sans fil d’une unité de communication vidéo HD. Pour acheter une télécommande sans fil, veuillez contacter votre revendeur. pMarquescommercialeset marquescommercialesdéposées pp HDMI, le logo HDMI et High-Definition Multimedia Interface sont des marques commerciales ou des marques commerciales déposées de la firme HDMI Licensing LLC aux États-Unis d’Amérique et dans d’autres pays. pp Adobe, Acrobat Reader et Reader sont des marques déposées ou des marques de fabrique d’Adobe Systems Incorporated aux États-Unis et/ou dans d’autres pays. 4 (F) FRANÇAIS EN AUCUN CAS Panasonic Corporation NE SERA TENU POUR RESPONSABLE POUR TOUTE PARTIE OU TOUTE PERSONNE, À L’EXCEPTION DU REMPLACEMENT OU D'UNE MAINTENANCE RAISONNABLE DE CE PRODUIT POUR LES CAS CITÉS, INCLUS MAIS NON LIMITÉS À CE QUI SUIT: Caractéristiques Possibilitéd’utiliserunetélécommandesansfil (accessoireoptionnel)d’emploifacile pp Une télécommande sans fil capable de piloter jusqu’à quatre appareils peut être utilisée. Elle peut être utilisée facilement pour régler les différentes fonctions ou commuter les appareils en regardant les écrans de menu. CapteurMOSdetype1/3etobjectifzoom12haute performance pp Un capteur MOS Full HD de type 1/3 et un DSP (processeur de signal numérique) sont intégrés. Des images de qualité élevée sont obtenues par différents types de traitement vidéo. pp En plus de son objectif zoom optique 12, l’appareil est également doté d’un zoom numérique 10 permettant de filmer des images d’excellente qualité avec des ambiances exceptionnelles. pp Une fonction DRS (plage dynamique étendue) qui corrige les surexpositions et les pertes de détails dans les parties sombres, et un nouveau réducteur de bruit numérique hybride (Hybrid DNR) qui minimise le retard d’image même dans les endroits obscurs et qui permet de filmer des scènes clairement, sont intégrés pour reproduire des images nettes et claires dans une gamme d’applications étendue. Unappareilfacileàexploitergrâceàl’intégrationd’une têtepanoramiquehauteperformance pp Panoramiques à la vitesse rapide de 90°/s pp Des grands angles de rotation avec une plage de panoramique horizontal ±100° et une plage de panoramique vertical ±30° pp Fonctionnement silencieux avec des niveaux de bruit de NC35 (vitesse normale) et NC40 (quand préréglé) 5 (F) Accessoires Vérifier que les accessoires suivants sont présents et vérifiés. Mode d’emploi <Les bases> (Ce manuel) .......................... 1 Câble d’alimentation* (2 m) ................................................ 2 Garantie ............................................................................... 1 Adaptateur secteur ............................................................. 1 FRANÇAIS * Utiliser le câble d’alimentation correspondant à la région. 6 (F) Précautions d’installation Enplusderespecterlesinstructionsdonnéesdansles“Consignesdesécurité”,veuillezobserver égalementlesprécautionssuivantes. Nepasinstallerouutiliserl’appareildansundes endroitssuivants. pp Sur la surface d’un mur (où l’appareil serait installé sur le côté et/ou serait fixé au mur à l’aide d’une potence de fixation) pp Sur un plafond (où l’appareil serait installé tête en bas) pp Dans un endroit (y compris sous une corniche d’immeuble) où l’appareil serait exposé directement à la pluie ou à de l’eau de ruissellement pp Dans un endroit comme une cuisine qui présente des concentrations élevées de vapeur et de graisses pp Dans un endroit à l’extérieur ou chaud, où la température peut dépasser 40 °C pp Dans un endroit froid où la température peut tomber en dessous de 0 °C pp Dans un endroit où l’humidité peut dépasser 85 % pp Dans un endroit où des produits chimiques sont utilisés, comme près d’une piscine pp En mer, près de la côte ou dans un endroit où des gaz corrosifs sont émis pp Dans un endroit où sont générés des radiations, des rayons X, de fortes ondes radio ou des champs magnétiques puissants pp Dans un endroit où l’appareil serait soumis à des vibrations importantes, comme à bord d’un véhicule ou d’un bateau (cet appareil n’est pas conçu pour être utilisé dans un véhicule) pp Dans un endroit où la température peut changer brusquement, comme près de la sortie d’air d’un climatiseur ou près d’une porte qui ouvre sur l’extérieur S’assurerquelestravauxd’installationsontconformes auxnormestechniquesrelativesauxéquipements électriques. Cetappareilestdestinéàuneutilisationenintérieur uniquement. Il ne peut pas être utilisé en extérieur. Éviter d’installer l’appareil dans un endroit où il sera exposé directement au soleil pendant une période prolongée, ou près d’un appareil de climatisation ou de chauffage. Sinon, l’appareil pourra présenter des déformations, des décolorations ou un fonctionnement défectueux et/ou des défauts de fonctionnement. Utiliser l’appareil dans un endroit où il ne risque pas d’être éclaboussé ou aspergé d’eau. Utilisercetappareilsurunesurfaceplateethorizontale. Ne pas installer l’appareil sur la surface d’un mur, sur un plafond ou dans un endroit où il serait incliné d’un certain angle. Remarque pp Ne pas tenir la caméra par la tête pendant les travaux d’installation. Cela pourrait entraîner un fonctionnement défectueux de l’appareil. CORRECT OK INCORRECT NG Àéviterpourassurerunfonctionnementstableet durable pp Une utilisation prolongée dans un endroit qui présente des niveaux élevés de température et d’humidité provoquera une détérioration des pièces de l’appareil et réduira sa durée de vie utile. pp S’assurer qu’un appareil de climatisation ou de chauffage ne souffle pas de l’air directement sur l’emplacement d’installation. Emplacementd’installation Installer l’appareil dans un endroit stable, qui n’est pas sujet à des vibrations. Si l’appareil est installé dans un endroit qui a tendance à vibrer, les images fournies par l’appareil trembleront également. Discuter en détail avec le revendeur avant d’installer l’appareil. Sil’appareilnedoitplusêtreutilisé,nepaslelaisser traîner,maisprendresoindeledéposercorrectement. Lorsdel’installation,letransfertoudeladéposede l’appareil,ildoitabsolumentêtretenuparsonsocle. Le fait de tenir la caméra par sa tête ou de la faire pivoter pourrait entraîner des dommages. Nepasfixerunfiltre,unpare-soleilouautrepiècesur l’appareil. 7 (F) Précautions d’installation Installationdel’adaptateursecteur pp Ne pas placer l’adaptateur secteur en contact direct avec le sol ou autre surface. De l’eau s’accumulant sur la surface à la suite d’une fuite d’eau de pluie, ou pour toute autre raison, peut poser un grave danger. Fixer solidement l’adaptateur secteur sur une surface sur laquelle de l’eau, de la poussière, ou autre, ne risque pas de s’accumuler. pp Fixer l’adaptateur solidement pour qu’il ne risque pas de se décrocher ou de tomber. Il doit être fixé avec une force pouvant supporter le poids (env. 320 g) de l’adaptateur secteur. S’ilyadespossibilitésd’interférencesduesàdes parasites Disposer les câbles de manière que le câble d’alimentation (cordon du plafonnier) de 220 V CA ou plus, et le câble des signaux soient placés à au moins 1 m de distance l’un de l’autre. Si ce n’est pas possible, faire passer chaque câble dans un conduit métallique séparé. (Les conduits métalliques doivent être reliés à la terre.) Installerl’adaptateursecteuraccessoireprèsdelaprise secteurprincipale,etlepositionnerdemanièrequesa fichepuisseêtrefacilementbranchéeetdébranchéede laprise. Si l’adaptateur secteur doit être raccordé dans un endroit où de la poussière s’accumule, nettoyer régulièrement la fiche d’alimentation pour en ôter la poussière et la saleté afin d’éviter l’apparition d’un cheminement. Interférencedesignauxradio Si l’appareil est installé près d’un téléviseur, d’une antenne radio émettrice, d’un champ électrique ou d’un champ magnétique puissant (comme celui qui est généré par un moteur, un transformateur ou des lignes de transport d’électricité), ses images risquent de présenter des distorsions et/ou du bruit. Interrupteurd’alimentation Cet appareil ne présente pas d’interrupteur d’alimentation. Il se met sous tension quand sa fiche d’alimentation est branchée sur une prise secteur. Quand l’appareil est sous tension, le panoramique horizontal, le panoramique vertical, le zoom et la mise au point fonctionnent. Avant toute opération de maintenance, la fiche d’alimentation doit impérativement être débranchée de la prise secteur. Lorsdubranchementdescâbles,s’assurerqueles zonesdesconnecteursnesontpassoumisesàdes charges. Cela peut causer une défaillance. Lachaleurgénéréedoitpouvoirs’échapper Cet appareil est conçu de manière que la chaleur générée à l’intérieur puisse s’échapper par ses surfaces. Ne pas installer l’appareil dans un endroit où il serait entouré de murs ou d’autres surfaces, et où la chaleur ne pourrait s’échapper. Par ailleurs, la chaleur se dissipe par le panneau inférieur, qui s’échauffe avec le temps : Ce phénomène est normal et n’indique pas un défaut de fonctionnement. Connexionducâbled’alimentation Le câble d’alimentation de l’adaptateur secteur doit impérativement être raccordé via un disjoncteur selon une des méthodes suivantes. (1) Raccorder le câble d’alimentation via une unité de contrôle d’alimentation. (2) Raccorder le câble d’alimentation à un disjoncteur dans un panneau de distribution électrique avec une distance de contact de 3,0 mm ou plus. Utiliser un disjoncteur qui est capable de fermer tous les pôles de l’alimentation secteur, excepté le conducteur de terre protectif. (3) Installer l’adaptateur secteur près de la prise secteur, et le raccorder via la fiche d’alimentation. IMPORTANT pp Lenomduproduitetsescaractéristiques électriquessontindiquéssursonpanneau inférieur. 8 (F) FRANÇAIS Miseàlaterre Avant d’utiliser l’appareil, vérifier que le fil de mise à la terre est fixé fermement. Vérifier la résistance de masse (inférieure à 100 ) de la borne de terre. Si la fiche d’alimentation dont être convertie et utilisée sous la forme d’une fiche à deux broches, demander préalablement l’avis du revendeur. Ensuite, utiliser un adaptateur de fiche équipé d’une borne de terre, et raccorder sans faute cette borne à la terre. Dans un tel cas, la connexion à la terre doit absolument être effectuée avant le branchement de la fiche d’alimentation à la source d’alimentation principale. De la même manière, avant de déconnecter le fil de terre, la fiche d’alimentation doit impérativement être déconnectée de la source d’alimentation principale. Utiliserl’adaptateursecteuretlecâbled’alimentation dédiés,fournisavecl’appareil. Raccorder fermement l’adaptateur secteur et le câble d’alimentation à l’entrée d’alimentation. Le câble d’alimentation fourni avec cet appareil doit toujours être utilisé avec cet appareil. L’appareil ne peut pas être utilisé avec un câble d’alimentation qui n’est pas fourni avec l’appareil. De la même manière, le câble d’alimentation fourni avec l’appareil ne peut pas être utilisé avec un autre dispositif. Précautions d’utilisation Filmerdansdesconditionsd’éclairageappropriées. Pour produire des images avec des couleurs agréables, filmer dans des conditions d’éclairage appropriées. Les couleurs des images risquent d’être faussées en cas de prise de vues sous un éclairage fluorescent. Sélectionner l’éclairage approprié. Zoomingetmiseaupoint Quand la mise au point est effectuée manuellement, des défauts de mise au point risquent d’apparaître pendant un zooming. Après un zooming, si nécessaire, refaire la mise au point ou passer la mise au point en mode automatique. Quand la mise au point est en mode manuel, procéder au zooming après avoir réglé la mise au point sur la position Tele maximum, là où la précision de mise au point est la plus élevée. (Cependant, si la distance de l’appareil au sujet est inférieure à 1,5 m, la mise au point sur le sujet risque d’être incorrecte en position Wide maximum.) Si le zooming est réalisé vers la position Tele maximum après que la mise au point a été réglée en position grandangle maximum, la mise au point risque de ne plus être correcte pendant le zooming. Pourassurerdesperformancesstablesàlongterme Si l’appareil est utilisé pendant longtemps dans un endroit où la température et le degré d’humidité sont élevés, ses pièces se détérioreront et sa durée de vie utile sera réduite. (Température recommandée : Maxi. 35 °C) S’assurer qu’un appareil de climatisation ou de chauffage ne souffle pas de l’air directement sur l’emplacement d’installation. Persistanced’imagesurlesfiltresdecouleurdu capteurMOS Si des parties du capteur MOS sont exposées continuellement à des spots de lumière ou à d’autres sources de lumière vive, les filtres de couleur à l’intérieur du capteur MOS vont se détériorer, et les parties concernées risquent de se décolorer. La décoloration risque d’être perceptible quand la direction du monitoring fixe est changée. Nepaspointerlacaméraversdes lumièresfortes Si des parties du capteur MOS sont exposées à des spots de lumière ou à d’autres sources de lumière forte, un effet d’éblouissement (les bords des sources de lumière deviennent flous) risque d’apparaître. Sujettrèslumineux Positionduzoomquandlacaméraestmisesous tension Quand l’appareil est mis sous tension, le zoom, la mise au point et le diaphragme reviennent aux positions qu’ils occupaient immédiatement avant la mise hors tension. (Cela se produit pour la mise au point et le diaphragme quand ils ont été réglés manuellement.) Cependant, ces positions risquent ne pas être rétablies si, par exemple, le câble d’alimentation a été déconnecté pendant le fonctionnement. Plagedetempératuredefonctionnement Éviter d’utiliser l’appareil dans un endroit froid, où la température peut tomber en dessous de 0 °C, ou dans un endroit chaud, où la température peut dépasser +40 °C, car ces températures affectent la qualité de l’image et endommagent les pièces internes. Éblouissement ReproductiondescouleursdescapteursMOS Suivant les teintes de couleur des sujets, la reproduction des couleurs peut se détériorer : Ce phénomène est normal et n’indique pas un défaut de fonctionnement. Encequiconcernelanormed’interfaceHDMI Cet appareil a été certifié compatible HDMI, mais en de rares occasions, il peut arriver que les images ne soient pas affichées, suivant le dispositif HDMI qui a été raccordé à l’appareil. Danslecasdesujetsàforteluminosité Un halo (flare) risque d’apparaître si une source de lumière très forte est pointée vers l’objectif. Dans un tel cas, changer l’angle ou prendre d’autres mesures pour y remédier. Mettrel’appareilhorstensionavantdeconnecteroude déconnecterdescâbles. Prendre toujours soin de mettre l’appareil hors tension avant de connecter ou de déconnecter des câbles. Lorsdel’utilisationdesfonctionsautomatiques pp Si “FullAuto” a été sélectionné à l’option Scene sur le menu de caméra, par exemple, tous les réglages automatiques sont activés, et le fonctionnement manuel n’est plus possible pour certaines options. pp Lors de l’utilisation de la fonction ATW (auto tracking white adjustment : suivi automatique de la balance des blancs) sous un éclairage fluorescent, la balance des blancs risque de fluctuer. pp Dans certaines situations, la mise au point risque de se faire difficilement pour le réglage auto. Dans un tel cas, sélectionner le réglage manuel et mettre au point manuellement. pp Il est possible que la luminosité ne soit pas réglée correctement dans le cas d’un sujet très lumineux quand les réglages du gain et du diaphragme sont en mode automatique. Si cela se produit, passer la vitesse d’obturation en mode manuel, puis effectuer le réglage. 9 (F) Précautions d’utilisation Manipulerl’appareilavecprécautions. Ne pas laisser tomber l’appareil ou le soumettre à un impact et des vibrations importants. Un tel choc pourrait provoquer une défaillance de l’appareil. Quandl’appareiln’estpasutilisé Mettre l’appareil hors tension quand il n’est pas utilisé. S’il ne doit plus être utilisé, ne pas le laisser traîner, mais prendre soin de le déposer correctement. FRANÇAIS Nepastoucherlespiècesdusystèmeoptique. Les pièces du système optique forment le coeur de la caméra. Elles ne doivent être touchées en aucune circonstance. Dans le cas improbable où elles doivent être dépoussiérées, ôter la poussière à l’aide d’un pinceau soufflant ou en les essuyant doucement avec un papier de nettoyage d’objectif. Aucuncorpsétrangernedoittoucherlespiècesen rotation. Sinon, cela pourrait causer des problèmes. Tenirl’appareilàl’abridel’eau. Éviter tout contact direct avec de l’eau. Sinon, cela pourrait causer des problèmes. Maintenance Mettre l’appareil hors tension avant toute opération de maintenance. Sinon, vous risqueriez de vous blesser. Essuyer la surface à l’aide d’un chiffon doux et sec. Éviter tout contact avec du benzine, du diluant pour peintures et autres substances volatiles, et éviter d’utiliser ces substances. Sinon, le boîtier risque de se décolorer. Nepastournerlatêtedecaméraàlamain. Le fait de tourner la tête de caméra à la main risque d’entraîner un fonctionnement défectueux de l’appareil. Utiliserl’appareildansunenvironnementavecuntaux d’humiditéetdepoussièreleplusbaspossible. Éviter d’utiliser l’appareil dans un environnement qui présente une concentration élevée d’humidité ou de poussière, car les pièces internes risquent d’être endommagées. Miseaurebutdel’appareil Quand l’appareil a atteint la fin de sa durée de vie utile et qu’il doit être mis au rebut, s’adresser à une entreprise qualifiée qui mettra l’appareil au rebut correctement de manière à protéger l’environnement. 10 (F) Concernant la télécommande sans fil (Accessoire optionnel) Cetappareilpeutêtrecommandéàdistanceparune télécommandesansfil(numérodemodèle:AW-RM50G) vendueséparément. L’appareilnepeutpasêtrepilotédirectementdepuisla télécommandesansfild’uneunitédecommunication vidéoHD. Vérifierlespointssuivantsavantd’utiliserla télécommandesansfil. Veuillezvousadresseràvotrerevendeurconcernant l’achatd’unetélécommandesansfil. pp Utiliserlatélécommandesansfilàunedistance inférieureà6mdel’appareil. pp Latélécommandesansfilrisquedenepas fonctionnersouscertainsanglesparrapportà l’appareil. Depuis un endroit d’où le capteur optique du signal de télécommande sans fil (ci-après dénommé “capteur optique”) est visible, pointer la fenêtre de transmission du signal de la télécommande sans fil vers le capteur optique, puis actionner les commandes. Il peut être plus difficile de piloter l’appareil si la télécommande se trouve derrière l’appareil. pp Sil’appareilestinstalléprèsd’unelumière fluorescente,d’unmoniteurauplasmaoud’un autreproduitdecetype,ousil’appareilestexposé àlalumièredusoleil,leseffetsdelalumière peuventempêcherdepiloterl’appareildepuisla télécommandesansfil. S’assurer de respecter les points suivants relatifs à l’installation et à l’utilisation. • Prendre les mesures nécessaires pour que la zone du capteur optique ne soit pas exposée à la lumière émise par une lumière fluorescente, un moniteur au plasma ou autre produit de ce type, ou à la lumière du soleil. • Installer l’appareil loin d’une lumière fluorescente, d’un moniteur au plasma ou autre produit de ce type. pp Pendantenviron10minutesaprèsquelespilesont étésortiesdelatélécommandesansfil,lasélection delafonctionàpiloter(touche[CAM1],[CAM2], [CAM3]ou[CAM4]actionnéeendernier)resteen mémoire.Cependant,aprèsuntempspluslong, lasélectionrevientaumêmeétatquesilatouche [CAM1]avaitétéactionnée. 11 (F) Les commandes et leurs fonctions pUnitédecaméra 1Capteuroptiquedusignaldetélécommande sansfil Des capteurs de lumière sont prévus à deux emplacements à l’avant du socle de la caméra. Il s’allume comme suit en fonction de l’état de l’appareil. Orange: L’appareil est en état de veille. Vert: L’appareil est sous tension. Rouge: Une erreur s’est produite dans l’appareil. Vertclignotantdeuxfois: Pendant qu’il est sous tension, l’appareil reçoit depuis la télécommande sans fil (accessoire optionnel) un signal correspondant à l’identification de commande à distance. Orangeclignotantdeuxfois: Pendant qu’il est sous tension, l’appareil reçoit depuis la télécommande sans fil (accessoire optionnel) un signal ne correspondant pas à l’identification de commande à distance. 3Têtedecaméra Elle tourne horizontalement. 4Unitéd’objectif Elle pivote vers le haut et le bas. <Panneauarrière> 5CommutateursIRID[IRID] [CAM1] [CAM2] [CAM3] [CAM4] Ces commutateurs servent à sélectionner l’ID de la télécommande sans fil (accessoire optionnel). Les positions “CAM1” à “CAM4” des commutateurs IR ID correspondent aux touches [CAM1] à [CAM4] sur la télécommande sans fil. 6ConnecteurHDMI[HDMI] Il s’agit du connecteur de sortie vidéo HDMI. <Panneauinférieur> 7Orificedemontagedefilantivol Utiliser cet orifice pour accrocher la fixation du fil. 8Connecteurdeservice Ce connecteur n’est utilisé que pour des opérations de maintenance. 9ConnecteurDCIN[12V IN ] Raccorder l’adaptateur secteur, fourni avec l’appareil, à ce connecteur pour fournir la tension CC 12 V à l’appareil. 12 (F) FRANÇAIS 2Voyantd’affichaged’état Les commandes et leurs fonctions :Orificefileté(filetage:1/4-20UNC)pourmonter lacaméra Utiliser cet orifice pour monter la caméra sur un pied par exemple. Commutateursdeservice SW1 SW2 SW3 SW4 ON OFF La caméra est utilisée avec tous les commutateurs positionnés sur OFF. 13 (F) Les commandes et leurs fonctions pTélécommandesansfil (Accessoireoptionnel) 3ToucheMENU Chaque fois que cette touche est tenue enfoncée pendant au moins 2 secondes, le fonctionnement commute entre l’affichage du menu de l’appareil et l’arrêt du menu. Si elle est enfoncée rapidement (pendant moins de 2 secondes) pendant qu’un menu est affiché, la modification des paramètres est annulée. 4TouchesCAM1àCAM4 Elles servent à sélectionner les appareils à exploiter. Quand une touche est sélectionnée, l’appareil correspondant à la touche sélectionnée peut être exploité. Si cette touche est enfoncée quand un des paramètres “Manual1 à 3” a été sélectionné pour “Scene” sur le menu de la caméra et que la mémoire AWB A ou AWB B a été sélectionnée pour le réglage de la balance des blancs, la balance des blancs est automatiquement ajustée et enregistrée dans la mémoire sélectionnée. 6ToucheMODE Elle sert prévue pour une expansion future des fonctions. Elle ne sert pas utilisée actuellement. 7TouchesGAIN[OFF][LOW][HI][AUTO] Elles servent à régler le gain. L’augmentation de gain peut être réglée en trois étapes à l’aide des touches [OFF], [LOW] et [HI]. [LOW] est réglé sur 9 dB, et [HI] sur 18 dB. Quand la touche [AUTO] est actionnée, la fonction AGC (réglage de gain automatique) est activée, et le gain est réglé automatiquement en fonction de la quantité de lumière. Le gain maximum pour la fonction AGC peut être déterminé sur le menu. 8Touchesd’appeldemémoiredepréréglage[1]à[12] Elles servent à rappeler les informations relatives à la direction de l’appareil et autres réglages qui ont été enregistrés dans les mémoires de préréglage N° 1 à 12 de l’appareil et à rétablir ces réglages. 1ToucheON/STANDBY Chaque fois que cette touche est tenue enfoncée pendant au moins 2 secondes, le fonctionnement commute entre la mise sous tension de l’appareil et la mise en état de veille. Remarques pp Quand le fonctionnement est commuté vers le mode de veille: La position actuelle de panoramique horizontal/vertical est sauvegardée dans la mémoire (en tant que préréglage de mise sous tension), et la caméra bouge de manière à pointer vers l’arrière. pp Quand le fonctionnement est commuté vers le mode de mise sous tension: La caméra revient à la position qui a été sauvegardée dans la mémoire (en tant que préréglage de mise sous tension) au moment où le fonctionnement a été commuté vers le mode de veille. 2Fenêtredetransmissiondusignal 14 (F) FRANÇAIS 5ToucheSET Les commandes et leurs fonctions ToucheA/FOCUS 9TouchePRESET/LIMIT Elle sert à enregistrer les réglages dans les mémoires de préréglage. Quand une touche d’appel de mémoire de préréglage est tenue enfoncée pendant que la touche PRESET/ LIMIT est tenue enfoncée, les informations relatives à la direction actuelle de l’appareil et d’autres réglages sont enregistrés sur la touche d’appel. Les touches d’appel de mémoire de préréglage [1] à [12] correspondent aux mémoires de préréglage N° 1 à 12 de l’appareil. Elle sert à établir la mise au point automatique de l’objectif. ToucheM/FOCUS Elle sert à établir la mise au point manuelle de l’objectif. Les touches FOCUS ([F] et [N]) sont utilisées pour effectuer le réglage. TouchesOPT[ON][OFF] Elles sont prévues pour une expansion future des fonctions. Elles ne sont pas utilisées actuellement. :Touchesdepanoramiquehorizontal/verticalet touchesd’exploitationdumenu [][][][][] ToucheHOME (1) Elles servent à changer la direction de l’appareil. L’appareil s’incline vers le haut ou le bas par les touches [] et [], et tourne à gauche ou à droite par les touches [] et []. La touche [] n’a aucun effet pendant le panoramique vertical ou horizontal. Quand les touches [] ou [] et [] ou [] sont enfoncées en même temps, l’appareil bouge en diagonale. Quand cette touche est tenue enfoncée pendant au moins 2 secondes, la direction de l’appareil (panoramique horizontal ou vertical) revient à la position de référence. TouchesZOOM[T][W] Elles servent à régler le zoom. Le zoom est réglé dans le sens grand angle par la touche [W] et dans le sens téléobjectif par la touche [T]. (2) Les touches servent à naviguer sur le menu quand un menu est affiché. Utiliser les touches [], [], [] et [] pour sélectionner les options du menu. Quand une option sélectionnée a un menu secondaire, ce dernier peut être affiché par une pression sur la touche []. Quand le curseur est aligné devant une option donnée et que la touche [] est actionnée sur le menu de réglage au niveau hiérarchique inférieur, le paramètre de l’option sélectionnée se met à clignoter. Quand la touche [] est actionnée après qu’un paramètre a été modifié par les touches [], [], [] et [], le paramètre cesse de clignoter et le nouveau paramètre est entré. Dans le cas d’un menu ordinaire, le nouveau paramètre prend effet immédiatement après qu’il a été modifié, si la modification est réalisée quand le paramètre clignote. Par contre, pour certains menus (Scene, Format et Initialize), le paramètre ne prend effet que quand la touche [] a été actionnée, le clignotement a cessé et le nouveau paramètre a été entré. Si la touche MENU est enfoncée rapidement (moins de 2 secondes) pendant que le paramètre clignote, la modification est annulée et le paramètre revient à sa valeur précédant la modification. ToucheFAST Elle sert à augmenter la vitesse d’exécution des opérations de panoramique horizontal, vertical, zoom et mise au point. Remarque pp Quand les paramètres d’une mémoire préréglée ont été rappelés, la vitesse de fonctionnement du panoramique horizontal et du panoramique vertical peut être modifiée à l’option Preset Speed du menu de caméra. ToucheSLOW Elle sert à ralentir la vitesse d’exécution des opérations de panoramique horizontal, vertical, zoom et mise au point. ToucheA/IRIS Elle sert à établir le réglage automatique du diaphragme en fonction de la quantité de lumière. ToucheM/IRIS Elle sert à établir le réglage manuel du diaphragme. Les touches IRIS + et IRIS – servent à effectuer le réglage proprement dit. TouchesFOCUS[F][N] ToucheIRIS+ Elles servent à faire la mise au point manuellement quand la mise au point de l’objectif est en réglage manuel. La mise au point est ajustée loin à l’aide de la touche [F] (far) et près à l’aide de la touche [N] (near). Elle sert à régler le diaphragme dans le sens ouvert. ToucheIRIS– Elle sert à régler le diaphragme dans le sens fermé. 15 (F) Réglage des identifications de commande à distance La télécommande sans fil (accessoire optionnel) est capable de piloter jusqu’à quatre appareils. Les identifications servent à déterminer à quelle caméra correspond chaque touche [CAM1], [CAM2], [CAM3] et [CAM4] de la télécommande. pp Si plusieurs appareils sont utilisés, poser une identification de commande à distance différente pour chaque appareil. pp Si un seul appareil est utilisé, régler l’identification de commande à distance sur “CAM1”, sauf si le réglage doit être changé. Méthodederéglage FRANÇAIS Utiliser les commutateurs IR ID situés sur le panneau arrière de l’appareil, et sélectionner “CAM1”, “CAM2”, “CAM3” ou “CAM4” comme ID de la télécommande. (Voir page 12) Les réglages des commutateurs IR ID “CAM1” à “CAM4” correspondent aux touches [CAM1] à [CAM4] de la télécommande sans fil. (Le réglage usine est “CAM1”.) CommutateursIRID Touches[CAM1]à[CAM4] 16 (F) Installation 1 Raccorderlesconnecteursdupanneauarrière. Câbledel’adaptateursecteur Câbledesortievidéo pInstallationdel’appareilsurunbureau Placerl’appareilàplatsurlasurface. Remarques pp Installer l’appareil dans un endroit stable, qui n’est pas sujet à des vibrations. Si l’appareil est installé dans un endroit qui a tendance à vibrer, les images fournies par l’appareil trembleront également. pp Faire attention à ce que l’appareil ne tombe pas et ne soit pas endommagé pendant l’installation. pp Ne pas tenir l’appareil par la tête pour le déplacer. pp Ne pas tenir la tête de la caméra ou la tourner. Cela pourrait entraîner un fonctionnement défectueux. pp Ne pas tirer sur les câbles raccordés. Cela pourrait faire tomber l’appareil et/ou provoquer des blessures. S’assurerquel’appareilnepuissepastomber. CORRECT OK 17 (F) INCORRECT NG Installation wwMontage de l’appareil sur un pied Utiliser un trépied extrêmement stable qui peut supporter le poids de la caméra quand elle est montée dessus. Fixer le pied sur l’orifice fileté pour le montage de la caméra, situé sous le panneau inférieur de la caméra. Poser le pied sur une surface parfaitement plane et de niveau. Serrer la vis à la main de manière à fixer le pied solidement. Ne pas serrer la vis en tournant le corps de la caméra. Cela pourrait entraîner un fonctionnement défectueux de l’appareil. Pour le montage du pied, utiliser une vis qui répond à la norme suivante. Vis pour le montage du pied (1/4-20UNC) 4,5 mm à 6 mm pw Ne pas installer l’appareil à un endroit où il y a beaucoup de passage. pw Quand l’appareil est monté sur un pied, ne pas surélever le pied au-dessus du sol. pw Monter l’appareil solidement de manière qu’il n’y ait pas de jeu. S’il y a du jeu, l’appareil risque de tomber et/ou de provoquer des blessures. pw Si l’appareil doit être utilisé pendant une période prolongée, prendre des mesures afin que l’appareil ne puisse pas se renverser, se décrocher ou tomber. Après l’utilisation de l’appareil, remettre sans tarder l’emplacement d’installation dans son état original. 18 (F) FRANÇAIS Remarques Connexions pConnexionsavecunsystèmedecommunicationvidéoHD CaméradecommunicationHD GP-VD150E SignalHDMI UnitédecommunicationvidéoHD KX-VC300,KX-VC600 Télécommandesansfil(accessoireoptionnel) AW-RM50G pp Pour obtenir une description des opérations de panoramique horizontal, panoramique vertical, zooming, préréglage et autres opérations de la caméra à l’aide d’une unité de communication vidéo HD, se reporter au mode d’emploi de l’unité compatible. 19 (F) Diagnostic de panne Symptôme Pasd’alimentation Nefonctionnepas (télécommande sansfilouunitéde communicationvidéo HD) Impossibleà piloteràpartirdela télécommandesansfil Causeetactionàprendre Pagesde référence pp L’adaptateursecteurest-ilfermementraccordéàlaprisesecteur? ––– pp Lafiched’alimentationdel’adaptateursecteurest-ellebranchée correctement? ––– pp Sil’appareilestpilotédepuislatélécommandesansfilfournie Se reporter également à “Impossible à piloter à partir de la télécommande sans fil”. ––– pp L’appareilest-ilsoustension? Si le voyant d’affichage d’état de l’appareil est éteint ou s’il est allumé en orange, cela signifie que l’appareil n’est pas alimenté. <Utilisation et réglages> pp L’appareilàpiloterest-ilbiensélectionné? <Utilisation et réglages> pp Lespilesdelatélécommandesont-ellesépuiséesouont-ellesété installéesaveclespolaritésinversées? Si le voyant d’affichage d’état ne clignote pas même quand la télécommande sans fil fournie est utilisée près du capteur optique du signal de télécommande sans fil, cela signifie que les piles sont épuisées. Remplacer les piles. pp Ya-t-ilunéclairagefluorescentouunmoniteurauplasmaprès del’appareil,etdanscecas,lecapteuroptiquedusignalde télécommandesansfilest-ilexposéàsalumière? 20 (F) ––– Page 11 FRANÇAIS qpFonctionnement Diagnostic de panne qpVidéo Symptôme Causeetactionàprendre pp L’appareilest-ilconnectécorrectementauxautresdispositifs raccordés? Aucuneimagen’est pp Silesystèmeestconfigurédemanièrequel’imagesoitégalement commutéequandlacaméraàpiloterestsélectionnée,est-ceque affichéeoulesimages l’appareilcorrecteaétésélectionnée? sontperturbées L’écrandemenuest affiché Pagesde référence Page 19 <Utilisation et réglages> pp Leréglagedusignalvidéoa-t-ilétésélectionnécorrectement? <Utilisation et réglages> pp Sortirdumenu. <Utilisation et réglages> pp SuivantlemoniteurHDMIutilisé,vouspouvezsubirunou plusieurssymptômesdécritsci-dessous. Lesécransdemenu sontdifficilesàvoir Pasdemiseaupoint automatique Lesujetn’estpasnet pendantlezooming quandlamiseau pointestenmode manuel • La résolution des caractères des menus affichés change en même temps que l’image de fond. • Suivant le paramètre d’accentuation des contours défini pour le moniteur, des lignes blanches apparaissent devant les ombres noires des menus. • Suivant le paramètre d’accentuation des contours défini pour le moniteur, les couleurs du fond risquent d’être superposées sur les zones blanches des menus. pp Lamiseaupointest-ellerégléesurmanuel? La mise au point automatique est lancée dès qu’elle est réglée sur automatique. <Utilisation et réglages> pp Danscertainessituations,lamiseaupointpeutsefaire difficilementquandelleestrégléesurautomatique. Dans de tels cas, sélectionner le réglage manuel et faire la mise au point manuellement. <Utilisation et réglages> pp Lamiseaupointa-t-elleétéeffectuéeenpositionTelemaximum? Effectuer d’abord la mise au point en position Tele où la précision du réglage est la plus élevée, puis procéder au zooming. ––– pp Danscertainesconditionsdetournage,ilpeutêtredifficilede fairelamiseaupointsurlesujet. Dans un tel cas, utiliser la mise au point automatique. pp Ilssontdusàdesrefletsdelumièreentrel’objectifetlecache Desrefletsenforme situédevantl’objectif.Trouverunemanièred’optimiserlaposition d’anneauapparaissent delalumièreparrapportàcelledel’appareil,etinstalleretutiliser auxquatrecoinsde l’appareildansunendroitoùdesrefletsnepourrontpasse l’image produire. Lescouleursnesont pascorrectes ––– <Utilisation et réglages> ––– pp ActiverlafonctionATW(suiviautomatiquedelabalancedes blancs). <Utilisation et réglages> pp Danscertainessituations,lescouleurspeuventêtreincorrectes quandlafonctionATWestutilisée. Dans de tels cas, effectuer le réglage de balance des blancs. <Utilisation et réglages> 21 (F) Diagnostic de panne Lesimagessont tropclairesoutrop sombres Causeetactionàprendre pp Sélectionnerleréglageautomatiquepourlediaphragme,ou biensélectionnerleréglagemanueletréglerlediaphragme manuellement. Pagesde référence <Utilisation et réglages> pp Lesimagespeuventêtresombressilescâblesdusignalvidéo sonttroplongs,carilyaatténuationdusignal. ––– Lesujetprésentedela distorsion pp Siunsujetpassebrusquementdevantlacaméra,ilpeutprésenter delégèresdistorsionsdufaitquecettecamérautiliseuncapteur d’imageMOS. Cephénomèneestnormaletneconstituepasunproblème. ––– Quandleflashse déclenchependant laprisedevues,seul lehautoulebasde l’écrandevientplus clair pp Danslecasd’uncapteurd’imageMOS,letimingdeprisede vuesdiffèrelégèremententrelecoinsupérieurgaucheetlecoin inférieurdroitdel’écran.Ainsi,quandleflashsedéclenche,le basdel’écrandevientplusclairdansunetrameetlehautdevient plusclairdanslatramesuivante. Cephénomèneestnormaletneconstituepasunproblème. ––– Laluminositéchange cycliquementoules couleurschangent, etdesbandes horizontalesdéfilent surl’écran pp Cephénomènedepapillotement(flicker)peutseproduiresousla lumièreproduiteparunéclairagefluorescent,desampoulesau mercureoud’autrestypesdetubesàdécharge. Cephénomèneestnormaletneconstituepasunproblème. Dansunetellesituation,ilconvientderéglerlavitessede l’obturateurélectroniquesur1/120dansunerégionoùla fréquenceélectriqueest60Hz,ousurOFFdansunerégionoùla fréquenceélectriqueest50Hz. <Utilisation et réglages> Quanddeslignes finesoudesmotifs pp Cephénomèneseproduitdufaitquelespixelssontdisposés cycliquessontfilmés, systématiquementsurchaquecapteurd’image.Ilapparaît quandlafréquencespatialed’unsujetetlepasdespixelssont despapillotementsou rapprochés.Pouryremédier,changerl’angledelacaméra,par descouleursparasites exemple. apparaissentpardessus 22 (F) ––– FRANÇAIS Symptôme Aspect extérieur Unité:mm R7 150 75 73 23 (F) 1,5 47,7 115,9 175,5 4,9 Fiche technique Sourced’alimentation: 12 V CC 10 % (Adaptateur secteur fourni) Consommationdecourant: 1,0 A Informations concernant la sécurité. p Donnéesgénérales p Entrée Températuredefonctionnementambiante: 0 °C à +40 °C Connecteurd’entrée: DC 12 V IN Températurederangement: –20 °C à +50 °C Plagesd’humiditéadmissibles: 20 % à 90 % (sans condensation) p Sortie Poids: Sortievidéo: Environ 1,2 kg Finition: HDMI (Connecteur HDMI) FRANÇAIS Dimensions(LPH): 150 148 177 mm Argentée 24 (F) Fiche technique p Fonctionsetperformance [Têtepanoramique] Vitessedepanoramiquehorizontal/vertical: Maxi. 90°/s ou plus [Unitédecaméra] Capteursd’image: MOS Full HD de type 1/3 Objectif: Zoom motorisé 12, f/1.6 à 2.0 (f=4,7 à 56,4 mm; équivalant à 35 mm: 36,9 mm à 442,8 mm) Miseaupoint: Plagedepanoramiquehorizontal: ±100° Plagedepanoramiquevertical: ±30° p Suivant la position du panoramique horizontal ou vertical, la caméra peut se refléter dans l’image. Commutation entre automatique et manuel Distancedemiseaupoint: Toute la plage de zooming: 1,5 m Position grand-angle maximum: 30 cm Silencedefonctionnement: NC35 (vitesse normale), NC40 (quand préréglé) Systèmeoptiquedeséparationdescouleurs: Système de filtre couleur sur la puce Illuminationminimum: 3 lx (50 IRE, F1.6, +36 dB) p Adaptateursecteur Résolutionhorizontale: 850 lignes TV Typ (zone centrale) Sélectiondugain: Auto, 0 dB, 3 dB, 6 dB, 9 dB, 12 dB, 15 dB, 18 dB Modedestockage: 0 dB, 6 dB, 12 dB, 18 dB Vitessesd’obturateurélectronique: Step: 1/120, 1/250, 1/500, 1/1000, 1/2000, 1/4000, 1/10000 Synchro scan: 50,20 Hz à 538,51 Hz Gamma: Off, Normal (Low, Mid, High), Cinema Balancedesblancs: AWB A, AWB B, ATW Entrée: 220 V à 240 V CA, 1,5 A, 50 Hz Sortie: 12 V CC, 2,5 A, 30 W p Accessoiresoptionnels pp TélécommandesansfilAW-RM50G (FabriquéeparPanasonic) (Pilessèches“R6”ou“LR6”2,vendues séparément) Variabilitédelaquantitéchromatique: Sept niveaux de variabilité Fichiersscènes: FullAuto, Manual1, Manual2, Manual3 Formatdesortie: HD 1080: 50i, SD 576: 50p Les poids et dimensions indiquées sont des valeurs approximatives. Sous réserve de modification des renseignements techniques sans préavis. 25 (F) FRANÇAIS Notes 26 (F) VERSIONEITALIANA (ITALIAN VERSION) Precauzioni per la sicurezza NONTOGLIEREILCOPERCHIOSVITANDOLO. PRECAUZIONE: Per ridurre i pericoli di scosse elettriche, non togliere il coperchio. All’interno non ci sono parti riparabili dall’utente. Per le riparazioni, rivolgersi a personale tecnico qualificato. PER RIDURRE I PERICOLI D’INCENDIO O Dl SCOSSE ELETTRICHE E Dl FASTIDIOSE INTERFERENZE, USARE SOLTANTO GLI ACCESSORIRACCOMANDATI. AVVISO: PRECAUZIONE: Questoapparecchiodeveesseredotatodi collegamentoditerra Per assicurare una buona ventilazione, non installare o sistemare questo apparecchio in uno scaffale, mobile incorporato od altro spazio chiuso. Per evitare i pericoli di scosse elettriche o d’incendio a causa di un surriscaldamento, accertarsi che tende od altro materiale non ostacolinolaventilazione. Per un funzionamento sicuro, la spina tripolare deve essere inserita solo in prese tripolari standard con un collegamento di terra al normale impianto domestico effettivamente funzionante. Eventuali prolunghe utilizzate con l’apparecchio devono avere tre fili ed essere collegate correttamente per assicurare un’opportuna messa a terra. Le prolunghe collegate scorrettamente sono causa frequente di incidenti. Il funzionamento corretto dell’apparecchio non implica automaticamente che la presa sia dotata di messa a terra o che l’impianto sia completamente sicuro. Per sicurezza, in caso di dubbi sull’effettiva presenza del collegamento di terra nella presa elettrica, consultare un elettricista qualificato. La presa di corrente deve essere installata nei pressi dell’apparato ed essere facilmente accessibile. In alternativa, la spina di alimentazione o l’accoppiatore elettrico devono essere prontamente utilizzabili. Si avvisa che gli apparecchi di CLASSE 1 devono essere collegati a una presa di rete dotata di collegamento protettivo di terra. AVVISO: • P ER RIDURRE IL RISCHIO DI INCENDI O SCOSSE ELETTRICHE, NON ESPORRE L’APPARECCHIOAPIOGGIAOUMIDITÀ. • L’APPARECCHIO NON DEVE ESSERE ESPOSTO A GOCCE O SPRUZZI. NON APPOGGIAREOGGETTICONTENENTILIQUIDO (ES.BICCHIERI)SULL’APPARECCHIO. AVVISO: PER PREVENIRE FERITE, QUESTO APPARECCHIO DEVE ESSERE MONTATO SALDAMENTE AL PAVIMENTO IN CONFORMITÀ ALLEISTRUZIONIDIINSTALLAZIONE. sono le informazioni sulla sicurezza. 1(I) ITALIANO Informazionipergliutentisullosmaltimentodiapparecchiatureelettricheedelettronicheobsolete (perinucleifamiliariprivati) Questo simbolo sui prodotti e/o sulla documentazione di accompagnamento significa che i prodotti elettrici ed elettronici usati non devono essere mescolati con i rifiuti domestici generici. Per un corretto trattamento, recupero e riciclaggio, portare questi prodotti ai punti di raccolta designati, dove verranno accettati gratuitamente. In alternativa, in alcune nazioni potrebbe essere possibile restituire i prodotti al rivenditore locale, al momento dell’acquisto di un nuovo prodotto equivalente. Uno smaltimento corretto di questo prodotto contribuirà a far risparmiare preziose risorse ed evitare potenziali effetti negativi sulla salute umana e sull’ambiente, che potrebbero derivare, altrimenti, da uno smaltimento inappropriato. Per ulteriori dettagli, contattare la propria autorità locale o il punto di raccolta designato più vicino. In caso di smaltimento errato di questo materiale di scarto, potrebbero venire applicate delle penali, in base alle leggi nazionali. Pergliutentiaziendalinell’UnioneEuropea Qualora si desideri smaltire apparecchiature elettriche ed elettroniche, contattare il rivenditore o il fornitore per ulteriori informazioni. Informazionisullosmaltimentoinnazionialdifuoridell’UnioneEuropea Questo simbolo è valido solo nell’Unione Europea. Qualora si desideri smaltire questo prodotto, contattare le autorità locali o il rivenditore e chiedere informazioni sul metodo corretto di smaltimento. 2(I) Sommario Precauzioniperlasicurezza..............................................1 Installazione......................................................................17 Primadell’uso.....................................................................4 Se l’unità viene installata su un piano ............................17 Descrizione generale .......................................................4 Se l’unità viene montata su un treppiede .......................18 Informazioni sui sistemi di comunicazione video HD .......4 Collegamenti.....................................................................19 Informazioni sulle Istruzioni per l’uso ...............................4 Collegamenti con un sistema di comunicazione video HD ..............................................................19 Informazioni sul telecomando wireless (accessorio opzionale) .....................................................4 Risoluzionedeiproblemi.................................................20 Marchi di fabbrica e marchi di fabbrica registrati ..............4 Aspetto..............................................................................23 Riguardo a copyright e licenza .........................................4 Datitecnici........................................................................24 Esonero dalla garanzia ....................................................4 Caratteristiche....................................................................5 Accessori............................................................................6 Precauzioniperl’installazione..........................................7 Precauzioniperl’uso.........................................................9 Informazionisultelecomandowireless (accessorioopzionale)................................................11 Partielorofunzioni..........................................................12 Unità videocamera .........................................................12 Telecomando wireless (accessorio opzionale)...............14 ImpostazionedegliIDdeltelecomando.........................16 Suddivisionedeimanualidiistruzioniperl’usodiquestomodello pp Il manuale di questa videocamera di comunicazione HD (di seguito, “l’unità”) è suddiviso in due manuali: il primo è <Nozioni di base> (il presente manuale), il secondo è <Operazioni e impostazioni>. Prima di installare l’unità, leggere le <Nozioni di base> in modo da installare l’unità correttamente. pp Il presente manuale spiega come installare l’unità. Inoltre, per informazioni dettagliate sull’uso dell’unità e la selezione delle impostazioni, vedere “Istruzioni per l’uso <Operazioni e impostazioni>” (file PDF). Scaricare il manuale “Istruzioni per l’uso <Operazioni e impostazioni>” dal sito Web indicato di seguito. http://panasonic.net/psn/products/hdvc/resource/users_guides.html Per leggere i file PDF è necessario utilizzare Adobe® Reader®, disponibile sul sito di Adobe Systems. 3(I) Prima dell’uso pDescrizionegenerale pRiguardoacopyrightelicenza pp La presente unità è una videocamera full HD integrata da una testa di panoramica orizzontale/verticale, dotata di un sensore MOS full HD di tipo 1/3 e di un processore di segnale digitale (DSP). Sono espressamente proibiti la distribuzione, la riproduzione, il disassemblaggio, la decompilazione, la retroingegnerizzazione ed anche l’esportazione in violazione delle leggi sull’esportazione del software fornito con questa unità. pp Oltre che di un obiettivo con zoom ottico 12, l’unità è dotata di uno zoom digitale 10 per ottenere riprese di alta qualità e cariche di atmosfera. pEsonerodallagaranzia pp L’unità può essere utilizzata esclusivamente con sistemi di comunicazione video HD Panasonic. Unità di comunicazione video HD compatibili: KX-VC300CX, KX-VC300EX, KX-VC600CX, KX-VC600EX pInformazionisuisistemidi comunicazionevideoHD 1 QUALSIASI DANNO E PERDITA, INCLUSI SENZA LIMITAZIONE, QUELLI DIRETTI O INDIRETTI, SPECIALI, CONSEGUENTI O ESEMPLARI, DERIVATI O RELATIVI AL PRODOTTO; pp Per la descrizione delle operazioni di panoramica orizzontale, panoramica verticale, zoom, preimpostazione e altre operazioni della videocamera con un’unità di comunicazione video HD, vedere le istruzioni per l’uso dell’unità supportata. 2 LESIONI PERSONALI O QUALSIASI DANNO CAUSATO DALL’UTILIZZO SCORRETTO O DALL’ESECUZIONE NEGLIGENTE DI OPERAZIONI DA PARTE DELL’UTENTE; pInformazionisulleIstruzioniper l’uso pp Per le finalità del presente manuale, i due modelli KX-VC300CX e KX-VC300EX vengono denominati “KX-VC300”, mentre i due modelli KX-VC600CX e KX-VC600EX vengono denominati “KX-VC600”. 3 SMONTAGGIO, RIPARAZIONE O MODIFICA NON AUTORIZZATI DEL PRODOTTO DA PARTE DELL’UTENTE; 4 INCONVENIENTI O QUALSIASI PERDITA DERIVATI DALLA MANCATA VISUALIZZAZIONE DELLE IMMAGINI, DOVUTI A QUALSIASI MOTIVO O CAUSA INCLUSI QUALSIASI GUASTO O PROBLEMA DEL PRODOTTO; 5 QUALSIASI PROBLEMA, CONSEGUENTE INCONVENIENTE, PERDITA O DANNO DERIVATO DAL SISTEMA COMBINATO CON DISPOSITIVI DI TERZI; pInformazionisultelecomando wireless(accessorioopzionale) 6 PERDITA DI DATI REGISTRATI CAUSATA DA QUALSIASI GUASTO. pp L’unità può essere comandata a distanza utilizzando un telecomando wireless (modello AW-RM50G) disponibile come accessorio opzionale. Non può essere comandata direttamente con il telecomando wireless di un’unità di comunicazione video HD. Per acquistare un telecomando wireless, contattare il rivenditore. pMarchidifabbricaemarchidi fabbricaregistrati pp HDMI, il logo HDMI e High-Definition Multimedia Interface sono marchi o marchi registrati di HDMI Licensing LLC negli Stati Uniti e in altri Paesi. pp Adobe, Acrobat Reader e Reader sono marchi registrati o marchi di Adobe Systems Incorporated negli Stati Uniti e/o in altri paesi. 4(I) ITALIANO IN NESSUN CASO Panasonic Corporation DOVRÀ ESSERE RITENUTA RESPONSABILE NEI CONFRONTI DI ALCUNA PARTE O PERSONA, FATTA ECCEZIONE PER LA SOSTITUZIONE O LA MANUTENZIONE RAGIONEVOLE DEL PRODOTTO, NEI CASI, INCLUSI MA NON LIMITATI AI SEGUENTI: Caratteristiche Èpossibileservirsidiuntelecomandowireless (accessorioopzionale)difacileutilizzo pp Il telecomando wireless è in grado di comandare fino a quattro unità. Può essere utilizzato senza difficoltà per impostare varie funzioni o attivarle da semplici menu a schermo. DotatadisensoreMOSditipo1/3eobiettivozoom12 adalteprestazioni pp Integra un sensore HD MOS di tipo 1/3 e un DSP (processore segnale digitale). Elaborando i video con diversi metodi, è possibile ottenere immagini di alta qualità. pp Oltre che di un obiettivo zoom 12, l’unità è dotata di uno zoom digitale 10 per ottenere immagini di alta qualità e cariche di atmosfera. pp La funzione di ampliamento della gamma dinamica (DRS), che compensa la sovraesposizione e la perdita di dettagli scuri, e la nuova funzione ibrida digitale di riduzione dei disturbi (Hybrid DNR), per ridurre la persistenza di immagine anche in luoghi scuri e riprendere le scene in modo nitido, sono integrate per riprodurre immagini pulite e nitide in un’ampia gamma di applicazioni. L’integrazioneconunatestadipanoramicaorizzontale/ verticaleconsenteunusosemplificatodell’unità pp Operazioni alla velocità elevata di 90°/s pp Ampi angoli di rotazione con un campo di panoramica orizzontale di ±100° e un campo di panoramica verticale di ±30° pp Funzionamento silenzioso con livelli di rumorosità NC35 (velocità normale) e NC40 (se personalizzata) 5(I) Accessori Controllare che i seguenti accessori siano effettivamente presenti e disponibili in numero esatto. Istruzioni per l’uso <Nozioni di base> (questo manuale) .... 1 Cavi di alimentazione* (2 m) ............................................... 2 Garanzia ............................................................................. 1 Alimentatore c.a. ................................................................. 1 ITALIANO * Utilizzare il cavo di alimentazione adatto alla propria località. 6(I) Precauzioni per l’installazione Oltreaipuntipresentatiallasezione“Precauzioniperlasicurezza”,rispettareancheleseguenti precauzioni. Verificarecheilavoridiinstallazionesianoconformialle normesulleapparecchiatureelettricheinvigore. L’unitàdeveessereutilizzatasoloininterni. Non può essere utilizzata in esterni. Evitare l’installazione nei luoghi in cui l’unità è esposta alla luce solare diretta per periodi prolungati o in prossimità di apparecchi di raffreddamento o riscaldamento. In caso contrario, l’unità potrebbe deformarsi, scolorirsi e presentare malfunzionamenti e/o altri problemi di funzionamento. Utilizzare l’unità al riparo da spruzzi o getti d’acqua. Utilizzarel'unitàsuunasuperficiepianaeregolare. Non installare l’unità sulla superficie di una parete, sul soffitto o in altri punti in cui potrebbe inclinarsi o assumere angolazioni scorrette. Nota pp Non tenere la videocamera mentre si eseguono i lavori di installazione. In caso contrario, potrebbero verificarsi malfunzionamenti. CORRETTO OK SCORRETTO NG Noninstallareoutilizzarel’unitàneiseguentiluoghi. pp Sulla superficie di una parete (dove l’unità potrebbe essere installata lateralmente e/o essere fissata alla parete con una staffa di montaggio) pp Sul soffitto (dove l’unità viene installata rivolta verso il basso) pp In punti dove l’unità risulterebbe esposta direttamente alla pioggia o all’acqua (comprese le grondaie degli edifici) pp In luoghi soggetti a un’elevata presenza di vapori e grassi, per esempio le cucine pp Ambienti all’aperto o esposti al calore dove la temperatura supera i 40 °C pp Ambienti freddi dove la temperatura è inferiore a 0 °C pp Ambienti dove l’umidità supera l’85 % pp Luoghi in cui vengono utilizzate sostanze chimiche, per esempio in prossimità di piscine pp Al mare, in zone costiere e in luoghi soggetti all’emissione di gas corrosivi pp Luoghi in cui vi è la generazione di radiazioni, raggi X e onde radio o campi magnetici di notevole entità pp Luoghi in cui l’unità potrebbe essere soggetta a vibrazioni di grande entità, per esempio a bordo di veicoli o imbarcazioni (l’unità non è progettata per l’utilizzo su veicoli) pp Luoghi in cui la temperatura è soggetta a forti sbalzi, per esempio nei pressi del getto d’aria di un condizionatore o vicino a una porta esposta a correnti esterne Operazionidaevitareperunfunzionamentostabile dell’unitàperperiodiprolungati pp L’uso dell’unità per periodi prolungati in luoghi soggetti a temperature e umidità elevate può deteriorare i componenti e ridurne la durata utile. pp Controllare che eventuali unità di raffreddamento o riscaldamento non soffino aria direttamente verso il punto di installazione. Informazionisulpuntodiinstallazione Installare l’unità in un punto stabile e non soggetto a scosse. Se l’unità viene installata in un punto soggetto a scosse, anche le immagini dell’unità risulteranno tremolanti. Installare l’unità dopo aver consultato il rivenditore per i dettagli. Sel’unitàèalterminedelladuratautileenondeve esserepiùutilizzata,nonlasciarlaadisposizionedi altrepersoneesmaltirlaadeguatamente. Perl’installazione,iltrasferimentoolosmaltimento dell’unità,tenerlasempredallabase. Se la testa della videocamera viene sorretta o ruotata, potrebbero verificarsi problemi. Noncollegarefiltri,paraluce,prolungheoaltri componentiall’unità. 7(I) Precauzioni per l’installazione Utilizzarel’alimentatorec.a.dedicatoeilcavodi alimentazioneindotazioneconl’unità. Collegare saldamente l’alimentatore c.a. e il cavo di alimentazione alla presa di corrente. Con l’unità è sempre necessario utilizzare il cavo di alimentazione fornito in dotazione. L’unità non può essere utilizzata con un cavo di alimentazione diverso da quello fornito in dotazione. Allo stesso modo, il cavo di alimentazione fornito in dotazione con l’unità non deve essere utilizzato con altri dispositivi. Messaaterra Prima di utilizzare l’unità, controllare che il cavo di terra sia stato collegato saldamente. Controllare la resistenza di isolamento (meno di 100 ) del terminale di terra. Se la spina di alimentazione deve essere convertita in una spina a due poli per l’uso, consultare innanzitutto il rivenditore. Quindi, utilizzare un adattatore per spina dotato di terminale di terra e collegare sempre il terminale alla messa a terra. In questo caso, eseguire sempre il collegamento di messa a terra prima di collegare la spina di alimentazione alla sorgente di alimentazione principale. Allo stesso modo, prima di scollegare il collegamento di messa a terra, è assolutamente necessario scollegare la spina di alimentazione dalla sorgente di alimentazione principale. Installazionedell’alimentatorec.a. pp Non collocare l’alimentatore c.a. a contatto diretto con il pavimento o altre superfici. Se per esempio vi è un accumulo d’acqua provocato da infiltrazioni di acqua piovana o simili, possono verificarsi gravi pericoli. Ancorare saldamente l’alimentatore c.a. a una superficie non soggetta all’accumulo di acqua, polvere, ecc. pp Fissare saldamente l’alimentatore in modo da evitare la possibilità di cadute o ribaltamenti. Fissarlo in modo da garantire una resistenza tale da reggere la massa dell’alimentatore c.a. (circa 320 g). Installarel’alimentatorec.a.indotazionevicinoalla presadicorrenteprincipaleeposizionarloinmodo chelaspinadialimentazionepossaesserecollegatae scollegataagevolmente. Se l’alimentatore c.a. deve essere collegato in punti soggetti all’accumulo di polvere, rimuovere regolarmente la polvere e lo sporco dalla spina di alimentazione per evitare la formazione di archi elettrici. Interferenzaconsegnaliradio Se l’unità viene collocata vicino a un’antenna di trasmissione TV o radio, oppure in prossimità di forti campi elettrici o magnetici (generati per esempio da un motore, un trasformatore o linee elettriche), le immagini possono risultare distorte e/o disturbate. Interruttorediaccensione L’unità non dispone di interruttore di accensione e si accende collegando la spina di alimentazione alla presa elettrica. Quando l’unità è accesa, è possibile eseguire le operazioni di panoramica orizzontale, panoramica verticale, zoom e messa a fuoco. Prima procedere con la manutenzione, scollegare sempre la spina di alimentazione dalla presa elettrica. Perilcollegamentodeicavi,verificarecheleareedei connettorinonsianosoggetteacarichi. In caso contrario, potrebbero verificarsi malfunzionamenti. Dispersionedelcalore L’unità consente di disperdere dalle proprie superfici il calore generato internamente. Non installare l’unità in punti in cui risulta circondata da pareti o altre superfici e che favoriscano accumuli di calore. Inoltre, il calore viene dissipato sul pannello inferiore, che si scalda nel tempo: questo fenomeno è normale e non indica guasti. Collegamentodelcavodialimentazione Collegare sempre il cavo di alimentazione dell’alimentatore c.a. munendolo di interruttore principale con uno dei seguenti metodi. (1) Collegare il cavo di alimentazione attraverso un’unità di controllo dell’alimentazione. (2) Collegare il cavo di alimentazione a un interruttore principale su un pannello di distribuzione elettrica con una distanza fra i contatti di almeno 3,0 mm. Utilizzare un interruttore principale in grado di disattivare i poli dell’alimentazione principale ad eccezione del conduttore protettivo di terra. (3) Installare l’alimentatore c.a. vicino alla presa elettrica e collegarlo mediante la spina di alimentazione. IMPORTANTE pp Ilnomedelprodottoeiparametrielettricisono indicatisulpannelloinferiore. 8(I) ITALIANO Seesistelapossibilitàdidisturbiointerferenze Disporre i cavi in modo che il cavo di alimentazione (cavo elettrico a soffitto) da almeno 220 V c.a. e il cavo segnale siano distanti almeno 1 m fra loro. In alternativa, posare ciascun cavo nel rispettivo condotto metallico. (I condotti metallici devono essere messi a terra.) Precauzioni per l’uso Zoomemessaafuoco Se la messa a fuoco viene regolata manualmente, il soggetto potrebbe sfocarsi durante lo zoom. Dopo lo zoom, se necessario, regolare la messa a fuoco o impostare la messa a fuoco automatica. Se si utilizza la regolazione manuale della messa a fuoco, procedere con lo zoom dopo aver impostato la posizione di messa a fuoco sul lato Tele, che garantisce una maggiore precisione di messa a fuoco. (Tuttavia, se la distanza dall’unità al soggetto è inferiore a 1,5 m, il soggetto potrebbe sfocarsi sul lato Wide.) Se lo zoom viene eseguito sul lato Tele dopo aver regolato la messa a fuoco sul lato Wide, il soggetto potrebbe sfocarsi. Effettuareleripreseincondizionidiilluminazione adeguate. Per ottenere immagini dai colori gradevoli, effettuare le riprese in condizioni di illuminazione adeguate. Se le riprese vengono effettuate con luci fluorescenti, le immagini potrebbero risultare di colore diverso. Selezionare l’illuminazione più adeguata secondo necessità. Pergarantireprestazionistabiliedurature L’uso prolungato dell’unità in luoghi soggetti a temperature e umidità elevate causa il deterioramento dei componenti e ne riduce la durata utile. (Temperatura consigliata: max. 35 °C) Controllare che eventuali unità di raffreddamento o riscaldamento non soffino aria direttamente verso il punto di installazione. Posizionedellozoomconl’unitàaccesa Se l’unità è accesa, lo zoom, la messa a fuoco e il diaframma tornano alla posizione che occupavano immediatamente prima dello spegnimento. (Questo si verifica per la messa a fuoco e il diaframma se impostati manualmente.) Tuttavia, questa posizione potrebbe non essere ripristinata se, per esempio, il cavo di alimentazione viene scollegato durante l’operazione. PersistenzadiimmaginesuifiltricoloredelsensoreMOS Se i componenti del sensore MOS vengono esposti in modo continuo a fari o altre luci brillanti, i filtri colore interni al sensore MOS si deteriorano e i relativi componenti possono scolorirsi. Lo scolorimento potrebbe notarsi quando cambia la direzione rispetto al punto fissato. Nonpuntarelavideocameraverso luciforti. Se i componenti del sensore MOS vengono esposti a fari o altre luci forti, potrebbe verificarsi il cosiddetto “blooming” (fenomeno in cui i bordi delle luci forti risultano sbavati). Soggettoluminoso Campoditemperaturadiesercizio Non utilizzare l’unità in luoghi eccessivamente freddi, dove la temperatura scende sotto 0 °C, o eccessivamente caldi, dove la temperatura supera +40 °C. Le temperature estreme riducono la qualità delle immagini e compromettono severamente le parti interne. InformazionisullostandardinterfacciaHDMI L’unità è stata certificata come compatibile HDMI. Tuttavia, in rare occasioni le immagini potrebbero non essere visualizzate a seconda del dispositivo HDMI collegato all’unità. Blooming InformazionisullariproduzionedeicolorideisensoriMOS A seconda delle tonalità di colore dei soggetti, la riproduzione dei colori potrebbe deteriorarsi: questo fenomeno è normale e non indica guasti. Disinserirelacorrenteprimadicollegareoscollegarei cavi. Prima di collegare o scollegare i cavi, accertarsi sempre che la corrente sia disinserita. Fenomenidovutiasoggettimoltoluminosi Se una sorgente molto luminosa viene puntata verso l’obiettivo, potrebbero comparire riflessi indesiderati (“flare”). In questi casi, cambiare l’angolazione o adottare altre misure correttive. Sesiutilizzanofunzioniautomatiche pp Se per esempio “FullAuto” è stato selezionato come impostazione di Scene nel menu della videocamera, tutte le impostazioni automatiche vengono attivate e le operazioni manuali non saranno più consentite per alcune voci. pp Durante l’uso della funzione ATW (regolazione automatica costante del bianco) con luci fluorescenti, il bilanciamento del bianco potrebbe variare. pp In alcune situazioni, potrebbe risultare difficile mettere a fuoco con l’impostazione automatica. In questi casi, selezionare l’impostazione manuale e mettere a fuoco manualmente. pp Se si riprendono oggetti luminosi utilizzando la regolazione automatica del guadagno e del diaframma, potrebbe essere impossibile ottenere una luminosità adeguata. In questi casi, impostare la velocità otturatore in modalità manuale ed eseguire le regolazioni. 9(I) Precauzioni per l’uso Maneggiarel’unitàconcura. Non far cadere l’unità o sottoporla a vibrazioni o urti violenti. In caso contrario, potrebbero verificarsi malfunzionamenti. Sel’unitànonèinuso Se l’unità non è in uso, spegnerla correttamente. Se l’unità è al termine della durata utile e non deve essere più utilizzata, non lasciarla a disposizione di altre persone e smaltirla adeguatamente. Nontoccareicomponentidelsistemaottico. I componenti del sistema ottico sono il nucleo essenziale della videocamera e non devono essere toccati per nessun motivo. Nella rara eventualità di depositi di polvere, rimuovere la polvere con una pompetta specifica per videocamere o strofinando delicatamente con carta per obiettivi. Impedireilcontattodicorpiestraneiconlepartirotanti. In caso contrario, possono verificarsi problemi. ITALIANO Tenerel’unitàlontanodall’acqua. Evitare il contatto diretto con l’acqua. In caso contrario, possono verificarsi problemi. Manutenzione Prima di procedere con la manutenzione, spegnere l’unità. In caso contrario, possono verificarsi infortuni. Pulire le superfici con un panno morbido e asciutto. Evitare il contatto con benzina, solventi e altre sostanze volatili. Evitare l’uso di tali sostanze nei pressi dell’unità. In caso contrario, l’involucro potrebbe scolorirsi. Nonruotaremanualmentelatestadellavideocamera. Ruotando manualmente la testa della videocamera, potrebbero verificarsi malfunzionamenti dell’unità. Utilizzarel’unitàinambientiminimamentesoggettia umiditàepolvere. Non utilizzare l’unità in ambienti con alte concentrazioni di umidità o polvere, che tendono a danneggiare i componenti interni. Smaltimentodell’unità Per disfarsi del prodotto al termine della sua durata utile, rivolgersi a un centro specializzato, in modo da smaltirlo correttamente e rispettare l’ambiente. 10 ( I ) Informazioni sul telecomando wireless (accessorio opzionale) L’unitàpuòancheesserecomandataadistanza utilizzandountelecomandowireless(modellonumero: AW‑RM50G),daacquistareseparatamente. L’unitànonpuòesserecomandatadirettamentecon iltelecomandowirelessdiun’unitàdicomunicazione videoHD. Controllareiseguentipuntiprimadiutilizzareil telecomandowireless. Perl’acquistodeltelecomandowireless,consultareil rivenditore. pp Utilizzareiltelecomandowirelessdaunaposizione distantemenodi6mdall’unità. pp Iltelecomandowirelesspotrebbenonfunzionarese puntatoversol’unitàdadeterminateangolazioni. Da un punto in cui è possibile vedere l’area di rilevamento del segnale del telecomando wireless (di seguito, “area di rilevamento”), puntare la finestra di trasmissione segnale del telecomando wireless verso l’area di rilevamento e premere i tasti. Se il telecomando viene azionato da dietro l’unità, potrebbe risultare più difficile azionare l’unità. pp Sel’unitàèinstallataneipressidilucifluorescenti, monitoralplasmaoprodottisimili,oppurese l’unitàèespostaallalucesolare,glieffettidellaluce possonoimpedireilcontrollodell’unitàtramiteil telecomandowireless. Per l’installazione e l’uso, procedere come segue. • Adottare opportuni accorgimenti per verificare che l’area di rilevamento del segnale non sia esposta alla luce proveniente da luci fluorescenti, monitor al plasma e prodotti simili o al sole. • Installare l’unità lontano da luci fluorescenti, monitor al plasma e prodotti simili. pp Anchedopoaverrimossolebatteriedal telecomandowireless,laselezionedell’operazione daeseguire(tasto[CAM1],[CAM2],[CAM3]o [CAM4]premutoperultimo)rimaneinmemoriaper circa10minuti.Tuttavia,setrascorreunintervallo ditempomaggiore,laselezionevieneriportata all’impostazionecorrispondenteallapressionedel tasto[CAM1]. 11 ( I ) Parti e loro funzioni pUnitàvideocamera 1Areadirilevamentodelsegnaledel telecomandowireless I sensori di luce sono ubicati in due punti, sul lato anteriore del piedistallo della videocamera. 2Spiadeldisplaydistato Si accende come descritto di seguito a seconda dello stato dell’unità. Arancio: Se viene attivata la modalità standby Verde: Se l’unità è accesa Rosso: Se si sono verificati errori sull’unità Verdeedoppiolampeggio: Se viene ricevuto un segnale di comando a distanza corrispondente all’ID del telecomando wireless (accessorio opzionale) mentre l’unità è accesa Arancioedoppiolampeggio: Se viene ricevuto un segnale di comando a distanza non corrispondente all’ID del telecomando wireless (accessorio opzionale) mentre l’unità è accesa Testadellavideocamera Ruota in direzione orizzontale. Ruota verso l’alto e verso il basso. <Pannelloposteriore> 5InterruttoriIRID[IRID] [CAM1] [CAM2] [CAM3] [CAM4] Permettono di selezionare l’ID del telecomando wireless (accessorio opzionale). Le impostazioni degli interruttori IR ID da “CAM1” a “CAM4” corrispondono ai tasti da [CAM1] a [CAM4] sul telecomando wireless. 6ConnettoreHDMI[HDMI] Connettore di uscita video HDMI. <Pannelloinferiore> 7Forodimontaggiopercavoantifurto Utilizzare il foro per fissare la staffa per cavo. 8Connettorediservizio Questo connettore viene utilizzato solo per eseguire la manutenzione. 9ConnettoreDCIN[12V IN ] Collegare l’alimentatore c.a. in dotazione con l’unità a questo connettore per alimentare la tensione 12 V c.c. all’unità. 12 ( I ) ITALIANO Unitàobiettivo Parti e loro funzioni :Forofilettato(filettatura:1/4‑20UNC)peril montaggiodellavideocamera Utilizzare il foro per montare la videocamera su un treppiede, ecc. Interruttoridiservizio SW1 SW2 SW3 SW4 ON OFF La videocamera viene utilizzata con tutti gli interruttori in posizione OFF. 13 ( I ) Parti e loro funzioni pTelecomandowireless (accessorioopzionale) TastoMENU A ogni pressione del tasto per almeno 2 secondi, il menu dell’unità viene visualizzato o chiuso. Se premuto brevemente (per meno di 2 secondi) mentre è visualizzato un menu, la modifica all’impostazione viene annullata. TastidaCAM1aCAM4 Vengono utilizzati per selezionare le unità da comandare. Dopo aver selezionato un tasto, è possibile comandare l’unità corrispondente al tasto selezionato. 5TastoSET Premendo il tasto quando per “Scene” è stata selezionata una delle impostazioni da “Manual1 a 3” nel menu della videocamera, e per la regolazione del bilanciamento del bianco è stata selezionata la memoria AWB A o AWB B, il bilanciamento del bianco viene regolato automaticamente e salvato nella memoria selezionata. 6TastoMODE Viene utilizzato per future espansioni delle funzioni e attualmente non può essere utilizzato. Vengono utilizzati per impostare il guadagno. L’aumento di guadagno può essere impostato secondo tre valori, corrispondenti ai tasti [OFF], [LOW] e [HI]. [LOW] è impostato su 9 dB e [HI] è impostato su 18 dB. Premendo il tasto [AUTO], viene attivata la funzione AGC e il guadagno viene regolato automaticamente in base alla quantità di luce. Il guadagno massimo per la funzione AGC può essere impostato utilizzando il rispettivo menu. 8Tastidirichiamodellememoriepersonalizzate da[1]a[12] Vengono utilizzati per richiamare le informazioni sulle direzioni dell’unità e altre impostazioni registrate nelle memorie personalizzate dalla n.1 alla n.12 e quindi riprodurle. 1TastoON/STANDBY A ogni pressione del tasto per almeno 2 secondi, l’unità viene accesa o viene attivata la modalità STANDBY. Note pp Quando viene attivata la modalità STANDBY: La posizione di panoramica orizzontale/verticale corrente viene salvata in memoria (come impostazione personalizzata per POWER ON) e la videocamera si sposta in modo da puntare all’indietro. pp Quando viene attivata la modalità POWER ON: La videocamera si sposta nella posizione salvata in memoria (come impostazione personalizzata per POWER ON) quando è stata attivata la modalità STANDBY. 2Finestraditrasmissionesegnale 14 ( I ) ITALIANO 7TastiGAIN[OFF][LOW][HI][AUTO] Parti e loro funzioni TastoA/FOCUS 9TastoPRESET/LIMIT Viene utilizzato per registrare le impostazioni nelle memorie personalizzate. Se il tasto di richiamo di una memoria personalizzata viene premuto tenendo contemporaneamente premuto il tasto PRESET/LIMIT, le informazioni sulle direzione corrente dell’unità e altre impostazioni vengono registrate nel tasto di richiamo. I tasti di richiamo delle memorie personalizzate da [1] a [12] corrispondono alle memorie personalizzate da n.1 a n.12 dell’unità. Viene utilizzato per la regolazione automatica della messa a fuoco. TastoM/FOCUS Viene utilizzato per la regolazione manuale della messa a fuoco. I tasti FOCUS ([F] e [N]) vengono utilizzati per la regolazione effettiva. TastiOPT[ON][OFF] Vengono utilizzati per future espansioni delle funzioni e attualmente non possono essere utilizzati. :Tastidipanoramicaorizzontale/verticaleetasti delleoperazionideimenu[][][][][] (1) Vengono utilizzati per cambiare la direzione dell’unità. L’unità effettua una panoramica verticale in direzione su/giù utilizzando i tasti [] e [] e una panoramica orizzontale in direzione sinistra/destra utilizzando i tasti [] e []. Il tasto [] non funziona durante le panoramiche verticali e orizzontali. Premendo contemporaneamente i tasti [] o [] e [] o [], l’unità si sposta diagonalmente. (2) Se l’unità visualizza i menu, questi tasti vengono utilizzati per le operazioni dei menu. Utilizzare i tasti [], [], [] e [] per selezionare le voci di menu. Se una voce selezionata prevede un sottomenu, il sottomenu viene visualizzato premendo il tasto []. Quando il cursore è allineato con una particolare voce e si preme il tasto [] nel menu di impostazione di livello gerarchico più basso, l’impostazione della voce selezionata lampeggia. Premendo il tasto [] dopo aver modificato la voce con i tasti [], [], [] e [], l’impostazione smette di lampeggiare e la nuova impostazione viene confermata. Con un normale menu, la nuova impostazione viene applicata subito dopo averla modificata se la modifica è stata eseguita mentre l’impostazione lampeggiava. Tuttavia, con alcuni menu (Scene, Format e Initialize) viene applicata solo dopo aver premuto il tasto [], quando l’impostazione ha smesso di lampeggiare e la nuova impostazione è stata confermata. Premendo brevemente il tasto MENU (per meno di 2 secondi) mentre l’impostazione lampeggia, la modifica viene annullata e viene ripristinata l’impostazione selezionata in precedenza. TastoHOME Se premuto per almeno 2 secondi, la direzione dell’unità (panoramica orizzontale o verticale) torna alla posizione di riferimento. TastiZOOM[T][W] Vengono utilizzati per regolare lo zoom obiettivo. Lo zoom viene regolato sul lato grandangolo utilizzando il tasto [W] e sul lato teleobiettivo utilizzando il tasto [T]. TastoFAST Viene utilizzato per variare la velocità di movimento, in modo da velocizzare la panoramica orizzontale, la panoramica verticale, lo zoom e la messa a fuoco. Nota pp Con la voce Preset Speed del menu della videocamera, è possibile variare la velocità operativa di panoramica orizzontale e verticale quando sono state richiamate le impostazioni delle memorie personalizzate. TastoSLOW Viene utilizzato per variare la velocità di movimento, in modo da rallentare la panoramica orizzontale, la panoramica verticale, lo zoom e la messa a fuoco. TastoA/IRIS Attiva l’impostazione per la regolazione automatica del diaframma obiettivo a seconda della quantità di luce. TastoM/IRIS Attiva l’impostazione per la regolazione manuale del diaframma obiettivo. I tasti IRIS + e IRIS – vengono utilizzati per la regolazione effettiva. TastiFOCUS[F][N] Vengono utilizzati per regolare manualmente la messa a fuoco dell’obiettivo se è stata impostata la messa a fuoco manuale. La messa a fuoco viene regolata verso il punto più distante premendo il tasto [F] e verso il punto più vicino premendo il tasto [N]. TastoIRIS+ Viene utilizzato per regolare il diaframma obiettivo nella direzione di apertura. TastoIRIS– Viene utilizzato per regolare il diaframma obiettivo nella direzione di chiusura. 15 ( I ) Impostazione degli ID del telecomando Il telecomando wireless (accessorio opzionale) è in grado di comandare fino a quattro unità. Gli ID vengono utilizzati per impostare le unità da selezionare se si premono i tasti [CAM1], [CAM2], [CAM3] e [CAM4] del telecomando wireless. pp Se si utilizzano più unità, impostare un ID telecomando diverso per ogni unità. pp Se si utilizza una sola unità, impostare l’ID telecomando su “CAM1” a meno che l’impostazione non necessiti di una modifica. Proceduradiimpostazione ITALIANO Utilizzare l’interruttore IR ID sul pannello posteriore dell’unità e selezionare “CAM1”, “CAM2”, “CAM3” o “CAM4 per l’ID telecomando. (vedere pag. 12) Le impostazioni degli interruttori IR ID da “CAM1” a “CAM4” corrispondono ai tasti da [CAM1] a [CAM4] sul telecomando wireless. (L’impostazione di fabbrica è “CAM1”.) InterruttoriIRID Tastida[CAM1]a[CAM4] 16 ( I ) Installazione 1 Collegareiconnettoridelpannelloposteriore. Cavoalimentatorec.a. Cavodiuscitavideo pSel’unitàvieneinstallatasuunpiano Collocarel’unitàsuunasuperficiepiana. Note pp Installare l’unità in un punto stabile e non soggetto a scosse. Se l’unità viene installata in un punto soggetto a scosse, anche le immagini dell’unità risulteranno tremolanti. pp Prestare attenzione affinché l’unità non casa o subisca danni di altro tipo durante l’installazione. pp Per trasportare l’unità, non tenerla dalla testa. pp Non afferrare o ruotare la testa della videocamera. In caso contrario, potrebbero verificarsi malfunzionamenti. pp Prestare attenzione a non tirare i cavi collegati. Questa operazione potrebbe causare la caduta dell’unità e/o eventuali infortuni. Verificarechel’unitànonpossacadere. CORRETTO OK SCORRETTO NG 17 ( I ) Installazione pSel’unitàvienemontatasuuntreppiede Utilizzare un treppiede molto stabile in grado di reggere il peso della videocamera montata. Collegare il treppiede al foro filettato per il montaggio della videocamera sul pannello inferiore della videocamera. Collocare il treppiede su una superficie perfettamente piana e regolare. Stringere manualmente la vite per montare saldamente il treppiede. Non stringere la vite ruotando il corpo della videocamera. In caso contrario, potrebbero verificarsi malfunzionamenti. Utilizzare una vite di montaggio treppiede conforme alle seguenti specifiche. Vitedimontaggiotreppiede(1/4‑20UNC) Da4,5mma6mm Note ITALIANO pp Non installare l’unità in punti soggetti a un frequente passaggio di persone. pp Quando si utilizza l’unità montata su un treppiede, non collocare il treppiede a un livello più alto del pavimento. pp Montare l’unità saldamente evitando qualsiasi instabilità. Eventuali instabilità possono causare la caduta dell’unità e/o infortuni. pp Se l’unità deve essere utilizzata per un periodo prolungato, adottare misure opportune per assicurare che l’unità non si ribalti, non cada, non si sganci o non subisca urti. Dopo aver utilizzato l’unità, riportare il punto di installazione nelle condizioni originali al più presto possibile. 18 ( I ) Collegamenti pCollegamenticonunsistemadicomunicazionevideoHD VideocameradicomunicazioneHD GP‑VD150E SegnaleHDMI UnitàdicomunicazionevideoHD KX‑VC300,KX‑VC600 Telecomandowireless(accessorioopzionale) AW‑RM50G pp Per la descrizione delle operazioni di panoramica orizzontale, panoramica verticale, zoom, preimpostazione e altre operazioni della videocamera con un’unità di comunicazione video HD, vedere le istruzioni per l’uso dell’unità supportata. 19 ( I ) Risoluzione dei problemi qpFunzionamento Alimentazione assente Impossibile comandarel’unità (comuneperil telecomando wirelesseun’unitàdi comunicazionevideo HD) Impossibile comandarel’unità coniltelecomando wireless Causaerimedio Paginedi riferimento pp L’alimentatorec.a.ècollegatosaldamenteallapresac.a.? ––– pp Laspinadialimentazionedell’alimentatorec.a.ècollegata correttamente? ––– pp Sel’unitàècomandatadaltelecomandowireless Vedere anche la voce “Impossibile comandare l’unità con il telecomando wireless”. ––– pp L’unitàèaccesa? Se la spia del display di stato dell’unità è spenta o è accesa di colore arancio, l’alimentazione dell’unità non è disponibile. <Operazioni e impostazioni> pp Èstataselezionatal’unitàdacomandarecorretta? <Operazioni e impostazioni> pp Lebatteriedeltelecomandosonoesauriteosonostateinstallate invertendolapolarità? Se la spia del display di stato dell’unità non lampeggia neanche quando il telecomando wireless viene utilizzato vicino all’area di rilevamento del segnale del telecomando wireless, le batterie sono esaurite. Sostituire le batterie. ––– pp L’unitàèsitrovavicinoaunalucefluorescenteoaunmonitoral plasma?Sesì,l’areadirilevamentodelsegnaledeltelecomando wirelessèespostaallaluce? Pag. 11 20 ( I ) ITALIANO Sintomo Risoluzione dei problemi qpVideo Sintomo Causaerimedio pp L’unitàèstatacollegatacorrettamenteaglialtridispositivi collegati? Leimmagininon vengonovisualizzate osonodisturbate Vienevisualizzatala schermatadimenu Paginedi riferimento Pag. 19 pp Seilsistemaèconfiguratoinmodochel’immaginesia commutataanchequandovieneselezionatalavideocamerada comandare,èstataselezionatal’unitacorretta? <Operazioni e impostazioni> pp L’impostazionedelsegnalevideoèstataselezionata correttamente? <Operazioni e impostazioni> pp Usciredalmenu. <Operazioni e impostazioni> pp AsecondadelmonitorHDMIinuso,potrebberoverificarsiunoo piùsintomitraquellidescrittidiseguito. Serisultadifficile visualizzarele schermatedimenu Nonvieneeseguita lamessaafuoco automatica Ilsoggettonon vienemessoafuoco durantelozoom quandosiutilizza lamessaafuoco manuale Neiquattroangoli delleimmagini compaionoriflessiad anello Problemiconicolori delleimmagini • La risoluzione dei caratteri dei display dei menu cambia quando cambia l’immagine di sfondo. • A seconda dell’impostazione di risalto dei bordi del monitor, vengono visualizzate righe bianche davanti alle ombreggiature nere dei menu. • A seconda dell’impostazione di risalto dei bordi del monitor, i colori di sfondo possono risultare sovrapposti alle parti bianche dei menu. ––– pp Lamessaafuocoèimpostatasumanuale? La messa a fuoco automatica inizia appena la messa a fuoco viene impostata su automatica. <Operazioni e impostazioni> pp Inalcunesituazioni,potrebberisultaredifficilemettereafuoco conl’impostazioneautomatica. In questi casi, selezionare l’impostazione manuale e mettere a fuoco manualmente. <Operazioni e impostazioni> pp LamessaafuocoèstataregolatasullatoTele? Regolare innanzitutto la messa a fuoco sul lato Tele, dove la precisione di messa a fuoco è maggiore, quindi procedere con lo zoom. ––– pp Inalcunecondizionioperative,potrebberisultaredifficilemettere afuocoisoggetti. In tali casi, utilizzare la messa a fuoco automatica. <Operazioni e impostazioni> pp Sonocausatidairiflessidilucetral’obiettivoedalcoperchio davantiall’obiettivo.Cercarediottimizzarelaposizione dell’illuminazioneinrelazioneaquelladell’unità,quindiinstallare eutilizzarel’unitainunpuntochenonpresentiriflessi. ––– pp AttivarelafunzioneATW(regolazioneautomaticacostantedel bianco). <Operazioni e impostazioni> pp Inalcunesituazioni,potrebbeessereimpossibileriprodurre correttamenteicoloriconlafunzioneATW. In questi casi, selezionare l’impostazione manuale e mettere a fuoco manualmente. <Operazioni e impostazioni> 21 ( I ) Risoluzione dei problemi Leimmaginisono troppochiareoscure Causaerimedio pp Selezionarel’impostazioneautomaticadeldiaframma,oppure selezionarel’impostazionemanualeeregolareildiaframma manualmente. Paginedi riferimento <Operazioni e impostazioni> pp Leimmaginipotrebberoesserescureseicavideisegnalivideo sonotroppolunghi,causandoun’attenuazionedelsegnale. ––– Isoggettirisultano distorti pp Seunsoggettohaattraversatoimprovvisamentelavideocamera, potrebberisultareleggermentedistortoperchélavideocamera utilizzaunsensorediimmagineMOS. Sitrattadiun’operazionenormaleenonindicaunproblema. ––– Sesiusaunflash duranteleriprese, vieneilluminatasolo lapartesuperiore oinferioredello schermo pp ConisensoridiimmagineMOS,itempidiripresavariano leggermentetralapartesuperioresinistraelaparteinferiore destradelloschermo.Pertanto,sesiusaunflash,laparte inferioredelloschermovieneilluminataconuncertoanticipo rispettoallapartesuperioredelloschermo. Sitrattadiun’operazionenormaleenonindicaunproblema. ––– Laluminosità cambiaciclicamente, oppurecambianoi colori,esinotano strisceorizzontali cheattraversanolo schermo pp Questofenomeno(sfarfallio)puòverificarsiinpresenzadi un’illuminazionetramitelucifluorescenti,lampadinealmercurioe altritipidilampadeascarica. Sitrattadiun’operazionenormaleenonindicaunproblema. Inquesticasi,siconsigliadiimpostarelavelocitàotturatore elettronicosu1/120nelleareeconfrequenzadellalineaelettrica a60HzosuOFFnelleareeconfrequenzadellalineaelettricaa 50Hz. Quandosiriprendono lineesottiliomotivi ciclici,siverificauno sfarfallioovengono aggiunticolori pp Questofenomenosiverificaperchéipixelsonodisposti sistematicamentesuognisensorediimmagine.Èriscontrabile quandolafrequenzaspazialediunsoggettointerferisceconil pixelpitch.Pertanto,ènecessariocambiarel’angolazionedella videocameraoadottarerimedisimili. 22 ( I ) <Operazioni e impostazioni> ––– ITALIANO Sintomo Aspetto Unità:mm R7 150 75 73 23 ( I ) 1,5 47,7 115,9 175,5 4,9 Dati tecnici Tensionedialimentazione: C.c. 12 V 10 % (Alimentatore c.a. in dotazione) Consumodicorrente: 1,0 A sono le informazioni sulla sicurezza. p GENERALI p INGRESSO Temperaturad’esercizio: 0 °C - +40 °C Connettorediingresso: DC 12 V IN Temperaturadideposito: –20 °C - +50 °C Gammediumiditàpermissibili: 20 % - 90 % (senza condensa) 1,2 kg circa Dimensioni(LPA): 150 148 177 mm Rifinitura: Uscitavideo: HDMI (connettore HDMI) Argento ITALIANO Massa: p USCITA 24 ( I ) Dati tecnici p FUNZIONIEPRESTAZIONI [Testadipanoramicaorizzontale/verticale] Velocitàoperativapanoramicaorizzontale/verticale: Max. 90°/s o superiore [Unitàvideocamera] Sensoridiimmagine: MOS Full-HD di tipo 1/3 Obiettivo: Messaafuoco: Campodipanoramicaorizzontale: ±100° Motorizzato con zoom 12, da f/1.6 a 2.0 (f= da 4,7 a 56,4 mm; equivalente 35 mm: da 36,9 mm a 442,8 mm) Commutazione automatica-manuale Distanzadimessaafuoco: Campo di zoom intero: 1,5 m Lato Wide: 30 cm Campodipanoramicaverticale: ±30° p A seconda della posizione di panoramica orizzontale o verticale, la videocamera potrebbe essere riflessa nell’immagine. Livellodirumore: Sistemaotticodiseparazionedeicolori: Sistema di filtri colore su chip NC35 (velocità normale), NC40 (se personalizzata) Illuminazioneminima: 3 lx (50 IRE, F1.6, +36 dB) Risoluzioneorizzontale: 850 righe TV, norm. (area centrale) Selezioneguadagno: Auto, 0 dB, 3 dB, 6 dB, 9 dB, 12 dB, 15 dB, 18 dB Modalitàmemorizzazione: 0 dB, 6 dB, 12 dB, 18 dB p Alimentatorec.a. Ingresso: C.a. 220 V - 240 V, 1,5 A, 50 Hz Uscita: C.c. 12 V, 2,5 A, 30 W Velocitàotturatoreelettronico: Step: 1/120, 1/250, 1/500, 1/1000, 1/2000, 1/4000, 1/10000 Synchro scan: 50,20 Hz - 538,51 Hz Gamma: Off, Normal (Low, Mid, High), Cinema Bilanciamentodelbianco: AWB A, AWB B, ATW Variabilitàentitàcolore: Variabilità di 7 livelli Filediscena: FullAuto, Manual1, Manual2, Manual3 Formatodiuscita: HD 1080: 50i, SD 576: 50p p Accessoriopzionali pp TelecomandowirelessAW‑RM50G (FabbricatadaPanasonic) (Batterieasecco“R6”o“LR6”2, daprocurarsiseparatamente) La massa e le dimensioni indicati sono approssimativi. Dati tecnici soggetti a modifiche senza avviso. 25 ( I ) ITALIANO Appunti 26 ( I ) VERSIÓNESPAÑOLA (SPANISH VERSION) Precauciones de seguridad NOQUITELACUBIERTADESATORNILLÁNDOLA. PRECAUCIÓN: No quite la tapa para evitar el riesgo de sacudidas eléctricas. Las piezas del interior no requieren mantenimiento por parte del usuario. Solicite las reparaciones al personal de servicio calificado. PARA REDUCIR EL RIESGO DE INCENDIOS, SACUDIDAS ELÉCTRICAS E INTERFERENCIAS MOLESTAS, UTILICE SOLAMENTE LOS ACCESORIOSRECOMENDADOS. ADVERTENCIA: PRECAUCIÓN: Esteaparatodeberáserconectadoatierra Para mantener unas buenas condiciones de ventilación, no instale ni ponga este aparato en una librería, mueble empotrado u otro espacio reducido. Para evitar el riesgo de que se produzcan sacudidas eléctricas o peligros de incendio debidos al recalentamiento, asegúrese de que las cortinas y otros materiales no obstruyanlaventilación. Para garantizar un funcionamiento seguro, la clavija de tres contactos deberá introducirse solamente en una toma de corriente para tres contactos estándar que se encuentre conectada a tierra mediante el cableado normal de la casa. Los cables prolongadores utilizados con el aparato deberán tener tres conductores y estar cableados correctamente para proporcionar la conexión a tierra adecuada. Los cables prolongadores mal cableados son una de las causas principales de que se produzcan accidentes mortales. El hecho de que el aparato funcione correctamente no significa que éste esté conectado a tierra o que la instalación sea completamente segura. Para su seguridad, si usted tiene alguna duda de la conexión a tierra eficaz del aparato, consulte a un electricista cualificado. La toma de corriente deberá estar instalada cerca del equipo, y a ella deberá tenerse un acceso sin problemas, o la clavija de alimentación o un acoplador que tenga el aparato deberán poder manejarse fácilmente. En la toma de corriente con conexión a tierra de protección deberá ponerse un aviso indicando que en ella se pueden conectar aparatos CLASS 1. ADVERTENCIA: • P ARA REDUCIR EL RIESGO DE INCENDIO O DESCARGA ELÉCTRICA NO EXPONGA ESTE APARATOALALLUVIANIALAHUMEDAD. • EL APARATO NO DEBERÁ EXPONERSE AL GOTEO NI A LAS SALPICADURAS,Y NINGÚN OBJETO CON LÍQUIDOS, COMO FLOREROS, DEBERÁPONERSEENCIMADELAPARATO. ADVERTENCIA: PARA EVITAR HERIDAS, ESTE APARATO DEBE ESTAR FIRMEMENTE INSTALADO AL PISO DE ACUERDO CON LAS INSTRUCCIONES DEINSTALACIÓN. indica información de seguridad. 1 (S) ESPAÑOL Informaciónsobrelaeliminaciónparalosusuariosdeequiposeléctricosyelectrónicosusados(particulares) La aparición de este símbolo en un producto y/o en la documentación adjunta indica que los productos eléctricos y electrónicos usados no deben mezclarse con la basura doméstica general. Para que estos productos se sometan a un proceso adecuado de tratamiento, recuperación y reciclaje, llévelos a los puntos de recogida designados, donde los admitirán sin coste alguno. En algunos países existe también la posibilidad de devolver los productos a su minorista local al comprar un producto nuevo equivalente. Si desecha el producto correctamente, estará contribuyendo a preservar valiosos recursos y a evitar cualquier posible efecto negativo en la salud de las personas y en el medio ambiente que pudiera producirse debido al tratamiento inadecuado de desechos. Póngase en contacto con su autoridad local para que le informen detalladamente sobre el punto de recogida designado más cercano. De acuerdo con la legislación nacional, podrían aplicarse multas por la eliminación incorrecta de estos desechos. ParaempresasdelaUniónEuropea Si desea desechar equipos eléctricos y electrónicos, póngase en contacto con su distribuidor o proveedor para que le informe detalladamente. InformaciónsobrelaeliminaciónenotrospaísesnopertenecientesalaUniónEuropea Este símbolo sólo es válido en la Unión Europea. Si desea desechar este producto, póngase en contacto con las autoridades locales o con su distribuidor para que le informen sobre el método correcto de eliminación. 2 (S) Índice Precaucionesdeseguridad...............................................1 Instalación.........................................................................17 Antesdeluso......................................................................4 Cuando se instala la unidad en un escritorio .................17 Perspectiva general..........................................................4 Cuando se monte la unidad en un trípode .....................18 Acerca de un sistema de comunicaciones visuales HD .............................................................4 Conexiones.......................................................................19 Conexiones con un sistema de comunicaciones visuales HD ...........................................................19 Acerca del manual de instrucciones ................................4 Acerca del mando a distancia inalámbrico (accesorio opcional) .........................................................4 Solucióndeproblemas....................................................20 Marcas comerciales y marcas comerciales registradas .....4 Apariencia.........................................................................23 Acerca de los derechos de autor y de la licencia.............4 Especificaciones..............................................................24 Renuncia de la garantía ...................................................4 Características....................................................................5 Accesorios..........................................................................6 Precaucionesparalainstalación......................................7 Precaucionesdefuncionamiento.....................................9 Acercadelmandoadistanciainalámbrico (accesorioopcional)....................................................11 Partesysusfunciones....................................................12 Unidad de la cámara ......................................................12 Mando a distancia inalámbrico (Accesorio opcional) .....14 Puestadelasidentificaciones delmandoadistancia.................................................16 Cómoestánconfiguradoslosmanualesdeinstruccionesde operacióndelmodelo pp El manual de esta cámara de comunicación HD (a partir de ahora “la unidad”) se divide en dos manuales: uno es <Lo básico> (este manual) y el otro es <Operaciones y ajustes>. Antes de instalar la unidad, asegúrese de leer <Lo básico> para asegurarse de que la unidad esté instalada correctamente. pp Este manual explica cómo instalar la unidad. Además, para conocer detalles de cómo utilizar la unidad y seleccionar sus ajustes, consulte el “Manual de instrucciones <Operaciones y ajustes>” (archivo PDF). Descargue el “Manual de instrucciones <Operaciones y ajustes>” desde la página inicial indicada a continuación. http://panasonic.net/psn/products/hdvc/resource/users_guides.html Para leer los archivos PDF necesitará Adobe® Reader®, el cual se encuentra disponible adquiriéndolo en Adobe Systems. 3 (S) Antes del uso pAcercadelosderechosde autorydelalicencia pPerspectivageneral pp Esta unidad es una cámara full HD integrada con un cabezal de panorámica-inclinación, e incluye un sensor MOS Full HD del tipo de 1/3 y un procesador de señal digital (DSP). La distribución, copiado, desensamblaje, contraposición de la compilación, contraposición de ingeniería, así como la exportación violando las leyes de exportación del software suministrado con esta unidad, quedan expresamente prohibidos. pp Además de su objetivo zoom óptico de 12, la unidad incluye un zoom digital de 10 para lograr una filmación de alta calidad que rebosa buen ambiente. pRenunciadelagarantía pp Esta unidad ha sido diseñada para ser utilizada exclusivamente con un sistema de comunicación visual HD de Panasonic. Unidades de comunicación visual HD compatibles: KX-VC300CX, KX-VC300EX, KX-VC600CX, KX-VC600EX Panasonic Corporation NO ACEPTA NINGÚN TIPO DE RESPONSABILIDAD CON PERSONAS LEGALES O FÍSICAS, A EXCEPCIÓN DEL REEMPLAZO O MANTENIMIENTO RAZONABLE DEL PRODUCTO, PARA LOS CASOS INCLUIDOS A CONTINUACIÓN, PERO SIN LIMITARSE A ELLOS: pAcercadeunsistemade comunicacionesvisualesHD 1 NINGÚN DAÑO O PÉRDIDA, INCLUYENDO PERO SIN LIMITARSE POR ELLO, LOS DIRECTOS O INDIRECTOS, ESPECIALES, CONSECUENTES O PUNITIVOS, QUE PUEDAN SURGIR O ESTAR RELACIONADOS CON EL PRODUCTO; pp Para conocer descripciones de la panorámica, la inclinación, el zoom, los preajustes y otras operaciones de la cámara utilizando una unidad de comunicación visual HD, consulte las instrucciones de funcionamiento de la unidad compatible. 2 HERIDAS PERSONALES NI NINGÚN TIPO DE DAÑO CAUSADO POR EL EMPLEO INADECUADO O LA OPERACIÓN NEGLIGENTE DEL USUARIO; 3 DESMONTAJE, REPARACIÓN O MODIFICACIÓN NO AUTORIZADOS DEL PRODUCTO POR EL USUARIO; pAcercadelmanualde instrucciones pp En este manual, a los dos modelos KX-VC300CX y KX-VC300EX se les llama “KX-VC300”, y a los dos modelos KX-VC600CX y KX-VC600EX se les llama “KX-VC600”. 5 NINGÚN PROBLEMA, INCONVENIENCIA CONSECUENTE, PÉRDIDAS NI DAÑOS QUE PUEDAN SURGIR POR HABER COMBINADO EL SISTEMA CON DISPOSITIVOS DE OTRAS MARCAS; pAcercadelmandoadistancia inalámbrico(accesorioopcional) 6 PÉRDIDA DE DATOS REGISTRADOS CAUSADOS POR UNA FALLA. pp Esta unidad se puede controlar a distancia utilizando un mando a distancia inalámbrico (modelo AW-RM50G) disponible como accesorio opcional. La unidad no se puede controlar directamente utilizando el mando a distancia inalámbrico de una unidad de comunicación visual HD. Para adquirir un mando a distancia inalámbrico, póngase en contacto con su concesionario. pMarcascomercialesymarcas comercialesregistradas pp HDMI, el logotipo HDMI y High-Definition Multimedia Interface son marcas de fábrica o marcas registradas de HDMI Licensing LLC en los Estados Unidos y en otros países. pp Adobe, Acrobat Reader y Reader son marcas registradas o marcas comerciales de Adobe Systems Incorporated en los Estados Unidos y/o en otros países. 4 (S) ESPAÑOL 4 INCONVENIENCIAS O CUALQUIER TIPO DE PÉRDIDA DEBIDO A QUE NO SE VISUALIZAN LAS IMÁGENES, DEBIDO A CUALQUIER MOTIVO O CAUSA, INCLUYENDO CUALQUIER FALLA O PROBLEMA DEL PRODUCTO; Características Esposibleutilizarunmandoadistanciainalámbrico (accesorioopcional)parafacilitarelfuncionamiento pp Se puede utilizar un mando a distancia inalámbrico capaz de controlar un máximo de cuatro unidades. Éste puede utilizarse fácilmente para establecer varias funciones o cambiar entre ellas mientras se observan pantallas de menús. SensorMOSdeltipode1/3yobjetivozoomde12de altorendimiento pp Se han incorporado un sensor MOS del tipo de 1/3 y un DSP (procesador de señal digital). Mediante el procesamiento de vídeo de muy diversas formas se obtienen imágenes de alta calidad. pp Además de su objetivo zoom óptico de 12, la unidad incluye un zoom digital de 10 para lograr imágenes de alta calidad que rebosan buen ambiente. pp Para reproducir imágenes limpias y nítidas en una amplia gama de aplicaciones, se ha incorporado una función de ampliación de gama dinámica (DRS) que compensa la sobreexposición y la pérdida de detalles oscuros y una función de reducción de ruido digital híbrida (DNR híbrida) para minimizar el retraso de imagen en lugares oscuros y filmar escenas claramente. Funcionamientofácildelaunidadgraciasasu integraciónconuncabezaldepanorámicaeinclinación dealtorendimiento pp Operaciones a una velocidad alta de 90°/s pp Ángulos de rotación grandes, con una gama de tomas panorámicas de ±100° y una gama de tomas de inclinación de ±30° pp Funcionamiento silencioso con niveles de ruido de NC35 (velocidad normal) y NC40 (cuando se preajuste) 5 (S) Accesorios Asegúrese de que tiene todos los accesorios indicados a continuación. Manual de instrucciones <Lo básico> (este manual) ......... 1 Cables de alimentación* (2 m) ........................................... 2 Garantía .............................................................................. 1 Adaptador de CA ................................................................ 1 ESPAÑOL * Use el cable de alimentación del mismo tipo que los empleados en su localidad. 6 (S) Precauciones para la instalación Ademásdeseguirlasindicacionesdelas“Precaucionesdeseguridad”,tometambiénlasprecaucionessiguientes. Noinstaleniutilicelaunidadenlostiposdelugares siguientes. pp En la superficie de una pared (donde la unidad quede instalada de costado y/o donde para quedar instalada tenga que emplearse una ménsula de montaje) pp En un techo (donde la unidad quedaría instalada mirando hacia abajo) pp En lugares (incluyendo aquellos que queden debajo de los aleros de un edificio) donde la unidad quede expuesta directamente a la lluvia o a la humedad pp En lugares, como cocinas, donde haya concentraciones altas de vapor y grasa pp En lugares exteriores o calientes donde la temperatura sobrepase los 40 °C pp En lugares fríos donde la temperatura disminuya por debajo de los 0 °C pp En lugares donde la humedad sobrepase el 85 % pp En lugares donde se utilicen productos químicos como, por ejemplo, cerca de piscinas pp En la mar, zonas costeras y lugares donde se emitan gases corrosivos pp En lugares donde se genere radiación, rayos X, ondas de radio o campos magnéticos intensos pp En lugares donde la unidad podría estar sujeta a muchas vibraciones como, por ejemplo, a bordo de un automóvil o una embarcación (esta unidad no ha sido diseñada para ser utilizada en vehículos) pp En lugares donde la temperatura esté sometida a cambios bruscos como, por ejemplo, cerca de una salida de aire de un acondicionador de aire o cerca de una puerta que permita la entrada de aire del exterior Asegúresedequeeltrabajodeinstalacióncumpla lasnormastécnicasrelacionadasconlosequipos eléctricos. Estaunidadhasidodiseñadaparaserutilizadaen interioressolamente. No se puede utilizar en exteriores. Evite instalar la unidad en un lugar donde quede expuesta a la luz solar directa durante mucho tiempo, o cerca de aparatos de refrigeración o calefacción. De lo contrario podrán producirse deformaciones, decoloración, fallos de funcionamiento y/o problemas con el funcionamiento. Utilice la unidad donde no pueda ser salpicada ni rociada con agua. Useestaunidadsobreunasuperficieplanaynivelada. No instale la unidad en la superficie de una pared, en un techo o en un lugar donde la unidad termine quedando inclinada. Nota pp No sujete el cabezal de la cámara cuando realice el trabajo de instalación. Hacerlo podría causar un fallo en el funcionamiento. Bien OK Mal NG Loquedebeevitarseparaasegurarquelaunidad funcionedeformaestableduranteunperiodolargode tiempo pp Utilizar la unidad durante mucho tiempo en un lugar con niveles de temperatura y humedad altos puede ser la causa de que sus piezas se deterioren y se reduzca su duración. pp Asegúrese de que no haya un aparato de refrigeración o de calefacción que sople aire directamente hacia el lugar de instalación de la cámara. Acercadellugardeinstalación Instale la unidad en un lugar estable que no sea susceptible de sufrir vibraciones. Si la unidad se instala en lugares susceptibles de sufrir vibraciones, esto será la causa de que vibren las imágenes de la unidad. Después de consultar con su concesionario e instale la unidad. Cuandolaunidadnovayaautilizarsemás,noladeje abandonadaencualquiersitio,asegúresededisponer deellaadecuadamente. Cuandoinstale,transfieraodesinstaledelaunidad, asegúresedesujetarlaporlapartedesupedestal. Si el cabezal de la cámara se sujeta o gira se pueden producir problemas. Nocoloqueunfiltro,unparasol,unextensoruotras piezasenlaunidad. 7 (S) Precauciones para la instalación Conexiónatierra Antes de utilizar la unidad, compruebe que el cable de tierra haya sido apretado firmemente. Verifique la resistencia de tierra (menos de 100 ) del terminal de tierra. Cuando la clavija de alimentación vaya a convertirse en clavija de 2 contactos para ser utilizada, consulte primero a su concesionario. Luego utilice un adaptador de clavija que esté equipado con terminal de tierra, y asegúrese absolutamente de conectar este terminal a tierra. En un caso como éste, asegúrese absolutamente de hacer la conexión a tierra antes del conectar el cable de alimentación a la fuente de alimentación principal. De forma similar, antes de desconectar de tierra, asegúrese absolutamente de desconectar primero la clavija de alimentación de la fuente de alimentación principal. UtiliceeladaptadordeCAyelcabledealimentación especializadoprovistoconlaunidad. Conecte firmemente el adaptador de CA y el cable de alimentación a una toma de corriente. El cable de alimentación suministrado con esta unidad deberá utilizarse siempre con esta unidad. La unidad no puede funcionar con un cable de alimentación que no sea el suministrado con ella. Tampoco podrá utilizarse el cable de alimentación suministrado con esta unidad con ningún otro aparato. InstalacióndeladaptadordeCA pp No ponga el adaptador de CA en contacto directo con el suelo ni con ninguna otra superficie similar. El agua acumulada en tales superficies debido a la entrada de agua de lluvia o a cualquier otra razón puede causar un grave peligro. Fije el adaptador de CA firmemente en una superficie en la que no se acumule agua, polvo, etc. pp Asegure firmemente el adaptador de forma que pueda caerse. Haga la instalación en una posición que pueda aguantar el peso (320 g aproximadamente) del adaptador de CA. Sihayunaposibilidaddequeseproduzcainterferencia deruido Instale los cables de forma que el cable de alimentación (cable de la luz del techo) de CA de 220 V o más y el cable de señales estén separados un mínimo de 1 m. De forma alternativa, pase los cables por su propio conducto de metal. (Los conductos de metal deberán estar conectados a tierra.) InstaleeladaptadordeCAsuministradocercadeuna tomadecorrienteycolóquelodeformaquesuenchufe dealimentaciónpuedaenchufarseydesenchufarse fácilmentedelatomadecorriente. Si el adaptador de CA va a colocarse en lugares donde se acumula polvo, elimine el polvo y la suciedad de la clavija de alimentación a intervalos frecuentes como medida de prevención para evitar descargas superficiales. Interferenciadeseñalesderadio Si la unidad se coloca cerca de un TV, una antena de transmisión de radio, un campo eléctrico o un campo magnético intensos (como el generado por un motor, transformador o cables de suministro eléctrico), sus imágenes se distorsionarán y/o podrán ser afectadas por ruido. Interruptordelaalimentación Esta unidad no tiene interruptor de la alimentación. La alimentación se conecta cuando la clavija de alimentación se enchufa en una toma de corriente. Cuando se conecta la alimentación se realizan las operaciones de panorámica, inclinación, zoom y enfoque. Antes de realizar trabajos de mantenimiento, asegúrese absolutamente de desconectar la clavija de alimentación de la toma de corriente. Escapedelcalorgenerado Esta unidad permite que el calor generado en su interior se escape por sus superficies. No instale la unidad en un lugar donde quede rodeada de paredes y otras superficies y donde quede atrapado el calor. Además, el calor se disipa al panel inferior que se calentará con el paso del tiempo: Esto es normal y no indica ningún problema. Conexióndelcabledealimentación Asegúrese absolutamente de conectar el cable de alimentación del adaptador de CA a través de un disyuntor utilizando uno de los métodos siguientes. (1) Conecte el cable de alimentación a través de una unidad de control de la alimentación. (2) Conecte el cable de alimentación a un disyuntor de un panel de distribución de alimentación con una distancia de contacto de 3,0 mm o más. Utilice un disyuntor que sea capaz de desactivar todos los polos del suministro de alimentación principal con la excepción del conductor de tierra. (3) Instale el adaptador de CA cerca de una toma de corriente y conéctelo a través de la clavija de alimentación. IMPORTANTE pp Elnombredelproductoysuscaracterísticas eléctricasestánmarcadasensupanelinferior. 8 (S) ESPAÑOL Cuandoconecteloscables,asegúresedequelaszonas delosconectoresnoesténsometidasaningunacarga. Si lo hace podrá causar fallos en el funcionamiento de la unidad. Precauciones de funcionamiento Filmebajolascondicionesdeiluminaciónapropiadas. Para obtener imágenes con los colores adecuados, filme bajo las condiciones de iluminación apropiadas. Las imágenes pueden no aparecer con los colores apropiados cuando se filme bajo la iluminación de luces fluorescentes. Seleccione la iluminación apropiada según sea necesario. Zoomyenfoque Cuando el enfoque se ajusta manualmente puede que se produzca desenfoque durante el empleo del zoom. Después de utilizar el zoom, si es necesario, ajuste el enfoque o ponga el modo de enfoque automático. Cuando utilice el enfoque en el modo manual, prosiga con el zoom después de ajustar la posición de enfoque en el extremo de telefoto donde la precisión del enfoque es más alta. (Sin embargo, si la distancia de la unidad al motivo es inferior a 1,5 m, el motivo podrá quedar desenfocado cuando se emplee el extremo de granangular.) Si el zoom se emplea para el extremo de telefoto después de haber ajustado el enfoque en el extremo de granangular puede que se produzca el desenfoque. Paraasegurarunrendimientoestablealargoplazo Utilizar la unidad durante periodos de tiempo largos en lugares donde los niveles de temperatura y humedad están altos hará que sus piezas se deterioren, reduciéndose por lo tanto su vida de servicio. (Temperatura recomendada: 35 °C máxima) Asegúrese de que no haya un aparato de refrigeración o de calefacción que sople aire directamente hacia el lugar de instalación de la cámara. Persistenciadeimagenenlosfiltrosdecolordelsensor MOS Si hay partes del sensor MOS que están expuestas continuamente a focos u otras luces brillantes, los filtros de color del interior del sensor MOS se deteriorarán, y las partes concernientes podrán decolorarse. La decoloración se podrá notar cuando se cambie el sentido del monitoreo fijo. Acercadelaposicióndelzoomcuandoseconectala alimentación Cuando se conecta la alimentación de la unidad, el zoom, el enfoque y el iris vuelven a las posiciones que ocupaban inmediatamente antes de desconectarse la alimentación. (Esto sucede con el enfoque y el iris cuando éstos se ajustan manualmente.) Sin embargo, esta posición, puede no restablecerse si, por ejemplo, el cable de alimentación se desconecta durante el funcionamiento. Noapuntelacámaraaluces intensas. Cuando haya partes del sensor MOS expuestas a focos u otras luces intensas puede que se produzca floración (un fenómeno por el cual los bordes de las luces intensas quedan borrosos). Gamadetemperaturasdefuncionamiento Evite utilizar la unidad en lugares fríos donde la temperatura baje más allá de los 0 °C o en lugares calientes donde la temperatura suba más de +40 °C, ya que estas temperaturas reducen la calidad de la imagen y afectan adversamente a las piezas interiores. Motivobrillante Floración AcercadelestándardelainterfazHDMI Esta unidad ha sido homologada como compatible con HDMI, pero en ocasiones muy poco comunes, las imágenes puede que no se visualicen dependiendo del aparato HDMI que se haya conectado a la unidad. Acercadelareproduccióndecoloresdelossensores MOS Dependiendo de los tonos de los colores de los motivos, la reproducción de los colores se puede deteriorar. Esto es normal y no indica ningún problema. Desconectelaalimentaciónantesdeconectaro desconectarloscables. Asegúrese siempre de desconectar la alimentación antes de conectar o desconectar los cables. Loquepasacuandosefilmanmotivosdemuchobrillo Si una fuente de luz muy brillante se apunta al objetivo puede que se forme destello. En casos como éste, cambie el ángulo o tome alguna otra medida para solucionar el problema. Cuandoseutilizanlasfuncionesautomáticas pp Si se ha seleccionado “FullAuto” para Scene en el menú de cámara, por ejemplo, todos los ajustes automáticos se activarán, y las operaciones manuales no se podrán realizar para algunos de los elementos. pp Cuando se utiliza la función ATW (ajuste del balance del blanco con seguimiento automático) bajo la iluminación de luces fluorescentes, el balance del blanco puede cambiar. pp En algunas situaciones puede ser difícil enfocar con el ajuste automático. En casos como éste, seleccione el ajuste manual y enfoque manualmente. pp El brillo apropiado puede no obtenerse cuando se filman objetos brillantes utilizando los ajustes automáticos para la ganancia y el iris. En casos como éste, ponga la velocidad del obturador en manual y haga el ajuste necesario. 9 (S) Precauciones de funcionamiento Manejelaunidadconcuidado. No deje caer la unidad ni la someta a golpes o vibraciones fuertes. Si lo hace puede causar fallos en el funcionamiento de la unidad. Cuandonoseutilicelaunidad Desconecte la alimentación de la unidad cuando no la utilice. Cuando la unidad no vaya a utilizar más no la deje abandonada en cualquier lugar, asegúrese de disponer de ella adecuadamente. Notoquelaspiezasdelsistemaóptico. Las piezas del sistema óptico son el verdadero corazón de la cámara. No las toque bajo ninguna circunstancia. En el caso improbable de que tengan polvo, quite el polvo utilizando un soplador de limpieza de cámaras o pasando suavemente un papel de limpieza de lentes. Nopermitaquesustanciasextrañasentrenencontacto conlaspiezasgiratorias. De lo contrario podrían producirse problemas. Mantengalaunidadalejadadelagua. Evite todo el contacto directo con el agua. De lo contrario podrían ocurrir problemas. ESPAÑOL Mantenimiento Desconecte la alimentación de la unidad antes de realizar trabajos de mantenimiento. De lo contrario podría herirse usted mismo. Limpie las superficies pasando un paño blando y seco. Evite el contacto con la bencina, los diluyentes de pintura y otras sustancias volátiles, y evite también utilizar estas sustancias. De lo contrario, la caja podría decolorarse. Nogireelcabezaldelacámaraconlamano. Girar el cabezal de la cámara con la mano puede causar fallos en el funcionamiento de la unidad. Utilicelaunidadenunambientedondelahumedadyel polvoseanmínimos. Evite utilizar la unidad en un ambiente donde haya una concentración elevada de humedad o polvo, ya que estas condiciones dañará las piezas interiores de la unidad. Paratirarlaunidad Cuando la unidad haya llegado al final de su vida de servicio y tenga que tirarse, solicite a un contratista cualificado que disponga de ella adecuadamente para proteger el medio ambiente. 10 (S) Acerca del mando a distancia inalámbrico (accesorio opcional) Estaunidadpuedefuncionarcontroladaadistancia medianteunmandoadistanciainalámbrico(modelo: AW‑RM50G)vendidoporseparado. Launidadnopuedefuncionardirectamenteutilizando elmandoadistanciainalámbricodeunaunidadde comunicaciónvisualHD. Compruebelospuntossiguientesantesdeusarel mandoadistanciainalámbrico. Consulteasuconcesionarioencuantoalacompra deunmandoadistanciainalámbrico. pp Utiliceelmandoadistanciainalámbricodesde posicionessituadasamenosde6mdelaunidad. pp Elmandoadistanciainalámbricopuedenofuncionar cuandoseapuntaalaunidaddesdeciertosángulos. Desde un lugar donde se pueda ver el área sensora señales del mando a distancia inalámbrico (de aquí en adelante, “área sensora de luz”), apunte la ventanilla de transmisión de señales del mando a distancia inalámbrico al área sensora de luz y emplee los botones. Puede que resulte más difícil controlar la unidad cuando el mando a distancia se utilice por detrás de la misma. pp Silaunidadestáinstaladacercadeluces fluorescentes,monitoresconpantalladeplasma uotrosaparatossimilaresosilaunidadestá expuestaalaluzsolar,losefectosdelaluzpodrán serlacausadequeresulteimposiblequelaunidad funcioneutilizandoelmandoadistanciainalámbrico. Asegúrese de seguir los pasos de abajo para la instalación y la utilización. • Tome los pasos necesarios para asegurar que el área sensora de luz no esté expuesta a la luz de luces fluorescentes, monitores con pantalla de plasma u otros aparatos similares o a la luz del sol. • Instale la unidad lejos de luces fluorescentes, monitores con pantalla de plasma u otros aparatos similares. pp Laseleccióndelaoperaciónquevaaserrealizada (elbotón[CAM1],[CAM2],[CAM3]o[CAM4]quefue pulsadoporúltimavez)permaneceráguardadaenla memoriaduranteunos10minutosaunqueseretiren laspilasdelmandoadistanciainalámbrico. Cuandopaseunperiododetiemposuperior,la seleccióncambiaráalestadoestablecidocuandose pulsóelbotón[CAM1]. 11 (S) Partes y sus funciones pUnidaddelacámara 1Áreasensoradeseñalesdelmandoadistancia Los sensores de luz están ubicados en dos lugares en la parte delantera del pedestal de la cámara. 2Luzindicadoradeestado Esta luz se enciende de la forma siguiente dependiendo del estado de la unidad. Anaranjado: Cuando se establece el modo de espera Verde: Cuando está conectada la alimentación Rojo: C uando se ha producido algún problema en la unidad Verdeyparpadeadosveces: Cuando, mientras está conectada la alimentación, se ha recibido procedente del mando a distancia inalámbrico (accesorio opcional) una señal que concuerda con la identificación del mando a distancia Anaranjadoyparpadeadosveces: Cuando, mientras está conectada la alimentación, se ha recibido procedente del mando a distancia inalámbrico (accesorio opcional) una señal que no concuerda con la identificación del mando a distancia 3Cabezaldelacámara Este cabezal gira en sentido horizontal. 4Unidaddelobjetivo <Paneltrasero> Esta unidad gira hacia arriba y hacia abajo. 5ConmutadoresIRID[IRID] [CAM2] [CAM3] [CAM4] Éstos se utilizan para seleccionar la identificación del mando a distancia inalámbrico (accesorio opcional). Los ajustes “CAM1” a “CAM4” del conmutador IR ID corresponden a los botones [CAM1] a [CAM4] del mando a distancia inalámbrico. <Panelinferior> 6ConectorHDMI[HDMI] Éste es el conector de salida de vídeo HDMI. 7Agujerodemontajeparaelcableantirrobo Utilice este agujero para colocar el cable antirrobo. 8Conectordeservicio Este conector sólo se utiliza cuando se realizan trabajos de mantenimiento. 9ConectorDCIN[12V IN ] Conecte el adaptador de CA suministrado con la unidad a este conector para suministrar CC 12 V a la unidad. 12 (S) ESPAÑOL [CAM1] Partes y sus funciones :Agujeroroscado(rosca:1/4‑20UNC)para montarlacámara Utilice este agujero cuando monte la cámara en un trípode, etc. Conmutadoresdeservicio SW1 SW2 SW3 SW4 ON OFF La cámara se utiliza con todos los conmutadores en la posición OFF. 13 (S) Partes y sus funciones pMandoadistanciainalámbrico (Accesorioopcional) 3BotónMENU Cada vez que se pulsa este botón durante al menos 2 segundos se visualiza el menú de la unidad o se sale del menú. Cuando se pulsa rápidamente (durante menos de 2 segundos) mientras se visualiza un menú, el cambio de ajuste se cancela. 4BotonesCAM1aCAM4 Estos botones se utilizan para seleccionar las unidades que van a ser utilizadas. Una vez seleccionado un botón, la unidad correspondiente al botón seleccionado puede ser utilizada. 5BotónSET Si se pulsa este botón cuando se ha seleccionado uno de los ajustes “Manual1 a 3” para “Scene” en el menú de la cámara y se ha seleccionado la memoria AWB A o la memoria AWB B mediante el ajuste del balance del blanco, el balance del blanco se ajusta y se registra automáticamente en la memoria seleccionada. 6BotónMODE Este botón se utiliza para la expansión futura de las funciones. No se utiliza en la actualidad. 7BotonesGAIN[OFF][LOW][HI][AUTO] 8Botonesderecuperacióndelamemoriade preajustes[1]a[12] Estos botones se utilizan para recuperar la información de direcciones y otros ajustes de la unidad, los cuales han sido registrados en las memorias de preajustes número 1 a número 12 de la unidad, y reproducir esos ajustes. 1BotónON/STANDBY Cada vez que se pulsa este botón durante al menos 2 segundos se conecta la alimentación o ésta se pone en el modo de espera. Notas pp Cuando la operación se transfiere al modo de espera: La posición de panorámica-inclinación actual se guarda en la memoria (como un preajuste de POWER ON), y la cámara se mueve de forma que apunta hacia atrás. pp Cuando la operación se transfiere al modo POWER ON: La cámara se mueve a la posición que fue guardada en la memoria (como un preajuste de POWER ON) cuando la operación se transfirió al modo STANDBY. 2Ventanilladetransmisióndeseñales 14 (S) ESPAÑOL Estos botones se utilizan para ajustar la ganancia. El aumento de ganancia se puede ajustar en tres pasos utilizando los botones [OFF], [LOW] y [HI]. [LOW] se pone en 9 dB y [HI] se pone en 18 dB. Cuando se pulsa el botón [AUTO], la función AGC se activa, y la ganancia se ajusta automáticamente dependiendo de la intensidad de la luz. La ganancia máxima de la función AGC se puede ajustar utilizando el menú. Partes y sus funciones BotónA/FOCUS 9BotónPRESET/LIMIT Este botón se utiliza cuando se ajusta automáticamente el enfoque del objetivo. Este botón se utiliza para registrar los ajustes en las memorias de preajustes. Cuando se pulsa un botón de recuperación de memoria de preajustes mientras se mantiene pulsado el botón PRESET/LIMIT, la información de las direcciones y ajustes actuales de la unidad se registra en el botón de recuperación. Los botones de recuperación de memorias de preajustes [1] a [12] corresponden a las memorias de preajustes número 1 a número 12 de la unidad. BotónM/FOCUS Este botón se utiliza cuando se ajusta manualmente en enfoque del objetivo. Los botones FOCUS ([F] y [N]) se utilizan cuando se realiza el ajuste real. BotonesOPT[ON][OFF] Estos botones se utilizan para la expansión futura de las funciones. No se utilizan en la actualidad. :Botonesdepanorámica‑inclinaciónybotones deutilizacióndemenús[][][][][] (1) Estos botones se utilizan para cambiar la dirección de la unidad. La unidad se inclina hacia arriba/abajo utilizando los botones [] y [], y hace la toma panorámica hacia la izquierda/derecha utilizando los botones [] y []. El botón [] no funciona durante la inclinación o las tomas panorámicas. Cuando se pulsan al mismo tiempo los botones [] o [] y [] o [], la unidad se mueve diagonalmente. BotónHOME Cuando se pulse este botón durante al menos 2 segundos, la dirección de la unidad (panorámica o inclinación) volverá a la posición de referencia. BotonesZOOM[T][W] Estos botones se utilizan para ajustar el zoom del objetivo. El zoom se ajusta en gran angular utilizando el botón [W] y en telefoto utilizando el botón [T]. (2) Los botones se utilizan con los menús cuando la unidad visualiza los menús. Utilice los botones [], [], [] y [] para seleccionar los elementos de menús. Cuando un elemento seleccionado tenga un menú secundario, el menú secundario se visualizará pulsando el botón []. Cuando el cursor se alinee con un elemento particular y se pulse el botón [] en el menú de ajuste del nivel jerárquico inferior, el ajuste del elemento seleccionado parpadeará. Cuando se pulse el botón [] después de haber cambiado el ajuste utilizando los botones [], [], [] y [], el ajuste dejará de parpadear, y se establecerá el nuevo ajuste. Con un menú normal, el nuevo ajuste se reflejará inmediatamente después de haber sido cambiado éste, si el cambio se hizo con el ajuste en el estado de parpadeo, pero hay algunos menús (Scene, Format e Initialize) en los que el cambio sólo se refleja después de haber pulsado el botón [], después de parar el parpadeo y después de establecerse el nuevo ajuste. Si el botón MENU se pulsa rápidamente (durante menos de 2 segundos) mientras el ajuste está en el estado de parpadeo, el cambio se cancelará, y el ajuste que se encontraba seleccionado antes del cambio se restablecerá. BotónFAST Este botón se utiliza para cambiar a alta velocidad el movimiento durante el empleo de tomas panorámicas, la inclinación, el zoom y el enfoque. Nota pp La velocidad de funcionamiento para la panorámica e inclinación, cuando los ajustes de la memoria de preajustes han sido recuperados, se puede cambiar utilizando el elemento Preset Speed del menú de cámara. BotónSLOW Este botón se utiliza para cambiar a baja velocidad el movimiento durante el empleo de tomas panorámicas, la inclinación, el zoom y el enfoque. BotónA/IRIS Esto establece la opción para ajustar automáticamente el iris del objetivo en consonancia con la intensidad de la luz. BotónM/IRIS Esto establece la opción para ajustar manualmente el iris del objetivo. Los botones IRIS + e IRIS – se utilizan cuando se realiza el ajuste real. BotonesFOCUS[F][N] Estos botones se utilizan para ajustar manualmente el enfoque del objetivo cuando el ajuste manual está establecido para el enfoque del objetivo. El enfoque se ajusta para lejos utilizando el botón [F] y para cerca utilizando el botón [N]. BotónIRIS + Este botón se utiliza para ajustar el iris del objetivo en la dirección de apertura. BotónIRIS– Este botón se utiliza para ajustar el iris del objetivo en la dirección de cierre. 15 (S) Puesta de las identificaciones del mando a distancia El mando a distancia inalámbrico (accesorio opcional) puede controlar hasta cuatro unidades. Las identificaciones se utilizan para establecer qué unidades se seleccionan cuando se han pulsado los botones [CAM1], [CAM 2], [CAM3] y [CAM4] del mando a distancia inalámbrico. pp Cuando se utilicen múltiples unidades, ponga una identificación de mando a distancia diferente para cara unidad. pp Cuando se utilice una unidad, ponga la identificación de mando a distancia en “CAM1” a menos que el ajuste tenga que ser cambiado. Procedimientoparaponerlasidentificaciones Utilice el conmutador IR ID del panel trasero de la unidad y seleccione “CAM1”, “CAM2”, “CAM3” o “CAM4” como identificación del mando a distancia. (Consulte la página 12.) Los ajustes “CAM1” a “CAM4” del conmutador IR ID corresponden a los botones [CAM1] a [CAM4] del mando a distancia inalámbrico. (El ajuste de fábrica es “CAM1”.) ESPAÑOL ConmutadoresIRID Botones[CAM1]a[CAM4] 16 (S) Instalación 1 Conectelosconectoresdelpaneltrasero. CabledeadaptadordeCA Cabledesalidadevídeo pCuandoseinstalalaunidadenunescritorio Coloquelaunidadplanasobrelasuperficie. Notas pp Instale la unidad en un lugar estable que no sea susceptible de sufrir vibraciones. Si la unidad se instala en lugares susceptibles de sufrir vibraciones, esto será la causa de que vibren las imágenes de la unidad. pp Tenga cuidado de que la unidad no se caiga ni se dañe durante la instalación. pp Cuando traslade la unidad, no la toma por su cabezal. pp No sujete el cabezal de la cámara no lo gire. Hacerlo podría causar fallos en el funcionamiento. pp Tenga cuidado de no tirar de los cables conectados. Si lo hace podría ser la causa de que cayera la unidad y/o se produjesen lesiones. Asegúresedequelaunidadnosecaiga. Bien OK 17 (S) Mal NG Instalación pCuandosemontelaunidadenuntrípode Utilice un trípode altamente estable que pueda aguantar el peso de la cámara montada en él. Coloque el trípode en el agujero roscado para montar la cámara situado en el panel inferior de la cámara. Ponga el trípode en una superficie completamente plana y nivelada. Apriete el tornillo a mano para montar el trípode firmemente. No apriete el tornillo girando el cuerpo de la cámara. Hacerlo podría causar un fallo en el funcionamiento. Utilice tornillos para montar el trípode que satisfagan la norma siguiente. Tornillosparamontareltrípode(1/4‑20UNC) 4,5mma6mm Notas ESPAÑOL pp No instale la unidad por donde vayan y vengan las personas. pp Cuando utilice la unidad montada en un trípode, no ponga el trípode en una posición alta por encima del suelo. pp Monte firmemente la unidad para que no quede floja. La flojedad podría ser la causa de que cayera la unidad y/o se produjesen lesiones. pp Cuando la unidad vaya a utilizarse durante mucho tiempo, tome medidas para asegurar que ésta no se caiga. Después de utilizar la unidad, restaure el lugar de instalación a su estado original sin falta. 18 (S) Conexiones pConexionesconunsistemadecomunicacionesvisualesHD CámaradecomunicaciónHD GP‑VD150E SeñalHDMI UnidaddecomunicaciónvisualHD KX‑VC300,KX‑VC600 Mandoadistanciainalámbrico(accesorioopcional) AW‑RM50G pp Para conocer descripciones de la panorámica, la inclinación, el zoom, los preajustes y otras operaciones de la cámara utilizando una unidad de comunicación visual HD, consulte las instrucciones de funcionamiento de la unidad compatible. 19 (S) Solución de problemas qpFuncionamiento Nosesuministra alimentación Nosepuedecontrolar launidad(mandoa distanciainalámbrico yunidadde comunicaciónvisual HD) Nosepuedecontrolar launidadutilizando elmandoadistancia inalámbrico Causayremedio Páginasde referencia pp ¿EstáeladaptadordeCAconectadofirmementealatomadeCA? ––– pp ¿Estálaclavijadealimentaciónconectadacorrectamenteal adaptadordeCA? ––– pp Cuandolaunidadestásiendocontroladaporelmandoadistancia inalámbrico Consulte también “No se puede controlar la unidad utilizando el mando a distancia inalámbrico”. ––– pp ¿Estáconectadalaalimentación? Si la luz indicadora de estado de la unidad está apagada, o si está encendida en color anaranjado, esto significa que no se suministra alimentación a la unidad. <Operaciones y ajustes> pp ¿Sehaseleccionadolaunidadcorrectaquevaaserutilizada? <Operaciones y ajustes> pp ¿Sehanagotadolaspilasdelmandoadistancia?¿Sehaninstalado laspilasconsuspolaridadesinvertidas? Si la luz indicadora de estado no parpadea a pesar de emplear el mando a distancia inalámbrico cerca del área sensora de señales del mando a distancia, esto significa que las pilas están agotadas. Sustituya las pilas. pp ¿Hayunalámparafluorescenteounmonitordeplasmacercadela unidad?Ysiesasí,¿estáeláreasensoradeseñalesdelmandoa distanciaexpuestaaesasluces? ––– Página 11 ESPAÑOL Síntoma 20 (S) Solución de problemas qpVídeo Causayremedio Páginasde referencia pp ¿Sehaconectadocorrectamentelaunidadalosdemásdispositivos conectados? Página 19 Síntoma Nosevisualizan imágenesoéstas estándistorsionadas Sevisualizala pantallademenú pp Sielsistemaestáconfiguradodeformaquelaimagentambién cambiacuandoseseleccionalacámaraquevaaserutilizada,¿ha sidoseleccionadalaunidadcorrecta? <Operaciones y ajustes> pp ¿Sehaseleccionadocorrectamenteelajustedelaseñaldevídeo? <Operaciones y ajustes> pp Salgadelmenú. <Operaciones y ajustes> pp DependiendodelmonitorHDMIqueestéutilizandopuedeque aparezcaunoomásdelossíntomasdescritosacontinuación. Resultadifícilverlas pantallasdemenús Noserealizael enfoqueautomático Elmotivonoqueda enfocadodurante elempleodelzoom cuandoseutilizael ajustemanualpara hacerelenfoque • La resolución de los caracteres de las visualizaciones de los menús cambia al cambiar la imagen de fondo. • Dependiendo del ajuste de mejora de bordes establecido para el monitor aparecen líneas blancas delante de las sombras negras de los menús. • Dependiendo del ajuste de mejora de bordes establecido para el monitor, puede que los colores de fondo se superpongan en las partes blancas de los menús. pp ¿Estáelenfoqueajustadoenmanual? El enfoque automático empieza tan pronto como éste se ajusta. <Operaciones y ajustes> pp Enalgunassituaciones,puederesultardifícilenfocarconel enfoqueautomático. En casos como éste, seleccione el ajuste manual y enfoque manualmente. <Operaciones y ajustes> pp ¿Seajustóelenfoqueenelextremodetelefoto? Ajuste primero el enfoque en el extremo de telefoto donde la precisión del enfoque es mayor, y luego prosiga empleando el zoom. pp Bajoalgunascondicionesdeoperaciónpuedequeseaposible enfocarlosmotivos. En tales casos, utilice en enfoque en el modo automático. pp Estesíntomasedebealosreflejosdelaluzentreelobjetivoyla Enlascuatro cubiertaenfrentedelobjetivo.Encuentreunaformadeoptimizarla esquinasdelaimagen posicióndelafuentedeluzconrelaciónalaposicióndelaunidad, aparecenreflejosen einstaleyutilicelaunidadenunlugardondenoseproduzcanlos formadeanillos reflejos. Algonoestábiencon loscoloresdelas imágenes ––– ––– <Operaciones y ajustes> ––– pp ActivelafunciónATW(Ajustedelbalancedelblancocon seguimientoautomático). <Operaciones y ajustes> pp Enalgunassituacionespuedequenosereproduzcanloscolores apropiadosutilizandolafunciónATW. En casos como éste, prosiga con el ajuste del balance del blanco. <Operaciones y ajustes> 21 (S) Solución de problemas Lasimágenesestán demasiadoclaraso demasiadooscuras Causayremedio pp Seleccioneelajusteautomáticoparaelirisoseleccioneelajuste manualyajusteelirismanualmente. Páginasde referencia <Operaciones y ajustes> pp Lasimágenespuedenestaroscurassielcabledevídeoes demasiadolargo,porqueestoatenúalaseñal. ––– Losmotivosaparecen distorsionados pp Siunmotivocruzarepentinamentedelantedelacámara,puedeque ésteaparezcadistorsionadoporqueestacámarautilizaunsensor deimagenMOS. Estoesnormalynoindicaningúnproblema. ––– Cuandoseactiva elflashdurantela filmaciónsólolas partessuperiore inferiordelapantalla quedanmásclaras pp ConunsensordeimagenMOS,lasincronizacióndelafilmación cambiaunpocoentrelapartesuperiorizquierdaylaparteinferior derechadelapantalla.Estosignificaquecuandoseactivaelflash, laparteinferiordelapantallaquedarámásclaraenelcampoactual ylapartesuperiordelapantallaquedarámásoscuraenelcampo siguiente. Estoesnormalynoindicaningúnproblema. ––– Elbrillocambia cíclicamenteolos colorescambian,y sepuedenverfranjas horizontalespasando atravésdelapantalla pp Estosfenómenos(parpadeo)puedenocurrirbajolailuminación delámparasfluorescentes,bombillasdemercuriouotrostiposde tubosdedescarga. Estoesnormalynoindicaningúnproblema. Enmomentoscomoeste,serecomiendaquelavelocidaddel obturadorelectrónicoseajustea1/120enáreasconunafrecuencia delalíneadealimentaciónde60Hz,oenOFFenáreasconuna frecuenciadelalíneadealimentaciónde50Hz. <Operaciones y ajustes> Cuandosefilman líneasopatrones cíclicos,seobserva parpadeooseañade coloraellos pp Estefenómenoseproduceporquelospíxelesestándispuestos sistemáticamenteencadasensordeimagen.Estefenómenose notacuandolafrecuenciaespacialdeunmotivoyelpasode píxelesseaproximan,asíquecambieelángulodelacámaraotome otramedidasimilar. ––– 22 (S) ESPAÑOL Síntoma Apariencia Unidad:mm R7 150 75 73 23 (S) 1,5 47,7 115,9 175,5 4,9 Especificaciones Alimentación: 12 V CC 10 % (Adaptador de CA suministrado) Consumodecorriente: 1,0 A indica información de seguridad. p GENERAL p ENTRADA Temperaturaambientaldefuncionamiento: 0 °C a +40 °C Conectordeentrada: DC 12 V IN Temperaturaparaguardarlaunidad: –20 °C a +50 °C Gamasdehumedadpermitidas: 20 % a 90 % (sin condensación) p SALIDA Masa: Salidadevídeo: 1,2 kg aproximadamente Dimensiones(AnProfAl): 150 148 177 mm Plateado ESPAÑOL Acabado: HDMI (Conector HDMI) 24 (S) Especificaciones p FUNCIONESYRENDIMIENTO [Cabezaldepanorámicaeinclinación] Velocidaddeoperacióndepanorámica‑inclinación: Max. 90°/s o más [Unidaddelacámara] Sensoresdeimagen: MOS Full-HD del tipo de 1/3 Objetivo: Enfoque: Margendepanorámica: ±100° Zoom motorizado de 12, f/1.6 a 2.0 (f=4,7 a 56,4 mm; equivalente a 35 mm: 36,9 mm a 442,8 mm) Margendeinclinación: ±30° p Dependiendo de la posición de panorámica o inclinación, la cámara puede que se refleje en la imagen. Conmutación entre automático y manual Distanciadeenfoque: Toda la gama del zoom: 1,5 m Extremo de granangular: 30 cm Silencio: NC35 (velocidad normal), NC40 (cuando se preajuste) Sistemaópticodeseparacióndecolores: Sistema de filtro de color en chip Iluminaciónmínima: 3 lx (50 IRE, F1.6, +36 dB) Resoluciónhorizontal: 850 líneas de TV típicas (Área central) p AdaptadordeCA Seleccióndeganancia: Auto, 0 dB, 3 dB, 6 dB, 9 dB, 12 dB, 15 dB, 18 dB Entrada: 220 V a 240 V CA, 1,5 A, 50 Hz Salida: 12 V CC, 2,5 A, 30 W Mododealmacenamiento: 0 dB, 6 dB, 12 dB, 18 dB Velocidadesdelobturadorelectrónico: Step: 1/120, 1/250, 1/500, 1/1000, 1/2000, 1/4000, 1/10000 Synchro scan: 50,20 Hz a 538,51 Hz Gamma: Off, Normal (Low, Mid, High), Cinema Balancedelblanco: AWB A, AWB B, ATW p Accesoriosopcionales pp MandoadistanciainalámbricoAW‑RM50G (FabricadaporPanasonic) (2pilassecastamaño“R6”o“LR6”,obtenidaspor separado) Variedaddecantidaddecroma: Variedad de 7 niveles Archivosdeescenas: FullAuto, Manual1, Manual2, Manual3 Formatodesalida: HD 1080: 50i, SD 576: 50p La masa y las dimensiones indicados son aproximados. Las especificaciones están sujetas a cambios sin previo aviso. 25 (S) ESPAÑOL Apuntes 26 (S) РУССКАЯ ВЕРСИЯ (RUSSIAN VERSION) Меры предосторожности НЕ ОТВИНЧИВАЙТЕ КРЫШКИ ПАНЕЛЕЙ. ОСТОРОЖНО: Для снижения риска удара электрическим током не снимайте панели. Внутри устройства нет деталей, подлежащих обслуживанию пользователем. Обратитесь за сервисным обслуживанием к квалифицированному персоналу. ДЛЯ СНИЖЕНИЯ РИСКА ВОЗНИКНОВЕНИЯ ПОЖАРА ИЛИ УДАРА ЭЛЕКТРИЧЕСКИМ ТОКОМ И ВОЗНИКНОВЕНИЯ ПОМЕХ ИСПОЛЬЗУЙТЕ ТОЛЬКО РЕКОМЕНДУЕМЫЕ ДОПОЛНИТЕЛЬНЫЕ ПРИНАДЛЕЖНОСТИ. ВНИМАНИЕ: ОСТОРОЖНО: Данный прибор должен быть заземлен Для обеспечения безопасной работы вставляйте трехконтактную штепсельную вилку исключительно в стандартную трехконтактную розетку, эффективно заземленную при помощи обычной бытовой проводки. Используйте с данным прибором исключительно трехжильные удлинительные шнуры, проводка которых выполнена надлежащим образом, для обеспечения заземления. Неправильная проводка удлинительных шнуров является основной причиной несчастных случаев. Нормальная работа прибора не может свидетельствовать о наличии заземления у розетки или о том, что процедура монтажа полностью безопасна. В целях Вашей безопасности, пожалуйста, обратитесь к квалифицированному электрику, если не уверены в эффективности заземления розетки. Для обеспечения надлежащей вентиляции не устанавливайте и не размещайте данное устройство на книжном стеллаже, во встроенном шкафу или в другом закрытом пространстве. Для предотвращения риска поражения электрическим током или опасности возгорания вследствие перегрева убедитесь, что занавески или другие материалы не препятствуют вентиляции. Розетка должна располагаться вблизи оборудования и быть легкодоступной, или же сетевой штепсель либо штепсельный разъем прибора должны оставаться в пределах досягаемости. Имейте в виду, что аппарат, относящийся по конструкции к КЛАССУ 1, следует подключать к СЕТЕВОЙ розетке с защитным заземлением. ВНИМАНИЕ: • ДЛЯ СНИЖЕНИЯ РИСКА ВОЗНИКНОВЕНИЯ ПОЖАРА ИЛИ УДАРА ЭЛЕКТРИЧЕСКИМ ТОКОМ НЕ ПОДВЕРГАЙТЕ ДАННОЕ ОБОРУДОВАНИЕ ВОЗДЕЙСТВИЮ ДОЖДЯ ИЛИ ВЛАГИ. • НЕ ПОДВЕРГАЙТЕ АППАРАТ ВОЗДЕЙСТВИЮ КАПЕЛЬ ИЛИ БРЫЗГ ЖИДКОСТЕЙ; ТАКЖЕ НЕ СТАВЬТЕ НА АППАРАТ КАКИЕ-ЛИБО ЕМКОСТИ, НАПОЛНЕННЫЕ ЖИДКОСТЬЮ, ТАКИЕ КАК ВАЗЫ. ВНИМАНИЕ: ВО ИЗБЕЖАНИЕ ПОВРЕЖДЕНИЯ ДАННЫЙ ПРИБОР ДОЛЖЕН БЫТЬ НАДЕЖНО ЗАКРЕПЛЕН НА ПОЛУ В СООТВЕТСТВИИ С ИНСТРУКЦИЕЙ ПО УСТАНОВКЕ. Данный знак обозначает информацию, относящуюся к технике безопасности. 1 (R) Содержание Меры предосторожности .................................................................1 Установка ..........................................................................................17 Перед использованием ....................................................................4 При установке устройства на столе ............................................17 Общие сведения .............................................................................4 При установке устройства на штатив .........................................18 Информация о системах HD видео конференц-связи ................4 Соединения.......................................................................................19 Об инструкции по эксплуатации ....................................................4 Подключение к системе HD видео конференц-связи ................19 Информация о пульте дистанционного управления (дополнительный аксессуар) ..............................................4 Поиск и устранение неисправностей ...........................................20 Внешний вид ....................................................................................23 Торговые знаки и зарегистрированные торговые знаки ..............4 Технические характеристики .........................................................24 Об авторском праве и лицензии ...................................................4 Отказ от гарантии ...........................................................................4 Характеристики ..................................................................................5 Принадлежности ................................................................................6 Предосторожности по установке ....................................................7 Меры предосторожности во время использования ...................9 Относительно пульта дистанционного управления (дополнительный аксессуар) ................................................... 11 Компоненты и их функции .............................................................12 Блок камеры .................................................................................12 Пульт дистанционного управления (Дополнительный аксессуар) ............................................14 РУССКИЙ Установка идентификаторов пульта дистанционного управления ....................................................16 2 (R) Как составлены инструкции по эксплуатации данной модели pp Руководство по данной камере высокого разрешения для конференц-связи (в дальнейшем “устройство”) подразделяется на две инструкции: <Основные положения> (данное руководство) и <Операции и установки>. Перед установкой устройства обязательно прочтите <Основные положения> для обеспечения правильности установки. pp В данном руководстве объясняется процедура установки устройства. Кроме того, для получения дополнительных сведений об управлении устройством и выборе настроек обратитесь к документу “Инструкция по эксплуатации <Операции и установки>” (файл PDF). Загрузите документ “Инструкция по эксплуатации <Операции и установки>” с приведенной ниже домашней страницы. http://panasonic.net/psn/products/hdvc/resource/users_guides.html Для чтения файлов PDF понадобится программа Adobe® Reader®, которая поставляется компанией Adobe Systems. 3 (R) Перед использованием pОбщие сведения pОб авторском праве и лицензии pp Данное устройство является интегрированной камерой высокого разрешения full HD с панорамно-наклонной головкой, в котором впервые использован 1/3-дюймовый МОП-датчик full HD и цифровой сигнальный процессор (DSP). Распространение, копирование, дизассемблирование, декомпиляция, реинжиниринг, а также экспорт в нарушение законов об экспорте программного обеспечения, поставляемого с данным устройством, категорически запрещено. pp В дополнение к оптическому объективу с увеличением 12 в устройстве предусмотрено цифровое масштабирование 10 для достижения высокого качества съемки, передающей все детали окружающей среды. pОтказ от гарантии НИ В КАКИХ СЛУЧАЯХ, КРОМЕ ЗАМЕНЫ ИЛИ ОБОСНОВАННОГО ТЕХОБСЛУЖИВАНИЯ ПРОДУКТА, Panasonic Corporation НЕ НЕСЕТ ОТВЕТСТВЕННОСТИ ПЕРЕД ЛЮБОЙ СТОРОНОЙ ИЛИ ЛИЦОМ ЗА СЛУЧАИ, ВКЛЮЧАЯ, НО НЕ ОГРАНИВАЯСЬ ЭТИМ: pp Данное устройство разработано для использования исключительно с системой HD видео конференц-связи Panasonic. Совместимые устройства HD видео конференц-связи: KX-VC300CX, KX-VC300EX, KX-VC600CX, KX-VC600EX 1 ВСЯКОЕ ПОВРЕЖДЕНИЕ И ПОТЕРИ, ВКЛЮЧАЮЩИЕ БЕЗ ОГРАНИЧЕНИЯ, НЕПОСРЕДСТВЕННЫЕ ИЛИ КОСВЕННЫЕ, СПЕЦИАЛЬНЫЕ, ПОБОЧНЫЕ ИЛИ ТИПОВЫЕ, ВОЗНИКАЮЩИЕ ИЗ ИЛИ ОТНОСЯЩИЕСЯ К ДАННОМУ ИЗДЕЛИЮ; pИнформация о системах HD видео конференц-связи 2 ТРАВМЫ ИЛИ ЛЮБОЕ ПОВРЕЖДЕНИЕ, ВЫЗЫВАЕМЫЕ НЕСООТВЕТСТВУЮЩИМ ПРИМЕНЕНИЕМ ИЛИ НЕБРЕЖНЫМ УПРАВЛЕНИЕМ ПОЛЬЗОВАТЕЛЯ; pp Для получения описаний операций поворота, наклона, трансфокации, выполнения предварительных установок и других операций камеры с помощью системы HD видео конференц-связи обратитесь к инструкции по эксплуатации поддерживаемого устройства. 3 НЕОБОСНОВАННУЮ РАЗБОРКУ, РЕМОНТ ИЛИ МОДИФИКАЦИЮ ИЗДЕЛИЯ ПОЛЬЗОВАТЕЛЕМ; 4 НЕУДОБСТВО ИЛИ ЛЮБЫЕ ПОТЕРИ, ВОЗНИКАЮЩИЕ ПРИ НЕПРЕДСТАВЛЕНИИ ИЗОБРАЖЕНИЙ ПО ЛЮБОЙ ПРИЧИНЕ, ВКЛЮЧАЮЩЕЙ ОТКАЗ ИЛИ НЕИСПРАВНОСТЬ ИЗДЕЛИЯ; pОб инструкции по эксплуатации 5 ЛЮБУЮ НЕИСПРАВНОСТЬ, КОСВЕННОЕ НЕУДОБСТВО ИЛИ ПОТЕРЮ ИЛИ ПОВРЕЖДЕНИЕ, ВОЗНИКАЮЩИЕ ИЗ СИСТЕМЫ, КОМБИНИРОВАННОЙ С УСТРОЙСТВАМИ ТРЕТЬЕЙ СТОРОНЫ; pp В данном руководстве обе модели KX-VC300CX и KX-VC300EX обозначаются как “KX-VC300”, а обе модели KX-VC600CX и KX-VC600EX обозначаются как “KX-VC600”. pИнформация о пульте дистанционного управления (дополнительный аксессуар) 6 ПОТЕРИ ЗАРЕГИСТРИРОВАННЫХ ДАННЫХ ИЗ-ЗА КАКОГО-ЛИБО СБОЯ. РУССКИЙ pp Управлять данным устройством можно дистанционно с помощью пульта дистанционного управления (модель AW-RM50G), который доступен в качестве дополнительного аксессуара. Управлять устройством непосредственно с помощью пульта дистанционного управления для системы HD видео конференцсвязи невозможно. Для приобретения пульта дистанционного управления обратитесь к дилеру. pТорговые знаки и зарегистрированные торговые знаки pp HDMI, логотип HDMI и High-Definition Multimedia Interface являются товарными знаками или зарегистрированными товарными знаками HDMI Licensing LLC в Соединенных Штатах Америки и других странах. pp Adobe, Acrobat Reader и Reader являются зарегистрированными товарными знаками или товарными знаками Adobe Systems Incorporated в Соединенных Штатах Америки и/или других странах. 4 (R) Характеристики Возможно использование легкого в управлении беспроводного пульта дистанционного управления (дополнительный аксессуар) pp Возможно использование беспроводного пульта дистанционного управления, которым можно управлять четырьмя устройствами. Он может легко использоваться для установки различных функций или переключения между ними во время просмотра экранов меню. Особенности МОП-датчика типа 1/3 и объектива с увеличением 12 pp МОП-датчик full HD типа 1/3 скомбинирован с DSP (цифровой сигнальный процессор). Изображения высокого качества получаются путем обработки видео множеством различных способов. pp В дополнение к оптическому объективу с увеличением 12 в устройстве предусмотрено цифровое масштабирование 10 для достижения высокого качества изображения, передающего все детали окружающей среды. pp Функция расширения динамического диапазона (DRS), компенсирующая переэкспонирование и потерю темных деталей, скомбинирована с новой функцией гибридного цифрового подавления шума (цифровое шумоподавление), предназначенной для минимизации задержек изображения даже в темных помещениях и для четкой съемки сцен, что позволяет воспроизводить чистые и четкие изображения во многих приложениях. Легкость управления устройством достигается благодаря наличию высокопроизводительного наклонно-поворотного устройства pp Эксплуатация с высокой скоростью 90°/s pp Большие углы поворота: диапазон вращения ±100° и диапазон наклона ±30° pp Тихая работа с уровнями шума NC35 (обычная скорость) и NC40 (при выполнении предварительной установки) 5 (R) Принадлежности Убедитесь в том, что приведенные ниже принадлежности имеются в наличии в указанном количестве. Инструкция по эксплуатации <Основные положения> (данное руководство) .................................................................... 1 Кабели электропитания* (2 m) .......................................................... 2 Адаптер переменного тока ................................................................ 1 Гарантия ............................................................................................. 1 РУССКИЙ * Используйте кабель электропитания, предназначенный для Вашего региона. 6 (R) Предосторожности по установке Помимо выполнения пунктов, представленных в разделе “Меры предосторожности”, соблюдайте также меры предосторожности, указанные ниже. Не устанавливайте и не используйте устройство в следующих местах. pp На поверхности стены (где устройство будет установлено боком и/или где устройство будет прикреплено к потолку с помощью крепежного кронштейна) pp На потолке (где устройство будет установлено с наклоном вниз) pp В местах (включая такие места, как под карнизами здания), где на устройство будет непосредственно попадать дождя или вода pp В таких местах, как кухни, с высокой концентрацией пара и жира pp В местах на открытом воздухе или в горячих местах, где температура превышает 40 °C pp В холодных местах, где температура опускается ниже 0 °C pp В местах, где влажность превышает 85 % pp В местах, где применяются химикаты, как, например, возле плавательных бассейнов pp Возле моря, в прибрежных зонах или в местах, где имеются выбросы коррозионных газов pp В местах генерации радиоактивных излучений, рентгеновских лучей, сильных радиоволн или магнитных полей pp В местах, где устройство будет подвержено повышенной вибрации, как, например, на борту автомобиля или корабля (данное устройство не предназначено для использования в автомобилях) pp В местах, в которых температура подвержена резким изменениям, таких, как возле выпускного канала кондиционера воздуха или возле двери, через которую наружный воздух проникает внутрь Убедитесь в том, что работы по установке соответствуют техническим стандартам для электрического оборудования. Данное устройство предназначено для использования только внутри помещений. Его нельзя использовать вне помещений. Не устанавливайте устройство в местах, где оно будет подвергаться воздействию прямых солнечных лучей в течение длительных периодов времени, или вблизи охлаждающих или нагревательных приборов. В противном случае это может привести к деформации, обесцвечиванию, возникновению неисправностей и/или проблем в работе. Устройство необходимо устанавливать в местах, где оно не будет подвержено разбрызгиванию или распылению воды. Используйте данное устройство на плоской и ровной поверхности. Не устанавливайте данное устройство на поверхности стены, на потолке или в месте, где устройство может наклониться под углом. Примечаниe pp Выполняя работы по установке, не держите камеру за головку. Это может привести к возникновению неисправностей. Правильно неПравильно OK NG Чего следует избегать, чтобы гарантировать стабильную продолжительную работу устройства pp Использование устройства в течение продолжительного периода в местах с высокими уровнями температуры и влажности приведет к разрушению его деталей и к сокращению срока его службы. pp Убедитесь в том, что никакое охлаждающее устройство или нагревательное устройство не будет направлять воздух непосредственно на места установки. Относительно места установки Устройство необходимо устанавливать в устойчивом месте, которое не будет подвергаться вибрационному воздействию. Если устройство установить в месте, подвергаемом вибрационному воздействию, это приведет к дрожанию изображений, выполняемых устройством. Установку устройства необходимо осуществлять после подробной консультации с дилером. Если дальнейшее использование устройства больше не предполагается, не оставляйте его в случайных местах, а обязательно демонтируйте его надлежащим образом. При установке, перемещении или демонтаже устройства обязательно держите его в области основания. Если головка камеры прижата или повернута, могут возникнуть проблемы. Не присоединяйте к устройству фильтр, колпак, удлинитель или другие детали. 7 (R) Предосторожности по установке Заземление Перед использованием устройства убедитесь в том, что заземляющий провод подсоединен надежно. Проверьте сопротивление заземления (менее 100 ) разъема заземления. В случае необходимости преобразования штепсельной вилки в двухштырьковую вилку сначала необходимо проконсультироваться с дилером. Также используйте штепсельную розетку, оборудованную разъемом заземления, который необходимо обязательно подключить к заземлению. В таком случае обязательно осуществите подключение к заземлению, прежде чем подключать штепсельную вилку к основному источнику питания. Аналогично, перед отключением заземляющего подключения сначала обязательно отключите штепсельную вилку от основного источника питания. Используйте прилагаемые адаптер переменного тока и кабель электропитания, которые предназначены для устройства. Надежно подсоедините адаптер переменного тока и кабель электропитания к источнику питания. Кабель электропитания, прилагающийся к данному устройству, необходимо всегда использовать с данным устройством. Использовать устройство со кабелем электропитания, который не прилагается к данному устройству, невозможно. Аналогично, использовать кабель электропитания, прилагающийся к данному устройству, с каким-либо другим устройством невозможно. Установка адаптера переменного тока pp Не размещайте адаптер переменного тока непосредственно на полу или какой-либо другой подобной поверхности. Вода, разлившаяся на поверхности в результате протекания дождевой воды или по другой причине, представляет чрезвычайную опасность. Надежно закрепите адаптер переменного тока на поверхности, на которой не будет собираться вода, пыль и т.п. pp Прикрепите адаптер надежно, чтобы он не упал ни при каких обстоятельствах. Закрепите его с помощью силы, которая может выдержать массу адаптера переменного тока (приблиз. 320 g). Если существует вероятность появления шумовых помех Проложите провода таким образом, чтобы кабель электропитания (провод потолочного освещения) напряжением 220 V переменного тока или более и сигнальный кабель были расположены на расстоянии по крайней мере 1 m друг от друга. В качестве альтернативы, проведите каждый кабель через отдельный металлический кабелепровод. (Металлические кабелепроводы должны быть заземлены.) Устанавливайте прилагаемый адаптер переменного тока возле сетевой розетки и располагайте его таким образом, чтобы его шнур питания мог легко вставляться и выниматься из розетки. Если адаптер переменного тока необходимо подключить в месте, где собирается пыль, регулярно удаляйте пыль и грязь со штепсельной вилки в качестве меры предотвращения утечки тока. Радиопомехи Если устройство размещено возле передающей ТВ- или радиоантенны или сильного электрического поля или магнитного поля (например поле, генерируемое мотором, трансформатором или линиями электропередач), его изображения могут быть искажены, и/или изображения могут быть подвержены влиянию шума. Выключатель питания Данное устройство не имеет выключателя питания. Питание включается при подключении его штепсельной вилки к сетевой розетке. Когда питание включено, выполняются операции поворота, наклона, масштабирования и фокусировки. Перед выполнением технического обслуживания обязательно выньте штепсельную вилку из сетевой розетки. При подсоединении кабелей убедитесь, что к местам разъемов не будет приложена какая-либо нагрузка. Это может привести к неисправности. Подключение кабеля электропитания Обязательно подключайте кабель электропитания адаптера переменного тока через выключатель питания, используя один из перечисленных ниже способов. (1) Подключайте кабель электропитания через устройство регулирования мощности. (2) Подключайте кабель электропитания к выключателю питания на силовом распределительном щите с контактным расстоянием 3,0 mm или более. Используйте выключатель питания, который может отключить все полюса основного источника питания, за исключением защитного заземления. (3) Устанавливайте адаптер переменного тока возле сетевой розетки и подключайте его с помощью штепсельной вилки. ВАЖНАЯ ИНФОРМАЦИЯ pp Название изделия и его расчётные электрические параметры указаны на нижней панели. 8 (R) РУССКИЙ Отвод генерируемого тепла В данном устройстве тепло, генерируемое внутри, отводится от его поверхности. Не устанавливайте устройство в месте, где оно будет окружено стенами или другими поверхностями и где будет собираться тепло. Кроме того, тепло рассеивается к нижней панели, которая будет со временем нагреваться: Это нормально и не указывает на какуюлибо проблему. Меры предосторожности во время использования Трансфокация и фокусировка При ручной установке фокуса во время трансфокации может произойти потеря фокусировки. После трансфокации необходимо, при необходимости, или отрегулировать фокус, или установить для фокуса автоматические настройки. При использовании фокуса с ручными настройками трансфокацию необходимо продолжать, установив фокус в положение Tele, где точность фокусировки выше. (Однако, если расстояние от устройства до объекта менее 1,5 m, объект может выйти из фокуса в положении Wide.) Если трансфокация выполняется в положение Tele после того, как фокус был отрегулирован в положении Wide, может произойти расфокусировка. Съемка в условиях надлежащего освещения. Для создания изображений с приятными для глаз цветами, выполняйте съемку в условиях надлежащего освещения. При съемке в условиях флуоресцентного освещения изображения могут не иметь их натуральных цветов. При необходимости выбирайте надлежащее освещение. Обеспечение стабильного качества в течение длительного периода времени Использование устройства в течение длительных периодов времени в местах с высокими уровнями температуры и влажности приведет к повреждению деталей, в результате чего сократится срок эксплуатации устройства. (Рекомендуемая температура: Макс. 35 °C) Убедитесь в том, что никакое охлаждающее устройство или нагревательное устройство не будет направлять воздух непосредственно на места установки. Относительно положения трансфокации при включении питания При включении питания устройства трансфокация, фокус и диафрагма возвращаются в положения, в которых они находились непосредственно перед отключением питания. (Это происходит с фокусом и диафрагмой, если они были установлены вручную.) Однако это положение может быть не восстановлено, если, например, кабель электропитания был отсоединен во время работы. Стойкость изображения на цветовых фильтрах МОП-датчика Если части МОП-датчика постоянно подвержены воздействию света прожектора или другого источника яркого света, цветовые фильтры внутри МОП-датчика будут повреждены, а соответствующие части изображения будут обесцвечены. Обесцвечивание может быть заметно при изменении направления неподвижного видеонаблюдения. Не направляйте камеру на источники сильного света. Если части МОП-датчика подвержены воздействию света прожектора или другого сильного света, может появиться блюминг (феномен, при котором края источников сильного света становятся размытыми). Диапазон рабочих окружающих температур Избегайте использовать устройство в холодных местах, где температура опускается ниже 0 °C, или в жарких местах, где температура повышается выше +40 °C, так как такие температуры ухудшают качество изображения и отрицательно влияют на внутренние части. Яркий объект О стандарте интерфейса HDMI Данное устройство было сертифицировано для использования со стандартом HDMI, но в редких случаях изображения могут не отображаться в зависимости от устройства HDMI, подключенного к устройству. Блюминг Цветовоспроизведение МОП-датчиков В зависимости от цветовых оттенков объектов может ухудшиться цветовоспроизведение: Это нормально и не указывает на какуюлибо проблему. Перед подключением или отключением кабелей отключите электропитание. Перед подключением или отключением кабелей обязательно убедитесь, что электропитание отключено. Что случается с объектами высокой яркости При наведении в объектив чрезвычайно яркого источника света могут появиться блики. В таком случае необходимо изменить угол или использовать какой-либо другой способ устранения. При использовании автоматических функций pp При выборе, например, значения “FullAuto” в качестве установки для пункта Scene в меню камеры, будут включены все автоматические установки, а для некоторых пунктов ручное управление станет невозможным. pp При использовании функции ATW (автоматическое слежение за балансом белого) в условиях флуоресцентного освещения баланс белого может изменяться. pp В некоторых ситуациях может быть трудно выполнить фокусировку при автоматической установке. В подобных случаях выбирайте ручную установку и выполняйте фокусировку вручную. pp Соответствующая яркость может быть не получена при съемке ярких объектов с помощью автоматических установок усиления и диафрагмы. В подобных случаях установите ручную скорость затвора и выполните регулировку. 9 (R) Меры предосторожности во время использования Обращайтесь с устройством осторожно. Не бросайте аппарат и не подвергайте его сильным ударам или вибрации. Такие действия могут привести к неисправности устройства. Когда устройство не используется Отключите питание устройства, когда оно не используется. Если дальнейшее использование устройства больше не предполагается, не оставляйте его в случайных местах, а обязательно демонтируйте его надлежащим образом. Не прикасайтесь к деталям оптической системы. Детали оптической системы являются основным компонентом камеры. Ни при каких условиях к ним нельзя прикасаться. В маловероятном случае их загрязнения удалите грязь с помощью вентилятора камеры, или осторожно протрите их чистящей салфеткой для объектива. Следите за тем, чтобы посторонние предметы не прикасались к вращающимся деталям. В противном случае, могут возникнуть неисправности. Не допускайте попадания на устройство воды. Избегайте каких-либо прямых контактов устройства с водой. В противном случае могут возникнуть неисправности. Техническое обслуживание Перед выполнением технического обслуживания выключите питание устройства. В противном случае такие действия могут привести к получению травмы. Протирайте поверхности мягкой сухой тканью. Не допускайте контакта устройства с бензином, растворителями для краски и другими летучими веществами, а также не используйте такие вещества. В противном случае корпус может быть обесцвечен. РУССКИЙ Не поворачивайте головку камеры рукой. Поворот головки камеры рукой может привести к неисправности устройства. Используйте устройство в условиях эксплуатации с минимальной влажностью и запыленностью. Избегайте использовать устройство в условиях эксплуатации с высокой концентрацией влаги и пыли, так как в таких условиях могут повредиться внутренние части. Утилизация устройства Когда устройство достигнет конца своего срока службы и будет утилизироваться, обратитесь к квалифицированному исполнителю для обеспечения надлежащей утилизации устройства с целью защиты окружающей среды. 10 (R) Относительно пульта дистанционного управления (дополнительный аксессуар) Управлять устройством можно дистанционно с помощью беспроводного пульта дистанционного управления (номер модели: AW-RM50G), который продается отдельно. Управлять устройством непосредственно с помощью пульта дистанционного управления для системы HD видео конференц-связи невозможно. Ознакомьтесь с приведенными ниже пунктами, прежде чем использовать беспроводной пульт дистанционного управления. Проконсультируйтесь с дилером по поводу приобретения пульта дистанционного управления. pp Выполняйте операции пультом дистанционного управления из положения менее 6 m от устройства. pp Пульт дистанционного управления может не работать, будучи направленным к устройству под определенными углами. Из места, с которого видна светочувствительная область сигнала пульта дистанционного управления (в дальнейшем “светочувствительная область”), направьте окно передачи сигнала пульта дистанционного управления на светочувствительную область и выполняйте операции кнопками. Управление устройством может быть затруднено, если использовать пульт дистанционного управления позади устройства. pp Если устройство установлено возле источников флуоресцентного освещения, плазменных мониторов или других подобных изделий, или же оно подвергается воздействию солнечного света, влияние света может сделать невозможным управление устройством с помощью пульта дистанционного управления. Перед установкой и использованием обязательно выполните приведенные ниже пункты. • Выполните действия пунктов для обеспечения того, чтобы на светочувствительную область не попадал солнечный свет или свет от источников флуоресцентного освещения, плазменных мониторов или других подобных изделий. • Установите устройство вдали от источников флуоресцентного света, плазменных мониторов и других подобных изделий. pp Даже после того, как батарейки извлечены из пульта дистанционного управления, в течение примерно 10 минут выбранная операция для выполнения (кнопка [CAM1], [CAM2], [CAM3] или [CAM4], нажатая последней) будет оставаться сохраненной в памяти. Однако, если пройдет более длительный период времени, выбор будет переустановлен на режим, соответствующий нажатию кнопки [CAM1]. 11 (R) Компоненты и их функции pБлок камеры 1 Светочувствительная область сигнала пульта дистанционного управления Светочувствительные датчики расположены в двух местах спереди на подставке камеры. 2 Индикаторная лампа состояния Загорается следующим образом в зависимости от состояния устройства. Оранжевый: При установленном режиме ожидания Зеленый: При включенном питании Красный: При появлении в устройстве проблемы Зеленый с двукратным миганием: При приеме сигнала, совпадающего с идентификатором пульта дистанционного управления, от беспроводного пульта дистанционного управления (дополнительный аксессуар) при включенном питании Оранжевый с двукратным миганием: При приеме сигнала, не совпадающего с идентификатором пульта дистанционного управления, от беспроводного пульта дистанционного управления (дополнительный аксессуар) при включенном питании 3 Головка камеры Вращается в горизонтальном направлении. 4 Блок линз <Задняя панель> Вращается в направлении вверх и вниз. 5 Переключатели IR ID [IRID] [CAM1] [CAM2] [CAM3] [CAM4] <Нижняя панель> 6 Разъем HDMI [HDMI] Это выходной разъем видео HDMI. 7 Монтажное отверстие для троса защиты от кражи Используйте данное отверстие для крепления троса. 8 Сервисный разъем Данный разъем используется только при выполнении сервисного обслуживания. 9 Разъем DC IN [12V IN ] Подключите к данному разъему адаптер постоянного тока, прилагаемый к устройству, для подачи на устройство напряжения 12 V переменного тока. 12 (R) РУССКИЙ Используются для выбора идентификатора беспроводного пульта дистанционного управления (дополнительный аксессуар). Установки переключателя IR ID от “CAM1” до “CAM4” соответствуют кнопкам от [CAM1] до [CAM4] на беспроводном пульте дистанционного управления. Компоненты и их функции : Резьбовое отверстие (резьба: 1/4-20UNC) для монтажа камеры Используйте данное отверстие при установке камеры на штатив и т.п. Служебные переключатели SW1 SW2 SW3 SW4 ON OFF Камера используется, когда все переключатели установлены в положение OFF. 13 (R) Компоненты и их функции 3 Кнопка MENU pПульт дистанционного управления (Дополнительный аксессуар) Каждый раз при нажатии этой кнопки в течение как минимум 2 секунд происходит переключение режима работы между отображением меню устройства и выходом из меню. При быстром нажатии (в течение менее 2 секунд) во время отображения меню происходит отмена изменения установки. 4 Кнопки CAM1 - CAM4 Используются для выбора устройства для управления. Как только выбрана кнопка, можно управлять устройством, соответствующим выбранной кнопке. 5 Кнопка SET При нажатии этой кнопки, когда в меню камеры для параметра “Scene” выбрана одна из установок от “Manual1” до “Manual3”, а во время регулировки баланса белого выбрана память AWB A или AWB B, происходит автоматическая регулировка баланса белого и его регистрация в выбранной памяти. 6 Кнопка MODE Используется для расширения функций в будущем. Она не используется в настоящее время. 7 Кнопки GAIN [OFF] [LOW] [HI] [AUTO] Используются для выбора усиления. Увеличение усиления может быть установлено за три шага с использованием кнопок [OFF], [LOW] и [HI]. Кнопке [LOW] соответствует значение 9 dB, а кнопке [HI] – 18 dB. При нажатии кнопки [AUTO] активируется функция автоматической регулировки усиления, и усиление регулируется автоматически в зависимости от количества света. Максимальное усиление функции автоматической регулировки усиления может быть установлено с помощью меню. 8 Кнопки вызова предустановленных шаблонов памяти от [1] до [12] Используются для вызова информации по направлениям устройства и другим установкам, сохраненным в предустановленных шаблонах памяти устройства от №1 до №12, и воспроизведения этих установок. 1 Кнопка ON/STANDBY РУССКИЙ Каждый раз при нажатии этой кнопки в течение как минимум 2 секунд происходит переключение режима работы между включением питания устройства и установкой режима ожидания. Примечания pp При переключении управления в режим ожидания: Текущее положение поворота-наклона сохраняется в памяти (в качестве предустановленного шаблона POWER ON), при этом камера перемещается таким образом, чтобы она была направлена назад. pp При переключении управления в режим POWER ON: Камера перемещается в положение, которое было сохранено в камере (в качестве предустановленного шаблона POWER ON) при переключении управления в режим STANDBY. 2 Окно передачи сигнала 14 (R) Компоненты и их функции Кнопка A/FOCUS 9 Кнопка PRESET/LIMIT Используется при автоматической регулировке фокуса объектива. Используется для сохранения установок в предустановленных шаблонах памяти. При нажатии кнопки вызова предустановленного шаблона памяти одновременно с удерживанием нажатой кнопка PRESET/LIMIT информация о направлении устройства в настоящий момент времени и другие установки сохраняются в кнопке вызова. Кнопки вызова предустановленных шаблонов памяти от [1] до [12] соответствуют предустановленным шаблонам памяти устройства от №1 до №12. Кнопка M/FOCUS Используется при ручной регулировке фокуса объектива. Кнопки FOCUS ([F] и [N]) используются для выполнения фактической регулировки. Кнопки OPT [ON] [OFF] Используются для расширения функций в будущем. Они не используются в настоящее время. : Кнопки наклонно-поворотного устройства и кнопки управления меню [] [] [] [] [] Кнопка HOME При нажатии в течение как минимум 2 секунд направление устройства (поворот или наклон) вернется в исходное положение. (1) Используются для изменения направления устройства. Устройство наклоняется в направлении вверх/вниз с помощью кнопок [] и [] поворачивается в направлении влево/вправо с помощью кнопок [] и []. Кнопка [] не работает во время наклона и поворота. При нажатии кнопок [] или [] и [] или [] одновременно устройство будет перемещаться по диагонали. Кнопки ZOOM [T] [W] Используются для регулировки трансфокации объектива. Трансфокация регулируется в широкоугольном режиме с помощью кнопки [W] и в режиме телефото с помощью кнопки [T]. (2) Кнопки используются для управления меню, когда устройство отображает меню. Воспользуйтесь кнопками [], [], [] и [] для выбора пунктов меню. Если выбранный пункт имеет подменю, подменю будет отображено при нажатии кнопки []. При наведении курсора на определенный пункт и нажатии кнопки [] в меню установок на нижнем уровне иерархии установка для выбранного пункта начнет мигать. При нажатии кнопки [], после того как установка была изменена с помощью кнопок [], [], [] и [], установка перестанет мигать, а новая установка будет введена. В обычном меню новая установка отображается сразу же после ее изменения, если изменение было произведено через установку, которая на тот момент мигала, но есть некоторые меню (Scene, Format и Initialize), в которых она отображается только после нажатия кнопки [], прекращения мигания и ввода новой установки. При быстром нажатии кнопки MENU (в течение менее 2 секунд), пока установка продолжает мигать, изменение будет отменено, и будет восстановлена установка, выбранная до изменения. Кнопка FAST Используется для изменения скорости перемещения, с которой выполняются операции поворота, наклона, трансфокации и фокусировки, в сторону увеличения скорости. Примечание pp Если вызваны установки предустановленного шаблона памяти, рабочую скорость поворота и наклона можно изменять с помощью пункта Preset Speed в меню камеры. Кнопка SLOW Используется для изменения скорости перемещения, с которой выполняются операции поворота, наклона, трансфокации и фокусировки, в сторону уменьшения скорости. Кнопка A/IRIS Задает установку автоматической регулировки диафрагмы объектива в соответствии с количеством света. Кнопка M/IRIS Задает установку ручной регулировки диафрагмы объектива. Кнопки IRIS + и IRIS – используются при выполнении фактической регулировки. Кнопки FOCUS [F] [N] Используются для регулировки фокуса объектива вручную, когда для фокуса объектива установлена ручная установка. Фокус регулируется на дальнем расстоянии с помощью кнопки [F] и на ближнем расстоянии с помощью кнопки [N]. Кнопка IRIS + Используется для регулировки диафрагмы объектива в направлении открывания. Кнопка IRIS – Используется для регулировки диафрагмы объектива в направлении закрывания. 15 (R) Установка идентификаторов пульта дистанционного управления Беспроводной пульт дистанционного управления (дополнительный аксессуар) позволяет осуществлять управление до четырех устройств. Идентификаторы используются для установки того, какие устройства будут выбираться при нажатии кнопок [CAM1], [CAM 2], [CAM3] и [CAM4] на пульте дистанционного управления. pp При использовании нескольких устройств установите разный идентификатор пульта дистанционного управления для каждого устройства. pp При использовании одного устройства установите значение идентификатор пульта дистанционного управления “CAM1”, если установку не нужно изменять. Процедура установки Используйте переключатель IR ID на задней панели устройства для выбора значения “CAM1”, “CAM2”, “CAM3” или “CAM4” в качестве идентификатора пульта дистанционного управления. (См. стр. 12) Установки переключателя IR ID от “CAM1” до “CAM4” соответствуют кнопкам от [CAM1] до [CAM4] на беспроводном пульте дистанционного управления. (Заводской установкой по умолчанию является “CAM1”.) Переключатели IR ID РУССКИЙ Кнопки [CAM1] - [CAM4] 16 (R) Установка 1 Подсоедините кабели к разъемам на задней панели. Кабель адаптера переменного тока Кабель выходного видеосигнала pПри установке устройства на столе Расположите устройство на плоской поверхности. Примечания pp Устройство необходимо устанавливать в устойчивом месте, которое не будет подвергаться вибрационному воздействию. Если устройство установить в месте, подвергаемом вибрационному воздействию, это приведет к дрожанию изображений, выполняемых устройством. pp Примите меры по предотвращению падения устройства или повреждения каким-либо другим путем. pp При переносе устройства не держите его за головку. pp Не беритесь за головку камеры и не вращайте ее. Это может привести к возникновению неисправностей. pp Не тяните за подсоединенные кабели. Такие действия могут привести к падению устройства и/или травме. Убедитесь в том, что устройство не упадет. Правильно OK неПравильно NG 17 (R) Установка pПри установке устройства на штатив Используйте высокоустойчивый штатив, способный выдержать вес установленной на нем камеры. Присоедините штатив к резьбовому отверстию для установки камеры на нижней панели камеры. Расположите штатив на абсолютно плоской и ровной поверхности. Затяните винт вручную, чтобы надежно установить штатив. Не затягивайте винт путем вращения корпуса камеры. Это может привести к возникновению неисправностей. Используйте винт для установки штатива, который соответствует приведенному ниже стандарту. Винт для установки штатива (1/4-20UNC) От 4,5 mm до 6 mm Примечания Не устанавливайте устройство в местах, где мимо него постоянно будут ходить люди. При использовании устройства, установленного на штатив, не размещайте штатив высоко над уровнем пола. Надежно установите устройство, чтобы не было расшатывания. Расшатывание может привести к падению устройства и/или травмам. Если устройство будет использоваться в течение длительного периода времени, примите меры по предотвращению опрокидывания или переворачивания устройства, а также по предотвращению его падения. После использования устройства незамедлительно восстановите место установки до первоначального состояния. РУССКИЙ pp pp pp pp 18 (R) Соединения pПодключение к системе HD видео конференц-связи Камера высокого разрешения для конференц-связи GP-VD150E Сигнал HDMI Cиcтема HD видео конференц-связи KX-VC300, KX-VC600 Пульт дистанционного управления (дополнительный аксессуар) AW-RM50G pp Для получения описаний операций поворота, наклона, трансфокации, выполнения предварительных установок и других операций камеры с помощью системы HD видео конференц-связи обратитесь к инструкции по эксплуатации поддерживаемого устройства. 19 (R) Поиск и устранение неисправностей qpЭксплуатация Отсутствует электропитание Не выполняются операции (общие для пульта дистанционного управления, cиcтема HD видео конференц-связи) Не выполняются операции с помощью пульта дистанционного управления Причина и меры по устранению Страницы для справок pp Надежно ли подключен адаптер переменного тока к розетке переменного тока? ––– pp Надежно ли подключена штепсельная вилка адаптера переменного тока? ––– pp При управлении устройством с помощью пульта дистанционного управления Обратитесь также к пункту “Не выполняются операции с помощью пульта дистанционного управления”. ––– pp Электропитание включено? Если индикаторная лампа состояния устройства выключена или загорелась оранжевым цветом, это означает, что электропитание на устройства не подается. <Операции и установки> pp Правильно ли выбрано управляемое устройство? <Операции и установки> pp Разрядились ли батарейки пульта дистанционного управления или при установке была перепутана полярность батареек? Если индикаторная лампа состояния не мигает даже если операции пультом дистанционного управления выполняются вблизи светочувствительной области сигнала пульта дистанционного управления, это означает, что батарейки разрядились. Замените батарейки. ––– pp Имеется ли возле устройства источник флуоресцентного освещения или плазменный монитор, и если да, не попадает ли это освещение на светочувствительную область сигнала пульта дистанционного управления? стр. 11 РУССКИЙ Симптом 20 (R) Поиск и устранение неисправностей qpВидео Симптом Изображения не отображаются или искажены Отображается экран меню Причина и меры по устранению Страницы для справок pp Надлежащим ли образом выполнено подключение данного устройства к другим устройствам? стр. 19 pp Если система сконфигурирована таким образом, что изображение также переключается при выборе устройства для управления, выбрано ли правильное устройство? <Операции и установки> pp Правильно ли выбрана установка видеосигнала? <Операции и установки> pp Выйдите из меню. <Операции и установки> pp В зависимости от используемого монитора HDMI может наблюдаться один или несколько признаков неисправности, описанных ниже. Плохо видны экраны меню Не выполняется автоматическая фокусировка Объект не попадает в фокус во время трансфокации, если для фокусировки использованы ручные установки По четырем углам изображений появляются кольцеобразные отражения Наблюдается искажение цвета изображений • Разрешение символов на экранах меню изменяется в зависимости от фонового изображения. • В зависимости от заданной для монитора установки выделения контуров, перед черными тенями меню появляются белые линии. • В зависимости от заданной для монитора установки выделения контуров, фоновые цвета могут накладываться на белые части меню. ––– pp Установлен ли ручной фокус? Автоматическая фокусировка инициируется сразу после установки автоматического фокуса. <Операции и установки> pp В некоторых ситуациях может быть трудно выполнить фокусировку при автоматической установке. В подобных случаях выбирайте ручную установку и выполняйте фокусировку вручную. <Операции и установки> pp Не был ли фокус установлен в положение Tele? Сначала отрегулируйте фокус в положение Tele, где точность фокусировки выше, а затем продолжайте выполнять трансфокацию. ––– pp В некоторых условиях эксплуатации сфокусировать объекты может быть сложно. В таких случаях используйте фокусировку с автоматическими установками. <Операции и установки> pp Такое явление вызвано отражением света между объективом и крышкой перед объективом. Необходимо найти оптимальное положение освещения по отношению к положению устройства, а также устройство необходимо устанавливать и использовать в месте, где отражения не будут появляться. ––– pp Активируйте функцию ATW (Автоматическое слежение за балансом белого). <Операции и установки> pp В некоторых ситуациях соответствующие цвета могут не воспроизводиться с помощью функции ATW. В подобных случаях продолжите регулировку баланса белого. <Операции и установки> 21 (R) Поиск и устранение неисправностей Симптом Изображения слишком светлые или слишком темные Причина и меры по устранению pp Выберите автоматическую установку диафрагмы либо выберите ручную установку и отрегулируйте диафрагму вручную. Страницы для справок <Операции и установки> pp Изображения могут быть темными при слишком длинных кабелях видеосигналов, так как это будет вызывать ослабление сигнала. ––– Объекты воспроизводятся искаженными pp Если объект неожиданно промелькнул перед камерой, он может быть слегка искажен, поскольку в данной камере используется МОП-датчик для изображений. Это нормально и не указывает на какую-либо неисправность. ––– При срабатывании вспышки во время съемки только верхняя или нижняя часть экрана становится светлее pp При использовании МОП-датчика для изображений время съемки слегка отличается в верхнем левом и нижнем правом углах экрана. Это обозначает, что при срабатывании вспышки нижняя часть экрана становится светлее в соответствующей области, а верхняя часть экрана становится светлее в следующей области. Это нормально и не указывает на какую-либо неисправность. ––– Яркость изменяется циклично или цвета изменяются, а на экране видны движущиеся горизонтальные полосы pp Такие феномены (мерцание) могут происходить при освещении, создаваемом флуоресцентными лампами, ртутными ламами или другими видами газоразрядных трубок. Это нормально и не указывает на какую-либо неисправность. В таких случаях рекомендуется установить для скорости электронного затвора значение 1/120 в регионах с частотой линий электропередач 60 Hz или значение OFF в регионах с частотой линий электропередач 50 Hz. При съемке тонких линий или цикличных шаблонов видно мерцание или к ним добавляется окраска pp Этот феномен встречается, поскольку пиксели упорядочены систематически на каждом датчике изображений. Это заметно, когда пространственная частота объекта и плотность пикселей сближаются, поэтому необходимо изменить угол камеры или предпринять другую подобную меру. <Операции и установки> РУССКИЙ ––– 22 (R) Внешний вид Единица измерения: mm R7 150 75 73 23 (R) 1,5 47,7 115,9 175,5 4,9 Технические характеристики Напряжение питания: Постоянное напряжение 12 V 10 % (Прилагаемый адаптер переменного тока) Потребляемый ток: 1,0 A Данный знак обозначает информацию, относящуюся к технике безопасности. p Общие p Вход Рабочая окружающая температура: От 0 °C до +40 °C Входные разъема: DC 12 V IN Температура хранения: От –20 °C до +50 °C Допустимые диапазоны влажности: От 20 % до 90 % (конденсация недопустима) p Выход Вес: Выходной видеосигнал: HDMI (Разъем HDMI) Приблиз. 1,2 kg Размеры (ширина глубина высота): 150 148 177 mm Серебряное покрытие РУССКИЙ Внешняя отделка: 24 (R) Технические характеристики p ФУНКЦИИ И ПРОИЗВОДИТЕЛЬНОСТЬ [Наклонно-поворотное устройство] Скорость выполнения операции поворота/наклона: Макс. 90°/s или более [Блок камеры] Датчики изображения: Full-HD МОП типа 1/3 Объектив: Моторизованная 12 трансфокация, f/1.6 - 2.0 (f=от 4,7 до 56,4 mm; эквивалент 35 mm: от 36,9 mm до 442,8 mm) Фокус: Переключение между автоматическим и ручным Фокусное расстояние: Весь диапазона трансфокации: 1,5 m Положение Wide: 30 сm Диапазон угла поворота: ±100° Диапазон угла наклона: ±30° p В зависимости от положения поворота или наклона камера может отображаться на изображении. Бесшумность: NC35 (обычная скорость), NC40 (при выполнении предварительной установки) Оптическая система цветоделения: Система фильтрования цветов на чипе Минимальная освещенность: 3 lx (50 IRE, F1.6, +36 dB) p Адаптер переменного тока Горизонтальное разрешение: Обычно 850 телевизионных строк (Центральная область) Выбор усиления: Авто, 0 dB, 3 dB, 6 dB, 9 dB, 12 dB, 15 dB, 18 dB Вход: От 220 V до 240 V переменного тока, 1,5 A, 50 Hz Выход: Постоянное напряжение 12 V, 2,5 A, 30 W Режим записи в память: 0 dB, 6 dB, 12 dB, 18 dB Скорость электронного затвора: Step: 1/120, 1/250, 1/500, 1/1000, 1/2000, 1/4000, 1/10000 Synchro scan: От 50,20 Hz до 538,51 Hz Гамма: Off, Normal (Low, Mid, High), Cinema Баланс белого: AWB A, AWB B, ATW p Дополнительные аксессуары pp Пульт дистанционного управления AW-RM50G (Изготовлена «Panasonic») (Сухая батарейка размера “R6” или “LR6” 2, приобретается отдельно) Диапазон уровней цветности: 7 уровней цветности Сюжетные файлы: FullAuto, Manual1, Manual2, Manual3 Выходной формат: HD 1080: 50i, SD 576: 50p Указанные вес и размеры являются приблизительными. Технические характеристики могут быть изменены без предварительного уведомления. 25 (R) РУССКИЙ Памятка 26 (R) © Panasonic System Networks Co., Ltd. 2012 F0912-0 PGQP1392ZA