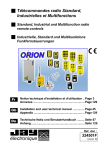
1
ISIS FR Système de transmission d’informations sans fil Notice d’installation et d’utilisation ................................ page 3 Annexes...................................................................... page 42 EN Wireless data transmission system Installation and user technical manual ....................... page 53 Appendix..................................................................... page 92 DE Kabelloses Datenübertragungssystem Technische Notiz und Benutzerhandbuch ................ Seite 103 Anhang ..................................................................... Seite 142 Ref.doc. : 331260D revision02 -2- ISIS - 331260D revision02 Notice technique d’installation et d’utilisation ISIS Système de transmission d’informations sans fil -Report d’états logiques- ISIS - 331260D revision02 DE EN FR -3- Table des matières 1 - Règles d’utilisation et précautions générales .......p. 6 2 - Présentation de la Série ISIS ...................................p. 7 3 - Identification des produits à la livraison ................p. 8 3.1- Recommandations au déballage ................................................... p. 8 3.2- Identification des produits à la livraison ......................................... p. 8 3.2.13.2.23.2.33.2.4- Emetteur ISE - 8 entrées logiques .................................................p. 8 Récepteur ISRS - 4 sorties relais...................................................p. 9 Récepteur ISRA - 8 sorties relais ..................................................p. 9 Transmetteur IST - 8 entrées TOR et 8 sorties relais ..................p. 10 3.3- Configuration des produits à la livraison...................................... p. 11 4 - Principe de fonctionnement ..................................p. 12 4.14.24.34.44.54.6- Généralités ....................................................................................p. 12 A quoi sert un canal d’émission radio et un code d’identité ?.....p. 14 Modes d’émission radio de l’émetteur/transmetteur ...................p. 15 Puissance d’émission radio de l’émetteur/transmetteur .............p. 16 Relais RM «Qualité radio» ...........................................................p. 17 Synchronisation des transmetteurs IST.......................................p. 17 5 - Mise en route rapide ...............................................p. 18 5.15.25.35.4- Préambule .....................................................................................p. 18 Raccordement du récepteur/module récepteur .........................p. 18 Raccordement de l’émetteur/module émetteur ..........................p. 19 Test des produits ...........................................................................p. 19 6 - Modification de la configuration usine .................p. 20 6.1- Préambule .....................................................................................p. 20 6.2- Changement de configuration du produit ....................................p. 22 6.2.1- Cas particulier du transmetteur IST ..............................................p. 24 6.3- Visualisation du canal radio récepteur/module récepteur ..........p. 25 6.4- Visualisation du code d’identité du récepteur/module récepteur p. 26 7 - Installation ...............................................................p. 27 7.1- Généralités sur la mise en place des produits ............................p. 27 7.1.1- Déport antenne .............................................................................p. 28 7.2- Condition d’installation des produits.............................................p. 29 7.2.1- Condition à respecter entre 2 ensembles ISIS de même puissance (1 ou 10mw) ......................................................................................p. 29 -4- FR EN DE ISIS - 331260D revision02 7.2.2- Condition à respecter entre ensemble ISIS 1mW et une radiocommande JAY Electronique Série UC, UD ou UR .........................................p. 31 7.3- Câblage des produits ....................................................................p. 33 7.3.17.3.27.3.37.3.47.3.5- Recommandations sur le câblage ................................................p. 33 Raccordement sur les borniers à ressort ......................................p. 33 Câblage de l’alimentation des produits .........................................p. 34 Raccordement des entrées sur l’émetteur/module émetteur ........p. 35 Raccordement des sorties sur les récepteurs/module récepteur..p. 36 7.4- Protection des sorties récepteur et antiparasitage......................p. 37 7.5- Courant minimum et maximum des sorties relais.......................p. 37 8 - Diagnostic et solution en cas de problème..........p. 38 8.1- Emetteur ISE et module émetteur du transmetteur IST .............p. 38 8.2- Récepteurs ISR et module récepteur du transmetteur IST ........p. 39 9 - Entretien et maintenance .......................................p. 40 10 - Garantie ...................................................................p. 41 11 - Annexes ...................................................................p. 42 11.1- Caractéristiques radio électriques................................................p. 42 11.2- Caractéristiques techniques de l’émetteur ISE et du module émetteur du transmetteur IST ......................................................................p. 42 11.3- Caractéristiques techniques des récepteurs ISR et du module récepteur du transmetteur IST .....................................................p. 44 11.3.1- Caractéristiques des relais récepteurs ISR et module récepteur du transmetteur IST ...........................................................................p. 45 11.3.2- Nombre de commutations sur différents contacteurs ...................p. 45 11.4-Caractéristiques et calibres des fusibles .......................................p. 46 11.5- Borniers de raccordement, numéros et fonctions .......................p. 47 11.6- Dimensions des produits ..............................................................p. 48 11.7- Installation du guide antenne avant utilisation.............................p. 49 11.8- Installation du kit antenne externe BNC ......................................p. 50 11.9- Configuration de vos éléments ISIS ............................................p. 51 Formulaire d’aide à l’amélioration de ce manuel .....p. 152 ISIS - 331260D revision02 DE EN FR -5- 1 - Règles d’utilisation et précautions générales • Pour une sécurité maximale d’installation et d’utilisation, il est recommandé de respecter les instructions fournies dans ce manuel. • L’alimentation doit être conforme à la norme EN60950, EN50081-1 (CEM), doit comporter le marquage CE et doit respecter les caractéristiques électriques préconisées dans cette documentation. • Entretenir le matériel et procéder à des contrôles périodiques. -6- FR EN DE ISIS - 331260D revision02 2 - Présentation de la Série ISIS Nous vous remercions de votre choix, vous venez d’acquérir le système de transmission d’informations sans fil : «Série ISIS» qui vous propose un haut niveau de fiabilité. La Série ISIS est destinée au report d’états logiques (mono ou bidirectionnel) pour des domaines d’applications variés tels que : - Equipements industriels - Infrastructure - Levage industriel - Equipements agricoles La Série ISIS intègre les exigences sécuritaires des normes applicables actuelles et en projet, et est conforme à la directive européenne : RTTE : équipements hertziens et terminaux de télécommunications (basse tension, compatibilité électromagnétique, spectre radioélectrique). Pour toutes questions liées à l’installation ou à l’utilisation de la Série ISIS, nous vous invitons à contacter notre service «Support technique client» : Lundi au vendredi Tel : +33.(0)4.76.41.44.00 Fax : +33.(0)4.76.41.44.44 Email : [email protected] ISIS - 331260D revision02 DE EN FR -7- 3 - Identification des produits à la livraison 3.1- Recommandations au déballage • Au déballage des produits, les antennes doivent être montées en suivant la procédure décrite en annexe, chapitre «Installation du guide antenne avant utilisation». • Si une modification de la configuration usine des émetteurs ISE doit être effectuée, une attention particulière doit être portée lors de l’ouverture du couvercle de l’émetteur ISE: ne pas exercer de tension sur la nappe électronique reliant la carte électronique et le couvercle. • il est fortement conseillé de modifier le code d'identité afin d’assurer l’unicité de votre installation, voir chapitre «Modification de la configuration usine». 3.2- Identification des produits à la livraison 3.2.1- Emetteur ISE - 8 entrées logiques Va Power Set i1...i8 Input 8 Input 7 Input 6 Input 5 Input 4 Input 3 Input 2 Input 1 Set Vb électronique i5 i6 i7 i8 i1 i2 i3 i4 i1...i8 Va Vb F1 Set ID ID ON 1 2 3 4 5 6 7 8 CONFIG B ON A CFG C 1 2 3 4 5 6 7 8 - DC+ A B SET Va Vb A i1 à i8 -8- 1 2 3 4 5 6 7 8 Bouton «SET» ID Dip-switch «ID» (code identité) Voyant jaune «alimentation» CFG Dip-switch «CONFIG» Voyant vert «émission radio» F1 Fusible (voir chapitre 11.4) Bornier «alimentation» B Bornier «entrées logiques» Voyants rouges «présence signal sur entrées n°1 à n°8» FR EN DE ISIS - 331260D revision02 3.2.2- Récepteur ISRS - 4 sorties relais F1 F2 RM R1 R2 R3 V1 V2 V3 R4 1 2 3 4 5 6 7 8 9 10 11 12 13 A B JP1 JP2 JP3 3.2.3- Récepteur ISRA - 8 sorties relais A 1 2 3 JP1 JP2 JP3 R8 R7 R6 R5 R4 R3 V1 V2 V3 R2 R1 RM F1 F2 4 5 6 7 8 9 10 11 12 13 14 15 16 17 18 19 20 21 B V1 V2 V3 F1 F2 Voyant vert «alimentation» Voyant rouge «programmation» Voyant vert «réception radio» Fusible (voir chapitre 11.4) Fusible (voir chapitre 11.4) ISIS - 331260D revision02 JP1 JP2 JP3 A B DE Cavalier de codage «JP1» Cavalier de codage «JP2» Cavalier de codage «JP3» Bornier «alimentation» Bornier «sorties relais» EN FR -9- 3.2.4- Transmetteur IST - 8 entrées TOR et 8 sorties relais Module émetteur Va Vb i5 i6 i7 i8 i1 i2 i3 i4 i1...i8 Set ID F1 ID ON 1 2 3 4 5 6 7 8 CONFIG B ON A CFG C 1 2 3 4 5 6 7 8 - DC+ A B A 1 2 3 JP1 JP2 JP3 R8 R7 R6 R5 R4 R3 V1 V2 V3 R2 R1 F1 F2 RM Module récepteur 1 2 3 4 5 6 7 8 4 5 6 7 8 9 10 11 12 13 14 15 16 17 18 19 20 21 B Module «émetteur 8 entrées TOR» SET Va Vb A i1 à i8 Bouton «SET» ID Dip-switch «ID» (code identité) Voyant jaune «alimentation» CFG Dip-switch «CONFIG» Voyant vert «émission radio» F1 Fusible (voir chapitre 11.4) Bornier «alimentation» B Bornier «entrées logiques» Voyants rouges «présence signal sur entrées n°1 à n°8» Module «récepteur 8 sorties relais» V1 V2 V3 F1 F2 Voyant vert «alimentation» Voyant rouge «programmation» Voyant vert «réception radio» Fusible (voir chapitre 11.4) Fusible (voir chapitre 11.4) JP1 JP2 JP3 A B Cavalier de codage «JP1» Cavalier de codage «JP2» Cavalier de codage «JP3» Bornier «alimentation» Bornier «sorties relais» IMPORTANT : Les transmetteurs doivent être synchronisés, voir chapitre «Synchronisation des transmetteurs IST» - 10 - FR EN DE ISIS - 331260D revision02 3.3- Configuration des produits à la livraison Les émetteurs, les récepteurs et les transmetteurs ISIS possèdent une configuration standard à la livraison, permettant d’être utilisés immédiatement. Les pré-réglages sont les suivants : Code d’identité : ............. 11111111 Canal radio : ................... 17 (434,7 MHz) Mode d’émission : .......... émission permanente Puissance d’émission : . 10mW Affectation des entrées sur émetteur et relais de sortie sur récepteur (affectation figée, ne peut pas être modifiée) : Entrées émetteur Relais de sortie commandés sur récepteur ISE / IST ISRS ISRA / IST 1 R1 R1 2 R2 R2 3 R3 R3 4 R4 R4 5 / R5 6 / R6 7 / R7 8 / R8 Position des curseurs des dip-switchs «ID» et «CONFIG» à l’intérieur de l’émetteur ou du module émetteur : ID CONFIG ON ON 1 2 3 4 5 6 7 8 1 2 3 4 5 6 7 8 = position du curseur Note : Dans le cas d’un remplacement d’un émetteur ou d’un récepteur ou d’un transmetteur seul, veuillez vous reportez au chapitre «modification de la configuration usine» pour reconfigurer le produit de remplacement. ISIS - 331260D revision02 DE EN FR - 11 - 4 - Principe de fonctionnement 4.1- Généralités Le système de transmission d’informations ISIS permet de transmettre par liaison radio 8 états logiques d’un point à un autre d’une installation. Liaison monodirectionnelle : L’émetteur ISE transmet les états logiques de ses entrées au récepteur ISRA (8 sorties) ou ISRS (4 sorties) qui les décode puis les restitue sur ses sorties relais. Liaison bidirectionnelle : Le transmetteur IST regroupe en un seul boîtier, un module émetteur et un module récepteur. Le module émetteur du 1er transmetteur IST envoie les états logiques de ses entrées au module récepteur du 2eme transmetteur IST associé et inversement. La transmission des états logiques s’effectue sur un canal radio avec un identifiant codé (code d’identité). IMPORTANT : Il est fortement conseillé de paramétrer l’émetteur et le récepteur ou les deux transmetteurs* sur une fréquence de communication non utilisée et un code d’identité personnalisé afin d’éviter toutes interférences avec d’autres systèmes radio installés à proximité. Dans la mesure où plusieurs systèmes radio cohabitent sur un même site, il convient de prendre des précautions d’installation. Pour cela, veuillez respecter les règles décrites dans le paragraphe « Condition d’installation des produits ». *= chaque couple «Module Emetteur / Module Récepteur» devra fonctionner avec un code d’identité et sur un canal radio différent. - 12 - FR EN DE ISIS - 331260D revision02 Entrée n°X Emetteur ISE Sortie n°X Récepteur ISRS/ISRA Entrée n°X X Sortie n°X Sortie n°Y Entrée n°Y Transmetteur IST n°1 ISIS - 331260D revision02 Transmetteur IST n°2 DE EN FR - 13 - 4.2- A quoi sert un canal d’émission radio et un code d’identité ? Le canal d’émission radio permet de véhiculer un message (un état logique) sur une fréquence hertzienne. Le produit ISIS offre un choix de 18 canaux radio. Au moment de l’installation, il est important de connaître les canaux d’émission radio utilisés à proximité (rayon d’environ 100 mètres). Le code d’identité permet de coder les messages radio transmis entre un émetteur et un récepteur ISIS. Ce produit offre un choix de 256 codes d’identité (par le DIP-switch «ID»). Dans le cas d’application, où plusieurs ensembles ISIS sont amenés à cohabiter sur un même site, par mesure de sécurité, il est impératif que chaque ensemble ISIS (1) communique avec des codes d’identité différents, exemples : Emetteur A Récepteur A Emetteur A Canal radio n°1 code : 11111111 Set Canal radio n°1 code : 11111111 Emetteur B Récepteur B Canal radio n°1 code : 11111000 Emetteur B électronique Récepteur B Canal radio n°3 code : 11111111 Power Set Canal radio n°3 code : 11111111 INSTALLATION INCORRECTE Les 2 ensembles A et B ont le même code d'identité. Le code "11111111" est le code par défaut à la livraison. électronique électronique Set Canal radio n°1 code : 11111000 Input 8 Input 7 Input 6 Input 5 Input 4 Input 3 Input 2 Input 1 électronique Input 8 Input 7 Input 6 Input 5 Input 4 Input 3 Input 2 Input 1 Power électronique Power électronique Set électronique Power Input 8 Input 7 Input 6 Input 5 Input 4 Input 3 Input 2 Input 1 électronique Input 8 Input 7 Input 6 Input 5 Input 4 Input 3 Input 2 Input 1 Récepteur A Canal radio n°3 code : 10101010 Canal radio n°3 code : 10101010 INSTALLATION CORRECTE Les 2 ensembles A et B ont un code d'identité différent. Les codes sont différents de celui pré-programmé à la livraison. (1) Sauf cas d’application où plusieurs émetteurs ISIS doivent communiquer avec le même récepteur - 14 - FR EN DE ISIS - 331260D revision02 4.3- Modes d’émission transmetteur radio de l’émetteur/ L’émetteur ISE peut fonctionner suivant 2 modes d’émission radio différents : Emission intermittente ou Emission permanente (choix par le curseur n°6 du DIP switch «CONFIG» émetteur). Le module émetteur du transmetteur IST fonctionne uniquement sur le mode Emission permanente. Important : un transmetteur configuré en mode Emission intermittente ne fonctionnera pas. Le choix du mode d’émission dépendra de l’application sur laquelle le produit ISIS sera utilisé. CONFIG Emission radio intermittente : (curseur n°6 sur OFF) "1" "0" ON 1 2 3 4 5 6 7 8 = position du curseur L’émetteur ISE est en émission radio si et seulement si au moins une de ces entrées est active. Ce mode est préconisé pour des applications où plusieurs émetteurs seront associés à un seul récepteur. Dans ce cas, il faudra s’assurer que les émetteurs ISIS n’émettent pas de la radio simultanément. Rappel : un transmetteur IST configuré en mode émission intermittente ne fonctionnera pas. CONFIG Emission radio permanente : (curseur n°6 sur ON) "1" "0" ON 1 2 3 4 5 6 7 8 = position du curseur L’émetteur ISE ou le transmetteur IST est en émission radio quelque soit l’état de ses entrées. Ce mode est préconisé pour des applications où il est nécessaire de contrôler la disponibilité de la liaison radio. Ce contrôle pourra être assuré en surveillant la sortie du relais RM « Qualité radio » (voir description en pages suivantes). ISIS - 331260D revision02 DE EN FR - 15 - 4.4- Puissance d’émission radio de l’émetteur/transmetteur L’émetteur ISE peut fonctionner suivant 2 puissances d’émission radio différentes : 1 mW ou 10 mW (choix par le curseur n°7 du DIP switch «CONFIG» émetteur). Le choix de la puissance d’émission radio, dépendra de l’application dans laquelle sera utilisé le produit ISIS. Le transmetteur IST fonctionne uniquement avec une puissance d’émission de 10mW. Important : un transmetteur configuré en puissance d’émission de 1mW ne fonctionnera pas. CONFIG "1" "0" Puissance d’émission radio 1 mW : (curseur n°7 sur OFF) ON 1 2 3 4 5 6 7 8 = position du curseur Si la portée entre l’émetteur et récepteur ISIS est faible ou si le temps de réponse d’une sortie doit être rapide (inférieure à 60ms max) il sera préférable de choisir une puissance d’émission à 1 mW. Rappel : un transmetteur IST configuré en puissance d’émission de 1mW ne fonctionnera pas. CONFIG Puissance d’émission radio 10 mW : (curseur n°7 sur ON) "1" "0" ON 1 2 3 4 5 6 7 8 = position du curseur Si la portée émetteur-récepteur ou entre transmetteurs ISIS est importante, il sera préférable de choisir une puissance radio à 10 mW. Attention : le temps de réponse d’une sortie en mode 10 mW est inférieure à 500 ms max. Remarque générale : Si plusieurs systèmes radio cohabitent à proximité des uns des autres, se reporter au chapitre « condition d’installation » pour installer les produits. - 16 - FR EN DE ISIS - 331260D revision02 4.5- Relais RM «Qualité radio» Afin de contrôler l’état de la liaison radio entre l’émetteur ISE et le récepteur ISR ou entre deux transmetteurs IST, une sortie «Qualité radio» est disponible sur le récepteur ISR ou transmetteur IST (relais «RM»). Relais RM activé : ......... bonne liaison radio entre l’émetteur et le récepteur Relais RM désactivé : ... pas de liaison radio entre l’émetteur et le récepteur Note : Cette fonction n’est valable qu’en mode d’émission permanente ou en mode d’émission intermittente dès qu’une entrée est active. 4.6- Synchronisation des transmetteurs IST Lorsque l’installation comporte des transmetteurs IST, ceux-ci doivent être «synchronisés». La synchronisation est à réaliser sur un seul des 2 transmetteurs avec le curseur n°8 du DIP switch «CONFIG» du module émetteur. CONFIG - Le curseur n°8 du premier transmetteur doit être à ON (synchro active) - Le curseur n°8 du second transmetteur doit être à OFF (synchro inactive). ISIS - 331260D revision02 CONFIG ON ON 1 2 3 4 5 6 7 8 1 2 3 4 5 6 7 8 = position du curseur = position du curseur Module émetteur IST_1 Module récepteur IST_2 Module récepteur IST_1 Module émetteur IST_2 Transmetteur IST_1 Transmetteur IST_2 DE EN FR - 17 - 5 - Mise en route rapide 5.1- Préambule Ce chapitre a pour but de comprendre le fonctionnement du système ISIS par une mise en route rapide. L’entrée n°2 de l’émetteur sera utilisée pour réaliser ce test. 5.2- Raccordement du récepteur/module récepteur Le récepteur ou module récepteur doit être câblé conformément au schéma ci-dessous en respectant le branchement de l’alimentation suivant le modèle utilisé : AC ,65$A / ,67$A 1 3 2 1 3 1 2 3 2 1 2 3 +12 VDC- 24 VDC (1) 2 1 3 1 2 3 3 2 1 1 2 3 DC ,65$4 / ,67$4 24 VAC 48 VAC 1 2 3 V1 V2 V3 RM R1 R2 R3 R4 R5 R6 R7 R8 4 5 6 7 8 9 10 11 12 13 14 15 16 17 18 19 20 21 Récepteur ISRA ou module récepteur du transmetteur IST DC - V1 V2 V3 RM 1 2 3 R1 R2 R3 ,656) + 12 VDC R4 AC 24 VDC (1) 24 VAC 48 VAC 1 2 3 1 2 3 1 2 3 1 2 3 1 2 3 1 2 3 1 2 3 1 2 3 4 5 6 7 8 9 10 11 12 13 Récepteur ISRS (1) = pas de polarité à respecter - 18 - FR EN DE ISIS - 331260D revision02 5.3- Raccordement de l’émetteur/module émetteur L’émetteur doit être câblé conformément au dessin ci-dessous : Va Power Input 8 Input 7 Input 6 Input 5 Input 4 Input 3 Input 2 Input 1 Set Vb i2 i1 Va i5 i6 i7 i8 i3 i4 i2 Vb SET ID ON 1 2 3 4 5 6 7 8 CONFIG ON - DC+ A B DC 9...30Volts 1 2 3 4 5 6 7 8 C 1 2 3 4 5 6 7 8 + - 5.4- Test des produits Alimenter l’émetteur et le récepteur ou les transmetteurs. • Emetteur ISE ou modules émetteurs des transmetteurs IST : - Un auto test est effectué (les voyants i1 à i8 clignotent de façon séquentielle) - Les voyants Va (alimentation) et i2 (entrée n°2 active) doivent s’allumer, le voyant Vb (émission radio) doit clignoter. • Récepteur ISR ou modules récepteurs des transmetteurs IST : - Les relais R2 et RM doivent s’activer (voyants R2 et RM allumés). - Les voyants V1 (alimentation) et V3 (réception radio) doivent s’allumer. En cas d’anomalie, consulter le chapitre «Diagnostic et solutions en cas de problème» ISIS - 331260D revision02 DE EN FR - 19 - 6 - Modification de la configuration usine 6.1- Préambule Afin d’assurer l’unicité de l’installation ISIS et d’éviter toute perturbation involontaire d’un autre système, il est fortement recommandé de personnaliser la configuration usine (configuration à la livraison) des produits. Ce paramétrage peut s’effectuer en atelier avant installation et utilisation définitive. Important : par sécurité, il est préférable que les entrées ne soient pas actives pendant la phase de reconfiguration du produit. Emetteur ISE - Module émetteur du transmetteur IST Le code d’identité se programme au moyen du DIP-switch 8 curseurs «ID» (curseur sur la position «ON» = 1). Exemple : ID "1" "0" ON 1 2 3 4 5 6 7 8 code d’identité = 10101011 = position du curseur Les autres configurations (canal radio, mode d’émission et puissance d’émission) se programment au moyen du DIP-switch 8 curseurs «CONFIG» (curseur sur la position «ON» = 1). CONFIG "1" "0" = position du curseur ON 1 2 3 4 5 6 7 8 Canal radio (voir tableau page suivante) Mode d'émission radio (transmetteur IST = toujours à "ON") 1 (ON) = émission radio permanente 0 (OFF) = émission radio intermittente - 20 - FR EN DE Utilisé uniquement pour transmetteur IST (voir § "synchronisation des transmetteurs") 1 (ON) = Synchronisation active 0 (OFF) = Synchronisation inactive Puissance d'émission radio (transmetteur IST = toujours à "ON") 1 (ON) = 10 mw 0 (OFF) = 1 mW ISIS - 331260D revision02 Tableau de programmation du canal radio sur émetteur ou transmetteur : Remarque : Si la position des curseurs ne correspond à aucun canal radio, tous les voyants de la carte clignotent tant que les positions ne sont pas correctes Numéro Numéro de canal de canal radio radio Série Séries ISIS UC-UD-UR 01 01 05 02 09 03 13 04 17 05 21 06 25 07 29 08 33 09 37 10 41 11 45 12 49 13 53 14 57 15 61 16 / 17 / 18 Position des 5 premiers curseurs du dip-switch «CONFIG» Fréqu. (MHz) Curseur Curseur Curseur Curseur Curseur 433,100 433,200 433,300 433,400 433,500 433,600 433,700 433,800 433,900 434,000 434,100 434,200 434,300 434,400 434,500 434,600 434,700 434,740 n°1 n°2 n°3 n°4 n°5 1 0 1 0 1 0 1 0 1 0 1 0 1 0 1 0 1 0 1 0 0 1 1 0 0 1 1 0 0 1 1 0 0 1 1 0 1 0 0 0 0 1 1 1 1 0 0 0 0 1 1 1 1 0 1 0 0 0 0 0 0 0 0 1 1 1 1 1 1 1 1 0 0 1 1 1 1 1 1 1 1 1 1 1 1 1 1 1 1 0 CONFIG ON Ex : 1 2 3 4 5 6 7 8 = position du curseur Code (position des curseurs) = 11001 Canal = 5 Fréquence = 433,5 Mhz Important : Dès qu’un curseur des 2 DIP-switchs (ID ou CONFIG) a été modifié, les voyants Va et Vb de l’émetteur (ou module émetteur) clignotent alternativement et toute émission radio est arrêtée tant que la nouvelle configuration n’a pas été validée par la procédure décrite dans le paragraphe suivant. ISIS - 331260D revision02 DE EN FR - 21 - Récepteur ISR - Module récepteur du transmetteur IST La configuration du récepteur s’effectue au moyen de 3 cavaliers de codage JP1, JP2 et JP3 qu’il faudra court-circuiter ou non avant alimentation. Récepteur ISRA ou module récepteur du transmetteur IST M R1 R2 R3 R4 R5 R6 R7 R8 5 6 7 8 9 10 11 12 13 14 15 16 17 18 19 20 21 JP1 JP2 JP3 Récepteur ISRS RM R1 R2 R3 R4 6.2- Changement de configuration du produit Suivre la procédure en page suivante. Précaution à prendre : Si vous ne modifiez pas le code d’identité, vous pouvez passer directement à l’étape n°2, dans ce cas, il n’est pas nécessaire de placer les cavaliers JP1 et JP3 en court circuit sur le récepteur. IMPORTANT : Nous attirons votre attention que cette procédure peut associer involontairement un autre récepteur ISIS utilisant le même code d’identité. Veuillez donc vérifier préalablement le code d’identité utilisé sur les autres ensembles ISIS Il est possible de refaire une association émetteur-récepteur avec un code d’identité différent, sans pour autant recouper l’alimentation du récepteur. Pour cela, recommencer la procédure à partir de l’étape n°2. - 22 - FR EN DE ISIS - 331260D revision02 ISIS - 331260D revision02 DE EN FR - 23 - Sur l'émetteur, sélectionner la nouvelle configuration du produit à l’aide des 2 DIP switchs ID et CONFIG (hors ou sous tension) puis appuyer sur le bouton SET 1 2 Vb Vb i1 SET V1 à i8 V2 récepteur (1 fois) (1 fois) puis émetteur (1 fois) (1 fois) Va Va émetteur JP1 JP2 JP3 récepteur Va V2 V3 récepteur Vb émetteur V3 Positions cavaliers de codage récepteur et états des voyants récepteur-émetteur = Voyant allumé fixe JP1 JP2 JP3 récepteur = Voyant clignotant Couper l’alimentation du récepteur et retirer si besoin les cavaliers JP1 et JP3 = Voyant clignotant alternativement Si l’association émetteur - récepteur n’a pas fonctionné (par ex, le récepteur était hors tension au moment de l’association) : Appuyer et maintenir le bouton SET pendant plus de 3 secondes afin de recaler l’ensemble ISIS sur le même canal radio. Au bout de 3 secondes, la séquence d'association commence et les 2 voyants Va et Vb de l’émetteur clignoteront jusqu'à l'arrêt de cette phase (durée : une trentaine de secondes). (le changement de configuration est transmis au récepteur) = Voyant éteint 5 4 3 Sur le récepteur, placer les cavaliers JP1 et JP3 Mettre ensuite le récepteur sous tension Relâcher le bouton SET Actions à réaliser Etape 6.2.1- Cas particulier du transmetteur IST Dans le cas d’un changement de configuration de 2 transmetteurs IST, la procédure décrite en page précédente devra être appliquée à chaque couple «Module emetteur / Module récepteur». Dans l’exemple schématisé ci-dessous, appliquer procédure de changement de configuration au couple : ● Module émetteur IST_1 / Module récepteur IST_2 puis: ● Module émetteur IST_2 / Module récepteur IST_1 la IMPORTANT : • la synchronisation doit être active sur l’un des deux transmetteurs (voir chapitre «Synchronisation des transmetteurs IST»). • Chaque couple «Module Emetteur / Module Récepteur» doit fonctionner avec un code d’identité et une fréquence radio différente. Module émetteur IST_1 Module récepteur IST_1 Frequence radio X Code identité X Frequence radio Y Code identité Y Transmetteur IST_1 - 24 - FR EN DE Module récepteur IST_2 Module émetteur IST_2 Transmetteur IST_2 ISIS - 331260D revision02 6.3- Visualisation du canal radio récepteur/module récepteur Cette procédure permet de connaître le numéro de canal radio utilisé par le récepteur ou le module récepteur. 1 2 3 Récepteur ISRA ou Module récepteur transmetteur IST V1 V2 V3 JP1 JP2 JP3 V1 V2 V3 RM R1 R2 R3 R4 R5 R6 R7 JP1 JP2 JP3 R8 4 5 6 7 8 9 10 11 12 13 14 15 16 17 18 19 20 21 V1 V2 V3 V1 V2 V3 JP1 JP2 JP3 Récepteur ISRS RM 1 2 3 Etape R1 R2 R3 R4 JP1 JP2 JP3 4 5 6 7 8 9 10 11 12 13 Actions à réaliser et état des voyants du récepteur ou du module récepteur du transmetteur 1 Mettre le récepteur ou le transmetteur hors tension 2 Placer les cavaliers JP1 et JP2 Mettre ensuite le récepteur ou le transmetteur sous tension 3 V1 JP1 JP2 JP3 La visualisation du canal radio utilisé actuellement par le récepteur est réalisée par les voyants V2 et V3 V2 indique les dizaines, si allumé = 10, si éteint = 0 V3 indique les unités par un nombre de clignotement Exemple : V2 V3 V3 V3 V3 + Canal radio : 10 + 3 = 13 , soit fréquence 434,300 MHz 4 Mettre le récepteur ou le transmet- JP1 JP2 JP3 teur hors tension Retirer les cavaliers JP1 et JP2 ISIS - 331260D revision02 DE EN FR - 25 - 6.4- Visualisation du code d’identité du récepteur/ module récepteur Cette procédure permet de connaître le code d’identité utilisé par le récepteur ou le module récepteur. 1 2 3 Récepteur ISRA ou Module récepteur transmetteur IST V1 V2 V3 JP1 JP2 JP3 V1 V2 V3 RM R1 R2 R3 R4 R5 R6 R7 JP1 JP2 JP3 R8 4 5 6 7 8 9 10 11 12 13 14 15 16 17 18 19 20 21 V1 V2 V3 V1 V2 V3 JP1 JP2 JP3 Récepteur ISRS RM 1 2 3 Etape R1 R2 R3 R4 JP1 JP2 JP3 4 5 6 7 8 9 10 11 12 13 Actions à réaliser et état des voyants du récepteur ou du module récepteur du transmetteur 1 Mettre le récepteur ou le transmetteur hors tension 2 Placer les cavaliers JP2 et JP3 Mettre ensuite le récepteur ou le transmetteur sous tension 3 V1 JP1 JP2 JP3 La visualisation du code d’identité est réalisée par les voyants V2 et V3 Le code identité est codé sur 8 bits. V2 indique la position 0 V3 indique la position 1 Relever pour chaque clignotement de V2 ou V3 la position « 0 » ou « 1 » des 8 bits du code d’identité Exemple : V2 V2 V3 V3 V3 V2 V3 V2 Code d'identité : 00111010 4 - 26 - Mettre le récepteur ou le transmet- JP1 JP2 JP3 teur hors tension Retirer les cavaliers JP2 et JP3 FR EN DE ISIS - 331260D revision02 7 - Installation 7.1- Généralités sur la mise en place des produits Les produits doivent être montés le plus près possible de l’armoire électrique de commande et être à l’abri des chocs et des intempéries. - Tout obstacle situé entre les antennes d’émission et de réception provoque une diminution de portée. - Les ondes radio ne traversant pas les parois métalliques, les antennes ne doivent pas être placées dans une enceinte formant un blindage, tel que : armoire métallique, mur en béton armé, charpente ou paroi métallique, etc. Dans de tels cas, l’antenne doit impérativement ressortir entièrement sous peine d’obtenir des performances fortement dégradées : Incorrect Correct Incorrect Métal Métal Correct Métal Correct Armoire Armoire métallique métallique - Les antennes d’émission et de réception doivent être orientées en vue directe, parallèles ou a défaut, dans le même sens : Conseillé Correct ISIS - 331260D revision02 Déconseillé DE EN Incorrect FR - 27 - 7.1.1- Déport antenne Si les conditions d’installation optimales ne sont pas respectées (cas d’une installation en armoire), il est nécessaire d’utiliser une antenne extérieure avec sa rallonge (connectique BNC), qui peut être commandée séparément. Cette utilisation nécessite l’acquisition et l’installation du kit antenne BNC débrochable, référencé : OWR01 (Voir installation du kit au chapitre «Installation du kit antenne extérieure»). Emetteur ISE ou récepteur ISR ou transmetteur IST Rallonge d’antenne (voir Réf. ci dessous) électronique IST électronique ISRS/ISRA ISE électronique Kit prise BNC antenne Réf.: OWR01 Antenne Réf. : VUB084 Rallonges d’antenne disponibles : réf. : VUB170, rallonge de 0,5m (connectique BNC), sans support réf. : VUB105, rallonge de 2m (connectique BNC), avec support réf. : VUB125, rallonge de 5m (connectique BNC), avec support réf. : VUB131, rallonge de 10m (connectique BNC), avec support IMPORTANT : JAY Electronique dégage toute responsabilité quant à l’usage d’autres rallonges ou antennes que celle préconisées ci-dessus. Les performances de l’antenne d’émission pourraient être en dehors des normes en vigueur. - 28 - FR EN DE ISIS - 331260D revision02 7.2- Condition d’installation des produits Dans la mesure où plusieurs systèmes radio cohabitent sur un même site, il convient de prendre des précautions d’installation. Pour cela veuillez respecter les règles décrites ci-après. Note : Ces conditions s’appliquent pour toutes puissances ou modes d’émission des émetteurs ou transmetteurs ISIS. 7.2.1- Condition à respecter entre 2 ensembles ISIS de même puissance (1 ou 10mw) P2 d1 d2 E4 E3 P1 E1 2 E2 Condition 1 : Prévoir au minimum 2 canaux radio d’écart entre les 2 ensembles ISIS (Exemple : canal n°5 pour l’ensemble E1-E2 et canal radio n°7 pour l’ensemble E3-E4) Condition 2 : Prévoir une distance minimum «d1» entre l’émetteur ou transmetteur E1 et le récepteur ou transmetteur E2 et «d2» entre l’émetteur ou transmetteur E3 et le récepteur ou transmetteur E4. La distance à respecter «d1» ou «d2» est liée à l’écart entre les canaux radio et la portée P1 ou P2 . Le graphique en page suivante permet la bonne mise en place des éléments. ISIS - 331260D revision02 DE EN FR - 29 - Distance minimum à respecter entre d (m) l’émetteur perturbant le récepteur perturbé La droite représentée ci-dessous détermine la distance «d» minimum en fonction de la portée «P» pour un écart de 8 canaux radio entre les ensembles ISIS. 16 15 14 13 12 11 10 9 8 7 6 5 4 3 2 1 0 50 100 150 200 250 P (m) Portée maximum entre un émetteur et un récepteur Exemple : si la portée «P1» entre E1 et E2 est de 90m, la distance minimum «d2» entre E2 et E3 devra être de 3m. Note : Ces distances sont théoriques et dépendent des conditions d’environnement. - 30 - FR EN DE ISIS - 331260D revision02 7.2.2- Condition à respecter entre ensemble ISIS 1mW et une radiocommande JAY Electronique Série UC, UD ou UR Note : Il n’y a pas de contraintes particulières d’installation si l’émetteur ISIS est configurée avec une puissance de 10mW. Exemple d’application : R2 d E1 R1 P E2 Condition 1 : Prévoir de régler le canal radio de l’ensemble ISIS à une fréquence supérieure à celle utilisée par la radiocommande JAY Electronique. Condition 2 : Prévoir une distance minimum «d» entre l’émetteur ISIS (E1) et le récepteur U* (R2) . La distance à respecter «d» est liée à l’écart entre les canaux radio et la portée «P». Le graphique en page suivante permet la bonne mise en place des éléments. ISIS - 331260D revision02 DE EN FR - 31 - d (m) Distance minimum à respecter entre l’émetteur ISIS et le récepteur U* La droite représentée ci-dessous détermine la distance «d» minimum en fonction de la portée «P» pour un écart de fréquence entre ensemble ISIS et autre radiocommande JAY Electronique de 200KHz. 5.0 4.5 4.0 3.5 3.0 2.5 2.0 1.5 1 0.5 0 P (m) 50 100 150 200 250 Portée maximum entre un émetteur et un récepteur Exemple : si la portée «P» entre E2 et R2 est de 50m, la distance minimum «d» entre E1 et R2 devra être de 0,5m si l’écart entre le canal radio de l’ensemble ISIS et une autre radiocommande JAY Electronique est de 200KHz. Note 1 : Ces distances sont théoriques et dépendent des conditions d’environnement. Note 2 : Dans le cas ou un ensemble ISIS cohabite avec un produit autre que JAY Electronique, la distance «d» dépendra de la sélectivité de la liaison radio utilisé sur ce produit. - 32 - FR EN DE ISIS - 331260D revision02 7.3- Câblage des produits 7.3.1- Recommandations sur le câblage Pour éviter tous risques d’électrocution, ne pas ouvrir les boîtiers des récepteurs ou des transmetteurs lorsque ceux-ci sont sous tension. • Utiliser des organes de commande avec système antiparasites intégré. • Ne pas positionner côte à côte des câblages de classes différentes. • Respecter un espacement minimum (20 cm) entre les différentes classes: - Classe 1 : Radio, câble d’antenne (cas d’une rallonge d’antenne), - Classe 2 : Secteur pour alimentation en énergie des différents éléments, - Classe 3 : Commande de puissance des moteurs, variateurs etc.... Idéalement chaque classe de câble est logée dans un chemin de câble qui lui est propre. Au cas ou un seul chemin de câble serait disponible, on écartera au maximum les câbles de classes différentes. 7.3.2- Raccordement sur les borniers à ressort En cas d’utilisation de fils multibrins souples, il est préférable d’utiliser des embouts sertis afin d’éviter les faux contacts et courts-circuits. Instructions à suivre pour ouvrir les borniers de raccordement : - Insérer un tournevis verticalement (lame plate de 1,5 à 3 mm de largeur) dans la fente située au regard du fil, - Insérer le fil, - Retirer le tournevis. Ne pas effectuer de mouvement de levier sur le tournevis afin d’éviter d’endommager le bornier et le circuit imprimé des produits. ISIS - 331260D revision02 DE EN FR - 33 - 7.3.3- Câblage de l’alimentation des produits IMPORTANT Le raccordement électrique de l’alimentation devra être fait de manière à ce que lorsque l’interrupteur général est désactivé, le récepteur ISR ou le transmetteur IST soit également désactivé. Alimentation de l’émetteur ISE * : i5 i6 i7 i8 i1 i2 i3 i4 Va Vb -+ 9 à 30Volts DC S1 ID ON 1 2 3 4 5 6 7 8 CONFIG ON - DC+ A B 1 2 3 4 5 6 7 8 C1 2 3 4 5 6 7 8 - DC+ A B * = Dans le cas d’un transmetteur, l’alimentation du module émetteur est assurée par le module récepteur du transmetteur. Alimentation (suivant modèle) du récepteur ISR ou du module récepteur du transmetteur IST : R3 R4 R5 R6 R7 1 1 2 3 R2 2 R8 4 5 6 7 8 9 10 11 12 13 14 15 16 17 18 19 20 21 24 VDC (1) 3 2 1 1 2 3 R1 3 JP1 JP2 JP3 3 +12 VDC- 2 1 1 2 3 1 2 3 RM V1 V2 V3 AC ,65$A / ,67$A 48 VAC 3 2 1 1 2 3 DC ,65$4 / ,67$4 24 VAC Récepteur ISRA ou transmetteur IST DC - + ,656) 12 VDC AC 24 VDC (1) 24 VAC 48 VAC V1 V2 V3 JP1 JP2 JP3 RM 1 2 3 R1 R2 R3 R4 1 2 3 1 2 3 1 2 3 1 2 3 1 2 3 1 2 3 1 2 3 1 2 3 4 5 6 7 8 9 10 11 12 13 Récepteur ISRS (1) = pas de polarité à respecter - 34 - FR EN DE ISIS - 331260D revision02 7.3.4- Raccordement des entrées sur l’émetteur/module émetteur Voici Les différentes possibilités de raccordement des entrées : Emetteur ISE Module émetteur du transmetteur IST i5 i6 i7 i8 i1 i2 i3 i4 Va ) Vb Pour alimenter les entrées du module émetteur du transmetteur IST, il est possible de raccorder les entrées sur l'alimentation du module émetteur (bornes +/-) représentées ci-dessous -+ S1 ID ON 1 2 3 4 5 6 7 8 CONFIG ON - DC+ A B 1 2 3 4 5 6 7 8 C1 2 3 4 5 6 7 8 0v - DC+ A B 3 à 30Vdc Contacts secs sur les entrées C 1 2 3 4 5 6 7 8 0v 3 à 30Vdc in in Sorties statiques PNP sur les entrées C 1 2 3 4 5 6 7 8 0v 3 à 30Vdc in in Sorties statiques NPN sur les entrées C 1 2 3 4 5 6 7 8 ISIS - 331260D revision02 DE EN FR - 35 - 7.3.5- Raccordement des sorties sur les récepteurs/module récepteur Exemple d’utilisation des sorties relais du récepteur : 1 2 3 RM V1 V2 V3 R1 R2 R3 R4 R5 R6 R7 JP1 JP2 JP3 R8 Récepteur ISRA Module récepteur du transmetteur IST 4 5 6 7 8 9 10 11 12 13 14 15 16 17 18 19 20 21 V1 V2 V3 JP1 JP2 JP3 RM 1 2 3 R1 R2 R3 Récepteur ISRS R4 4 5 6 7 8 9 10 11 12 13 R1 R2 R3 R4 6 7 8 9 10 11 12 13 AC AC Contacteur Voyant / Lampe DC + - Entrée automate - 36 - FR EN DE ISIS - 331260D revision02 7.4- Protection des sorties récepteur et antiparasitage Lorsque des charges inductives sont raccordées aux sorties relais du récepteur (bobines de contacteurs, électrovannes ou électrofreins), il est impératif de placer préventivement des éléments d’antiparasitage tels que condensateurs, circuits RC, diodes, etc, directement aux bornes des éléments commandés, et de les raccorder avec des connections aussi courtes que possible. Il convient également d’utiliser une résistance de tirage sur les entrées automates. Exemples de système de protection à utiliser : Bornier des sorties du récepteur AC DC + - DC + - R - + Sortie sur relais en AC Sortie sur relais en DC Entrée automate (Circuit RC) (Diode de roue libre) (résistance de tirage R=Vdc/Imin(10mA)) 7.5- Courant minimum et maximum des sorties relais Veillez à ne pas dépasser les caractéristiques mini et maxi spécifiées au chapitre «caractéristiques techniques récepteur», en installant le cas échéant une charge supplémentaire ou des relayages intermédiaires (contacts auxiliaires dans l’armoire électrique pour la commande de puissance par exemple.) ISIS - 331260D revision02 DE EN FR - 37 - 8 - Diagnostic et solution en cas de problème Problème constaté Cause possible F1 1 2 3 4 5 6 7 8 CONFIG ON i1 Va Vb ON ID Vb +DC- A B Set S1 Va i2 i3 i4 Power 1 2 3 4 5 6 7 8 i5 i6 i7 i8 i1 électronique Input 8 Input 7 Input 6 Input 5 Input 4 Input 3 Input 2 Input 1 C 1 2 3 4 5 6 7 8 8.1- Emetteur ISE et module émetteur du transmetteur IST SOLUTION Rebrancher correctement Le voyant jaune Les câbles d’alimentation ne Va ne s’allume sont pas correctement insérés les câbles dans le bornier à ressort pas à la mise sous tension Vérifier le fusible F1 sur support Remplacer le fusible Lorsqu’une entrée est activée, le voyant correspondant ne s’allume pas Après la mise sous tension de l’émetteur tous les voyants clignotent simultanément - 38 - FR Les câbles sur l’entrée ne sont pas correctement insérés dans le bornier à ressort Rebrancher correctement les câbles La tension sur l’entrée est inférieure à 3V Vérifier le circuit de commande La position des curseurs sur le DIP-switch «CONFIG» sont incorrects Positionner correctement les curseurs sur une configuration ou canal radio existants (voir tableaux de programmation) EN DE ISIS - 331260D revision02 8.2- Récepteurs ISR et module récepteur du transmetteur IST ISRA - IST 1 2 3 F1 V1 V2 V3 JP1 JP2 JP3 F2 RM R1 R2 R3 R4 R5 R6 R7 R8 4 5 6 7 8 9 10 11 12 13 14 15 16 17 18 19 20 21 ISRS V1 V2 V3 JP1 JP2 JP3 F1 F2 RM 1 2 3 R1 R2 R3 R4 4 5 6 7 8 9 10 11 12 13 Problème constaté Cause possible Les câbles d’alimentation ne sont Le voyant vert V1 ne pas correctement insérés dans le s’allume pas à la mise bornier à ressort Vérifier les fusibles F1 et F2 sur sous tension support Le voyant vert V3 de réception radio ne s’allume pas lorsque l’émetteur envoie un état actif SOLUTION Rebrancher correctement les câbles Remplacer les fusibles défectueux Rebrancher correctement Le fil d’antenne est mal connecté le fil d’antenne Vérifier que le récepteur (ou module récepteur du transmetteur Reprendre la procédure de n°1) est sur le même canal programmation du canal radio que l’émetteur (ou module radio émetteur du transmetteur n°2) Le voyant rouge V2 Les cavaliers JP1, JP2 et JP3 s’allume après la mise sont en position «court-circuit» sous tension Retirer les cavaliers placés en court-circuit. Le(s) relais ne s’active(nt) pas alors que le voyant V3 est allumé (liaison radio établie) Refaire une procédure d’association émetteur récepteur, voir chapitre «changement de configuration du produit» Le code d’identité est différent entre l’émetteur et le récepteur ou entre les deux transmetteurs ISIS ISIS - 331260D revision02 DE EN FR - 39 - 9 - Entretien et maintenance AVANT DE PROCÉDER À TOUTE MANIPULATION D’ENTRETIEN, COUPER L’ALIMENTATION GÉNÉRALE DU SYSTEME COMMANDÉ. - Les boîtiers des émetteurs, récepteurs et transmetteurs ISIS ne doivent pas être ouverts en dehors des phases de configuration et câblage. L’ouverture des boîtiers doit se faire dans un endroit propre, sec et exempt de poussière. - Une attention particulière doit être apportée sur les risques de l’utilisation des transmissions d’informations Série ISIS dans un milieu comportant des solvants de polymères ou des colles pouvant dégrader le bon fonctionnement des produits. Vérifier régulièrement les points suivants: - Les branchements des alimentations, des entrées et des sorties, Les contacts de relais de commande, L’état et la position correcte du joint de couvercle, Le serrage des vis du boîtier et du presse étoupe ainsi que l’étanchéité de l’antenne, - Si l’accessoire réf.:OWR01 (prise antenne BNC externe) est utilisé, vérifier le branchement de l’antenne, et vérifier qu’elle soit propre et non oxydée au niveau du connecteur. - Procéder au nettoyage des produits en éliminant tout corps étranger y adhérant. N’utiliser que des nettoyants non agressifs à base de solution savonneuse. - 40 - FR EN DE ISIS - 331260D revision02 10 - Garantie Tous nos appareils sont garantis 2 ans à partir de la date de fabrication indiquée sur le produit, hors pièces d’usure. La réparation, la modification ou le remplacement d’un appareil pendant la période de garantie ne peuvent avoir pour effet de prolonger le délai de garantie. La garantie ne couvre pas les défauts résultant : • du transport, • d’une fausse manoeuvre ou du non-respect des schémas de raccordement lors de la mise en service, • d’un manque de surveillance ou d’entretien, d’une utilisation non conforme aux spécifications de la notice technique et, d’une façon générale, des conditions de stockage, d’exploitation ou d’environnement (influences atmosphériques, chimiques, électriques, mécaniques ou autres) non appropriées ou non prévues lors de la commande. La garantie ne peut s’exercer si des modifications, démontages ou adjonctions ont été effectués par le client sans l’ accord écrit de notre Société. La responsabilité de la Société JAY Electronique pendant la période de garantie est limitée à tout vice de matière ou de construction; elle comprend la réparation en ses ateliers ou le remplacement gratuit des pièces reconnues défectueuses après expertise de ses «services techniques». Elle ne peut donner droit à aucune indemnisation au titre de dommages et intérêts. En cas de contestation relative à une fourniture ou à son règlement, LE TRIBUNAL DE COMMERCE DE GRENOBLE est seul compétent, même en cas d’Appel ou de pluralité de défendeurs. ISIS - 331260D revision02 DE EN FR - 41 - 11 - Annexes 11.1- Caractéristiques radio électriques Bandes de fréquence ISM 433-434Mhz Modulation FM Canaux radio 18 canaux programmables Espacement de 100KHz à partir de 433,1 à 434,7MHz, le 18eme sur 434,740MHz Puissance apparente rayonnée ISE/ISR :1mW ou 10mW suivant sélection IST : 10mW Portée moyenne (1) En espace dégagé (1mW) : 200m (2) En espace dégagé (10mW) : 350m En milieu industriel typique (1mW) : 80m (2) En milieu industriel typique (10mW) : 100m (1) = La portée varie suivant les conditions d’environnement, l’antenne de réception et sa position (la portée est diminuée en cas d’obstacles métalliques tels que: charpentes, parois, enceintes etc...). La portée est diminuée si l’un des produits est monté sur un équipement mobile. (2) = Mode 1mW non disponible pour les transmetteurs IST. 11.2- Caractéristiques techniques de l’émetteur ISE et du module émetteur du transmetteur IST Boîtier Matière : ABS Couleur : Jaune (ISE) ou Gris (IST) Etanchéité : IP65 Dimensions (hors PE et antennes) : ISE : 92 x 123 x 50 mm IST : 120 x 240 x 100 mm Poids : 270 g Alimentation Type : DC Plage de tension : 9V à 30VDC Consommation pour émetteur ISE (pour transmetteur IST voir chapitre suivant). min. = 100 mA max. = 200 mA par entrée active = 12 mA Nombre d’entrées disponibles 8 - 42 - FR EN DE ISIS - 331260D revision02 Tenue au transitoire rapide de l’alimentation Sans dommage Tenue aux inversions de polarité sur l’alimentation 30V Protection fusible Fusible 250 mA sur support Niveau bas sur entrée optocoupleur Tension continue < 2 V Niveau haut sur entrée optocoupleur Tension continue > 3 V Niveau de tension maximum sur une entrée sans dommage 30 V Tenue au transitoire rapide sur l’alimentation en couplage direct +2KV Tenue aux décharges électrostatiques ± 4 kV Tenue aux champs électromagnétiques 10v/m Plage de température de fonctionnement -20°C à +50°C Plage de température de stockage -30°C à 70°C Fréquence max. d’un signal sur une entrée (mode d’émission radio permanente ou intermittente) Mode 1mW (1) = 10Hz max Mode 10mW = 0,5Hz max (1) = Mode 1mW non disponible pour les transmetteurs IST. ISIS - 331260D revision02 DE EN FR - 43 - 11.3- Caractéristiques techniques des récepteurs ISR et du module récepteur du transmetteur IST Boîtier Matière : ABS Couleur : Jaune (ISRS) ou Gris (ISRA/IST) Etanchéité : IP65 Dimensions (hors PE et antenne) : ISRS : 92 x 123 x 50 mm ISRA/IST : 240 x 120 x 100 mm Poids : ISRS : 350 g / ISRA : 1,2 kg / IST : 1,3 kg Alimentation récepteur ISRS DC : 12VDC (9 à 20VDC) 24VDC (20 à 75VDC) AC : 24VAC (+10%/-15%) 48VAC (+10%/-15%) Alimentation récepteur ISRA et transmetteur IST DC : 12VDC (9 à 20VDC) 24VDC (20 à 28VDC) AC : 24VAC (+10%/-15%) 48VAC (+10%/-15%) Nombre de sorties ISRS : 4 + 1 sortie «Qualité radio» ISRA/IST : 8 + 1 sortie «Qualité radio» Type de sortie Relais avec 1 contact à fermeture Antenne Fixe (standard) ou externe type BNC réf.: VUB084 grâce au kit réf.: OWR01 Sensibilité tuner < 2μV Protection fusible Fusibles sur support (calibres suivant tension d’alimentation et modèles récepteur, voir paragraphe «caractéristiques et calibres fusibles») Temps de réponse d’une sortie quand une entrée est Mode 1mW (non disponible IST) : < 60ms activée ou désactivée (mode Mode 10mW : < 500ms d’émission radio permanente ou intermittente) Temps d’arrêt passif (en cas de brouillage radio) - 44 - FR EN 2 secondes sur un relais de fonction 1,9 seconde sur le relais «Qualité radio» (RM) DE ISIS - 331260D revision02 Consommations Tension d’alimentation des éléments ISRS ISRA IST Min Max par sortie activée Min Max par sortie activée Min Max par entrée activée par sortie activée 12VDC 24VDC 24-48VAC 23 mA 200 mA + 20 mA 23 mA 300 mA + 20 mA 123 mA 500 mA + 12 mA + 20 mA 350 mW 2W + 275 mW 350 mW 3W + 275 mW 1.8 W 6W + 180 mW + 275mW 350 mW 2W + 275 mW 9W 16 W + 300 mW 9W 16 W + 200 mW + 300 mW 11.3.1- Caractéristiques des relais récepteurs ISR et module récepteur du transmetteur IST • Contacts : AgNi 0,15 • Puissance maximum à cosphi=1 : 2000 VA • Courant maximum commutable : 8 A • Tension maximum commutable : 400 VAC • Courant / Tension minimum commutable conseillé : 100 mA / 12 VDC • 100 000 commutations à 250 VAC, 8 A, cosphi=1 • 50 000 commutations à 24 VDC, 8 A • Essais selon EN 60947-5-1 : DC13 à 0,5 A / 24 VDC AC15 à 3 A / 250VAC 11.3.2- Nombre de commutations sur différents contacteurs Grandeur physique commutée par Contacteur le relais CA2DN LC1D09 LC1D18 LC2D09 Nombre de commutation pour les relais de sortie Commutation sous 230VAC (70VA,cosphi=0,75) 2 x 10 Commutation sous 110VAC, (70VA,cosphi=0,75) 1 x 10 Commutation sous 48VAC (70VA,cosphi=0,75) 0,5 x 10 ISIS - 331260D revision02 DE EN 6 6 6 FR - 45 - 11.4-Caractéristiques et calibres des fusibles Emetteur ISE / Module émetteur du transmetteur IST Fusible type 663 (LT-5) sur support électronique, calibre 250mA F1 ID ON 1 2 3 4 5 6 7 8 CONFIG ON +DC- A B 1 2 3 4 5 6 7 8 C 1 2 3 4 5 6 7 8 Récepteur ISRA / Module récepteur du transmetteur IST Type 663 (LT-5) sur support électronique Alimentation en 12 VDC = Fusible à l’emplacement F2 315mA/250VAC/T Alimentation en 24 VDC = Fusible à l’emplacement F1 250mA/250VAC/T Alimentation en 24 VAC = Fusible à l’emplacement F2 1,6A/250VAC/T Alimentation en 48 VAC = Fusible à l’emplacement F1 800mA/250VAC/T 1 2 3 F1 F2 RM R1 R2 R3 R4 R5 R6 R7 R8 4 5 6 7 8 9 10 11 12 13 14 15 16 17 18 19 20 21 Récepteur ISRS Type 663 (LT-5) sur support électronique Alimentation en 12 VDC = Fusible à l’emplacement F2 250mA/250VAC/T Alimentation en 24 VDC = Fusible à l’emplacement F1 500mA/250VAC/T Alimentation en 24 VAC = Fusible à l’emplacement F1 500mA/250VAC/T Alimentation en 48 VAC = Fusible à l’emplacement F1 500mA/250VAC/T F1 RM R1 R2 R3 R4 F2 1 2 3 - 46 - FR EN 4 5 6 7 8 9 10 11 12 13 DE ISIS - 331260D revision02 11.5- Borniers de raccordement, numéros et fonctions Emetteur ISE / Module émetteur du transmetteur IST : Numéro de borne «-» DC «+» C 1 2 3 4 5 6 7 8 Fonction Alimentation Commun, 0VDC des entrées Entrée n°1 Entrée n°2 Entrée n°3 Entrée n°4 Entrée n°5 Entrée n°6 Entrée n°7 Entrée n°8 Récepteur ISR / Module récepteur du transmetteur IST : Numéro de borne 1-2-3 4-5 6-7 8-9 10 - 11 12 - 13 14 - 15 16 - 17 18 - 19 20 - 21 Fonction Alimentation Contacts du relais «Qualité radio» RM Contacts du relais de sortie R1 Contacts du relais de sortie R2 Contacts du relais de sortie R3 Contacts du relais de sortie R4 Contacts du relais de sortie R5* Contacts du relais de sortie R6* Contacts du relais de sortie R7* Contacts du relais de sortie R8* * = seulement sur récepteur ISRA ou transmetteur IST ISIS - 331260D revision02 DE EN FR - 47 - 11.6- Dimensions des produits Emetteur ISE et récepteur ISRS : 20 Unité de mesure = mm 26 170 2xØ4 électronique 123 108 Power Set électronique Input 8 Input 7 Input 6 Input 5 Input 4 Input 3 Input 2 Input 1 79 25 50 19 25 92 Récepteur ISRA : Transmetteur IST : 120 100 66 27 120 100 15 170 66 50 27 170 4xØ4 4xØ4 229 240 229 240 électronique électronique 90 90 35 30 47 48 - 48 - FR EN 35 30 DE 48 47 ISIS - 331260D revision02 11.7- Installation du guide antenne avant utilisation 1. Ouvrir le boîtier et dévisser l’écrou spirale de l’antenne Fil antenne Ecrou spirale 2. Insérer le fil antenne dans le guide Guide 3. Glisser le guide dans l’écrou spirale, puis dans l’embase du presse étoupe jusqu’à la limite intérieure de celui-ci. STOP 4. Revisser l’écrou spirale jusqu’au point dur puis effectuer ¼ de tour pour bloquer le guide antenne et assurer l’étanchéité. Vérifier que le guide est bien maintenu. S’assurer que l’antenne est entrée au maximum dans le guide pour permettre une réception optimale. ISIS - 331260D revision02 DE EN FR - 49 - 11.8- Installation du kit antenne externe BNC OWR01 Kit antenne externe Emetteur ISE / Récepteur ISRS Module émetteur du transmetteur IST A OWR01 B C Récepteur ISRA Module récepteur du transmetteur IST électronique électronique 1 1 2 2 A A 3 B 3 C B 4 C 4 Fr - 50 - FR EN DE ISIS - 331260D revision02 11.9- Configuration de vos éléments ISIS Information sur l’Installation : Equipement commandé : Configuration de l’émetteur ou du module émetteur du transmetteur n°1 : Configuration du module émetteur du transmetteur n°2 : (noircir les positions des curseurs) (noircir les positions des curseurs) ID ID ON ON 1 2 3 4 5 6 7 8 1 2 3 4 5 6 7 8 = position du curseur = position du curseur CONFIG CONFIG ON ON 1 2 3 4 5 6 7 8 1 2 3 4 5 6 7 8 = position du curseur ISIS - 331260D revision02 = position du curseur DE EN FR - 51 - - 52 - FR EN DE ISIS - 331260D revision02 Installation and user technical manual ISIS Wireless data transmission system -Logic state indication- ISIS - 331260D revision02 DE EN FR - 53 - Table of contents 1 - General safety rules and precautions...................p. 56 2 - Presentation of ISIS series ....................................p. 57 3 - Identification of products on delivery...................p. 58 3.1- Unpacking recommendations ......................................................p. 58 3.2- Product identification on delivery .................................................p. 58 3.2.13.2.23.2.33.2.4- Transmitter ISE - 8 logic inputs ....................................................p. 58 Receiver ISRS - 4 relay outputs...................................................p. 59 Receiver ISRA - 8 relay outputs ..................................................p. 59 Transceiver IST - 8 logic inputs and 8 relay outputs ....................p. 60 3.3- Product configuration on delivery.................................................p. 61 4 - Operating principle .................................................p. 62 4.1- General information ......................................................................p. 62 4.2- What is the purpose of a radio transmission channel and an identity code ? ............................................................................................p. 64 4.3- Transmitter radio transmission modes.........................................p. 65 4.4- Transmitter radio transmit power .................................................p. 66 4.5- «Radio quality» RM relay .............................................................p. 67 4.6- Synchronizing transceivers IST....................................................p. 67 5 - Quick startup...........................................................p. 68 5.15.25.35.4- Preliminary remarks ......................................................................p. 68 Connecting the receiver/receiver module ....................................p. 68 Connecting the transmitter/transmitter module ...........................p. 69 Testing the products ......................................................................p. 69 6 - Changing the factory configuration ......................p. 70 6.1- Preliminary remarks ......................................................................p. 70 6.2- Changing the product configuration.............................................p. 72 6.2.1- Particular case for transceiver IST ................................................p. 74 6.3- Display of receiver/receiver module radio channel .....................p. 75 6.4- Display of receiver/receiver module identity code.......................p. 76 7 - Installation ...............................................................p. 77 7.1- General information concerning installation of products.............p. 77 7.1.1- Using the exterior antenna ............................................................p. 78 7.2- Product installation safety requirements......................................p. 79 7.2.1- Conditions to be observed between two ISIS assemblies with same transmit power (1 or 10mw) ..........................................................p. 79 - 54 - FR EN DE ISIS - 331260D revision02 7.2.2- Condition to be observed between 1mW ISIS assembly and a JAY Electronique radio remote control of the UC, UD or UR series.....p. 81 7.3- Wiring the products .......................................................................p. 83 7.3.17.3.27.3.37.3.47.3.5- Wiring recommendations .............................................................p. 83 Terminal strips ...............................................................................p. 83 Wiring the electrical power supply ................................................p. 84 Connection of inputs on transmitter ISE/transmitter module IST ..p. 85 Connection of outputs on ISR receivers / IST receiver module ....p. 86 7.4- Interference suppression of the electrical installation and protection of the power supply .......................................................................p. 87 7.5- Minimum and maximum current of relay outputs........................p. 87 8 - Diagnostics and corrective actions in case of problem....................................................................p. 88 8.1- Transmitter ISE and transceiver transmitter module IST............p. 88 8.2- Receiver ISR and transceiver receiver module IST....................p. 89 9 - Inspection and servicing........................................p. 90 10 - Warranty ..................................................................p. 91 11 - Appendices .............................................................p. 92 11.1- Radio characteristics.....................................................................p. 92 11.2- Technical characteristics for ISE transmitter and transceiver transmitter module IST .................................................................p. 92 11.3- Technical characteristics for ISR receiver and transceiver receiver module IST ....................................................................................p. 94 11.3.1- ISR receiver and IST transceiver receiver module relay characteristics ...............................................................................p. 95 11.3.2- Number of switching cycles on various contactors .......................p. 95 11.411.511.611.711.811.9- Fuse characteristics ......................................................................p. 96 Terminal strips, number and function ...........................................p. 97 Product dimensions ......................................................................p. 98 Installation of the antenna guide before use ...............................p. 99 Installation of external BNC antenna kit.....................................p. 100 Unit configuration summary .......................................................p. 101 «Help us improve this manual» form.........................p. 152 ISIS - 331260D revision02 DE EN FR - 55 - 1 - General safety rules and precautions • For maximum safety during installation and use, be sure to apply the instructions given in this manual. • The power supply must be compliant with the requirements of standard EN60950, EN50081-1 (EMC), must carry the CE marking, and must have the electrical characteristics specified in this manual. • Ensure your equipment is properly serviced and perform periodic checks. - 56 - FR EN DE ISIS - 331260D revision02 2 - Presentation of ISIS series Thank you for choosing our ISIS data transmission system which will provide you the highest level of reliability. The ISIS Series generates logical signal transfers (mono or bidirectional) for a broad range of applications, including : - Industrial equipment - Infrastructure - Industrial lifting system - Agricultural equipment The ISIS Series fully satisfies the safety requirements of the current applicable and draft standards and is compliant with European directive : RTTE : Microwave equipment and telecommunication terminals (low voltage, electromagnetic compatibility, radio spectrum). For any questions or recommendations related to installation of the ISIS series, contact our «Customer technical support department» : Monday to Friday Phone : +33.(0)4.76.41.44.00 Fax : +33.(0)4.76.41.44.44 Email : [email protected] ISIS - 331260D revision02 DE EN FR - 57 - 3 - Identification of products on delivery 3.1- Unpacking recommendations • When unpacking the products, the antenna must be installed as detailed in the procedure given in appendix under the section entitled: «Installing antenna guide before use». • If a change to the factory configuration of the transmitters is required, pay special attention when opening the transmitter ISE cover : be careful not to apply any tension to the electronic ribbon cable connecting the electronic board and the cover. • it is strongly advised to change the identity code to ensure the unicity of your installation, see «Changing the default setting». 3.2- Product identification on delivery 3.2.1- Transmitter ISE - 8 logic inputs Va Power Set i1...i8 Input 8 Input 7 Input 6 Input 5 Input 4 Input 3 Input 2 Input 1 Set Vb électronique i5 i6 i7 i8 i1 i2 i3 i4 i1...i8 Va Vb F1 Set ID ID ON 1 2 3 4 5 6 7 8 CONFIG B ON A CFG C 1 2 3 4 5 6 7 8 - DC+ A B SET Va Vb A i1 to i8 - 58 - 1 2 3 4 5 6 7 8 Button «SET» ID Dip-switch «ID» (identity code) Yellow indic. light «power supply» CFG Dip-switch «CONFIG» Green indic. light «Radio transmission» F1 Fuse (see chapter 11.4) Terminal strip «power supply» B Terminal strip «logic inputs» Red indicator lights showing «Signal present on inputs Nos. 1 to 8» FR EN DE ISIS - 331260D revision02 3.2.2- Receiver ISRS - 4 relay outputs F1 F2 RM R1 R2 R3 V1 V2 V3 R4 1 2 3 4 5 6 7 8 9 10 11 12 13 A B JP1 JP2 JP3 3.2.3- Receiver ISRA - 8 relay outputs A 1 2 3 JP1 JP2 JP3 R8 R7 R6 R5 R4 R3 V1 V2 V3 R2 R1 RM F1 F2 4 5 6 7 8 9 10 11 12 13 14 15 16 17 18 19 20 21 B V1 V2 V3 F1 F2 Green indicator light «power supply» Red indicator light «programming» Green indicator light «radio reception» Fuse (see chapter 11.4) Fuse (see chapter 11.4) ISIS - 331260D revision02 JP1 JP2 JP3 A B DE Jumper «JP1» Jumper «JP2» Jumper «JP3» Term.strip «Power supply» Term.strip «Relay outputs» EN FR - 59 - 3.2.4- Transceiver IST - 8 logic inputs and 8 relay outputs Transmitter Module Va Vb i5 i6 i7 i8 i1 i2 i3 i4 i1...i8 Set ID F1 ID ON 1 2 3 4 5 6 7 8 CONFIG B ON A CFG C 1 2 3 4 5 6 7 8 - DC+ A B 1 2 3 4 5 6 7 8 A Receiver Module 1 2 3 JP1 JP2 JP3 R8 R7 R6 R5 R4 R3 V1 V2 V3 R2 R1 RM F1 F2 4 5 6 7 8 9 10 11 12 13 14 15 16 17 18 19 20 21 B «8 logic inputs transmitter» Module SET Va Vb A i1 to i8 Button «SET» ID Dip-switch «ID» (identity code) Yellow indic. light «power supply» CFG Dip-switch «CONFIG» Green indic. light «Radio transmission» F1 Fuse (see chapter 11.4) Terminal strip «power supply» B Terminal strip «logic inputs» Red indicator lights showing «Signal present on inputs Nos. 1 to 8» «8 relay outputs receiver» Module V1 V2 V3 F1 F2 Green indicator light «power supply» Red indicator light «programming» Green indicator light «radio reception» Fuse (see chapter 11.4) Fuse (see chapter 11.4) JP1 JP2 JP3 A B Jumper «JP1» Jumper «JP2» Jumper «JP3» Term.strip «Power supply» Term.strip «Relay outputs» IMPORTANT : All transceivers must be synchronized, see chapter «Synchronizing Transceivers IST» - 60 - FR EN DE ISIS - 331260D revision02 3.3- Product configuration on delivery The ISIS transmitters, receivers and transceivers are supplied with a standard configuration for immediate use. The pre-settings are as follows : Identity code : ................ 11111111 Radio channel : .............. 17 (434,7 MHz) Transmit mode : ............. continuous transmission Transmit power : ............ 10mW Assignment of inputs on transmitter and output relays on receiver (static Assignment, can not be changed) : Transmitter inputs Output relays controlled on receiver ISE / IST ISRS ISRA / IST 1 R1 R1 2 R2 R2 3 R3 R3 4 R4 R4 5 / R5 6 / R6 7 / R7 8 / R8 Position of cursors of «ID» and «CONFIG» dip-switches inside the transmitter or transmitter module : ID CONFIG ON ON 1 2 3 4 5 6 7 8 1 2 3 4 5 6 7 8 = cursor position Note : In the case of a replacement of a transmitter or a receiver or a transceiver alone, please refer to chapter «Changing the factory configuration» to configure again the replaced product. ISIS - 331260D revision02 DE EN FR - 61 - 4 - Operating principle 4.1- General information The ISIS data transmission system is designed to transmit 8 logic states from one point of an installation to another. Unidirectional link : The transmitter ISE transmits the logic states of its inputs by radio to the receiver ISRA (8 outputs) or ISRS (4 outputs) which decodes the states and restores them on its relay outputs. Bidirectional link: The transceiver IST includes in one case, a transmitter module and receiver module. The transmitter module from the first transceiver IST sends the logic states of its inputs to the receiver module of the 2nd transceiver IST and vice versa. The logic states are transmitted on a radio channel with a coded identifier (identity code). IMPORTANT : We strongly recommend that you configure your transmitter and receiver or both transceivers* on a communication frequency which is not used at your site ; the identity code should also be customized to avoid any interference with other radio systems installed in the vicinity. If several radio systems coexist on the same site, some precautions should be taken for installation. To do this, please respect the rules described in the paragraph «Product installation safety requirements». *= each «Transmitter Module / Receiver Module» couple will have to work with a different identity code and different radio channel. - 62 - FR EN DE ISIS - 331260D revision02 Input nb.X Transmitter ISE Output nb.X Receiver ISRS/ISRA Input nb.X Output nb.X Output nb.Y Y Input nb.Y Transceiver IST nb.1 ISIS - 331260D revision02 Transceiver IST nb.2 DE EN FR - 63 - 4.2- What is the purpose of a radio transmission channel and an identity code ? The radio transmission channel is used to carry a message (a logic state) on an RF frequency. The ISIS product provides a choice of 18 radio channels. On installation, it is important to know the radio transmission channels being used in the vicinity (over a radius of around 100 meters). The identity code is used to code the radio messages transmitted between an ISIS transmitter and an ISIS receiver. This product provides a choice of 256 identity codes (by “ID” DIP-switch). In an application where several ISIS assemblies are operating together on the same site, as a safety measure, each ISIS assembly (1) should communicate with different identity codes : Transmitter A Receiver A Transmitter A Radio channel n°1 ID code : 11111111 Set Radio channel n°1 ID code : 11111111 Transmitter B Receiver B Radio channel n°1 ID code : 11111000 Transmitter B Receiver B Radio channel n°3 ID code : 11111111 Power Set Radio channel n°3 ID code : 11111111 INSTALLATION NOK The two assemblies A and B have the same ID code. ID code "11111111" is default code on delivery. électronique électronique Input 8 Input 7 Input 6 Input 5 Input 4 Input 3 Input 2 Input 1 électronique Set électronique Radio channel n°1 ID code : 11111000 Input 8 Input 7 Input 6 Input 5 Input 4 Input 3 Input 2 Input 1 Power électronique Power électronique Set électronique Power Input 8 Input 7 Input 6 Input 5 Input 4 Input 3 Input 2 Input 1 électronique Input 8 Input 7 Input 6 Input 5 Input 4 Input 3 Input 2 Input 1 Receiver A Radio channel n°3 ID code : 10101010 Radio channel n°3 ID code : 10101010 INSTALLATION OK The two assemblies A and B have a different ID code. The ID codes are different from the pre-programmed one delivery. (1) Except when several ISIS transmitters must communicate with the same receiver - 64 - FR EN DE ISIS - 331260D revision02 4.3- Transmitter radio transmission modes The ISE transmitter can operate with two different radio transmission modes : Intermittent transmission or Continuous transmission (selected by cursor No. 6 of transmitter «CONFIG» DIP switch). The transmitter module of IST transceiver works only on «continuous transmission» mode. Important: a transmitter configured with «intermittent transmission» mode will not work. The choice of transmission mode will depend on the application in which the ISIS product is used. Intermittent radio transmission : (cursor No. 6 set to OFF) CONFIG "1" "0" ON 1 2 3 4 5 6 7 8 = cursor position The transmitter ISE only transmits provided at least one of its inputs is active. This mode is recommended for applications where several transmitters are associated to a single receiver. In this case, you must ensure that the ISIS transmitters do not transmit simultaneously. Reminder: a transmitter module IST configured with «intermittent transmission» mode will not work. CONFIG Continuous radio transmission : (cursor No. 6 set to ON) "1" "0" ON 1 2 3 4 5 6 7 8 = cursor position The transmitter ISE or transceiver IST transmits whatever the state of its inputs. This mode is recommended for applications where it is necessary to monitor the availability of the radio link. This control can be ensured by monitoring the output of the “Radio quality” RM relay (see description on following pages). ISIS - 331260D revision02 DE EN FR - 65 - 4.4- Transmitter radio transmit power The transmitter ISE can operate with two different radio transmit powers : 1mW or 10mW (selected by cursor No. 7 of transmitter «CONFIG» DIP switch). The choice of radio transmit power will depend on the application in which the ISIS product is used. The transceiver IST only works with 10 mW transmission power. Important: a transceiver configured with 1mW transmit power will not work. CONFIG 1 mW radio transmit power : (cursor No. 7 set to OFF) "1" "0" ON 1 2 3 4 5 6 7 8 = cursor position If the range between the ISIS transmitter and receiver is short or if the response time of an output must be fast (less than 60ms max), it is preferable to select a transmit power of 1 mW. Reminder: a transceiver IST configured with 1mW transmit power will not work. CONFIG 10 mW radio transmit power : "1" "0" (cursor No. 7 set to ON) ON 1 2 3 4 5 6 7 8 = cursor position If the range of the ISIS transmitter-receiver or between transceivers IST is long, it is preferable to choose a radio transmit power of 10 mW. Warning: the response time of an output with 10 mW mode is less than 500 ms max. General remark : If several radio systems are working in the vicinity of each other, refer to the « Product installation safety requirements » section to install your system. - 66 - FR EN DE ISIS - 331260D revision02 4.5- «Radio quality» RM relay To check the state of the radio link between transmitter ISE and receiver ISR or between two transceivers IST, an output «Radio quality» is available on the receiver ISR or transceiver IST (relay «RM»). RM relay activated : ...... radio link between transmitter and receiver is good RM relay deactivated : .. no radio link between transmitter and receiver Note : This function is only valid in «continuous transmission» mode or «intermittent transmission» mode as soon an input is active. 4.6- Synchronizing transceivers IST When the installation includes transceivers IST, they must be «Synchronized». «Synchronization» is performed on only one of the two transceivers with the cursor nb.8 of the transmitter module CONFIG DIP switch. CONFIG - Cursor Nb.8 of the first transceiver must be on ON position (active sync) - Cursor Nb.8 of the second transceiver must be on OFF position (inactive sync) ISIS - 331260D revision02 CONFIG ON ON 1 2 3 4 5 6 7 8 1 2 3 4 5 6 7 8 = cursor position = cursor position Transmitter module IST_1 Receiver module IST_2 Receiver module IST_1 Transmitter module IST_2 Transceiver IST_1 Transceiver IST_2 DE EN FR - 67 - 5 - Quick startup 5.1- Preliminary remarks This section will allow you to quickly startup and operate your ISIS system. Input No. 2 of the transmitter will be used to perform this test. 5.2- Connecting the receiver/receiver module The receiver or receiver module must be wired as shown in the drawing below, connecting the power supply in accordance with the model used: AC ,65$A / ,67$A 1 3 2 1 3 1 2 3 2 1 2 3 +12 VDC- 24 VDC (1) 2 1 3 1 2 3 3 2 1 1 2 3 DC ,65$4 / ,67$4 24 VAC 48 VAC 1 2 3 V1 V2 V3 RM R1 R2 R3 R4 R5 R6 R7 R8 4 5 6 7 8 9 10 11 12 13 14 15 16 17 18 19 20 21 Receiver ISRA or receiver module of the transceiver IST DC - V1 V2 V3 RM 1 2 3 R1 R2 R3 ,656) + 12 VDC R4 AC 24 VDC (1) 24 VAC 48 VAC 1 2 3 1 2 3 1 2 3 1 2 3 1 2 3 1 2 3 1 2 3 1 2 3 4 5 6 7 8 9 10 11 12 13 Receiver ISRS (1) = no polarity to be respected - 68 - FR EN DE ISIS - 331260D revision02 5.3- Connecting the transmitter/transmitter module The transmitter must be wired as shown in the drawing below : Va Power Input 8 Input 7 Input 6 Input 5 Input 4 Input 3 Input 2 Input 1 Set Vb i2 i1 Va i5 i6 i7 i8 i3 i4 i2 Vb SET ID ON 1 2 3 4 5 6 7 8 CONFIG ON - DC+ A B DC 9...30Volts 1 2 3 4 5 6 7 8 C 1 2 3 4 5 6 7 8 + - 5.4- Testing the products Supply the transmitter and the receiver or transceivers. • Transmitter ISE or transmitter modules from IST side : - A self-test is performed (indicator lights i1 to i8 flash sequentially). - The Va (power supply) and i2 (input No. 2 active) indicator lights should come on; the Vb indicator light (radio transmission) should flash. • Receiver ISR or receiver modules from IST side : - The R2 and RM relays should activate (indicator lights R2 and RM come on). - The V1 (power supply) and V3 (radio reception) indicator lights should come on. In the event of a malfunction, refer to the «Diagnostics and corrective actions» section. ISIS - 331260D revision02 - 69 DE EN FR 6 - Changing the factory configuration 6.1- Preliminary remarks To ensure the uniqueness of the ISIS installation and avoid any unintentional interference with another system, we strongly recommend that you customize the factory configuration (configuration on delivery) of your products. You can re-configure your products in shop before installing and using your equipment. Important : For safety reasons, it is preferable that the inputs not be active during the reconfiguration procedure. Transmitter ISE - Transmitter module of transceiver IST The identity code is programmed using the 8 «ID» DIP-switches (cursor set to «ON» = 1). Example : ID "1" "0" ON Identity code = 10101011 1 2 3 4 5 6 7 8 = cursor position The other configurations (radio channel, transmission mode and transmit power) are programmed using the 8 «CONFIG» DIP-switches (cursor set to «ON» = 1). CONFIG "1" "0" 1 2 3 4 5 6 7 8 Radio channel (see table on next page) Radio transmission mode (transceiver IST = always on "ON" position) 1 (ON) = continuous radio transmission 0 (OFF) = intermittent radio transmission - 70 - FR EN = cursor position ON DE Used only for transceiver IST (see § "Synchronizing transceivers IST") 1 (ON) = Active Sync 0 (OFF) = Sync Inactive Radio transmit power (transceiver IST = always on "ON" position) 1 (ON) = 10 mw 0 (OFF) = 1 mW ISIS - 331260D revision02 Transmitter radio channel programming table : Note : If the position of the cursors does not correspond to any radio channel, all the indicator lights on the board will flash so long as the positions are not correct. Radio Radio channel channel number number ISIS UC-UD-UR Series Series 01 01 05 02 09 03 13 04 17 05 21 06 25 07 29 08 33 09 37 10 41 11 45 12 49 13 53 14 57 15 61 16 / 17 / 18 Frequ. (MHz) 433,100 433,200 433,300 433,400 433,500 433,600 433,700 433,800 433,900 434,000 434,100 434,200 434,300 434,400 434,500 434,600 434,700 434,740 CONFIG ON Ex : 1 2 3 4 5 6 7 8 cursor position Position of the first 5 cursors of the DIP_switch «CONFIG» Cursor Cursor Cursor Cursor CCursor nb.1 nb.2 nb.3 nb.4 nb.5 1 0 1 0 1 0 1 0 1 0 1 0 1 0 1 0 1 0 1 0 0 1 1 0 0 1 1 0 0 1 1 0 0 1 1 0 1 0 0 0 0 1 1 1 1 0 0 0 0 1 1 1 1 0 1 0 0 0 0 0 0 0 0 1 1 1 1 1 1 1 1 0 0 1 1 1 1 1 1 1 1 1 1 1 1 1 1 1 1 0 Code (position of cursors) = 11001 Channel = 5 Frequency = 433,5 Mhz Important : Whenever a cursor on either of the 2 DIP-switch sets (ID or CONFIG) has been modified, the Va and Vb indicator lights on the transmitter (or transmitter module) flash alternately and all radio transmission is stopped so long as the new configuration has not been validated by the procedure described in the following section. ISIS - 331260D revision02 DE EN FR - 71 - Receiver ISR - Receiver module of transceiver IST The receiver is configured using 3 encoding jumpers JP1, JP2 and JP3 which must be short-circuited (or not) before they are supplied. Receiver ISRA or receiver module of transceiver IST M R1 R2 R3 R4 R5 R6 R7 R8 5 6 7 8 9 10 11 12 13 14 15 16 17 18 19 20 21 JP1 JP2 JP3 Receiver ISRS RM R1 R2 R3 R4 6.2- Changing the product configuration Follow the procedure in next page. Precaution to be taken : If you do not change the identity code, you can go directly to step 2. In this case, there is no need to short-circuit jumpers JP1 and JP3 on the receiver. IMPORTANT : Beware that this procedure can unintentionally associate another ISIS receiver using the same identity code. Before you begin the association procedure, be sure to check the identity code used on the other ISIS. You can perform a new transmitter-receiver association with a different identity code without switching off the receiver power supply. To do so, repeat the procedure starting from step 2. - 72 - FR EN DE ISIS - 331260D revision02 ISIS - 331260D revision02 DE EN FR - 73 - On the transmitter, select the new product configuration using the ID and CONFIG DIP switches (with power on or off). then press the SET button 1 2 (Once) (Once) to (Once) (Once) then i1 i8 Vb Va transmitter V2 V3 receiver Vb transmitter Va SET V3 Vb V2 transmitter V1 receiver Va JP1 JP2 JP3 receiver Receiver encoding jumper positions and receiver-transmitter indicator light states = Indicator light on steady JP1 JP2 JP3 receiver = Indicator light flashes Switch off the receiver power supply and remove jumpers JP1 and JP3 if necessary = Indicator light flashes alternately If the transmitter-receiver association has not operated (for example, receiver shutdown at moment of association) : Press and hold the SET button for 3 seconds afin de recaler l’ensemble ISIS sur le même canal radio. to line up the ISIS assembly on the same radio channel. After 3 seconds, the 2 indicator lights Va and Vb on the transmitter will flash during the entire transmitter-receiver association phase (around thirty seconds). (The change of configuration is transmitted to the receiver) = Indicator light off 5 4 3 On the receiver, insert jumpers JP1 and JP3 Then, switch on the receiver Release the SET button Actions Step 6.2.1- Particular case for transceiver IST When changing the configuration of two transceivers IST, the procedure described in the previous page will be applied to each «transmitter module / receiver module» couple. In the example illustrated below, use the configuring procedure for couple : ● Transmitter module IST_1 / Receiver module IST_2 puis: ● Transmitter module IST_2 / Receiver module IST_1 IMPORTANT : • synchronization must be active on one of the two transceivers (see «Synchronizing Transceivers IST»). • Each «Module Transmitter / Receiver Module» couple have to operate with a different ID code and a different radio frequency.. Transmitter module IST_1 Receiver module IST_1 - 74 - Transceiver IST 1 FR EN DE Radio frequency X ID code X Radio frequency Y ID code Y Receiver module IST_2 Transmitter module IST_2 Transceiver IST 2 ISIS - 331260D revision02 6.3- Display of receiver/receiver module radio channel This procedure is used to identify the number of the radio channel used by the receiver. 1 2 3 Receiver ISRA or transceiver receiver module IST V1 V2 V3 JP1 JP2 JP3 V1 V2 V3 RM R1 R2 R3 R4 R5 R6 R7 JP1 JP2 JP3 R8 4 5 6 7 8 9 10 11 12 13 14 15 16 17 18 19 20 21 V1 V2 V3 V1 V2 V3 JP1 JP2 JP3 Receiver ISRS RM 1 2 3 Step R1 R2 R3 R4 JP1 JP2 JP3 4 5 6 7 8 9 10 11 12 13 Actions and states of receiver / receiver module indicator lights 1 Switch off the receiver or the transceiver 2 Insert jumpers JP1 and JP2 Then, switch on the receiver or the transceiver 3 V1 JP1 JP2 JP3 The radio channel currently used by the receiver is displayed by indicator lights V2 and V3 V2 indicates the tens, if ON = 10, if OFF = 0. V3 indicates the units by a number of flashes Example : V2 V3 V3 V3 V3 + Radio channel : 10 + 3 = 13 , i.e. frequency 434,300 MHz 4 Switch off the receiver / transceiver JP1 JP2 JP3 Remove jumpers JP1 and JP2 ISIS - 331260D revision02 DE EN FR - 75 - 6.4- Display of receiver/receiver module identity code This procedure is used to determine the identity code used by the receiver or tranceiver receiver module. 1 2 3 Receiver ISRA or transceiver receiver module IST V1 V2 V3 JP1 JP2 JP3 V1 V2 V3 RM R1 R2 R3 R4 R5 R6 R7 JP1 JP2 JP3 R8 4 5 6 7 8 9 10 11 12 13 14 15 16 17 18 19 20 21 V1 V2 V3 V1 V2 V3 JP1 JP2 JP3 Receiver ISRS RM 1 2 3 Step R1 R2 R3 R4 JP1 JP2 JP3 4 5 6 7 8 9 10 11 12 13 Actions and states of receiver/receiver module indicator lights 1 Switch off the receiver or the transceiver 2 Insert jumpers JP2 and JP3 Then, switch on the receiver or the transceiver 3 The identity code is displayed by indicator lights V2 and V3 The identity code is encoded on 8 bits. V2 indicates the 0 position V3 indicates the 1 position For each flash of V2 or V3 record the « 0 » or « 1 » position of the 8 bits of the identity code. V1 JP1 JP2 JP3 Example : V2 V2 V3 V3 V3 V2 V3 V2 Identity code : 00111010 4 - 76 - Switch off the receiver/transceiver Remove jumpers JP2 and JP3 FR EN DE JP1 JP2 JP3 ISIS - 331260D revision02 7 - Installation 7.1- General information concerning installation of products The products should be mounted as near as possible to the electric control cabinet and sheltered from possible impacts and weather. - Any obstacle between the transmitting and receiving antennas will reduce the range of the assembly. - The radio waves do not travel through metal walls. The antennas must therefore not be placed in an enclosure forming a shield, such as a metal cabinet, a reinforced concrete wall, a steel structure or metal wall, etc. In such cases, the antenna must be entirely exposed. Failure to do so will result in strongly downgraded performance : OK NOK OK NOK Metal cabinet Metal cabinet Metal Metal Metal OK - The transmitting and receiving antennas must be set up with a direct line of view of each other, in the same direction or parallel : Recommended OK ISIS - 331260D revision02 Not recommended DE EN NOK FR - 77 - 7.1.1- Using the exterior antenna If the optimum installation conditions are not observed (installation in cabinet, for example), you must use an exterior antenna with extension (BNC connector), which can be ordered separately. For this configuration, you must purchase and install the plug-in BNC antenna kit, reference : OWR01 (See procedure in section entitled «Installation of exterior antenna kit»).. Transmitter ISE or receiver ISR or transceiver IST Antenna extension (see Ref. below) électronique IST électronique ISRS/ISRA ISE électronique Antenna BNC connector kit Ref.: OWR01 Antenna Ref. : VUB084 Antenna extensions available : ref. : VUB170, 0,5m extension (BNC connector), without bracket ref. : VUB105, 2m extension (BNC connector), with bracket ref. : VUB125, 5m extension (BNC connector), with bracket ref. : VUB131, 10m extension (BNC connector), with bracket IMPORTANT : JAY Electronique shall not be liable for use made of any other extensions or antennas other than those recommended above. The performance of the transmit antenna may not satisfy the requirements of the currently applicable standards. - 78 - FR EN DE ISIS - 331260D revision02 7.2- Product installation safety requirements The following installation precautions should be taken when several radio systems are operating on a same site. Be sure to observe the rules detailed below. Note : These requirements apply to all power levels and transmission modes of the ISIS transmitters or transceivers. 7.2.1- Conditions to be observed between two ISIS assemblies with same transmit power (1 or 10mw) P2 d1 d2 E4 E3 P1 E1 E2 2 Condition 1 : Ensure a spacing of at least 2 radio channels between the two ISIS assemblies (Example : channel No. 5 for assembly E1-E2 and radio channel No. 7 for assembly E3-E4) Condition 2 : Ensure a minimum distance «d1» between the transmitter E1 and the receiver or transceiver E2 and «d2» between the transmitter or transceiver E3 and the receiver or transceiver E4. The distance «d1» or «d2» to be observed is linked to the spacing between the radio channels and the range P1 or P2 . Use the chart on the following page to properly set up the components. ISIS - 331260D revision02 DE EN FR - 79 - Minimum distance to be respected between the d (m) perturbing transmitter and the perturbed receiver The curve defines the minimum distance «d» as a function of the range «P» for a difference of eight radio channels between the ISIS assemblies. 16 15 14 13 12 11 10 9 8 7 6 5 4 3 2 1 0 50 100 150 200 250 P (m) Max. range between transmitter and receiver Example : if range «P1» between E1 and E2 is 90m, the minimum «d2» between E2 and E3 must be 3 m. Note : These distances are theoretical and depend on the environment conditions. - 80 - FR EN DE ISIS - 331260D revision02 7.2.2- Condition to be observed between 1mW ISIS assembly and a JAY Electronique radio remote control of the UC, UD or UR series Note : There are no particular installation constraints if the ISIS transmitter is configured with a 10mW transmit power.. Application example : R2 d E1 R1 P E2 Condition 1 : Be sure to set the radio channel of the ISIS assembly for a frequency greater than that used by the JAY Electronique radio remote control. Condition 2 : Be sure to provide a minimum distance «d» between the ISIS (E1) and the receiver U* (R2). The distance to be observed «d» is linked to the spacing between the radio channels and the range «P». Use the chart on the following page to properly set up the components. ISIS - 331260D revision02 DE EN FR - 81 - d (m) Minimum distance to be respected between ISIS transmitter and the U* receiver The curve defines the minimum distance «d» as a function of the range «P» for a frequency spacing of 200 KHz between an ISIS assembly and another JAY Electronique radio remote control. 5.0 4.5 4.0 3.5 3.0 2.5 2.0 1.5 1 0.5 0 P (m) 50 100 150 200 250 Max. range between transmitter and receiver Example : if range «P» between E2 and R2 is 50m, the minimum «d» between E1 and R2 must be 0,5m if the radio channel spacing between the ISIS assembly and another JAY Electronique remote control is 200KHz. Note 1 : These conditions are theoretical and depend on the environment conditions. Note 2 : If the ISIS assembly is operating in the same area with a product other than a JAY Electronique product, the distance «d» will depend on the selectivity of the radio link used on the other product. - 82 - FR EN DE ISIS - 331260D revision02 7.3- Wiring the products 7.3.1- Wiring recommendations To avoid any risk of electrocution, do not open the receiver or transceiver unit when powered up. • Use control components with integrated interference suppression system. • Do not place cables of different classes side by side. • A minimum space (20 cm) should be observed between the different classes: - Classe 1 : Radio, antenna cable (case of an antenna extension), - Classe 2 : Mains for power supply of various units, - Classe 3 : Power control for motors, variable speed drive, etc... Ideally, each cable class should be run through a cable path specific to the cable. If only one cable path is available, the cables of different classes should be separated as much as possible. 7.3.2- Terminal strips If flexible stranded wire is used, crimped terminations should be used to avoid false contacts and short circuits. To open the connection terminal strips: - Vertically insert the screwdriver (flat tip screwdriver of 1.5 to 3 mm width) in the slot located opposite the wire, - Insert the wire, - Remove the screwdriver. Do not apply any lever movement to the screwdriver as this can result in damage to the terminal strip and the printed circuit on the motherboard. ISIS - 331260D revision02 DE EN FR - 83 - 7.3.3- Wiring the electrical power supply IMPORTANT The electrical connections should be made such that when the main switch is off, the receiver ISR or the transceiver IST is also deactivated. ISE transmitter power supply * : i5 i6 i7 i8 i1 i2 i3 i4 Va Vb 9 àto30Volts 30V DC DC S1 ID -+ ON 1 2 3 4 5 6 7 8 CONFIG ON - DC+ A B 1 2 3 4 5 6 7 8 C1 2 3 4 5 6 7 8 - DC+ A B * = In the case of a transceiver IST, the transmitter module power supply is provided by the receiver module of the transceiver.. ISR receiver / IST Transceiver power supply (depending on version) : R3 R4 R5 R6 R7 1 2 3 R2 1 R8 4 5 6 7 8 9 10 11 12 13 14 15 16 17 18 19 20 21 24 VDC (1) 3 2 AC ,65$A / ,67$A 1 1 2 3 R1 2 3 +12 VDC- 2 1 1 2 3 1 2 3 RM 3 JP1 JP2 JP3 48 VAC 3 2 1 1 2 3 DC ,65$4 / ,67$4 V1 V2 V3 24 VAC Receiver ISRA or transceiver IST DC - + ,656) 12 VDC AC 24 VDC (1) 24 VAC 48 VAC V1 V2 V3 JP1 JP2 JP3 RM 1 2 3 R1 R2 R3 R4 1 2 3 1 2 3 1 2 3 1 2 3 1 2 3 1 2 3 1 2 3 1 2 3 4 5 6 7 8 9 10 11 12 13 Receiver ISRS (1) = no polarity to be respected - 84 - FR EN DE ISIS - 331260D revision02 7.3.4- Connection of inputs on transmitter ISE/transmitter module IST Here are the various possibilities of input connections : Transmitter ISE Transceiver transmitter module IST i5 i6 i7 i8 i1 i2 i3 i4 Va ) Vb To supply the transmitter module inputs of transceiver IST, it is possible to connect these inputs on the transmitter module power terminals (+ / -) shown below -+ S1 ID ON 1 2 3 4 5 6 7 8 CONFIG ON - DC+ A B 1 2 3 4 5 6 7 8 C1 2 3 4 5 6 7 8 0v - DC+ A B 3 to 30Vdc Dry contacts on inputs C 1 2 3 4 5 6 7 8 0v 3 to 30Vdc in in PNP solid state outputs on inputs C 1 2 3 4 5 6 7 8 0v 3 to 30Vdc in in NPN solid state outputs on inputs C 1 2 3 4 5 6 7 8 ISIS - 331260D revision02 DE EN FR - 85 - 7.3.5- Connection of outputs on ISR receivers / IST receiver module Example of use of the receiver relay outputs : 1 2 3 RM V1 V2 V3 R1 R2 R3 R4 R5 R6 R7 JP1 JP2 JP3 R8 Receiver ISRA Transceiver receiver module IST 4 5 6 7 8 9 10 11 12 13 14 15 16 17 18 19 20 21 V1 V2 V3 JP1 JP2 JP3 RM 1 2 3 R1 R2 R3 Receiver ISRS R4 4 5 6 7 8 9 10 11 12 13 R1 R2 R3 R4 6 7 8 9 10 11 12 13 AC AC Contactor Indicator lights DC + - Programmable Logic Controller input - 86 - FR EN DE ISIS - 331260D revision02 7.4- Interference suppression of the electrical installation and protection of the power supply In the event of inductive loads on the receiver relay outputs (contactor coils, solenoid valves or electro-brakes), interference suppression devices such as capacitors, RC circuits, diodes, etc. must be placed directly at the terminals of the controlled components using the shortest possible connections. A draw resistor should also be used on the controller inputs. Examples of protection system to be used : Receiver output terminal strip AC DC + - DC + - R - + Output on AC relay Output on DC relay Draw resistor R (RC circuit ) (freewheel diode) (R=Vdc/Imin(100mA)) 7.5- Minimum and maximum current of relay outputs Be sure not to exceed the minimum and maximum characteristics specified in «Receiver technical characteristics» section, by installing, if necessary, an additional load or intermediate relays (auxiliary contacts in electrical control cabinet for power control, for example). ISIS - 331260D revision02 DE EN FR - 87 - 8- Diagnostics and corrective actions in case of problem Problem Possible cause Yellow indicator Power supply cables not correctly inserted in spring light Va does not light up on terminal strip power up Check fuse F1 on support When an input is activated, the corresponding indicator light does not come on When transmitter is switched on, all the indicator lights flash simultaneously - 88 - FR Cables on inputs not correctly inserted in spring terminal strip F1 1 2 3 4 5 6 7 8 CONFIG ON i1 Va Vb ON ID Vb +DC- A B Set S1 Va i2 i3 i4 Power 1 2 3 4 5 6 7 8 i5 i6 i7 i8 i1 électronique Input 8 Input 7 Input 6 Input 5 Input 4 Input 3 Input 2 Input 1 C 1 2 3 4 5 6 7 8 8.1- Transmitter ISE and transceiver transmitter module IST CORRECTIVE ACTION Reconnect cables correctly Replace fuse Reconnect cables correctly Voltage on input is less than 3V Check control circuit The position of the cursors on the «CONFIG» DIP-switches are incorrect EN DE Correctly position the cursors on an existing configuration or radio channel (see programming tables) ISIS - 331260D revision02 8.2- Receiver ISR and transceiver receiver module IST ISRA - IST 1 2 3 F1 V1 V2 V3 JP1 JP2 JP3 F2 RM R1 R2 R3 R4 R5 R6 R7 R8 4 5 6 7 8 9 10 11 12 13 14 15 16 17 18 19 20 21 ISRS V1 V2 V3 JP1 JP2 JP3 F1 F2 RM 1 2 3 R1 R2 R3 R4 4 5 6 7 8 9 10 11 12 13 Problem Possible cause CORRECTIVE ACTION Power supply cables not Green indicator light correctly inserted in spring V1 does not come terminal strip on when receiver is Check fuses F1 and F2 on powered up support Reconnect cables correctly Replace faulty fuses Green indicator light V3 for radio reception does not come on when transmitter sends an active state Antenna wire incorrectly connected Connect antenna wire correctly Check that receiver (or receiver module of transceiver nb.1) Repeat radio channel is on same radio channel as programming procedure transmitter (or transmitter module of transceiver nb.2) Red indicator light V2 comes on after power up Jumpers JP1, JP2 and JP3 are in «short-circuit» position Relay(s) do not activate though indicator light V3 is on (radio link established) Repeat transmitterIdentity code mismatch receiver association; between ISIS transmitter and see “changing product receiver configuration” section ISIS - 331260D revision02 DE Remove jumpers placed in short-circuit position. EN FR - 89 - 9 - Inspection and servicing BEFORE PERFORMING ANY SERVICING OPERATION, SWITCH OFF THE MAIN POWER SUPPLY OF THE CONTROL SYSTEM. - The ISIS transmitter, receiver and transceiver units must not be opened, except for configuration and wiring purposes. The units must only be opened in a clean, dry location free of dust. - Special care must be taken when using the ISIS data transmission system in an environment containing polymer solvents or adhesives which could downgrade correct operation of the products. Regularly check the following points : - Connection of power supplies, inputs and outputs, Control relay contacts, Condition and correct position of cover seal, Tightening of screws on housing and cable gland, and antenna sealing system, - If accessory ref.:OWR01 (external BNC antenna connector) is used, check antenna connection, and check that it is clean and free of any rust at the connector. - Clean the products by eliminating any foreign matter. Only use non aggressive cleaning product on base of soapy solution. - 90 - FR EN DE ISIS - 331260D revision02 10 - Warranty All our devices are guarantied 2 years as of the date of manufacture indicated on the product, wear parts not included. No repair, modification or replacement of a product during the warranty period can be understood as an extension of the warranty period. Limits of warranty : The warranty does not cover defects resulting from : • • • • Transport False manoeuver or non-observance of connection diagrams when setting the equipment into service Insufficient supervision or servicing, utilization not complying with the specifications detailed in the technical manual and, as a general rule, storage, operation or environment conditions (atmospheric, chemical, electrical or other conditions). Conditions not specified on order of the equipment The warranty shall not apply subsequent to any modifications or additions to the equipment performed by the customer without written approval by JAY Electronique. The JAY Electronique responsability during the warranty period is limited to material and construction defects. This warranty comprises repair in the JAY Electronique workshops or replacement, free of charge, of parts recognized to be defective following expert inspection by the Jay Technical Department. The warranty shall not give rise to any compensation for damage claims. Any disputes relative to a supply or settlement thereof shall be ruled by the COURT OF COMMERCE OF GRENOBLE, solely competent, even in the event of an Appeal or a plurality of defendants. ISIS - 331260D revision02 DE EN FR - 91 - 11 - Appendices 11.1- Radio characteristics Transmit frequency bands ISM 433-434Mhz Modulation FM Radio channels 18 user-programmable Steps 100KHz from 433,1 to 434,7MHz, the 18th 434,740MHz Effective radiated power ISE/ISR : 1mW or 10mW depending selection IST : 10mW Average range (1) In unobstructed area (1mw) : 200m (2) In unobstructed area (10mw) : 350m In typical industrial environment (1mW) : 80m (2) In typical industrial environment (10mW) : 100m (1) = Range will vary according to environment conditions of transmitter and reception antenna (metal frameworks, walls … ). The range will be decreased if one of the products is mounted on a moving equipment. (2) = 1mW mode not available for IST transceivers 11.2- Technical characteristics for ISE transmitter and transceiver transmitter module IST Housing Material : ABS Color : Yellow (ISE) or Gray (IST) Tightness : IP65 Dimensions (w/out CG and antennas): ISE : 92 x 123 x 50 mm IST : 120 x 240 x 100 mm Weight : 270 g Power supply Type : DC Range : 9V to 30VDC consumption (see next section for transceiver IST). min. = 100 mA max. = 200 mA by active input = 12 mA Number of available input 8 - 92 - FR EN DE ISIS - 331260D revision02 Withstand capacity relative to fast power supply transients Without damage Withstand capacity relative to polarity inversions on power 30V Fuse protection Fuse 250 mA Low level on opto-coupler input DC Voltage < 2 V High level on opto-coupler input DC Voltage > 3 V Maximum voltage level on an input with no damage 30 V Withstand capacity relative to fast power supply transients with +2KV direct connection Withstand capacity relative to electrostatic discharges ± 4 kV Withstand capacity relative to electromagnetic fields 10v/m Operating temperature range -20°C to +50°C Storage temperature range -30°C to 70°C Maximum frequency of a signal on an input (continuous or intermittent transmission mode) 1mW mode (1) = 10Hz max 10mW mode = 0,5Hz max (1) = 1mW mode not available for IST transceivers ISIS - 331260D revision02 DE EN FR - 93 - 11.3- Technical characteristics for ISR receiver and transceiver receiver module IST Housing Material : ABS Color : Yellow (ISRS) or Gray (ISRA/IST) Tightness : IP65 Dimensions (w/out CG and antennas): ISRS = 92 x 123 x 50 mm ISRA/IST = 240 x 120 x 100 mm Weight : ISRS : 350 g / ISRA : 1,2 kg / IST : 1,3 kg ISRS receiver power supply DC : AC : 12VDC (9 to 20VDC) 24VAC (+10%/-15%) 24VDC (20 to 75VDC) 48VAC (+10%/-15%) ISRA receiver / IST transceiver power supply DC : AC : 12VDC (9 to 20VDC) 24VAC (+10%/-15%) 24VDC (20 to 28VDC) 48VAC (+10%/-15%) Number of output ISRS : 4 + 1 «Radio quality» ISRA/IST : 8 + 1 «Radio quality» Type of output Relays with 1 NO contact Antenna Fixed (standard) or BNC external type ref.: VUB084 with kit ref.: OWR01 Tuner sensitivity < 2μV Fuse protection 2 fuses on electronic support (rated in accordance with power supply voltage and receiver models; see “fuse characteristics and rating section”) Response time of an output when an input is activated or deactivated (continuous or intermittent radio transmission mode) 1mW mode (not available for IST) : < 60ms 10mW mode : < 500ms Passive shutdown time (radio jamming) 2 s. on a function relay 1.9 s. on the «Radio quality» relay (RM) - 94 - FR EN DE ISIS - 331260D revision02 Consumption Element power voltage ISRS ISRA IST Min Max By active output Min Max By active output Min Max By active input By active output 12VDC 24VDC 24-48VAC 23 mA 200 mA + 20 mA 23 mA 300 mA + 20 mA 123 mA 500 mA + 12 mA + 20 mA 350 mW 2W + 275 mW 350 mW 3W + 275 mW 1.8 W 6W + 180 mW + 275mW 350 mW 2W + 275 mW 9W 16 W + 300 mW 9W 16 W + 200 mW + 300 mW 11.3.1- ISR receiver and IST transceiver receiver module relay characteristics • Contacts : AgNi 0,15 • Max. power at cosphi=1 : 2000 VA • Max. current switching : 8 A • Max. voltage switching : 400 VAC • Minimum Current / Voltage advised switching : 100 mA / 12 VDC • 100 000 switching cycles at 250 VAC, 8 A, cosphi=1 • 50 000 switching cycles at 24 VDC, 8 A • Tests per EN 60947-5-1 : DC13 to 0,5 A / 24 VDC AC15 to 3 A / 250VAC 11.3.2- Number of switching cycles on various contactors Contactor CA2DN LC1D09 LC1D18 LC2D09 Physical unit switched by relay Number of switching cycles for output relays Switching under 230VAC (70VA,cosphi=0,75) 2 x 10 Switching under 110VAC, (70VA,cosphi=0,75) 1 x 10 Switching under 48VAC (70VA,cosphi=0,75) 0,5 x 10 ISIS - 331260D revision02 DE EN 6 6 6 FR - 95 - 11.4- Fuse characteristics Transmitter ISE / Transceiver transmitter module IST Type 663 (LT-5) on electronic support, calibre 250mA F1 ID ON 1 2 3 4 5 6 7 8 CONFIG ON +DC- A B 1 2 3 4 5 6 7 8 C 1 2 3 4 5 6 7 8 Receiver ISRA / Transceiver receiver module IST Type 663 (LT-5) on electronic support Supplied with 12 VDC = Fuse at location F2 315mA/250VAC/T Supplied with 24 VDC = Fuse at location F1 250mA/250VAC/T Supplied with 24 VAC = Fuse at location F2 1,6A/250VAC/T Supplied with 48 VAC = Fuse at location F1 800mA/250VAC/T 1 2 3 F1 F2 RM R1 R2 R3 R4 R5 R6 R7 R8 4 5 6 7 8 9 10 11 12 13 14 15 16 17 18 19 20 21 Receiver ISRS Type 663 (LT-5) on electronic support Supplied with 12 VDC = Fuse at location F2 250mA/250VAC/T Supplied with 24 VDC = Fuse at location F1 500mA/250VAC/T Supplied with 24 VAC = Fuse at location F1 500mA/250VAC/T Supplied with 48 VAC = Fuse at location F1 500mA/250VAC/T F1 RM R1 R2 R3 R4 F2 1 2 3 - 96 - FR EN 4 5 6 7 8 9 10 11 12 13 DE ISIS - 331260D revision02 11.5- Terminal strips, number and function Transmitter ISE / Transceiver transmitter module IST : Terminal number «-» DC «+» C 1 2 3 4 5 6 7 8 Function Power supply Common, 0VDC for inputs Input nb 1 Input nb 2 Input nb 3 Input nb 4 Input nb 5 Input nb 6 Input nb 7 Input nb 8 Receiver ISR / Transceiver receiver module IST Terminal number 1-2-3 4-5 6-7 8-9 10 - 11 12 - 13 14 - 15 16 - 17 18 - 19 20 - 21 Function Power supply «Radio quality» RM relay contacts Contacts of R1 output relay Contacts of R2 output relay Contacts of R3 output relay Contacts of R4 output relay Contacts of R5* output relay Contacts of R6* output relay Contacts of R7* output relay Contacts of R8* output relay * = only on receiver ISRA or transceiver IST ISIS - 331260D revision02 DE EN FR - 97 - 11.6- Product dimensions Transmitter ISE and receiver ISRS : 20 Unit = mm 26 170 2xØ4 électronique 123 108 électronique Input 8 Input 7 Input 6 Input 5 Input 4 Input 3 Input 2 Input 1 Power Set 79 25 50 19 25 92 Transceiver IST : Receiver ISRA : 120 100 66 27 120 100 15 170 66 50 27 170 4xØ4 4xØ4 229 240 229 240 électronique électronique 90 90 35 30 47 48 - 98 - FR EN 35 30 DE 48 47 ISIS - 331260D revision02 11.7- Installation of the antenna guide before use 1. Open the housing and unscrew the spiral nut used to secure the antenna Antenna wire Spiral nut 2. Insert the antenna wire in the guide Guide 3. Slide the guide into the spiral nut, then fully into the cable gland base upto the limit in the base STOP 4. Tighten the spiral nut to the sticking point, then add a quarter turn to lock the antenna guide and ensure tightness of the assembly. Check that the guide is securely mounted. Check that the antenna entered at most the guide to allow an optimal reception ISIS - 331260D revision02 DE EN FR - 99 - 11.8- Installation of external BNC antenna kit OWR01 External antenna kit Transmitter ISE / Receiver ISRS Transceiver transmitter module IST A OWR01 B C Receiver ISRA Transceiver receiver module IST électronique électronique 1 1 2 2 A A 3 B 3 C B 4 C 4 Fr - 100 - FR EN DE ISIS - 331260D revision02 11.9- Unit configuration summary Information about the installation : Controlled equipment : Transmitter configuration or Transceiver nb.1 : Transmitter configuration or Transceiver nb.2 : (Gray in or tick the cursor position) (Gray in or tick the cursor position) ID ID ON ON 1 2 3 4 5 6 7 8 1 2 3 4 5 6 7 8 = cursor position = cursor position CONFIG CONFIG ON ON 1 2 3 4 5 6 7 8 1 2 3 4 5 6 7 8 = cursor position = cursor position ISIS - 331260D revision02 DE EN FR - 101 - - 102 - FR EN DE ISIS - 331260D revision02 Technische Notiz und Benutzerhandbuch ISIS Kabelloses Datenübertragungssystem -Logische Statussignale- ISIS - 331260D revision02 DE EN FR - 103 - INHALT 1 - Allgemeine Benutzungsvorschriften und Sicherheitsmassnahmen ...................................... s.106 2 - Vorstellung der Produktreihe ISIS........................ s.107 3 - Kennzeichnung der Produkte bei Lieferung ....... s.108 3.1- Empfehlungen beim Auspacken ................................................. s.108 3.2- Produktidentifizierung .................................................................. s.108 3.2.13.2.23.2.33.2.4- Sender ISE - 8 logische Eingänge .............................................. s.108 Empfänger ISRS - 4 Relaisausgänge ......................................... s.109 Empfänger ISRA - 8 Relaisausgänge ........................................ s.109 Transceiver IST - 8 logische Eingänge und 8 Relaisausgänge .. s.110 3.3- Konfiguration bei der Lieferung ....................................................s.111 4 - Funktionsprinzip .................................................... s.112 4.14.24.34.44.54.6- Allgemeines .................................................................................. s.112 Wozu dienen ein Funkkanal und ein Identitätscode? ................ s.114 Sender/Transceiver-Funkmodus ................................................ s.115 Funkstärke des Senders ............................................................. s.116 RM Relais «Funkqualität» ........................................................... s.117 Synchronisierung der Transceiver IST ....................................... s.117 5 - Rasche Inbetriebnahme ........................................ s.118 5.15.25.35.4- Vorwort.......................................................................................... s.118 Anschluss des Empfängers/Empfängermoduls......................... s.118 Anschluss des Senders/Sendermoduls ..................................... s.119 Test der Produkte ......................................................................... s.119 6 - Änderung der Werkskonfiguration ...................... s.120 6.1- Vorwort.......................................................................................... s.120 6.2- Konfigurationsänderung des Produkts ....................................... s.122 6.2.1- Sonderfall des Transceivers IST .................................................. s.124 6.3- Anzeige des Funkkanals des Empfängers / Empfängermoduls ... s.125 6.4- Anzeige des Empfänger/Empfängermodul -Identitätscodes .... s.126 7 - Installation .............................................................. s.127 7.1- Allgemeines über die Anbringung der Produkte ........................ s.127 7.1.1- Antennenversetzung .................................................................... s.128 7.2- Installationsbedingungen ............................................................. s.129 - 104 - FR EN DE ISIS - 331260D revision02 7.2.1- Zwischen zwei ISIS-Systemen mit gleicherleistung (1 oder 10 mW) zu beachtende Bedingungen ............................................................ s.129 7.2.2- Zu beachtende Bedingungen zwischen einem ISIS-Set 1mW und der Funkfernsteuerung JAY Electronique Serie UC, UD oder UR ..... s.131 7.3- Anschluss der Produkte............................................................... s.133 7.3.17.3.27.3.37.3.47.3.5- Anschlussempfehlungen ............................................................. s.133 Anschluss an die Klemmenfeder ................................................. s.133 Anschluss der Stromversorgung .................................................. s.134 Anschluss der Eingänge des Senders / Sendermoduls .............. s.135 Anschluss der Ausgänge des Empfängers / Empfängermodul .... s.136 7.4- Schutz der Empfängerausgänge und Entstörung ..................... s.137 7.5- Minimaler und maximaler Arbeitsstrom der Relaisausgänge.... s.137 8 - Diagnose und Lösungen im Problemfall ............. s.138 8.1- Sender ISE und Sendermodul Transceiver IST......................... s.138 8.2- Empfänger ISR und Empfängermodul Transceiver IST............ s.139 9 - Kontrolle und Wartung .......................................... s.140 10 - Garantie .................................................................. s.141 11 - Anhang ................................................................... s.142 11.1- Funkelektrische Eigenschaften ................................................... s.142 11.2- Technische Daten für Sender ISE und Sendermodul IST......... s.142 11.3- Technische Daten für Empfänger ISR und Empfängermodul Transceiver IST .....s.144 11.3.1- Eigenschaften der Relais Empfänger ISR und Empfängermodul IST .............. s.145 11.3.2- Anzahl der Umschaltungen der einzelnen Schütze ..................... s.145 11.411.511.611.711.811.9- Eigenschaften der Sicherungen.................................................. s.146 Anschlussklemmen, Nummern und Funktionen........................ s.147 Dimensionen der Produkte.......................................................... s.148 Installation des Antenneführers vor der Anwendung ................. s.149 Installation des abnehmbaren Antenne-BNC-Kits ..................... s.150 Konfiguration Ihrer Sender/Empfänger/Transceiver ISIS .......... s.151 Formular für Verbesserungsvorschläge für dieses Handbuch . s.152 ISIS - 331260D revision02 DE EN FR - 105 - 1 - Allgemeine Benutzungsvorschriften und Sicherheitsmassnahmen • Für eine optimale Sicherheit bei Installation und Nutzung müssen die in diesem Handbuch gegebenen Sicherheitsanweisungen beachtet werden. • Die Stromversorgung muss der Norm EN60950, EN50081-1 (EMV) entsprechen, die Kennzeichnung CE tragen und die in diesen Unterlagen vorgeschriebenen elektrischen Eigenschaften beachten. • Das Material warten und regelmässig überprüfen. - 106 - FR EN DE je nach Benutzungshäufigkeit ISIS - 331260D revision02 2 - Vorstellung der Produktreihe ISIS Wir danken Ihnen für Ihr Vertrauen. Sie haben soeben ein kabelloses Datenübertragunssystem der Serie ISIS erstanden, das Ihnen erhöhte Zuverlässigkeit bietet. Die Serie ISIS ist für die Übertragung logische Statussignale (Monooder bidirektional) für folgende unterschiedliche Anwendungsbereiche vorgesehen : - Industrielle Ausrüstungen - Infrastrukturen - Industrielle Hebevorrichtungen - Landwirtschaftliche Ausrüstungen Die Serie ISIS erfüllt die Sicherheitsanforderungen der derzeitig gültigen und sich in Ausarbeitung befindlichen Normen und entspricht der Europäischen Richtlinie : RTTE : Funkausrüstung und Telekommunikationsterminals (Niederspannung, elektromagnetische Verträglichkeit, funkelektrisches Spektrum). Für jegliche Benutzungsfragen oder Probleme in Bezug auf die Installation der Serie ISIS wenden Sie sich bitte an unseren technischen Kundendienst : Montag bis Freitag Tel : +33.(0)4.76.41.44.00 Fax : +33.(0)4.76.41.44.44 Email : [email protected] ISIS - 331260D revision02 DE EN FR - 107 - 3 - Kennzeichnung der Produkte bei Lieferung 3.1- Empfehlungen beim Auspacken • Beim Auspacken der Produkte muss die Antenne nach dem im Anhang im Kapitel «Installation des Antenneführers vor der Anwendung» erläutertem Verfahren montiert werden. • Wenn die Werkskonfiguration der Sender geändert werden muss, muss bei der Öffnung des Sendergehäuses folgendes beachtet werden: Keine Spannung auf den Elektronikstreifen zwischen elektronischer Karte und Deckel ausüben. • Es wird dringend empfohlen den Identitätscode zu ändern, um die Einheitlichkeit Ihrer Anlage zu gewährleisten. Mehr dazu im Kapitel «Änderung der Werkskonfiguration». 3.2- Produktidentifizierung 3.2.1- Sender ISE - 8 logische Eingänge Va Power Set i1...i8 Input 8 Input 7 Input 6 Input 5 Input 4 Input 3 Input 2 Input 1 Set Vb électronique i5 i6 i7 i8 i1 i2 i3 i4 i1...i8 Va Vb F1 Set ID ID ON 1 2 3 4 5 6 7 8 CONFIG B ON A CFG C 1 2 3 4 5 6 7 8 - DC+ A B SET Va Vb A i1 bis i8 - 108 - 1 2 3 4 5 6 7 8 Taste «SET» ID Dip-switch «ID» (Identitätscode) Gelb LED «Stromversorgung» CFG Dip-switch «CONFIG» Güne LED «Radio Übertragung» F1 Sicherung (Siehe Kapitel 11.4) Klemmleiste «Stromversorgung» B Klemmleiste «logische Eingänge» LED «Signal auf den Eingängen Nr. 1 bis Nr. 8 vorhanden » FR EN DE ISIS - 331260D revision02 3.2.2- Empfänger ISRS - 4 Relaisausgänge F1 F2 RM R1 R2 R3 V1 V2 V3 R4 1 2 3 4 5 6 7 8 9 10 11 12 13 A B JP1 JP2 JP3 3.2.3- Empfänger ISRA - 8 Relaisausgänge A 1 2 3 JP1 JP2 JP3 R8 R7 R6 R5 R4 R3 V1 V2 V3 R2 R1 RM F1 F2 4 5 6 7 8 9 10 11 12 13 14 15 16 17 18 19 20 21 B V1 V2 V3 F1 F2 Grüne LED «Stromversorgung» Rote LED «Programmierung» Grüne LED «Empfang Funksignal» Sicherung (Siehe Kapitel 11.4) Sicherung (Siehe Kapitel 11.4) ISIS - 331260D revision02 JP1 JP2 JP3 A B DE Jumper «JP1» Jumper «JP2» Jumper «JP3» Klemm. «Stromversorgung» Klemm. «Relaisausgänge» EN FR - 109 - 3.2.4- Transceiver IST - 8 logische Eingänge und 8 Relaisausgänge Sendermodul Va Vb i5 i6 i7 i8 i1 i2 i3 i4 i1...i8 Set ID F1 ID ON 1 2 3 4 5 6 7 8 CONFIG B ON A CFG C 1 2 3 4 5 6 7 8 - DC+ A B A 1 2 3 JP1 JP2 JP3 R8 R7 R6 R5 R4 R3 V1 V2 V3 R2 R1 F1 F2 RM Empfängermodul 1 2 3 4 5 6 7 8 4 5 6 7 8 9 10 11 12 13 14 15 16 17 18 19 20 21 B Modul «Sender 8 logische Eingänge» SET Va Vb A i1 bis i8 Taste «SET» ID Dip-switch «ID» (Identitätscode) Gelb LED «Stromversorgung» CFG Dip-switch «CONFIG» Güne LED «Radio Übertragung» F1 Sicherung (Siehe Kapitel 11.4) Klemmleiste «Stromversorgung» B Klemmleiste «logische Eingänge» LED «Signal auf den Eingängen Nr. 1 bis Nr. 8 vorhanden » Modul «Empfänger 8 Relaisausgänge» V1 Grüne LED «Stromversorgung» JP1 Jumper «JP1» V2 Rote LED «Programmierung» JP2 Jumper «JP2» V3 Grüne LED «Empfang Funksignal» JP3 Jumper «JP3» Klemm. «Stromversorgung» F1 Sicherung (Siehe Kapitel 11.4) A F2 Sicherung (Siehe Kapitel 11.4) B Klemm. «Relaisausgänge» WICHTIG : Die Transceiver müssen synchronisiert werden. Mehr dazu im Kapitel «Synchronisierung der Transceiver IST» - 110 - FR EN DE ISIS - 331260D revision02 3.3- Konfiguration bei der Lieferung Die ISIS-Sender, Empfänger und Transceiver werden mit einer Standard- konfiguration geliefert, die einen sofortigen Einsatz ermöglicht. Die Voreinstellungen sind folgende : Identitätscode :............... 11111111 Funkkanal : ..................... 17 (434,7 MHz) Sendemodus : ................ durchgehende Sendung Sendestärke :.................. 10mW Zuordung der Sendereingänge und Empfängerausgangsrelais (unveränderlich) : Sendereingänge Gesteuerte Empfängerausgangsrelais ISE / IST ISRS ISRA / IST 1 R1 R1 2 R2 R2 3 R3 R3 4 R4 R4 5 / R5 6 / R6 7 / R7 8 / R8 Position der Dip-Switch-Cursor «ID» und «CONFIG» im Sender und Sendermodul : ID CONFIG ON ON 1 2 3 4 5 6 7 8 1 2 3 4 5 6 7 8 Cursorposition Anmerkung : Beim Umtausch eines Senders oder Empfängers allein, wenden Sie sich an den Kapitel «Anderung der Werkskonfiguration» um die Konfiguration des Ersatzproduktes zu ändern. ISIS - 331260D revision02 DE EN FR - 111 - 4 - Funktionsprinzip 4.1- Allgemeines Das Datenübertragungssystem ISIS ermöglicht die Übertragung von 8 logischen Status von einem Punkt der Anlage auf einen anderen Punkt. Monodirektionale Verbindung : Der ISE Sender überträgt den logischen Status seiner Ausgänge über Funk auf den ISRA Empfänger (8 Ausgänge) oder ISRS Empfänger (4 Ausgänge) , der diese dechiffriert und auf seinen Relaisausgängen wieder herstellt. Bidirektionale Verbindung : Der Transceiver IST besteht aus einem Gehäuse, einem Sendermodul und einem Empfängermodul. Das Sendermodul des 1. Transceivers IST schickt den Logikzustand seiner Eingänge an das Empfängermodul des 2. und zugeordneten Transceivers IST. Die Übertragung der logischen Status erfolgt über einen Funkkanal mit einem Identitätscode. WICHTIG : Es wird dringend geraten, den Sender und den Empfänger oder die beiden Transceiver* auf eine nicht benutzte Kommunikationsfrequenz und mit einem einmaligen Identitätscode zu programmieren, um jegliche Interferenzen mit anderen in der Nähe installierten Funksystemen zu vermeiden. Wenn mehrere Funksysteme an demselben Ort benutzt werden, müssen bestimmte Installationsvorsichten eingehalten werden (siehe Kapitel «Installationsbedingungen»). *= jedes «Sender-/ Empfänger-Modul» Paar muss mit einem Identitätscode und auf einem getrennten Funkkanal funktionieren. - 112 - FR EN DE ISIS - 331260D revision02 Eingang Nr.X Ausgang Nr.X Sender ISE Empfänger ISRS/ISRA Eingang Nr.X Ausgang Nr.X Ausgang Nr.Y Eingang Nr.Y Transceiver IST Nr.1 ISIS - 331260D revision02 Transceiver IST Nr.2 DE EN FR - 113 - 4.2- Wozu dienen ein Funkkanal und ein Identitätscode? Der Funkkanal ermöglicht die Übertragung von Nachrichten (einen logischen Status) auf einer Hertzfrequenz. Das ISISPodukt ermöglicht eine Auswahl zwischen 18 Funkkanälen. Bei der Installation ist es wichtig, über die in der Nähe benutzten Funkkanäle (innerhalb eines Radius von 100 Meter) informiert zu sein. Der Identitätscode ermöglicht die Chiffrierung der von einem ISIS Sender auf einen ISIS Empfänger übertragenen Funkmeldungen. Dieses Produkt bietet eine Auswahl zwischen 256 Identitätscodes (über den DIP-Schalter «ID»). Bei Anwendungen, bei denen mehrere ISIS Systeme an demselbem Standort benutzt werden, muss jedes ISIS-System(1) aus Sicherheitsgründen über einen anderen Identitätscode kommunizieren : Sender A Empfänger A Sender A Set Funkkanal Nr.1 IDcode : 11111111 Sender B Funkkanal Nr.1 IDcode : 11111111 Empfänger B Sender B Empfänger B Power Set Funkkanal Nr.3 IDcode : 11111111 Funkkanal Nr.3 IDcode : 11111111 INSTALLATION NICHT KORREKT Die beiden Systeme A und B besitzen denselben Identitätscode. Der Code "11111111" ist die Standard-Code für die Lieferung. électronique électronique Input 8 Input 7 Input 6 Input 5 Input 4 Input 3 Input 2 Input 1 électronique Set électronique Funkkanal Nr.1 Funkkanal Nr.1 IDcode : 11111000 IDcode : 11111000 Input 8 Input 7 Input 6 Input 5 Input 4 Input 3 Input 2 Input 1 Power électronique Power électronique Set électronique Power Input 8 Input 7 Input 6 Input 5 Input 4 Input 3 Input 2 Input 1 électronique Input 8 Input 7 Input 6 Input 5 Input 4 Input 3 Input 2 Input 1 Empfänger A Funkkanal Nr.3 Funkkanal Nr.3 IDcode : 10101010 IDcode : 10101010 INSTALLATION KORREKT Die beiden Systeme A und B haben einen unterschiedlichen Identitätscode. Die Codes unterscheiden sich von den vorprogrammierten Lieferung. (1) Ausser bei Anwendungen, bei denen mehrere ISIS Sender mit demselben Empfänger kommunizieren müssen. - 114 - FR EN DE ISIS - 331260D revision02 4.3- Sender/Transceiver-Funkmodus Der Sender ISE kann in zwei verschiedenen Funkmodus arbeiten: Diskontinuierliche Sendung oder durchgehende Sendung (Auswahl mit dem Cursor Nr. 6 des DIP Switch «CONFIG» im Sender). Das Sendermodul des Transceivers IST funktioniert nur in der Betriebsart «Durchgehende Funksendung». Wichtig : Ein auf die Betriebsart «Diskontinuierliche Funksendung» parametrierter Transceiver wird nicht funktionieren. Der Auswahl des Funkmodus hängt von der Anwendung ab, für die das ISIS-System benutzt wird. CONFIG Diskontinuierliche Funksendung : (Cursor Nr.6 auf OFF) "1" "0" ON 1 2 3 4 5 6 7 8 = Cursorposition Der Sender ISE ist nur auf Sendung, wenn mindestens einer der Eingänge aktiv ist. Dieser Modus wird für Anwendungen empfohlen, bei denen mehrere Sender demselben Empfänger zugeordnet werden. In diesem Fall muss sichergestellt werden, dass die ISIS Sender nicht gleichzeitig senden. Hinweis : Ein auf die Betriebsart «Diskontinuierliche Funksendung» parametrierter Transceiver wird nicht funktionieren. CONFIG Durchgehende Funksendung : (Cursor Nr. 6 auf ON) "1" "0" ON 1 2 3 4 5 6 7 8 = Cursorposition Der Sender ISE oder Transceiver IST ist unabhängig vom Status seiner Eingänge auf Sendung. Dieser Modus wird für Anwendungen empfohlen, bei denen es notwendig ist, die Verfügbarkeit der Funkverbindung zu kontrollieren. Diese Kontrolle kann durch die Überwachung des Relaisausgangs RM «Funkqualität» erfolgen (siehe Beschreibung auf den nächsten Seiten). ISIS - 331260D revision02 DE EN FR - 115 - 4.4- Funkstärke des Senders Der Sender ISE kann mit zwei verschiedenen Funkstärken betrieben werden: 1 mW oder 10 mW (Wahl mit dem Cursor Nr.7 des DIP Switch «CONFIG» im Sender). Die Wahl der Funkstärke hängt von der Anwendung ab, für die das ISIS System benutzt wird. Der Transceiver IST funktioniert ausschließlich mit einer Funksendeleistung von 10mW. Wichtig : Ein auf eine Funksendeleistung von 1mW parametrierter Transceiver wird nicht funktionieren. CONFIG Funkstärke 1 mW : (Cursor Nr. 7 auf OFF) "1" "0" ON 1 2 3 4 5 6 7 8 = Cursorposition Wenn die Reichweite zwischen ISIS Sender und Empfänger schwach ist oder wenn die Reaktionszeit eines Ausganges rasch sein muss (unter 60 ms), sollte besser eine Funkstärke 1 mW gewählt werden. Hinweis : Ein auf eine Funksendeleistung von 1mW parametrierter Transceiver wird nicht funktionieren. CONFIG Funkstärke10 mW : (Cursor Nr. 7 auf ON) "1" "0" ON 1 2 3 4 5 6 7 8 = Cursorposition Wenn die Reichweite zwischen ISIS Sender und Empfänger groß sein muss, ist es besser, die Funkstärke 10 mW zu wählen. Achtung : die Reaktionszeit eines Ausganges im Modus 10 mW ist unter 500 ms. Allgemeiner Hinweis: Wenn mehrere Funksysteme nebeneinander vorhanden sind, schauen Sie im Kapitel « Installationsbedingungen » für die Installation der Produkte nach. - 116 - FR EN DE ISIS - 331260D revision02 4.5- RM Relais «Funkqualität» Um den Status der Funkverbindung zwischen Sender ISE und Empfänger ISR oder oder zwischen zwei Transceivern IST zu prüfen, ist ein Ausgang «Funkqualität» im Empfänger/Transceiver verfügbar (Relais RM). RM Relais aktiviert : ...... Gute Funkverbindung zwischen Sender und Empfänger RM Relais deaktiviert : .. Keine Funkverbindung zwischen Sender und Empfänger Hinweis : Diese Funktion ist nur im durchgehenden Funkmodus verfügbar oder im diskontinuierlichen Funkmodus sobald ein Ausgang aktiv ist. 4.6- Synchronisierung der Transceiver IST Wenn die Installation Transceiver IST, enthält, müssen diese «synchronisiert» werden. Die Synchronisierung erfolgt auf einem der beiden Transceiver mit dem Cursor Nr. 8 des DIP-Switch «CONFIG» des Sendermoduls. CONFIG - Der Cursor Nr. 8 des ersten Transceivers muss auf ON stehen (Synchro. aktiv). - Der Cursor Nr. 8 des zweiten Transceivers muss auf OFF stehen (Synchro. inaktiv).. ISIS - 331260D revision02 CONFIG ON ON 1 2 3 4 5 6 7 8 1 2 3 4 5 6 7 8 = Cursorposition = Cursorposition Sendermodul IST_1 Empfängermodul IST_2 Empfängermodul IST_1 Sendermodul IST_2 Transceiver IST_1 Transceiver IST_2 DE EN FR - 117 - 5 - Rasche Inbetriebnahme 5.1- Vorwort Ziel dieses Kapitels ist, sich mit der Funktionsweise des ISISSystems über eine rasche Inbetriebnahme vertraut zu machen. Der Sendereingang Nr.2 wird für die Durchführung dieses Tests benutzt. 5.2- Anschluss des Empfängers/Empfängermoduls Der Empfänger oder Empfängermodul muss verkabelt sein und nachstehender Zeichnung entsprechen. Dabei muss der Anschluss der Stromversorgung dem benutzten Modell entsprechen : AC ,65$A / ,67$A 1 3 2 1 3 1 2 3 2 1 2 3 +12 VDC- 24 VDC (1) 2 1 3 1 2 3 3 2 1 1 2 3 DC ,65$4 / ,67$4 24 VAC 48 VAC 1 2 3 V1 V2 V3 RM R1 R2 R3 R4 R5 R6 R7 R8 4 5 6 7 8 9 10 11 12 13 14 15 16 17 18 19 20 21 Empfänger ISRA oder Empfängermodul IST DC - V1 V2 V3 RM 1 2 3 R1 R2 R3 ,656) + 12 VDC R4 AC 24 VDC (1) 24 VAC 48 VAC 1 2 3 1 2 3 1 2 3 1 2 3 1 2 3 1 2 3 1 2 3 1 2 3 4 5 6 7 8 9 10 11 12 13 Empfänger ISRS (1) = Keine polarität - 118 - FR EN DE ISIS - 331260D revision02 5.3- Anschluss des Senders/Sendermoduls Der Sender muss verkabelt sein und nachstehender Zeichnung entsprechen : Va Power Input 8 Input 7 Input 6 Input 5 Input 4 Input 3 Input 2 Input 1 Set Vb i2 i1 Va i5 i6 i7 i8 i3 i4 i2 Vb SET ID ON 1 2 3 4 5 6 7 8 CONFIG ON - DC+ A B DC 9...30Volts 1 2 3 4 5 6 7 8 C 1 2 3 4 5 6 7 8 + - 5.4- Test der Produkte Sender und Empfänger oder beide Transceiver einschalten. • Seite Sender ISE / Sendermodul IST : - Es wird ein Autotest durchgeführt (die LED i1 und i8 blinken auf sequentielle Weise) - Die LED Va (Stromversorgung) und i2 (Eingang Nr. 2 aktiv) müssen aufleuchten, die LED Vb (Funk) muss blinken. • Seite Empfänger ISE / Empfängermodul IST : - Die Relais R2 und RM müssen aktiviert werden (LED R2 und RM leuchten). - Die LED V1 (Stromversorgung) und V3 (Funksendung) müssen aufleuchten. Bei Anomalien im Kapitel «Diagnose und Lösungen im Problemfall» nachschauen ISIS - 331260D revision02 DE EN FR - 119 - 6 - Änderung der Werkskonfiguration 6.1- Vorwort Um die Einheitlichkeit der ISIS Installation zu gewährleisten und jegliche unbeabsichtige Störung eines anderen Systems zu vermeiden, wird empfohlen, die Werkskonfiguration (Konfiguration bei der Lieferung) der Produkte individuell umzuprogrammieren. Diese Programmierung kann in der Werkstatt vor der definitiven Installation und Benutzung erfolgen. Aus Sicherheitsgründen wird empfohlen, das die Eingänge während der Umprogrammierung des Produkts nicht aktiv sind. Wichtig : Sender ISE / Sendermodul des Transceivers IST Der Identitätscode wird anhand des DIP-Schalters mit 8 Cursors «ID» im Inneren programmiert (Cursor auf Position «ON» = 1). ID Beispiel : ON Identitätscode = "1" "0" 10101011 1 2 3 4 5 6 7 8 = Cursorposition Die anderen Konfigurationen (Funkkanal, Funkmodus und Funkstärke) werden mit dem DIP-Schalter mit 8 Cursors «CONFIG» im Inneren programmiert (Cursor auf Position «ON» = 1). CONFIG "1" "0" 1 2 3 4 5 6 7 8 Funkkanal (siehe Tabelle auf der folgenden Seite) Funkmodus (Transceiver IST = immer auf "ON") 1 (ON) = Durchgehende Funksendung 0 (OFF) = Diskontinuierliche Funksendung - 120 - FR EN = Cursorposition ON DE Nur für Transceiver IST (Siehe § "Synchronisierung der Transceiver") 1 (ON) = Synchro. aktiv 0 (OFF) = Synchro. inaktiv Funkstärke (Transceiver IST = immer auf "ON") 1 (ON) = 10 mw 0 (OFF) = 1 mW ISIS - 331260D revision02 Progammiertabelle des Funkkanals auf dem Sender oder Transceiver : Wenn die Position der Cursor keinem Funkkanal entspricht, blinken solange alle LED der Karte auf, bis die Position korrekt ist Hinweis : FunkFunkkanal kanal Nr. Nr. Serie Serie ISIS UC-UD-UR 01 01 05 02 09 03 13 04 17 05 21 06 25 07 29 08 33 09 37 10 41 11 45 12 49 13 53 14 57 15 61 16 / 17 / 18 Frequ. (MHz) 433,100 433,200 433,300 433,400 433,500 433,600 433,700 433,800 433,900 434,000 434,100 434,200 434,300 434,400 434,500 434,600 434,700 434,740 CONFIG ON Ex : 1 2 3 4 5 6 7 8 Cursorposition Position der ersten 5 Cursors Dip-switch «CONFIG» Cursor Cursor Cursor Cursor Cursor Nr.1 Nr.2 Nr.3 Nr.4 Nr.5 1 0 1 0 1 0 1 0 1 0 1 0 1 0 1 0 1 0 1 0 0 1 1 0 0 1 1 0 0 1 1 0 0 1 1 0 1 0 0 0 0 1 1 1 1 0 0 0 0 1 1 1 1 0 1 0 0 0 0 0 0 0 0 1 1 1 1 1 1 1 1 0 0 1 1 1 1 1 1 1 1 1 1 1 1 1 1 1 1 0 Code (position cursors) = 11001 Funkkanal = 5 Frequenz = 433,5 Mhz Wichtig : Sobald ein Cursor einer der beiden DIP-Schalter (ID oder CONFIG) geändert wurde, blinken die LED Va und Vb des Senders (oder des Sendermoduls) abwechselnd auf und die Funkverbindung wird solange unterbrochen, bis die neue Konfiguration durch das in nachstehendem Paragraphen beschriebene Verfahren freigegeben wurde. ISIS - 331260D revision02 DE EN FR - 121 - Empfänger ISR / Empfängermodul des Transceivers IST Die Konfiguration des Empfängers erfolgt über die drei KodierReitern JP1, JP2 und JP3, die vorm Einschalten kurzgeschlossen werden oder nicht Empfänger ISRA oder Empfängermodul des Transceivers IST M R1 R2 R3 R4 R5 R6 R7 R8 5 6 7 8 9 10 11 12 13 14 15 16 17 18 19 20 21 JP1 JP2 JP3 Empfänger ISRS RM R1 R2 R3 R4 6.2- Konfigurationsänderung des Produkts Befolgen Sie das Programmierungsverfahren in der nächsten Seite. Achtung : Wenn Sie den Identitätscode nicht ändern, können Sie direkt zu Schritt Nr. 2 übergehen. In diesem Fall müssen die Reiter JP1 und JP3 auf dem Empfänger nicht kurzgeschlossen werden. WICHTIG : Wir weisen hiermit drauf hin, dass bei diesem Verfahren ein anderer ISIS-Sender mit demselben Identitätscode unbeabsichtigt ebenfalls zugeordnet werden kann. Überprüfen Sie deshalb vorher den Identitätscode der anderen ISIS-Systeme. Die Sender-Empfänger-Zuordnung kann mit einem anderen Identitätscode durchgeführt werden, ohne das desshalb der Empfänger abgeschaltet werden muss. Dazu das Verfahren ab Schritt 2 erneut durchführen. - 122 - FR EN DE ISIS - 331260D revision02 ISIS - 331260D revision02 DE EN FR - 123 - Am Sender die neue Konfiguration anhand der beiden DIP Schalter ID und CONFIG auswählen (eingeschaltet oder ausgeschaltet) dann Auf die Sendertaste SET drücken 1 2 Vb Va Sender i1 SET V1 à i8 V2 Sender (1 Mal) (1 Mal) dann (1 Mal) (1 Mal) Vb Va Sender JP1 JP2 JP3 Empfänger Va V2 V3 Empfänger Vb Sender V3 Position der Reiter auf dem Empfänger und Status der Sender-Empfänger-LED = Led leuchtet = Led blinkt Die Stromversorgung des Senders unterbrechen und gebenenfalls die beiden Reiter JP1 und JP3 entfernen = Led blinkt abwechselnd JP1 JP2 JP3 Empfänger Wenn die Zuordnung zwischen Sender und Empfänger nicht funktioniert hat (der Empfänger war z.B. während der Zuordnung ausgeschaltet) : Die Taste SET 3 Sekunden gedrückt halten, um das gesamte ISIS System erneut auf denselben Funkkanal zu programmieren. Nach 3 Sekunden blinken die beiden LED Va und Vb während der gesamten Zuordnungsphase Sender-Empfänger auf (Dauer: 30 Sekunden). (der Konfigurationswechsel wird auf den Empfänger übertragen) = Led aus 5 4 3 Die Reiter JP1 und JP3 des Empfängers anbringen Anschliessend den Empfänger einschalten Die SET Taste loslassen Durchzuführende Vorgänge Schritt 6.2.1- Sonderfall des Transceivers IST Im Falle einer Konfigurationsänderung des 2 Transceivers IST, muss das auf der vorherigen Seite beschriebene Verfahren für jedes «Sender-/Empfängermodul»-Paar angewendet werden. Im unten abgebildeten Beispiel ist das Änderungsverfahren auf folgendes Paar anzuwenden : ● Sendermodul IST_1 / Empfängermodul IST_2 Dann: ● Sendermodul IST_2 / Empfängermodul IST_1 WICHTIG : • Die Synchronisierung muss auf einem der beiden Transceiver aktiviert sein (mehr dazu im Kapitel «Synchronisierung der Transceiver IST»). • Jedes «Sender-/ Empfänger-Modul» Paar muss mit einem Identitätscode und auf einem getrennten Funkkanal funktionieren. Sendermodul IST_1 Empfängermodul IST_1 Transceiver IST_1 - 124 - FR EN DE Funkkanal X ID code X Funkkanal Y ID code Y Empfängermodul IST_2 Sendermodul IST_2 Transceiver IST_2 ISIS - 331260D revision02 6.3- Anzeige des Funkkanals des Empfängers / Empfängermoduls Durch dieses Verfahren kann man den vom Sender benutzten Funkkanal in Erfahrung bringen. 1 2 3 Empfänger ISRA oder Empfängermodul des Transceivers IST V1 V2 V3 JP1 JP2 JP3 V1 V2 V3 RM R1 R2 R3 R4 R5 R6 R7 JP1 JP2 JP3 R8 4 5 6 7 8 9 10 11 12 13 14 15 16 17 18 19 20 21 V1 V2 V3 Empfänger ISRS V1 V2 V3 JP1 JP2 JP3 RM 1 2 3 R1 R2 R3 R4 JP1 JP2 JP3 4 5 6 7 8 9 10 11 12 13 Durchzuführende Vorgänge und Status der Empfänger/Empfängermodul-Led Schritt 1 Empfänger oder Transceiver ausschalten 2 Die Reiter JP1 und JP2 anbringen JP1 JP2 JP3 Anschliessend den Empfänger oder Empfängermodul einschalten 3 V1 Die Anzeige des derzeitig vom Empfänger benutzten Funkkanals erfolgt über die LED V2 und V3 V2 gibt die Zehner an, wenn sie leuchtet = 10, wenn sie aus ist = 0 V3 gibt die Einheiten durch die Anzahl des Blinkens an Beispiel : V2 V3 V3 V3 V3 + Funkkanal : 10 + 3 = 13 , Frequenz 434,300 MHz 4 Empfänger oder Transceiver ausschalten. Reiter JP1 und JP2 entfernen ISIS - 331260D revision02 DE JP1 JP2 JP3 EN FR - 125 - 6.4- Anzeige des Empfänger/Empfängermodul -Identitätscodes Durch dieses Verfahren kann der Identitätscode des Empfängers in Erfahrung gebracht werden: 1 2 3 Empfänger ISRA oder Empfängermodul des Transceivers IST V1 V2 V3 JP1 JP2 JP3 V1 V2 V3 RM R1 R2 R3 R4 R5 R6 R7 JP1 JP2 JP3 R8 4 5 6 7 8 9 10 11 12 13 14 15 16 17 18 19 20 21 V1 V2 V3 Empfänger ISRS V1 V2 V3 JP1 JP2 JP3 RM 1 2 3 R1 R2 R3 R4 JP1 JP2 JP3 4 5 6 7 8 9 10 11 12 13 Durchzuführende Vorgänge und Status der Empfänger/Empfängermodul -Led Schritt 1 Empfänger oder Transceiver ausschalten. 2 Die Reiter JP1 und JP3 anbringen. JP1 JP2 JP3 Anschliessend den Empfänger/Empfängermodul einschalten. V1 Die Anzeige des Identitätscodes erfolgt durch die LED V2 und V3 3 Der Identitätscode ist über 8 Bit kodiert. V2 gibt die Position 0 an. V3 gibt die Position 1 an. Bei jedem Blinken von V2 oder V3 die Position « 0 » oder « 1 » der 8 Bit des Identitätscodes erheben. Beispiel : V2 V2 V3 V3 V3 V2 V3 V2 Identitätscode : 00111010 4 - 126 - Empfänger oder Transceiver ausschalten. Reiter JP1 und JP3 entfernen. FR EN DE JP1 JP2 JP3 ISIS - 331260D revision02 7 - Installation 7.1- Allgemeines über die Anbringung der Produkte Die Produkte müssen so nah wie möglich am Steuerschaltschrank und vor Stössen und Witterung geschützt montiert werden. - Jedes Hindernis zwischen Sender und Empfängerantenne führt zu einer Verringerung der Reichweite. - Die Funkwellen durchqueren keine Metallwände. Die Antennen dürfen nicht innerhalb von Abgrenzungen montiert werden, die eine Abschirmung bilden, wie Metallschrank, Wand aus Stahlbeton, Metalldachstuhl oder Wand, etc. In diesem Fall muss die Antenne unbedingt vollständig herausragen, ansonsten können die Leistungen stark beeinträchtigt werden: Falsch OK Falsch Metall OK Metall Metall OK Metallschrank Metallschrank - Die Sender- und Empfängerantennen müssen in Direktsicht, in die gleiche Richtung oder parallel montiert werden : Empfohlen OK ISIS - 331260D revision02 Abgeraten DE EN Falsch FR - 127 - 7.1.1- Antennenversetzung Wenn die optimalen Installationsbedingungen nicht eingehalten werden können (bei Installation in einem Schrank), muss eine Aussenantenne mit Verlängerung benutzt werden (BNCAnschluss), die separat bestellt werden kann. Dazu muss das abnehmbare BNC-Antennenset erworben und installiert werden. Artikelnummer: OWR01 (Siehe Installation des Sets Kapitel «Installation des Aussenantennensets»). Sender ISE oder Empfänger ISR oder Transceiver IST Verlängerung (Siehe Ref. unten) électronique IST électronique ISRS/ISRA ISE électronique Abnehmbare Antenne BNC Kit Ref.: OWR01 Antenne Ref. : VUB084 Verfügbare Antennenverlängerung : Ref. : VUB170, Verlängerung von 0,5m (Stecker BNC), ohne Halter Ref. : VUB105, Verlängerung von 2m (Stecker BNC), mit Halter Ref. : VUB125, Verlängerung von 5m (Stecker BNC), mit Halter Ref. : VUB131, Verlängerung von 10m (Stecker BNC), mit Halter WICHTIG : JAY Electronique kann bei der Benutzung von anderen Antennen oder Verlängerungen als empfohlen nicht haftbar gemacht werden. Die Leistungsmerkmale der Senderantenne könnten ausserhalb der geltenden Normen liegen. - 128 - FR EN DE ISIS - 331260D revision02 7.2- Installationsbedingungen Wenn mehrere Funksysteme an demselben Standort betrieben werden, müssen Sicherheitsvorkehrungen bei der Installation getroffen werden. Dazu nachstehende Regeln beachten. Hinweis : Diese Bedingungen gelten für alle Funkmodus und Stärken der ISIS Sender oder Transceiver. 7.2.1- Zwischen zwei ISIS-Systemen mit gleicherleistung (1 oder 10 mW) zu beachtende Bedingungen P2 d1 d2 E4 E3 P1 E1 E2 2 Bedingung 1 : Abstand von mindestens 2 Funkkanälen zwischen zwei ISIS-Systemen beachten (Beispiel : Funkkanal Nr. 5 für das Paar E1-E2 und Funkkanal Nr. 7 für das Paar E3E4) Bedingung 2 : Einen Mindestabstand «d1» zwischen Sender oder Transceiver E1 und Empfänger oder Transceiver E2 und Einen Mindestabstand «d2» zwischen Sender oder transceiver E3 und Empfänger oder Transceiver E4. Der einzuhaltende Abstand «d1» oder «d2» hängt von dem Abstand der Funkkanäle und dem Reichweite P1 oder P2 . Die Übersicht auf der folgenden Seite ermöglicht eine gute Anbringung der Elemente. ISIS - 331260D revision02 DE EN FR - 129 - Minimaler zu beachtender Abstand zwischen dem d (m) störenden Sender und dem gestörten Empfänger Die nachstehende Gerade definiert den Mindestabstand «d» in Bezug auf den Reichweite «P» bei einem Abstand von 8 Funkkanälen zwischen den beiden Paaren ISIS. 16 15 14 13 12 11 10 9 8 7 6 5 4 3 2 1 0 50 100 150 200 250 P (m) Maximale Reichweite zwischen Sender und Empfänger Beispiel : wenn die Reichweite «P1» zwischen E1 und E2 gleich 90 m ist, muss der Mindestabstand «d2» zwischen E2 und E3 3 m betragen. Hinweis : Diese Abstände geben theoretische Werte an und hängen von den Umgebungsbedingungen ab. - 130 - FR EN DE ISIS - 331260D revision02 7.2.2- Zu beachtende Bedingungen zwischen einem ISIS-Set 1mW und der Funkfernsteuerung JAY Electronique Serie UC, UD oder UR Anmerkung : es gibt keine besondere Installationsvoraussetzungen wenn der ISIS Sender 10 mW Leistung hat. Anwendungsbeispiel : R2 d E1 R1 P E2 Bedingung 1 : Den Funkkanal des ISIS-Sets auf einer höheren Frequenz als die Funkfernsteuerung JAY Electronique einstellen. Bedingung 1 : Einen Mindestabstand «d» zwischen ISISSender (E1) und Empfänger U* (R2) beachten. Der einzuhaltende Abstand «d» hängt vom Abstand zwischen den Funkkanälen und dem Reichweite «P». Die Übersicht auf der folgenden Seite ermöglicht eine gute Anbringung der Elemente. ISIS - 331260D revision02 DE EN FR - 131 - Minimaler zu beachtender Abstand (m) zwischen Sender ISIS und Empfänger U* Die nachstehende Gerade definiert den Mindestabstand «d» in Bezug auf den Reichweite «P» für einen Frequenzabstand zwischen einem ISIS-System und einer anderen Funkfernsteuerung von JAY Electronique mit 200KHz. d 5.0 4.5 4.0 3.5 3.0 2.5 2.0 1.5 1 0.5 0 P (m) 50 100 150 200 250 Maximale Reichweite zwischen Sender und Empfänger Beispiel : Wenn den Reichweite «P» zwischen E2 und R2 gleich 50 m, muss «d» zwischen E1 und R2 mindestens 0,5m betragen wenn der Abstand zwischen dem Funkkanal des ISIS-System und einer anderen Funkfernsteuerung von JAY Electronique 200KHz beträgt. Hinweis 1 : Dieses Abstände stellen theoretische Werte dar und hängen von den Umgebungsbedingungen ab. Hinweis 2 : Wenn ein ISIS-System mit einem Produkt, dass nicht von JAY Electronique stammt am selben Ort betrieben wird, hängt der Abstand «d» von der Art der Funkverbindung dieses Produkts ab. - 132 - FR EN DE ISIS - 331260D revision02 7.3- Anschluss der Produkte 7.3.1- Anschlussempfehlungen Zur Vermeidung jeglicher Stromstossgefahren darf das Empfängergehäuse oder Transceivergehäuse nicht geöffnet werden, wenn es sich unter Spannung befindet • Steuerorgane mit integriertem Entstörungssystem verwenden. • Kabel unterschiedlicher Klassen nicht nebeneinander legen. • Einen Mindestabstand (20 cm) zwischen den einzelnen Klassen einhalten: - Klasse 1 : Funk, Antennenkabel (Antennenverlängerung), - Klasse 2 : Stromnetz für Energieversorgung der einzelnen Gehäuse, - Klasse 3 : Leistungssteuerung der Motoren, Regler, etc.... Idealerweise sollte jede Kabelklasse in einem eigenen Kabeltrog verlaufen. Sollte nur ein Kabeltrog vorhanden sein, müssen die Kabel der einzelnen Klassen so weit wie möglich voneinander entfernt verlegt werden. 7.3.2- Anschluss an die Klemmenfeder Wenn flexible mehradrige Drähte benutzt werden, wird empfohlen, gequetschte Kabelverbindungen zu benutzen, um falsche Kontakte und Kurzschlüsse zu vermeiden. Anschlussklemmen der Empfänger öffnen: - einen Schraubenzieher vertikal (mit flacher Klinge von 1,5 bis 3 mm Breite) in den Schlitz gegenüber dem Kabel einführen, - das Kabel einführen, - den Schraubenzieher herausziehen. Keine Hebelbewegung auf den Schraubenzieher ausüben, um Beschädigungen der Klemmleiste und der gedruckten Schaltung der Grundkarte zu vermeiden. ISIS - 331260D revision02 DE EN FR - 133 - 7.3.3- Anschluss der Stromversorgung WICHTIG Der elektrische Anschluss der Stromversorgung muss bei getrenntem Hauptschalter und desaktiviertem Empfänger ISR oder Transceiver IST erfolgen. Stromversorgung des Senders ISE * : i5 i6 i7 i8 i1 i2 i3 i4 Va Vb -+ à 30Volts 99 bis 30V DC DC S1 ID ON 1 2 3 4 5 6 7 8 CONFIG ON - DC+ A B 1 2 3 4 5 6 7 8 C1 2 3 4 5 6 7 8 - DC+ A B * = Im Falle eines Transceivers wird das Sendermodul Empfängermodul des Transceivers mit Strom versorgt. über das Stromversorgung (je nach Modell) des Empfängers ISR oder des Transceiver IST R3 R4 R5 R6 R7 1 1 2 3 R2 2 R8 4 5 6 7 8 9 10 11 12 13 14 15 16 17 18 19 20 21 24 VDC (1) 3 2 1 1 2 3 R1 3 JP1 JP2 JP3 3 +12 VDC- 2 1 1 2 3 1 2 3 RM V1 V2 V3 AC ,65$A / ,67$A 48 VAC 3 2 1 1 2 3 DC ,65$4 / ,67$4 24 VAC Receiver ISRA oder Transceiver IST DC - + 12 VDC ,656) AC 24 VDC (1) 24 VAC 48 VAC V1 V2 V3 JP1 JP2 JP3 RM 1 2 3 R1 R2 R3 R4 1 2 3 1 2 3 1 2 3 1 2 3 1 2 3 1 2 3 1 2 3 1 2 3 4 5 6 7 8 9 10 11 12 13 Receiver ISRS (1) = Keine polarität - 134 - FR EN DE ISIS - 331260D revision02 7.3.4- Anschluss der Eingänge des Senders / Sendermoduls Verschiedene Möglichkeiten zum Anschluss der Eingänge : Sender ISE Sendermodul IST ) Für eine Stromversorgung der Eingänge des Sendermoduls des Transceivers IST, können die Eingänge ebenfalls, wie unten abgebildet, an die Stromversorgung des Sendermoduls (+/- Kontakte) angeschlossen werden i5 i6 i7 i8 i1 i2 i3 i4 Va Vb -+ S1 ID ON 1 2 3 4 5 6 7 8 CONFIG ON - DC+ A B 1 2 3 4 5 6 7 8 C1 2 3 4 5 6 7 8 0v - DC+ A B 3 bis 30Vdc Arbeitskontakte auf den Eingängen C 1 2 3 4 5 6 7 8 0v 3 bis 30Vdc in in Statische PNP-Ausgänge auf den Eingängen C 1 2 3 4 5 6 7 8 0v 3 bis 30Vdc in in Statische NPN-Ausgänge auf den Eingängen C 1 2 3 4 5 6 7 8 ISIS - 331260D revision02 DE EN FR - 135 - 7.3.5- Anschluss der Ausgänge des Empfängers / Empfängermodul Anwendungsbeispiel der Relaisausgänge des Empfängers : 1 2 3 RM V1 V2 V3 R1 R2 R3 R4 R5 R6 R7 JP1 JP2 JP3 R8 Empfänger ISRA Empfängermodul IST 4 5 6 7 8 9 10 11 12 13 14 15 16 17 18 19 20 21 V1 V2 V3 JP1 JP2 JP3 RM 1 2 3 R1 R2 R3 R4 Empfänger ISRS 4 5 6 7 8 9 10 11 12 13 R1 R2 R3 R4 6 7 8 9 10 11 12 13 AC AC Schütz LED-Lampe DC + - SPS-Eingang - 136 - FR EN DE ISIS - 331260D revision02 7.4- Schutz der Empfängerausgänge und Entstörung Bei induktiver Last der Relaisausgänge (Schützspulen, Elektroventile oder Elektrobremsen) müssen unbedingt Vorrichtungen zur Entstörung wie Kondensatoren, RC-Kreise, Dioden, etc. direkt an die Anschlüsse der gesteuerten Elemente angebracht und mit so kurzen Verbindungen wie möglich angeschlossen werden. Es wird empfohlen, einen Verbrauchswiderstand auf den Automatenengängen zu benutzen. Beispiele für zu benutzende Schutzvorrichtungen : Ausgangsklemme des Empfängers AC DC + - DC + - R - + Ausgang AC-Relais Ausgang DC-Relais Automate (RC-Kreis) (freie Raddiode) (Verbrauchswiderstand R=Vdc/Imin(100mA)) 7.5- Minimaler und maximaler Arbeitsstrom der Relaisausgänge Darauf achten, die im Kapitel «Anhang/Technische Daten/ Empfänger» spezifizierten Mindest- und Höchstangaben nicht zu überschreiten, und gegebenenfalls eine zusätzliche Last oder Zwischenrelais installieren (Nebenkontakte im Schaltschrank für die Leistungssteuerung zum Beispiel). ISIS - 331260D revision02 DE EN FR - 137 - 8 - Diagnose und Lösungen im Problemfall Festgestelltes Problem Die gelbe LED Va leuchtet beim Einschalten nicht auf Wenn ein Eingang aktiviert wird, leuchtet die entsprechende LED nicht auf Nach dem Einschalten des Senders blinken alle LED gleichzeitig auf - 138 - FR F1 1 2 3 4 5 6 7 8 CONFIG ON i1 Va Vb ON ID Vb +DC- A B Set S1 Va i2 i3 i4 Power 1 2 3 4 5 6 7 8 i5 i6 i7 i8 i1 électronique Input 8 Input 7 Input 6 Input 5 Input 4 Input 3 Input 2 Input 1 C 1 2 3 4 5 6 7 8 8.1- Sender ISE und Sendermodul Transceiver IST Mögliche Ursache GRUND Die Versorgungskabel wurden nicht ordnungsgemäss in die Federklemme eingeführt Die Kabel erneut anschliessen Sicherung F1 im Halter überprüfen Sicherung auswechseln Die Eingangskabel wurden nicht ordnungsgemäss in die Federklemme eingeführt Die Kabel erneut anschliessen. Die Eingangsspannung liegt unter 3V Steuerkreis überprüfen Die Cursor ordnungsgemäss auf eine Die Position der Cursor auf dem vorhandene Konfiguration DIP-Schalter «CONFIG» ist oder Funkkanal nicht korrekt positionieren (siehe Programmiertabelle) EN DE ISIS - 331260D revision02 8.2- Empfänger ISR und Empfängermodul Transceiver IST ISRA - IST 1 2 3 F1 V1 V2 V3 JP1 JP2 JP3 F2 RM R1 R2 R3 R4 R5 R6 R7 R8 4 5 6 7 8 9 10 11 12 13 14 15 16 17 18 19 20 21 ISRS V1 V2 V3 JP1 JP2 JP3 F1 F2 RM 1 2 3 R1 R2 R3 R4 4 5 6 7 8 9 10 11 12 13 Festgestelltes Problem Mögliche Ursache GRUND Die Versorgungskabel wurden nicht ordnungsgemäss in die Die grüne LED Federklemme eingeführt V1 leuchtet beim Einschalten nicht auf Sicherungen F1 und F2 im Halter überprüfen Das Antennenkabel ist nicht Die grüne LED V3 für richtig angeschlossen den Funkempfang Überprüfen, ob sich leuchtet nicht auf, der Empfänger (oder wenn der Sender Empfängermodul Nr.1) auf einen aktiven Status demselben Funkkanal wie der sendet Sender (oder Sendermodul Nr.2) befindet Die rote LED V2 leuchtet nach dem Einschalten auf Die Reiter JP1, JP2 und JP3 befinden sich in der « Kurschlussposition ». Das/die Relais aktivieren sich nicht, obwohl Der Identitätscode von Sender die LED V3 leuchtet und Empfänger ist nicht (Funkverbindung identisch. erstellt). ISIS - 331260D revision02 DE Die Kabel erneut anschliessen Defekte Sicherungen auswechseln Das Antennenkabel richtig anschliessen Das FunkkanalProgrammierverfahren wieder aufnehmen Die sich in Kurzschlussposition befindlichen Reitern entfernen. Erneut das Zuordnungsverfahren Sender/ Empfänger durchführen, siehe Kapitel «Produktkonfiguration ändern» EN FR - 139 - 9 - Kontrolle und Wartung SCHALTEN SIE VOR JEGLICHEM WARTUNGSEINGRIFF DIE STROMVERSORGUNG DES GESTEUERTEN SYSTEMS AB. - Die Gehäuse der ISIS-Sender, Empfänger und Transceiver dürfen nur zu Konfigurations- oder Anschlusszwecken geöffnet werden. Die Öffnung der Gehäuse muss an einem sauberen, trockenen und staubfreien Ort erfolgen. - Besondere Aufmerksamkeit muss auf die Benutzungsrisiken des Datenübertragungssystem ISIS in einer Umgebung mit polymeroder klebstoffhaltigen Lösungen verwendet werden, da diese den ordnungsgemässen Betrieb des Senders oder Empfängers beeinträchtigen können. Regelmässig folgende Punkte überprüfen : - Anschluss der Stromversorgungen, der Eingänge und Ausgänge, Kontakte der Steuerrelais, Zustand und ordnungsgemässe Position der Deckeldichtung, Sitz der PG-Verschraubung sowie die Antennedichtigkeit, Wenn das Zubehör Artikelnr.: OWR01 (externe BNCAntennensteckdose) benutzt wird, den Anschluss der Antenne überprüfen und sicherstellen, dass die Steckverbindung nicht oxidiert ist. - Die Produkte reinigen und alle Fremdkörper entfernen, die an ihm haften könnten. Nur nicht agressive Reinigungsmittel auf der Grundlage von Seifenlösungen benutzen. - 140 - FR EN DE ISIS - 331260D revision02 10 - Garantie Alle unsere Geräte stehen unter 2-jähriger Garantie ab dem auf dem Produkt angegebenen Fertigungsdatum, Verschleissteile ausgenommen. Die Reparatur, Änderung oder der Austausch eines Produkts während des Garantiezeitraums hat keine verlängernde Wirkung auf den Garantiezeitraum. Einschränkungen : • Transportschäden, • Schäden, die am Gerät durch unsachgemäße Handhabung oder Nichtbeachtung der Anschlußpläne bei der Inbetriebnahme verursacht werden, • Schäden, die aufgrund mangelnder Aufmerksamkeit oder Wartung, infolge einer Nutzung, die nicht den Spezifi kationen der technischen Beschreibung entspricht, und im weitesten Sinne auf unangemessene oder zum Zeitpunkt der Bestellung nicht vorgesehene Lager-, Betriebs- oder Umweltbedingungen (atmosphärische, chemische, elektrische oder andere Einwirkungen) zurückzuführen sind. Die Garantie entfällt, wenn der Kunde Veränderungen oder Ergänzungen am Gerät vornimmt, ohne die schriftliche Zustimmung durch unser Unternehmen. Die Haftung des Unternehmens JAY Electronique beschränkt sich während der Garantiezeit auf Materialfehler oder Konstruktionsmängel; sie umfaßt die Reparatur in unserem Werk oder den kostenlosen Austausch defekter Teile nach Begutachtung durch einen unserer «Technischen Dienste». Die Garantie schließt keinen Anspruch auf Schadensersatz ein. Im Streitfall, in Bezug auf ein Ersatzteil oder die Bezahlung, ist der Gerichtsstand nach unserer Wahl das Handelsgericht Grenoble (TRIBUNAL DE COMMERCE DE GRENOBLE), ebenso im Berufungsfall oder bei Mehrzahl von Beklagten. ISIS - 331260D revision02 DE EN FR - 141 - 11 - Anhang 11.1- Funkelektrische Eigenschaften Besetzte Bandbreite ISM 433-434Mhz Modulation FM Funkkanäle 18 programmierbare Frequenzen 100KHz Abstand von 433,1 bis 434,7 MHz, der 18. auf 434,740MHz Abgegebene Strahlungsleistung ISE/ISR :1mW oder 10mW nach Modell IST : 10mW Reichweite (1) auf freiem Feld (1mw) : 200m (2) auf freiem Feld (10mw) : 350m In industriellem Umfeld (1mw) : 80m (2) In industriellem Umfeld (10mw) : 100m (1) = Die Reichweite variiert je nach Umgebungsbedingungen und Position der Empfängerantenne (die Reichweite wird durch metallische Hindernisse wie Dachstühle, Wände, Einfassungen, etc. eingeschränkt). Die Reichweite ist verringert, wenn eines der Produkte auf eine mobile Ausrüstung montiert ist. (2) = Modus 1 mW nicht verfügbar für Transceiver STI. 11.2- Technische Daten für Sender ISE und Sendermodul IST Gehäuse Material : ABS Farbe : Gelb (ISE) oder Grau (IST) Dichtigkeit : IP65 Dimensionen (ohne Kabelverschraubung und Antenne) : ISE : 92 x 123 x 50 mm IST : 120 x 240 x 100 mm Gewicht : 270 g Stromversorgung Typ : DC Spannungsbereich : 9V bis 30VDC Verbrauch für Sender ISE (für Transceiver IST siehe nächstes Kapitel). min. = 100 mA max. = 200 mA von aktive Eingang = 12 mA von 100mA bis 200mA Anzahl der Eingänge 8 - 142 - FR EN DE ISIS - 331260D revision02 Rasche Übergangsfestigkeit der Stromversorgung Ohne Schaden Falschpolungsfestigkeit der Stromversorgung 30V Schutz Sicherung Sicherung 250 mA Untere Ebene beim Optokoppler-Eingang Gleichspannung < 2 V Obere Ebene beim OptokopplerGleichspannung > 3 V Eingang Höchstspannung auf einem Eingang ohne Schaden 30 V Rasche Übergangsfestigkeit der Stromversorgung bei Direktkopplung +2KV Elektrostatische Entladungsfestigkeit ± 4 kV Elektromagnetische Feldfestigkeit 10v/m Betriebstemperaturbereich -20°C bis +50°C Lagertemperaturbereich -30°C bis 70°C Höchstfrequenz eines Signals auf einem Eingang (durchgehender oder unterbrochener Funkmodus) Modus 1mW (1) = 10Hz max Modus 10mW = 0,5Hz max (1) = Modus 1 mW nicht verfügbar für Transceiver STI. ISIS - 331260D revision02 DE EN FR - 143 - 11.3- Technische Daten für Empfänger ISR und Empfängermodul Transceiver IST Gehäuse Material : ABS Farbe : Gelb (ISRS) oder Grau (ISRA/IST) Dichtigkeit : IP65 Dimensionen (ohne Kabelverschraubung und Antenne) : ISRS : 92 x 123 x 50 mm ISRA/IST : 240 x 120 x 100 mm Gewicht : ISRS : 350 g / ISRA : 1,2 kg / IST : 1,3 kg Stromversorgung Empfänger ISRS DC : 12VDC (9 bis 20VDC) 24VDC (20 bis 75VDC) AC : 24VAC (+10%/-15%) 48VAC (+10%/-15%) Stromversorgung Empfänger ISRA und Transceiver IST DC : 12VDC (9 bis 20VDC) 24VDC (20 bis 28VDC) AC : 24VAC (+10%/-15%) 48VAC (+10%/-15%) Anzahl der Ausgänge ISRS : 4 + 1 «Funkqualität» ISRA/IST : 8 + 1 «Funkqualität» Art der Ausgänge Relais mit 1 Schließer Antenne Fest (standard) oder über BNC-HF-Stecker typ BNC ref.: VUB084 mit kit ref.: OWR01 Empfindlichkeit des Tuners < 2μV Schutz durch Sicherungen Sicherungen mit Halter (Kaliber je nach Versorgungsspannung und Empfängermodell, siehe Paragraph «Sicherungseigenschaften und-kaliber») Antwortzeit eines Ausgangs wenn ein Eingang aktiviert oder deaktiviert wird (durchgehender oder unterbrochener Funkmodus) Modus 1mW (nicht für IST) : < 60ms Modus 10mW : < 500ms Passive Abschaltzeit (Funkstörungen) 2 s. auf einem Relay-Funktion 1,9 s. auf das Relais «Funkqualität» (RM) - 144 - FR EN DE ISIS - 331260D revision02 Verbrauch Stromversorgung der Produkte ISRS ISRA IST Min Max aktiviert Ausgang Min Max aktiviert Ausgang Min Max aktiviert Eingang aktiviert Ausgang 12VDC 24VDC 24-48VAC 23 mA 200 mA + 20 mA 23 mA 300 mA + 20 mA 123 mA 500 mA + 12 mA + 20 mA 350 mW 2W + 275 mW 350 mW 3W + 275 mW 1.8 W 6W + 180 mW + 275mW 350 mW 2W + 275 mW 9W 16 W + 300 mW 9W 16 W + 200 mW + 300 mW 11.3.1- Eigenschaften der Relais Empfänger Empfängermodul IST • Kontakte : AgNi 0,15 • Max. Schaltleistung cosphi=1 : 2000 VA • Max. Schaltstrom : 8 A • TMax. Schaltspannung : 400 VAC • Min. Schaltstrom / Schaltstrom : 100 mA / 12 VDC • 100 000 Umschaltungen bei 250 VAC, 8 A, cosphi=1 • 50 000 Umschaltungen bei 24 VDC, 8 A • Versuche nach EN 60947-5-1 : DC13 bei 0,5 A / 24 VDC AC15 bei 3 A / 250VAC ISR und 11.3.2- Anzahl der Umschaltungen der einzelnen Schütze Schütz CA2DN LC1D09 LC1D18 LC2D09 Vom Relais geschaltete physikalische Größe Umschaltzahl fur Relais Umschaltung bei 230VAC (70VA,cosphi=0,75) 2 x 10 Umschaltung bei 110VAC, (70VA,cosphi=0,75) 1 x 10 Umschaltung bei 48VAC (70VA,cosphi=0,75) 0,5 x 10 ISIS - 331260D revision02 DE EN 6 6 6 FR - 145 - 11.4- Eigenschaften der Sicherungen Sender ISE / Sendermodul IST Sicherung Typ 663 (LT-5) elektronischer Träger, 250mA Power Input 8 Input 7 Input 6 Input 5 Input 4 Input 3 Input 2 Input 1 Set électronique Empfänger ISRA / Empfängermodul IST Typ 663 (LT-5) elektronischer Träger Stromversorgung 12 VDC = Lage für Sicherung : F2, 315mA/250VAC/T Stromversorgung 24 VDC = Lage für Sicherung : F1 250mA/250VAC/T Stromversorgung 24 VAC = Lage für Sicherung : F2 1,6A/250VAC/T Stromversorgung 48 VAC = Lage für Sicherung : F1 800mA/250VAC/T 1 2 3 F1 F2 RM R1 R2 R3 R4 R5 R6 R7 R8 4 5 6 7 8 9 10 11 12 13 14 15 16 17 18 19 20 21 Empfänger ISRS Typ 663 (LT-5) elektronischer Träger Stromversorgung 12 VDC = Lage für Sicherung : F2 250mA/250VAC/T Stromversorgung 24 VDC = Lage für Sicherung : F1 500mA/250VAC/T Stromversorgung 24 VAC = Lage für Sicherung : F1 500mA/250VAC/T Stromversorgung 48 VAC = Lage für Sicherung : F1 500mA/250VAC/T F1 RM R1 R2 R3 R4 F2 1 2 3 - 146 - FR EN 4 5 6 7 8 9 10 11 12 13 DE ISIS - 331260D revision02 11.5- Anschlussklemmen, Nummern und Funktionen Sender ISE / Sendermodul IST Anschlussnummer «-» DC «+» C 1 2 3 4 5 6 7 8 Funktion Stromversorgung Gemeinsam, 0VDC Eingang Eingang n°1 Eingang n°2 Eingang n°3 Eingang n°4 Eingang n°5 Eingang n°6 Eingang n°7 Eingang n°8 Empfänger ISR / Empfängermodul IST Anschlussnummer 1-2-3 4-5 6-7 8-9 10 - 11 12 - 13 14 - 15 16 - 17 18 - 19 20 - 21 Funktion Stromversorgung Kontakte des Relais RM «Funkqualität» Kontakte des Relais R1 Kontakte des Relais R2 Kontakte des Relais R3 Kontakte des Relais R4 Kontakte des Relais R5* Kontakte des Relais R6* Kontakte des Relais R7* Kontakte des Relais R8* * = Nur für Empfänger ISRA oder Transceiver IST ISIS - 331260D revision02 DE EN FR - 147 - 11.6- Dimensionen der Produkte Sender ISE und Empfänger ISRS : 20 Maßeinheit = mm 26 170 2xØ4 électronique 123 108 électronique Input 8 Input 7 Input 6 Input 5 Input 4 Input 3 Input 2 Input 1 Power Set 79 25 50 19 25 92 Transceiver IST : Empfänger ISRA : 120 100 66 27 120 100 15 170 66 50 27 170 4xØ4 4xØ4 229 240 229 240 électronique électronique 90 90 35 30 47 48 - 148 - FR EN 35 30 DE 48 47 ISIS - 331260D revision02 11.7- Installation des Antenneführers vor der Anwendung 1. Das Empfängergehäuse öffnen und die Spiralmutter der Antenne lösen Antennendraht Spiralmutter 2. Den Antennendraht in die Führung einführen. Führung 3. Die Führung in die Spiralmutter und dann in die Basis der PDGVerschraubung bis zum Innenanschlag einführen STOP 4. Die Spiralmutter wieder bis zum Anschlag festziehen und anschliessend eine ¼ Drehung durchführen, um die Antennenführung zu blockieren und die Dichtigkeit zu gewährleisten. Sicherstellen, daß die Führung ordnungsgemäss gehalten wird. Sicherstellen, daß die Antennendraht in die Führung höchstens eingetreten ist, um einen optimalen Empfang zu erlauben ISIS - 331260D revision02 DE EN FR - 149 - 11.8- Installation des abnehmbaren Antenne-BNC-Kits OWR01 Abnehmbare Antenne-BNC-Kit A OWR01 Sender ISE / Empfänger ISRS Sendermodul IST B C Empfänger ISRA Empfängermodul IST électronique électronique 1 1 2 2 A A 3 B 3 C B 4 C 4 Fr - 150 - FR EN DE ISIS - 331260D revision02 11.9- Konfiguration Ihrer Transceiver ISIS Sender/Empfänger/ Informationen über die Installation : Bestelltes Gerät : Konfiguration des Senders oder Sendermoduls Transceiver Nr.1 : Konfiguration des Senders oder Sendermoduls Transceiver Nr.2 : (Die cursorpositionen schwärzen) (Die cursorpositionen schwärzen) ID ID ON ON 1 2 3 4 5 6 7 8 1 2 3 4 5 6 7 8 = Cursorposition = Cursorposition CONFIG CONFIG ON ON 1 2 3 4 5 6 7 8 1 2 3 4 5 6 7 8 = Cursorposition = Cursorposition ISIS - 331260D revision02 DE EN FR - 151 - Formulaire d’aide à l’amélioration de ce manuel «Help us improve this manual» form Formular für Verbesserungsvorschläge für dieses Handbuch - Améliorons ensemble ce manuel d’installation et d’utilisation ! - We can improve this manual with your assistance ! - Helfen Sie uns bei der Verbesserung des Installations- und Benutzerhandbuchs ! Informations personnelles / Personal information / Persönliche Angaben: Nom Name Société Company Gesellschaft Adresse Address Ville City Stadt Code postal Post code Postleitzahl Tel Fax E-mail (avec n° page / with page nb / mit Seite Nr) •Merci de nous faire parvenir cette page par courrier ou par fax à l’adresse suivante: •Please send us this form completed either by post or by fax at: •Bitte schicken Sie uns diese Seite per Fax oder per Post an folgende Adresse: JAY Electronique Service documentation - Eric DECHAME Fax : +33.(0)4.76.41.44.44 ZAC la Bâtie, rue Champrond F38334 SAINT ISMIER cedex - 152 - ISIS - 331260D revision02 ISIS - 331260D revision02 - 153 - NOTES : - 154 - ISIS - 331260D revision02 ISIS - 331260D revision02 - 155 - Realisation JAY Electronique 331260D-revision02-FR-EN-DE.indd 01.04.2011 E.D. ZAC la Bâtie, rue Champrond F38334 SAINT ISMIER cedex Tel : +33 (0)4 76 41 44 00 - Fax : +33 (0)4 76 41 44 44 www.jay-electronique.fr