1
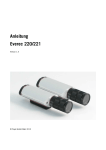
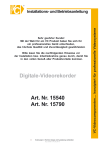
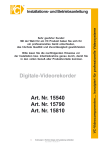
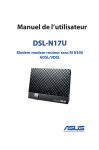
Schnellstartanleitung IDL 400s
Quick Installation Guide IDL 400s
Deutsch
2
English
22
Schnellstartanleitung
IDL 400s
Advanced SAT>IP Multiscreen Server
De
Inhaltsverzeichnis
Wichtige Informationen  4
Kurzbeschreibung  6
Multibox im Überblick   7
Anschließen der Multibox  8
Inbetriebnahme der Multibox   9
Konfiguration
9
Firmwareaktualisierung über USB
18
Werksreset
18
Endgeräte
18
Technische Spezifikationen
20
3
In dieser Schnellstartanleitung wird die Installation und Konfiguration in Kurzform erklärt. Für weitergehende Informationen beachten Sie bitte die ausführliche Beschreibung in der Montageanleitung, die Sie unter
“www.inverto.tv/multibox” herunterladen können.
Wichtige Informationen
Copyright
(Copyright© 2013 Inverto Digital Labs) Dieses Benutzerhandbuch darf nicht ohne vorherige schriftliche Einwilligung von Inverto kopiert, benutzt, teilweise oder komplett übersetzt werden.
Garantie
Die Garantie bezieht sich nicht auf Teile, die durch falschen Gebrauch oder andere Arten von Fehlbedienung
als in diesem Benutzerhandbuch beschrieben, defekt geworden sind. Lesen Sie das Handbuch sorgfältig und
vergewissern Sie sich, dass Sie die mitgelieferten Anleitungen verstanden haben.
Bitte bewahren Sie die Originalverpackung auf, für den Fall, dass Sie das Gerät umtauschen müssen.
CE MARK FOR EUROPEAN HARMONISED STANDARDS
Das auf solchen Geräten angebrachte CE ZEICHEN bedeutet, dass es den EMC Richtlinien (2004/108/EC),
Niederspannungs-Richtlinien (2006/95/EC) und RoHS Richtlinien (2011/65/EC) entspricht.
WEEE Consumer Notice
Das Inverto Digital Labs S.a.r.l. Produkt, dass Sie erworben haben, unterliegt den Richtlinien von 2002/96/EC des
Europäischen Parlaments und dem EU Rat für Elektromüll und die Entsorgung elektronischer Geräte (WEEE)
und fällt in den Zuständigkeitsbereich dieser Richtlinien, so dass alle Geräte, die nach dem 13. August 2005 auf
den Markt gebracht wurden nicht auf unsortiertem Kommunalmüll entsorgt werden dürfen. Nutzen Sie bitte Ihre
lokalen WEEE Entsorgungsmöglichkeiten, die Sie für dieses Produkt zur Verfügung haben und halten Sie bitte
alle anwendbaren Anforderungen ein. Für weitere Informationen wie man Ihr Produkt in Ihrem Land richtig entsorgt setzen Sie sich bitte mit Ihrem Verkäufer in Verbindung oder besuchen Sie die “Support”-Abteilung unserer
Webseite: www.inverto.tv/support
Entsorgung von alten elektrischen und elektronischen Geräten (maßgeblich in der EU und anderen
europäischen Ländern mit Mülltrennung).
Dieses Symbol am Produkt oder an der Verpackung bedeutet, dass das Produkt nicht als Haushaltsmüll entsorgt
werden sollte, sondern zu einer dafür vorgesehenen Elektromüll-Entsorgungsstelle gebracht werden sollte. Bei
richtiger Entsorgung helfen Sie mit, mögliche negative Auswirkungen auf die Umwelt und die Gesundheit der
Menschen zu verhindern, welche durchaus durch nicht gerechte Elektromüll-Entsorgung entstehen kann. Das
Recycling von Materialien hilft natürliche Bodenschätze zu erhalten. Für weitere Recycling-Informationen über
dieses Produkt setzen Sie sich bitte mit Ihrer lokalen Müllentsorgungsstelle oder mit dem Händler, bei dem Sie
das Produkt gekauft haben, in Verbindung.
Sicherheitshinweise
Warnung:
Zu Ihrer Sicherheit, beachten Sie bitte folgenden Vorsichtsmaßnahmen:
caution
RISK OF ELECTRIC SHOCK
DO NOT OPEN
4
!
• Um die Gefahr eines Elektroschocks zu vermeiden, sollten Sie niemals das Gehäuse öffnen.
• Es befinden sich im Gerät keinen Teile, die vom Anwender repariert werden können.
• Bei Bedarf wenden Sie sich an qualifizierte Servicefachkräften.
De
Das Blitzsymbol mit Pfeilspitze in einem gleichseitigen Dreieck weist den Benutzer auf das Vorhandensein einer nicht isolierten gefährlichen elektrischen Spannung innerhalb des Systemgehäuses hin, die
ausreichen kann um einen elektrischen Schlag zu verursachen.
!
Das Ausrufungszeichen in einem gleichseitigen Dreieck soll den Benutzer auf das Vorhandensein
wichtiger Anweisungen für Bedienung und Wartung (Instandhaltung) in der dem Gerät beiliegenden Dokumentation aufmerksam machen.
Sicherheitsvorkehrungen:
Dieses Gerät wurde nach Vorgaben internationaler Sicherheitsstandards hergestellt. Zu ihrem eigenen Schutz
sollten Sie die Sicherheitsvorkehrungen sorgfältig durchlesen, bevor Sie ihr neues Gerät in Betrieb nehmen. Der
Hersteller übernimmt keine Haftung für Schäden, die durch unsachgemäße Handhabung und durch Nichteinhaltung der Sicherheitsvorkehrungen entstanden sind.
•Dieses Gerät ist für den Empfang und die Wiedergabe von Bild- und Tonsignalen bestimmt. Jede andere Ver
wendung ist ausdrücklich ausgeschlossen.
•Betreiben Sie das Gerät ausschließlich mit dem beiliegenden Steckernetzteil.
•Beachten Sie bitte beim Aufstellen, dass die verwendete Netzsteckdose leicht zugänglich ist.
•Wenn das Gerät starken Temperaturschwankungen ausgesetzt ist, z.B. beim Transport vom Kalten ins Warme, lassen Sie ihn mindestens zwei Stunden im Betriebsraum stehen, bevor Sie ihn an das Stromnetz anschließen.
•Setzen Sie das Gerät keinerlei Feuchtigkeit aus. Der Digital-Receiver ist für den Betrieb in trockenen Räumen bestimmt. Sollten Sie ihn dennoch im Freien betreiben, schützen Sie ihn vor Feuchtigkeit (Regen, Wasser
spritzer).
Betreiben Sie das Gerät auf einer ebenen und harten Unterlage.
Stellen Sie eine ausreichende Belüftung des Gerätes sicher. Sorgen Sie dafür, dass links und rechts ein freier Raum von etwa 5 cm, oben von 10 cm zur Verfügung steht,damit die Luft ungehindert zirkulieren kann und das Gerät nicht überhitzt. Decken Sie die Lüftungsschlitze niemals mit Zeitungen,Tischtüchern, Gardinen, usw. ab.
Stellen Sie keine mit Flüssigkeit gefüllten Gefäße oder offene Brandquellen (z.B.Kerzen) auf das Gerät.
Betreiben Sie das Gerät nicht in unmittelbarer Nähe von Heizelementen oder in der prallen Sonne.
Das Gerät sollte bei Temperaturen von 5ºC bis 40ºC betrieben werden. Verwenden Sie das Gerät nur in einem gemäßigten Klima, nicht unter tropischen Bedingungen.
Vermeiden Sie Kurzschlüsse!
Gewitter stellen eine Gefahr für jedes elektrische Gerät dar. Auch bei ausgeschaltetem Gerät kann es durch einen Blitzeinschlag in das Stromnetz und/oder in die Antennenanlage beschädigt werden.Trennen Sie deshalb
bei einem Gewitter oder bei längeren Betriebspausen (z.B. Urlaub) das Gerät vom Netz und von der Anten-
nenanlage.
Öffnen Sie das Gerät auf keinen Fall. Schäden durch fehlerhaften Anschluss und/oder unsachgemäße Hand habung sind von jeglicher Haftung ausgeschlossen.
•
•
•
•
•
•
•
•
5
Kurzbeschreibung
Mit dem Multibox SAT>IP Server können frei empfangbare Satellitenprogramme über ein bestehendes WLAN/
LAN-Heimnetzwerk auf Smartphones, Tablet-PCs und Notebooks übertragen werden. Die Multibox ist mit vier Satellitenempfängern ausgestattet. Damit können bis zu vier Nutzer ihr Lieblingsprogramm auf ihrem Endgerät sehen.
Dazu muss die Multibox mit dem Endgeräten im selben Netzwerk über LAN oder WLAN verbunden sein.
Geräteeigenschaften:
• Voll kompatibler und zertifizierter SAT>IP Server mit 4 Sat-Tunern
• Streaming von Live TV- & Radiokanälen an bis zu vier kompatible Clients via LAN/WLAN
• DLNA-kompatibler Servermodus unterstützt DLNA Client-Geräte und/oder Apps
• Web-basierende Konfiguration und Management (Passwortgeschützt)
• Unterstützung von MPEG2 TS und PS over IP, Unicast und Multicast
• Unterstützung von Unicable und DiSEqC 1.0 Protokollen
• Firmware Update via USB-Stick oder online via Internet
Unterstützte Endgeräte:
• iOS (iPad/iPhone) und Android Tablets und Smartphones mit der Elgato SAT>IP App.
• DLNA/UPnP-kompatible Gerät, z.B. MediaPlayer, Video Streamer, Spielkonsolen
• DLNA/UPnP-kompatible Fernseher
• DLNA/UPnP-kompatible PC Softwareanwendungen, z.B. VLC Player, DVBViewer*
• SAT>IP-kompatible Client-Geräte
WICHTIG! Mindestanforderungen:
• Um HDTV Programme betrachten zu können, benötigen Sie einen entsprechend leistungsfähigen SAT>IP/DLNA Client, deshalb kann die flüssige Wiedergabe von hochauflösenden Inhalten nicht
garantiert werden.
• Die Kompatibilität mit anderen DLNA Geräten kann nicht garantiert werden.
• Um das Konfigurationsmenü von einem WindowsPC aus über den mDNS Hostnamen zu öffnen, muss
Ihr PC das Apple Bonjour Protokoll unterstützen, dies ist dann der Fall wenn Apple Programme wie
iTunes oder Quicktime auf Ihrem PC installiert sind.
• Der Netzwerkdurchsatz sollte über 20Mbps per angeschlossenem Client liegen um auch HDTV Pro-
gramm flüssig wiedergeben zu können. Wir empfehlen Router mit 1GbE LAN oder 300Mbits WLAN.
* Wird nicht von allen DVB Viewer Versionen unterstützt.
6
De
Multibox im Überblick
Rückansicht
1
2
3
4
5
6
7
8
10
11
12
9
1. Sat-Eingang 1 - Horizontal High / Multischalter 1 / Unicable
2. Sat-Eingang 2 - Vertikal High / Multischalter 2
3. Sat-Eingang 3 - Horizontal Low / Multischalter 3
4. Sat-Eingang 4 - Vertikal Low / Multischalter 4
5. Reset-Taste
6. USB-Buchse
7. LAN-Buchse (1GbE)
8. Netzteil-Anschlussbuchse
9. Netzschalter (ON/OFF)
Vorderansicht
10. Betriebsanzeige 11. Anzeige für bestehende LAN-Verbindung
12. Anzeige der verbundenen Teilnehmer
7
Anschließen der Multibox
Entfernen Sie alle Schutzfolien vom Gehäuse.
Verbinden der Multibox mit dem Satelliten-Signal
Abhängig von der Satellitenempfangsanlage sind 3 Anschlussvarianten möglich:
Quad-/Oct-LNB oder Multischalter
Verbinden Sie die Ausgänge des LNBs/Multischalters über geeignete Sat-Antennenkabel mit den Eingängen 1 …
4 der Multibox.
Hinweis: Wenn Sie weniger als 4 Endgeräte betreiben möchten, benötigen Sie entsprechend weniger Eingänge
(immer von Eingang 1 beginnend).
Quattro LNB
Verbinden Sie die 4 Ausgänge des Quattro-LNBs über geeignete Sat-Antennenkabel mit den Eingängen 1 … 4 der
Multibox in der folgenden Anschlussreihenfolge. Quattro LNB Ausgang
Multibox Eingang
Horizontal High
1
Vertical High
2
Horizontal Low
3
Vertical Low
4
Unicable
Verbinden Sie den Ausgang des Unicable LNB/Multiswitch mit dem Eingang 1 der Multibox (auch mit Unicable
beschriftet) über ein geeignetes Sat-Antennenkabel.
Verbinden der Multibox mit Ihrem Heimnetzwerk
Verbinden Sie die LAN-Buchse 7 der Multibox über ein LAN-Kabel mit einem LAN-Anschluss ihres Netzwerks
Router/Swtich/Access Point.
Hinweis: Damit der Multibox automatisch eine IP-Adresse zugewiesen bekommt, muss ein DHCP-Server im Netzwerk aktiv sein (normalerweise integriert im Router und standardmäßig aktiv). Die Multibox muss sich im gleichen
“Netz” wie die Endgeräte befinden (gleicher IP-Adressbereich).
Für eine flüssige Wiedergabe empfehlen wir, für eine Verbindung zu den Endgeräten, ein 1000Mbit/s-Netzwerk für
LAN und eine 300Mbit/s-WLAN-Netzwerk. Zusätzlich muss ein, für die Wiedergabe vorgesehenes Gerät (z.B. ein
PC), über eine entsprechende Rechenleistung und eine geeignete Grafikleistung verfügen.
Verbinden der Multibox mit dem Stromnetz
Stecken Sie das Steckernetzteil in eine Steckdose und verbinden Sie es mit der Netzgeräte-Buchse 8.
8
De
Inbetriebnahme der Multibox
Schalten Sie die Multibox mit dem Netzschalter 9 an der Geräterückseite ein. Die Multibox meldet sich im Netzwerk an und bezieht eine IP-Adresse vom DHCP-Server (LAN-Betriebsanzeige 11 blinkt). Die LAN-Betriebsanzeige leuchtet dauerhaft, sobald die LAN-Verbindung besteht.
Konfiguration
Die Multibox kann über einen PC der sich im selben Netzwerk befindet konfiguriert werden. Die Konfiguration
erfolgt über ein Web-Interface und erfordert eine Anmeldung.
Ihrer Multibox wird standardmäßig mit dem Namen ‘myMultibox-xxxxxx’ im Netzwerk angezeigt. Sie können den
Gerätename später im Konfigurationsmenü ändern1.
Folgendermaßen können Sie das Anmeldefenster für das Konfigurationsmenü, mit einen PC der sich im selben
Netzwerk befindet, öffnen.
Zugriff über “Computer”
®
Windows 7 :
• Öffnen Sie “Computer”.
• Wählen Sie “Netzwerk”.
Die Multibox wird rechts angezeigt. Ein Doppelklick öffnet das Anmeldefenster.
1
Der Gerätename darf nicht länger als 15 Zeichen sein. Der Gerätename kann sich mit zukünftigen
Softwareupdates ändern.
9
®
Windows XP :
• Öffnen Sie den Arbeitsplatz.
• Wählen Sie “Netzwerkumgebung”.
• Ein Doppelklick auf myMultibox öffnet das Anmeldefenster.
Wird die Multibox nicht angezeigt, müssen Sie im Fenster “Netzwerkumgebung” unter Netzwerkaufgaben” die
“Symbole für Netzwerk-UPnP-Geräte einblenden”.
Zugang über Browser
Ihre Multibox unterstützt das Bonjour* Protokoll von Apple. Falls Sie einen Apple Computer besitzen, oder Apples
Bonjour Software auf Ihrem Windows PC installiert ist, geben Sie einfach folgende Adresse in die Adresszeile Ihres
Browsers ein:myMultibox-xxxxxx.local
Dabei steht “xxxxxx” für die letzten 6 Stellen der MAC-Adresse der Multibox (siehe Aufkleber an der Geräteunterseite z.B. myMultibox-000546.local).
IDL 400s MultiboxTM
EAN:
MAC:
Serial:
Digital SAT>IP Multiscreen server
10
1S81C11240000000
00:24:A6:00:05:46
5453002611739
TM
De
*Bonjour, auch bekannt also konfigurationsloses Netzwerk, aktiviert die automatische Unterstützung von Computern, Geräten und Diensten in IP Netzwerken die Standard IP Protokolle verwenden. Es ist Kernbestandteil von
Apple Anwendungen wie z.B. iTunes, Quicktime und anderen.
Falls auf Ihrem Computer Apples Bonjour Software nicht installiert ist, müssen Sie die IP-Adresse, die der Multibox
vom DHCP-Server zugewiesen wurde, verwenden. Geben Sie diese IP-Adresse gefolgt von einem Doppelpunkt
und der Portnummer 8080 (z.B.192.168.0.166:8080) ein und drücken anschließend “Enter”.
Diese IP-Adresse wird durch den Netzwerkrouter vergeben und kann im Konfigurationsmenü des Netzwerkrouters
eingesehen werden (Voraussetzung: das DHCP Protokoll ist aktiviert).
Anmelde-Fenster
Geben Sie das Passwort ein und klicken Sie auf Schaltfläche “Anmelden”. Das Standard-Passwort ist “admin”.
Das Status-Fenster wird angezeigt.
11
Antennenkonfiguration
Aktivieren Sie das Menü “Antenne”.
Wählen Sie je nach Anschlussvariante die entsprechende Einstellung für die Sat-Eingänge der Multibox:
1. “Quad” (Werkseinstellung) – Wählen Sie ‘Quad’ falls ein Quad LNB, Octo LNB oder Universal Multiswitch an
Ihre Multibox angeschlossen ist.
2. “Quattro” (Quattro LNB) – Wählen Sie ‘Quattro’ falls ein Quattro an Ihre Multibox angeschlossen ist.
3. “Unicable” (Unicable LNB oder Unicable Multiswitch) – Wählen Sie ‘Unicable’ falls ein Unicable LNB oder Unicable Multiswitch an Ihre Multibox angeschlossen ist.
4. klicken Sie anschließend auf “Speichern”.
Bei der Auswahl “Unicable” werden Eingabefelder für die 4 Unicable-Frequenzen eingeblendet.
12
De
Geben Sie hier die 4 verschiedenen Frequenzen ein, über die dann die Programme an die 4 Tuner übertragen
werden.
Speichern Sie die Frequenzen mit der Schaltfläche “Speichern“.
13
DLNA Konfiguration
Ihre Multibox ist auch ein DLNA kompatibler Server und kann daher Live Satelliten-TV auch auf DLNA fähige Wiedergabegeräte und/oder Anwendungen (DLNA Clients) streamen, die das SAT>IP Protoikoll nicht unterstützen.
Es ist jedoch zu bemerken, dass die Verwendung von DLNA zum Live TV Streaming auf Audio- und Videoinhalte
beschränkt ist. Auf andere Informationen wie Programminformation (EPG), Videotext und Untertitel kann nicht per
DLNA zugegriffen werden.
Wenn Sie Endgeräte verwenden möchten, die Signale von einem DLNA-Server empfangen können (DLNA Clients), müssen Sie den DNLA-Server folgendermaßen aktivieren:
1. Aktivieren Sie das Menü “DLNA”.
2. Aktivieren Sie die Checkbox “DLNA aktivieren” und übernehmen Sie die Änderung durch betätigen der Schaltfläche “Speichern”.
Anders als SAT>IP Endgeräte, welche selbst die TV-/Radiokanalliste verwalten, benötigen DLNA Endgeräte
eine Liste die vom Server zur Verfügung gestellt wird. Ihre Multibox hat bereits eine voreingestellte Kanalliste
(Hauptliste TV) mit den deutschen Programmen auf ASTRA 19.2°. Diese Kanalliste wird als Textdokument
gespeichert und kann bei Bedarf manuell geändert werden.
Im Bereich “DLNA Hauptliste TV” können Sie aktualisierte Kanallisten, die Sie unter www.inverto.tv herunterladen
können, auswählen.
14
De
Unter “Favoritenliste(n)” können Sie sich eine Favoritenliste aus der Hauptliste erzeugen.
Über die entsprechenden Schaltflächen können Sie eine neue Favoritenliste erstellen, diese exportieren (um Sie
zu sichern), bei Bedarf wieder importieren, bearbeiten oder entfernen (löschen).
• Klicken Sie auf die Schaltfläche “Neu”.
• Klicken Sie die neue Liste an und wählen Sie “Bearbeiten”.
• Wählen Sie in der Hauptliste ein Programm und ziehen Sie es mit der Maus in die Favoritenliste.
• Zum Entfernen ziehen Sie ein Programm aus der Favoritenliste in den “Papierkorb”
• Mit der Schaltfläche (“Sortieren”) können Sie die Hauptliste alphabetisch sortieren. Die Schaltfläche
(“Alles löschen”) löscht den kompletten Inhalt der Favoritenliste.
• Speichern Sie die Favoritenliste mit der Schaltfläche (“Speichern”). Die Favoritenliste wird nun anstelle der Hauptliste an DLNA-Endgeräte übertragen.
15
16
De
Das System Menü
Im Menü System können Sie ein Firmwareupdate durchführen, das Zugangspasswort für die Konfiguration ändern,
den Gerätenamen ändern, eine feste IP Adresse vergeben, sowie einen Geräte-Neustart (Reboot) durchführen.
Online Firmware Aktualisierung
Klicken Sie auf die Schaltfläche “Aktualisieren”, um nach einer neueren Firmware im Internet zu suchen. Ist eine
neue Firmware verfügbar, wird diese automatisch heruntergeladen. Klicken Sie auf die Schaltfläche “Update”, um
die Firmware zu installieren. Die Multibox startet anschließend neu.
Hinweis: Die Multibox muss mit dem Internet verbunden sein, um nach neue Software zu suchen und diese zu
aktualisieren. Falls sich in dem Netzwerk kein DHCP Server befindet, müssen Sie die IP Adressen für Gateway
und DNS manuell im Netzwerk Menü eingeben.
Lokales Firmware Update
1. Klicken Sie auf die Schaltfläche “Durchsuchen” und wählen Sie die Datei (z.B.idl4k.bin) mit der neuen Firmware
aus.
2. Durch klicken der Schaltfläche “Aktualisieren” wird die neu Firmware auf der Multibox installiert. Anschließend
startet die Multibox neu.
Passwort ändern
1. Geben Sie in die beiden Eingabefelder Ihr neues Passwort ein und klicken Sie auf die Schaltfläche “Ändern”.
2. Klicken Sie auf die Schaltfläche “Neustart”.
17
Firmwareaktualisierung
über USB
Hinweis: Hierfür wird kein PC benötigt!
1. Schalten Sie die Multibox aus.
2. Kopieren Sie die neue Firmware auf einen USB-Stick (Root-Verzeichnis). Der Stick muss im “FAT32”-Dateisystem formatiert sein.
3. Stecken Sie den Stick in die obere USB Buchse der Multibox.
4. Schalten Sie die Multibox ein.
Die Firmware wird automatisch aktualisiert. Während des Updates zeigen die LEDs 12 ein “Lauflicht”. Zum Ende
leuchten alle LEDs auf und gehen dann aus. Die Box startet normal.
Werksreset
Ein Werksreset setzt das Gerät auf die Werkseinstellungen zurück. Das bedeutet, falls Sie eine Favoritenliste
erstellt haben wird diese bei dem Werksreset gelöscht. Falls Sie Ihre bestehende Favoritenliste später wiederverwenden möchten exportieren Sie diese vorher und speichern sie auf Ihrem PC. Nach dem Werksreset können Sie
die Favoritenlisten wieder von Ihrem PC importieren oder einen neue erstellen.
Aus dem selben Grund müssen eventuell geänderte Hauptlisten auch wieder neu geladen werden.
Um das Gerät auf die Werkseinstellungen zurück zu setzen:
Schalten Sie die Multibox aus 9, halten Sie die Reset-Taste 5 für 10 Sekunden gedrückt, während Sie die Multibox
wieder einschalten.
Endgeräte
iOS und Android Smartphones/Tablets
1. Installieren Sie die “Elgato Sat>IP” App auf Ihrem iPhone, iPad oder iPod Touch.
2. Starten Sie die App.
Nach einem Sendersuchlauf erlaubt die Elgato SAT>IP Anwendung Ihnen alle unverschlüsselten SD-Programme
zu empfangen, die an den Sat-Eingängen anstehenden.
PCs
mit Microsoft Windows® Betriebssystem:
Mit Hilfe des Programms “DVBViewer” haben Sie Zugriff auf die Multibox. Dabei steht auch Videotext und EPG
zur Verfügung.
DLNA Endgeräte
Da DLNA ein offener Standard ist, gibt es sowohl Hardware als auch diverse Software (Apps) für PCs, Smartphones und Tablet-PCs, die DNLA unterstützen. Falls der DLNA-Server der Multibox aktiviert ist, können Sie mit
DLNA kompatiblen Endgeräten, die Programme der “Hauptliste TV” bzw. der Favoritenliste empfangen.
UPnP fähige Endgeräte
Endgeräte/Software, die einen UPnP-Client beinhalten (z.B. VLC Player), können ebenfalls auf die “Hauptliste TV”
bzw. die Favoritenliste zugreifen.
RTSP (Real-Time Streaming Protocol)
Besitzen Sie umfassende Kenntnisse in Satelliten-und EDV-Technik, können Sie auch über RTSP die Sendereinstellung vornehmen. Endgeräte/Software, die über das Real- Time Streaming Protocol kommunizieren (z.B. VLC
Player), können direkt über Befehlsstrings programmiert werden.
Beispiel mit VLC Player: Wählen Sie “Medien” -> “Netzwerkstream öffnen…” und geben Sie die Netzwerkadresse
(URL) nach folgendem Muster ein (Angaben in eckigen Klammern sind Platzhalter):
18
De
rtsp://[Multibox-IP- Adresse]/?src=[DiSEqC-Befehl]&fe=[Tuner]&freq=[Satelliten-frequenz]&sr=[Symbolrate]&pol=[
Polarisation]&msys=[Modulations-Norm]&pids=-[PAT,PMT,V-PID,A-PID]
Ein entsprechendes Beispiel:
rtsp://192.168.0.166/?src=1&freq=10744&sr=22000&pol=h&msys=dvbs&pids=0,400,401,402
In diesem Beispiel hat der Multibox die IP-Adresse 192.168.0.166, stellt DiSEqC-Position
A (src=1), die Frequenz 10744MHz (freq=10744), eine Symbolrate von 22MSym/s (sr=22000), die Norm DVB-S
(msys=dvbs), eine horizontale Polarisation (pol=h) und die benötigten PIDs - PAT-PID, PMT-PID, Video-PID und
Audio-PID - (pids=0,400,401,402) ein. Da die Eingabe fe=[Tuner] fehlt, erfolgt die Auswahl des Tuners automatisch.
Die benötigten Werte für den Satellitenempfang finden Sie im Internet (z.B. bei www.kingofsat.net).
19
Technische Spezifikationen
Betriebssystem:
Linux
Anschlüsse
• Sat IF Eingänge: 4 x F-Anschlüsse, jeweils mit unabhängiger Kontrolle (13/18V, 0/22KHz DiSEqC)
• Netzwerk: 1 x RJ45, 1GbE
• Front-End: 4 x DVB-S2
Netzwerkprotokolle:
Voll kompatibler und zertifizierter SAT>IP Server Stack HTTP/HTTPS, DHCP, UDP, IGMP, UPnP, RTP, RTCP,
RTSP UPnP/DLNA-kompatibler Server
USB:
2 x USB 2.0 Host Anschluss
Management:
Web basierende Konfiguration, passwortgeschützte Anmeldung
Stromversorgung:
• Externer AC/DC Adapter, Netzspannung 100-240VAC, 50/60Hz
• DC Ausgang zum Receiver 12V, 3A (maximaler Stromverbrauch für alle Front-Ends ca. 15W =
Entsprechend 800mA LNB Versorgung)
• Im Betrieb max. 30W
Bedienung und Display:
• 1 x Ein/Aus-Schalter
• 4 x Client LED, x1 Netzwerk LED, x1 Betriebsmodus LED
• 1 x Resettaste
Zubehör:
• Bedienungsanleitung in 2 Sprachen
• AC/DC Netzteil
Grösse:
190 x 170 x 40mm (BxTxH)
Richtlinien:
•
CE Konformität:
- 2004/108/EG (EMV Richtlinie)
- 2006/95/EG (Niederspannungsrichtlinie)
- 2011/65/EC (RoHS Richtlinie)
2009/125/EG (Ökodesign Richtlinie):
Verordnung (EG) Nr. 278/2009/EG (Leistungsaufnahme externer Netzteile)
•
20
Inverto Digital Labs
18 Duchscherstrooss, L-6868 Wecker, Luxembourg
Tel: +352 264 367 1 Fax: +352 264 313 68
e-mail: [email protected]
De
21
Quick Installation Guide
IDL 400s
Advanced SAT>IP Multiscreen Server
En
Table of Contents
Notices   24
Introduction  26
Product overview   27
Connecting the MultiBox   28
Switching on your MultiBox device   29
Configuration     29
Firmaware update over the USB port 38
Factory reset 38
Client devices 38
Technical specifications 40
23
This brief setup manual describes the installation and configuration of your Multibox SAT>IP Server device.
For further information please visit www.inverto.tv/multibox.
Notices
Copyright
Statement (Copyright © 2013 Inverto Digital Labs) – Not to be copied, used or translated in part or whole without
Inverto prior consent in writing except approval of ownership of copyright and copyright law.
Warranty
This warranty does not cover parts which may become defective due to misuse of the information contained in this
manual. Read this manual carefully and make sure you understand the instructions provided. Please retain the
original packaging, should it be necessary at some stage to return the unit.
CE MARK FOR EUROPEAN HARMONISED STANDARDS
The CE mark which is attached to these products means it conforms to EMC Directive (2004/108/EC), Low Voltage
Directive (2006/95/EC) and to the RoHS Directive (2011/65/EC).
WEEE Consumer Notice
The Inverto Digital Labs S.a.r.l. product you have purchased is subject to Directive 2002/96/EC of the European
Parliament and the Council of the European Union on waste electrical and electronic equipment (WEEE) and, in
jurisdictions adopting that Directive, is marked as being put on the market after August 13, 2005, and should not
be disposed of as unsorted municipal waste. Please utilize your local WEEE collection facilities in the disposition of
this product and otherwise observe all applicable requirements. For further information on how to properly dispose
of your product and for information specific to your country, please contact your vendor or visit the “Support” section of our website: www.inverto.tv/support
Disposal of Old Electrical and Electronic Equipment (Applicable in the European Union and other European) countries with separate collection systems
This symbol on the product or on its packaging indicates that this product shall not be treated as household waste.
Instead it shall be handed over to the applicable collection point for the recycling of electrical and electronic equipment. By ensuring this product is disposed of correctly, you will help prevent potential negative consequences
for the environment and human health, which could otherwise be caused by inappropriate waste handling of this
product. The recycling of materials will help to conserve natural resources. For more detailed information about
recycling of this product, please contact your local Civic Office, your household waste disposal service, or the shop
where you purchased the product.
Safety Notices
Warning:
For your safety, be aware of the following precautions:
caution
RISK OF ELECTRIC SHOCK
DO NOT OPEN
!
• To prevent electric shock,do not remove cover.
• No user serviceable parts inside.
• Refer servicing to qualified service personal.
24
En
The lightning flash with arrowhead symbol within an equilateral triangle is intended to alert the user to
the presence of uninsulated dangerous voltage” within the product’s enclosure that may be of sufficient magnitude to constitute a risk of electric shock to persons.
!

The exclamation point within an equilateral triangle is intended to alert the user to the presence of
important operating and maintenance (servicing) instructions in the literature accompanying the appliance.
Important Safety Instructions:
This device was manufactured according to the specifications of international safety standards. For your own
protection, you should read the safety instructions carefully before using your new device. The manufacturer assumes no liability for damages caused by improper handling or by ignoring the safety precautions.
• This device is designed to receive Satellite TV signals and distribute them to client devices over your
IP home network. Any other use is expressly prohibited.
• Operate the device only with the supplied AC adapter.
• When setting up the device, make sure the mains socket is easily accessible.
• If the device is subject to a sudden change in temperature, for example when brought in from a cold to
a warm room, let it stand for at least two hours before you connect it to the mains supply.
• Do not expose the device to any moisture. The digital receiver is designed for use in dry rooms. If you
do use it out- doors, please ensure that it is protected from moisture, such as rain or splashing water.
• Place the device on a flat, solid surface for use.
• Make sure the device is adequately ventilated. Make sure that the left and right, a free space of bout 5
cm, 10 cm above is available to allow the air to circulate freely and the device does not overheat.
• Never cover the vents with newspapers, tablecloths, curtains, etc.
• Do not place anything on the device which could initiate fires (e.g. candles) or contain liquids.
• Do not use the device close to heating units or in direct sunlight.
• The device should be operated at temperatures of 5 ºC to 40 ºC. Use the device only in a moderate
climate, not in tropical conditions.
• Avoid short circuits!
• Thunderstorms are a danger to all electrical devices. Even if the device is switched off, it can be
•
damaged by a stroke of lightning to the mains or the antenna cable. Therefore always disconnect the
device from the mains and from the antenna unit during a thunderstorm or extended shutdowns (e.g.
holidays).
Never open the device under any circumstances. Liability is not accepted for damage caused by faulty
connections or inappropriate handling of the device.
25
Introduction
The Multibox SAT>IP Server allows free Satellite Live TV programs to be received and distributed to smart phones,
tablet PCs and notebooks/PCs and other Client devices over your LAN/WLAN home network. The Multibox is
equipped with four satellite tuners, so up to four users can watch their favourite channels on their mobile devices.
The Multibox device, therefore must be connected to the same WLAN/LAN network the Client devices are connected to.
Main features:
• Fully compliant and certified SAT>IP Server with 4 Satellite tuners
• Streaming Live SD/HD TV & Radio programs to 4 compatible Clients over LAN/WLAN
• DLNA-compatible Server mode supporting DLNA Client devices and/or apps
• Web-based device configuration and management (password protected)
• Support MPEG2 TS and PS over IP, Unicast and Multicast
• Support Unicable and DiSEqC1.0 protocols
• Firmware update over USB stick or online over the internet
Supported Client devices:
• iOS (iPad/iPhone) and Android tablets and smart phones using Elgato SAT>IP app.
• DLNA/UPnP compatible devices eg Media players, Video streamers, Gaming consoles
• DLNA/UPnP compatible TVs
• DLNA/UPnP compatible PC software applications eg VLC Player, DVBViewer*
• SAT>IP compliant Client devices
Important! Notes on Minimum System Requirements:
• HDTV programs require powerful SAT>IP/DLNA Client devices/applications in order to decode
smoothly, therefore HDTV video decoding is not guaranteed on all SAT>IP/DLNA Clients.
• DLNA compatibility is not guaranteed with all DLNA Clients.
• Accessing the product login page from a Windows PC over mDNS hostname resolution requires the
accessing device to have Apple’s bonjour software installed (eg through iTune, Safari or QuickTime
software).
• Network (LAN/WLAN) throughput shall be over 20Mbps per connected SAT>IP Client device in order
to guarantee smooth streaming of HDTV programs. Recommended router speeds: 300Mbps for
WLAN, 1GbE for LAN.
* May not be supported by all versions of DVBViewer
26
En
Product overview
Back panel view
1
2
3
4
5
6
7
8
10
11
12
9
1. Sat input 1 - Horizontal High / Universal LNB port 1 / Unicable
2. Sat input 2 - Vertical High / Universal LNB port 2
3. Sat input 3 – Horizontal Low / Universal LNB port 3
4. Sat input 4 – Vertical Low / Universal LNB port 4
5. Reset button
6. USB host interface
7. LAN port (1GbE)
8. Power supply input connector
9. Power switch (ON/OFF)
Front panel view
10. Power on LED indicator 11. LAN connection activity LED indicator
12. Connected users LED indicators
27
Connecting the Multibox
Remove all protective films from the housing.
Connecting the Multibox to Satellite Signals
The Multibox can be connected to any of the following satellite reception equipment:
Quad / Octo LNBs or Universal multiswitches
Connect the outputs of the LNB/multiswitch to the inputs 1 … 4 of the Multibox via suitable SAT antenna cables.
Note: If you intend to use less than 4 client devices, you require correspondingly less inputs (connect from input
1 and up).
Quattro LNB
Connect the 4 outputs of the Quattro LNB to the 4 inputs 1 … 4 of the Multibox via suitable SAT antenna cables
and ensure the correct port assignment as follows.
Quattro LNB output
band port
Multibox input port
Horizontal High
1
Vertical High
2
Horizontal Low
3
Vertical Low
4
Unicable
Connect the Unicable output of the Unicable LNB/multiswitch to input 1 of the Multibox (also marked with “Unicable”) via a suitable SAT antenna cable.
Connecting the Multibox to your home network
Connect the LAN socket 7 of the Multibox to a LAN connector of your network router/switch/access point via a
LAN cable.
Note: A DHCP server needs to be active in the network (normally integrated in the router and active by default) so
the Multibox will be able to obtain network IP settings automatically. The Multibox shall be connected on the same
network your client devices are connected to (same IP address range).
For a smooth video streaming of satellite Live TV we recommend using a 1GbE LAN router or a 300Mbit/s WLAN
router/access point. In addition, Client devices (e.g. PCs) must have an appropriate computing (CPU) power and
graphic processor.
Connecting the Multibox to Power supply
Connect the supplier AC/DC power adapter to mains and then connect it to the power supply input 8.
28
En
Switching On your Multibox device
Switch On the Multibox using the power switch 9, which is located at the rear side. The Multibox
connects to the network and obtains network IP settings from the DHCP server (LAN connection LED blinks).
Once the connection is established, the LAN connection indicator LED lights permanently.
Configuration
The Multibox can be configured using a PC that is connected within the same network. The configuration is done
through a web interface and requires to login the device first.
The default name of your Multibox device is ‘myMultibox-xxxxxx’ where xxxxxx are the 6 right-most characters
of the unit’s MAC address and this is how it will be displayed on the network. You can change the device name
later on in the configuration menu 1.
The MAC address of the unit appears on the sticker at the bottom side of the unit.
You can access the login page and the configuration menus using any PC connected in the same network as
follows:
Access via “My Computer”
®
Windows 7 :
• Open “Computer”
• Select “Network”
The Multibox device (myMultibox-xxxxxx) will be displayed on the right. Double click on it to open the login page.
1
Device name shall be limited to 15 characters; Device name may change with future software updates.
29
®
Windows XP :
• Open “My Computer”.
• Select “Network environment”.
• Double click on the myMultibox-xxxxxx icon.
If the Multibox is not displayed, select “Show symbols for network UPnP devices” in window “My Network Places”,
section “Network tasks”.
Direct access via web browser
Your Multibox device supports the Apple’s Bonjour* protocol. If you are using an Apple computer or if Apple’s
Bonjour software is installed on your Window PC, then simply type the following address in the address bar of the
browser: myMultibox-xxxxxx.local
Where the “xxxxxx” are the 6 right-most characters of your Multibox´s MAC address (see the label at the bottom side
of the device; e.g. myMultibox-000546.local).
IDL 400s MultiboxTM
EAN:
MAC:
Serial:
Digital SAT>IP Multiscreen server
30
1S81C11240000000
00:24:A6:00:05:46
5453002611739
TM
En
* Bonjour, also known as zero-configuration networking, enables automatic discovery of computers, devices, and
services on IP networks using industry standard IP protocols. It is a key component of Apple applications e.g.,
iTunes, iPhoto and others.
If your PC does not have Apple’s Bonjour software installed, type the IP address, which was assigned to your Multibox device by the local DHCP server, and, separated by a “:”, port 8080 e.g. 192.168.0.166:8080. Subsequently
press “Enter”.
This IP address was assigned from the network router and can be found in the configuration menu of the router (the
DHCP protocol must be activated in the router).
Login window
The default password is “admin”. Enter the Password and click on button “Login”(Anmelden).
The status page is displayed.
31
Antenna configuration
Select the “Antenna” menu.
Select the type of LNB that is connected to Satellite input of your Multibox based on your satellite installation: 1.“Quad” (default factory setting) – Select ‘Quad’ when a Quad LNB, Octo LNB or Universal multiswitch is
connected to your Multibox.
2. “Quattro” (Quattro LNB) – Select ‘Quattro’ when a Quattro LNB is connected to your Multibox directly.
3. “Unicable” (Unicable LNB or Unicable multiswitch) – Select ‘Unicable’ when a Unicable LNB or Unicable switch
is connected to your Multibox.
4. Click on “Save” (Speichern).
If “Unicable” is selected, there will be 4 input boxes displayed for you to set the Unicable 4 User Band frequencies.
32
En
Herein enter the frequencies of the 4 Unicable User Bands over which the satellite signals are then transmitted
to the 4 tuners.
Store the frequencies using button “Save” (Speichern).
33
DLNA Configuration
Your Multibox device is also a DLNA-compatible server and therefore can stream Live Satellite TV to DLNA Media
Player Client devices and/or software applications (DLNA Clients) that are not standard SAT>IP Clients. It is important to understand that using DLNA for Live TV streaming is limited to audio and video only and other information such as EPG, teletext or subtitling cannot be accessible by the DLNA Clients. If you would like to use DLNA
Clients, you have to enable the DLNA Server option as follows:
1. Select the “DLNA” menu
2. Check the “DLNA aktiv” check box and confirm by clicking on “Save” (Speichern). Unlike SAT>IP Clients that
holds and manages the TV/Radio channel list, the DLNA Clients are relying on channel lists provided by the
DLNA Server. Your Multibox device stores a default channel list (Main TV List) of German ASTRA 19.2° TV
channels. The channel list is stored as a text file that can be edited manually if needed.
Under the “DLNA Main TV List” section you can upload an updated channel list (Main TV List) which you first need
to download from www.inverto.tv/multibox.
34
En
You can create and manage your own favourite channel list under section “Favorit List(s)”.
Using the respective buttons, you can create (“New”), export to file (“Export”, for backup), if necessary re-import
from file (“Import”), modify (“Edit”) or delete (“Delete”) a favourite list.
• Click on button “New”.
• Click on the new list and select “Edit”.
• Select a channel from the main list (“Main TV List”) and move it (drag& drop) to your favourite list
using the mouse.
• To remove a channel from the favourite list, select the channel you want to delete and move it (drag &
drop) to the trash
• Using the button “Sort” (Sortieren) you can sort the main list in alphabetical order. The button “Delete all” (Alles löschen) deletes all the channels of a favourite list.
• Save the favourite list by the button “Save” (Speichern), then this favourite list will be the channel list
that DLNA Clients will be able to use (instead of the default main list).
35
36
En
The System menu
Using the “System” menu, you can perform a firmware update, change the configuration login password, change
the default device name, set a manual IP address to the device as well as perform a system reboot.
Online Firmware Update
Click on button “Search”, in order to search for a newer firmware online. If a new firmware is available it will be
downloaded automatically. Clicking on the button “Update” (Aktualisieren) will start the process of installing the
new firmware onto the Multibox device. At the end of the installation process, the Multibox will restart automatically.
Note: The Multibox device must be connected to the internet in order to search and access new firmware updates.
If your network has no active DHCP server, you will need to manually enter DNS and Gateway IP addresses in
the Network menu.
Local Firmware Update via connected PC
1. Click on button “Choose File” and select the file containing a new firmware (e.g. idl4k.bin).
2. Clicking on the button “Update” (Aktualisieren) will start the process of installing the new firmware onto the
Multibox device. At the end of the installation process, the Multibox will restart automatically.
Changing the Password
1. Enter the new password into both text input boxes and click on the button “Apply” (Aendern). The Multibox shall
be restarted in order to set the new password.
2. Click on button “Restart” (Neustart).
37
Firmware update over the
USB port
Note: This firmware update option does not require a PC.
1. Switch off your Multibox device.
2. Copy the new firmware file to an USB stick at the root directory. The stick must be formatted with the “FAT32”
file system.
3. Insert the USB stick into the upper USB socket at the back panel of your Multibox device.
4. Switch on your Multibox device.
The firmware will be updated automatically. You will see a “running light” on the front panel LEDs 12. At the end of
the firmware update all front panel LEDs will switch on and then off. Then the device will start normally.
Factory Reset
The ‘Factory Reset’ function will reset the device to the original factory settings. This means that if you have created a favourite list, it will be deleted during the ‘Factory Reset’ process. If you want to keep your favourite list for
future use, you will have to Export the favourite list to a file first and store it on your PC. After the ‘Factory Reset’
ended, you can import the favourite list file from your PC or create a new one. Similarly, updates of the main TV list (Main TV List) must be loaded again.
To perform ‘Factory Reset’: Switch off your Multibox device 9, press and hold the reset button 5 on the rear panel
of your Multibox while you power on the device and keep it pressed for 10 seconds .
Client Devices
iOS Smart phones/Tablets
1. Install the “Elgato Sat>IP” App on your iPhone, iPod Touch or iPad.
2. Start the App.
The Elgato SAT>IP Application allows you to receive all unscrambled (FTA) SD programmes which are present at
the Sat inputs after a satellite scan is done.
PCs
With Microsoft Windows® operating system:
Using the programme “DVBViewer” you can get access to your Multibox. Herein also Teletext and EPG is available.
DLNA Clients
As DLNA is an open standard, hardware as well as several software (Apps) which supports DLNA are available. If
the DLNA Server option of your Multibox is activated, you can receive the channels of the “main TV list” (“Main TV
List”) or of the favourite list using DLNA Client devices.
UPnP Client devices
UPnP-compatible Client devices/software e.g. VLC player, can access the “main TV list” as well as the favourite
list.
Real-Time Streaming Protocol (RTSP)
38
If you have comprehensive knowledge of satellite and IP technology, you also can use Client devices/software
which can communicate via the Real Time Streaming Protocol (e.g. VLC player), to control the satellite tuners of
your Multibox via RTSP commands.
En
Example using the VLC player: Select “Media” -> “Open Network Stream” and type the network URL. The URL
must look as follows (values in square brackets are place holders):
rtsp://[Multibox IP address]/?src=[DiSEqC command]&fe=[tuner]&freq=[satellite frequency]&sr=[ symbol rate]&pol
=[polarization]&msys=[demodulation standard]&pids=[PAT,V-PID.A-PID.PMT]
An example should look like this:
rtsp://192.168.0.166/?src=1&freq=10744&sr=22000&pol=h&msys=dvbs&pids=0,400,401,402
In this example the Multibox device with an IP address 192.168.0.166 will tune to DiSEqC Position A (src=1), frequency 10744MHz (freq=10744), symbol rate 22MSym/s (sr=22000), polarization horizontal (pol=h), DVB-S modulation (msys=dvbs), and the necessary PIDs – PAT pid, PMT-pid, Video-pid and Audio-pid - (pids=0,400,401,402).
As there is no frontend selected (fe=[Tuner]), this will be handled automatically by the Multibox device which will
assign a free front end (if available) for executing the command. You can find the values necessary for satellite
reception in the internet (e.g. at www.kingofsat.net).
39
Technical specifications
Operating system:
Linux
Interfaces:
• Sat IF inputs: x4 F-connectors, each with independent control (13/18V, 0/22KHz DiSEqC)
• Network (Ethernet): x1 RJ45, 1GbE
• Front ends: x4 DVB-S2
Network protocols:
Fully compliant and certified SAT>IP Server stack HTTP/HTTPS, DHCP, UDP, IGMP, UPnP, RTP, RTCP, RTSP
UPnP/DLNA-compatible server
USB:
2 x USB 2.0 host ports
Management:
Web-based configuraion; password protected login
Power supply:
• External AC/DC adaptor, Main Input 100-240VAC ~, 50/60 Hz
• DC Output to receiver 12V, 3A (max power consumption for all Front-end is 15W = equivalent to
800mA total LNB load).
• Operating mode: max. 30W
Control and Display:
• 1 x On/Off switch button
• 4 x Client LED, x1 Network activity LED, x1 On/Off LED
• 1 x Reset button
Accessories:
• Installation Manual in 2 languages
• AC/DC power adaptor
Size:
W 190mm x D 170mm x H 40mm
Regulations:
•
CE compliance:
- 2004/108/EC (EMC Directive)
- 2006/95/EC (Low Voltage Directive)
- 2011/65/EC (RoHS Directive)
2009/125/EC (Eco-design Directive):
Commission Regulation (EC) No 278/2009 (power consumption of external power supplies)
•
40
Inverto Digital Labs
18 Duchscherstrooss, L-6868 Wecker, Luxembourg
Tel: +352 264 367 1 Fax: +352 264 313 68
e-mail: [email protected]
En
41
Notes / Notizen
..................................................
....................................................
..................................................
....................................................
..................................................
....................................................
..................................................
....................................................
..................................................
....................................................
..................................................
....................................................
..................................................
....................................................
..................................................
....................................................
..................................................
....................................................
42
En
..................................................
....................................................
..................................................
....................................................
..................................................
....................................................
..................................................
....................................................
..................................................
....................................................
..................................................
....................................................
..................................................
....................................................
..................................................
....................................................
..................................................
....................................................
V300113
43
V300113