1
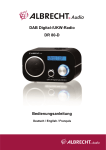
DAB+/UKW Digital-Radio DR 60
Benutzerhandbuch
Deutsch / English / Français
1
Deutsch
1 Inhaltsverzeichnis
1
Inhaltsverzeichnis .......................................................................................................... 2
2
Bedienelemente ............................................................................................................. 3
3
Erstes Einschalten des Radios....................................................................................... 4
4
DAB+ Modus ................................................................................................................. 4
5
4.1
Sender speichern ................................................................................................. 4
4.2
Senderspeicher aufrufen ...................................................................................... 4
4.3
Informationen zum Sender ................................................................................... 5
4.4
Kein Signal ........................................................................................................... 5
4.5
Signalstärke ......................................................................................................... 5
UKW-Modus .................................................................................................................. 6
5.1
Umschalten von DAB+ zu UKW ........................................................................... 6
5.2
Automatische Sendersuche.................................................................................. 6
5.3
Anzeigemodus ..................................................................................................... 6
5.4
Klangmodus ......................................................................................................... 6
5.5
Signalstärke ......................................................................................................... 7
6
Menü ............................................................................................................................. 7
7
System-Rückstellung ..................................................................................................... 8
8
Gewährleistungs- und Recyclinginformationen............................................................... 9
9
Serviceanschrift und technische Hotline ........................................................................10
2
Deutsch
2 Bedienelemente
3
2
1
5
4
7
6
8
9
14
15
1. Lautsprecher
2. LC-Display
3. Ein/Aus
4. Informationen
5. Scan
6. Senderspeicher
10
16
11
12
13
12. Select / Auswahltaste
13. ►► Vor
14. 3,5 mm Ohrhörerbuchse
15. Netzteileingang
16. Teleskopantenne
7. Menü
8. Lautstärke –
9. Lautstärke +
10. DAB+/UKW
11. ◄◄ Zurück
Deutsch
3
3 Erstes Einschalten des Radios
•
•
•
Stromversorgung:
Das Netzteil gehört zum Lieferumfang.
Schließen Sie das Netzteil am Netzteileingang des Radios und an einer Steckdose an.
Ziehen Sie die Teleskopantenne vollständig aus.
Das Radio synchronisiert zuerst die Uhrzeit automatisch. Drücken Sie dann Ein/Aus auf dem
Radio. Die Hintergrundbeleuchtung des LCD schaltet sich ein und das Radio beginnt mit dem
Scan nach neuen Sendern.
Drücken Sie eine der Lautstärketasten zum Einstellen der Lautstärke, mit Lautstärke+ erhöhen Sie die
Lautstärke. Mit Lautstärke- verringern Sie die Lautstärke.
Zum Durchlaufen der aufgefundenen Sender drücken Sie „◄◄“ oder „►►“. Zum Halten eines Senders
drücken Sie die Auswahltaste oder warten Sie 5 Sekunden ab, bis der Sender automatisch gewählt ist.
Der aktuelle Sendername wird im LCD angezeigt.
Bei einem späteren Einschalten des Radios wird der zuletzt gehörte Sender aufgerufen.
4 DAB+ Modus
4.1 Sender speichern
Sie können bis zu 10 Sender speichern; hierdurch können Sie Ihre Lieblingssender mit einfachem
Tastendruck aufrufen.
Zum Speichern muss der Sender zunächst eingestellt sein, dann halten Sie die „Senderspeicher“-Taste
gedrückt. Wenn „Leer P x“ im LCD blinkt, können Sie den Senderspeicher mit „◄◄“ oder „►►“ wählen.
Nach der Auswahl des Senderspeichers drücken Sie zur Bestätigung „Select“. „P x Saved“ wird
angezeigt und der Sender wurde erfolgreich gespeichert.
Senderspeicher
4.2 Senderspeicher aufrufen
Drücken Sie Preset und wählen Sie mit „◄◄“ oder „►►“ den gewünschten Sender; dann bestätigen
Sie wieder mit der Auswahltaste.
4
Deutsch
4.3 Informationen zum Sender
Informationen
Mit wiederholtem Tastendruck auf „Info“ durchlaufen Sie die folgenden Anzeigemodi:
Radiotext, Uhrzeit, Frequenz, Ensemble, Version und Sender
Radiotext
Sender
Uhrzeit
Version
Frequenz
Ensemble
1
2
4.4 Kein Signal
Liegt nach der automatischen Sendersuche kein Signal vor, so wird „OFF AIR“ angezeigt. Diese
Anzeige erfolgt auch für einen Sender mit schwachem Signal. Vergewissern Sie sich, dass die Antenne
vollständig ausgezogen ist und scannen Sie erneut.
4.5 Signalstärke
Die Signalstärke des aktuellen Senders wird oben links im Display angezeigt. Als Symbol wird eine
Antenne mit 3 Signalbalken verwendet. Bei sehr schwachen Sendern werden weder das
Antennensymbol noch die Signalbalken angezeigt, bei einem starken Sender sehen Sie alle drei Balken.
Deutsch
5
5 UKW-Modus
5.1 Umschalten von DAB+ zu UKW
Zum Umschalten des Radios von DAB+ zu UKW drücken Sie „DAB+/FM“. Das Display zeigt oder eine
andere zuletzt gehörte Frequenz:
87,50 MHZ
2
5.2
Automatische Sendersuche
Zur Suche nach einem UKW-Sender drücken Sie „Scan“. Das Frequenzband wird aufwärts durchsucht.
Mit einem vorherigen Druck auf „◄◄“ oder „►►“ ändern Sie die Suchrichtung. Beim Auffinden eines
Senders wird die Sendersuche unterbrochen. Wird kein Sender gefunden, so wird die Sendersuche nach
einem vollständigen Durchlauf durch das UKW-Band (87,5-108 MHz) beendet.
5.3 Anzeigemodus
Mit wiederholtem Tastendruck auf „Info“ durchlaufen Sie die folgenden Anzeigemodi:
Radiotext, Uhrzeit, Frequenz, Version
Radiotext
Version
Uhrzeit
Frequenz
5.4 Klangmodus
Mit „Select“ schalten Sie den Klangmodus zwischen „Mono“ und „Auto“ um, sofern Sie sich in keinem
Menü befinden. Umschalten zu „Mono“ kann die Signalqualität schwacher Sender verbessern.
6
Deutsch
5.5 Signalstärke
Die Signalstärke des aktuellen Senders wird oben links im Display angezeigt. Als Symbol wird eine
Antenne mit 3 Signalbalken verwendet. Bei sehr schwachen Sendern werden weder das
Antennensymbol noch die Signalbalken angezeigt, für einen starken Sender sehen Sie alle drei Balken.
6 Menü
Mit „Menu“ wählen Sie zwischen folgenden Menüoptionen: Manueller Scan/Lokaler Scan/ Vollständiger
Scan/ Uhrzeit/ Dimmer/ Sprache/ 12-/24-Stundenformat. Mit „◄◄“ oder „►►“ wählen Sie die
Menüpunkte:
Manueller
Lokaler Scan
Vollständiger
Scan
Uhr
Dimmer
Sprache
12/24h
Alarm 1
Alarm
Manuelle
Uhrzeit
Alarm 2
12h
einstellen
24h
einstellen
1
2
Manuelle
Sendersuche:
Neben der automatischen Sendersuche steht Ihnen ebenfalls eine manuelle
Sendersuche zur Verfügung. Dies ist nützlich beim Ausrichten der Antenne oder bei
Suchen von Sendern, die bei der automatischen Sendersuche übergangen wurden.
Drücken Sie „Menu“ und schalten Sie mit „◄◄“ oder „►►“ zur „manuellen
Sendersuche“ um. Nun drücken Sie „◄◄“ oder „►►“ zum Durchlaufen der DAB+
Kanäle von 5A bis 13F.
Erkennt das Radio ein Ensemble auf einem der Kanäle, so wird dies im LCD
angezeigt. Drücken Sie Select zum Aufrufen des aktuellen Ensembles, im LCD wird
der erste Sender im Ensemble angezeigt.
Zur Anzeige der Sender auf dem Ensemble drücken Sie „◄◄“ oder „►►“, damit
wird automatisch der nächste Sender gewählt. Nach dem letzten Sender im
Ensemble wird wieder zum ersten Sender umgeschaltet. Zum Verlassen der
manuellen Sendersuche drücken Sie die „Select“-Taste.
Deutsch
7
Lokaler Scan:
Vollständiger
Scan:
Drücken Sie „Select“ zum Aufrufen der lokalen Sendersuche der DAB-Kanäle 11B
bis 12D.
Werden keine Sender gefunden, so führen Sie einen vollständigen oder manuellen
Scan durch. Dieses Menü steht Ihnen nur im DAB-Modus zur Verfügung.
Drücken Sie „Select“ zum Aufrufen des vollständigen Scans und scannen Sie alle
DAB-Kanäle von 5A bis 13F. Dieses Menü steht Ihnen nur im DAB-Modus zur
Verfügung.
Uhr:
In diesem Menü können Sie die Zeit manuell einstellen und die Alarmeinstellungen
ändern.
Es stehen zwei Alarmeinstellungen zur Verfügung. Für den Weckalarm wählen Sie
neben der Zeit auch die Quelle des Alarmsignals. Wählen Sie zwischen DAB, UKW
oder Summer.
Dimmer:
Im Dimmermenü wird die automatische Abschaltung der Hintergrundbeleuchtung
gesteuert. Bei Einstellung auf „Ein“ ist die Beleuchtung immer eingeschaltet. Im
Mobilbetrieb empfehlen wir die Einstellung „10 Sec“. Hiermit wird die Beleuchtung
nach 10 Sekunden ausgeschaltet und damit der Batterieverbrauch des Radios
verringert.
Sprache:
Hier stellen Sie die Menüsprache ein. Englisch oder Deutsch kann eingestellt
werden.
12/24h:
Drücken Sie „Select“ zum Aufrufen der Einstellung des Zeitformats. Dann drücken
Sie „◄◄“ oder „►►“ zur Auswahl des 12- oder 24-Stundenformats; drücken Sie
„Select“ zur Bestätigung.
7 System-Rückstellung
Halten Sie „DAB+/FM“-Taste für 3 Sekunden gedrückt. Im Display wird „RESET“ angezeigt. Drücken Sie
die Auswahltaste zur Bestätigung der Rückstellung.
Bitte beachten Sie, dass bei der Rückstellung alle DAB+ und UKW-Senderspeicher sowie die interne
DAB+ Speicherung gelöscht werden.
Nehmen Sie beispielsweise eine Rückstellung zu den Werkseinstellungen vor, wenn Sie umziehen und
am neuen Standort die bisherigen Sender nicht mehr verfügbar sind. Nehmen Sie keine Rückstellung vor,
so verbleiben auch die nicht länger verfügbaren Sender im Radiospeicher.
8
Deutsch
8 Gewährleistungs- und Recyclinginformationen
Wir sind verpflichtet, jedem Gerät Informationen über die Entsorgung, über die gesetzlichen
Gewährleistungsbestimmungen und die EG Konformitätserklärungen mit Hinweisen über das Benutzen
der Geräte in den verschiedenen Ländern beizufügen. Sie finden daher diese Informationen im folgenden
Text.
Gesetzliche Gewährleistung von 2 Jahren nach Kaufdatum
Der Verkäufer dieses Geräts gewährt Ihnen eine gesetzliche Gewährleistung von zwei Jahren nach
Kaufdatum des Geräts. Diese Gewährleistung umfasst alle Fehler, die durch defekte Bauteile oder
fehlerhafte Funktionen innerhalb der Gewährleistungsfrist auftreten sollten, nicht jedoch Fehler, die auf
normaler Abnutzung beruhen, wie z.B. verbrauchte Akkus, Kratzer im Display, Gehäuse-defekte,
abgebrochene Antennen, sowie Defekte durch äußere Einwirkung, wie Korrosion, Überspannung durch
unsachgemäße externe Spannungsversorgung oder Verwendung ungeeigneten Zubehörs. Ebenso sind
Fehler von der Gewährleistung ausgeschlossen, die auf nicht bestimmungsgemäßen Umgang mit dem
Gerät beruhen.
Bitte wenden Sie sich bei Gewährleistungsansprüchen zunächst unmittelbar an den Händler, bei dem Sie
das Gerät erworben haben, oder auch gleich an unseren Servicepartner. Der Händler wird Ihr Gerät
entweder reparieren oder austauschen, oder er wird Ihnen eine für das Gerät spezialisierte
Serviceadresse nennen.
Falls Sie Ihr Gerät einschicken, vergessen Sie Ihre Kaufquittung als Nachweis über das Kaufdatum nicht
und beschreiben Sie bitte den aufgetretenen Fehler möglichst genau.
Elektroschrottgesetz und Recycling
Europäische Gesetze verbieten das Entsorgen von defekten oder nicht mehr brauchbaren
Geräten über den Hausmüll. Sollten Sie eines Tages Ihr Gerät entsorgen wollen, dann
geben Sie es bitte nur bei den überall eingerichteten kommunalen Sammelstellen zum
Recycling ab. Dieses Sammelsystem wird von der Industrie finanziert und sichert auch die
umweltgerechte Entsorgung und das Recycling wertvoller Rohstoffe.
Deutsch
9
9 Serviceanschrift und technische Hotline
PST professional support technologies GmbH
Breitscheider Weg 117a
40885 Ratingen
Die Servicehotline ist unter 02102 - 1459546 (reguläre Kosten für das deutsche Festnetz) bzw. per e-mail
unter
[email protected]
erreichbar.
Bevor Sie bei einem Problem ein vermeintlich defektes Gerät zurückschicken, können Sie Zeit und
Versandkosten sparen, indem Sie zunächst ein paar einfache Tests (siehe Kapitel Störungserkennung)
durchführen, oder lassen Sie sich per Hotline helfen
© 2013 Alan Electronics GmbH
Druckfehler vorbehalten.
10
Deutsch
DAB+ / FM Digital Radio DR 60
User Manual
English
English
1
1 Table of Contents
1
Table of Contents .........................................................................................................12
2
Location of Controls ......................................................................................................13
3
Switching your radio on for the first time........................................................................14
4
DAB+ mode ..................................................................................................................14
5
4.1
Storing stations ...................................................................................................14
4.2
Recalling a stored station ....................................................................................14
4.3
Additional Station Information..............................................................................15
4.4
Signal Not Available.............................................................................................15
4.5
Signal strength ....................................................................................................15
FM mode ......................................................................................................................16
5.1
Switching from DAB+ to FM ................................................................................16
5.2
Autoscan .............................................................................................................16
5.3
Display mode ......................................................................................................16
5.4
Audio Mode .........................................................................................................16
5.5
Signal strength ....................................................................................................17
6
Menu ............................................................................................................................17
7
System Reset ...............................................................................................................18
8
Warranty and Recycling Information .............................................................................18
9
Service Address And Technical Hotline (for units sold in Germany) ..............................19
12
English
2 Location of Controls
3
1
2
5
7
4
6
8
9
14
10
16
11
12
13
15
1. Speaker
13.
►► Next
Key
2. LC Display
14. 3.5mm Earphone Socket
3. ON / OFF Key
15. DC Power Socket
4. Display Key
16. Telescopic antenna
5. Scan Key
6. Preset Key
7. Menu Key
8. Volume Down Key
9. Volume Up Key
10. DAB+/ FM Key
11.
◄◄ Previous
Key
12. Select Key
English
13
3 Switching your radio on for the first time
•
•
•
Power Supply:
The mains adapter is supplied with the package.
Connect the mains adapter to the DC power socket of the radio and to a wall socket.
Extend the telescopic antenna as far as it can go.
The radio will automatically synchronize the clock. Then press the Power switch on the radio. The
LCD backlight will light up during the operation of the radio and start scanning for new stations.
If you can't hear any sound, then press the volume up key until you reach the desired level. If you
consider the volume is too high, then press the volume down key to reach the desired level.
To explore the stations that have been found you need to press "◄◄" or "►►" to switch to the next found
station. When you find a station that you would like to listen to, then press the S elect key or wait 5
seconds until the station is automatically selected. The current station name is shown on the LCD.
If you switch your radio on after your first use the radio will play the last used mode with the station that
was in last operation.
4 DAB+ mode
4.1 Storing stations
You can store up to 10 of your favorite stations to the preset keys, this will enable you to get access to
your favorite stations at the touch of one button.
To store a preset you must first be listening to the station that you would like to save, then press and
hold the "Preset" key. If you see "Empty P x" blinking on the LCD, you can change the selected memory
by pressing "◄◄" or "►►". When you have selected your desired memory you need to confirm the
selection by pressing “Select”. Then "P x Saved" will be displayed on the LCD which means the station
has been stored successfully.
Preset Key
4.2 Recalling a stored station
Press the "Preset" key and select with the "◄◄" or "►►" keys the station that you want to listen to and
confirm it with the Select key.
14
English
4.3 Additional Station Information
Info Key
When you press the "Info” key, the display will cycle through the following display modes:
Radiotext, Time, Channel Frequency, Ensemble, Version and Station
Radiotext
Station
Time
Version
CH Freq
Ensemble
1
2
4.4 Signal Not Available
When there is no signal received after the Autoscan has been done, the display will show “OFF AIR”. It
may be because of a too weak station signal. Please check if the antenna has been pulled out and try to
do the scan again.
4.5 Signal strength
The signal strength of the currently received station is displayed in the upper left corner of the screen.
The icon is an antenna symbol with 3 signal bars. On very weak stations the antenna symbol and the
signal bars disappears completely and on strong stations all 3 bars are shown.
English
15
5 FM mode
5.1 Switching from DAB+ to FM
In order to switch the radio from DAB+ to FM mode you need to press the "DAB+/FM" key once. The
display will show:
1
2
87.50MHZ
5.2 Autoscan
To search for a FM station you need to press the "Scan" key. This will start scanning up the frequency
band. You can change the scanning direction by pressing "◄◄" or "►►" once. Once a station has been
found, the scan will stop automatically. If no station is found, then the tuning will stop once it is cycled
through the entire FM band (87.5-108MHz).
5.3 Display mode
When you press the "Info” key, the display will cycle through the following display modes:
Radiotext, Clock, Channel Frequency, Version
1
2
1
2
Radiotext
Version
Clock
CH Freq
1
2
5.4 Audio Mode
While not being in the menu the audio mode can be switched between “Mono” or “Auto” by pressing the
“Select” key. Changing the audio mode to “mono” may improve the signal quality on weak stations.
16
English
5.5 Signal strength
The signal strength of the currently received station is displayed in the upper left corner of the screen.
The icon is an antenna symbol with 3 signal bars. On very weak stations the antenna symbol and the
signal bars disappears completely and on strong stations all 3 bars are shown.
6 Menu
If you press the "Menu" key, you can select the following Menu options Manual / Local scan mode / Full
scan mode / Clock / Dimmer / Language / 12/24H format setting by pressing "◄◄" or "►►" to select and
shown as below:
Manual
2
Loc Scan
1
2
Fullscan
Alarm 1
Alarm
1
2
Clock
1
Language
2
Alarm 2
Manu CLK
Dimmer
1
1
2
2
1
1
2
2
Set 12H
12/24H
1
Set 24H
2
Manual tune:
As well as an auto tune function, you can manually tune the receiver. This can help
you when aligning your aerial antenna or when adding stations that were missed
while auto tuning.
Press "Menu" key and turn the "◄◄" or "►►" key to "manual" and select it. Now
press the "◄◄" or "►►" key to move through the DAB+ channels which are
numbered from 5A to 13F.
When the receiver locates an ensemble/multiplex on one of the DAB+ channels, it
will display this on the LCD. Now press down Select key to enter the current
ensemble/multiplex, the LCD will now display the first station in the
ensemble/multiplex.
To see what stations are present on the found ensemble/multiplex, just press the
"◄◄" or "►►" key, it will automatically select the next station. Once you have
reached the last station in the found ensemble, it will revert back to the first station
again. If you wish to exit the manual tuning mode press the Select key.
Loc Scan:
Press "Select" to enter into local scan mode and scan 11B-12D range DAB channels.
If you cannot find any station, you may need to do a Full scan or Manual scan. This
menu is only available in the DAB mode.
English
17
Full Scan:
Press "Select" to enter into Full scan mode and scan all DAB channels from 5A-13F.
This menu is only available in the DAB mode.
Clock:
You can set the alarm and the time in this menu. Two different alarms are available.
When setting up the alarm you can choose the time and the source of the alarm
signal. You can select between DAB, FM and Buzzer.
Dimmer:
In the dimmer menu the automatic dimming of the background illumination is
controlled. If you set the menu to “On” the illumination is always on. In mobile
operation setting this menu to “10 sec” is recommended. This will dim the illumination
after 10 seconds of no operation and will reduce the power consumption of the radio.
Language:
Here the menu language is selected. English and German are available.
12/24H:
Press "Select" to enter to time format setting. Then press "◄◄" or "►►" to select
12H or
24H format and press "Select" to confirm.
7 System Reset
Press and hold the “DAB+/FM" key for 3 seconds. The display will show "RESET". Press the select key to
confirm to start the Reset.
Please note that once the reset has taken place you will lose all of your stored presets both DAB+ and
FM and the internal DAB+ registry.
There may be times when you need to reset your receiver back to its original factory settings i.e. when
you move the radio to another part of the country and would like to pick up the local & national DAB+
stations in that area. If you don't do the Reset some stored stations on the radio may no longer be
available.
8 Warranty and Recycling Information
We are legally obliged to include disposal and warranty information as well as EU declaration of
conformity with the use instructions in different countries for every unit. Please find this information on the
following pages.
2-Year Warranty From Date Of Purchase
The manufacturer/retailer guarantees this product for two years from date of purchase. This warranty
includes all malfunctions caused by defective components or incorrect functions within the warranty
period excluding wear and tear, such as exhausted batteries, scratches on the display, defective casing,
broken antenna and defects due to external effects such as corrosion, over voltage through improper
external power supply or the use of unsuitable accessories. Defects due to unintended use are also
excluded from the warranty.
Please contact your local dealer for warranty claims. The dealer will repair or exchange the product or
forward it to an authorized service center.
You can also contact our service partner directly. Please include your proof of purchase with the product
and describe the malfunction as clearly as possible.
18
English
WEEE and Recycling
The European laws do not allow any more the disposal of old or defective electric or
electronic devices with the household waste. Return your product to a municipal collection
point for recycling to dispose of it. This system is financed by the industry and ensures
environmentally responsible disposal and the recycling of valuable raw materials.
9 Service Address And Technical Hotline (for units
sold in Germany)
PST professional support technologies GmbH
Breitscheider Weg 117a
D - 40885 Ratingen
Contact our service hotline by phone +492102 - 1459546 (regular costs for German fixed network) or email at [email protected].
Before returning the product, check the chapter “Troubleshooting” for some easy steps and tests or
contact our hotline.
© 2013 Alan Electronics GmbH
Printing errors reserved.
English
19
Radio numérique DAB+/FM DR 60
Guide d'utilisateur
Français
20
Français
1 Sommaire
1
Sommaire ............................................................................... 21
2
Emplacements des éléments de commande........................... 22
3
Mise en route de la radio pour la première fois ....................... 23
4
Mode DAB+ ............................................................................ 23
5
4.1
Présélection de stations ................................................... 23
4.2
Écoute d'une station présélectionnée .............................. 24
4.3
Affichage d'informations supplémentaires sur les stations 24
4.4
Absence de signal ........................................................... 24
4.5
Force du signal ................................................................ 24
Mode FM ................................................................................ 25
5.1
Passage du mode radio numérique au mode FM ............ 25
5.2
Recherche automatique de stations................................. 25
5.3
Mode info......................................................................... 25
5.4
Mode audio ...................................................................... 25
5.5
Force du signal ................................................................ 26
6
Menu ...................................................................................... 26
7
Réinitialisation de la radio ....................................................... 27
8
Information importante ............................................................ 27
21
Français
2 Emplacements des éléments de commande
7
1
3
2
5
4
6
8
9
14
15
10
11
12
13
16
1. Haut-parleur
9. Touche Vol+
2. Écran LCD
10. Touche DAB+/FM
3. Touche marche/arrêt
11. ◄◄ Touche Précédent
4. Touche Info
12. Touche Sélectionner
5. Touche Rechercher
13. ►► Touche Suivant
6. Touche
Présélectionner
14. Sortie 3,5 mm pour
écouteurs
7. Touche Menu
15. Entrée alimentation en
courant continu
8. Touche Vol-
16. Antenne télescopique
22
Français
3
Mise en route de la radio pour la première fois
•
•
•
Alimentation électrique :
Un adaptateur secteur est fourni avec votre appareil.
Branchez l'extrémité appropriée de cet adaptateur sur l'entrée alimentation en courant continu
de votre radio et branchez l'autre extrémité sur une prise secteur.
Déployez complètement l'antenne télescopique.
La radio synchronise automatiquement son horloge interne. Appuyez sur la touche
marche/arrêt pour allumer la radio. L'écran LCD s'allume et la radio démarre une recherche
de nouvelles stations.
Si vous n'entendez aucun son dans le haut-parleur, appuyez sur la touche Vol+ jusqu'à régler le volume
sonore à un niveau d'écoute confortable. Si le niveau sonore est trop élevé, appuyez sur la touche Voljusqu'à le ramener à niveau plus acceptable.
Pour parcourir la liste des stations qui ont été détectées, appuyez sur la touche « ◄◄ » pour revenir à
la station précédente et sur la touche « ►► »pour passer à la station suivante. Pour écouter le contenu
de la station actuellement sélectionnée dans la liste, appuyez sur la touche « Select » ou attendez 5
secondes sans appuyer sur aucune touche. Le nom de la station qui est actuellement diffusée apparaît
sur l'écran LCD.
Lorsque vous allumez la radio après l'avoir utilisée une première fois, celle-ci diffuse automatiquement
la dernière station que vous avez écoutée.
4 Mode DAB+
4.1 Présélection de stations
Vous pouvez présélectionner jusqu'à 10 stations afin d'accéder à vos contenus préférés simplement en
appuyant sur une touche.
Pour présélectionner une station, synchronisez la radio sur sa fréquence, appuyez sur la touche «
Preset » lorsque vous entendez son contenu et maintenez cette touche enfoncée. Dès que vous
apercevez le message « Empty P x » qui clignote sur l'écran LCD, choisissez la position en mémoire à
laquelle vous voulez affecter cette station à l'aide des touches « ◄◄ » et « ►► ». Après que vous avez
choisi une position, appuyez sur la touche « Select » pour confirmer votre choix. Le message « P x
Saved » apparaît lorsque l'opération réussit.
Touche Présélectionner
Français
23
4.2 Écoute d'une station présélectionnée
Appuyez sur la touche « Preset » et sélectionnez la position en mémoire de la station que vous voulez
écouter à l'aide des touches « ◄◄ » et « ►► ». Appuyez sur la touche « Select » pour confirmer votre
choix.
4.3 Affichage d'informations supplémentaires sur les
stations
Touche Info
Chaque pression sur la touche « Info » affiche une information différente, selon la séquence suivante :
Radiotexte, Horloge, Fréquence de la station, Diffuseur, Version et Station
Radiotexte
Station
Horloge
Version
Fréq. station
Diffuseur
1
2
4.4 Absence de signal
Lorsque la radio ne détecte aucun signal pendant la recherche automatique de station, elle affiche le
message « OFF AIR ». Un signal trop faible suffit pour déclencher ce message. Vérifiez que l'antenne
est complètement déployée et recommencez la recherche de stations.
4.5 Force du signal
La force du signal de la station qui est actuellement diffusée est affichée dans le coin supérieur gauche
de l'écran. par l'icône d'une antenne à 3 barres. Lorsque le signal reçu est très faible, ni l'icône
d'antenne ni les barres de niveau ne sont affichées sur l'écran ; lorsque le signal est très fort, l'icône
d'antenne et les 3 barres de niveau sont affichées.
24
Français
5
Mode FM
5.1 Passage du mode radio numérique au mode FM
Pour passer du mode radio numérique au mode FM, appuyez une fois sur la touche « DAB+/FM ».
L'écran affiche alors :
87,50 MHZ
2
5.2
Recherche automatique de stations
Pour démarrer une recherche automatique de stations FM, appuyez sur la touche « Scan ». La
recherche s'effectue dans le sens croissant des fréquences. Vous modifiez la direction de recherche à
l'aide des touches « ◄◄ » et « ►► ». La radio s'arrête sur la première station qu'elle détecte. ou
lorsqu'elle atteint la fin de la bande FM (87,5-108 MHz) si elle ne détecte aucune station.
5.3 Mode info
Chaque pression sur la touche « Info » affiche une information différente, selon la séquence suivante :
Radiotexte, Horloge, Fréquence de station et Version
Radiotexte
Version
Horloge
Fréq. station
5.4 Mode audio
Lorsque la radio ne se trouve pas en mode menu, appuyez sur la touche « Select » pour passer du
mode « Mono » au mode « Auto » et vice-versa. Le choix du mode « mono » peut améliorer la qualité
du signal lorsqu'une station émet faiblement.
Français
25
5.5 Force du signal
La force du signal de la station qui est actuellement diffusée est affichée dans le coin supérieur gauche
de l'écran. par l'icône d'une antenne à 3 barres. Lorsque le signal reçu est très faible, ni l'icône
d'antenne ni les barres de niveau ne sont affichées sur l'écran ; lorsque le signal est très fort, l'icône
d'antenne et les 3 barres de niveau sont affichées.
6 Menu
La touche « Menu » vous permet d'accéder aux options suivantes : Manuelle/Recherche
locale/Recherche totale /Horloge/Éclairage/Langue/12/24H Utilisez les touches « ◄◄ » et « ►► »
pour passer d'une option à l'autre :
Manuelle
Rech. loc
Rech.
totale
Réveil 1
Réveil
Horloge
Réveil 2
Horl. manu
Éclairage
Langue
Format 12H
12/24H
Format 24H
1
2
Option Manuelle : Dans certains cas, la recherche manuelle de stations est préférable à la recherche
automatique, par exemple pour synchroniser votre antenne aérienne ou pour
ajouter des stations qui n'ont pas été détectées lors de la recherche automatique.
Appuyez sur la touche « Menu » et sélectionnez l'option « Manuelle » à l'aide
des touches « ◄◄ » et « ►► ». Confirmez votre choix. Utilisez les touches
« ◄◄ » et « ►► » pour parcourir la bande numérique entre 5A et 13F.
Dès qu'un diffuseur/multiplex est détecté sur l'un des canaux de la bande
numérique, il apparaît sur l'écran LCD de la radio. Pour accéder à ce
diffuseur/multiplex, appuyez sur la touche « Select ». Sa première station apparaît
sur l'écran LCD.
Pour parcourir les autres stations du diffuseur/multiplex, utilisez sur les touches
« ◄◄ » et « ►► ». Si vous appuyez sur la touche Suivant alors que la dernière
station du diffuseur/mulitplex est affichée sur l'écran, le défilement reprend avec la
première station. Pour quitter la recherche manuelle, appuyez sur la touche
« Select ».
26
Français
Option Rech. loc : Appuyez sur la touche « Select » pour passer en mode de recherche des stations
numériques locales. La bande numérique est alors limitée à 11B-12D.
Si vous ne détectez aucune station locale, passez en mode Recherche totale ou
Recherche manuelle. Cette option n'est accessible que depuis le mode radio
numérique (DAB).
Recherche totale : Appuyez sur la touche « Select » pour passer en mode recherche totale. La bande
numérique est alors étendue à la plage 5A-13F. Cette option n'est accessible que
depuis le mode radio numérique (DAB).
Option Horloge :
Depuis ce même mode Horloge, vous pouvez spécifier jusqu'à deux heures de
réveils. Pour chacune, vous indiquez l'heure de réveil que vous désirez et la
source audio que vous voulez entendre (radio numérique, radio FM ou sonnerie).
Éclairage :
Cette option vous permet de configurer l'éclairage automatique de l'écran.
Choisissez la valeur « On » pour garder l'écran constamment allumé. Sinon,
choisissez la valeur « 10 sec » pour réduire l'éclairage en l'absence de toute
opération pendant 10 secondes et diminuer ainsi la consommation énergétique de
la radio.
Langue :
Choisissez cette option pour changer la langue d'affichage. Les langues Anglais et
Allemand sont disponibles.
12/24H :
Choisissez cette option pour modifier le format d'affichage de l'heure et appuyez
sur la touche « Select » pour confirmer votre choix. Choisissez le format
d'affichage 12 heures ou 24 heures à l'aide des touches « ◄◄ » et « ►► », et
appuyez sur la touche « Select » pour confirmer votre choix.
7 Réinitialisation de la radio
Appuyez sur la touche « DAB+/FM » et maintenez-la enfoncée pendant 3 secondes. L'écran affiche
alors l'indication « RESET ». Appuyez sur la touche Select pour confirmer votre choix et démarrer la
réinitialisation.
Notez que la réinitialisation aux réglages d'usine efface toutes vos présélections de stations
numériques et FM, ainsi que le contenu du registre interne du mode radio numérique.
La réinitialisation de la radio est nécessaire, par exemple, si vous changez de région et voulez accéder
aux stations numériques locales et nationales de la nouvelle région. Faute de quoi, vous risquez de ne
plus pouvoir accéder à certaines de vos anciennes stations.
8 Information importante
Nous sommes légalement tenus d'inclure les dispositions et les informations de garantie et la
déclaration de conformité de l'UE avec le mode d'emploi de chaque unité, et ce dans la langue de
chaque pays.
Veuillez trouvez ces informations dans les pages suivantes.
Deux ans de garantie à compter de la date d’achat
Le Fabricant/revendeur garantit ce produit pour deux ans à compter de la date d’achat. Cette garantie
couvre tout dysfonctionnement dû à une défaillance des composants ou à des fonctions incorrectes
pendant la période de la garantie à l'exception des pièces d’usure, telles que batteries, égratignures de
Français
27
l'écran, défectuosité du boîtier, rupture de l'antenne et les défaillances dues à des raisons extérieures
telles que corrosion, surtension à cause d'une source d'alimentation externe inappropriée ou
l'utilisation d'accessoires inadéquats. La garantie ne couvre pas les défaillances dues à un usage non
prévu.Contactez votre revendeur local pour réclamation sous garantie. Le revendeur
réparera/remplacera ou envoie le produit à un centre de service agréé.
Vous pouvez également contacter directement notre station de réparation agrée. Incluez la preuve
d'achat avec le produit et décrivez l'anomalie de la façon la plus précise.
Déchets d'Equipements Electriques et Electroniques (DEEE) et recyclage
La loi Européennes ne permet pas la mise au rebus des équipements électriques et
électroniques usagés avec les ordures ménagères. Ramenez votre produit à un centre de
collecte municipal pour être recyclé. Ce système de collecte est financé par les industriels
pour garantir l’élimination respectueuse de l’environnement et le recyclage de matières
premières précieuses.
Adresse du service d'assistance téléphonique (en Allemagne)
PST professional support technologies GmbH
Breitscheider Weg 117a
40885 Ratingen
Contactez notre service d'assistance téléphonique par téléphone au +492102 - 1459546 ou par
courriel au [email protected].
Avant de retourner le produit consultez le chapitre “Dépannage” pour vous aidera à effectuer certains
tests faciles, sinon contactez notre service d'assistance téléphonique.
© 2013 Alan Electronics GmbH
Droits d'impression réservés.
28
Français