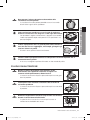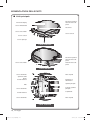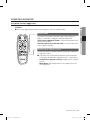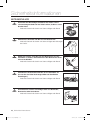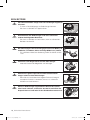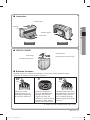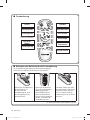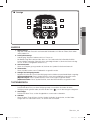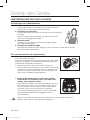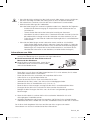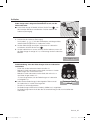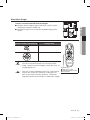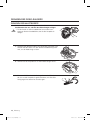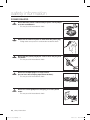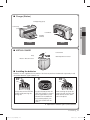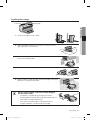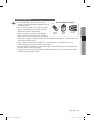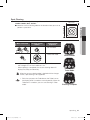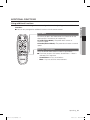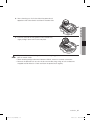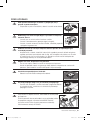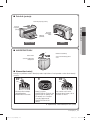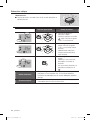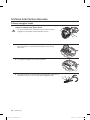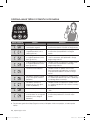
1
SR8930
Robot aspirapolvere
Manuale dell’utente
Questo manuale è realizzato interamente con carta riciclata.
✻ Prima di utilizzare questo prodotto, leggere attentamente le istruzioni.
✻ Solo per uso interno.
Italiano
imagine the possibilities
Grazie per aver acquistato un prodotto Samsung.
Per ricevere un servizio più completo, Registra il
tuo prodotto su
www.samsung.com/register
DJ68-00664B.indb 01
2012.6.16 11:9:48 AM
informazioni sulla sicurezza
INFORMAZIONI SULLA SICUREZZA
• Prima di utilizzare il prodotto, leggere attentamente questo manuale e conservarlo per future
consultazioni.
• Poiché queste istruzioni coprono diversi modelli del prodotto, le caratteristiche dell’aspirapolvere
ATTENZIONE
acquistato potrebbero differire leggermente da quanto descritto in questo manuale.
ATTENZIONE
SIMBOLI DI AVVERTENZA/ATTENZIONE UTILIZZATI
ATTENZIONE
AVVERTENZA
Indica che sussiste il rischio di lesioni gravi perfino mortali.
Indica che sussiste il rischio di lesioni personali o danni materiali.
ALTRI SIMBOLI UTILIZZATI
Indica che sussiste il rischio di lesioni personali o danni materiali.
NOTA
02_ informazioni sulla sicurezza
DJ68-00664B.indb 02
2012.6.16 11:9:48 AM
INFORMAZIONI IMPORTANTI SULLA SICUREZZA
Durante l’uso di apparecchiature elettriche, è necessario seguire alcune precauzioni di base, tra le quali:
LEGGERE TUTTE LE ISTRUZIONI D’USO PRIMA DI UTILIZZARE IL ROBOT
ASPIRAPOLVERE.
Scollegare l'apparecchio dalla presa di corrente in caso di inutilizzo o prima di effettuarne la manutenzione.
ATTENZIONE: per ridurre il rischio di incendio, scosse elettriche o lesioni:
INFORMAZIONI GENERALI
• Utilizzare il prodotto solo secondo quanto descritto in questo manuale.
• Non utilizzare l’aspirapolvere o la base di ricarica qualora presentino danni.
• Se l’aspirapolvere è caduto, ha subito danni, è stato lasciato all'aperto o è caduto in acqua,
rivolgersi a un centro assistenza.
• Non maneggiare il robot aspirapolvere o la base di ricarica con le mani bagnate.
• Utilizzare solo su superfici asciutte e in ambienti chiusi.
• Questo apparecchio non deve essere utilizzato da persone (bambini inclusi) con ridotte capacità
fisiche, sensoriali o mentali, inesperte o prive di un'adeguata conoscenza, a meno che una
persona responsabile della loro sicurezza non fornisca un'adeguata supervisione e istruzioni
relativamente all’uso.
• Prestare attenzione al fine di evitare che i bambini giochino con l’apparecchio.
BASE DI RICARICA
• Non modificare la spina polarizzata per adattarla a una presa non polarizzata o a un cavo di
prolunga.
• Non utilizzare all'esterno o su superfici bagnate.
• Scollegare la base di ricarica dalla presa elettrica in caso di inutilizzo e prima di effettuare la
manutenzione.
• Per ricaricare l'apparecchio, usare solo la base di ricarica fornita in dotazione dal produttore.
• Non utilizzare se la spina o il cavo di alimentazione sono danneggiati.
• Non trasportare l'apparecchio tirandolo per il cavo, non utilizzare il cavo come maniglia, non
chiudere porte sul cavo, non far passare il cavo intorno a bordi o angoli taglienti. Tenere il cavo
lontano da fonti di calore.
• Non utilizzare prolunghe o prese con una capacità di corrente inadeguata al carico.
• Non scollegare la spina di alimentazione tirandola per il cavo. Per scollegare l'apparecchio,
afferrare la spina, non il cavo.
• Non manomettere o bruciare le batterie poiché potrebbero esplodere a elevate temperature.
• Non tentare di aprire la base di ricarica. Eventuali riparazioni devono essere eseguite
esclusivamente da un centro di assistenza qualificato.
• Non esporre la base di ricarica a temperature elevate, umidità o vapore.
informazioni sulla sicurezza _03
DJ68-00664B.indb 03
2012.6.16 11:9:48 AM
informazioni sulla sicurezza
ROBOT ASPIRAPOLVERE
• Non aspirare oggetti rigidi, appuntiti o taglienti come vetro, chiodi, viti, monete o simili.
• Non utilizzare senza filtro. Durante la manutenzione dell’unità, non inserire dita o altri oggetti nel
comparto della ventola per evitare lesioni in caso di attivazione accidentale dell'apparecchio.
• Non inserire oggetti nelle aperture di ventilazione. Non utilizzare se le aperture sono ostruite;
mantenerle libere da polvere, residui, capelli o qualunque oggetto possa ridurre il flusso dell’aria.
• Non aspirare sostanze tossiche (candeggina, ammoniaca, disgorgante idraulico e così via).
• Non aspirare oggetti in fiamme o che possano causare fumo, quali sigarette, fiammiferi o braci.
• Non utilizzare per aspirare liquidi infiammabili o combustibili come la benzina, né usare in luoghi
dove tali sostanze potrebbero essere presenti.
• Non usare il robot aspirapolvere in spazi ristretti in cui siano presenti vapori rilasciati da vernici a
base d’olio, diluenti, antitarme, polveri infiammabili o altri vapori esplosivi o tossici.
• In caso di uso intensivo o temperature estreme, dalle batterie può fuoriuscire liquido. Se il
liquido fuoriuscito entra a contatto con la pelle, lavare immediatamente con acqua. Se il liquido
fuoriuscito entra a contatto con gli occhi, lavare immediatamente con acqua corrente per
almeno 10 minuti. Consultare un medico.
04_ informazioni sulla sicurezza
DJ68-00664B.indb 04
2012.6.16 11:9:48 AM
indice
INFORMAZIONI SULLA SICUREZZA
02
06
07
10
11
Alimentazione
Operazioni preliminari
In uso
Pulizia e Manutenzione
CARATTERISTICHE DEL PRODOTTO
13
MONTAGGIO DELL'ASPIRAPOLVERE
15 Componenti
16 Nomenclatura delle parti
15
FUNZIONAMENTO
DELL'ASPIRAPOLVERE
20
MANUTENZIONE STRUMENTI E
FILTRI
34
RISOLUZIONE DEI PROBLEMI
20 Installazione del robot aspirapolvere
20 Ordine d'installazione
20 Accensione e spegnimento
21 Installazione della base di ricarica
22 Ricarica in corso
23 Informazioni sulla batteria
24 Installazione di VIRTUAL GUARD
26 Utilizzo del robot aspirapolvere
26 Avviare/Interrompere la pulizia
27 Ricarica
28 Pulizia automatica
29 Pulizia Spot
30 Pulizia Max
31 Pulizia manuale
32 Avvio Ritardato
33 Funzioni aggiuntive
33 Uso delle funzioni aggiuntive
34 Pulizia del robot aspirapolvere
34 Rispettare i metodi di pulizia e manutenzione
34 Pulizia della spia del sensore e della telecamera
35 Pulizia della vaschetta di raccolta polvere e dei
filtri
36 Pulizia del robot aspirapolvere
36 Pulizia della spazzola principale
38 Pulizia delle spazzole rotative laterali per la
pulizia dei bordi
39 Pulizia delle ruote di guida
40 Checklist prima di contattare l'assistenza
42 Risoluzione dei problemi mediante codici di errore
40
SPECIFICHE DEL PRODOTTO
43
indice _05
DJ68-00664B.indb 05
2012.6.16 11:9:48 AM
informazioni sulla sicurezza
ALIMENTAZIONE
ATTENZIONE
ATTENZIONE
ATTENZIONE
ATTENZIONE
ATTENZIONE
Non piegare eccessivamente il cavo di alimentazione
né posizionarvi sopra oggetti pesanti che potrebbero
danneggiarlo.
- La mancata osservanza di questa precauzione può causare
incendi o scosse elettriche.
Accertarsi di rimuovere eventuale polvere o acqua dalla spina
di alimentazione.
- La mancata osservanza di questa precauzione può causare
malfunzionamenti o scosse elettriche.
Non estrarre la spina di alimentazione tirandola per il cavo né
toccare la spina con le mani bagnate.
- La mancata osservanza di questa precauzione può causare
incendi o scosse elettriche.
Non usare una spina multipla su una presa singola.
(Non lasciare il cavo di alimentazione appoggiato a terra).
- La mancata osservanza di questa precauzione può causare
incendi o scosse elettriche.
Non usare un cavo o una spina di alimentazione danneggiati o
una presa allentata.
- La mancata osservanza di questa precauzione può causare
incendi o scosse elettriche.
06_ informazioni sulla sicurezza
DJ68-00664B.indb 06
2012.6.16 11:9:48 AM
OPERAZIONI PRELIMINARI
AVVERTENZA
AVVERTENZA
AVVERTENZA
AVVERTENZA
AVVERTENZA
AVVERTENZA
Non usare mai il robot aspirapolvere in presenza di materiali
combustibili quali:
- Candele o lampade da tavolo sul pavimento.
- Fuochi non sorvegliati (fiamme o tizzoni).
- Benzina, alcool distillato, diluenti, portaceneri con sigarette
accese, ecc.
Il robot aspirapolvere è destinato esclusivamente a un uso domestico. Non utilizzare
nei seguenti luoghi.
- Soffitte, interrati, magazzini, edifici industriali, locali separati distanti dall'edificio principale,
luoghi esposti all’acqua o all'umidità come bagni o lavanderie e superfici strette o
rialzate da terra come tavoli o ripiani. Se usato in tali luoghi possono verificarsi seri danni
(malfunzionamenti o rotture).
01 INFORMAZIONI SULLA SICUREZZA
AVVERTENZA
Prima di attivare il robot aspirapolvere, accertarsi che la
vaschetta di raccolta polvere sia inserita.
- Se la vaschetta di raccolta polvere non è inserita, il robot
aspirapolvere non funzionerà.
Aprire tutte le porte delle stanze per effettuarne la pulizia.
- Quando una porta è chiusa, il robot aspirapolvere non è in grado di accedere alla stanza.
- Tuttavia, verificare che la porta per accedere all'ingresso principale, alla veranda, al bagno e altre
eventuali porte siano chiuse per evitare la caduta del robot aspirapolvere a un piano inferiore.
Non utilizzare l'aspirapolvere su pavimenti neri.
- In tal caso, il robot aspirapolvere potrebbe non funzionare
correttamente.
In caso di tappeti con lunghe frange, ripiegare le frange sotto il
tappeto.
- Se non vengono ripiegate, le frange possono causare danni
al tappeto e al robot stesso in quanto potrebbero rimanere
intrappolate nella ruota di guida o nella spazzola principale.
Se il sensore di dislivello è sporco, il robot aspirapolvere
potrebbe rischiare di cadere dalle scale.
Ciò potrebbe causare lesioni personali e gravi danni al prodotto.
Per evitare tale rischio, installare la VIRTUAL GUARD
(impostazione Fence Mode) davanti a zone pericolose. Pulire la
spia del sensore e la telecamera.
informazioni sulla sicurezza _07
DJ68-00664B.indb 07
2012.6.16 11:9:49 AM
AVVERTENZA
AVVERTENZA
AVVERTENZA
AVVERTENZA
AVVERTENZA
AVVERTENZA
AVVERTENZA
Rimuovere eventuali piccoli oggetti od oggetti delicati dall’area
da pulire.
- Rimuovere eventuali oggetti prima di procedere alla pulizia.
- Assicurarsi di rimuovere oggetti fragili quali vasi, vetri, porcellane, ecc.
- Il robot aspirapolvere non è in grado di riconoscere monete, anelli
o altri oggetti di valore quali gioielli.
Rimuovere eventuali oggetti sparsi sul pavimento prima di
effettuare la pulizia.
- Il robot aspirapolvere è progettato per rilevare ostacoli a una
distanza di 5 cm.
- Eventuali asciugamani, tappetini posti davanti a vasche da bagno,
lavandini, ingressi o locali di servizio, cavi di alimentazione, tovaglie
e nastri possono rimanere intrappolati nelle ruote di guida o nella
spazzola causando la caduta di oggetti dal tavolo.
Richiedere ai membri della famiglia (o ai coinquilini) di prestare
attenzione prima di effettuare la pulizia o durante l’uso della
Modalità di pulizia programmata.
- Il robot aspirapolvere può urtare contro i bambini, facendoli
cadere.
Accertarsi che i bambini non mettano i piedi o si siedano sul
robot aspirapolvere.
- I bambini potrebbero cadere provocandosi lesioni o danneggiare
seriamente il prodotto.
Se un bambino o un animale domestico viene lasciato da solo
all’interno della casa, accertarsi che l'interruttore di alimentazione
dell'aspirapolvere sia in posizione di spegnimento (Off).
- Il robot aspirapolvere può attirare la loro attenzione.
- Nelle ruote di guida o nella spazzola potrebbero restare intrappolati
dita, piedi, abiti, capelli o peli, provocando lesioni.
- Se un bambino o un animale domestico si trova sulla traiettoria
dell’aspirapolvere, potrebbe essere scambiato per un ostacolo e il
cambio di direzione potrebbe impedire la pulizia dell'area interessata.
- Quando l’interruttore di alimentazione è in posizione "Off",
l’alimentazione e tutte le funzioni sono disattivate.
Durante l’installazione della base di ricarica, non lasciare il
cavo di alimentazione a terra.
- Quando il robot aspirapolvere si dirige verso la base di ricarica per
autoricaricarsi o vi passa vicino, potrebbe rimanere impigliato nel
cavo.
Tenere sempre il cavo di alimentazione della base di ricarica
collegato alla presa elettrica.
- Sebbene l’aspirapolvere sia dotato di una funzione di ricarica
automatica, tale operazione non sarà possibile se il cavo di
alimentazione della base di ricarica non è collegato alla presa elettrica.
08_ informazioni sulla sicurezza
DJ68-00664B.indb 08
2012.6.16 11:9:49 AM
AVVERTENZA
ATTENZIONE
La presenza di oggetti davanti alla base di ricarica impedisce
al robot aspirapolvere di caricarsi automaticamente.
- Mantenere la zona sgombra da oggetti.
circa
0,5 m
circa
ATTENZIONE
ATTENZIONE
ATTENZIONE
ATTENZIONE
1m
Non devono essere presenti ostacoli e dislivelli entro un raggio
di 0,5 m a sinistra e a destra ed entro 1 m sul davanti.
circa
ATTENZIONE
cir
ca
0,5 m
circa
0,5 m
cir
ca
0,5 m
1m
01 INFORMAZIONI SULLA SICUREZZA
AVVERTENZA
Installare la base di ricarica in una posizione facilmente
accessibile al robot aspirapolvere.
- L'installazione della base di ricarica in un angolo può causare
movimenti extra e interferire con il regolare processo di ricarica
automatica.
Non provocare un corto circuito dei contatti della base di
ricarica con oggetti metallici quali bastoncini, cacciaviti,
eccetera.
- In caso contrario potrebbero verificarsi gravi danni alla base di
ricarica.
Accertarsi che non vi siano tracce di liquidi sulla base di
ricarica.
- La mancata osservanza di questa precauzione può causare
incendi o scosse elettriche.
Accertarsi che il robot aspirapolvere non aspiri o passi sopra
liquidi quali acqua, olio o urina di animali domestici.
- La mancata osservanza di questa precauzione può causare gravi
danni al prodotto.
- I liquidi potrebbero spandersi tramite le ruote dell’apparecchio
sporcando la zona circostante.
Non utilizzare la base di ricarica per scopi diversi da quelli previsti dal costruttore.
- La mancata osservanza di questa precauzione può causare gravi danni alla base di ricarica
o provocare un incendio.
Non installare la base di ricarica su pavimenti scuri.
- In caso contrario, il robot aspirapolvere avrà difficoltà a tornare alla base di ricarica.
informazioni sulla sicurezza _09
DJ68-00664B.indb 09
2012.6.16 11:9:49 AM
IN USO
AVVERTENZA
AVVERTENZA
AVVERTENZA
AVVERTENZA
AVVERTENZA
ATTENZIONE
Il robot aspirapolvere non può essere utilizzato su tappeti
spessi.
- Potrebbero verificarsi problemi di funzionamento.
- Potrebbero verificarsi danni ai tappeti.
Non usare il robot aspirapolvere su tavoli o su altre superfici
rialzate da terra.
- L'eventuale caduta potrebbe causare danni.
Durante il funzionamento, il robot aspirapolvere può urtare
contro i mobili, ad esempio gambe di sedie, di tavoli, oggetti
lunghi e sottili, ecc..
- Per accelerare e ottimizzare il processo di pulizia, sollevare le sedie
da terra posizionandole sopra i tavoli.
Non posizionare oggetti sopra il robot aspirapolvere.
- In caso contrario si potrebbe verificare un malfunzionamento.
Rimuovere immediatamente eventuali pezzi di carta o di
plastica di grandi dimensioni aspirati dal robot durante la
pulizia.
- L’uso prolungato dell'aspirapolvere con le aperture di ventilazione
ostruite può comportare gravi danni al prodotto.
Se si avverte un rumore insolito, odore o fumo proveniente dal
robot aspirapolvere, spegnere immediatamente l'apparecchio
e chiamare il centro assistenza.
10_ informazioni sulla sicurezza
DJ68-00664B.indb 10
2012.6.16 11:9:50 AM
AVVERTENZA
NOTA
NOTA
01 INFORMAZIONI SULLA SICUREZZA
NOTA
Non spostare il robot aspirapolvere afferrandolo dalla
vaschetta di raccolta polvere.
- La vaschetta di raccolta polvere potrebbe staccarsi causando
lesioni fisiche o gravi danni al prodotto.
Il robot aspirapolvere potrebbe non essere in grado di continuare a
funzionare se rimane bloccato all'ingresso o sulla soglia della veranda.
- Per riprendere il regolare funzionamento, spegnere e riaccendere
il robot aspirapolvere dopo averlo portato in una posizione in cui
possa proseguire.
Il robot aspirapolvere non è in grado di pulire efficacemente le
aree che non riesce a raggiungere, ad esempio, gli angoli e gli
spazi tra i divani e le pareti.
- Di tanto in tanto, pulire tali aree manualmente.
Talvolta il robot aspirapolvere non riesce ad aspirare le matasse di polvere che si
formano durante la pulizia.
- In tal caso, raccogliere la polvere utilizzando un altro metodo di pulizia.
PULIZIA E MANUTENZIONE
AVVERTENZA
AVVERTENZA
ATTENZIONE
Durante la pulizia del prodotto, non spruzzare acqua
direttamente sulla superficie esterna né asciugare con
sostanze volatili quali benzene, diluenti o alcol.
- La mancata osservanza di questa precauzione può causare gravi
danni al prodotto.
L'unità può essere smontata o rimontata solo da tecnici di
assistenza qualificati.
- La mancata osservanza di questa precauzione può causare danni
al prodotto.
Rimuovere regolarmente eventuali corpi estranei accumulatisi
davanti ai sensori Ostacoli e Dislivello.
- La sporcizia che si accumula sui sensori può causare un
funzionamento inaffidabile dei sensori.
Sensore di dislivello
Sensore ostacoli
informazioni sulla sicurezza _11
DJ68-00664B.indb 11
2012.6.16 11:9:50 AM
ATTENZIONE
Durante la rimozione di corpi estranei, spegnere l’apparecchio
prima di verificare la spazzola di pulizia.
- La mancata osservanza di questa precauzione può comportare
l’accensione accidentale dell’unità e causare lesioni personali o
gravi danni al prodotto.
Spazzole laterali per la
pulizia dei bordi
Spazzola principale
ATTENZIONE
ATTENZIONE
ATTENZIONE
Se il cavo di alimentazione è danneggiato, richiederne
la sostituzione a un tecnico qualificato presso un centro
assistenza.
- La mancata osservanza di questa precauzione può causare
incendi o scosse elettriche.
Prima di pulire la base di ricarica, scollegare il cavo di
alimentazione.
Per effettuare la sostituzione della batteria, contattare un
centro di assistenza Samsung Electronics.
- L’uso di batterie non originali può comportare un
malfunzionamento del prodotto.
12_ informazioni sulla sicurezza
DJ68-00664B.indb 12
2012.6.16 11:9:51 AM
caratteristiche del prodotto
COMODA FUNZIONE VIRTUAL GUARD
È possibile restringere il raggio d'azione del robot aspirapolvere a una zona delimitata usando la
modalità Fence (barriera virtuale).
• Cosa si intende per riconoscimento della
forma del soffitto (Visionary mapping plus™)?
Questa funzione riconosce la forma del soffitto
mediante una telecamera posizionata sulla parte
superiore dell’apparecchio per identificare l’area da
pulire e il modo migliore per passarvi sopra e pulire
ogni sezione del pavimento.
PULIZIA DELICATA DI OGNI ANGOLO
Poiché il robot aspirapolvere è in grado di pulire il pavimento in modo sequenziale ( ) seguendo
una mappa determinata dalla funzione di riconoscimento della forma del soffitto, è in grado di pulire
ogni angolo del pavimento.
VARIE MODALITÀ DI PULIZIA
Per soddisfare tutte le esigenze di pulizia sono disponibili varie modalità di funzionamento.
2
5
6
Circa 1,5 m
3
4
Circa 1,5 m
1
1. Modalità Auto: Pulisce tutte le stanze in modo automatico.
2. Modalità Spot: Pulisce in modo accurato una zona delimitata. Questa modalità può essere
utilizzata per pulire briciole di pane o di torta.
3. Modalità Max: Funziona fino a quando la batteria non è quasi scarica.
4. Modalità Manual (Manuale): È possibile utilizzare il robot manualmente per pulire la
superficie desiderata.
5. Modalità Turbo: In questa modalità, la spazzola principale ruota alla velocità massima per una
pulizia più efficace (è inoltre possibile cambiare modalità usando il telecomando).
6. Avvio Ritardato: All’ora impostata, il robot aspirapolvere inizia a pulire il pavimento.
caratteristiche del prodotto _13
DJ68-00664B.indb 13
2012.6.16 11:9:51 AM
AUTO RICARICA
Quando il livello di carica della batteria è basso, il robot
aspirapolvere si dirige automaticamente verso la base di ricarica
per effettuare automaticamente un ciclo di ricarica rapida.
SPAZZOLE ROTATIVE LATERALI PER LA PULIZIA DEI BORDI
Le spazzole rotative laterali per la pulizia dei bordi eseguono la
pulizia dei punti più inaccessibili.
SUPERAMENTO DELLE SOGLIE DELLE PORTE
Circa 1cm
Tipo di scalino
Verticale
L’innovativo sistema di guida dell'aspirapolvere permette al
robot di superare soglie di porte con un'altezza di circa 1 cm
e di pulire tutte le stanze. A seconda della forma della soglia, il
robot aspirapolvere potrebbe non essere in grado di superare
soglie di 1 cm.
OSTACOLI
Quando il robot aspirapolvere incontra un ostacolo durante la
pulizia, il sensore consente di evitarlo e di continuare la pulizia.
(È possibile che l'aspirapolvere tocchi ostacoli sottili o stretti).
ANTI CADUTA
Per impedire la caduta del robot aspirapolvere, i 3 sensori di
dislivello rilevano la presenza di eventuali vuoti o dislivelli sulla
superficie del pavimento, come scalini o soglie di porte.
DISPOSITIVO DI SICUREZZA
arresto
Se durante il funzionamento il robot aspirapolvere viene
sollevato da terra, le ruote di guida, la spazzola principale,
il motore di aspirazione, le spazzole rotative laterali vengono
automaticamente fermate da un sensore di rilevamento.
14_ caratteristiche del prodotto
DJ68-00664B.indb 14
2012.6.16 11:9:51 AM
montaggio dell'aspirapolvere
COMPONENTI
02 MONTAGGIO
■ Unità principale
■ Telecomando
■ Base di ricarica
(Stazione)
■ Altri componenti
(Batterie tipo AAA)
Manuale dell’utente
VIRTUAL GUARD Filtro di ricambio
/ 2 batterie
Spazzola per
pulizia
Guida di avvio
rapido
montaggio _15
DJ68-00664B.indb 15
2012.6.16 11:9:51 AM
NOMENCLATURA DELLE PARTI
■ Unità principale
Pulsante di espulsione
vaschetta di raccolta
polvere
Pannello del display
Sensore Virtual Guard
Telecamera
Sensore telecomando
Sensore ostacoli
Sensore ostacoli
Sensore paracolpi
Parte anteriore
Pulsante di espulsione
vaschetta di raccolta
polvere
Vaschetta di raccolta
polvere
Sensore telecomando
Parte laterale
Sensore di dislivello
Ruote di guida
Spazzola rotativa
laterale
Interruttore di
alimentazione
Contatti di ricarica
Rullo
Spazzola principale
Sensore di dislivello
Coperchio spazzola
principale
Copribatteria
Contatti di ricarica
Ruote di guida
Sensore di dislivello
Parte inferiore
16_ montaggio
DJ68-00664B.indb 16
2012.6.16 11:9:52 AM
■ Base di ricarica (Stazione)
Spia di ricarica (verde)
02 MONTAGGIO
Spia di
alimentazione
(rosso)
Avvolgicavo
Contatti di
ricarica
Parte anteriore
Parte posteriore
■ VIRTUAL GUARD
Pulsante di modalità/
alimentazione
Spia modalità
Sensore di rilevamento corpo
principale
Sensore di rilevamento distanza
■ Installazione delle batterie
Le batterie non sono fornite in dotazione con il prodotto. È necessario acquistare le batterie
separatamente. Installare le batterie alcaline (tipo D) prima dell'uso.
1
Sollevare il coperchio della
VIRTUAL GUARD premendo
la linguetta di bloccaggio.
2
3
Installare le batterie nella
VIRTUAL GUARD come
mostrato nella figura
sottostante. (Se le batterie
vengono installate con la
polarità errata, la VIRTUAL
GUARD non funzionerà).
Una volta inserita la punta
del coperchio nell'apposita
fessura, premere l'altra
estremità per chiuderla
facendola scattare in
posizione.
❈ Specifiche: Batterie alcaline tipo D (LR20)
montaggio _17
DJ68-00664B.indb 17
2012.6.16 11:9:53 AM
■ Telecomando
Alimentazione
Ricarica
Auto
Max
Pulsanti di
direzione
Spot
(Retromarcia non
supportata).
Avvio/Arresto
Manuale
Turbo
Avvio Ritardato
Segnali acustici
■ Installazione delle batterie del telecomando
Al momento dell'acquisto del prodotto, le batterie non sono installate nel telecomando.
Installare le batterie (tipo AAA) prima dell'uso.
1
Sollevare il coperchio del
vano batterie nella parte
posteriore del telecomando
premendo la linguetta di
bloccaggio.
2
Installare le batterie nel
telecomando come mostrato
nella figura sottostante.
(Se le batterie vengono
installate con la polarità
errata, il telecomando non
funzionerà).
3
Una volta inserita la punta
del coperchio nell'apposita
fessura, premere l'altra
estremità per chiuderla
facendola scattare in
posizione.
❈ Specifiche: Batterie tipo AAA
18_ montaggio
DJ68-00664B.indb 18
2012.6.16 11:9:54 AM
■ Pannello del display
2
1
3
5
4
6
B
7
02 MONTAGGIO
A
C
8
PARTI DEL DISPLAY
1.
2.
-
Numero
Mostra il timer, lo stato di avanzamento e i codici di errore mediante numeri, lettere e simboli grafici.
Indicatore livello batteria
In carica: Mostra l’andamento della ricarica in tre fasi.
In uso: Mostra il livello di carica della batteria. Il livello di carica della batteria scende da FULL
(Carica completa) a ogni livello indicato durante l’uso. (Quando la batteria è completamente
scarica, un livello lampeggerà visualizzando "Lo" (Basso)).
3. Timer
- Quando è impostata la pulizia programmata, l'icona Timer è accesa.
4. Modalità Turbo
- Questa icona si accende quando la modalità Turbo è abilitata.
5. Visualizzazione della modalità di pulizia
- Ogni qualvolta si preme il pulsante della modalità di pulizia, viene visualizzata la modalità di
pulizia corrispondente.
(A) Modalità Auto: Questa icona si accende quando si seleziona la modalità di pulizia Auto.
(B) Modalità Spot: Questa icona si accende quando si seleziona la modalità di pulizia Spot.
(C) Modalità Max: Questa icona si accende quando si seleziona la modalità di pulizia Max.
PARTE PULSANTI
6. Modalità di pulizia
- Premere per selezionare una modalità di pulizia. Una volta selezionata una modalità di pulizia,
premere il pulsante (
) per avviare la pulizia.
7. Avvio/Arresto
- Premere per avviare/arrestare la pulizia.
8. Ricarica
- Quando si preme questo pulsante, il robot aspirapolvere torna alla base di ricarica per ricaricare
le batterie.
montaggio _19
DJ68-00664B.indb 19
2012.6.16 11:9:55 AM
funzionamento dell'aspirapolvere
INSTALLAZIONE DEL ROBOT ASPIRAPOLVERE
Ordine d'installazione
1. Accensione e spegnimento
Per utilizzare il robot aspirapolvere, è necessario portare l'interruttore
di alimentazione situato nella parte inferiore dell'unità principale in
posizione di accensione "On".
2. Installazione della base di ricarica
Per caricare il robot aspirapolvere, è necessario installare la base di
ricarica.
Poiché le batterie sono scariche al momento dell’acquisto del prodotto,
prima di utilizzare l’unità è necessario effettuare un ciclo di carica
completo.
3. Ricarica delle batterie
Prima di utilizzare il robot aspirapolvere è necessario caricare completamente le batterie.
4. Installazione di VIRTUAL GUARD
È possibile restringere il raggio d'azione del robot aspirapolvere a una zona delimitata usando la
modalità Fence (barriera virtuale).
Accensione e spegnimento
Per utilizzare il robot aspirapolvere, è necessario portare l'interruttore
di alimentazione in posizione On.
Se si preme l'interruttore di arresto di emergenza, tutte le
impostazioni a eccezione dell'ora corrente e delle programmazioni
settimanali andranno perse.
❈ Se dall’accensione dell’apparecchio non viene premuto
alcun pulsante per circa 1 minuto, l’apparecchio si spegne
automaticamente per preservare la batteria. Per riaccenderlo,
tenere premuto il pulsante di accensione (Start/Stop) (Avvia/
Arresta) sul corpo principale.
1. Sollevare l’unità e attivare l’interruttore di alimentazione,
avendo cura di non premere nessun altro pulsante.
- Se le icone non si accendono, significa che le batterie sono
scariche. In tal caso, riporre il robot aspirapolvere nella base
di ricarica dopo averlo acceso mediante l'interruttore di
alimentazione.
- L'ora configurata potrebbe essere diversa dall'ora corrente. Se
l'ora configurata non è corretta, impostare l'ora corrente.
AVVERTENZA
Se l'interruttore di alimentazione è su Off, il robot aspirapolvere
non verrà caricato anche se si trova sulla base di ricarica.
20_ funzionamento
DJ68-00664B.indb 20
2012.6.16 11:9:56 AM
Installazione della base di ricarica
Spia di
alimentazione
Spia di ricarica
03 FUNZIONAMENTO
1. Installare la base di ricarica su una superficie piana.
2. Non devono essere presenti ostacoli e dislivelli entro un raggio
di 0,5 m a sinistra e a destra ed entro 1 m sul davanti.
0,5
circa
m
circa
0,5 m
cir
ca
1m
3. Installare la base di ricarica in una posizione facilmente accessibile
dal robot aspirapolvere.
4. Posizionare il cavo di alimentazione lungo la parete.
5. Se il pavimento è in legno, installare la base di ricarica nella
stessa direzione dei listelli di legno.
NOTA
Mantenere sempre il cavo di alimentazione della base
di ricarica collegato alla presa elettrica.
- Se la base di ricarica non è collegata a una presa elettrica,
il robot aspirapolvere non sarà in grado di trovare la base
per ricaricarsi automaticamente.
- Se il robot aspirapolvere non entra in contatto con la base
di ricarica, la batteria inizia a scaricarsi automaticamente.
funzionamento _21
DJ68-00664B.indb 21
2012.6.16 11:9:56 AM
Ricarica in corso
Al momento dell’acquisto del prodotto, la batteria
è completamente scarica ed è necessario caricarla
completamente prima dell’utilizzo.
Spia di
alimentazione
Spia di ricarica
Accendere l'apparecchio premendo l'interruttore posto nella parte
inferiore.
1. Una volta allineati i contatti di ricarica dell'unità
principale con i contatti presenti sulla base di
ricarica, premere l'unità principale fino a quando
viene emesso l'avviso di ricarica in corso.
- La spia di ricarica diventa verde.
Spia di
alimentazione
Spia di ricarica
2. Controllare lo stato di carica del robot aspirapolvere.
- All’inizio della ricarica, sul pannello del display verranno
visualizzati in sequenza la "carica residua della batteria" e
"
".
-
Al termine del ciclo di ricarica, sul pannello del display verranno
visualizzati in sequenza il livello di carica della batteria e "FULL"
(Carica completa).
Flash
Flash
Ricarica in corso Carica completata
■ Quando il display del livello della batteria lampeggia
durante il funzionamento, il robot aspirapolvere
interrompe la pulizia e si ricarica automaticamente nella
base di ricarica.
■ Se il robot aspirapolvere inizia il ciclo di pulizia in un punto
diverso da quello in cui si trova la base di ricarica e non
riesce a individuarla durante il funzionamento, si arresterà
vicino al punto in cui ha iniziato.
■ Se durante la pulizia il livello della batteria lampeggia e
viene visualizzato il simbolo "Lo", il robot aspirapolvere
non può essere controllato mediante il telecomando o i
pulsanti presenti sull'unità principale. In tal caso, portare
manualmente il robot nella base di ricarica. (Ciò avviene
quando la batteria è completamente scarica).
<Display di ricarica>
Carica
Ricarica
completa in corso
Ricarica
necessaria
22_ funzionamento
DJ68-00664B.indb 22
2012.6.16 11:9:56 AM
NOTA
03 FUNZIONAMENTO
• Al momento dell'acquisto del prodotto, sono necessari circa 180 minuti per effettuare una ricarica
completa della batteria al fine di garantire un'autonomia di funzionamento di circa 100 minuti.
• Se la ricarica viene effettuata quando la batteria è surriscaldata, il tempo necessario può
risultare maggiore.
• Misure da intraprendere quando la ricarica non viene effettuata in modo regolare. Se il robot
aspirapolvere non può essere ricaricato automaticamente, verificare le seguenti condizioni:
- Spegnere e riaccendere il robot aspirapolvere premendo l'interruttore di
alimentazione nella parte inferiore.
- Ripristinare l'alimentazione della base di ricarica.
- Verificare che non vi siano sostanze estranee sul connettore della base di ricarica e
pulire il connettore posto sull'unità principale e quello della base di ricarica con un
panno asciutto.
- Verificare che non vi siano oggetti vicino alla base di ricarica che possano riflettere il segnale.
• Quando il robot aspirapolvere viene separato dalla base di ricarica, le batterie iniziano a
scaricarsi naturalmente.
- Se possibile, caricare il robot aspirapolvere mediante la base di ricarica. (In caso
di assenza prolungata per un viaggio di lavoro o una vacanza, spegnere il robot
aspirapolvere e scollegare il cavo di alimentazione della base di ricarica).
Informazioni sulla batteria
■ Il robot aspirapolvere è alimentato da una batteria ricaricabile agli ioni di litio (Li-ion) ed è dotato
di una funzione di protezione dal sovraccarico al fine di garantirne una lunga durata.
■ Il periodo di garanzia della batteria è di 6 mesi dalla
data di acquisto.
■ Prima di acquistare una batteria, fornire al centro di
assistenza il numero del modello della batteria e richiedere il
ricambio originale recante il simbolo (
).
-
Questa batteria è indicata solo per il robot aspirapolvere Samsung. È proibito l’uso con altri
apparecchi o per altri scopi.
Non smontare o manomettere la batteria.
Ricaricarla in un luogo ben ventilato.
Non esporre la batteria a fonti di calore e non scaldarla.
Non collegare oggetti metallici ai poli (+) o (-) della batteria.
Conservare in luoghi chiusi (0°C~40°C).
Prima di smaltire il prodotto, smaltire le batterie in modo responsabile.
Non smaltire le batterie insieme ai normali rifiuti domestici.
Per lo smaltimento delle batterie esauste, attenersi alle normative locali.
❈ Se la batteria non funziona correttamente, non smontarla. Contattare il centro di assistenza più vicino.
❈ Un maggiore tempo di ricarica e una minore durata della batteria indicano l’approssimarsi della
fine del ciclo di vita della batteria. Contattare un centro di assistenza autorizzato per richiedere
una batteria sostitutiva.
La batteria ricaricabile incorporata nel prodotto non è sostituibile dall’utente.
Per informazioni sulla sostituzione, rivolgersi al fornitore del servizio.
funzionamento _23
DJ68-00664B.indb 23
2012.6.16 11:9:56 AM
Installazione di VIRTUAL GUARD
È possibile restringere il raggio d'azione del robot
aspirapolvere a una zona delimitata usando la
modalità Fence (barriera virtuale).
Spia modalità
Sensore di
rilevamento
distanza
Pulsante di
modalità/
alimentazione
Sensore di
rilevamento
corpo principale
Funzionamento pulsanti
1. Sequenza configurazione
- Modalità Fence (barriera virtuale): La spia rossa lampeggia.
- Off: La spia è spenta.
2. Impostazione della modalità
- Premendo il pulsante di modalità/alimentazione verranno
attivate in sequenza le seguenti modalità: Fence (barriera
virtuale) ➝ Power off (spegnimento).
❈ La distanza della barriera virtuale è di almeno 2,5 m e può
essere differente in funzione degli ambienti e dello stato di
movimento del robot.
Formazione di una barriera (virtuale)
VIRTUAL GUARD crea un barriera invisibile che il robot
aspirapolvere non può superare.
Ad esempio, di fronte a vasi, mobili, porte d’ingresso e così via.
1. Selezionare la modalità Fence (barriera virtuale)
utilizzando il pulsante di modalità/accensione.
- La spia della modalità lampeggia in rosso.
Sensore
distanza
Viene formata una
2. Installare VIRTUAL GUARD di fronte all’area cui si
barriera (virtuale).
desidera bloccare l’accesso al robot aspirapolvere.
- Installare VIRTUAL GUARD in modo che il sensore di rilevamento della distanza formi una
barriera invisibile che il robot aspirapolvere non può superare.
24_ funzionamento
DJ68-00664B.indb 24
2012.6.16 11:9:57 AM
Informazioni sul sensore IrDA
AVVERTENZA
03 FUNZIONAMENTO
• La trasmissione a infrarossi potrebbe essere
[Priorità dei segnali a infrarossi]
irregolare nei luoghi esposti a luce alogena o in
spazi aperti.
• Il robot aspirapolvere utilizza 3 tipi di dispositivi a
>
>
infrarossi, uno dei quali potrebbe non funzionare
correttamente davanti a un altro dispositivo con
Telecomando
Virtual
Base di ricarica
priorità superiore.
guard
• Durante il controllo del robot aspirapolvere
mediante telecomando, il robot potrebbe
attraversare la barriera virtuale della VIRTUAL GUARD o urtare contro un ostacolo in quanto il
segnale del telecomando ha una priorità superiore rispetto a quello della VIRTUAL GUARD.
• In caso di utilizzo del robot aspirapolvere in un ambiente piccolo o a una distanza ridotta, l’unità
potrebbe non funzionare correttamente a causa delle interferenze dei segnali a infrarossi.
• Installare la VIRTUAL GUARD lontano dalla base di ricarica poiché, se troppo vicina, potrebbe
interrompere le operazioni di ricarica automatica.
• L'utilizzo simultaneo di più robot aspirapolvere potrebbe causare malfunzionamenti a causa
delle interferenze dei segnali a infrarossi.
funzionamento _25
DJ68-00664B.indb 25
2012.6.16 11:9:57 AM
UTILIZZO DEL ROBOT ASPIRAPOLVERE
Avviare/Interrompere la pulizia
È possibile attivare o disattivare tutte le funzioni del robot
aspirapolvere.
■ Ogni funzione viene eseguita solo se l’interruttore di
alimentazione è su On.
■ Quando il robot aspirapolvere è in funzione, premere il pulsante
(
) per annullare l'operazione e selezionare una funzione.
Accensione e spegnimento
Accensione
-
Unità principale: Premere il pulsante (
).
Spegnimento
- Telecomando: Premere il pulsante [Power].
-
Unità principale: Tenere premuto il pulsante (
) per 3 secondi.
❈ Se dall’accensione dell’apparecchio non viene premuto alcun pulsante
per circa 1 minuto, l’apparecchio si spegne automaticamente per
preservare la batteria. Per riaccenderlo, tenere premuto il pulsante di
accensione (Start/Stop) (Avvia/Arresta) sul corpo principale.
Utilizzo del
telecomando
Avvio o arresto della pulizia
Avvio
- Telecomando: Premere i pulsanti Auto, Spot, Max, Manual
(Manuale).
- Unità principale: Selezionare la modalità Auto, Spot, Max
premendo il pulsante (
), quindi (
).
-
All’inizio del ciclo di pulizia, il robot aspirapolvere inizia a muoversi.
) senza la selezione di una modalità
❈ La pressione del pulsante (
di pulizia attiva la modalità di pulizia Auto.
Arresto
-
Per arrestare il robot, premere il pulsante (
) sul telecomando o
sull'unità principale.
Quando le operazioni di pulizia vengono interrotte, il robot
aspirapolvere si ferma.
Utilizzo dei pulsanti
dell’unità principale
26_ funzionamento
DJ68-00664B.indb 26
2012.6.16 11:9:57 AM
Ricarica
03 FUNZIONAMENTO
Premendo il pulsante Recharging (Ricarica), il robot
aspirapolvere torna alla base di ricarica per ricaricare le
batterie.
■ Quando il robot aspirapolvere è in funzione, premere il pulsante
) per annullare l'operazione e premere il pulsante di ricarica.
(
1. Premere il pulsante Recharging (Ricarica).
- (“
”) è l'icona che viene visualizzata sul display e il robot
aspirapolvere torna alla base di ricarica.
2. Per arrestare il robot aspirapolvere mentre sta tornando alla base di
ricarica, premere il pulsante (
).
3. Per testare la funzione di ricarica automatica, premere il pulsante di
ricarica quando il robot aspirapolvere si trova a meno di 1,5 m dalla
base di ricarica.
Utilizzo del
telecomando
Risoluzione dei problemi nel caso il robot aspirapolvere non
ritorni alla base di ricarica
- Verificare l’installazione della base di ricarica
- Quando la base di ricarica si trova in una posizione in cui non
riesce a guidare il robot aspirapolvere fino a essa.
- Quando la base di ricarica si trova a una distanza superiore a 5 m
dal robot aspirapolvere.
Il robot può impiegare un tempo superiore per tornare alla base
di ricarica.
■ Ricaricare manualmente il robot aspirapolvere nei seguenti casi:
- Quando la base di ricarica è installata in un angolo.
- Quando la batteria è completamente scarica.
- Quando il robot aspirapolvere è impigliato in un ostacolo (mobili,
ecc.)
- Quando il robot non è in grado di superare un dislivello per
dirigersi verso la base di ricarica.
Utilizzo dei pulsanti
dell’unità principale
1,
5
m
in
av
an
ti
funzionamento _27
DJ68-00664B.indb 27
2012.6.16 11:9:57 AM
Pulizia automatica
Il robot aspirapolvere si muove autonomamente ed esegue la pulizia
automatica della casa fino al suo completamento.
■ Se si preme il pulsante Start/Stop (Avvio/Arresto) sull'unità principale
o sul telecomando senza selezionare alcuna modalità di pulizia, verrà
automaticamente avviato un ciclo di pulizia automatica.
■ Se la pulizia inizia quando il robot aspirapolvere è inserito nella base
di ricarica, il tempo necessario per tornarvi sarà minore poiché il robot
aspirapolvere memorizza la posizione originale durante il funzionamento.
■ Se il robot aspirapolvere inizia il ciclo di pulizia in un punto diverso da
quello in cui si trova la base di ricarica e non riesce a individuarla durante il funzionamento, si
arresterà vicino al punto in cui ha iniziato.
■ Se il livello di carica delle batterie scende eccessivamente durante le operazioni di pulizia, il
robot aspirapolvere tornerà automaticamente alla base di ricarica per poi riprendere la pulizia
una volta ricaricate le batterie. (Numero di operazioni di pulizia riprese: una)
Pulsante sull'unità
principale
▶
Pulsante sul
telecomando
Sequenza di
configurazione
1. Impostare la
modalità.
1 volta
2. Annullare la
modalità.
NOTA
Informazioni sulla funzione Riprendi pulizia
• Se il robot aspirapolvere ritiene che la pulizia sia stata
completata, la funzione di ripresa della pulizia non viene
eseguita.
• Se si sposta il robot aspirapolvere o si preme un pulsante
mentre è in carica, la pulizia verrà ritenuta completata senza
necessità di eseguire la funzione di ripresa della pulizia.
AVVERTENZA
• Non spostare il robot aspirapolvere né premere alcun
pulsante durante la pulizia. In caso contrario, il robot
aspirapolvere riterrà che il ciclo di pulizia non sia completato
e avvierà nuovamente la pulizia dall’inizio.
• Ogni volta che si preme il pulsante Turbo, l'icona Turbo
sul display si accende e si spegne in maniera sequenziale.
Quando l'icona Turbo è accesa, è possibile iniziare la pulizia
in modalità Turbo.
Modalità Normale
Modalità Turbo
Pulizia completata
28_ funzionamento
DJ68-00664B.indb 28
2012.6.16 11:9:58 AM
Pulizia Spot
Pulsante sull'unità
principale
▶
Pulsante sul
telecomando
Circa 1,5 m
Circa 1,5 m
03 FUNZIONAMENTO
È possibile effettuare la pulizia di una zona specifica contenente
ad esempio briciole di pane o di biscotti, polvere o simili.
■ Spostare il robot aspirapolvere nella posizione in cui si desidera
eseguire una pulizia spot.
Sequenza di
configurazione
1. Impostare la
modalità.
2volte
2. Annullare la
modalità.
-
Nella modalità di pulizia Spot, il robot aspirapolvere esegue la
pulizia di un’area di 1,5 m x 1,5 m.
Una volta terminata la pulizia, il robot aspirapolvere visualizzerà sul
display i messaggi End (Fine), Stop (Arresto) e Stand-by.
NOTA
AVVERTENZA
Modalità Normale
Modalità Turbo
Quando il robot aspirapolvere è inserito nella base di ricarica,
la funzione di pulizia spot non è supportata.
• Ogni volta che si preme il pulsante Turbo, l'icona Turbo
sul display si accende e si spegne in maniera sequenziale.
Quando l'icona Turbo è accesa, è possibile iniziare la pulizia
in modalità Turbo.
Pulizia completata
funzionamento _29
DJ68-00664B.indb 29
2012.6.16 11:9:58 AM
Pulizia Max
Il robot aspirapolvere si sposta automaticamente ed esegue la
pulizia fino a esaurimento della carica delle batterie e il livello di
carica visualizzato è uno.
■ Se la pulizia inizia quando il robot aspirapolvere è inserito nella base
di ricarica, il tempo necessario per tornarvi sarà minore poiché
il robot aspirapolvere memorizza la posizione originale durante il
funzionamento.
■ Se il robot aspirapolvere inizia il ciclo di pulizia in un punto diverso
da quello in cui si trova la base di ricarica e non riesce a individuarla
durante il funzionamento, si arresterà vicino al punto in cui ha iniziato.
■ Se il livello di carica delle batterie scende eccessivamente durante le operazioni di pulizia, il
robot aspirapolvere tornerà automaticamente alla base di ricarica per poi riprendere la pulizia
una volta ricaricate le batterie. (Numero di operazioni di pulizia riprese: una)
Pulsante sull'unità
principale
▶
Pulsante sul
telecomando
Sequenza di
configurazione
1. Impostare la
modalità.
3volte
2 volte in modalità ricarica
2. Annullare la
modalità.
NOTA
Informazioni sulla funzione Riprendi pulizia
• Se il robot aspirapolvere ritiene di aver completato la pulizia,
la funzione di ripresa della pulizia non verrà eseguita.
• Se si sposta il robot aspirapolvere o si preme un pulsante
mentre l’unità è in carica, il robot aspirapolvere riterrà che la
pulizia sia completata (senza necessità di doverla ripetere).
AVVERTENZA
Modalità Normale
Modalità Turbo
• Non spostare il robot aspirapolvere né premere alcun
pulsante durante la pulizia. In caso contrario, il robot
aspirapolvere riterrà che il ciclo di pulizia non sia completato
e avvierà nuovamente la pulizia dall’inizio.
• Ogni volta che si preme il pulsante Turbo, l'icona Turbo
sul display si accende e si spegne in maniera sequenziale.
Quando l'icona Turbo è accesa, è possibile iniziare la pulizia
in modalità Turbo.
30_ funzionamento
DJ68-00664B.indb 30
2012.6.16 11:9:59 AM
Pulizia manuale
Pulsante sul telecomando
03 FUNZIONAMENTO
È possibile spostare il robot aspirapolvere per pulire una zona
specifica usando direttamente il telecomando.
■ Spostare il robot aspirapolvere nella posizione in cui si desidera
eseguire una pulizia manuale.
■ La pulizia manuale può essere eseguita solo mediante il telecomando.
Sequenza di configurazione
1. Impostare la modalità.
2. Annullare la modalità.
NOTA
AVVERTENZA
• Quando il robot aspirapolvere è inserito nella base di
ricarica, la funzione di pulizia manuale non è supportata.
• Trascorso 1 minuto entra in modalità standby.
• Ogni volta che si preme il pulsante Turbo, l'icona Turbo
sul display si accende e si spegne in maniera sequenziale.
Quando l'icona Turbo è accesa, è possibile iniziare la pulizia
in modalità Turbo.
Tasti direzionali
(Avanti, Sinistra, Destra)
Funzione retromarcia non
disponibile.
funzionamento _31
DJ68-00664B.indb 31
2012.6.16 11:9:59 AM
Avvio Ritardato
In questa modalità, è possibile programmare l'avvio di un
ciclo di pulizia a partire da una determinata ora.
■ Un ciclo di pulizia programmato viene eseguito solo quando
l'aspirapolvere è inserito nella base di ricarica.
Telecomando
Lampeggia
Diminuisce
Aumenta
Lampeggia
Diminuisce
Lampeggia
Lampeggia
Lampeggia
-
Annullamento delle
impostazioni
1. Premere il pulsante Avvio
Ritardato.
- Viene visualizzata
l’impostazione corrente
e l’icona
lampeggia.
Premere il pulsante Y o Z per
impostare l’ora.
2. Premere il pulsante Avvio
Ritardato. Premere il pulsante
Y o Z per impostare la
modalità di pulizia.
- È possibile selezionare la
modalità di pulizia Auto o Max.
3. Premere il pulsante Avvio
Ritardato.
- Il valore impostato
lampeggerà e l’impostazione
sarà completata.
- Una volta completate le
impostazioni, vengono
visualizzate l’ora configurata e
l’icona
.
Lampeggia
Annullamento delle
impostazioni
Aumenta
Sequenza di configurazione
-
Se si preme il pulsante Start/Stop (Avvio/Arresto) quando
l’aspirapolvere è in carica o si sta impostando l’ora, le
impostazioni vengono annullate.
Tenere presente che le impostazioni vengono annullate se
l’aspirapolvere è scollegato dalla base di ricarica.
Se non viene premuto alcun pulsante per 1 minuto durante
l’impostazione dell’ora, l’aspirapolvere esce automaticamente
dalla modalità di impostazione dell’ora.
32_ funzionamento
DJ68-00664B.indb 32
2012.6.16 11:9:59 AM
FUNZIONI AGGIUNTIVE
Uso delle funzioni aggiuntive
Modalità Turbo
Ogni volta che si preme il pulsante Turbo, l'icona Turbo sul
display si accende e si spegne in maniera sequenziale.
Turbo attivato (Modalità Turbo): La spazzola principale ruota
alla massima velocità.
Turbo disattivato (modalità Normale): La spazzola principale
ruota a velocità normale.
03 FUNZIONAMENTO
È possibile utilizzare il robot in modo più pratico ed efficace applicando le altre funzioni
di pulizia.
■ Le funzioni aggiuntive possono essere configurate solo con il telecomando.
Selezione di un segnale acustico
Premere il pulsante di selezione Sound (Suono) per selezionare
un segnale acustico.
■ Ogni volta che si preme questo pulsante, viene selezionata
la sequenza Sound Effects (Segnali acustici) → Mute (Muto).
- Sound Effects (Segnali acustici): Vengono emessi segnali
acustici.
- Mute (Muto): Non vengono emessi né segnali acustici né
messaggi vocali.
funzionamento _33
DJ68-00664B.indb 33
2012.6.16 11:10:0 AM
manutenzione strumenti e filtri
PULIZIA DEL ROBOT ASPIRAPOLVERE
Rispettare i metodi di pulizia e manutenzione
■ Se l’interruttore di alimentazione è danneggiato, contattare un
tecnico dell’assistenza per evitare eventuali incidenti.
■ Non utilizzare strumenti o dispositivi meccanici non previsti dal
produttore che potrebbero accelerare la deformazione del robot
aspirapolvere.
■ Spegnere sempre l’unità principale
mediante l'interruttore di alimentazione
posto nella parte inferiore prima di pulire il
robot aspirapolvere. Il robot aspirapolvere
potrebbe accendersi improvvisamente e
causare lesioni.
Pulizia della spia del sensore e della telecamera
Spegnere l’unità mediante l'interruttore di alimentazione posto
nella parte inferiore prima di pulire il robot aspirapolvere.
■ Non spruzzare acqua, diluenti, benzene o sostanze simili
direttamente sull'unità principale del robot aspirapolvere.
■ Pulire delicatamente la spia del sensore o
la telecamera con un panno morbido.
Telecamera
Spia sensore anteriore
Spia sensore anteriore e
telecamera
Spia sensore di dislivello
Spia sensore posteriore
34_ manutenzione
DJ68-00664B.indb 34
2012.6.16 11:10:0 AM
Pulizia della vaschetta di raccolta polvere e dei filtri
04 MANUTENZIONE
Per prima cosa, svuotare la vaschetta di raccolta polvere prima di pulirla.
■ Durante l'estrazione della vaschetta, prestare attenzione a non
rovesciare la polvere raccolta.
■ Svuotare la vaschetta nei seguenti casi:
1. Quando nella vaschetta si è accumulata una quantità eccessiva di polvere.
2. Quando la potenza di aspirazione si è ridotta.
3. Quando improvvisamente la rumorosità è aumentata.
1. Premere il pulsante di espulsione della vaschetta di raccolta polvere
(PUSH), quindi estrarre la vaschetta.
2. Rimuovere il coperchio della vaschetta tirandolo nella direzione della
freccia illustrata nella figura.
3. Rimuovere il filtro e il filtro a rete dalla vaschetta di
raccolta polvere.
NOTA
Filtro
Filtro a rete
4. Pulire il filtro, la rete e la vaschetta di raccolta polvere.
❈ È possibile utilizzare acqua corrente.
Dopo la pulizia con acqua:
1. Vaschetta di raccolta polvere: Asciugare accuratamente.
2. Filtro, filtro a rete: Asciugare accuratamente e rimontarli.
5. Reinstallare il filtro e il filtro a rete sulla vaschetta di
raccolta polvere.
- Installare il filtro a rete con il lato della griglia rivolto verso
il basso. Se l'orientamento non è corretto, non sarà
possibile montarlo.
AVVERTENZA
Se la vaschetta di raccolta polvere viene montata senza filtro, verrà visualizzato il codice di
errore C08.
Assicurarsi di montare il filtro.
6. Chiudere il coperchio della vaschetta di raccolta polvere e
reinserirla nell’unità principale.
manutenzione _35
DJ68-00664B.indb 35
2012.6.16 11:10:0 AM
PULIZIA DEL ROBOT ASPIRAPOLVERE
Pulizia della spazzola principale
Spegnere l’unità mediante l'interruttore di alimentazione
posto nella parte inferiore prima di pulire il robot
aspirapolvere.
• Dal momento che la polvere raccolta nella vaschetta potrebbe
AVVERTENZA
fuoriuscire, estrarre la vaschetta di raccolta prima di pulire la
spazzola.
1. Dopo avere controllato l’eventuale presenza di corpi estranei,
premere il tasto di sgancio che tiene il coperchio della spazzola.
2. Sollevare la spazzola dall'unità principale.
3. Rimuovere eventuali corpi estranei quali capelli o filamenti avvolti
intorno alla spazzola mediante una spazzola per la pulizia o un
aspirapolvere.
36_ manutenzione
DJ68-00664B.indb 36
2012.6.16 11:10:0 AM
4. Al termine della pulizia, reinstallare la spazzola nell'unità a
partire dal lato opposto all'interruttore di alimentazione.
04 MANUTENZIONE
5. Inserire il lato nelle due scanalature e far scorrere la spazzola
lentamente verso il basso fino a farla scattare in posizione.
AVVERTENZA
• Onde evitare l'ostruzione del robot aspirapolvere, prestare attenzione a non aspirare
stuzzicadenti o cotton fioc.
• Se la rimozione degli oggetti è complicata, contattare il Centro di assistenza.
• Poiché il robot aspira la sporcizia presente sul pavimento, è possibile che aspiri anche capelli e
altri filamenti. Controllare ed eventualmente pulire regolarmente la spazzola.
manutenzione _37
DJ68-00664B.indb 37
2012.6.16 11:10:1 AM
Pulizia delle spazzole rotative laterali per la pulizia dei bordi
Spegnere l’unità mediante l'interruttore di alimentazione
posto nella parte inferiore prima di pulire il robot
aspirapolvere.
1. Verificare che le spazzola rotativa laterale non sia piegata o non
sia bloccata da oggetti incastrati.
2. Indossando guanti di gomma, avvolgere la spazzola rotativa
laterale con un panno imbevuto d’acqua calda per circa 10
secondi quindi strofinare.
3. Ruotando la spazzola rotativa laterale, ripetere le procedure
descritte al punto 2.
4. Se si sono incastrati capelli o filamenti tra la spazzola rotativa
laterale e l'unità principale, con un cacciavite a croce svitare
ed estrarre la vite di ritenuta della spazzola. Prima di rimontare
la spazzola, verificare che il segno "L" sulla spazzola rotativa
laterale per la pulizia dei bordi e il segno "L" sull'unità principale
siano allineati, quindi rimontare la spazzola. (La lettera "R" è
incisa sulla parte destra della spazzola rotativa laterale).
NOTA
L
Dal momento che nella spazzola rotativa si impigliano facilmente capelli e altri corpi estranei,
effettuarne frequentemente la pulizia.
Una quantità eccessiva di corpi estranei può danneggiare la spazzola.
38_ manutenzione
DJ68-00664B.indb 38
2012.6.16 11:10:1 AM
Pulizia delle ruote di guida
04 MANUTENZIONE
Spegnere sempre l’unità mediante l'interruttore di alimentazione
posto nella parte inferiore prima di pulire il robot.
■ Se il robot aspirapolvere improvvisamente inizia a procedere a zig
zag, verificare che non vi siano corpi estranei incastrati fra le ruote di
guida.
1. Durante la pulizia delle ruote di guida, posizionare un panno morbido
sul pavimento e capovolgere l'unità principale appoggiandola con
cura.
2. Verificare l’eventuale presenza di corpi estranei e rimuoverli con un
bastoncino o un paio di pinzette non appuntite.
manutenzione _39
DJ68-00664B.indb 39
2012.6.16 11:10:1 AM
risoluzione dei problemi
CHECKLIST PRIMA DI CONTATTARE L'ASSISTENZA
Anomalia
Checklist
Il robot aspirapolvere • La vaschetta di raccolta è inserita
non funziona prima
correttamente?
della pulizia.
• L’interruttore di alimentazione è in
posizione On?
Misure correttive
• Montare la vaschetta di raccolta
polvere.
• Portare l’interruttore di
alimentazione in posizione On.
• È attivata la modalità di pulizia
sul display?
• Premere il pulsante
. (Per
spegnerlo, tenere premuto il
per almeno 3
pulsante
secondi).
• Lampeggia una sola tacca del
livello di carica della batteria e sul
display viene visualizzato "Lo"?
• Sollevare il robot aspirapolvere e
inserirlo manualmente nella base di
ricarica per ricaricarlo.
• Il robot aspirapolvere non funziona • Sostituire le batterie del
telecomando. (Tipo AAA)
quando le batterie del telecomando
sono scariche.
Il robot aspirapolvere • Lampeggia una sola tacca del
• Sollevare il robot aspirapolvere e
ha smesso di
livello di carica della batteria e sul
inserirlo manualmente nella base di
funzionare durante la
display viene visualizzato "Lo"?
ricarica per ricaricarlo.
pulizia.
• Il robot aspirapolvere si è impigliato • Spegnerlo mediante l'interruttore
in qualche cavo sul pavimento?
di alimentazione e rimuovere i cavi.
• Il robot aspirapolvere si è fermato
di fronte a un dislivello?
- La ruota di guida si è sollevata.
• Spegnere il robot aspirapolvere
mediante l'interruttore di
alimentazione e spostarlo in un
altro punto da pulire.
• Intorno alla ruota di guida si è
avvolto un fazzoletto?
• Spegnere il robot aspirapolvere
mediante l'interruttore di
alimentazione e rimuovere il
fazzoletto.
• Il robot è rimasto incastrato nella
soglia della porta?
• Spegnere il robot aspirapolvere
mediante l'interruttore di
alimentazione e spostarlo in un
altro punto da pulire.
La potenza di
• Controllare se la vaschetta di
aspirazione è debole.
raccolta polvere è piena.
• Arrestare il robot aspirapolvere e
svuotare la vaschetta di raccolta
polvere.
• Controllare se la bocchetta di
aspirazione è ostruita da corpi
estranei.
• Spegnere il robot aspirapolvere
e rimuovere i corpi estranei dalla
bocchetta di aspirazione.
• Controllare se il filtro è intasato.
• Pulire il filtro.
40_ risoluzione dei problemi
DJ68-00664B.indb 40
2012.6.16 11:10:1 AM
Anomalia
Checklist
Misure correttive
• Rimuovere eventuali ostacoli
presenti nel raggio di un 1 m
davanti e 0,5 m ai lati della base di
ricarica.
• Se i poli di ricarica sono sporchi,
pulirli con un panno asciutto.
• La VIRTUAL GUARD è installata
nei pressi della base di ricarica?
• Spostare la VIRTUAL GUARD in
un'altra posizione in modo che il
robot possa raggiungere la base di
ricarica.
Il robot aspirapolvere • Le batterie della VIRTUAL GUARD
supera la VIRTUAL
sono esaurite?
GUARD.
• La spia che indica la modalità è
spenta?
• Sostituire le batterie.
(2 alcaline tipo D (LR20))
La durata della
batteria della
VIRTUAL GUARD è
troppo breve.
• Sostituire le batterie con batterie
alcaline nuove.
(2 alcaline tipo D (LR20))
• Si stanno utilizzando batterie
drycell al manganese?
05 RISOLUZIONE DEI PROBLEMI
Il robot aspirapolvere • Verificare se la spina di
non è in grado di
alimentazione della base di ricarica
trovare la base di
sia correttamente inserita nella
ricarica.
presa elettrica.
• Verificare che la VIRTUAL GUARD
sia spenta, quindi impostarla nella
modalità desiderata.
Il robot aspirapolvere • Il robot aspirapolvere potrebbe
• La direzione di pulizia è
improvvisamente
eseguire il ciclo di pulizia in
determinata dalla posizione iniziale.
esegue il ciclo di
direzione diagonale nei seguenti
Poiché il robot pulisce disegnando
pulizia in direzione
casi:
una mappa, alla fine coprirà l'intera
diagonale.
area. (Funzionamento normale)
- Dopo che il robot aspirapolvere è
Installare la base di ricarica nella
stato caricato nella base di ricarica
direzione delle tavole di legno e
posizionata in un angolo.
avviare il ciclo di pulizia con il robot
- Quando il robot aspirapolvere,
aspirapolvere inserito nella base di
dopo la pulizia di un'area, si sposta
ricarica.
utilizzando una traiettoria più
breve.
- Quando l'angolo con cui entra in
contatto con un ostacolo non è
perpendicolare (90˚).
- Quando il pavimento è costituito
da piastrelle o legno.
risoluzione dei problemi _41
DJ68-00664B.indb 41
2012.6.16 11:10:2 AM
RISOLUZIONE DEI PROBLEMI MEDIANTE CODICI DI ERRORE
CODICE DI
ERRORE
CAUSA
• Il robot aspirapolvere è
rimasto intrappolato o
si è bloccato durante il
funzionamento.
SOLUZIONE
• Spegnere il robot mediante l'interruttore di
alimentazione posto nella parte inferiore e
spostarlo in un'altra posizione.
• Un corpo estraneo (filamenti, • Spegnere l’unità premendo il tasto sul fondo
carta, giocattoli, ecc.) è
del robot e rimuovere il corpo estraneo
rimasto impigliato nella
impigliato nella spazzola principale.
spazzola principale.
• Un corpo estraneo (filamenti,
carta, giocattoli, ecc.) è
rimasto impigliato nella ruota
di guida sinistra.
• Spegnere l’unità premendo il tasto sul fondo
del robot e rimuovere il corpo estraneo
impigliato nella ruota di guida sinistra.
• Un corpo estraneo (filamenti,
carta, giocattoli, ecc.) è
rimasto impigliato nella ruota
di guida destra.
• Spegnere l’unità premendo il tasto sul fondo
del robot e rimuovere il corpo estraneo
impigliato nella ruota di guida destra.
• Verificare il sensore paracolpi. • Spegnere premendo il pulsante nella parte
inferiore dell'unità e rimuovere l'ostacolo
davanti al robot aspirapolvere o spostarlo in un
altro punto.
• La spia del sensore Ostacoli
è sporca (polvere, macchie o
altro).
• Spegnere l’unità premendo il tasto sul fondo
del robot e pulire la spia del sensore anteriore
e posteriore usando un panno morbido.
• La spia del sensore di dislivello • Spegnere l’unità premendo il tasto sul fondo
è sporca (polvere, macchie o
del robot e pulire la spia del sensore di
altro).
dislivello usando un panno morbido.
• La vaschetta di raccolta
polvere non è inserita.
• Inserire la vaschetta di raccolta polvere fino ad
avvertire un “clic”.
• Un corpo estraneo (filamenti,
• Spegnere l’unità premendo il tasto sul fondo
indumenti, ecc..) è rimasto
del robot e rimuovere il corpo estraneo
intrappolato nelle spazzole rotative
impigliato nelle spazzole.
laterali per la pulizia dei bordi.
❈ Premendo il pulsante Avvio/Arresto o l'interruttore di alimentazione, il codice di errore scompare.
42_ risoluzione dei problemi
DJ68-00664B.indb 42
2012.6.16 11:10:2 AM
specifiche del prodotto
80 mm (altezza)
350 mm (lunghezza)
161 mm (lunghezza)
350 mm (larghezza)
Unità principale
Classificazione
Specifiche
meccaniche
Specifiche
elettriche
Specifiche di
pulizia
275 mm (larghezza)
Base di ricarica (Stazione)
Articolo
SERIE SR8930*
Diametro
350mm
Altezza
80mm
Peso
3,2 kg
Tensione di corrente
AC 220-240 V~, 50-60 Hz
Consumo elettrico per la ricarica
40 W
Consumo elettrico dell’unità
principale
40 W
Specifiche delle batterie
14,4 V/31,68Wh
Tipo di ricarica
Ricarica automatica/Ricarica manuale
Modalità di pulizia
Automatica, Spot, Max, Manual,
Avvio Ritardato
Tempo di ricarica
Circa 180 minuti
Durata pulizia
(calcolata sulla base di pavimenti
con superfici lisce)
Circa 100 minuti
Metodo di pulizia
Riconoscimento forma soffitto
Tipo pulsante unità principale
Touch
06 SPECIFICHE DEL PRODOTTO
122 mm (altezza)
Questo aspirapolvere è approvato per quanto segue:
Direttiva sulla compatibilità elettromagnetica : 2004/108/EEC
Direttiva sulla sicurezza di bassa tensione : 2006/95/EC
specifiche del prodotto _43
DJ68-00664B.indb 43
2012.6.16 11:10:2 AM
OPEN SOURCE ANNOUNCEMENT
Some software components of this product incorporate source code covered under the BSD.
And this software is based in part on the work of the Independent JPEG Group.
■ OpenCV :
IMPORTANT : READ BEFORE DOWNLOADING, COPYING, INSTALLING OR USING.
By downloading, copying, installing or using the software you agree to this license.
If you do not agree to this license, do not download, install, copy or use the software.
License Agreement
For Open Source Computer Vision Library
Copyright (C) 2000-2008, Intel Corporation, all rights reserved.
Copyright (C) 2008-2010, Willow Garage Inc., all rights reserved.
Third party copyrights are property of their respective owners.
Redistribution and use in source and binary forms, with or without modification, are permitted provided
that the following conditions are met:
Redistribution’s of source code must retain the above copyright notice, this list of conditions and the
following disclaimer.
Redistribution’s in binary form must reproduce the above copyright notice, this list of conditions and the
following disclaimer in the documentation and/or other materials provided with the distribution.
The name of the copyright holders may not be used to endorse or promote products derived from this
software without specific prior written permission.
This software is provided by the copyright holders and contributors “as is” and any express or implied
warranties, including, but not limited to, the implied warranties of merchantability and fitness for a
particular purpose are disclaimed.
In no event shall the Intel Corporation or contributors be liable for any direct, indirect, incidental, special,
exemplary, or consequential damages (including, but not limited to, procurement of substitute goods
or services; loss of use, data, or profits; or business interruption) however caused and on any theory of
liability, whether in contract, strict liability, or tort (including negligence or otherwise) arising in any way out
of the use of this software, even if advised of the possibility of such damage.
■ Copyright (c) 2006, 2008, 2009, 2010 Edward Rosten
All rights reserved.
Redistribution and use in source and binary forms, with or without modification, are permitted provided
that the following conditions are met:
Redistributions of source code must retain the above copyright notice, this list of conditions and the
following disclaimer.
Redistributions in binary form must reproduce the above copyright notice, this list of conditions and the
following disclaimer in the documentation and/or other materials provided with the distribution.
Neither the name of the University of Cambridge nor the names of its contributors may be used to
endorse or promote products derived from this software without specific prior written permission.
THIS SOFTWARE IS PROVIDED BY THE COPYRIGHT HOLDERS AND CONTRIBUTORS “AS
IS” AND ANY EXPRESS OR IMPLIED WARRANTIES, INCLUDING, BUT NOT LIMITED TO, THE
IMPLIED WARRANTIES OF MERCHANTABILITY AND FITNESS FOR A PARTICULAR PURPOSE ARE
DISCLAIMED. IN NO EVENT SHALL THE COPYRIGHT OWNER OR CONTRIBUTORS BE LIABLE FOR
ANY DIRECT, INDIRECT, INCIDENTAL, SPECIAL, EXEMPLARY, OR CONSEQUENTIAL DAMAGES
(INCLUDING, BUT NOT LIMITED TO, PROCUREMENT OF SUBSTITUTE GOODS OR SERVICES;
LOSS OF USE, DATA, OR PROFITS; OR BUSINESS INTERRUPTION) HOWEVER CAUSED AND ON
ANY THEORY OF LIABILITY, WHETHER IN CONTRACT, STRICT LIABILITY, OR TORT (INCLUDING
NEGLIGENCE OR OTHERWISE) ARISING IN ANY WAY OUT OF THE USE OF THIS SOFTWARE, EVEN
IF ADVISED OF THE POSSIBILITY OF SUCH DAMAGE.
DJ68-00664B.indb 44
2012.6.16 11:10:3 AM
memo
DJ68-00664B.indb 45
2012.6.16 11:10:3 AM
Se avete commenti o domande sui prodotti Samsung,
contattate il Servizio Clienti Samsung.
800-SAMSUNG(726-7864)
www.samsung.com
DJ68-00664B.indb 46
2012.6.16 11:10:3 AM
SR8930
Robo-Sauger
Benutzerhandbuch
Dieses Handbuch ist zu 100 % auf Recyclingpapier gedruckt.
✻ Lesen Sie die Anweisungen sorgfältig durch, ehe Sie das Gerät in Betrieb nehmen.
✻ Nur zum Einsatz in geschlossenen Räumen geeignet.
Deutsch
imagine the possibilities
Wir freuen uns, dass Sie sich für ein Samsung-Produkt
entschieden haben!
Produkt registrieren und gewinnen unter
www.samsung.com/register
DJ68-00664B.indb 01
2012.6.16 11:10:3 AM
Sicherheitsinformationen
SICHERHEITSINFORMATIONEN
• Bitte lesen Sie die Bedienungsanleitung gründlich durch, und bewahren Sie sie zum späteren
Nachschlagen auf.
• Da die folgenden Hinweise zum Betrieb für verschiedene Modelle gelten, können die
WARNUNG
Eigenschaften Ihres Staubsaugers sich leicht von den in diesem Handbuch beschriebenen
unterscheiden.
WARNUNG
SYMBOLE DER GEFAHREN-/WARNHINWEISE
WARNUNG
Dieses Zeichen weist darauf hin, dass Lebensgefahr oder ein ernsthaftes
Verletzungsrisiko besteht.
VORSICHT
Dieses Zeichen weist darauf hin, dass die Gefahr von Personen- oder
Sachschäden besteht.
WEITERE VERWENDETE SYMBOLE
HINWEIS
Dieses Zeichen weist darauf hin, dass die Gefahr von Personen- oder
Sachschäden besteht.
02_ Sicherheitsinformationen
DJ68-00664B.indb 02
2012.6.16 11:10:3 AM
WICHTIGE HINWEISE ZUR SICHERHEIT
Beim Umgang mit Elektrogeräten sind einige grundlegende Vorsichtsmaßnahmen wie u.a. die folgenden
zu beachten:
LESEN SIE VOR DER VERWENDUNG IHRES ROBO-SAUGERS SÄMTLICHE
ANWEISUNGEN GRÜNDLICH DURCH.
Ziehen Sie den Stecker aus der Steckdose, wenn Sie das Gerät nicht verwenden, und ehe Sie
Wartungsarbeiten durchführen.
So verringern Sie die Gefahr von Brand, Stromschlag oder Verletzungen:
ALLGEMEIN
• Verwenden Sie das Gerät nur wie in diesem Handbuch beschrieben.
• Verwenden Sie Ihren Robo-Sauger nicht, wenn dieser bzw. seine Ladestation beschädigt wurden.
• Wenn der Robo-Sauger nicht korrekt funktioniert, heruntergefallen oder beschädigt ist, im Freien
vergessen oder in Wasser eingetaucht wurde, lassen Sie ihn von einem Kundendienstcenter
zurück.
• Berühren Sie die Ladestation und den Robo-Sauger nicht mit nassen Händen.
• Verwenden Sie ihn nur auf trockenen Flächen in Innenräumen.
• Dieses Gerät darf nicht von Personen (einschließlich Kindern) bedient werden, die körperlich,
geistig oder psychisch benachteiligt sind oder über mangelnde Erfahrung und Kenntnisse
verfügen, es sei denn, sie wurden unter anfänglicher Beobachtung zu ihrer Sicherheit bezüglich
der Benutzung des Gerätes von einer verantwortlichen Person entsprechend unterwiesen.
• Kleine Kinder müssen beaufsichtigt werden, um sicher zu stellen, dass sie nicht mit dem Gerät
spielen.
AKKU-LADESTATION
• Verwenden Sie das Gerät nicht im Freien oder auf nassen Flächen.
• Ziehen Sie den Stecker der Ladestation aus der Steckdose, wenn Sie diese nicht verwenden,
und ehe Sie Wartungsarbeiten durchführen.
• Verwenden Sie nur die vom Hersteller mitgelieferte Ladestation.
• Verwenden Sie das Gerät nicht mit einem beschädigten Kabel oder Stecker.
• Ziehen und tragen Sie das Gerät nicht am Kabel und verwenden Sie das Kabel nicht als
Tragegriff. Ziehen Sie das Kabel auch nicht um scharfe Ecken oder Kanten herum. Halten Sie
das Kabel entfernt von beheizten Oberflächen.
• Verwenden Sie keine Verlängerungskabel oder Steckdosen mit unzureichender Leistung.
• Ziehen Sie niemals am Kabel, um den Stecker aus der Steckdose zu ziehen. Um den Stecker
herauszuziehen, fassen Sie den Stecker, nicht das Kabel an.
• Beschädigen Sie die Akkus nicht. Diese auch nicht verbrennen, da sie bei hohen Temperaturen
explodieren.
• Versuchen Sie keinesfalls, die Ladestation zu öffnen. Reparaturen dürfen nur durch ein
qualifiziertes Kundendienstcenter vorgenommen werden.
• Setzen Sie die Ladestation keinen hohen Temperaturen aus und lassen Sie weder Feuchtigkeit
noch Nässe in irgendeiner Form in Kontakt mit der Ladestation kommen.
Sicherheitsinformationen _03
DJ68-00664B.indb 03
2012.6.16 11:10:3 AM
Sicherheitsinformationen
ROBO-SAUGER
• Saugen Sie keine harten oder scharfen Gegenstände wie Glas, Nägel, Schrauben, Münzen usw.
auf.
• Verwenden Sie den Staubsauger niemals ohne Filter. Wenn Sie Wartungsarbeiten am Gerät
durchführen, stecken Sie niemals Ihre Finger oder andere Gegenstände in die Lüfterkammer,
denn das Gerät könnte sich möglicherweise ungewollt einschalten.
• Stecken Sie keinerlei Gegenstände in die Öffnungen des Geräts. Verwenden Sie das Gerät nicht
mit versperrten Öffnungen. Halten Sie Öffnungen frei von Staub, Fusseln, Haaren und anderen
Stoffen, die die Luftströmung behindern könnten.
• Saugen Sie keine giftigen Stoffe (Chlorbleiche, Ammoniak, Abflussreiniger usw.) auf.
• Saugen Sie keine brennenden oder glühenden Objekte (z. B. Zigaretten, Streichhölzer oder
heiße Asche) auf.
• Verwenden Sie das Gerät nicht, um leicht entzündliche oder brennbare Flüssigkeiten wie Benzin
aufzusaugen, und setzen Sie es nicht an Stellen ein, wo solche Stoffe vorhanden sein könnten.
• Verwenden Sie den Robo-Sauger nicht in geschlossenen Räumen, wenn die Luft darin Dämpfe
von lösemittelhaltigen Farben, Lackverdünnern, Mottenschutzmitteln, brennbarem Staub oder
andere explosive bzw. giftige Dämpfe enthält.
• Akkus und Batterien können bei extremen Einsatz- oder Temperaturbedingungen auslaufen.
Wenn diese Flüssigkeit auf die Haut kommt, waschen Sie sie sofort mit Wasser ab. Wenn die
Flüssigkeit in die Augen kommt, spülen Sie diese unverzüglich und mindestens 10 Minuten lang
mit sauberem Wasser. Suchen Sie medizinische Hilfe.
04_ Sicherheitsinformationen
DJ68-00664B.indb 04
2012.6.16 11:10:3 AM
Inhalt
SICHERHEITSINFORMATIONEN
02
06
07
10
11
Netzanschluss
Vor inbetriebnahme
Beim Betrieb
Reinigung und Wartung
GERÄTEMERKMALE
13
ÜBERSICHT ÜBER DAS GERÄT
15 Bestandteile des Geräts
16 Bezeichnungen der Teile
15
BETRIEB DES GERÄTS
20
WARTUNG VON ZUBEHÖR UND
FILTERN
34
FEHLERSUCHE
20 Inbetriebnahme des Robo-Saugers
20 Anweisungen zur Inbetriebnahme
20 Ein- und Ausschalten am Hauptschalter
21 Installieren der Ladestation
22 Laden
23 Informationen zum Akku
24 Einstellen des VIRTUAL GUARD
26 Betrieb des Robo-Saugers
26 Ein- und Ausschalten des Robo-Saugers
27 Aufladen
28 Automatisches Saugen
29 Punktsaugen
30 MAXIMALSAUGEN
31 Manuelles Saugen
32 Startzeitvorwahl
33 Spezialfunktionen
33 Verwenden von Spezialfunktionen
34 Reinigen des Robo-Saugers
34 Hinweise zu Reinigung und Wartung
34 Reinigen der Sensorfenster und der Kamera
35 Reinigen des Staubbehälters und der Filter
36 Reinigen des robo-saugers
36 Reinigen der Hauptbürste
38 Reinigen der rotierenden Seitenbürsten für die
Kantenreinigung
39 Reinigen der Antriebsräder
40 Checkliste zur Selbsthilfe
42 Fehlercodes und Fehlerbehebung
40
TECHNISCHE DATEN
43
Inhalt _05
DJ68-00664B.indb 05
2012.6.16 11:10:3 AM
Sicherheitsinformationen
NETZANSCHLUSS
WARNUNG
WARNUNG
WARNUNG
WARNUNG
WARNUNG
Vermeiden Sie übermäßiges Verdrehen des Kabels. Keine
schweren Gegenstände auf das Kabel stellen, da dieses sonst
brechen kann.
- Andernfalls besteht die Gefahr von Stromschlägen oder Brand.
Entfernen Sie Schmutz und Wasser vom Netzstecker.
- Andernfalls besteht die Gefahr von Stromschlägen oder Störungen
des Geräts.
Ziehen Sie niemals am Kabel, um den Netzstecker aus der
Steckdose zu ziehen, und berühren Sie den Netzstecker nicht
mit nassen Händen
- Andernfalls besteht die Gefahr von Stromschlägen oder Brand.
Schließen Sie nicht mehrere Geräte an eine Steckdose an.
(Lassen Sie das Kabel nicht ungeschützt auf dem Boden
herumliegen.)
- Andernfalls besteht die Gefahr von Stromschlägen oder Brand.
Verwenden Sie niemals beschädigte oder lose Netzkabel,
Netzstecker oder Steckdosen.
- Andernfalls besteht die Gefahr von Stromschlägen oder Brand.
06_ Sicherheitsinformationen
DJ68-00664B.indb 06
2012.6.16 11:10:3 AM
VOR INBETRIEBNAHME
VORSICHT
VORSICHT
VORSICHT
VORSICHT
VORSICHT
VORSICHT
Verwenden Sie den Robo-Sauger nie in Räumen mit
brennenden Gegenständen oder Stoffen wie:
- Räume mit Kerzen oder Schreibtischlampen auf dem Boden.
- Räume mit unbeaufsichtigtem Feuer (Feuer oder Glut).
- Räume, in denen sich Benzin, Alkohol, Verdünner, Aschenbecher
mit brennenden Zigaretten usw. befinden.
Der Robo-Sauger ist nur zum Gebrauch in privaten Haushalten bestimmt. Verwenden
Sie ihn niemals in Räumlichkeiten wie:
- Dachböden, Kellern, Lagerhäusern, Industriegebäuden, abgelegenen, vom Hauptgebäude
entfernten Zimmern, Feuchträumen (z.B. in Badezimmern oder Waschküchen) sowie auf
schmalen und hochgelegenen Flächen (z.B. auf Tischen oder Regalen). Bei Einsatz in
solchen Bereichen können schwerste Schäden (Betriebsstörungen und Bruch) auftreten.
01 SICHERHEITSINFORMATIONEN
VORSICHT
Stellen Sie vor dem Aktivieren des Robo-Saugers sicher, dass
der Staubbehälter eingesetzt ist.
- Wenn der Staubbehälter nicht eingesetzt wurde, kann der RoboSauger nicht in Betrieb genommen werden.
Öffnen Sie alle Türen, damit alle Zimmer gesaugt werden.
- Wenn eine Tür geschlossen ist, kann der Robo-Sauger nicht in dieses Zimmer gelangen.
- Um einen eventuellen Absturz des Robo-Saugers zu vermeiden, stellen Sie jedoch sicher,
dass Haustür, Terrassentür, Badezimmertür sowie andere betroffene Türen geschlossen sind.
Verwenden Sie das Gerät niemals auf schwarzen Böden.
- In diesen Bereichen ist der korrekte Betrieb des Geräts nicht
gewährleistet.
Bei Teppichen mit langen Fransen schieben Sie die Fransen
unter den Teppich.
- Wenn Sie die Fransen nicht unter den Teppich schieben, kann
es zu schwersten Schäden am Teppich und dem Robo-Sauger
selbst kommen, wenn sich die Fransen im Antriebsrad oder in der
Hauptbürste verfangen.
Wenn der Absturzsensor verunreinigt ist, kann der Robo-Sauger
möglicherweise an Treppen oder Geländern herunterfallen.
Dies kann Personenschäden und schwerste Beschädigungen
am Gerät verursachen.
Um dieses Risiko auszuschließen, installieren Sie vor
gefährlichen Bereichen VIRTUAL GUARDS (Einstellung:
Zaunmodus). Reinigen Sie die Sensorfenster und die Kamera.
Sicherheitsinformationen _07
DJ68-00664B.indb 07
2012.6.16 11:10:4 AM
VORSICHT
VORSICHT
VORSICHT
VORSICHT
VORSICHT
VORSICHT
VORSICHT
Entfernen Sie vor dem Staubsaugen kleine Objekte oder
zerbrechliche Gegenstände aus dem zu reinigenden Bereich.
- Vergewissern Sie sich vor dem Staubsaugen, dass keine
Gegenstände herumliegen.
- Vergewissern Sie sich, dass zerbrechliche Gegenstände (z.B. Gegenstände
aus Porzellan oder Glas, Blumenvasen usw.) weg gestellt wurden.
- Der Robo-Sauger erkennt weder Münzen, noch Ringe oder
andere Wertgegenstände wie Schmuck.
Entfernen Sie vor dem Staubsaugen alle Gegenstände, die auf
dem Boden herumliegen.
- Der Robo-Sauger erkennt Hindernisse in einer Entfernung von 5 cm.
- Badehandtücher, Abtreter vor Badezimmern und Waschbecken,
Eingängen, Besenkammern, Netzkabel, Tischtücher oder Gürtel
können sich im Antriebsrad oder in der Hauptbürste verfangen.
Dadurch können Gegenstände vom Tisch fallen.
Informieren Sie alle Familienmitglieder oder andere betroffene
Personen über die Reinigungszeiten des Robo-Saugers (sofort
oder später mit der Startzeitvorwahl).
- Der Robo-Sauger kann Kinder anfahren, sodass sie umfallen.
Stellen Sie sicher, dass Kinder nicht auf den Robo-Sauger
treten oder sich daraufsetzen.
- Kinder könnten hinfallen und sich verletzen oder es könnten
schwerste Schäden am Gerät auftreten.
Wenn ein Kind oder Haustier alleine zu Hause ist, vergessen Sie
nicht, den Robo-Sauger über den Hauptschalter auszuschalten.
- Der Robo-Sauger könnte ihre Aufmerksamkeit erregen.
- Wenn das rotierende Rad oder die rotierende Bürste Finger, Füße, Kleidung
oder Haare berührt bzw. einfängt, kann dies zu Verletzungen führen.
- Wenn ein Kind oder ein Haustier im Weg des Robo-Saugers steht,
kann es als Hindernis identifiziert werden, und der entsprechende
Bereich wird möglicherweise nicht gereinigt.
- Durch Ausschalten des Geräts am Hauptschalter wird, wird die
Stromversorgung getrennt und sämtliche Funktionen werden deaktiviert.
Wenn Sie die Ladestation installieren, lassen Sie das Netzkabel
nicht ungeschützt auf dem Boden herumliegen.
- Wenn der Robo-Sauger automatisch aufgeladen wird und an der
Ladestation vorbeifährt, kann es passieren, dass er das Netzkabel
mit sich schleift.
Lassen Sie das Netzkabel des Ladegeräts immer in der Steckdose.
- Obwohl der Robo-Sauger eine Selbstladefunktion besitzt, kann
sein Akku nicht automatisch geladen werden, wenn das Netzkabel
der Ladestation nicht mit der Steckdose verbunden ist.
08_ Sicherheitsinformationen
DJ68-00664B.indb 08
2012.6.16 11:10:4 AM
VORSICHT
WARNUNG
Gegenstände vor dem Ladegerät verhindern, dass der RoboSauger automatisch geladen wird.
- Halten Sie diesen Bereich frei.
0,5
fähr
m
0,5
fähr
m
u
un
ge
fäh
r1
m
Im Bereich der Ladestation, d.h. 0,5 m seitlich und 1 m nach
vorn dürfen sich keinerlei Hindernisse oder Absätze befinden.
0,5
fähr
unge
WARNUNG
Schließen Sie die Ladekontakte nicht mit Metallobjekten wie
Drähten, Schraubendrehern usw. kurz.
- Dies führt zu schwersten Schäden an der Ladestation.
WARNUNG
Vergewissern Sie sich, dass sich keinerlei Flüssigkeitsreste auf
der Ladestation befinden.
- Andernfalls besteht die Gefahr von Stromschlägen oder Brand.
WARNUNG
WARNUNG
WARNUNG
m
unge
hr 0,5
ngefä
m
unge
un
ge
fä
hr
1m
01 SICHERHEITSINFORMATIONEN
VORSICHT
Stellen Sie das Ladegerät an einer Stelle auf, die für den RoboSauger gut zugänglich ist.
- Wenn das Ladegerät in einer Ecke aufgestellt wird, kann
dies zusätzliches Manövrieren erforderlich machen und den
automatischen Ladevorgang stören.
Vergewissern Sie sich, dass der Robo-Sauger nicht über
Flüssigkeiten (z. B. Wasser, Öl oder Tierurin) fährt und diese
womöglich aufsaugt.
- Dies kann zu schwersten Schäden am Gerät führen.
- Die Flüssigkeiten können sich über die Räder ausbreiten und so zu
weiteren Verunreinigungen führen.
Verwenden Sie den Sauger nie für andere Zwecke.
- Dies kann zu schweren Schäden an der Ladestation führen oder Brände verursachen.
Installieren Sie die Ladestation niemals auf schwarzen Böden.
- Ist die Ladestation auf einem dunklen Boden installiert, hat der Robo-Sauger
Schwierigkeiten, zur Ladestation zurückzufinden.
Sicherheitsinformationen _09
DJ68-00664B.indb 09
2012.6.16 11:10:5 AM
BEIM BETRIEB
VORSICHT
VORSICHT
VORSICHT
VORSICHT
VORSICHT
WARNUNG
Sie können den Robo-Sauger nicht auf hochflorigen Teppichen
einsetzen.
- Es kann zu Beschädigungen am Robo-Sauger kommen.
- Dies kann zu Schäden am Teppich führen.
Verwenden Sie den Robo-Sauger nicht auf Tischen oder
anderen hochliegenden Bereichen.
- Dies kann zu Schäden am Gerät führen, wenn es während des
Betriebes herunterfällt.
Der Robo-Sauger kann im Betrieb gegen bestimmte Möbel (z.B.
Stuhlbeine, Tischbeine, dünne und lange Möbel usw.) stoßen.
- Für schnellere und bessere Säuberung stellen Sie Stühle auf den
Tisch.
Stellen Sie keine Gegenstände auf den Robo-Sauger.
- Andernfalls besteht die Möglichkeit von Störungen.
Entfernen Sie große Papierstücke und Plastiktüten beim
Saugen sofort aus dem Robo-Sauger.
- Wenn Sie das Gerät über einen längeren Zeitraum hinweg mit
verstopftem Lufteinlass verwenden, kann es zu schwersten
Schäden am Gerät kommen.
Wenn am Robo-Sauger ungewöhnliche Geräusche, Geruch
oder Rauch auftreten, schalten Sie das Gerät sofort über den
Hauptschalter aus und rufen Sie das Kundendienstzentrum an.
10_ Sicherheitsinformationen
DJ68-00664B.indb 10
2012.6.16 11:10:5 AM
VORSICHT
HINWEIS
HINWEIS
01 SICHERHEITSINFORMATIONEN
HINWEIS
Tragen Sie den Robo-Sauger niemals am Griff des
Staubbehälters.
- Dabei kann der Staubbehälter herausgezogen werden, was
Verletzungen oder schwerste Schäden am Gerät zur Folge haben
kann.
Möglicherweise kann der Robo-Sauger seinen Betrieb nicht
fortsetzen, wenn er an Türschwellen hängen bleibt.
- Um weiter zu saugen, schalten Sie den Robo-Sauger über den
Hauptschalter aus und wieder ein, nachdem Sie ihn an eine Stelle
gebracht haben, wo er sich wieder bewegen und saugen kann.
Der Robo-Sauger kann schwer erreichbare Stellen nicht zu
100% reinigen (z.B. Ecken und Flächen zwischen Sofa und
Wand).
- Reinigen Sie diese Stellen bitte gelegentlich selbst.
Staubansammlungen, die sich beim Saugen gebildet haben, können nach dem
Saugen zurückbleiben, wenn der Robo-Sauger es nicht schafft, sie aufzusaugen.
- Entfernen Sie den Staub in diesem Fall mit einem anderen Reinigungsgerät.
REINIGUNG UND WARTUNG
VORSICHT
VORSICHT
WARNUNG
Wenn Sie das Gerät reinigen, dürfen Sie kein Wasser direkt
auf die Außenflächen sprühen oder es mit Chemikalien wie
Reinigungsbenzin, Verdünner oder Alkohol abwischen.
- Dies kann zu schwersten Schäden am Gerät führen.
Das Gerät darf ausschließlich von qualifizierten
Servicetechnikern auseinander genommen oder
zusammengebaut werden.
- Andernfalls kann es zu schwersten Schäden am Gerät kommen.
Entfernen Sie regelmäßig Verschmutzungen, die sich auf dem
Hindernis- bzw. Absturzsensor angesammelt haben.
- Auf den Sensoren angesammelter Schmutz bewirkt ungenaue
Messungen der Sensoren.
Absturzsensor
Hindernissensor
Sicherheitsinformationen _11
DJ68-00664B.indb 11
2012.6.16 11:10:5 AM
WARNUNG
Zum Entfernen von Fremdstoffen schalten Sie zuerst das Gerät
über den Hauptschalter aus, dann können Sie Fremdstoffe mit
der Reinigungsbürste entfernen.
- Andernfalls schaltet sich das Gerät möglicherweise unerwartet ein,
was zu Verletzungen oder schwersten Schäden am Gerät führen
kann.
Seitenbürste für
Kanten
Hauptbürste
WARNUNG
WARNUNG
WARNUNG
Wenn das Netzkabel beschädigt ist, lassen Sie es durch einen
qualifizierten Servicetechniker in einem Kundendienstcenter
ersetzen.
- Andernfalls besteht die Gefahr von Stromschlägen oder Brand.
Vergewissern Sie sich vor dem Reinigen der Ladestation
zu Ihrer Sicherheit, dass das Netzkabel aus der Steckdose
gezogen ist.
Wenden Sie sich an ein Kundendienstcenter von Samsung
Electronics, um den Akku ersetzen zu lassen.
- Werden keine Originalakkus verwendet, kommt es zu
Gerätestörungen.
12_ Sicherheitsinformationen
DJ68-00664B.indb 12
2012.6.16 11:10:6 AM
Gerätemerkmale
MEHR BEQUEMLICHKEIT DURCH DIE VIRTUAL GUARD-FUNKTION
Sie können den Betrieb des Robo-Saugers mit einem elektronischen Zaun (virtuelle Wand oder) auf
einen bestimmten Bereich beschränken.
• Was ist die Deckenerkennungsfunktion
(Visionary mapping plus™)?
Diese Funktion erkennt die Form der Decke mit
Hilfe einer an der Geräteoberseite eingebauten
Kamera. Diese bestimmt den zu reinigenden
Bereich und den besten Weg, um jeden
Bodenbereich zu reinigen.
GRÜNDLICHE ECKENREINIGUNG
Da der Robo-Sauger den Boden in einer bestimmten Folge ( ) entsprechend einem von der
Deckenerkennungsfunktion vorgegebenen Bewegungsmuster reinigt, wird jede Ecke erreicht.
VERSCHIEDENE REINIGUNGSMODI
Es gibt verschiedene Reinigungsmodi, die all Ihren Anforderungen entsprechen.
2
5
6
Ungefähr 1,5 m
3
4
Ungefähr 1,5 m
1
1. Automatikbetrieb: Reinigt alle Zimmer automatisch.
2. Punktsaugen: Reinigt einen abgegrenzten Bereich intensiv. Diese Betriebsart kann verwendet
werden, um z.B. Brot- oder Kekskrümel zu entfernen.
3. Maximalmodus: Das Gerät läuft solange, bis der Akku fast leer ist.
4. Manuelles Saugen: Sie können den Boden auch manuell reinigen, indem Sie den RoboSauger mit einer Fernbedienung lenken.
5. Turbomodus: In diesem Modus läuft die Hauptbürste mit maximaler Drehzahl und sorgt so für
eine besonders intensive Reinigung (mit der Fernbedienung einstellbar).
6. Startverzögerung: Zur angegebenen Zeit reinigt der Robo-Sauger den Boden.
Gerätemerkmale _13
DJ68-00664B.indb 13
2012.6.16 11:10:6 AM
AUTOMATIKBETRIEB
Wenn der Akku schwach ist, wird der Robo-Sauger automatisch
zur Ladestation geführt, damit er automatisch geladen werden
kann.
ROTIERENDE SEITENBÜRSTEN
Die rotierenden Seitenbürsten entfernen Staub von Rändern
und Kanten
ÜBERQUERUNG VON TÜRSCHWELLEN
ungefähr 1cm
Treppenförmig
Vertikal
Das innovative Fahrsystem des Robo-Saugers macht es
möglich, dass er Türschwellen bis zu einer Höhe von etwa 1cm
überquert und die Zimmer dahinter reinigt. Je nach Form der
Türschwelle kann es vorkommen, dass der Robo-Sauger eine
1 cm hohe Schwelle nicht überqueren kann.
KOLLISIONSSCHUTZ
Trifft der Robo-Sauger beim Saugen auf Hindernisse, kann das
Gerät mit Hilfe der Hindernissensoren diese umgehen, um den
Saugvorgang fortzusetzen. (Dabei kann es vorkommen, dass
dünne, schmale Hindernisse nicht erkannt werden.)
STURZSICHERUNG
Die 3 Absturzsensoren erkennen abwärts führende Stufen oder
die Schwelle der Haustür und verhindern so, dass der RoboSauger hinunterfällt.
SICHERHEITSVORRICHTUNG
Stopp
Wenn der Robo-Sauger im Betrieb hochgehoben wird,
hält ein Sensor automatisch die Antriebsräder, die Hauptbürste,
den Saugmotor und die rotierenden Seitenbürsten an.
14_ Gerätemerkmale
DJ68-00664B.indb 14
2012.6.16 11:10:6 AM
Übersicht über das Gerät
BESTANDTEILE DES GERÄTS
02 ÜBERSICHT
■ Robo-Sauger
■ Fernbedienung
■ Ladestation
■ Weiteres Zubehör
(Batterien Typ AAA)
Benutzerhandbuch /
VIRTUAL GUARD
2 Batterien
Ersatzfilter
Reinigungsbürste
Kurzanleitung
Übersicht _15
DJ68-00664B.indb 15
2012.6.16 11:10:7 AM
BEZEICHNUNGEN DER TEILE
■ Sauger
Freigabeschalter für
Staubbehälter
Anzeige
Virtual GUARDSensor
Kamera
Fernbedienungssensor
Hindernissensor
Hindernissensor
Absturzsensor
Vorderseite
Freigabeschalter für
Staubbehälter
Staubbehälter
Fernbedienungssensor
Seite
Absturzsensor
Antriebsrad
Rotierende
Seitenbürste
Hauptschalter
Ladekontakt
Hauptbürste
Rolle
Hauptbürstenabdeckung
Absturzsensor
Akkufachabdeckung
Ladekontakt
Antriebsrad
Absturzsensor
Unterseite
16_ Übersicht
DJ68-00664B.indb 16
2012.6.16 11:10:7 AM
■ Ladestation
Ladelampe (grün)
02 ÜBERSICHT
Netzlampe
(rot)
Kabelaufrollsystem
Ladekontakte
Vorderseite
Rückseite
■ VIRTUAL GUARD
Modus-/Netztaste
Modusanzeige
Erkennungssensor für Robo-Sauger
Abstandserkennungssensor
■ Batterien einsetzen
Batterien sind nicht im Lieferumfang enthalten. Sie müssen zusätzlich erworben werden.
Setzen Sie vor Gebrauch Alkali-Batterien (Typ D) ein.
1
Drücken Sie auf die
Verriegelungslasche und
heben Sie die Abdeckung
des VIRTUAL GUARD an.
2
3
Setzen Sie die Batterien
wie in der Abbildung oben
gezeigt in den VIRTUAL
GUARD ein. (Wenn die
Batterien mit falscher Polung
eingesetzt werden, arbeitet
der VIRTUAL GUARD nicht.)
Nachdem Sie die eine Seite
der Abdeckung in den Schlitz
eingesetzt haben, drücken
Sie am anderen Ende der
Abdeckung, bis diese hörbar
einrastet.
❈ Technische Daten: Alkali-Batterien Typ D (LR20)
Übersicht _17
DJ68-00664B.indb 17
2012.6.16 11:10:8 AM
■ Fernbedienung
Ein/Aus
Aufladen
Automatikmodus
Maximalmodus
Richtungstasten
Punktmodus
(Rückwärtsbewegungen
werden nicht ausgeführt.)
Start/Stopp
Manueller
Modus
Turbomodus
Startverzögerung
Sound-Effekte
■ Einsetzen der Batterien für die Fernbedienung
Die Fernbedienung wird beim Kauf ohne Batterien geliefert.
Setzen Sie vor Gebrauch Alkali-Batterien (Typ AAA) ein.
1
Nehmen Sie die Abdeckung
des Batteriefachs an
der Rückseite der
Fernbedienung ab, dazu
die Verriegelungslasche
herunterdrücken.
2
3
Setzen Sie die Batterien
wie in der nachfolgenden
Abbildung gezeigt in
die Fernbedienung ein.
(Wenn die Batterien mit
falscher Polung eingesetzt
werden, funktioniert die
Fernbedienung nicht.)
Nachdem Sie die eine Seite
der Abdeckung in den Schlitz
eingesetzt haben, drücken
Sie am anderen Ende der
Abdeckung, bis diese hörbar
einrastet.
❈ Technische Daten: Alkali-Batterien Typ AAA
18_ Übersicht
DJ68-00664B.indb 18
2012.6.16 11:10:9 AM
■ Anzeige
2
1
3
5
4
6
B
7
02 ÜBERSICHT
A
C
8
ANZEIGE
1. Ziffernanzeige
- Zeigt den Timer, den Fortschritt und eventuelle Fehlercodes mit Hilfe von Ziffern, Buchstaben
und Symbolen an.
2. Ladesymbolanzeige
- Ladevorgang: Zeigt den Ladefortschritt in 3 Phasen an.
- Bei Betrieb: Zeigt den Ladestand des Akkus an. Der Ladestand wird im Betrieb allmählich
immer niedriger angezeigt. (Wenn der Akku vollständig entladen ist, blinkt eine Stufe und zeigt
mit „Lo“ an, dass nachgeladen werden muss.)
3. Startzeitvorwahl
- Wenn nach Zeitplan gesaugt werden soll, leuchtet das Symbol für die Startzeitvorwahl.
4. Turbomodus
- Dieses Symbol leuchtet, wenn Turbobetrieb ausgewählt wurde.
5. Anzeige des Reinigungsmodus
- Bei jedem Drücken der Taste für den Reinigungsmodus wird der entsprechende Modus angezeigt.
(A) Automatikbetrieb: Dieses Symbol leuchtet, wenn Automatikbetrieb ausgewählt wurde.
(B) Punktsaugen: Dieses Symbol leuchtet, wenn Punktsaugen ausgewählt wurde.
(C) Maximalmodus: Dieses Symbol leuchtet, wenn der Maximalmodus ausgewählt wurde.
TASTENBEREICH
6. Reinigungsmodus
- Drücken Sie diese Taste, um einen Reinigungsmodus auszuwählen. Nachdem Sie einen
Reinigungsmodus gewählt haben, drücken Sie die Taste (
), um mit dem Saugen zu beginnen.
7. Start/Stopp
- Drücken Sie diese Taste, um den Saugbetrieb zu starten oder zu beenden.
8. Aufladen
- Wenn Sie diese Taste drücken, wird das Symbol „Aufladen“ eingeschaltet, und der RoboSauger kehrt zur Ladestation zurück, um seinen Akku aufzuladen.
Übersicht _19
DJ68-00664B.indb 19
2012.6.16 11:10:10 AM
Betrieb des Geräts
INBETRIEBNAHME DES ROBO-SAUGERS
Anweisungen zur Inbetriebnahme
1. Ein- und Ausschalten des Geräts
Um den Robo-Sauger zu verwenden, müssen Sie das Gerät am
Hauptschalter an der Geräteunterseite einschalten.
2. Installieren der Ladestation
Um den Robo-Sauger aufzuladen, müssen Sie zuerst die Ladestation
installieren.
Der Akku ist beim Kauf nicht geladen und sollte vor dem ersten
Gebrauch vollständig geladen werden.
3. Laden des Akkus
Der Akku muss vor dem ersten Gebrauch des Robo-Saugers
vollständig geladen werden.
4. Einstellen des VIRTUAL GUARD
Sie können den Betrieb des Robo-Saugers mit dem Zaunmodus (virtuelle Wand) auf einen
bestimmten Bereich beschränken.
Ein- und Ausschalten am Hauptschalter
Um den Robo-Sauger zu verwenden, müssen Sie das Gerät mit
dem Hauptschalter einschalten.
Wenn das Gerät über den Hauptschalter abgeschaltet wird, werden
dabei alle Einstellungen mit Ausnahme der Uhrzeiteinstellung und
wöchentlichen Zeitvorgabe zurückgesetzt.
❈ Wenn innerhalb von 1 Minute nach dem Einschalten am
Hauptschalter keine Taste gedrückt wird, schaltet sich das Gerät
automatisch ab, um ein Entladen des Akkus zu vermeiden. Zum
erneuten Einschalten halten Sie die Taste Start/Stop am Gerät
oder auf der Fernbedienung länger gedrückt.
1. Heben Sie den Robo-Sauger an und schalten Sie den
Hauptschalter ein. Stellen Sie sicher, dass dabei keine
anderen Tasten gedrückt werden.
- Wenn dabei die Symbole nicht aufleuchten, bedeutet dies, dass
der Akku des Geräts leer ist. Um den Robo-Sauger in diesem
Fall zu verwenden, müssen Sie das Gerät am Hauptschalter
einschalten und es dann an die Ladestation andocken.
- Die am Gerät konfigurierte Uhrzeit kann von der tatsächlichen
Uhrzeit abweichen. Berichtigen Sie gegebenenfalls die
Uhrzeiteinstellung.
VORSICHT
Wenn das Gerät über den Hauptschalter ausgeschaltet ist, wird der Robo-Sauger nicht
geladen, selbst wenn er an die Ladestation angedockt ist.
20_ Betrieb
DJ68-00664B.indb 20
2012.6.16 11:10:11 AM
Installieren der Ladestation
Netzanzeige
Ladeanzeige
03 BETRIEB
1. Stellen Sie das Ladegerät auf einer ebenen Fläche auf.
2. Im Bereich der Ladestation, d.h. 0,5 m seitlich und 1 m nach
vorn dürfen sich keinerlei Hindernisse oder Absätze befinden.
m
hr 0,5
fä
unge
0,5
fähr
unge
m
un
ge
fä
hr
1m
3. Stellen Sie die Ladestation an einer Stelle auf, die für den RoboSauger gut zugänglich ist.
4. Verlegen Sie das Netzkabel an der Wand entlang.
5. Bei Holzfußböden stellen Sie die Ladestation in Richtung der
Holzmaserung auf.
HINWEIS
Lassen Sie den Netzstecker der Ladestation immer in
der Steckdose.
- Wenn die Ladestation nicht mit Strom versorgt wird,
kann der Robo-Sauger die Ladestation nicht finden und
demnach auch nicht automatisch aufgeladen werden.
- Wenn der Robo-Sauger von der Ladestation getrennt
wird, wird der Akku automatisch entladen.
Betrieb _21
DJ68-00664B.indb 21
2012.6.16 11:10:11 AM
Laden
Wenn Sie das Gerät erwerben, ist der Akku vollständig
entladen, und Sie müssen den Robo-Sauger manuell
aufladen.
Ladeanzeige
Netzanzeige
Schalten Sie die Stromversorgung am Hauptschalter an der
Geräteunterseite ein.
1. Nachdem Sie die Ladekontakte an Gerät und
Ladestation aufeinander ausgerichtet haben,
schieben Sie das Gerät in Position, bis das
Ladesignal ertönt.
- Die Ladeanzeige blinkt grün.
Netzanzeige
Ladeanzeige
2. Überprüfen Sie den Ladestand des Robo-Saugers.
- Wenn das Laden beginnt, werden am Display nacheinander das
Ladesymbol und „
” angezeigt.
-
Wenn das Laden beendet ist, werden am Display nacheinander
das Ladesymbol und „FULL“ angezeigt.
Laden
Blinkt
Blinkt
■ Wenn die Anzeige für den Ladestand beim Saugen blinkt,
schaltet das Gerät automatisch den Saugvorgang ab
und dockt zum Aufladen an die Ladestation an.
■ Beginnt der Robo-Sauger den Saugvorgang nicht direkt
an der Ladestation und findet die Ladestation während
des Betriebs nicht, schaltet das Gerät dort ab, wo es mit
dem Saugen begonnen hat.
■ Wenn die Anzeige für den Ladestand beim Saugen blinkt
und „Lo” angezeigt wird, kann der Robo-Sauger nicht
mehr über die Fernbedienung oder die Geräte-Tasten
angesteuert werden. Tragen Sie den Robo-Sauger
in diesem Fall zur Ladestation zurück, um den Akku
aufzuladen. (Dies passiert,wenn der Akku vollständig
entladen ist.)
Vollständig
geladen
<Ladesymbolanzeige>
Laden
beendet
Laden
Aufladen
erforderlich
22_ Betrieb
DJ68-00664B.indb 22
2012.6.16 11:10:11 AM
HINWEISE
03 BETRIEB
• Wenn Sie den Akku nach dem Kauf des Geräts erstmals laden, dauert es etwa 180 Minuten,
den Akku vollständig aufzuladen; die Ladung reicht für etwa 100 Minuten Betriebszeit.
• Die Ladezeit kann zunehmen, wenn Sie den Akku in überhitztem Zustand aufladen.
• Maßnahmen bei Störungen des Ladebetriebs
Wenn der Robo-Sauger nicht automatisch geladen werden kann, überprüfen Sie Folgendes:
- Schalten Sie die Stromversorgung am Hauptschalter an der Geräteunterseite aus
und wieder ein.
- Trennen Sie den Netzstecker der Ladestation kurzzeitig vom Stromnetz.
- Kontrollieren Sie, ob am Ladeanschluss Fremdstoffe vorhanden sind und wischen Sie
die Ladekontakte am Sauger und an der Ladestation mit einem trockenen Tuch ab.
- Prüfen Sie, ob es in der Nähe der Ladestation Objekte gibt, die als starke Reflektoren
wirken können.
• Wenn Sie den Robo-Sauger von der Ladestation trennen, entlädt er sich allmählich.
- Laden Sie den Robo-Sauger mit der Ladestation, sofern dies möglich ist. (Wenn der
Robo-Sauger längere Zeit nicht benutzt wird, schalten Sie die Stromversorgung des
Robo-Saugers am Hauptschalter an der Geräteunterseite aus und ziehen Sie das
Netzkabel der Ladestation aus der Steckdose, um beide Geräte einzulagern.)
Informationen zum Akku
■ Der Robo-Sauger wird über einen umweltfreundlichen Lithium-Ionen-Akku (Li-ion) mit Strom
versorgt. Der Überladungsschutz garantiert eine lange Lebensdauer.
■ Die Garantiezeit für den Akku beläuft sich auf 6
Monate ab dem Kaufdatum.
■ Bevor Sie einen neuen Akku kaufen, fragen Sie das
)
Kundendienstcenter nach dem Echtheitssymbol (
und nach der Modellnummer.
-
Dieser Akku ist nur für Samsung Robo-Sauger bestimmt. Es ist strikt verboten, ihn für andere
Geräte oder andere Zwecke zu verwenden.
Bauen Sie den Akku nicht auseinander und manipulieren Sie ihn nicht.
Laden Sie ihn nur an gut belüfteten Stellen auf.
Werfen Sie den Akku nicht ins Feuer und erhitzen Sie ihn nicht.
Verbinden Sie die Pole (+) oder (-) des Akkus nicht mit Metallgegenständen.
Bewahren Sie Akkus in Innenbereichen auf (0 °C bis 40 °C).
Bevor Sie dieses Gerät entsorgen, entsorgen Sie den Akku in umweltfreundlicher Weise.
Entsorgen Sie den Akku nicht zusammen mit Ihrem normalen Haushaltsmüll.
Befolgen Sie beim Entsorgen alter Akkus stets alle in Ihrem Land geltenden gesetzlichen
Bestimmungen.
❈ Wenn der Akku defekt ist, nehmen Sie ihn nicht auseinander. Wenden Sie sich an Ihr
nächstgelegenes Kundendienstcenter.
❈ Verlängerte Aufladezeiten und kürzere Nutzungsdauer sind Zeichen für das nahende Ende der
Lebensdauer des Akkus. Wenden Sie sich an das Kundendienstcenter, um den Akku zu ersetzen.
Der in dieses Gerät eingebaute Akku kann vom Benutzer nicht ausgetauscht werden.
Informationen zum Austausch erhalten Sie bei Ihrem Dienstleister.
Betrieb _23
DJ68-00664B.indb 23
2012.6.16 11:10:12 AM
Einstellen des VIRTUAL GUARD
Sie können den Betrieb des Robo-Saugers
mit dem Zaunmodus (virtuelle Wand) auf einen
bestimmten Bereich beschränken.
Modusanzeige
Abstandserkennungssensor
Modus-/
Netztaste
Erkennungssensor
für Robo-Sauger
Bedienung der Tasten
1. Modusanzeige
- Zaunmodus (virtuelle Wand): Die rote Anzeige blinkt.
- Aus: Die Anzeige leuchtet nicht mehr.
2. Einstellen des Modus
- Bei jedem Drücken der Modus-/Netztaste schaltet das
Gerät zwischen dem Zaunmodus (virtuelle Wand) und dem
Ausschaltmodus (Strom aus) um.
❈ Der Abstand zur virtuellen Wand beträgt mindestens
2,5 m und kann je nach Umgebungsbedingungen und
Saugerbewegungen variieren.
Einstellen eines Zaunes (virtuelle Wand)
Der VIRTUAL GUARD schafft eine unsichtbare Barriere, die der
Robo-Sauger nicht überqueren kann,
z. B. vor Blumentöpfen, Möbeln, der Haustür usw.
1. Wählen Sie mit der Modus-/Netztaste den Zaunmodus
(virtuelle Wand).
- Die Modusanzeige blinkt rot.
Abstands
erkennungssensor
Ein Zaun (virtuelle Wand) wird
2. Installieren Sie den VIRTUAL GUARD vor der Fläche,
gebildet.
zu der Sie dem Robo-Sauger den Zugang sperren
möchten.
- Installieren Sie den VIRTUAL GUARD, damit der Abstandserkennungssensor eine unsichtbare
Barriere schafft, die der Robo-Sauger nicht überqueren kann.
24_ Betrieb
DJ68-00664B.indb 24
2012.6.16 11:10:12 AM
Informationen zum IrDA-Sensor
VORSICHT
03 BETRIEB
• Die Übertragung der Infrarotsignale ist im Freien
[Infrarotsignal-Priorität]
oder bei Vorhandensein von Halogenlampen
störungsanfällig.
• Der Robo-Sauger verwendet 3 Arten von
>
>
Infrarotgeräten, die möglicherweise vor einem
anderen Gerät mit einer höheren Priorität nicht
Fernbedienung
VIRTUAL
Ladestation
funktionieren.
GUARD
• Beim Steuern des Robo-Saugers mit der
Fernbedienung kann es vorkommen, dass der
Robo-Sauger den virtuellen Zaun des VIRTUAL GUARD überquert oder gegen ein Hindernis
fährt, weil das Fernbedienungssignal eine höhere Priorität als das Signal des VIRTUAL GUARD
hat.
• Wenn Sie den Robo-Sauger in einem kleinen Raum oder auf kurze Distanz steuern, kann es
aufgrund von Interferenzen der Infrarotsignale zu Störungen kommen.
• Installieren Sie den VIRTUAL GUARD nicht in der Nähe der Ladestation, da der automatische
Ladevorgang unterbrochen werden kann, wenn der VIRTUAL GUARD sich nahe bei der
Ladestation befindet.
• Wenn Sie mehrere Robo-Sauger gleichzeitig verwenden, kann es aufgrund von Interferenzen
der Infrarotsignale zu Störungen kommen.
Betrieb _25
DJ68-00664B.indb 25
2012.6.16 11:10:12 AM
BETRIEB DES ROBO-SAUGERS
Ein- und Ausschalten des Robo-Saugers
Sie können alle Funktionen des Robo-Saugers aktivieren
bzw. deaktivieren.
■ Die Funktionen des Robo-Saugers sind verfügbar, nachdem
das Gerät mit dem Hauptschalter eingeschaltet wurde.
),
■ Ist der Robo-Sauger in Betrieb, drücken Sie die Taste (
um den Betrieb zu unterbrechen und eine Funktion zu wählen.
Ein- und Ausschalten des Geräts
Einschalten des Geräts
-
Robo-Sauger: Drücken Sie die Taste (
).
Ausschalten des Geräts
- Fernbedienung: Drücken Sie die Taste Power.
-
Robo-Sauger: Halten Sie die Taste (
) 3 Sekunden lang gedrückt.
❈ Wenn innerhalb von 1 Minute nach dem Einschalten am Hauptschalter
keine Taste gedrückt wird, schaltet sich das Gerät automatisch ab, um
ein Entladen des Akkus zu vermeiden. Zum erneuten Einschalten halten
Sie die Taste Start/Stop am Gerät oder auf der Fernbedienung länger
gedrückt.
Fernbedienung
Starten und Anhalten des Robo-Saugers
Starten
- Fernbedienung: Drücken Sie die Taste Auto, Spot, Max oder
Manual.
-
Robo-Sauger: Drücken Sie nacheinander die Tasten (
) und (
, um Auto, Punkt, Maximal auszuwählen.
Der Saugprozess beginnt, sobald der Robo-Sauger sich in
Bewegung setzt.
) drücken, ohne einen Reinigungsmodus
❈ Wenn Sie die Taste (
zu wählen, beginnt der Robo-Sauger im Automatikmodus.
Anhalten
-
)
Tasten am RoboSauger
Um den Robo-Sauger anzuhalten, drücken Sie die Taste(
) auf
der Fernbedienung oder am Robo-Sauger.
Wenn der Saugprozess angehalten wird, bleibt der Robo-Sauger stehen.
26_ Betrieb
DJ68-00664B.indb 26
2012.6.16 11:10:12 AM
Aufladen
Durch Drücken der Ladetaste (Recharging) können Sie den
Robo-Sauger zum Ladegerät zurückkehren lassen, um den
Akku aufzuladen.
03 BETRIEB
) , um
■ Ist der Robo-Sauger in Betrieb, drücken Sie die Taste (
den laufenden Betrieb zu unterbrechen. Drücken Sie dann die
Ladetaste (Recharging).
1. Drücken Sie die Ladetaste (Recharging).
”) auf dem Gerätedisplay wird eingeschaltet,
- Das Symbol („
und der Robo-Sauger kehrt zur Ladestation zurück.
2. Um den Robo-Sauger anzuhalten, während er zur Ladestation
zurückkehrt, drücken Sie die Taste (
).
3. Um die Ladefunktion zu testen, drücken Sie die Ladetaste, wenn sich
der Robo-Sauger in weniger als 1,5 m Entfernung von der Ladestation
befindet.
Fernbedienung
Fehlerbehebung, wenn der Robo-Sauger nicht zur Ladestation
zurückkehrt
- Prüfen Sie, ob die Ladestation korrekt installiert ist.
- Befindet sich die Ladestation an einer Stelle, von der aus sie den
Robo-Sauger nicht zurückführen kann?
- Befindet sich die Ladestation an einer Stelle, die mehr als 5 m
vom Robo-Sauger entfernt ist?
: Es kann länger dauern, bis der Robo-Sauger zur Ladestation
zurückgekehrt ist.
■ Laden Sie den Robo-Sauger in den folgenden Fällen manuell.
Tasten am Robo- Die Ladestation ist in einer Ecke aufgestellt.
Sauger
- Der Akku ist vollständig entladen.
- Der Robo-Sauger wird durch ein Hindernis (Möbel usw.) aufgehalten.
- Der Robo-Sauger kommt nicht über die Türschwelle hinweg und bis zum Aufstellort der
Ladestation.
Betrieb _27
DJ68-00664B.indb 27
2012.6.16 11:10:13 AM
Automatisches Saugen
Der Robo-Sauger bewegt sich selbsttätig und säubert automatisch
das Haus, bis der Saugvorgang abgeschlossen ist.
■ Wenn Sie die Taste Start/Stop am Gerät oder auf der Fernbedienung
drücken, ohne einen Reinigungsmodus zu wählen, beginnt der RoboSauger im Automatikmodus.
■ Wenn der Saugvorgang gestartet wird, während der Robo-Sauger
an die Ladestation angedockt ist, reduziert sich die Zeit für das
Zurückfahren zur Ladestation, da der Sauger seine Ausgangsposition
für die Rückfahrt speichert.
■ Beginnt der Robo-Sauger den Saugvorgang nicht direkt an der Ladestation und kann die Ladestation
beim Saugen nicht finden, schaltet das Gerät dort ab, wo es mit dem Saugen begonnen hat.
■ Wenn die Akkuladung beim Saugen zu schwach wird, kehrt der Robo-Sauger automatisch
zur Ladestation zurück, und setzt das Reinigen erst wieder fort, nachdem der Akku wieder
aufgeladen ist. (Anzahl der wieder aufgenommenen Reinigungsvorgänge: einer)
Tasten am RoboSauger
Tasten auf der
Fernbedienung
Konfiguration
1. Modus einstellen
▶
1 Mal
2. Modus beenden.
Normalbetrieb
Informationen zum Fortsetzen des Saugprozesses
• Wenn der Robo-Sauger feststellt, dass die Reinigung
abgeschlossen ist, wird die Funktion zum Fortsetzen des
HINWEISE
Reinigens nicht aktiviert.
• Wenn Sie eine Taste drücken oder den Robo-Sauger
bewegen, während er geladen wird, geht der Robo-Sauger
davon aus, dass das Reinigen abgeschlossen ist, und setzt
das Reinigen nicht fort.
VORSICHT
Turbomodus
• Drücken Sie keine Tasten und bewegen Sie den RoboSauger nicht, während er die Reinigung ausführt.
Andernfalls geht der Robo-Sauger davon aus, dass das
Reinigen abgeschlossen ist, und beginnt wieder von vorn. Reinigung abgeschlossen
• Wenn Sie auf der Fernbedienung die Taste Turbo drücken,
wird auf dem Display das Symbol für Turbomodus einbzw. ausgeschaltet. Wird das Symbol für Turbomodus
angezeigt, können Sie den Boden im Turbomodus reinigen.
28_ Betrieb
DJ68-00664B.indb 28
2012.6.16 11:10:13 AM
Punktsaugen
Tasten am RoboSauger
Tasten auf der
Fernbedienung
Ungefähr 1,5m
Ungefähr 1,5m
03 BETRIEB
Sie können ganz einfach einen bestimmten Bereich reinigen, in
dem sich z. B. viele Krümel, Staub usw. befinden.
■ Bewegen Sie den Robo-Sauger an die Stelle, wo die Punktreinigung
durchgeführt werden soll.
Konfiguration
1. Modus einstellen
▶
2 Mal
2. Modus beenden.
Normalbetrieb
-
Im Punktreinigungsmodus säubert der Robo-Sauger einen
Bereich mit einer Länge und Breite von 1,5 m.
Wenn das Saugen beendet ist, zeigt der Robo-Sauger „End“,
„Stop“ und „Standby“ an.
HINWEIS
VORSICHT
Turbomodus
Wenn der Robo-Sauger an die Ladestation angedockt ist,
kann eine Punktreinigung nicht durchgeführt werden.
• Wenn Sie auf der Fernbedienung die Taste Turbo drücken,
wird auf dem Display das Symbol für Turbomodus einbzw. ausgeschaltet. Wird das Symbol für Turbomodus
angezeigt, können Sie den Boden im Turbomodus reinigen.
Reinigung abgeschlossen
Betrieb _29
DJ68-00664B.indb 29
2012.6.16 11:10:13 AM
MAXIMALSAUGEN
Der Robo-Sauger bewegt sich automatisch und macht sauber,
bis der Akku fast leer ist und nur noch eine Ladestufe angezeigt
wird (blinkt).
■ Wenn der Saugvorgang gestartet wird, während der Robo-Sauger
an die Ladestation angedockt ist, reduziert sich die Zeit für das
Zurückfahren zur Ladestation, da der Sauger seine Ausgangsposition
für die Rückfahrt speichert.
■ Beginnt der Robo-Sauger den Saugvorgang nicht direkt an der
Ladestation und kann die Ladestation beim Saugen nicht finden,
schaltet das Gerät dort ab, wo es mit dem Saugen begonnen hat.
■ Wenn die Akkuladung beim Saugen zu schwach wird, kehrt der Robo-Sauger automatisch
zur Ladestation zurück, und setzt das Reinigen erst wieder fort, nachdem der Akku wieder
aufgeladen ist. (Anzahl der wieder aufgenommenen Reinigungsvorgänge: einer)
Tasten am RoboSauger
Tasten auf der
Fernbedienung
Konfiguration
1. Modus einstellen
▶
3 Mal
Zweimal bei Ladebetrieb
2. Modus beenden.
Informationen zum Fortsetzen des Saugprozesses
• Wenn der Robo-Sauger feststellt, dass die Reinigung
abgeschlossen ist, wird die Funktion zum Fortsetzen des
HINWEISE
Reinigens nicht aktiviert.
• Wenn Sie eine Taste drücken oder den Robo-Sauger
bewegen, während er geladen wird, geht der Robo-Sauger
davon aus, dass das Reinigen abgeschlossen ist, und setzt
das Reinigen nicht fort.
VORSICHT
Normalbetrieb
Turbomodus
• Drücken Sie keine Tasten und bewegen Sie den RoboSauger nicht, während er reinigt. Andernfalls geht der
Robo-Sauger davon aus, dass das Reinigen abgeschlossen
ist, und beginnt wieder von vorn.
• Wenn Sie auf der Fernbedienung die Taste Turbo drücken,
wird auf dem Display das Symbol für Turbomodus einbzw. ausgeschaltet. Wird das Symbol für Turbomodus
angezeigt, können Sie den Boden im Turbomodus reinigen.
30_ Betrieb
DJ68-00664B.indb 30
2012.6.16 11:10:14 AM
Manuelles Saugen
Tasten auf der Fernbedienung
03 BETRIEB
Sie können den Robo-Sauger mit der Fernbedienung selbst
steuern, um eine bestimmte Stelle zu reinigen.
■ Bewegen Sie den Robo-Sauger an die Stelle, wo die manuelle
Reinigung durchgeführt werden soll.
■ Manuelles Saugen kann nur über die Fernbedienung gesteuert
werden.
Konfiguration
1. Modus einstellen
2. Modus beenden.
HINWEIS
VORSICHT
• Wenn der Robo-Sauger an die Ladestation angedockt ist,
kann der manuelle Saugmodus nicht aktiviert werden.
• Erfolgt 1 Minute lang keine Eingabe, schaltet das Gerät auf
Standby-Betrieb um.
• Wenn Sie auf der Fernbedienung die Taste Turbo drücken,
wird auf dem Display das Symbol für Turbomodus einbzw. ausgeschaltet. Wird das Symbol für Turbomodus
angezeigt, können Sie den Boden im Turbomodus reinigen.
Richtungstasten
(vorwärts, links, rechts)
Rückwärtsbewegungen werden
nicht ausgeführt.
Betrieb _31
DJ68-00664B.indb 31
2012.6.16 11:10:14 AM
Startzeitvorwahl
Sie können den Robo-Sauger in diesem Modus so
programmieren, dass er zu einer bestimmten Zeit zu saugen
beginnt.
■ Das Reinigen mit Startzeitvorwahl kann nur dann ausgeführt
werden, wenn der Robo-Sauger an die Ladestation angedockt
ist.
Fernbedienung
Blinkt
Weniger
Mehr
Blinkt
Weniger
Blinkt
Blinkt
1. Drücken Sie die
Startverzögerungstaste.
- Die aktuelle Einstellung wird
angezeigt,
blinkt.
Auf Y oder die Z Taste
drücken, um die Stunden
einzustellen.
2. Drücken Sie die
Startverzögerungstaste.
Auf Y oder die Z
Taste drücken, um den
Reinigungsmodus einzustellen.
- Sie können zwischen
Automatikbetrieb oder
Maximalmodus wählen.
3. Drücken Sie die
Startverzögerungstaste.
- Die eingestellte Wert blinkt,
damit ist die Einstellung
beendet.
- Sind die Einstellungen beendet,
werden die eingestellte Zeit
angezeigt.
und
Blinkt
Blinkt
Einstellungen löschen
Timeout
Mehr
Konfiguration
Wenn Sie bei der Zeiteinstellung oder während das Gerät
geladen wird die Taste Start/Stop drücken, werden damit alle
Einstellungen gelöscht.
Bitte beachten Sie, dass die Einstellungen gelöscht werden,
wenn das Gerät von der Ladestation getrennt wird.
Wenn während der Uhrzeiteinstellung 1 Minute lang keine
Taste gedrückt wird, bricht das Gerät automatisch diesen
Einstellungsmodus ab.
32_ Betrieb
DJ68-00664B.indb 32
2012.6.16 11:10:14 AM
SPEZIALFUNKTIONEN
Verwenden von Spezialfunktionen
Turbomodus
Wenn Sie auf der Fernbedienung die Taste Turbo drücken,
wird auf dem Display das Symbol für Turbomodus ein- bzw.
ausgeschaltet.
Turbomodus: Die Hauptbürste läuft mit max. Drehzahl.
Normalbetrieb: Die Hauptbürste läuft mit Standarddrehzahl.
03 BETRIEB
Die Spezialfunktionen machen die Verwendung des Robo-Saugers noch einfacher und
bequemer.
■ Die Einstellung der Spezialfunktionen kann nur über die Fernbedienung vorgenommen werden.
Auswahl eines Sound-Effekt
Drücken Sie die Taste Sound, um einzustellen, ob SoundEffekte ausgegeben werden sollen oder nicht.
■ Bei jedem Drücken auf die Taste Sound wird zwischen der
Wiedergabe von Sound-Effekten und dem Stumm → Modus
umgeschaltet.
- Sound Effects (Sound-Effekte): Mit Sound-Effekten
- Stumm: Ohne Sound-Effekte oder Ansagen
Betrieb _33
DJ68-00664B.indb 33
2012.6.16 11:10:15 AM
Wartung von Zubehör und Filtern
REINIGEN DES ROBO-SAUGERS
Hinweise zu Reinigung und Wartung
■ Wenn der Hauptschalter am Sauger beschädigt ist, wenden Sie
sich an den Kundendienst von Samsung, damit keine Unfalle
passieren.
■ Benutzen Sie keine Hilfsmittel oder mechanischen Vorrichtungen,
die nicht vom Hersteller installiert wurden.
■ Schalten Sie stets den Hauptschalter
an der Geräteunterseite aus, ehe Sie
den Robo-Sauger reinigen. Der RoboSauger könnte plötzlich angehen und eine
Verletzung verursachen.
Reinigen der Sensorfenster und der Kamera
Schalten Sie stets den Hauptschalter an der Geräteunterseite
aus, ehe Sie den Robo-Sauger reinigen.
■ Sprühen Sie niemals Wasser, Verdünner, Reinigungsbenzin usw.
direkt auf den Robo-Sauger.
■ Wischen Sie das Sensorfenster und die
Kamera vorsichtig mit einem weichen Tuch
ab.
Kamera
Fenster der vorderen Sensoren
Fenster der vorderen
Sensoren und Kamera
Fenster der
Absturzsensoren
Fenster der hinteren
Sensoren
34_ Wartung
DJ68-00664B.indb 34
2012.6.16 11:10:15 AM
Reinigen des Staubbehälters und der Filter
04 WARTUNG
Entleeren Sie vor dem Reinigen den Staubbehälter.
■ Wenn Sie den Staubbehälter herausnehmen, achten Sie sorgfältig
darauf, den Staub aus dem Behälter nicht zu verschütten.
■ Leeren Sie den Staubbehälter in folgenden Situationen:
1. Staub hat sich im Staubbehälter angesammelt.
2. Die Saugleistung geht plötzlich zurück.
3. Das Betriebsgeräusch wird lauter.
1. Drücken Sie die Freigabetaste für den Staubbehälter (PUSH) und
ziehen Sie den Staubbehälter heraus.
2. Öffnen Sie den Deckel des Staubbehälters, indem Sie ihn in
Richtung des in der Abbildung dargestellten Pfeils ziehen.
3. Nehmen Sie den Filter und den Gewebefilter vom
Staubbehälter ab.
Filter
Gewebefilter
4. Entfernen Sie den Staub von Filter, Gewebefilter und Staubbehälter.
❈ Sie können diese Teile mit Wasser abwaschen.
Nach dem Reinigen mit Wasser:
1. Staubbehälter: Wischen Sie den Staubbehälter
HINWEIS
vollständig trocken.
2. Filter, Gewebefilter: Wischen Sie diese vollständig
trocken und setzen Sie sie dann wieder ein.
5. Setzen Sie den Filter und den Gewebefilter wieder in den
Staubbehälter auf.
- Achten Sie beim Einsetzen des Gewebefilters darauf,
dass die Gitterseite nach unten zeigt. Ist der Filter nicht
richtig ausgerichtet, lässt er sich nicht wieder einsetzen.
VORSICHT
Wird der Staubbehälter ohne Filter eingesetzt, wird der Fehlercode C08 angezeigt.
Vergewissern Sie sich, dass die Filter eingebaut sind.
6. Schließen Sie den Deckel des Staubbehälters und setzen Sie den
Behälter wieder in den Robo-Sauger ein.
Wartung _35
DJ68-00664B.indb 35
2012.6.16 11:10:15 AM
REINIGEN DES ROBO-SAUGERS
REINIGEN DER HAUPTBÜRSTE
Schalten Sie stets den Hauptschalter an der
Geräteunterseite aus, ehe Sie den Robo-Sauger reinigen.
• Da der Staub aus dem Staubbehälter herausfallen kann,
entfernen Sie den Staubbehälter, ehe Sie die Hauptbürste
VORSICHT
reinigen.
1. Nachdem Sie überprüft haben, ob Fremdstoffe vorhanden sind,
drücken Sie den Haken, mit dem die Bürstenabdeckung fixiert
wird, um die Abdeckung zu lösen.
2. Nehmen Sie die Hauptbürste aus dem Robo-Sauger heraus.
3. Entfernen Sie Fremdstoffe (z. B. lange Haare oder Fäden),
die sich um die Hauptbürste gewickelt haben, mit Hilfe einer
Reinigungsbürste oder eines Staubsaugers.
36_ Wartung
DJ68-00664B.indb 36
2012.6.16 11:10:16 AM
4. Nach dem Reinigen setzen Sie die Hauptbürste zuerst auf der
Seite gegenüber dem Hauptschalter ein, und befestigen Sie
dann die andere Seite der Bürste ebenso.
04 WARTUNG
5. Setzen Sie dabei das Teil am seitlichen Rand in die
vorhandenen Nuten ein. Drücken Sie es dann vorsichtig
nach unten, bis es einrastet.
VORSICHT
• Um zu verhindern, dass der Robo-Sauger verstopft, achten Sie darauf, keine Fremdkörper
aufzusaugen.
• Wenn sich die Fremdstoffe nur mit Schwierigkeiten entfernen lassen, wenden Sie sich an ein
Kundendienstcenter.
• Da die Saugbürste den Staub vom Boden aufnimmt, können sich lange Fäden oder Haare um
die Bürste wickeln. Kontrollieren und reinigen Sie die Hauptbürste regelmäßig.
Wartung _37
DJ68-00664B.indb 37
2012.6.16 11:10:16 AM
Reinigen der rotierenden Seitenbürsten für die Kantenreinigung
Schalten Sie stets den Hauptschalter an der
Geräteunterseite aus, ehe Sie den Robo-Sauger reinigen.
1. Kontrollieren Sie, ob die Seitenbürsten verbogen sind, oder ob
Fremdstoffe an den Bürsten haften.
2. Ziehen Sie Gummihandschuhe an und wickeln Sie die
Seitenbürsten in ein Tuch ein, das Sie vorher 10 Sekunden
lang in heißes Wasser getaucht haben Wischen Sie die Bürste
vorsichtig mit dem Tuch ab.
3. Drehen Sie die Seitenbürsten und wiederholen Sie den Vorgang
aus Schritt 2.
4. Wenn sich Haare oder Fäden zwischen dem Robo-Sauger und
den Seitenbürsten verfangen haben, lösen Sie die Schrauben
der Seitenbürsten mit Hilfe eines Kreuzschlitzschraubendrehers
und ziehen Sie die Bürsten ab. Wenn Sie die Bürsten wieder
einbauen, bringen Sie die L-Markierungen an der Seitenbürste
und am Sauger übereinander und bauen Sie die Seitenbürste
dann wieder ein. (Die rechte Seitenbürste ist mit dem
Buchstaben “R” markiert.)
HINWEIS
L
Da die rotierenden Seitenbürsten leicht Haare und andere Fremdstoffe anziehen, reinigen Sie die
Bürsten regelmäßig und in kurzem Abstand.
Zu viele Fremdstoffe an den Seitenbürsten können die Bürsten beschädigen.
38_ Wartung
DJ68-00664B.indb 38
2012.6.16 11:10:16 AM
Reinigen der Antriebsräder
04 WARTUNG
Schalten Sie stets den Hauptschalter an der Geräteunterseite
aus, ehe Sie den Robo-Sauger reinigen.
■ Wenn der Robo-Sauger plötzlich im Zickzack zu fahren beginnt,
kann es sein, dass Fremdstoffe an den Antriebsrädern haften.
1. Zum Reinigen der Antriebsräder legen Sie ein weiches Tuch auf den
Boden und legen Sie den Sauger vorsichtig mit der Oberseite nach
unten ab.
2. Kontrollieren Sie das Gerät auf Fremdstoffe und entfernen Sie diese
mit Hilfe eines Stäbchens oder einer abgerundeten Pinzette.
Wartung _39
DJ68-00664B.indb 39
2012.6.16 11:10:16 AM
Fehlersuche
CHECKLISTE ZUR SELBSTHILFE
Störung
Der Robo-Sauger
lässt sich nicht in
Betrieb nehmen.
Checkliste
Maßnahme
• Ist der Staubbehälter eingesetzt?
• Setzen Sie den Staubbehälter ein.
• Ist der Hauptschalter
eingeschaltet?
• Schalten Sie das Gerät am
Hauptschalter ein.
• Wird der Reinigungsmodus
am Display angezeigt?
• Drücken Sie die Taste
. (Zum
Ausschalten halten Sie die Taste
mindestens 3 Sekunden lang
gedrückt.)
• Blinkt in der Ladestandsanzeige
• Heben Sie den Robo-Sauger an
nur eine Stufe und wird am Display
und docken Sie ihn manuell an die
„Lo“ angezeigt?
Ladestation an, um ihn aufzuladen.
• Der Robo-Sauger kann nicht in
• Ersetzen Sie die Batterien in der
Fernbedienung. (Typ AAA)
Betrieb genommen werden, wenn
die Batterien in der Fernbedienung
leer sind.
Der Robo-Sauger
stellt plötzlich den
Saugbetrieb ein.
• Blinkt in der Ladestandsanzeige
• Heben Sie den Robo-Sauger an
nur eine Stufe und wird am Display
und docken Sie ihn manuell an die
„Lo“ angezeigt?
Ladestation an, um ihn aufzuladen.
• Hat sich der Robo-Sauger in einem • Schalten Sie das Gerät über den
Kabel auf dem Boden verfangen?
Hauptschalter aus und entfernen
Sie die Kabel.
Die Saugleistung ist
gering.
• Bleibt der Robo-Sauger an einer
Bodenkante (Höhenunterschied)
hängen?
- Das Antriebsrad hat keinen
Bodenkontakt.
• Schalten Sie das Gerät am
Hauptschalter aus und bringen Sie
den Robo-Sauger an eine andere
Stelle, um den Saugvorgang
fortzusetzen.
• Hat sich ein dünnes Tuch um das
Antriebsrad gewickelt?
• Schalten Sie das Gerät über den
Hauptschalter aus und entfernen
Sie das Tuch.
• Steckt der Robo-Sauger an einer
Türschwelle fest?
• Schalten Sie das Gerät am
Hauptschalter aus und bringen Sie den
Robo-Sauger an eine andere Stelle,
um den Saugvorgang fortzusetzen.
• Prüfen Sie, ob der Staubbehälter
voll ist.
• Halten Sie den Robo-Sauger an
und leeren Sie den Staubbehälter.
• Prüfen Sie, ob der Einlass durch
Fremdstoffe blockiert wird.
• Schalten Sie das Gerät am
Hauptschalter aus und entfernen
Sie die Fremdstoffe.
• Kontrollieren Sie, ob der Filter
verstopft ist.
• Säubern Sie gründlich den Filter.
40_ Fehlersuche
DJ68-00664B.indb 40
2012.6.16 11:10:16 AM
Störung
Checkliste
Maßnahme
Der Robo-Sauger
• Prüfen Sie, ob das Netzkabel
findet die Ladestation
der Ladestation richtig mit der
nicht.
Steckdose verbunden ist.
05 FEHLERSUCHE
• Es dürfen sich rechts und links
im Abstand von 0,5 m und vorn
im Abstand von 1 m von der
Ladestation keine Hindernisse
befinden. Entfernen Sie diese ggf.
• Wenn Fremdstoffe am Ladekontakt
haften, wischen Sie diese mit
einem trockenen Tuch ab.
• Wurde der VIRTUAL GUARD in der • Setzen Sie den VIRTUAL GUARD
Nähe der Ladestation installiert?
an eine andere Stelle, damit
der Robo-Sauger automatisch
aufladen kann.
Der Robo-Sauger
kann den VIRTUAL
GUARD passieren.
• Sind die Batterien des VIRTUAL
GUARD verbraucht?
• Ersetzen Sie die Batterien.
(2 Alkali-Batterien, Typ D, LR20)
• Ist die Modusanzeige
ausgeschaltet?
• Überprüfen Sie, ob der VIRTUAL
GUARD ausgeschaltet ist und
stellen Sie den VIRTUAL GUARD
dann in den gewünschten Modus.
Die Laufzeit der
Batterien des
VIRTUALGUARD ist
zu kurz.
• Verwenden Sie ManganTrockenzellen?
• Ersetzen Sie diese durch neue
Alkali-Batterien.
(2 Alkali-Batterien, Typ D, LR20)
Der Robo-Sauger
fängt plötzlich beim
Saugen an, diagonal
zu fahren.
• Der Robo-Sauger fährt in
• Der Richtung beim Saugprozess
diagonaler Richtung in folgenden
ist vom Ausgangsort abhängig.
Situationen:
Da der Robo-Sauger den Bereich
nach einem bestimmten Muster
- nach einem Ladevorgang, wenn
reinigt, wird nach und nach der
die Ladestation in einer Ecke steht.
gesamte Bereich abgefahren.
- wenn der Robo-Sauger, nachdem
(Normalbetrieb)
ein Bereich gereinigt wurde, zu
Installieren Sie die Ladestation
einem neuen, zu reinigenden
so, dass sie parallel zur
Bereich auf einem verkürzten Weg
Holzmaserung steht. Starten Sie
fährt,
den Saugprozess, während der
- wenn die Fahrtrichtung in Bezug
Robo-Sauger an der Ladestation
auf ein vorhandenes Hindernis
angedockt ist.
nicht rechtwinklig zum Hindernis
ist,
- wenn es sich um Holz- oder
Fliesenböden handelt.
Fehlersuche _41
DJ68-00664B.indb 41
2012.6.16 11:10:17 AM
FEHLERCODES UND FEHLERBEHEBUNG
Fehlercode
Ursache
• Der Robo-Sauger hat sich
beim Fahren verfangen,
verklemmt oder hängt fest.
Fehlerbehebung
• Schalten Sie das Gerät am Hauptschalter an
der Geräteunterseite aus und bringen Sie den
Robo-Sauger an eine andere Stelle.
• Fremdstoffe (Schnur, Papier, • Schalten Sie das Gerät am Hauptschalter an
Spielzeug usw.) sitzen an der
der Geräteunterseite aus und entfernen Sie die
Hauptbürste fest.
Fremdstoffe von der Hauptbürste.
• Fremdstoffe (Schnur, Papier,
Spielzeug usw.) sitzen am
linken Antriebsrad fest.
• Schalten Sie das Gerät am Hauptschalter an
der Geräteunterseite aus und entfernen Sie die
Fremdstoffe vom linken Antriebsrad.
• Fremdstoffe (Schnur, Papier,
Spielzeug usw.) sitzen am
rechten Antriebsrad fest.
• Schalten Sie das Gerät am Hauptschalter an
der Geräteunterseite aus und entfernen Sie die
Fremdstoffe vom rechten Antriebsrad.
• Überprüfen Sie den
Hindernissensor.
• Schalten Sie das Gerät am Hauptschalter an
der Geräteunterseite aus. Räumen Sie das
Hindernis aus dem Weg oder bringen Sie den
Robo-Sauger an eine andere Stelle.
• Fremdstoffe (Staub,
Schmutz usw.) befinden
sich auf den Sensorfenstern
(Hindernissensoren).
• Schalten Sie das Gerät am Hauptschalter an
der Geräteunterseite aus und entfernen Sie
die Fremdstoffe an den Sensorfenstern an der
Gerätevorder- und -rückseite mit Hilfe eines
weichen Tuches.
• Fremdstoffe (Staub,
Schmutz usw.) befinden
sich auf den Sensorfenstern
(Absturzsensoren)
• Schalten Sie das Gerät am Hauptschalter an
der Geräteunterseite aus und entfernen Sie die
Fremdstoffe an den Sensoren mit Hilfe eines
weichen Tuches.
• Der Staubbehälter ist nicht
eingesetzt.
• Setzen Sie den Staubbehälter so ein, dass er
hörbar einrastet.
• Fremdkörper (Schnur,
• Schalten Sie das Gerät am Hauptschalter
Kleidungsstücke usw.) haben
an der Geräteunterseite aus und entfernen
sich in den rotierenden
Sie die Fremdstoffe aus den rotierenden
Seitenbürsten verfangen.
Seitenbürsten.
❈ Zum Löschen eines Fehlercodes drücken Sie die Taste Start/Stop oder schalten Sie den Hauptschalter
an der Geräteunterseite aus.
42_ Fehlersuche
DJ68-00664B.indb 42
2012.6.16 11:10:17 AM
Technische Daten
80 mm (Höhe)
350 mm (Länge)
161 mm (Länge)
350 mm (Breite)
Robo-Sauger
Klassifikation
Mechanisch
Elektrisch
275 mm (Breite)
Ladestation
Bezeichnung
SR8930* SERIE
Durchmesser
350 mm
Höhe
80 mm
Gewicht
3,2 kg
Netzspannung
AC 220 - 240 V~, 50 - 60 Hz
Leistungsaufnahme der Ladestation
40 W
Leistungsaufnahme des RoboSauger
40 W
Akku
14,4 V / 31,68Wh
Ladeverfahren
Automatisch/manuell laden
Reinigungsmodi
Automatik-, Punkt-, Maximalmodus,
manueller Modus, Startzeitvorwahl
Ladezeit
Etwa 180 Minuten
Betriebszeit
(auf hartem Untergrund)
Etwa 100 Minuten
Reinigung
Reinigungsmethode
Deckenformerkennung
Tastentyp am Robo-Sauger
Touch-Tasten
06 TECHNISCHE DATEN
122 mm (Höhe)
Dieses Gerät erfüllt die nachfolgenden
Richtlinien: EMV-Richtlinie 2004/108/EG
Niederspannungsrichtlinie 2006/95/EG
Technische Daten _43
DJ68-00664B.indb 43
2012.6.16 11:10:17 AM
OPEN SOURCE ANNOUNCEMENT
Some software components of this product incorporate source code covered under the BSD.
And this software is based in part on the work of the Independent JPEG Group.
■ OpenCV :
IMPORTANT : READ BEFORE DOWNLOADING, COPYING, INSTALLING OR USING.
By downloading, copying, installing or using the software you agree to this license.
If you do not agree to this license, do not download, install, copy or use the software.
License Agreement
For Open Source Computer Vision Library
Copyright (C) 2000-2008, Intel Corporation, all rights reserved.
Copyright (C) 2008-2010, Willow Garage Inc., all rights reserved.
Third party copyrights are property of their respective owners.
Redistribution and use in source and binary forms, with or without modification, are permitted provided
that the following conditions are met:
Redistribution’s of source code must retain the above copyright notice, this list of conditions and the
following disclaimer.
Redistribution’s in binary form must reproduce the above copyright notice, this list of conditions and the
following disclaimer in the documentation and/or other materials provided with the distribution.
The name of the copyright holders may not be used to endorse or promote products derived from this
software without specific prior written permission.
This software is provided by the copyright holders and contributors “as is” and any express or implied
warranties, including, but not limited to, the implied warranties of merchantability and fitness for a
particular purpose are disclaimed.
In no event shall the Intel Corporation or contributors be liable for any direct, indirect, incidental, special,
exemplary, or consequential damages (including, but not limited to, procurement of substitute goods
or services; loss of use, data, or profits; or business interruption) however caused and on any theory of
liability, whether in contract, strict liability, or tort (including negligence or otherwise) arising in any way out
of the use of this software, even if advised of the possibility of such damage.
■ Copyright (c) 2006, 2008, 2009, 2010 Edward Rosten
All rights reserved.
Redistribution and use in source and binary forms, with or without modification, are permitted provided
that the following conditions are met:
Redistributions of source code must retain the above copyright notice, this list of conditions and the
following disclaimer.
Redistributions in binary form must reproduce the above copyright notice, this list of conditions and the
following disclaimer in the documentation and/or other materials provided with the distribution.
Neither the name of the University of Cambridge nor the names of its contributors may be used to
endorse or promote products derived from this software without specific prior written permission.
THIS SOFTWARE IS PROVIDED BY THE COPYRIGHT HOLDERS AND CONTRIBUTORS “AS
IS” AND ANY EXPRESS OR IMPLIED WARRANTIES, INCLUDING, BUT NOT LIMITED TO, THE
IMPLIED WARRANTIES OF MERCHANTABILITY AND FITNESS FOR A PARTICULAR PURPOSE ARE
DISCLAIMED. IN NO EVENT SHALL THE COPYRIGHT OWNER OR CONTRIBUTORS BE LIABLE FOR
ANY DIRECT, INDIRECT, INCIDENTAL, SPECIAL, EXEMPLARY, OR CONSEQUENTIAL DAMAGES
(INCLUDING, BUT NOT LIMITED TO, PROCUREMENT OF SUBSTITUTE GOODS OR SERVICES;
LOSS OF USE, DATA, OR PROFITS; OR BUSINESS INTERRUPTION) HOWEVER CAUSED AND ON
ANY THEORY OF LIABILITY, WHETHER IN CONTRACT, STRICT LIABILITY, OR TORT (INCLUDING
NEGLIGENCE OR OTHERWISE) ARISING IN ANY WAY OUT OF THE USE OF THIS SOFTWARE, EVEN
IF ADVISED OF THE POSSIBILITY OF SUCH DAMAGE.
DJ68-00664B.indb 44
2012.6.16 11:10:17 AM
memo
DJ68-00664B.indb 45
2012.6.16 11:10:17 AM
Falls Sie Fragen oder Anregungen zu Samsung-Produkten haben,
wenden Sie sich bitte an den Samsung-Kundendienst.
01805 - SAMSUNG(726-7864 € 0,14/Min. aus dem dt.
Festnetz, max. € 0,42/Min. aus Mobilnetzen)
www.samsung.com
DJ68-00664B.indb 46
2012.6.16 11:10:18 AM
SR8930
Vacuum Cleaning Robot
user manual
This manual is made with 100 % recycled paper.
✻ Before operating this unit, please read the instructions carefully.
✻ For indoor use only.
English
imagine the possibilities
Thank you for purchasing a Samsung product.
To receive a more complete service,
please register your product at
www.samsung.com/register
DJ68-00664B.indb 01
2012.6.16 11:10:18 AM
safety information
SAFETY INFORMATION
• Before operating the appliance, please read this manual thoroughly and retain it for your
reference.
• Because these following operating instructions cover various models, the characteristics of your
WARNING
vacuum cleaner may differ slightly from those described in this manual.
WARNING
CAUTION/WARNING SYMBOLS USED
WARNING
CAUTION
Indicates that a danger of death or serious injury exists.
Indicates that a risk of personal injury or material damage exists.
OTHER SYMBOLS USED
Indicates that a risk of personal injury or material damage exists.
NOTE
02_ safety information
DJ68-00664B.indb 02
2012.6.16 11:10:18 AM
IMPORTANT SAFETY INSTRUCTIONS
When using an electrical appliance, basic precautions should be observed, including the following:
READ ALL INSTRUCTIONS BEFORE USING YOUR VACUUM CLEANING
ROBOT.
Unplug from outlet when not in use and before conducting maintenance.
WARNING: to reduce the risk of fire, electric shock, or injury:
GENERAL
• Use only as described in this manual.
• Do not operate the vacuum cleaning robot or charger if it has been damaged in any way.
• If the cleaner is not working as it should, has been dropped, damaged, left outdoors, or
dropped in water, return it to a customer care center.
• Do not handle the charger or vacuum cleaning robot with wet hands.
• Use only on dry, indoor surfaces.
• This appliance is not intended for use by persons (including children) with reduced physical,
sensory or mental capabilities, or lack of experience and knowledge, unless they have been
given supervision or instruction concerning use of the appliance by a person responsible for
their safety.
• Children should be supervised to ensure that they do not play with the appliance.
BATTERY CHARGER
•
•
•
•
•
•
•
•
•
•
•
Do not modify the polarized plug to fit a non-polarized outlet or extension cord.
Do not use outdoors or on wet surfaces.
Unplug the charger from the outlet when not in use and before servicing.
Use only the charger supplied by the manufacturer to recharge.
Do not use with a damaged cord or plug.
Do not pull or carry by the cord, use the cord as a handle, close the door on the cord, or pull
the cord around sharp edges or corners. Keep the cord away from heated surfaces.
Do not use extension cords or outlets with inadequate current carrying capacity.
Do not unplug by pulling on the cord. To unplug, grasp the plug, not the cord.
Do not mutilate or incinerate batteries as they will explode at high temperatures.
Do not attempt to open the charger. Repairs should only be carried out by a qualified customer
care centre.
Do not expose the charger to high temperatures or allow moisture or humidity of any kind to
come into contact with the charger.
safety information _03
DJ68-00664B.indb 03
2012.6.16 11:10:18 AM
safety information
VACUUM CLEANING ROBOT
• Do not pick up hard or sharp objects such as glass, nails, screws, coins, and etc.
• Do not use without a filter in place. When servicing the unit, never put fingers or other objects
into the fan chamber in case the unit accidentally turns on.
• Do not put any objects into openings. Do not use with any openings blocked; keep openings
free of dust, lint, hair, and anything that may reduce air flow.
• Do not pick up toxic materials (chlorine bleach, ammonia, drain cleaner, etc.).
• Do not pick up anything that is burning or smoke, such as cigarettes, matches, or hot ashes.
• Do not use to pick up flammable or combustible liquids such as gasoline, nor use on areas
where they may be present.
• Do not use vacuum cleaning robot in an enclosed space filled with vapours given off by oil
based paint, paint thinner, moth proofing substances, flammable dust, or other explosive or
toxic vapours.
• Leaks from battery cells can occur under extreme usage or temperature conditions. If the liquid
gets on skin, wash quickly with water. If the liquid gets into the eyes, flush them immediately
with clean water for a minimum of 10 minutes. Seek medical attention.
04_ safety information
DJ68-00664B.indb 04
2012.6.16 11:10:18 AM
contents
SAFETY INFORMATION
02
06
07
10
11
Power Related
Before Use
In Use
Cleaning and Maintenance
PRODUCT FEATURES
13
ASSEMBLING THE CLEANER
15 Components
16 Name of each part
15
OPERATING THE CLEANER
20
MAINTAIN TOOLS AND FILTERS
34
TROUBLESHOOTING
20 Installing the vacuum cleaning robot
20 Installation order
20 Turning the Power Switch on or off
21 Installing the charger
22 Charging
23 About the Battery
24 Installing the VIRTUAL GUARD
26 Using the vacuum cleaning robot
26 Starting/Stopping Cleaning
27 Recharging
28 Auto Cleaning
29 Spot Cleaning
30 Max Cleaning
31 Manual Cleaning
32 Delay Start
33 Additional Functions
33 Using additional functions
34 Cleaning the vacuum cleaning robot
34 Please keep the cleaning and maintenance
methods in mind
34 Cleaning the Sensor Window and the Camera
35 Cleaning the Dust Bin and the Filters
36 Cleaning the vacuum cleaning robot
36 Cleaning the Power Brush
38 Cleaning the Edge-Cleaning Side rotating Brush
39 Cleaning the Driving Wheel
40 Checklist before SVC Calls
42 Troubleshooting for Error Codes
40
PRODUCT SPECIFICATION
43
contents _05
DJ68-00664B.indb 05
2012.6.16 11:10:18 AM
safety information
POWER RELATED
WARNING
WARNING
Do not bend the power cord forcefully or place a heavy object
on it that could break it.
- This may result in fire or electric shock.
Make sure to remove any dust or water from the power plug.
- Failing to do so may result in a malfunction or electric shock.
WARNING
Do not pull the power plug by the cord or touch the plug with
wet hands.
- This may result in fire or electric shock.
WARNING
Do not use multiple plugs in a single socket.
(Do not leave the cord lying exposed on the floor.)
- This may result in fire or electric shock.
WARNING
Do not use a damaged power cord, plug, or a loose power
outlet.
- This may result in fire or electric shock.
06_ safety information
DJ68-00664B.indb 06
2012.6.16 11:10:18 AM
BEFORE USE
CAUTION
CAUTION
CAUTION
CAUTION
CAUTION
CAUTION
01 SAFETY INFORMATION
CAUTION
Before activating the vacuum cleaning robot, make sure that
the dust bin is assembled.
- If the dust bin is not inserted, vacuum cleaning robot will not
operate.
Never use vacuum cleaning robot in locations with combustible
material such as.
- Locations with candles or desk lamps on the floor.
- Locations with unattended fires (fire or embers).
- Locations with gasoline, distilled alcohol, thinner, ashtrays with
burning cigarettes, etc.
Vacuum cleaning robot is for domestic use only. Do not use it in the following
locations.
- Attics, basements, warehouses, industrial buildings, separate rooms distant from the
main building, locations exposed to wet or damp conditions such as bathrooms or wash
rooms, and narrow and highly situated locations such as tables or shelves. Critical damage
(abnormal operation and breakage) may occur when used in these locations.
Open all doors to clean all rooms.
- When a door is closed, the vacuum cleaning robot will not be able to enter that room.
- However, make sure to close the doors to the main entrance, the veranda and the
bathroom, and any other rooms where the vacuum cleaning robot may fall to a lower floor.
Do not use the cleaner on a black floor.
- The vacuum cleaning robot may not run normally in this case.
For carpets with long tassels, fold the tassels under the carpet.
- Unfolded tassels may result in critical damage to the carpet and
the machine itself, as they get caught in the driving wheel or the
power brush.
When the cliff sensor is polluted, the vacuum cleaning robot
may be in danger of falling down the stairs.
This may cause personal injury and critical damage to the
product.
To prevent risk, install the VIRTUAL GUARDs (Fence Mode
setting) in front of dagerous areas. Clean the sensor window
and camera.
safety information _07
DJ68-00664B.indb 07
2012.6.16 11:10:19 AM
CAUTION
CAUTION
CAUTION
CAUTION
CAUTION
CAUTION
CAUTION
Remove small objects or brittle items from the area to be
cleaned in advance.
- Make sure to clear any objects before cleaning.
- Make sure to remove fragile items such as china, glass objects,
flowerpots, etc.
- Vacuum cleaning robot does not recognize coins, rings or other
valuable items such as jewelry.
Remove objects scattered on the floor before cleaning.
- Vacuum cleaning robot is designed to detect obstacles 5cm away
from it.
- Bath towels, pads in front of bathrooms and sinks, entrances,
utility rooms, power cords, table cloths or belts can become
entangled in the driving wheel or power brush. This can cause
objects to fall from the table.
Inform all family members (or relevant parties) to be cautious
before cleaning or when using the Scheduled Cleaning Mode.
- Vacuum cleaning robot may run into children, causing them to fall.
Ensure that children do not step or sit on the vacuum cleaning
robot.
- Children may fall and injure themselves or critical damage may
occur to the product.
When a child or pet is left alone, make sure to turn off the
Power Switch of the vacuum cleaning robot.
- Vacuum cleaning robot may attract their attention.
- When the rotating wheel or brush catches fingers, feet, clothing or
hair, this may result in injury.
- If a child or pet is in the way of the vacuum cleaning robot, it may
be identified as an obstacle and the area may not cleaned.
- When the Power Switch is turned off, it will cut off the power
supply and deactivate all functions.
When installing the charger station, do not leave the power
cord exposed on the floor.
- When the vacuum cleaning robot automatically recharges or
passes by the charger station, it may drag the power cord around
with it.
Always keep the power cord of the charger plugged into the
outlet.
- Although the vacuum cleaning robot has a self-charging function,
if the power cord of the charger station is unplugged, it cannot
charge its battery automatically.
08_ safety information
DJ68-00664B.indb 08
2012.6.16 11:10:19 AM
CAUTION
WARNING
Objects in front of the charger will prevent the vacuum
cleaning robot from auto-charging itself.
- Clear the area.
m
t 0.5
abou
m
ut 0.5
abo
ab
ou
t
There should be no obstacles and cliffs 0.5m to the left and
right and within 1m of the front.
1m
m
t 0.5
m
abou
01 SAFETY INFORMATION
CAUTION
Install the charger in a location that can be easily accessed by
the vacuum cleaning robot.
- If the charger is installed in a corner, this may cause extra
movements and may disturb the automatic recharging process.
t 0.5
abou
WARNING
Do not short-circuit the charge pins with metal objects such
as chopsticks, screwdrivers, and etc.
- This will result in critical damage to the charger.
WARNING
Make sure that there is no trace of liquids on the charger
station.
- Failing to do so may result in fire or electric shock.
WARNING
WARNING
WARNING
ab
ou
t
1m
Make sure the vacuum cleaning robot does not vacuum or
move over liquids such as water, oil or pet litter.
- This may result in critical damage to the product.
- Liquids may spread through the wheels resulting in contamination.
Do not use the charger for other purposes.
- This may result in critical damage to the charger or cause a fire.
Do not install the charger station on a dark floor.
- If the floor where the charger station is installed is dark, it is hard for the vacuum cleaning
robot to return to it.
safety information _09
DJ68-00664B.indb 09
2012.6.16 11:10:19 AM
IN USE
CAUTION
You cannot use the vacuum cleaning robot on thick carpets.
- This may result in problems with the vacuum cleaning robot.
- This may result in damage to carpets.
CAUTION
Do not use the vacuum cleaning robot on a table or other high
locations.
- This may result in damage when the unit accidentally drops.
CAUTION
CAUTION
CAUTION
WARNING
Vacuum cleaning robot may bump into furniture such as chair
legs, table legs, thin and long furniture, etc. while operating.
- For a quicker and cleaner performance, place the chairs on top of
the table.
Do not place any objects on top of the vacuum cleaning robot.
- This may result in malfunction.
Immediately remove any large pieces of paper or plastic bags
from the machine while cleaning.
- Using the machine for an extended period of time with its inlet port
obstructed may result in critical damage to the product.
If an unusual sound, smell or smoke is emitted from the
vacuum cleaning robot, immediately turn off the Power Switch
and call the customer care center.
10_ safety information
DJ68-00664B.indb 10
2012.6.16 11:10:20 AM
CAUTION
NOTE
NOTE
01 SAFETY INFORMATION
NOTE
Do not move the robotic vacuum cleaner holding the dustbin
part.
- This may cause the dustbin to separate, resulting in injury or
serious damage to the product.
Vacuum cleaning robot may not be able to continue its
operation if it is stuck at the entrance or veranda doorsill.
- To resume operating, turn the Power Switch off and then on again
after moving it to a location where it can continue cleaning.
Vacuum cleaning robot cannot completely clean locations that
it cannot reach, such as corners, and spaces between sofas
and walls.
- Please clean these locations occasionally.
Dust clusters may remain after cleaning, when the vacuum cleaning robot fails to
pick up dust clusters that were formed while cleaning.
- In this case, sweep up the dust with another cleaning tool.
CLEANING AND MAINTENANCE
CAUTION
CAUTION
WARNING
When cleaning the product, do not spray water directly onto
the exterior or wipe it with a volatile material such as benzene,
thinner or alcohol.
- This may result in critical damage to the product.
The unit must not be disassembled or reconstructed by anyone
other than a qualified service engineer.
- This may result in damage to the product.
Remove any foreign substances accumulated on the Obstacle
and Cliff sensors on a regular basis.
- Dirt accumulated on the sensors will result in inaccurate
functioning of the sensors.
Cliff sensor
Obstacle sensor
safety information _11
DJ68-00664B.indb 11
2012.6.16 11:10:20 AM
WARNING
When removing foreign substances, always use the cleaning
brush after turning the Power Switch off.
- Failing to do so may result in sudden operation of the unit and
cause an injury or critical damage to the product.
Edge-cleaning side
brush
Power brush
WARNING
WARNING
WARNING
If the power cord is damaged, have it replaced by a qualified
service engineer from the customer care center.
- Failing to do so may result in fire or electric shock.
Before cleaning the charger, make sure to disconnect the
power cord for safety.
Contact the Samsung Electronics customer care center to
replace the battery.
- Failing to use original batteries will result in product failure.
12_ safety information
DJ68-00664B.indb 12
2012.6.16 11:10:20 AM
product features
CONVENIENT VIRTUAL GUARD FUNCTION
You can confine the vacuum cleaning robot to a particular section by using the Fence (virtual wall)
mode.
• What is ceiling shape recognition (Visionary
mapping plus™)?
This function recognizes the shape of the ceiling
using the camera on top to identify the area to be
cleaned and determines the best way to pass over
and clean every section of the floor.
DELICATE CLEANING OF EVERY CORNER
Since the vacuum cleaning robot cleans the floor in a sequential way ( ) along the map
determined by the ceiling shape recognition function, it cleans every corner of the floor.
VARIOUS CLEANING MODES
Various cleaning modes are provided to meet all your needs.
2
5
6
About 1.5m
3
4
About 1.5m
1
1. Auto Mode : Cleans all rooms automatically.
2. Spot Mode : Cleans a localized area intensely. It can be used to clean bread or cookie
crumbs.
3. Max Mode : Runs until the battery is nearly depleted.
4. Manual Mode : You can clean the floor manually by moving the cleaning robot.
5. Turbo Mode : Since the power brush rotates at maximum speed in this mode, the product will
clean more effectively.(You can switch the mode with the remote control.)
6. Delay Start : At the specified time, the cleaning robot cleans the floor.
product features _13
DJ68-00664B.indb 13
2012.6.16 11:10:21 AM
AUTO CHARGING
When the battery is low, the vacuum cleaning robot is
automatically guided to the charger to enable it to perform a
quick auto charge.
EDGE-CLEANING SIDE ROTATING BRUSH
The edge-cleaning side rotating brush cleans dust from the
edges.
DOORSILL CROSSING
About 1cm
Stair type
Vertical type
The vacuum cleaning robot innovative driving system makes
it possible for it to cross over doorsills with a height of about
1cm and clean all rooms. The vacuum cleaning robot may not
be able to pass a 1cm doorsill depending on the shape of the
doorsill.
AVOIDING OBSTACLES
When the vacuum cleaning robot encounters an obstacle while
cleaning, the obstacle sensor allows the cleaner to avoid it and
continue cleaning. (It may happen that the cleaner touches thin
or fine obstacles.)
ANTI-FALLING
The 3 Cliff sensors detect downward steps such as stairs or
the front door threshold to prevent vacuum cleaning robot from
falling down stairs.
SAFETY DEVICE
stop
When the vacuum cleaning robot is lifted up while cleaning,
the driving wheels, power brush, suction motor, and side
rotating brush are stopped autonati(all) by sensor.
14_ product features
DJ68-00664B.indb 14
2012.6.16 11:10:21 AM
assembling the cleaner
COMPONENTS
02 ASSEMBLING
■ Main Body
■ Remote Control
■ Charger (Station)
■ Others Components
(AAA-Type Batteries)
User Manual /
2 Battery
VIRTUAL GUARD
Spare Filter
Cleaning Brush
Quick Start Guide
assembling _15
DJ68-00664B.indb 15
2012.6.16 11:10:21 AM
NAME OF EACH PART
■ Main unit
Dustbin Eject Button
Display panel
Virtual Guard Sensor
Camera
Remote Control Sensor
Obstacle Sensor
Obstacle Sensor
Bumper Sensor
Front
Dustbin Eject Button
Dust bin
Remote Control Sensor
Side
Cliff Sensor
Driving Wheel
Rotating Side Brush
Power Switch
Charge Pin
Power Brush
Roller
Power Brush Cover
Cliff Sensor
Battery Cover
Charge Pin
Driving Wheel
Cliff Sensor
Bottom
16_ assembling
DJ68-00664B.indb 16
2012.6.16 11:10:22 AM
■ Charger (Station)
Charging lamp (green)
02 ASSEMBLING
Power lamp
(red)
Cord winder
Charging
terminals
Front
Back
■ VIRTUAL GUARD
Power Button
Lamp
Main Body Detection Sensor
Distance Detection Sensor
■ Installing the batteries
Batteries are not supplied with the product. You have to purchase the batteries separately. Install
the alkaline batteries (type D) before use.
1
Lift the cover of the VIRTUAL
GUARD while pressing the
locking tab.
2
3
Install the batteries into the
VIRTUAL GUARD as shown
by the figure below. (If the
batteries are installed with
the incorrect polarity, the
VIRTUAL GUARD will not
work.)
After inserting the tip of the
cover into the slot, push the
other end to close it until it
clicks into place.
❈ Specification: Alkaline Type D (LR20) batteries
assembling _17
DJ68-00664B.indb 17
2012.6.16 11:10:23 AM
■ Remote Control
Power
Recharging
Auto
Max
Directional
Buttons
Spot
(moving backwards is
not supported.)
Start/Stop
Manual
Turbo
Delay Start
Sound
■ Installing the Remote Control Batterise
Batteries are not installed in the remote control when purchasing the product.
Install the batteries (type AAA) before use.
1
Lift the battery compartment
cover at the back of the
remote control, while
pressing the locking tab.
2
3
Install the batteries into the
remote control as shown
by the figure below. (If the
batteries are installed with
the wrong polarity, the
remote control will not work.)
After inserting the tip of the
cover into the slot, push the
other end to close it until it
clicks into place.
❈ Specification: AAA type batteries
18_ assembling
DJ68-00664B.indb 18
2012.6.16 11:10:24 AM
■ Display panel
2
1
3
5
4
6
B
7
02 ASSEMBLING
A
C
8
DISPLAY PART
1.
2.
-
Number Display
Shows the timer display, progress status, and error codes using numbers, letters and graphics.
Battery Level Indicator
Charging : Shows the charging progress in 3 steps.
In Use : Shows the battery charge level. The battery charge level is reduced by each level from
FULL while operating. (When the battery is fully discharged, one level will flash to display “Lo”.)
3. Timer
- When cleaning is scheduled, the Timer icon is lit.
4. Dust Sensor Mode
- This icon turns on when Dust Sensor mode is enabled.
5. Cleaning Mode Display
- Each time the Cleaning Mode button is pressed, the corresponding cleaning mode is displayed.
(A) Auto Mode : This icon turns on when Auto cleaning mode is selected.
(B) Spot Mode : This icon turns on when Spot cleaning mode is selected.
(C) Max Mode : This icon turns on when Max cleaning mode is selected.
BUTTON PART
6. Cleaning Mode
) button to
- Press to select a cleaning mode. After selecting a cleaning mode, press the (
start cleaning.
7. Start/Stop
- Press to start/stop cleaning.
8. Recharging
- When this button is pressed, The cleaning robot will return to the charger station to charge its
battery.
assembling _19
DJ68-00664B.indb 19
2012.6.16 11:10:25 AM
operating the cleaner
INSTALLING THE VACUUM CLEANING ROBOT
Installation order
1. Turning the Power Switch on or off
To use the vacuum cleaning robot, you must turn on the Power Switch
at the bottom of the main unit.
2. Installing the Charger
To charge the vacuum cleaning robot, you must first install the charger.
Since the battery is discharged when the product is purchased, you
must fully charge the battery before use.
3. Charging the Battery
You should charge the battery completely before using the vacuum
cleaning robot.
4. Installing the VIRTUAL GUARD
You can confine the vacuum cleaning robot to a particular section by using Fence (virtual wall)
mode.
Turning the Power Switch on or off
To use the vacuum cleaning robot, you must turn the Power Switch
on.
If you turn off the Power switch, all settings except for the current
time and the Weekly reservations are reset.
❈ If no key is pressed for approximately 1 minute after turning the
power on, the power is automatically cut to prevent the battery
discharging.
To turn the power on again, press and hold the power (Start/
Stop) button on the main body.
1. Lift the body and turn on the power switch while making
sure not to press any other button.
- If the icons are not turned on, it indicates that the battery charge
is depleted. In this case, dock the vacuum cleaning robot to the
charger station after turning the Power Switch on.
- The configured time may be different from the current time. If the
configure time is incorrect, set the time to the current time.
CAUTION
If the Power Switch is turned off, the vacuum cleaning robot will
not be charged even if it is docked with the charger station.
20_ operating
DJ68-00664B.indb 20
2012.6.16 11:10:25 AM
Installing the charger
Power lamp
Charging lamp
03 OPERATING
1. Install the charger on a flat surface.
2. There should be no obstacles and cliffs 0.5m to the left and
right and within 1 m of the front.
m
t 0.5
t
abou
0.5m
abou
ab
ou
t1
m
3. Install the charger in a location where it can be easily accessed by
the vacuum cleaning robot.
4. Arrange the power cord along the wall.
5. When the floor is made of wood, install the charger in the same
direction as the grain of the wood.
NOTE
Always keep the power cord of the charger plugged
into the power outlet.
- If no power is supplied to the charger, the vacuum
cleaning robot will not be able to find the charger and will
not be able to charge automatically.
- If the vacuum cleaning robot is separated from the
charger, the battery is automatically discharged.
operating _21
DJ68-00664B.indb 21
2012.6.16 11:10:25 AM
Charging
When the product is initially purchased, the battery is fully
discharged, and you must charge the vacuum cleaning
robot manually.
Charging lamp
Power lamp
Turn on the Power Switch at the bottom of the product.
1. After aligning the charge pins of the main unit with
the charge pin of the charger station, press the main
unit until you hear a Recharging power sound from
the charger.
- The Charging Lamp turns green.
Power lamp
2. Check the charge status of the vacuum cleaning robot.
- When charging starts, “the amount of remaining battery power”
and “
” are displayed on the status display panel in this
sequence.
- When charging is complete, the battery level indicator and
“FULL” will be displayed in the display panel.
Flash
Flash
■ When the battery level display flashes while cleaning,
the vacuum cleaning robot stops vacuuming and
automatically charges itself at the charger.
■ If the vacuum cleaning robot starts the current cleaning
run at a location other than the charging station and fails
to locate the charging station while cleaning, it will stop
near the location where it started cleaning.
■ When the battery level flashes and “Lo” is displayed while
cleaning, vacuum cleaning robot cannot be operated by
the remote control or the buttons on the main unit. In
this case, directly carry the vacuum cleaning robot to the
charger to charge the battery. (This is when the battery is
completely discharged.)
Charging lamp
Charging
Fully charged
<Charge display>
Charge
Charging Required
complete
charging
22_ operating
DJ68-00664B.indb 22
2012.6.16 11:10:26 AM
NOTE
03 OPERATING
• When the product is initially purchased, it will take about 180 minutes to fully charge the
battery and will run for about 100 minutes.
• When charging the battery while the battery is over-heated, the charging time can increase.
• Measures to take when charging is not smooth.
When the vacuum cleaning robot cannot be automatically charged, check the following:
- Turn the Power Switch at the bottom of the vacuum cleaning robot off and on.
- Re-plug the power of the charger.
- Check whether there are any foreign substances on the charge connector and wipe
the charge connector on the main unit and the charger with a dry cloth.
- Check whether there are objects near the charger that are strong reflectors.
• When separating the vacuum cleaning robot from the charger, it will discharge naturally.
- Charge the vacuum cleaning robot through the charger, if possible. (When leaving
your home unattended for a long period of time due to a business trip, travelling etc.,
turn off the Power Switch of the vacuum cleaning robot and unplug the power of the
charger to store them.)
About the Battery
■ The vacuum cleaning robot is powered by an environment-friendly Lithuim-ion (Li-ion)
rechargeable battery, and an over-charge prevention function guarantees an extended life time.
■ The battery warranty period is 6 months from the date
of purchase.
■ When purchasing a battery, ask the customer care center
) and model number
for the genuine part symbol (
before purchasing it.
-
This battery is only for Samsung vacuum cleaning robot. It is strictly prohibited to use it for other
appliances or for other purposes.
Do not disassemble or modify the battery.
Charge it in a location with good ventilation.
Do not expose the battery to fire and do not heat it.
Do not connect any metallic objects to the (+) or (-) terminals of the battery.
Keep it indoors (0°C~40°C).
Before you discard product, dispose of batteries in an environmentally safe manner.
Do not discard this batteries with your regular household trash.
Follow all local regulations when disposing of old batteries.
❈ If the battery is out of order, do not disassemble it. Contact your nearest customer care center.
❈ An increased charging time and a shorter battery life indicates the near end of the battery life.
Please contact an authorized customer care center to replace your battery.
The rechargeable battery incorporated in this product is not user replaceable.
For information on its replacement, please contact your service provider.
operating _23
DJ68-00664B.indb 23
2012.6.16 11:10:26 AM
Installing the VIRTUAL GUARD
You can confine the vacuum cleaning robot to a
particular section by using Fence (virtual wall) mode.
Power Button
Lamp
Distance
Detection
Sensor
Main Body
Detection
Sensor
Button operations
1. Lamp operations
- Fence (virtual wall) Mode: The red lamp flashes.
- Off :The lamp is turned off.
2. Turn the Power Button on
- Whenever you press the Power button, Fence (virtual wall)
mode ➝ Power off is selected in this sequence.
❈ The distance of virtual wall is 2.5m at minimum and may
differ depending on surroundings and movement status of
the robot.
Forming a Fence (virtual wall)
VIRTUAL GUARD creates an invisible barrier that the vacuum
cleaning robot cannot cross.
E.g. in front of pots, furniture, the front door, and so on.
1. Turn the Fence (virtual wall) mode on using the Power
button.
- The mode lamp flashes red.
Distance
Sensor
2. Install the VIRTUAL GUARD in front of the area you
A fence (virtual wall)
want to block access from the vacuum cleaning robot. is formed.
- Install the VIRTUAL GUARD so that the distance detection
sensor can form an invisible barrier that the vacuum cleaning robot cannot cross.
24_ operating
DJ68-00664B.indb 24
2012.6.16 11:10:26 AM
About the IrDA sensor
CAUTION
03 OPERATING
• The infrared signal transmission may not be
[Infrared Signal Priority]
smooth in locations exposed to halogen lamps or
in outdoor locations.
• Vacuum cleaning robot uses 3 types of infrared
>
>
devices and a device may not work in front of
another device with a higher priority.
Remote
Virtual
Charger
• When controlling the vacuum cleaning robot
Control
guard
with the remote control, the vacuum cleaning
robot may cross the virtual fence of the VIRTUAL
GUARD or run against an obstacle, because the remote control signal has a higher priority than
the VIRTUAL GUARD signal.
• When using the vacuum cleaning robot in a small location or at a close distance, it may
malfunction due to interference of the infrared signals.
• Install the VIRTUAL GUARD away from the charger as auto charging may be interrupted if the
VIRTUAL GUARD is near the charger.
• If more than one vacuum cleaning robot is used simultaneously, they may malfunction due to
interference of the infrared signals.
operating _25
DJ68-00664B.indb 25
2012.6.16 11:10:26 AM
USING THE VACUUM CLEANING ROBOT
Starting/Stopping Cleaning
You can run or stop all vacuum cleaning robot functions.
■ Each vacuum cleaning robot function only runs when the
Power Switch is turned on.
■ When the vacuum cleaning robot is operating, press the (
button to cancel the operation and select a function.
)
Turning the power on or off
Turning the power on
-
Main unit: Press the (
) button.
Turning the power off
- Remote control: Press the [Power] button.
-
Main unit: Press and hold the (
) button down for 3 seconds.
❈ If no key is pressed for approximately 1 minute after turning the power
on, the power is automatically cut to prevent the battery discharging.
To turn the power on again, press and hold the power (Start/Stop)
button on the main body.
Using the remote
control
Starting or stopping cleaning
Starting
- Remote control : Press the Auto, Spot, Max, Manual button.
-
Main unit : Select Auto, Spot, Max mode by using the (
and then pressing the (
-
) button
) button.
When cleaning begins, the vacuum cleaning robot starts to move.
) button without selecting cleaning mode starts
❈ Pressing the (
to perform the Auto mode cleaning.
Stopping
) remote control or main unit button.
-
To stop, press the (
-
When cleaning is stopped, the vacuum cleaning robot stops.
Using the main unit
buttons
26_ operating
DJ68-00664B.indb 26
2012.6.16 11:10:27 AM
Recharging
You can have the vacuum cleaning robot return to the charger
to charge the battery by using the Recharging button.
03 OPERATING
)
■ When the vacuum cleaning robot is operating, press the (
button to cancel the operation and press the Recharging button.
1. Press the Recharging button.
”) is displayed on the display panel and the vacuum
- (“
cleaning robot returns to the charging station for recharging.
2. To stop the vacuum cleaning robot while it is returning to the charger,
press the (
) button.
3. To test the auto charge function, press the Recharging button when
the vacuum cleaning robot is less than 1.5m from the charger.
Using the remote
control
Troubleshooting when the vacuum cleaning robot does not
return to the charger
- Check the installation of the charger
- When the charger is in a location where the charger cannot guide
the vacuum cleaning robot to the charger.
- When the charger is more than 5m away from vacuum cleaning
robot.
: It may require a longer time for the vacuum cleaning robot to
return to the charger.
■ Manually charge the vacuum cleaning robot in the following cases.
- When the charger is installed in a corner.
- When the battery is fully discharged.
- When the vacuum cleaning robot is trapped by an obstacle
(furniture etc.)
- When the vacuum cleaning robot cannot pass over the doorsill to
the location where the charger is installed.
Using the main unit
buttons
1.
5m
ah
ea
d
operating _27
DJ68-00664B.indb 27
2012.6.16 11:10:27 AM
Auto Cleaning
The vacuum cleaning robot will move by itself and automatically
clean the house until cleaning is completed once.
■ If you press the Start/Stop button on the main unit or remote control
without selecting a cleaning mode, an automatic cleaning run starts.
■ If cleaning begins when the vacuum cleaning robot is docked with the
charger station, the time to return to the charger is decreased since the
vacuum cleaning robot remembers its original position while moving.
■ If the vacuum cleaning robot starts the current cleaning run at a location
other than the charging station and fails to locate the charging station
while cleaning, it will stop near the location where it started cleaning.
■ If the battery level becomes too low while cleaning, the vacuum cleaning robot will automatically
return to the charger station and resume cleaning after charging its battery. (Number of cleaning
operations resumed : Once)
Main unit button
Remote control
button
Configuration
Sequence
1. Set the mode.
▶
1time
2. Cancel the mode.
Normal Mode
NOTE
About the Resume Cleaning function
• If the vacuum cleaning robot has evaluated that cleaning is
complete, the resume cleaning function is not performed.
• If you move the vacuum cleaning robot when it is being
charged or press a button, the vacuum cleaning robot
judges cleaning to be complete and does not resume
cleaning.
CAUTION
• Do not move the vacuum cleaning robot when it is cleaning
or press a button while it is cleaning. Otherwise, the
vacuum cleaning robot judges cleaning to be complete and
starts cleaning again from the beginning.
• Each time you press the Turbo button, the Turbo icon on
the display panel is turned on or off sequentially. When the
Turbo icon is turned on, you can start cleaning in Turbo
mode.
Turbo Mode
Cleaning Complete
28_ operating
DJ68-00664B.indb 28
2012.6.16 11:10:27 AM
Spot Cleaning
Main unit button
Remote control
button
About 1.5m
About 1.5m
03 OPERATING
You can conveniently clean a specific area that has a a lot of
cookie crumbs, dust, and etc.
■ Move the vacuum cleaning robot to the location where you want to
perform a spot clean.
Configuration
Sequence
1. Set the mode.
▶
2time
2. Cancel the mode.
Normal Mode
-
In Spot cleaning mode, the vacuum cleaning robot cleans an area
with a length of 1.5m and a width of 1.5m.
When cleaning is completed, the vacuum cleaning robot will
display End, Stop, and Stand by.
NOTE
CAUTION
Turbo Mode
When the vacuum cleaning robot is docked with the charger
station, spot cleaning is not supported.
• Each time you press the Turbo button, the Turbo icon on
the display panel is turned on or off sequentially. When the
Turbo icon is turned on, you can start cleaning in Turbo
mode.
Cleaning Complete
operating _29
DJ68-00664B.indb 29
2012.6.16 11:10:28 AM
Max Cleaning
The vacuum cleaning robot automatically moves and cleans until
the battery runs out and the battery level flashes only one level.
■ If cleaning begins when the vacuum cleaning robot is docked with
the charger station, the time to return to the charger is decreased
since the vacuum cleaning robot remembers its original position while
moving.
■ If the vacuum cleaning robot starts the current cleaning run at
a location other than the charging station and fails to locate the
charging station while cleaning, it will stop near the location where it
started cleaning.
■ If the battery level becomes low while cleaning, the vacuum cleaning robot automatically returns
to the charger station and resumes cleaning after charging the battery. (Number of resumed
cleaning operations: Once)
Main unit button
Remote control
button
Configuration
Sequence
1. Set the mode.
▶
3time
2 times in charging mode
2. Cancel the mode.
NOTE
About the Resume Cleaning function
• If the vacuum cleaning robot judges cleaning to be
complete, resume cleaning is not performed.
• If you move the vacuum cleaning robot while it is being
charged or press a button, vacuum cleaning robot judges
cleaning to be complete (cleaning is not resumed).
CAUTION
Normal Mode
Turbo Mode
• Do not move the vacuum cleaning robot while it is cleaning
or press a button while cleaning. Otherwise, the vacuum
cleaning robot judges cleaning to be complete and starts
cleaning again from the beginning.
• Each time you press the Turbo button, the Turbo icon on
the display panel is turned on or off sequentially. When the
Turbo icon is turned on, you can start cleaning in Turbo
mode.
30_ operating
DJ68-00664B.indb 30
2012.6.16 11:10:28 AM
Manual Cleaning
Remote control button
03 OPERATING
You can move the vacuum cleaning robot to clean a particular
location directly by using the remote control.
■ Move the vacuum cleaning robot to the location where you want to
perform manual cleaning.
■ You can manually clean using the remote control only.
Configuration Sequence
1. Set the mode.
2. Cancel the mode.
NOTE
CAUTION
• When the vacuum cleaning robot is docked with the
charger station, manual cleaning is not supported.
• If there is no input for about 1 minute to switch to standby
mode.
• Each time you press the Turbo button, the Turbo icon on
the display panel is turned on or off sequentially. When the
Turbo icon is turned on, you can start cleaning in Turbo
mode.
Directional Buttons
(Forwards, Left, Right)
A backwards function is not
supported.
operating _31
DJ68-00664B.indb 31
2012.6.16 11:10:28 AM
Delay Start
In this mode, you can schedule the cleaner to start a once-off
cleaning run from a particular time.
■ A scheduled cleaning run is only performed when the cleaner is
docked to the charger station.
Remote Control
Blinks
Decrease
Increase
Decrease
Increase
Blinks
Blinks
Blinks
Blinks
-
Timeout
1. Press the Delay Start button.
- The current setting is
blinks.
displayed and
Press the Y or Z button to
set the hour.
2. Press the Delay Start button.
Press the Y or Z button to
set the cleaning mode.
- You can select either Auto or
Max cleaning mode.
3. Press the Delay Start button.
- The value you set will
blink and the settings are
completed.
- When the settings are
completed, the configured
are displayed.
time and
Blinks
Canceling the Settings
Configuration Sequence
-
If you press the Start/Stop button while the cleaner is charging
or you are setting the time, the settings are canceled.
Please take note that the settings are canceled if the cleaner
is detached from the charger station.
If there is no input for 1 minute while you are setting the time,
the cleaner exits Time Set mode automatically.
32_ operating
DJ68-00664B.indb 32
2012.6.16 11:10:29 AM
ADDITIONAL FUNCTIONS
Using additional functions
Turbo Mode
Each time you press the Turbo button, the Turbo icon on the
display panel is turned on or off sequentially.
On turbo (Turbo Mode) : The power brush rotates at
maximum speed.
Off turbo (Normal Mode) : The power brush rotates at normal
speed.
03 OPERATING
You can use the cleaning robot more easily and conveniently using various additional
functions.
■ You can only configure the additional functions with the remote control.
Selecting a Sound Effect
Press the Sound select button to select a sound effect.
■ Each time you press this button, Sound Effects → Mute is
selected in this sequence.
- Sound Effects : Plays sound effects.
- Mute : Plays no sound or announcements.
operating _33
DJ68-00664B.indb 33
2012.6.16 11:10:29 AM
maintain tools and filters
CLEANING THE VACUUM CLEANING ROBOT
Please keep the cleaning and maintenance methods in mind
■ When the Power Switch is damaged, please contact the service
agent so that it does not cause any accidents.
■ Do not use any means or mechanical devices not installed by the
manufacturer that could accelerate the deformation of the vacuum
cleaning robot.
■ Always turn off the power switch at the
bottom of the main unit before cleaning
the vacuum cleaning robot. The vacuum
cleaning robot could operate suddenly and
cause an injury.
Cleaning the Sensor Window and the Camera
You must turn off the Power Switch at the bottom of the main
unit before cleaning the vacuum cleaning robot.
■ Never spray water, thinner, benzene etc. directly onto the main unit
of vacuum cleaning robot.
■ Lightly wipe the sensor window or camera
using a soft cloth.
Camera
Front Sensor window
Front Sensor Window and
Camera
Cliff Sensor Window
Rear Sensor Window
34_ maintain
DJ68-00664B.indb 34
2012.6.16 11:10:29 AM
Cleaning the Dust Bin and the Filters
04 MAINTAIN
First, empty the dust bin before cleaning it.
■ When separating the dust bin, take care not to spill the dust out of the
dust bin.
■ Empty the dust bin in the following cases.
1. When dust has accumulated inside the dust bin.
2. When the suction power suddenly becomes weak.
3. When the noise suddenly increases.
1. Press the Dust Bin Eject (PUSH) button and pull the dust bin to
separate the dust bin.
2. Separate the dust bin cover by pulling it in the direction of the arrow
in the figure.
3. Remove the filter and the mesh filter from the dustbin.
NOTE
Filter
Mesh filter
4. Shake the dust from the filter, Mesh filter and dustbin.
❈ You can clean it with water.
After cleaning it with water :
1. Dustbin : Wipe the water off completely.
2. Filter, Mesh filter : Dry them completely and then
reassemble them.
5. Reassemble the filter and mesh filter onto the dustbin.
- Assemble the mesh filter while the grid side is facing
downward. If the orientation is not correct, you will not be
able to assemble it.
CAUTION
If the dustbin is assembled without the filter being mounted, the error code C08 occurs.
Make sure to mount the filter.
6. Close the dust bin cover and install it into the main unit.
maintain _35
DJ68-00664B.indb 35
2012.6.16 11:10:30 AM
CLEANING THE VACUUM CLEANING ROBOT
Cleaning the Power Brush
You must turn off the Power Switch at the bottom of the
main unit before cleaning the vacuum cleaning robot.
• Because the dust in the dust bin may come out, separate the
dust bin first before cleaning the power brush.
CAUTION
1. After checking whether there are any foreign substances, press
the hook that is fixing the brush cover to separate it.
2. Lift the power brush up from the main unit.
3. Remove any foreign substances such as long hairs or strings
wrapped around the power brush using a cleaning brush or a
vacuum cleaner.
36_ maintain
DJ68-00664B.indb 36
2012.6.16 11:10:30 AM
4. After a cleaning run, first fix the side of the power brush
opposite to the Power Switch and then fix the other side.
04 MAINTAIN
5. Insert the side into the two grooves and assemble it by
slightly sliding it down until it clicks into place.
CAUTION
• To prevent the vacuum cleaning robot from becoming clogged, be careful not to vacuum tooth
picks or cotton swabs.
• When removing foreign substances becomes difficult, contact a customer care center.
• Because the power brush vacuums the dust on the floor, long strings or hair can become
wrapped around the brush. Check and clean the power brush regularly.
maintain _37
DJ68-00664B.indb 37
2012.6.16 11:10:30 AM
Cleaning the Edge-Cleaning Side rotating Brush
You must turn off the Power Switch at the bottom of the
main unit before cleaning the vacuum cleaning robot.
1. Check whether the side rotating brush is bent or whether there
are any foreign substances stuck on the brush.
2. Wearing rubber gloves, wrap the side rotating brush with a cloth
using hot water for about 10 seconds and wipe it on the cloth.
3. Turning the side rotating brush, repeat the procedures in Step 2.
4. If hair or string is wrapped between the main unit and the side
rotating brush, undo the screw of the side rotating brush using
a (+) driver to remove it. When reassembling the brush, check
the “L” mark on the edge-cleaning side rotating brush and the
“L” mark on the main unit and then reassemble the side rotating
brush. (Letter “R” is carved at the right side rotating brush.)
NOTE
L
Because the side rotating brush easily attracts hair and other foreign substances, make sure to
clean it frequently.
Excessive foreign substances on the side rotating brush can damage the brush.
38_ maintain
DJ68-00664B.indb 38
2012.6.16 11:10:30 AM
Cleaning the Driving Wheel
04 MAINTAIN
You must turn off the Power Switch at the bottom of the main
unit before cleaning the robot.
■ If the vacuum cleaning robot suddenly starts to zigzag, there may be
foreign substances stuck on the driving wheel.
1. When cleaning the driving wheel, place a soft cloth on the floor and
flip the main unit, placing it down carefully.
2. Check for foreign substances and remove them using a stick or a
pair of blunt nippers if necessary.
maintain _39
DJ68-00664B.indb 39
2012.6.16 11:10:31 AM
troubleshooting
CHECKLIST BEFORE SVC CALLS
Symptom
Vacuum cleaning
robot does not
operate at all before
cleaning.
Vacuum cleaning
robot stopped
operating while
cleaning.
Checklist
Measure to Take
• Is the dust bin assembled?
• Install the dust bin.
• Is the Power Switch turned on?
• Turn on the Power Switch.
• Is cleaning mode
panel turned on?
button. (To turn it
in the display • Press the
button
off, press and hold the
down for 3 seconds or longer.)
• Is the battery level flashing only
one level and is ‘Lo’ displayed in
the display panel?
• Lift up the vacuum cleaning robot,
and manually dock the vacuum
cleaning robot onto the charger to
charge it.
• Vacuum cleaning robot will not
operate when the battery in the
remote control is depleted.
• Replace the batteries in the remote
control. (AAA type)
• Is the battery level flashing only
one level and is ‘Lo’ displayed in
the display panel?
• Lift up the vacuum cleaning robot,
manually dock the robot onto the
charger to charge it.
• Has the vacuum cleaning robot
become hooked on wires on the
floor?
• Turn off the Power Switch and
remove the wires.
• Is the vacuum cleaning robot stuck • Turn off the Power Switch and
to the floor where there is a height
move the cleaning vacuum
difference?
cleaning robot to another place to
clean.
- The driving wheel is lifted.
• Is there a thin towel (cloth)
• Turn off the Power Switch and
wrapped around the driving wheel?
remove the thin towel.
• Is the vacuum cleaning robot stuck • Turn off the Power Switch and
on the doorsill?
move the vacuum cleaning robot
to another place to clean.
The suction power is
weak while cleaning.
• Check whether the dust bin is full
of dust.
• Stop the vacuum cleaning robot
and empty the dust bin.
• Check whether the suction inlet is
clogged by foreign substances.
• Turn off the Power Switch and
remove the foreign substances on
the suction inlet.
• Check whether the filter is clogged. • Clean the filter well.
40_ troubleshooting
DJ68-00664B.indb 40
2012.6.16 11:10:31 AM
Symptom
Checklist
Measure to Take
Vacuum cleaning
• Check whether the power plug of
robot cannot find the
the charger is plugged correctly
charger.
into the outlet.
• If there are any foreign substances
on the change pin, wipe them off
with a dry towel.
• Is the VIRTUAL GUARD installed
near the charger?
• Move the VIRTUAL GUARD to
another place so that the vacuum
cleaning robot can charge
automatically.
Vacuum cleaning
• Are the batteries of the VIRTUAL
robot passes through
GUARD worn out?
the VIRTUAL GUARD.
• Is the lamp turned off?
• Replace the batteries.
(2 type D (LR20) alkaline batteries)
The battery usage
time of the VIRTUAL
GUARD is too short.
• Replace the batteries with new
alkaline batteries.
(2 type D (LR20) alkaline batteries)
• Are you using manganese drycell
batteries?
The vacuum cleaning • The vacuum cleaning robot may
robot suddenly
clean in a diagonal direction in the
performs its cleaning
following cases.
operation in the
- After the vacuum cleaning robot
diagonal direction.
has been charged while placed at
an angle in the charger station.
- When the vacuum cleaning robot
moves to another area by a
shortened route after cleaning an
area.
- When the angle of making
contact with an obstacle is not
perpendicular (90˚).
- When the floor is made of tiles or
wood.
05 TROUBLESHOOTING
• If there are any obstacles within a
range of about 1m in front of the
charger and about 0.5m range to
the left and right of the charger,
you should remove the obstacles.
• Check if the VIRTUAL GUARD
is turned off and then turn the
VIRTUAL GUARD on.
• The cleaning direction is
determined by the initial location.
Since it cleans areas by drawing a
map, it eventually covers the entire
area. (Normal operation)
Install the charging station in
the direction of the grain of the
wood, and start cleaning while the
vacuum cleaning robot is docked
with the charger station.
troubleshooting _41
DJ68-00664B.indb 41
2012.6.16 11:10:31 AM
TROUBLESHOOTING FOR ERROR CODES
ERROR CODE
CAUSE
SOLUTION
• Vacuum cleaning robot is
caught, stuck or trapped
while navigating.
• Turn off the Power Switch at the bottom and
move the vacuum cleaning robot to a different
location.
• A foreign substance (string,
paper, toy etc.) is caught in
the power brush.
• Turn off the Power Switch at the bottom and
remove the foreign substance from the power
brush.
• A foreign substance (string,
paper, toy etc.) is caught in
the left driving wheel.
• Turn off the Power Switch at the bottom and
remove the foreign substance from the left
driving wheel.
• A foreign substance (string,
paper, toy etc.) is caught in
the right driving wheel.
• Turn off the Power Switch at the bottom and
remove the foreign substance from the right
driving wheel.
• Check the Bumper sensor.
• Turn off the at the bottom, and then remove
the obstacle from the front of the vacuum
cleaning robot or move it to a different location.
• A foreign substance (dust,
stain etc.) is on the Obstacle
sensor window.
• Turn off the Power Switch at the bottom and
wipe the foreign substance from the front and
rear sensor windows using a soft cloth.
• A foreign substance (Dust,
• Turn off the Power Switch at the bottom and
stain etc.) is on the Cliff sensor
wipe the foreign substance on the cilff sensor
window.
window with a soft cloth.
• Dust bin not inserted.
• Insert the dust bin until you hear a “Click”
sound.
• A foreign substance (String,
cloth etc.) is caught on the
edge-cleaning side rotating
brush.
• Turn off the Power Switch at the bottom and
wipe the foreign substance from the edgecleaning side rotating brush.
❈ If you press the Start/Stop button or turn off the Power Switch, the error code is cleared.
42_ troubleshooting
DJ68-00664B.indb 42
2012.6.16 11:10:31 AM
product specification
80 mm (Height)
350 mm (Length)
350 mm (Width)
161 mm (Length)
Main Body
Classification
Mechanical
Specifications
Electrical
Specifications
Cleaning
Specifications
275 mm (Width)
Charger(Station)
Item
SR8950* SERIES
Diameter
350mm
Height
80mm
Weight
3.2kg
Power voltage
AC220-240V~, 50-60Hz
Charge power consumption
40 W
Main unit power consumption
40 W
Battery specifications
14.4V / 31.68Wh
Charging type
Auto Charging/Manual Charging
Cleaning mode
Auto, Spot, Max, Manual, Delay Start
Charging time
About 180 minutes
Cleaning time
(on the basis of hard floor)
About 100 minutes
Cleaning method
Ceiling shape recognition
Main unit button type
Touch type
06 PRODUCT SPECIFICATION
122 mm (Height)
This Vacuum cleaner is approved the following.
Electromagnetic Compatibility Directive : 2004/108/EEC
Low Voltage Directive : 2006/95/EC
product specification _43
DJ68-00664B.indb 43
2012.6.16 11:10:32 AM
OPEN SOURCE ANNOUNCEMENT
Some software components of this product incorporate source code covered under the BSD.
And this software is based in part on the work of the Independent JPEG Group.
■ OpenCV :
IMPORTANT : READ BEFORE DOWNLOADING, COPYING, INSTALLING OR USING.
By downloading, copying, installing or using the software you agree to this license.
If you do not agree to this license, do not download, install, copy or use the software.
License Agreement
For Open Source Computer Vision Library
Copyright (C) 2000-2008, Intel Corporation, all rights reserved.
Copyright (C) 2008-2010, Willow Garage Inc., all rights reserved.
Third party copyrights are property of their respective owners.
Redistribution and use in source and binary forms, with or without modification, are permitted provided
that the following conditions are met:
Redistribution’s of source code must retain the above copyright notice, this list of conditions and the
following disclaimer.
Redistribution’s in binary form must reproduce the above copyright notice, this list of conditions and the
following disclaimer in the documentation and/or other materials provided with the distribution.
The name of the copyright holders may not be used to endorse or promote products derived from this
software without specific prior written permission.
This software is provided by the copyright holders and contributors “as is” and any express or implied
warranties, including, but not limited to, the implied warranties of merchantability and fitness for a
particular purpose are disclaimed.
In no event shall the Intel Corporation or contributors be liable for any direct, indirect, incidental, special,
exemplary, or consequential damages (including, but not limited to, procurement of substitute goods
or services; loss of use, data, or profits; or business interruption) however caused and on any theory of
liability, whether in contract, strict liability, or tort (including negligence or otherwise) arising in any way out
of the use of this software, even if advised of the possibility of such damage.
■ Copyright (c) 2006, 2008, 2009, 2010 Edward Rosten
All rights reserved.
Redistribution and use in source and binary forms, with or without modification, are permitted provided
that the following conditions are met:
Redistributions of source code must retain the above copyright notice, this list of conditions and the
following disclaimer.
Redistributions in binary form must reproduce the above copyright notice, this list of conditions and the
following disclaimer in the documentation and/or other materials provided with the distribution.
Neither the name of the University of Cambridge nor the names of its contributors may be used to
endorse or promote products derived from this software without specific prior written permission.
THIS SOFTWARE IS PROVIDED BY THE COPYRIGHT HOLDERS AND CONTRIBUTORS “AS
IS” AND ANY EXPRESS OR IMPLIED WARRANTIES, INCLUDING, BUT NOT LIMITED TO, THE
IMPLIED WARRANTIES OF MERCHANTABILITY AND FITNESS FOR A PARTICULAR PURPOSE ARE
DISCLAIMED. IN NO EVENT SHALL THE COPYRIGHT OWNER OR CONTRIBUTORS BE LIABLE FOR
ANY DIRECT, INDIRECT, INCIDENTAL, SPECIAL, EXEMPLARY, OR CONSEQUENTIAL DAMAGES
(INCLUDING, BUT NOT LIMITED TO, PROCUREMENT OF SUBSTITUTE GOODS OR SERVICES;
LOSS OF USE, DATA, OR PROFITS; OR BUSINESS INTERRUPTION) HOWEVER CAUSED AND ON
ANY THEORY OF LIABILITY, WHETHER IN CONTRACT, STRICT LIABILITY, OR TORT (INCLUDING
NEGLIGENCE OR OTHERWISE) ARISING IN ANY WAY OUT OF THE USE OF THIS SOFTWARE, EVEN
IF ADVISED OF THE POSSIBILITY OF SUCH DAMAGE.
DJ68-00664B.indb 44
2012.6.16 11:10:32 AM
memo
DJ68-00664B.indb 45
2012.6.16 11:10:32 AM
memo
DJ68-00664B.indb 46
2012.6.16 11:10:32 AM
memo
DJ68-00664B.indb 47
2012.6.16 11:10:32 AM
DJ68-00664B.indb 48
2012.6.16 11:10:32 AM
SR8930
Robotski sesalnik
Uporabniški priročnik
Ta priročnik je izdelan iz 100 % recikliranega papirja.
✻ Pred uporabo izdelka pozorno preberite navodila.
✻ Samo za uporabo v zaprtih prostorih.
Slovenščina
svet novih možnosti
Zahvaljujemo se vam za nakup Samsungovega
izdelka.
Če želite popolnejšo ponudbo storitev,
izdelek registrirajte na
www.samsung.com/register
DJ68-00664B.indb 01
2012.6.16 11:10:32 AM
varnostne informacije
VARNOSTNE INFORMACIJE
• Pred uporabo naprave pazljivo preberite priročnik in ga shranite za prihodnjo uporabo.
OPOZORILO
OPOZORILO
• Ker so ta navodila namenjena različnim modelom, bodo značilnosti vašega sesalnika morda
drugačne od tistih v tem priročniku.
UPORABLJENA SIMBOLA ZA OPOZORILO/POZOR
OPOZORILO
POZOR
Označuje nevarnost smrtnih ali hudih poškodb.
Označuje nevarnost telesnih poškodb ali materialne škode.
DRUGI UPORABLJENI SIMBOLI
Označuje nevarnost telesnih poškodb ali materialne škode.
OPOMBA
02_ varnostne informacije
DJ68-00664B.indb 02
2012.6.16 11:10:32 AM
POMEMBNA VARNOSTNA NAVODILA
Ko uporabljate električni aparat, upoštevajte naslednje osnovne varnostne ukrepe:
PRED UPORABO ROBOTSKEGA SESALNIKA PREBERITE VSA NAVODILA.
Izključite sesalnik iz vtičnice, če ga ne uporabljate in pred vzdrževanjem.
OPOZORILO: za zmanjšanje nevarnosti požara, električnega udara ali
poškodb:
SPLOŠNO
• Uporabljajte samo v skladu z navodili v tem priročniku.
• Robotskega sesalnika in polnilnika ne uporabljate, če sta kakor koli poškodovana.
• Če sesalnik ne deluje ustrezno, vam je padel na tla, se je poškodoval, ste ga pustili na prostem
ali vam je padel v vodo, ga vrnite centru za pomoč strankam.
• Polnilnika in robotskega sesalnika ne prijemajte z mokrimi rokami.
• Sesalnik uporabljajte samo na suhih površinah v zaprtih prostorih.
• Aparata ne smejo uporabljati osebe (in otroci) s fizičnimi, senzoričnimi in psihičnimi motnjami ter
osebe, ki nimajo dovolj izkušenj in znanja, razen če jih nadzira ali jim o uporabi aparata svetuje
oseba, ki je odgovorna za njihovo varnost.
• Otroke je treba nadzorovati in tako zagotoviti, da se ne igrajo z aparatom.
POLNILNIK BATERIJE
• Ne spreminjajte polariziranega vtiča tako, da se bo prilegal nepolarizirani vtičnici ali kabelskemu
podaljšku.
• Sesalnika ne uporabljajte na prostem ali na mokrih površinah.
• Izključite polnilnik iz vtičnice, če ga ne uporabljate in pred servisiranjem.
• Baterijo polnite samo s polnilnikom, ki ga je priložil proizvajalec.
• Izdelka ne uporabljajte, če je kabel ali vtič poškodovan.
• Kabla ne vlecite, ne uporabljajte ga za prenašanje ali kot ročaj, ne priprite ga z vrati in ne vlecite
ga okoli ostrih robov ali vogalov. Kabel ne sme priti v stik z vročimi površinami.
• Ne uporabljajte kabelskih podaljškov ali vtičnic s premajhno močjo prenosa električnega toka.
• Izdelka ne izključujte tako, da ga vlečete za kabel. Ko želite izključiti izdelek, primite za vtič, in ne
za kabel.
• Baterij ne smete poškodovati ali sežigati, saj pri višjih temperaturah eksplodirajo.
• Polnilnika ne poskušajte razstaviti. Popravila sme izvajati samo usposobljeni center za pomoč
strankam.
• Polnilnika ne izpostavljajte visokim temperaturam in pazite, da ne pride v stik s kakršno koli
mokroto ali vlago.
varnostne informacije _03
DJ68-00664B.indb 03
2012.6.16 11:10:33 AM
varnostne informacije
ROBOTSKI SESALNIK
• Ne sesajte trdih ali ostrih predmetov, kot so steklo, žeblji, vijaki, kovanci ipd.
• Sesalnika ne uporabljajte brez nameščenega filtra. Med servisiranjem izdelka ne vstavljajte
prstov ali predmetov v prostor z ventilatorjem, saj se lahko izdelek nehote vklopi.
• Ne vstavljajte predmetov v odprtine. Izdelka ne uporabljajte, če je katera od odprtin blokirana.
V odprtinah se ne smejo kopičiti prah, vlakna, lasje in karkoli drugega, kar bi zmanjšalo pretok
zraka.
• Ne vsesavajte strupenih snovi (klorovega belila, amonijaka, čistila za odtoke itd.).
• Izdelka ne uporabljajte za sesanje predmetov, ki gorijo ali se kadijo, kot so cigarete, vžigalice in
vroč pepel.
• Ne vsesavajte vnetljivih ali gorljivih tekočin, kot je bencin, in izdelka ne uporabljajte v prostorih,
kjer so te tekočine lahko prisotne.
• Robotskega sesalnika ne uporabljajte v zaprtem prostoru, kjer so prisotni hlapi barv na osnovi
olja, hlapi razredčil za barve, snovi za zaščito pred molji, vnetljiv prah ali drugi eksplozivni ali
strupeni hlapi.
• Pri ekstremni uporabi ali ekstremnih temperaturah lahko pride do puščanja baterijskih celic. Če
tekočina pride v stik s kožo, jo hitro sperite z vodo. Če tekočina pride v stik z očmi, jih takoj
začnite spirati s čisto vodo in spirajte najmanj 10 minut. Poiščite zdravniško pomoč.
04_ varnostne informacije
DJ68-00664B.indb 04
2012.6.16 11:10:33 AM
vsebina
VARNOSTNE INFORMACIJE
02
06
07
10
11
Napajanje
Pred uporabo
Med uporabo
Čiščenje in vzdrževanje
ZNAČILNOSTI IZDELKA
13
SESTAVA SESALNIKA
15 Sestavni deli
16 Ime posameznega dela
15
UPORABA SESALNIKA
20
VZDRŽEVANJE NASTAVKOV IN
FILTRA
34
ODPRAVLJANJE TEŽAV
20 Namestitev robotskega sesalnika
20 Vrstni red namestitve
20 Vklop ali izklop stikala za napajanje
21 Namestitev polnilnika
22 Polnjenje
23 Baterija
24 Namestitev NAVIDEZNEGA ČUVAJA
26 Uporaba robotskega sesalnika
26 Zagon/ustavitev sesanja
27 Polnjenje
28 Samodejno sesanje
29 Sesanje območja
30 Maksimalno sesanje
31 Ročno sesanje
32 Zakasnitev vklopa
33 Dodatne funkcije
33 Uporaba dodatnih funkcij
34 Čiščenje robotskega sesalnika
34 Upoštevajte načine čiščenja in vzdrževanja
34 Čiščenje okenca senzorja in kamere
35 Čiščenje posode za prah in filtrov
36 Čiščenje robotskega sesalnika
36 Čiščenje zmogljive krtače
38 Čiščenje stranske vrtljive krtače za sesanje
robov
39 Čiščenje pogonskega kolesca
40 Kaj je treba preveriti, preden pokličete serviserja
42 Odpravljanje težav s pomočjo kod napak
40
SPECIFIKACIJE IZDELKA
43
vsebina _05
DJ68-00664B.indb 05
2012.6.16 11:10:33 AM
varnostne informacije
NAPAJANJE
OPOZORILO
OPOZORILO
Ne prepogibajte napajalnega kabla in nanj ne postavljajte
težkih predmetov, ki bi ga lahko poškodovali.
- To lahko povzroči požar ali električni udar.
Z napajalnega vtiča odstranite morebitni prah ali vodo.
- V nasprotnem lahko pride do okvare ali električnega udara.
OPOZORILO
Napajalnega vtiča ne vlecite za kabel ali ga prijemajte z
mokrimi rokami.
- To lahko povzroči požar ali električni udar.
OPOZORILO
V eni vtičnici ne uporabljajte več vtičev.
(Kabla ne pustite ležati nezaščitenega na tleh.)
- To lahko povzroči požar ali električni udar.
OPOZORILO
Ne uporabljajte poškodovanega napajalnega kabla, vtiča ali
zrahljane napajalne vtičnice.
- To lahko povzroči požar ali električni udar.
06_ varnostne informacije
DJ68-00664B.indb 06
2012.6.16 11:10:33 AM
PRED UPORABO
POZOR
POZOR
POZOR
POZOR
POZOR
POZOR
Robotskega sesalnika ne uporabljajte v prostorih z vnetljivimi
materiali, kot so:
- Prostori, kjer so na tleh sveče ali namizne svetilke.
- Prostori z nenadzorovanim gorenjem (ogenj ali ogorki).
- Prostori, v katerih so bencin, destiliran alkohol, razredčilo, pepelniki
s prižganimi cigaretami itd.
Robotski sesalnik je namenjen izključno domači uporabi. Ne uporabljajte ga v
naslednjih prostorih.
- Na podstrešjih, v kleteh, skladiščih, industrijskih zgradbah, prostorih, ločenih od glavne
zgradbe, prostorih, izpostavljenih vodi ali vlagi, kot so kopalnice ali pralnice, ter na ozkih
in visokih mestih, kot so mize ali police. Pri uporabi na takšnih mestih lahko pride do
nepravilnega delovanja in resnih poškodb izdelka.
01 VARNOSTNE INFORMACIJE
POZOR
Pred uporabo robotskega sesalnika se prepričajte, da je
posoda za prah sestavljena.
- Če posoda za prah ni nameščena, robotski sesalnik ne bo deloval.
Odprite vsa vrata, da posesate vse prostore.
- Če so vrata zaprta, robotski sesalnik ne more posesati prostora.
- Vendar ne pozabite zapreti vrat glavnega vhoda, balkona in kopalnice ter vseh ostalih
prostorov, kjer bi robotski sesalnik lahko padel v nižje nadstropje.
Sesalnika ne uporabljajte na črnih tleh.
- Robotski sesalnik morda ne bo pravilno deloval.
Če imajo preproge dolge rese, jih umaknite pod preprogo.
- Če rese niso umaknjene, se lahko zataknejo v pogonsko kolesce
ali zmogljivo krtačo, zaradi česar se lahko resno poškoduje
preproga ali sesalnik.
Če je senzor za stopnice umazan, lahko robotski sesalnik pade
po stopnicah.
To lahko povzroči telesne poškodbe in resne poškodbe izdelka.
Da preprečite tveganje, namestite NAVIDEZNE ČUVAJE
(nastavitev načina Fence (Ograja)) pred nevarna območja.
Očistite okence senzorja in kamero.
varnostne informacije _07
DJ68-00664B.indb 07
2012.6.16 11:10:33 AM
POZOR
POZOR
POZOR
POZOR
POZOR
POZOR
POZOR
Preden začnete sesati prostor, odstranite manjše in lomljive
predmete.
- Pred sesanjem se prepričajte, da ste odstranili vse predmete.
- Prepričajte se, da ste odstranili vse lomljive predmete, kot so
predmeti iz porcelana in stekla, cvetlične posode itd.
- Robotski sesalnik ne prepozna kovancev, prstanov ali drugih
dragocenih predmetov, kot je nakit.
Pred sesanjem odstranite vse predmete, ki so razmetani po
tleh.
- Robotski sesalnik je zasnovan tako, da zazna ovire v oddaljenosti
5 cm.
- Kopalniške brisače, preproge pred tuši in lijaki, vhodi, pralnicami,
napajalni kabli, namizni prti ali pasovi se lahko zapletejo v
pogonsko kolesce ali zmogljivo krtačo. To lahko povzroči, da
predmeti padejo z mize.
Vse člane družine (ali osebe, ki jih zadeva sesanje) pred
sesanjem ali uporabo načina sesanja po urniku opozorite, naj
bodo pozorni.
- Če se robotski sesalnik zaleti v otroke, lahko padejo.
Poskrbite, da otroci robotskega sesalnika ne bodo pohodili ali
se nanj usedli.
- Otroci lahko padejo in se poškodujejo, tudi izdelek se lahko
močno poškoduje.
Ko je otrok ali hišni ljubljenček sam doma, se prepričajte, da
ste izklopili stikalo za napajanje na robotskem sesalniku.
- Robotski sesalnik bo morda pritegnil njihovo pozornost.
- Če se v vrtljivo kolesce ali krtačo zataknejo prsti, noge, obleka ali
lasje, lahko pride do telesnih poškodb.
- Če otrok ali hišni ljubljenček ovirata robotski sesalnik, ju ta lahko
zazna kot oviro in območje morda ne bo posesano.
- Če je stikalo za napajanje izklopljeno, je napajanje izključeno in vse
funkcije so onemogočene.
Pri nameščanju polnilne postaje ne pustite napajalnega kabla
izpostavljenega na tleh.
- Ko se robotski sesalnik samodejno polni ali gre mimo polnilnika,
lahko povleče napajalni kabel za seboj.
Napajalni kabel polnilnika naj bo vedno priključen na vtičnico.
- Čeprav ima robotski sesalnik funkcijo samodejnega polnjenja, ne
more samodejno polniti baterije, če je napajalni kabel polnilnika
izključen.
08_ varnostne informacije
DJ68-00664B.indb 08
2012.6.16 11:10:33 AM
POZOR
OPOZORILO
Če se pred polnilnikom nahajajo predmeti, se robotski sesalnik
ne more samodejno polniti.
- Odstranite morebitne predmete.
pri
OPOZORILO
OPOZORILO
OPOZORILO
1m
m
l. 0,5
m
l. 0,5
OPOZORILO
ab
ou
t
Poskrbite, da 0,5 m levo in desno od polnilnika ter 1m pred
njim ne bo ovir ali stopnic.
prib
OPOZORILO
m
l. 0,5
prib
,5m
bl. 0
prib
pr
ib
l. 1
m
01 VARNOSTNE INFORMACIJE
POZOR
Polnilnik namestite na mesto, kjer bo robotski sesalnik zlahka
dostopal do njega.
- Če polnilnik namestite v vogal, lahko pride do dodatnih premikov,
kar lahko zmoti proces samodejnega polnjenja.
V vtiče za polnjenje ne vstavljajte kovinskih predmetov, kot so
kitajske paličice, izvijači itd.
- To lahko resno poškoduje polnilnik.
Poskrbite, da na polnilni postaji ni tekočine.
- V nasprotnem lahko pride do požara ali električnega udara.
Z robotskim sesalnikom ne sesajte tekočin, kot so voda, olje in
iztrebki hišnih ljubljenčkov.
- To lahko povzroči resno poškodbo izdelka.
- Tekočina se lahko raznese s kolesci in poveča umazanijo.
Sesalnika ne uporabljajte v druge namene.
- To lahko povzroči okvaro polnilnika ali požar.
Polnilne postaje ne namestite na temna tla.
- Če so na mestu namestitve polnilne postaje tla temna, robotski sesalnik težko poišče pot
nazaj.
varnostne informacije _09
DJ68-00664B.indb 09
2012.6.16 11:10:34 AM
MED UPORABO
POZOR
Robotskega sesalnika ne smete uporabljati na debelih
preprogah.
- To lahko poškoduje robotski sesalnik.
- To lahko poškoduje preproge.
POZOR
Robotskega sesalnika ne uporabljajte na mizi in drugih
privzdignjenih površinah.
- Če izdelek pade na tla, se utegne poškodovati.
POZOR
Robotski sesalnik se lahko med delovanjem zaleti v pohištvo,
denimo noge stolov ali mize, tanko in dolgo pohištvo ipd.
- Da bi bilo čiščenje hitrejše in učinkovitejše, dvignite stole na mizo.
POZOR
POZOR
OPOZORILO
Na robotski sesalnik ne postavljajte predmetov.
- To lahko povzroči okvaro.
Če med sesanjem sesalnik vsesa večje kose papirja ali
plastične vrečke, jih takoj odstranite.
- Če ima robotski sesalnik zamašeno sesalno odprtino in ga kljub
temu uporabljate, lahko pride do resnih poškodb izdelka.
Če iz robotskega sesalnika prihaja nenavaden hrup, vonj ali
dim, takoj izklopite stikalo za napajanje in pokličite center za
pomoč strankam.
10_ varnostne informacije
DJ68-00664B.indb 10
2012.6.16 11:10:34 AM
POZOR
OPOMBA
OPOMBA
01 VARNOSTNE INFORMACIJE
OPOMBA
Robotskega sesalnika ne prijemajte za posodo za prah, kadar
ga prestavljate.
- Posoda za prah bi se lahko snela, kar bi utegnilo povzročiti hude
poškodbe ali okvaro izdelka.
Robotski sesalnik ne more nadaljevati sesanja, če ne more
prečkati praga vhoda ali balkona.
- Za ponovni zagon delovanja izklopite stikalo za napajanje,
prestavite sesalnik na primerno mesto in znova vklopite stikalo.
Če iz robotskega sesalnika prihaja nenavaden hrup, vonj ali
dim, takoj izklopite stikalo za napajanje in pokličite center za
pomoč strankam. Robotskega sesalnika ne uporabljajte za
sesanje miz ali drugih visokih mest.
- Sesalnik lahko pade in se poškoduje.
Po sesanju lahko ostanejo kepice prahu, če so te nastale med sesanjem in jih
robotski sesalnik ni uspel vsesati.
- V tem primeru prah očistite z drugim pripomočkom za čiščenje.
ČIŠČENJE IN VZDRŽEVANJE
POZOR
POZOR
OPOZORILO
Če želite očistiti sesalnik, ohišja ne škropite neposredno z
vodo in ga ne brišite z vnetljivimi sredstvi, kot so bencin,
razredčilo ali alkohol.
- To lahko povzroči resno poškodbo izdelka.
Izdelek lahko razstavlja ali sestavlja samo ustrezno
usposobljen serviser.
- V nasprotnem lahko pride do poškodbe izdelka.
Redno čistite nečistočo, ki se nabere na senzorjih za ovire in
stopnice.
- Nesnaga, ki se nakopiči na senzorjih, povzroči, da senzorji ne
delujejo pravilno.
Senzor za stopnice
Senzor za ovire
varnostne informacije _11
DJ68-00664B.indb 11
2012.6.16 11:10:34 AM
OPOZORILO
Ko odstranjujete morebitne tujke, najprej izklopite stikalo za
napajanje in nato uporabite čistilno krtačo.
- Če tega ne upoštevate, se izdelek lahko nenadoma vklopi in
povzroči telesne poškodbe ali resne poškodbe izdelka.
Stranska krtača za
sesanje robov
Zmogljiva krtača
OPOZORILO
OPOZORILO
OPOZORILO
Če je napajalni kabel poškodovan, naj ga zamenja usposobljen
serviser iz centra za pomoč strankam.
- V nasprotnem lahko pride do požara ali električnega udara.
Pred čiščenjem polnilnika iz varnostnih razlogov izključite
napajalni kabel.
Če želite zamenjati baterijo, se obrnite na center za pomoč
strankam družbe Samsung Electronics.
- Uporaba neoriginalnih baterij povzroči okvaro izdelka.
12_ varnostne informacije
DJ68-00664B.indb 12
2012.6.16 11:10:35 AM
značilnosti izdelka
PRIROČNA FUNKCIJA NAVIDEZNEGA ČUVAJA
Robotski sesalnik lahko omejite na določeno območje tako, da uporabite način Fence (Ograja;
navidezna stena).
• Kaj je prepoznavanje oblike stropa
(Visionary mapping plus™)?
Ta funkcija preko kamere na vrhu sesalnika
prepozna obliko stropa in določi območje sesanja,
tako ugotavlja najboljšo pot skozi prostor in
zagotavlja sesanje vseh talnih območij.
TEMELJITO SESANJE VSEH VOGALOV
Ker robotski sesalnik omogoča zaporedno sesanje tal ( ) po načrtu, ki ga določi funkcija
prepoznavanja oblike stropa, posesa vse vogale v prostoru.
RAZLIČNI NAČINI SESANJA
Na voljo so različni načini sesanja, ki bodo izpolnili vse vaše potrebe.
2
5
6
Pribl. 1.5m
3
4
Pribl. 1.5m
1
1. Način samodejnega sesanja : Samodejno sesanje vseh prostorov.
2. Način sesanja območja : Temeljito sesanje določenega območja. Uporabljate ga lahko za
sesanje drobtinic kruha ali piškotov.
3. Način maksimalnega sesanja : Sesalnik deluje, dokler baterija ni skoraj izpraznjena.
4. Način ročnega sesanja: Tla lahko sesate ročno tako, da premikate robotski sesalnik.
5. Turbonačin : V tem načinu se zmogljiva vrtača vrti z največjo hitrostjo, zato sesalnik
učinkoviteje čisti (način lahko vklopite z daljinskim upravljalnikom).
6. Zakasnitev vklopa : Robotski sesalnik posesa tla ob določenem času.
značilnosti izdelka _13
DJ68-00664B.indb 13
2012.6.16 11:10:35 AM
SAMODEJNO POLNJENJE
Ko je raven napolnjenosti baterije nizka, se robotski sesalnik
samodejno usmeri proti polnilniku, kjer se nato izvede hitro
samodejno polnjenje.
STRANSKA VRTLJIVA KRTAČA ZA SESANJE ROBOV
Stranska vrtljiva krtača za sesanje robov čisti prah na robovih.
PREČKANJE PRAGOV
Pribl. 1cm
Stopničast prag
Inovativni pogonski sistem robotskega sesalnika omogoča
prečkanje pragov v višini 1 cm in tako sesanje vseh prostorov.
Robotski sesalnik morda ne bo mogel prečkati 1-cm praga,
odvisno od oblike praga.
Navpičen prag
PREPREČEVANJE TRČENJ
Če robotski sesalnik zazna oviro med sesanjem, mu senzor za
ovire pomaga izogniti se oviri in nadaljevati sesanje. (Sesalnik se
bo morda dotaknil tanjših ali drobnih ovir.)
SISTEM PREPREČEVANJA PADCEV
3 senzorji za stopnice zaznavajo stopnice ali hišni prag, kar
preprečuje, da bi robotski sesalnik padel po stopnicah.
VARNOSTNA NAPRAVA
stop
Če med sesanjem robotski sesalnik dvignete, senzor samodejno
ustavi pogonska kolesca, zmogljivo krtačo, motor sesalnika in
stransko vrtljivo krtačo.
14_ značilnosti izdelka
DJ68-00664B.indb 14
2012.6.16 11:10:35 AM
sestava sesalnika
SESTAVNI DELI
02 SESTAVLJANJE
■ Osrednja enota
■ Daljinski upravljalnik
■ Polnilnik (postaja)
■ Drugi sestavni deli
(bateriji vrste AAA)
Uporabniški priročnik
/2 bateriji
NAVIDEZNI
ČUVAJ
Dodatni filter
Čistilna krtača
Navodila za hitro
uporabo
sestavljanje _15
DJ68-00664B.indb 15
2012.6.16 11:10:36 AM
IME POSAMEZNEGA DELA
■ Glavna enota
Gumb za ločevanje
posode za prah
Nadzorna plošča
Senzor Navideznega
Čuvaja
Kamera
Senzor daljinskega
upravljalnika
Senzor za ovire
Senzor za ovire
Senzor odbijača
Zgornja stran
Gumb za ločevanje
posode za prah
Posoda za prah
Senzor daljinskega
upravljalnika
Stranski del
Senzor za stopnice
Pogonsko kolesce
Stranska vrtljiva krtača
Stikalo za napajanje
Vtič za polnjenje
Valjček
Zmogljiva krtača
Senzor za stopnice
Pokrov zmogljive
krtače
Pokrov baterij
Vtič za polnjenje
Pogonsko kolesce
Senzor za stopnice
Spodnja stran
16_ sestavljanje
DJ68-00664B.indb 16
2012.6.16 11:10:36 AM
■ Polnilnik (postaja)
Lučka za polnjenje (zelena)
Priključki
polnilnika
02 SESTAVLJANJE
Lučka za
napajanje
(rdeča)
Nastavek
za navijanje
kabla
Zgornja stran
Nazaj
■ NAVIDEZNI ČUVAJ
Gumb za način/vklop
Lučka načina
Senzor za zaznavanje glavne
enote
Senzor za zaznavanje
oddaljenosti
■ Namestitev baterij
Baterije niso priložene izdelku. Baterije je treba kupiti ločeno. Pred uporabo vstavite alkalni bateriji
(vrste D).
1
Pritisnite jeziček zaklepa
in dvignite pokrov
NAVIDEZNEGA ČUVAJA.
2
3
Bateriji vstavite v
NAVIDEZNEGA ČUVAJA, kot
je prikazano na spodnji sliki.
(Če bateriji nista vstavljeni
s pravilno polarnostjo,
NAVIDEZNI ČUVAJ ne
deluje.)
Ko vstavite zatič v režo,
pritisnite drugi konec, da se
zaskoči na mestu.
❈ Specifikacije: alkalne baterije vrste D (LR20)
sestavljanje _17
DJ68-00664B.indb 17
2012.6.16 11:10:38 AM
■ Daljinski upravljalnik
Napajanje
Polnjenje
Samodejno
Maksimalno
sesanje
Smerne tipke
Območno
sesanje
(Vzvratno sesanje ni
podprto.)
Zagon/ustavitev
Ročno
Turbonačin
Zakasnitev
vklopa
Zvok
■ Namestitev baterij v daljinski upravljalnik
Ob nakupu izdelka v daljinskem upravljalniku ni baterij.
Pred uporabo vstavite baterije (vrsta AAA).
1
Pritisnite jeziček zaklepa in
dvignite pokrov prostora
za baterije na hrbtni strani
daljinskega upravljalnika.
2
Bateriji vstavite v daljinski
upravljalnik, kot je prikazano
na sliki. (Če bateriji nista
vstavljeni s pravilno
polarnostjo, daljinski
upravljalnik ne deluje.)
3
Ko vstavite zatič v režo,
pritisnite drugi konec, da se
zaskoči na mestu.
❈ Specifikacije: baterije vrste AAA
18_ sestavljanje
DJ68-00664B.indb 18
2012.6.16 11:10:39 AM
■ Nadzorna plošča
2
1
3
5
4
6
B
7
02 SESTAVLJANJE
A
C
8
ZASLON
1.
2.
-
Zaslon s številkami
Prikaz časovnika, stanja napredka in kod napak s številkami, črkami in grafiko.
Indikator stanja baterije
Polnjenje : prikaz procesa polnjenja v 3 korakih.
Med uporabo : prikaz stanja napolnjenosti baterije. Med delovanjem se napolnjenost baterije
postopno znižuje od stanja polne napolnjenosti (FULL). (Ko je baterija popolnoma izpraznjena,
utripa raven za prikaz nizkega stanja baterije »Lo«.)
3. Časovnik
- Če izberete način sesanja po urniku, sveti ikona časovnika.
4. Turbonačin
- Ikona se vklopi, kadar je omogočen turbonačin.
5. Zaslon načina sesanja
- Ko pritisnete gumb za način sesanja, se prikaže ustrezen način sesanja.
(A) Način samodejnega sesanja : ikona se vklopi, ko izberete način samodejnega sesanja.
(B) Način sesanja območja : ikona se vklopi, ko izberete način sesanja območja.
(C) Način maksimalnega sesanja : ikona se vklopi, ko izberete način maksimalnega sesanja.
GUMBI
6. Način sesanja
- Pritisnite za izbiro načina sesanja. After selecting a cleaning mode, press the (
) button to
start cleaning.
7. Zagon/ustavitev
- Pritisnite za zagon/ustavitev sesanja.
8. Polnjenje
- Ko pritisnete ta gumb, se robotski sesalnik se vrne do polnilne postaje na polnjenje baterije.
sestavljanje _19
DJ68-00664B.indb 19
2012.6.16 11:10:39 AM
uporaba sesalnika
NAMESTITEV ROBOTSKEGA SESALNIKA
Vrstni red namestitve
1. Vklop ali izklop stikala za napajanje
Za uporabo robotskega sesalnika vklopite stikalo za napajanje na dnu
glavne enote.
2. Namestitev polnilnika
Za polnjenje robotskega sesalnika najprej namestite polnilnik.
Ob nakupu izdelka je baterija prazna, zato morate pred uporabo
sesalnika baterijo polno napolniti.
3. Polnjenje baterije
Pred uporabo robotskega sesalnika morate baterijo popolnoma
napolniti.
4. Namestitev NAVIDEZNEGA ČUVAJA
Robotski sesalnik lahko omejite na določeno območje tako, da uporabite način Fence (Ograja;
navidezna stena).
Vklop ali izklop stikala za napajanje
Za uporabo robotskega sesalnika vklopite stikalo za napajanje.
Če stikalno za zasilni izklop izklopite, se ponastavijo vse nastavitve,
razen trenutnega časa in tedenskega urnika.
❈ Če približno 1 minuto po vklopu napajanja ne pritisnete
nobenega gumba, se napajanje samodejno izklopi, da ne
pride do izpraznitve baterije. Napajanje znova vklopite tako, da
pritisnete in kratek čas držite gumb za napajanje (Start/Stop
(Zagon/ustavitev)) na glavni enoti.
1. Dvignite ohišje in vklopite stikalo za napajanje, vendar
pazite, da ne pritisnete nobenega drugega gumba.
- Če ikone ne svetijo, to pomeni, da je baterija prazna. V tem
primeru vklopite stikalo za napajanje in robotski sesalnik
namestite na polnilno postajo.
- Nastavljeni čas bo morda drugačen od trenutnega časa. Če je
nastavljeni čas napačen, ga nastavite na trenutni čas.
POZOR
Če je stikalo za napajanje izklopljeno, se robotski sesalnik ne bo
polnil, tudi če je priključen na polnilno postajo.
20_ uporaba
DJ68-00664B.indb 20
2012.6.16 11:10:40 AM
Namestitev polnilnika
Lučka za
napajanje
Lučka za polnjenje
03 UPORABA
1. Polnilnik namestite na ravno površino.
2. Poskrbite, da 0,5 m levo in desno od polnilnika ter 1 m pred
njim ne bo ovir ali stopnic.
m
l. 0,5
pribl.
0,5m
prib
pr
ib
l. 1
m
3. Polnilnik namestite na mesto, kjer bo robotski sesalnik zlahka
dostopal do njega.
4. Napajalni kabel napeljite ob steni.
5. Če so tla lesena, namestite polnilnik v enaki smeri, kot so
položena tla.
OPOMBA
Napajalni kabel polnilnika naj bo vedno vključen v
napajalno vtičnico.
- Če polnilnik ni priključen na napajanje, robotski sesalnik ne
zazna polnilnika in se ne more samodejno polniti.
- Če je robotski sesalnik ni priključen na polnilnik, se baterija
samodejno prazni.
uporaba _21
DJ68-00664B.indb 21
2012.6.16 11:10:40 AM
Polnjenje
Ob nakupu izdelka je baterija popolnoma prazna, zato
morate robotski sesalnik napolniti ročno.
Lučka za
polnjenje
Lučka za
napajanje
Izklopite in vklopite stikalo za napajanje na spodnji strani izdelka.
1. Ko poravnate kontakte za polnjenje na glavni enoti s
kontakti za polnjenje na polnilni enoti, vstavite glavno
enoto, tako da iz polnilnika zaslišite zvok polnjenja.
- Lučka polnjenja sveti zeleno.
Lučka za
napajanje
Lučka za polnjenje
2. Preverite stanje napolnjenosti robotskega sesalnika.
- Ko se polnjenje začne, se na nadzorni plošči prikažeta
”, v tem zaporedju.
»preostala zmogljivost baterije« in »
-
Ko se napajanje konča, se na nadzorni plošči prikažeta indikator
stanja baterije in oznaka »FULL« (Polno), v tem zaporedju.
Polnjenje
Lučka
Lučka
■ Če med sesanjem prikaz stanja baterije utripa, robotski
sesalnik preneha čistiti in se samodejno napolni na
polnilniku.
■ Če robotski sesalnik začne sesanje na drugem mestu in
ne polnilni postaji, in polnilne postaje med čiščenjem ne
uspe najti, se bo zaustavil na mestu, kjer se je sesanje
začelo.
■ Če med sesanjem prikaz stanja baterije utripa in se
prikaže oznaka »Lo«, robotskega sesalnika ni mogoče
upravljati z daljinskim upravljalnikom ali gumbi na
glavni enoti. V tem primeru odnesite robotski sesalnik
do polnilnika, da napolnite baterijo. (Če je baterija
popolnoma izpraznjena.)
Polno napolnjena
baterija
<Prikaz polnjenja>
Polnjenje Polnjenje Potrebno
končano
polnjenje
22_ uporaba
DJ68-00664B.indb 22
2012.6.16 11:10:41 AM
03 UPORABA
• Ob nakupu izdelka bo prvo polnjenje baterije trajalo približno 180 minut, baterija pa bo
delovala približno 100 minut.
• Polnjenje pregrete baterije lahko poveča čas polnjenja.
• Ukrepi, ko polnjenje ni ustrezno.
Ko samodejno polnjenje robotskega sesalnika ni mogoče, preverite naslednje:
- Izklopite in vklopite stikalo za napajanje na spodnji strani robotskega sesalnika.
- Znova priključite napajanje napajalnika.
- Preverite, ali je morda na priključku polnilnika nesnaga, ter obrišite priključek
polnilnika na glavni enoti in polnilnik s suho krpo.
- Preverite, ali se poleg polnilnika nahajajo predmeti, ki motijo polnjenje baterije.
• Ko robotski sesalnik vzamete s polnilnika, se začne baterija prazniti.
- Zato imejte robotski sesalnik po možnosti na polnilniku. (Če zapustite dom za daljši
čas, denimo ko se odpravite na poslovno pot, potovanje itd., izklopite stikalo za
napajanje na robotskem sesalniku in izključite polnilnik ter obe enoti shranite.)
OPOMBA
Baterija
■ Robotski sesalnik je opremljen z okolju prijazno sekundarno litij-ionsko baterijo (Li-ion), funkcija
za preprečevanje prekomernega polnjenja pa zagotavlja dolgo življenjsko dobo baterije.
■ Garancijska doba baterije je 6 mesecev od datuma
nakupa.
■ Ob nakupu baterije od centra za pomoč strankam
) in številko
zahtevajte simbol izvirnega dela (
modela.
-
Ta baterija je namenjena samo Samsungovim robotskim sesalnikom. Uporaba za druge naprave
ali namene je strogo prepovedana.
Baterije ne razstavljajte ali spreminjajte.
Baterijo polnite v dobro prezračenem prostoru.
Baterije ne izpostavljajte ognju in je ne segrevajte.
Polov (+) in (-) ne povezujte s kakršnimi koli kovinskimi predmeti.
Baterijo hranite v notranjih prostorih (0°C–40°C).
Preden izdelek zavržete, baterije odvrzite na okolju prijazen način.
Baterij ne odvrzite med običajne gospodinjske odpadke.
Stare baterije odvrzite v skladu z lokalnimi predpisi.
❈ Če baterija ne deluje, je ne razstavljajte. Obrnite se na najbližji center za pomoč strankam.
❈ Daljši čas polnjenja in kratek čas delovanja kažeta na prihajajoči konec dobe uporabnosti
baterije. Za zamenjavo baterije se obrnite na pooblaščeni center za pomoč strankam.
Sekundarne baterije, ki je priložena temu izdelku, uporabnik ne more zamenjati sam.
Za informacije o zamenjavi baterije se obrnite na vašega ponudnika storitev.
uporaba _23
DJ68-00664B.indb 23
2012.6.16 11:10:41 AM
Namestitev NAVIDEZNEGA ČUVAJA
Robotski sesalnik lahko omejite na določeno
območje tako, da uporabite način Fence (Ograja;
navidezna stena).
Lučka načina
Senzor za
zaznavanje
oddaljenosti
Gumb za način/
vklop
Senzor za
zaznavanje
glavne enote
Delovanje gumbov
1. Delovanje lučke načina
- Način Fence (Ograja; navidezna stena): utripa rdeča lučka.
- Off (Izklopljeno): lučka je izklopljena.
2. Nastavitev načina
- Ko pritisnete gumb za način/napajanje, izberete način Fence
(Ograja; navidezna stena) ➝ Power off (Izklopljeno), v tem
zaporedju.
❈ Oddaljenost navideznega zidu je najmanj 2,5 m in se lahko
razlikuje glede na okolico in robotovo stanje premikanja.
Postavitev navidezne stene
NAVIDEZNI ČUVAJ ustvari nevidno pregrado, ki je robotski
sesalnik ne more prečkati.
Npr. pred cvetličnimi posodami, pohištvom, vhodnimi vrati itd.
1. Z gumbom za način/napajanje izberite način Fence
(Ograja; navidezna stena).
- Utripa rdeča lučka načina.
Senzor za
oddaljenost
2. NAVIDEZNEGA ČUVAJA namestite pred območje, do
Postavi se ograja
katerega želite preprečiti dostop robotskemu sesalniku. (navidezna stena).
- NAVIDEZNEGA ČUVAJA namestite tako, da lahko senzor za
oddaljenost oblikuje nevidno ogrado, ki je robotski sesalnik ne bo mogel prečkati.
24_ uporaba
DJ68-00664B.indb 24
2012.6.16 11:10:41 AM
O senzorju IrDA
POZOR
03 UPORABA
• Infrardeči prenos signala morda ne bo tekoče
[Prednost infrardečega signala]
deloval na mestih, ki so osvetljena s halogenskimi
lučmi ali na prostem.
• Robotski sesalnik uporablja 3 vrste infrardečih
>
>
naprav, zato naprava, ki se nahaja pred
prednostno napravo, morda ne bo delovala.
Daljinski
Navidezni
Polnilnik
• Pri upravljanju robotskega sesalnika z daljinskim
upravljalnik
čuvaj
upravljalnikom lahko sesalnik prečka navidezno
ograjo NAVIDEZNEGA ČUVAJA ali se zaleti v oviro,
ker ima signal daljinskega upravljalnika prednost pred signalom NAVIDEZNEGA ČUVAJA.
• Pri uporabi robotskega sesalnika v majhnem prostoru ali na kratkih razdaljah lahko pride do
medsebojnih motenj infrardečega signala.
• NAVIDEZNI ČUVAJ naj bo nameščen stran od polnilnika, saj se utegne samodejno polnjenje
prekiniti, če se NAVIDEZNI ČUVAJ nahaja blizu polnilnika.
• Če sočasno uporabljate več kot en robotski sesalnik, lahko pride do okvare zaradi medsebojnih
motenj infrardečih signalov.
uporaba _25
DJ68-00664B.indb 25
2012.6.16 11:10:41 AM
UPORABA ROBOTSKEGA SESALNIKA
Zagon/ustavitev sesanja
Zaženete ali zaustavite lahko vse funkcije robotskega
sesalnika.
■ Funkcije robotskega sesalnika delujejo samo, če je stikalo za
napajanje vklopljeno.
■ Med delovanjem robotskega sesalnika pritisnite gumb (
prekličete delovanje in izberete želeno funkcijo.
) da
Vklop ali izklop napajanja
Vklop napajanja
-
Glavna enota: pritisnite gumb (
).
Izklop napajanja
- Daljinski upravljalnik: pritisnite gumb [Power] (Napajanje).
-
Glavna enota: pritisnite gumb (
) in ga držite pritisnjenega 3 sekunde.
❈ Če približno 1 minuto po vklopu napajanja ne pritisnete nobenega
gumba, se napajanje samodejno izklopi, da ne pride do izpraznitve
baterije. Napajanje znova vklopite tako, da pritisnete in kratek čas držite
gumb za napajanje (Start/Stop (Zagon/ustavitev)) na glavni enoti.
Uporaba daljinskega
upravljalnika
Zagon ali zaustavitev sesanja
Zagon
- Daljinski upravljalnik: pritisnite gumb Auto (Samodejno), Spot
(Območje), Max (Maksimalno), Manual (Ročno).
- Glavna enota: Izberite način Auto (Samodejno)/Spot (Območje)/
Max (Maksimalno)/ tako, da pritisnete gumb(
) nato pa pritisnite
gumb (
-
).
Sesanje se začne tako, da se robotski sesalnik začne premikati.
) ne da bi izbrali način sesanja, je izbran
❈ Če pritisnete gumb (
način samodejnega sesanja.
Zastavitev
-
Za ustavitev sesanja pritisnite gumb (
) na daljinskem
upravljalniku ali glavni enoti.
Ko sesanje ustavite, se robotski sesalnik ustavi.
Uporaba gumbov
glavne enote
26_ uporaba
DJ68-00664B.indb 26
2012.6.16 11:10:42 AM
Polnjenje
Če želite, da se robotski sesalnik vrne k polnilniku in napolni
baterijo, pritisnite gumb Recharging (Polnjenje).
03 UPORABA
) da
■ Med delovanjem robotskega sesalnika pritisnite gumb (
prekličete delovanje, nato pritisnite gumb Recharging (Polnjenje).
1. Pritisnite gumb Recharging (Polnjenje).
”)) se prikaže na nadzorni plošči in robotski sesalnik se vrne
- (“
na polnilno postajo na polnjenje.
2. Če želite robotski sesalnik zaustaviti med vračanjem do polnilnika,
pritisnite gumb (
).
3. Če želite preizkusiti funkcijo samodejnega polnjenja, pritisnite gumb
Recharging (Polnjenje), ko je robotski sesalnik manj kot 1,5 m oddaljen
od polnilnika.
Uporaba daljinskega
upravljalnika
Odpravljanje težav, ko se robotski sesalnik ne vrne k polnilniku
- Preverite namestitev polnilnika.
- Če je polnilnik nameščen na mestu, kamor ne more voditi
robotskega sesalnika.
- Če se polnilnik oddaljen več kot 5 m od robotskega sesalnika.
: V teh primerih bo robotski sesalnik morda potreboval več časa,
da se vrne k polnilniku.
■ Robotski sesalnik napolnite ročno v teh primerih:
- Če je polnilnik nameščen v kotu.
- Če je baterija popolnoma izpraznjena.
- Če se je robotski sesalnik zagozdil v oviro (npr. pohištvo itd.).
- Če robotski sesalnik ne more prečkati praga, da bi dosegel
mesto, kjer je nameščen polnilnik.
Uporaba gumbov
glavne enote
1,
5
m
sp
re
da
j
uporaba _27
DJ68-00664B.indb 27
2012.6.16 11:10:42 AM
Samodejno sesanje
Robotski sesalnik se samodejno premika in sesa, dokler niso
posesani vsi prostori.
■ Če pritisnete gumb Start/Stop (Zagon/ustavitev) na glavni enoti ali
daljinskem upravljalniku, ne da bi izbrali način sesanja, se zažene
samodejno sesanje.
■ Če se sesanje začne, ko je robotski sesalnik priključen na polnilnik, se
sesalnik hitreje vrne k polnilniku, saj si med sesanjem zapomni svoje
prvotno mesto.
■ Če robotski sesalnik začne sesanje na drugem mestu in ne polnilni
postaji, in polnilne postaje med čiščenjem ne uspe najti, se bo zaustavil na mestu, kjer se je
sesanje začelo.
■ Če je raven napolnjenosti baterije med sesanjem prenizka, se robotski sesalnik samodejno vrne
k polnilniki postaji. Ko je baterija napolnjena, nadaljuje s sesanjem. (Nadaljevanje sesanja: enkrat)
Gumb glavne
enote
Gumb daljinskega
upravljalnika
Potek nastavitve
1. Nastavite način.
▶
Enkrat
2. Prekličite način.
Običajni način
Funkcija nadaljevanja sesanja
• Če robotski sesalnik oceni, da je sesanje končano, se
funkcija nadaljevanja sesanja ne izvede.
OPOMBA
• Če robotski sesalnik med polnjenjem prestavite ali pritisnete
gumb, sesalnik oceni, da je sesanje zaključeno in ne
nadaljuje sesanja.
POZOR
• Robotskega sesalnika med sesanjem ne prestavljajte in
ne pritiskajte gumbov. V nasprotnem sesalnik oceni, da je
sesanje zaključeno in začne čistiti od začetka.
• Ko pritisnete gumb Turbo, se na nadzorni plošči
izmenjaje vklaplja in izklaplja ikona turbonačina. Ko je
ikona turbonačina vklopljena, lahko zaženete sesanje v
turbonačinu.
Turbonačin
Čiščenje končano
28_ uporaba
DJ68-00664B.indb 28
2012.6.16 11:10:42 AM
Sesanje območja
Ta način omogoča sesanje določenega območja, kjer je polno
drobtinic piškotov, prahu itd.
■ Robotski sesalnik prestavite v prostor, kjer želite izvesti sesanje
območja.
Pribl. 1.5m
Pribl. 1.5m
03 UPORABA
Gumb glavne
enote
Gumb daljinskega
upravljalnika
Potek nastavitve
1. Nastavite način.
▶
Dvakrat
2. Prekličite način.
Običajni način
-
V načinu sesanja območja robotski sesalnik posesa 1,5 m dolgo
in 1,5 m široko območje.
Ko je sesanje zaključeno, se na zaslonu prikaže sporočilo End
(Končano), Stop (Ustavitev) ali Standby (V pripravljenosti).
OPOMBA
POZOR
Turbonačin
Če je robotski sesalnik priključen na polnilnik, način sesanja
območja ni podprt.
• Ko pritisnete gumb Turbo, se na nadzorni plošči
izmenjaje vklaplja in izklaplja ikona turbonačina. Ko je
ikona turbonačina vklopljena, lahko zaženete sesanje v
turbonačinu.
Čiščenje končano
uporaba _29
DJ68-00664B.indb 29
2012.6.16 11:10:43 AM
Maksimalno sesanje
Robotski sesalnik se samodejno premika in sesa, dokler se ne
izprazni baterija in utripa lučka najnižje ravni napolnjenosti.
■ Če se sesanje začne, ko je robotski sesalnik priključen na polnilnik, se
sesalnik hitreje vrne k polnilniku, saj si med sesanjem zapomni svoje
prvotno mesto.
■ Če robotski sesalnik začne sesanje na drugem mestu in ne polnilni
postaji, in polnilne postaje med čiščenjem ne uspe najti, se bo
zaustavil na mestu, kjer se je sesanje začelo.
■ Če je raven napolnjenosti baterije med sesanjem nizka, se robotski
sesalnik samodejno vrne k polnilni postaji. Ko je baterija napolnjena,
nadaljuje s sesanjem. (Nadaljevanje sesanja: enkrat) enkrat)
Gumb glavne
enote
Gumb daljinskega
upravljalnika
Potek nastavitve
1. Nastavite način.
▶
Trikrat
2-krat v načinu polnjenja
2. Prekličite način.
Funkcija nadaljevanja sesanja
• Če robotski sesalnik oceni, da je sesanje končano, se
nadaljevanje sesanja ne izvede.
OPOMBA
• Če robotski sesalnik med polnjenjem prestavite ali pritisnete
gumb, sesalnik oceni, da je sesanje zaključeno (ne nadaljuje
sesanja).
POZOR
Običajni način
Turbonačin
• Robotskega sesalnika med sesanjem ne prestavljajte in
ne pritiskajte gumbov. V nasprotnem sesalnik oceni, da je
sesanje zaključeno in začne čistiti od začetka.
• Ko pritisnete gumb Turbo, se na nadzorni plošči
izmenjaje vklaplja in izklaplja ikona turbonačina. Ko je
ikona turbonačina vklopljena, lahko zaženete sesanje v
turbonačinu.
30_ uporaba
DJ68-00664B.indb 30
2012.6.16 11:10:43 AM
Ročno sesanje
Gumb daljinskega
upravljalnika
03 UPORABA
Robotski sesalnik lahko z daljinskim upravljalnikom premaknete v
prostor, ki ga želite posesati.
■ Robotski sesalnik prestavite v prostor, kjer želite opraviti ročno
sesanje.
■ Ročno sesanje je mogoče samo z daljinskim upravljalnikom.
Potek nastavitve
1. Nastavite način.
2. Prekličite način.
OPOMBA
POZOR
• Če je robotski sesalnik priključen na polnilnik, način ročnega
sesanja ni podprt.
• Če 1 minuto ne storite ničesar, preklopi v način pripravljenosti.
• Ko pritisnete gumb Turbo, se na nadzorni plošči
izmenjaje vklaplja in izklaplja ikona turbonačina. Ko je
ikona turbonačina vklopljena, lahko zaženete sesanje v
turbonačinu.
Smerne tipke
(naprej, levo, desno) Funkcija
vzvratnega premikanja ni
podprta.
uporaba _31
DJ68-00664B.indb 31
2012.6.16 11:10:43 AM
Zakasnitev vklopa
V tem načinu lahko določite enkratno izvajanje sesanja ob
izbranem času.
■ Sesanje po urniku se izvede samo, če je sesalnik priključen na
polnilno postajo.
Daljinski upravljalnik
Utripa
Zmanjšaj
Povečaj
Utripa
Zmanjšaj
Utripa
Utripa
Utripa
-
Časovna omejitev
1. Pritisnite na gumb za
zakasnitev vklopa.
- Prikaže se trenutna nastavitev,
utripa. Pritisnite na gumb
Y ali Z in nastavite uro.
2. Pritisnite gumb za zakasnitev
vklopa. Pritisnite na gumb
Y ali Z za nastavitev načina
čiščenja.
- Izberete lahko avtomatski
(Auto) ali maksimalni (Max)
način čiščenja.
3. Pritisnite gumb za zakasnitev
vklopa.
- Vrednost, ki ste jo nastavili,
bo utripala, nastavitve so
končane.
- Ko so nastavitve končane, se
prikažeta nastavljeni čas in
.
Utripa
Preklic nastavitev
Povečaj
Potek nastavitve
-
Če pritisnete gumb Start/Stop (Zagon/ustavitev) med
polnjenjem ali nastavljanjem ure, se nastavitve prekličejo.
Nastavitve se prekličejo tudi, če sesalnik odklopite s polnilne
postaje.
Če med nastavljanjem ure 1 minuto ne storite ničesar, sesalnik
samodejno zapusti način nastavitve časa.
32_ uporaba
DJ68-00664B.indb 32
2012.6.16 11:10:44 AM
DODATNE FUNKCIJE
Uporaba dodatnih funkcij
Turbonačin
Ko pritisnete gumb Turbo, se na nadzorni plošči izmenjaje
vklaplja in izklaplja ikona turbonačina.
On turbo (Turbo Mode) : The power brush rotates at
maximum speed.
Off turbo (Normal Mode) : The power brush rotates at
maximum speed.
03 UPORABA
Dodatne funkcije omogočajo preprostejšo in priročnejšo uporabo robotskega sesalnika.
■ Dodatne funkcije lahko nastavite samo z daljinskim upravljalnikom.
Izbira zvočnega signala
Če želite izbrati zvočni učinek, pritisnite gumb Sound (zvočni
signal).
■ Ko pritisnete ta gumb, določite Sound Effects (zvočni signali)
→ Mute (brez zvoka), v tem zaporedju.
- Sound Effects (zvočni signali) : zvočni signali se
predvajajo.
- Mute (brez zvoka): zvočni signali in opozorila se ne
predvajajo.
uporaba _33
DJ68-00664B.indb 33
2012.6.16 11:10:44 AM
vzdrževanje nastavkov in filtra
ČIŠČENJE ROBOTSKEGA SESALNIKA
Upoštevajte načine čiščenja in vzdrževanja
■ Če je stikalo za napajanje poškodovano, stopite v stik s servisnim
zastopnikom, da se izognete nezgodam.
■ Ne uporabljajte sredstev ali mehanskih naprav, ki jih ni namestil
proizvajalec in bi utegnile poškodovale robotski sesalnik.
■ Pred čiščenjem robotskega sesalnika
vedno izklopite stikalo na spodnji strani
glavne enote. Delovanje robotskega
sesalnika se utegne nepričakovano sprožiti
in povzročiti poškodbo.
Čiščenje okenca senzorja in kamere
Pred čiščenjem robotskega sesalnika morate vedno izklopiti
stikalo na spodnji strani glavne enote.
■ Glavne enote robotskega sesalnika nikoli ne škropite z vodo,
razredčilom, bencinom ipd.
■ Nežno obrišite okence senzorja in kamero
z mehko krpo.
Kamera
Okence sprednjega senzorja
Okence sprednjega senzorja
Okence senzorja za stopnice
in kamera
Hrbtno okence senzorja
34_ vzdrževanje
DJ68-00664B.indb 34
2012.6.16 11:10:44 AM
Čiščenje posode za prah in filtrov
04 VZDRŽEVANJE
Pred čiščenjem izpraznite posodo za prah.
■ Pri snemanju posode za prah pazite, da ne raztresete prahu iz posode
za prah.
■ Izpraznite posodo za prah v teh primerih:
1. Ko se posoda za prah napolni.
2. Če se moč sesanja nenadoma zmanjša.
3. Ko se hrup nenadoma močno poveča.
1. Pritisnite gumb za ločevanje posode za prah (PUSH (Potisni)) in
povlecite posodo za prah, če jo želite ločiti.
2. Povlecite pokrov posode za prah v smeri puščice na sliki in snemite
pokrov.
3. Odstranite filter in filtrirno mrežico iz posode za prah.
Filter
Filtrirna mrežica
4. Stresite prah s filtra, filtrirne mrežice in posode za prah.
❈ Lahko jih sperete z vodo.
Po čiščenju z vodo:
1. Posoda za prah: obrišite vso vodo.
OPOMBA
2. Filter, filtrirna mrežica: preden ju sestavite, ju morate
popolnoma posušiti.
5. Ponovno namestite filter in filtrirno mrežico na posodo za
prah.
- Filtrirno mrežico namestite, ko je mreža obrnjena navzdol.
Če filter ni pravilno obrnjen, ga ne boste mogli namestiti.
POZOR
Če posodo za prah vstavite brez filtra, se prikaže koda napake C08.
Pazite, da boste namestili filter.
6. Zaprite pokrov posode za prah in posodo vstavite v glavno enoto.
vzdrževanje _35
DJ68-00664B.indb 35
2012.6.16 11:10:45 AM
ČIŠČENJE ROBOTSKEGA SESALNIKA
Čiščenje zmogljive krtače
Pred čiščenjem robotskega sesalnika morate vedno izklopiti
stikalo na spodnji strani glavne enote.
• Da ne bi raztresli prahu iz posode za prah, pred čiščenjem
zmogljive krtače najprej izvlecite posodo za prah.
POZOR
1. Preverite, ali je morda na priključku polnilnika nesnaga; nato
pritisnite kljukico, s katero je pritrjen pokrov krtače, da ga
odstranite.
2. Privzdignite zmogljivo krtačo iz glavne enote.
3. S čistilno krtačo ali sesalnikom odstranite morebitne tujke, kot so
dolgi lasje ali vrvice, ki so se navile okoli zmogljive krtače.
36_ vzdrževanje
DJ68-00664B.indb 36
2012.6.16 11:10:45 AM
4. Ko zmogljivo krtačo očistite, jo najprej pritrdite na strani stikala
za napajanje, nato pa še na drugi strani.
04 VZDRŽEVANJE
5. Stranico vstavite v dva utora in jo namestite tako, da jo
potiskate navzdol, dokler se ne zaskoči.
POZOR
• Da preprečite zamašitev robotskega sesalnika, ne sesajte zobotrebcev in bombažnih blazinic.
• Če tujkov ne morete odstraniti, stopite v stik s centrom za pomoč strankam.
• Ker zmogljiva krtača sesa prah s tal, se lahko okoli nje ovijejo lasje in dolge niti. Zmogljivo krtačo
redno pregledujte in čistite.
vzdrževanje _37
DJ68-00664B.indb 37
2012.6.16 11:10:45 AM
Čiščenje stranske vrtljive krtače za sesanje robov
Pred čiščenjem robotskega sesalnika morate vedno izklopiti
stikalo na spodnji strani glavne enote.
1. Preverite, ali je stranska vrtljiva krtača zvita in ali se je na njej
nabrala nesnaga.
2. Z gumijastimi rokavicami primite krpo, ki ste jo namočili v vročo
vodo, in z njo ovijte stransko vrtljivo krtačo. Pustite delovati 10
sekund in nato krtačo obrišite.
3. Obrnite stransko vrtljivo krtačo in ponovite postopek, opisan v
koraku 2.
4. Če so se okoli glavne enote in stranske vrtljive krtače ovili lasje
ali vrvice, krtačo odvijte s križnim izvijačem in jo odstranite. Pri
nameščanju krtače pazite, da se bo oznaka »L« na stranski vrtljivi
krtači za sesanje robov ujemala z oznako »L« na glavni enoti.
Nato ponovno namestite stransko vrtljivo krtačo. (Črka »R« je
odtisnjena na desni stranski vrtljivi krtači.)
OPOMBA
L
Na stransko vrtljivo krtačo se pogosto ovijejo lasje in drugi tujki, zato jo redno čistite.
Če se na stranski vrtljivi krtači nabere preveč nesnage, lahko slednja povzroči poškodbe.
38_ vzdrževanje
DJ68-00664B.indb 38
2012.6.16 11:10:45 AM
Čiščenje pogonskega kolesca
04 VZDRŽEVANJE
Pred čiščenjem robota morate vedno izklopiti stikalo na spodnji
strani glavne enote.
■ Če začne robotski sesalnik nenadoma začne begati, je vzrok morda
nesnaga, ki ovira pogonsko kolesce.
1. Ko želite očistiti pogonsko kolesce, na tla položite mehko krpo in
previdno obrnite glavno enoto.
2. Preverite, ali so se na kolescu nabrali tujki in jih po potrebi odstranite
s palčko ali topo pinceto.
vzdrževanje _39
DJ68-00664B.indb 39
2012.6.16 11:10:45 AM
odpravljanje težav
KAJ JE TREBA PREVERITI, PREDEN POKLIČETE SERVISERJA
Znak
Robotski sesalnik se
pred sesanjem sploh
ne zažene.
Robotski sesalnik
med sesanjem
preneha delovati.
Moč sesanja je
zmanjšana.
Preverite
Rešitev
• Ali je posoda za prah nameščena? • Namestite posodo za prah.
• Ali je stikalo za napajanje
vklopljeno?
• Vklopite stikalo za napajanje.
• Ali je na nadzorni plošči vklopljena
ikona
za način sesanja?
. (Za izklop
• Pritisnite gumb
3
pritisnite in držite gumb
sekunde ali dlje.)
• Ali utripa ikona nizke ravni
napolnjenosti baterije in je na
nadzorni plošči prikazana oznaka
»Lo«?
• Dvignite robotski sesalnik in ga
ročno priključite na polnilnik, da ga
napolnite.
• Robotski sesalnik ne deluje, če je
baterija v daljinskem upravljalniku
prazna.
• Zamenjajte bateriji v daljinskem
upravljalniku. (Vrsta AAA)
• Ali utripa ikona nizke ravni
napolnjenosti baterije in je na
nadzorni plošči prikazana oznaka
»Lo«?
• Dvignite robotski sesalnik in ga
ročno priključite na polnilnik, da ga
napolnite.
• Ali se je robotski sesalnik zataknil
med žice na tleh?
• Izklopite stikalo za napajanje in
odstranite žice.
• Ali je robotski sesalnik obtičal, ker
ne more prečkati višinske ovire?
- Pogonsko kolesce je dvignjeno.
• Izklopite stikalo za napajanje in
prestavite robotski sesalnik v
prostor, ki ga želite posesati.
• Ali je okoli pogonskega kolesca
ovita drobna krpa (blago)?
• Izklopite stikalo za napajanje in
odstranite krpo.
• Ali robotski sesalnik ne more
prečkati praga?
• Izklopite stikalo za napajanje in
prestavite robotski sesalnik v
prostor, ki ga želite posesati.
• Preverite, ali je posoda za prah
polna.
• Izklopite robotski sesalnik in
izpraznite posodo za prah.
• Preverite, ali je sesalna odprtina
zamašena zaradi nesnage.
• Izklopite stikalo za napajanje in
odstranite nesnago iz sesalne
odprtine.
• Preverite, ali je filter zamašen.
• Temeljito očistite filter.
40_ odpravljanje težav
DJ68-00664B.indb 40
2012.6.16 11:10:46 AM
Znak
Robotski sesalnik ne
najde polnilnika.
Preverite
Rešitev
• Preverite, ali je napajalni vtič
polnilnika ustrezno vključen v
vtičnico.
• Če je priključek polnilnika umazan,
ga obrišite s suho krpo.
• Ali je NAVIDEZNI ČUVAJ nameščen • NAVIDEZNEGA ČUVAJA prestavite
blizu polnilnika?
na drugo mesto, da se robotski
sesalnik lahko samodejno polni.
Robotski sesalnik gre • Ali sta bateriji v NAVIDEZNEM
mimo NAVIDEZNEGA
ČUVAJU izpraznjeni?
ČUVAJA.
• Ali je lučka načina vklopljena?
• Zamenjajte bateriji.
(2 alkalni bateriji vrste D (LR20))
Čas delovanja baterij • Ali uporabljate manganovi suhi
NAVIDEZNEGA
bateriji?
ČUVAJA je prekratek.
• Zamenjajte bateriji z novima
alkalnima baterijama.
(2 alkalni bateriji vrste D (LR20))
05 ODPRAVLJANJE TEŽAV
• Če se približno 1 m pred
polnilnikom in približno 0,5 m levo
ali desno od polnilnika nahajajo
ovire, jih odstranite.
• Preverite, ali je NAVIDEZNI ČUVAJ
izklopljen in ga nato nastavite na
želeni način.
Robotski sesalnik se • Diagonalno premikanje robotskega • Smer čiščenja je odvisna od
sesalnika se lahko pojavi v
začne med sesanjem
začetnega mesta. Ker sesalnik
nenadoma premikati
naslednjih primerih:
čisti po vnaprej določenem načrtu,
diagonalno.
posesa celotno območje. (Običajno
- Če je bil robotski sesalnik med
delovanje)Namestite postajo za
polnjenjem postavljen pod kotom
polnjenje v enaki smeri, kot so
na polnilno postajo.
položena tla, in zaženite čiščenje,
- Če se robotski sesalnik po sesanju
ko je robotski sesalnik priključen
območja premakne v drug prostor
na polnilno postajo.
po bližnjici.
- Če se površine ovire ne dotika
pravokotno (90˚).
- Na ploščicah ali lesenih tleh.
odpravljanje težav _41
DJ68-00664B.indb 41
2012.6.16 11:10:46 AM
ODPRAVLJANJE TEŽAV S POMOČJO KOD NAPAK
KODA NAPAKE
VZROK
REŠITEV
• Robotski sesalnik se med
krmarjenjem zagozdi.
• Izklopite stikalo za napajanje na spodnji strani
in prestavite robotski sesalnik na drugo mesto.
• V zmogljivo krtačo so se
zagozdili predmeti (vrvica,
papir, igrača itn.).
• Izklopite stikalo za napajanje na spodnji strani
in odstranite ujete predmete iz zmogljive
krtače.
• V levo pogonsko kolesce so
se zagozdili predmeti (vrvica,
papir, igrača itn.).
• Izklopite stikalo za napajanje na spodnji
strani in odstranite ujete predmete iz levega
pogonskega kolesca.
• V desno pogonsko kolesce so • Izklopite stikalo za napajanje na spodnji strani
se zagozdili predmeti (vrvica,
in odstranite ujete predmete iz desnega
papir, igrača itn.).
pogonskega kolesca.
• Preverite senzor odbijača.
• Izklopite stikalo na spodnji strani in nato
odstranite oviro pred robotskim sesalnikom
ali pa prestavite robotski sesalnik na drugo
mesto.
• Na okencu senzorja za ovire
je tuja snov (prah, madež in
podobno).
• Izklopite stikalo za napajanje na spodnji strani
in z mehko krpo obrišite tujo snov s sprednjega
in hrbtnega okenca senzorja.
• Na okencu senzorja za
stopnice je tuja snov (prah,
madež in podobno).
• Izklopite stikalo za napajanje na spodnji strani
in z mehko krpo obrišite tujo z okenca senzorja
za stopnice.
• Posoda za prah ni vstavljena. • Vstavite posodo za prah, tako da zaslišite
»klik«.
• V stransko vrtljivo krtačo za
• Izklopite stikalo za napajanje na spodnji strani
sesanje robov so se zagozdili
in odstranite predmete iz stranske vrtljive
predmeti (vrvica, blago in
krtače.
podobno).
❈ Če pritisnete gumb Start/Stop (Zagon/ustavitev) ali izklopite stikalo za napajanje, se koda napake
izbriše.
42_ odpravljanje težav
DJ68-00664B.indb 42
2012.6.16 11:10:46 AM
specifikacije izdelka
80 mm (višina)
350 mm (dolžina)
161 mm (dolžina)
350 mm (širina)
Osrednja enota
Klasifikacija
275 mm (širina)
Polnilnik (postaja)
Element
SERIJA SR8930*
Premer
350mm
Višina
80mm
Teža
3,2kg
Napetost
220–240 V AC, 50–60 Hz
Poraba energije polnilnika
40 W
Poraba energije glavne enote
40 W
Specifikacije baterije
14,4 V/31,68Wh
Mehanske
lastnosti
06 SPECIFIKACIJE IZDELKA
122 mm (višina)
Električni podatki
Specifikacije
čiščenja
Način polnjenja
Samodejno polnjenje/ročno polnjenje
Način sesanja
Samodejno, Območje, Maksimalno, Ročno,
Zakasnitev vklopa
Čas polnjenja
Približno 180 minut
Čas sesanja
(na podlagi sesanja trdih tal)
Približno 100 minut
Način sesanja
Prepoznavanje oblike stropa
Vrsta gumba glavne enote
Gumb na dotik
Sesalnik je skladen z naslednjima direktivama.
Direktiva o elektromagnetni združljivosti: 2004/108/EGS
Direktiva o nizki napetosti: 2006/95/ES
specifikacije izdelka _43
DJ68-00664B.indb 43
2012.6.16 11:10:46 AM
OPEN SOURCE ANNOUNCEMENT
Some software components of this product incorporate source code covered under the BSD.
And this software is based in part on the work of the Independent JPEG Group.
■ OpenCV :
IMPORTANT : READ BEFORE DOWNLOADING, COPYING, INSTALLING OR USING.
By downloading, copying, installing or using the software you agree to this license.
If you do not agree to this license, do not download, install, copy or use the software.
License Agreement
For Open Source Computer Vision Library
Copyright (C) 2000-2008, Intel Corporation, all rights reserved.
Copyright (C) 2008-2010, Willow Garage Inc., all rights reserved.
Third party copyrights are property of their respective owners.
Redistribution and use in source and binary forms, with or without modification, are permitted provided
that the following conditions are met:
Redistribution’s of source code must retain the above copyright notice, this list of conditions and the
following disclaimer.
Redistribution’s in binary form must reproduce the above copyright notice, this list of conditions and the
following disclaimer in the documentation and/or other materials provided with the distribution.
The name of the copyright holders may not be used to endorse or promote products derived from this
software without specific prior written permission.
This software is provided by the copyright holders and contributors “as is” and any express or implied
warranties, including, but not limited to, the implied warranties of merchantability and fitness for a
particular purpose are disclaimed.
In no event shall the Intel Corporation or contributors be liable for any direct, indirect, incidental, special,
exemplary, or consequential damages (including, but not limited to, procurement of substitute goods
or services; loss of use, data, or profits; or business interruption) however caused and on any theory of
liability, whether in contract, strict liability, or tort (including negligence or otherwise) arising in any way out
of the use of this software, even if advised of the possibility of such damage.
■ Copyright (c) 2006, 2008, 2009, 2010 Edward Rosten
All rights reserved.
Redistribution and use in source and binary forms, with or without modification, are permitted provided
that the following conditions are met:
Redistributions of source code must retain the above copyright notice, this list of conditions and the
following disclaimer.
Redistributions in binary form must reproduce the above copyright notice, this list of conditions and the
following disclaimer in the documentation and/or other materials provided with the distribution.
Neither the name of the University of Cambridge nor the names of its contributors may be used to
endorse or promote products derived from this software without specific prior written permission.
THIS SOFTWARE IS PROVIDED BY THE COPYRIGHT HOLDERS AND CONTRIBUTORS “AS
IS” AND ANY EXPRESS OR IMPLIED WARRANTIES, INCLUDING, BUT NOT LIMITED TO, THE
IMPLIED WARRANTIES OF MERCHANTABILITY AND FITNESS FOR A PARTICULAR PURPOSE ARE
DISCLAIMED. IN NO EVENT SHALL THE COPYRIGHT OWNER OR CONTRIBUTORS BE LIABLE FOR
ANY DIRECT, INDIRECT, INCIDENTAL, SPECIAL, EXEMPLARY, OR CONSEQUENTIAL DAMAGES
(INCLUDING, BUT NOT LIMITED TO, PROCUREMENT OF SUBSTITUTE GOODS OR SERVICES;
LOSS OF USE, DATA, OR PROFITS; OR BUSINESS INTERRUPTION) HOWEVER CAUSED AND ON
ANY THEORY OF LIABILITY, WHETHER IN CONTRACT, STRICT LIABILITY, OR TORT (INCLUDING
NEGLIGENCE OR OTHERWISE) ARISING IN ANY WAY OUT OF THE USE OF THIS SOFTWARE, EVEN
IF ADVISED OF THE POSSIBILITY OF SUCH DAMAGE.
DJ68-00664B.indb 44
2012.6.16 11:10:47 AM
memo
DJ68-00664B.indb 45
2012.6.16 11:10:47 AM
memo
DJ68-00664B.indb 46
2012.6.16 11:10:47 AM
memo
DJ68-00664B.indb 47
2012.6.16 11:10:47 AM
Code No. DJ68-00664B REV(0.0)
DJ68-00664B.indb 48
2012.6.16 11:10:47 AM