Download Samsung SW70X1P Инструкция по использованию
Transcript
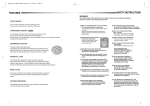
SAFETY INSTRUCTIONS
FEATURES
Be sure that the washer is grounded.
FUZZY CONTROL
F uzzy control operates with best washing course
Put your laundry into the washer evenly.
To avoid electrical shock, use metal pipe for the
ground connection.But do not ground the washer
with gas pipes or telephone lines because of the
dangers of explosion or lightning strike.
by sensing the washload like artificial intelligence.
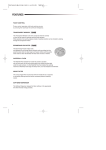
CLEAN WASH BY THE DOUBLE FALL
Double fall,falling down from top of the tub,cleans
heavy dirt and dissolves detergent throughly
with impact power.
Uneven laundry may cause noise or vibration.
Don't use excessively hot water.
(50˚C or more)
Ventilation openings must not be obstructed
by carpeting when the washing machine
is installed on a carpeted floor.
Plastic parts may be deformed or damaged.
Also, clothing may be deformed or bleached.
During spinning, don't put your hand
in the spin basket.
Before washing, check all pockets.
If nails or pins remain in pockets,they may
damage the washer or clothes.
Because the spin basket is rotating at high
speed, rotating parts may injure your hand.
ADOPTION OF THE MAGIC HAND
T he “Magic Hand” provides both the powerful washing
action needed to completely clean larger and heavier
items and the gentle washing action for dedicate fabric.
The “Magic Hand” significantly increases washing
power and ensures tangle-free operation.
Never splash water on the control panel.
If the power supply cord of this
washer is damaged, it must be
replaced by a repair shop appointed
by the manufacturer, because special
purpose tools are required.
Never allow children to operate or play
with the washer.
Disconnect the power cord from the power
supply when not in use.
DESCRIPTION OF PARTS
CONTROL PANEL
① POWER BUTTON
⑥ WATER LEVEL SELECT BUTTON
Press this button once to operate.
Press once again to turn the washer off.
LID
Be sure to keep the lid
closed during washing
and spinning.
DETERGENT BOX
RINSE CASE
DOUBLE FALL GUIDE
WATER SUPPLY
HOSE(HOT)
WATER SUPPLY HOSE
(COLD)
According to the washload,select the
water level ; HIGH➝ MEDIUM➝ LOW➝
➁ START/HOLD BUTTON
Use to pause and restart the operation.
To change the washing procedure during
operation, press this button to stop, and
once again to restart after changing the procedure.
⑧ REMAINING TIME INDICATOR LIGHT
Press this button when delay start
washing is needed.
The indicator light shows the remaining time
(in minutes) of each wash cycle.
At the end of the cycle,the power automatically
switches off.
➃ FUNCTION SELECT BUTTON
BLEACH INLET
SPIN BASKET
POWER CORD
With every press of this button, the
function changes;
SOUND ABSORPTION
PANEL
RINSE&SPIN➝ WASH&RINSE&SPIN➝ WASH
Stainless
LINT FILTER
“MAGIC HAND”
PULSATOR
FRONT CONTROL
PANEL
Lint will be collected in the
lint filter during washing.
WASH➝ RINSE➝ SPIN➝ WASH&RINSE➝
➈ FUNCTION INDICATOR LIGHT
➄ COURSE SELECT BUTTON
With every press of this button, the washing
course changes; FUZZY ➝SOAK➝WOOL ➝SPEEDY
The function in use indicator shows the
current function as a flashing symbol.
The light goes out at the end of the function.
GROUND LEAD
When the water pipe is metal,
make sure to cover the end
of the ground wire.
ADJUSTABLE LEGS
As you press this button, the type of water
is selected as follows.
COLD➝ COLDHHOT➝ HOT➝ COLD
➂ DELAY START BUTTON
DRAIN-HOSE
(PUMP)
EXTRA LOW➝ HIGH
⑦ WATER SUPPLY SELECT BUTTON
FUZZY
WATER DRAIN HOSE
Adjust the length of the
legs when installing
the washer.
1
2
WASHING PROCEDURE
the best washing course
FUZZY COURSE Selects
automatically.
laundry is soaked in water so that the
SOAK COURSE The
dirt can be eliminated completely.
1. Before starting washing, check the following;
1. Press the power button to "ON".
Connect the water supply hose to the water tap.
Leave a tap open. Plug the power cord in.
Make sure to lay down the drain hose.(In case no drain pump)
2. Put the laundry into the washer and add
detergent,too.
The remaining time indicator should show "- -"
3. Press the START/HOLD button and put
the proper amount of detergent into
the detergent box.
POWER
2. Press the DELAY START button once.
2. Press the course select button once.
START/HOLD
DELAY START
COURSE
3. Press the START/HOLD button
ex)
3 hours
You may change the delay start time with
use the DEALY START button.
(from 3 hours to 12 hours)
4. Close the lid.
Water level is selected automatically.
Washing,rinsing, and spinning follow.
POWER
4. Press the START/HOLD button.
Water level is selected automatically.
Washing,rinsing, and spinning follow.
If you want to pause, press the START/HOLD
button again.You can change the course when paused.
START/HOLD
1. Press the power button to "ON".
POWER
Be careful not to overload.
Use right detergent for the fabrics you are washing.
3. Press the POWER Button to"ON".
DELAY START COURSE Select this course when you have to go out or do something else.
ex)
High level
MANUAL FUNCTIONS
If you want to pause, press the START/HOLD
button again.You can change the course when
paused.
START/HOLD
ex)
High level
4. Close the lid.
FUNCTION
FUNCTION BUTTON
TIME
WASH ONLY
Press the POWER button.
Press the FUNCTION SELECT button once.
Press the START/HOLD button once.
Washing goes on for 23 minutes.
When the FUNCTION button is pressed during washing,
the wash time can be changed to between 3 and 25
minutes in duration.
5. Close the lid.
The washing finishes by the time you reserved.
once
ex) high level
RINSE ONLY
high or medium water level is
WOOL COURSE Only
available. Cold water is selected.
washing is speedy, it is
SPEEDY COURSE Because
good for light or less stained laundry.
Press the FUNCTION button twice.
Press the START/HOLD button once.
Rinsing goes on for 15 minutes.
1. Press the power button to "ON".
1. Press the power button to "ON".
When the FUNCTION button is pressed during rinsing,
the rinse times can be changed to between 1 and 5
times in duration.
POWER
SPIN ONLY
POWER
2. Press the course select button twice.
2. Press the course select button three times.
If you want to pause ,press the START/HOLD
button again.You can change the course when paused.
ex)
High level
3. Press the START/HOLD button
Water level is selected automatically.
Washing, rinsing, and spinning follow.
If you want to pause, press the START/HOLD button
again.You can change the course when paused.
START/HOLD
-Do not use water above 30˚C for WOOL washing.
-Refer to the tag attached on the clothes for washing information.
-Fasten buttons and turn inside out before washing.
-Use the detergent indicated in the laundry.
-When the degree of dirt is extreme, soak the laundry in warm
water for about 10 minutes before pressing the WOOL course
button in order to enhance washing efficiency.
3
ex) high level
Press the FUNCTION button four times.
Press the START/HOLD button once.
4. Close the lid.
CAUTION . . .
three times
WASH AND RINSE
COURSE
Washing,rinsing, and spinning follow.
START/HOLD
Press the FUNCTION button three times.
Press the START/HOLD button once.
Spin drying goes on for 9 minutes.
When the FUNCTION button is pressed during spinning,
the spin time can be changed to from 5 to 11 minutes.
COURSE
3. Press the START/HOLD button.
ex) high level
twice
4. Close the lid.
ex)
High level
Washing and rinsing go on for 43 minutes.
When the FUNCTION button is pressed during working,
the rinse times can be changed to between 1 and 5
times in duration.
four times
ex) high level
RINSE AND SPIN
Press the FUNCTION button five times.
Press the START/HOLD button once.
Rinsing and spin drying follow.
When the FUNCTION button is pressed during working,
the rinse times can be changed to between 1 and 5
times in duration.
five times
ex) high level
WASH AND RINSE AND SPIN
Press the FUNCTION button six times.
Press the START/HOLD button once.
Washing, rinsing and spinning follow.
When the FUNCTION button is pressed during working,
the rinse times can be changed to between 1 and 5
times in duration.
six times
ex) high level
4
INSTALLATION
ENVIRONMENT
CONNECTING THE DRAIN HOSE
Maintain at least 10cm between the washer and the wall.
Place the washer on a sturdy flat surface.
(a)
If the washer is placed on an uneven or weak surface,
noise or vibration occurs. (Allowable is 2˚)
Adjust the legs for even placement.
Never install the washer near water.
HOW TO PUT THE DETERGENT IN
(b)
1.Open the detergent box by pulling in the
IN CASE OF PUMP-DRAINED WASHER
Be sure to join tightly
the drain hose into the
drain-outlet on the
back of the machine.
Avoid direct sunlight or heaters.
Install the drain hose
in the position of about
70~80cm above
the ground.
70~80cm
As plastic and electrical components are affected
by direct heat,never place the washer near furnaces,
boliers,etc.Do not place under direct sunlight.
ASSEMBLING THE SOUND ABSORBING
PANEL
Tilt the washer a little and lift up the panel
until it clicks as shown in the figure
If the filter net is clogged after washing, push up and pull out two nets .Wash the filter net in the water.
After pressing the joint ring(a), insert the drain hose(b)
to drain direction.
Leave some space
Do not place the washer in steamy rooms or where
the washer is directly exposed to rain.Moisture may
destroy the electrical insulation causing an electrical
shock hazard.
CLEANING THE FILTER NET
direction of the arrow as shown in the
figure and then put the powder detergent
in the detergent box.
2.Put in one-time amount
of detergent evenly
so the detergent may
not brim over the box.
HOW TO CLEAN THE FILTER
not to wet the floor.
Disassemble the D-Fall
guide with the (-)driver,
and make clean.
After making clean,
reassemble the D-Fall
guide.
Rear-side
When a proper amount(one time does) of fiber softener
is stored in the softener inlet, it is automatically put in
at the last rinsing course.*In case the hot water only is
connected, this operation may not be made.
base line
*When too much softner is stored above the base line,
it may flow down at any time.
1.Place a rag under the washer filter
2.Rotate the filter counterclockwise and
CLEANING THE DOUBLE FALL OUTLET
HOW TO PUT IN RINSE
pull out the filter.
3.Remove dirts and rotate the filter
clockwise until it locks in position.
Filter
LEVELLING
1.Adjust the side horizontality ➀ first and
the front horizontatily② next.
1
2
2.If the thread is not within the limit,
adjust the height of the legs.
3.Adjust the legs on feet
OPEN
CLOSE
for levelling .
Loosen
Lock
RAG
TROUBLESHOOTING
CONNECTING THE WATER SUPPLY HOSE
1.Remove the adaptor
from the water
supply hose.
c
2.First,using a "+" type
screw driver, loosen the
four screws on the adaptor.
Next,take the adaptor and
turn part(b) following the
arrow for gap about 5mm
between them.
3. Connect adaptor to the
water tap by tightening
the screws firmly.
Then,turn part (b)
following the arrow and
put (a) and (b)together.
a
b
a
4.Connect the water supply
hose to the adaptor. Pull down
the part (c) of the water supply
hose .When the part (c)is released,
the hose is automatically
connected to the adaptor
making a 'click' sound.
Washing machine won't work
Water dose not drain
Is the water tap opened?
Is the washer plugged in?
Is the power cut off?
Is there enough water?
Is the drain hose down?(No pump)
Is the drain hose frozen?
Is the drain hose clogged?
5. Connect the other end of
the water supply hose to
the inlet water valve at the
back of the washer.
Screw the hose clockwise
all the way in.
Water is not supplied
If the water tap is a screw
type,assemble a water
supply hose that fits to the
tap as shown.
b
NOTICE After completing connection,if water leaks from the hose,then repeat the same setps.
5
Use the most conventional type of faucet for water supply.
In case the faucet is square or too big,remove the spacing ring before inserting the faucet into the adaptor.
Is the water tap opened?
Is the water cut off?
Is the water supply hose or hose
connection clogged?
Is the water tap frozen?
If water is not supplied in 1 hour,
a buzzer will sound, and the remaining
time indicator will show "7E".
If the water dose not drain in 6
minutes, a buzzer will sound,and the
remaining time indicator will show "E".
Spinning does not work
Is the laundry spread out evenly
in the washer?
Is the washer set on a sturdy
flat surface?
Power won't cut off
Water is overflowed
This sign means power is not cut
off automatically.
Make sure there is lighting
on the lamp whenever press the
power button.
Restart after spinning.
If the error sign still indicates,
call agency.
6
IN CASE THE NEED FOR SERVICING ARISES.
Don't hesitate to call any agency nearby with your name, address
and telephone number when anything wrong with your product occurs.
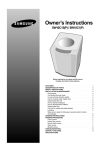
SW70X1(P) /SW70X2(P)
SW75X1S(P) /SW75X2S(P)
FEATURES
DESCRIPTION OF PARTS
SAFETY INSTRUCTIONS
CONTROL PANEL
WASHING PROCEDURE
Fuzzy course
Soak course
Wool course
Speedy course
Delay start course
MANUAL FUNCTIONS
INSTALLATION
Environment
Assembling the sound absorbing panel
Connecting the drain hose
In case of pump-drained washer
Cleaning the double fall outlet
Connecting the water supply hose
Cleaning the filter net.
How to put the detergent in
How to clean the filter
How to put in rinse
Levelling
TROUBLESHOOTING
SPECIFICATIONS
y
;
y
;
y
;
y
;
y
;
y
;
y
;
y
;
y
;
y
;
y
;
1
1
2
2
3
3
3
3
3
4
4
5
5
5
5
5
5
5
6
6
6
6
6
6
SPECIFICATIONS
WASHING CAPACITY
RATED POWER
CONSUMPTION
DIMENSIONS
WEIGHT
WATER PRESSURE
WASHING TYPE
WASH
SPIN
5kg/5.5kg
310W
240W
W540xD560xH850mm
STANDARD
WATER LEVEL
WATER USAGE
HIGH
MED
LOW
MIN
50 l
43 l
35 l
28 l
145 l
31kg
PULSATOR
ROTATING SPEED
126rpm
0.5kgf/cm2 - 8.0kgf/cm2
(2N/cm2~80N/cm2)
SPINNING TUB
ROTATING SPEED
760rpm
Stirring Type


