1
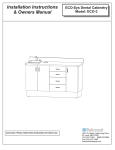
Installation Instructions
& Owners Manual
Consumer: Please retain these instructions for future use.
E-Series Dental Cabinetry
Model: ECO-6
1631 Dr. Martin Luther King Drive
St. Louis, MO 63106
(314) 231-7383 (888) 833-3682
Fax (314) 621-2296
www.belmontequip.com
Rev-091908
ISOMETRIC VIEW
Detail Drawings
Model: ECO-6
General Cabinet Handling Information
Models: ECO-6
OK
Figure A
Move by using some type of roller dolly,
slings or a comparable moving aid.
See Figure A and B
OK
Figure B
Attention: DO NOT lift by Sliding Top
which could result in damage to the
sliding mechanism.
Rev-090808
Surface Cleaning
Model: ECO-3 / ECO-6
ECO-Sys Cabinetry Systems
Laminate Surfaces Cleaning Instructions
The disinfectant solution should be applied in accordance with the instructions
provided by the manufacturer.
The following solutions are recommended for laminate
surfaces, they may also be used on metal and glass surfaces:
Product
Manufacturer
Birex®
Biotrol International
Kodak Clinasept
Kodak
Foaming Disinfectant Catalogue #829-5230
Belmont is not responsible for any changes made by the manufacturer in the chemical
composition of the cleaning solutions listed above, which may affect the surface finish
after application.
Rev-100308
Hinge Adjustments
Model: ECO-6
Adjustment Instructions for Concealed Hinges and Drawers
3-Dimension Adjustment for Snap-On Hinge
Note: Remove Cover Cap
Allows for three-way adjustments in the hinge arm.
The side adjustment is a micro adjustment. The depth
and height adjustment is held by a grid system.
Release Latch
Use #2 POZIdrive screwdriver to adjust screws.
1 – Side adjustment
2 – Depth adjustment
3 – Height adjustment
Adjustment for Drawer
1 – Height adjustment: Loosen screws
B slightly. Adjust screw A (adjustment
+/- 2mm). Tighten screws B.
2 - Side adjustment: Loosen screws B
slightly. Adjust front to required
position (adjustment range +/1.5mm). Tighten screws B.
Rev-091908
Assembly Instructions
Model: & ECO-6
D
C
B
A
Component Identification
A Lower Cabinet
B Lower Back Panel
C Upper Back Panel
D Upper Storage
Note: Back Panels (Item B & C) attached to
Lower Cabinet (Item A) during shipping.
Rev-100308
PAGE 1
Assembly Instructions
Model: ECO-6
Step 1
Check the incoming power location to see if it conforms to the specification on the floor template drawing.
If a dental delivery system is to be installed on this cabinet, confirm that the appropriate air, water and
vacuum plumbing stubs are in place.
Step 2
Remove (2) Doors (A1) and (4) Drawers (A2)
from Lower Cabinet (A) (see Figure 1). Note:
Drawers must be kept in order and returned
to original locations in order to properly fit.
A
A1
A2
Remove the (2) Bottom Covers (A3) from inside
Lower Cabient (A) (see Figure 1).
2x
4x
SIDE
DOOR
PULL LEVER
TO RELEASE
HINGE
Figure 1
A3
Step 3
Remove Upper/Lower Back Panels (A4) & (A5)
by removing (4) Allen Bolts (A6) from each
panel using a 4mm Allen Wrench (see Figure 2).
A6
A4
Step 4
Move Lower Cabinet (A) to its desired
location (see “General Cabinet Handling
Information” page for moving information).
A5
Figure 2
Attention: DO NOT lift by Sliding Top
which could result in damage to the
sliding mechanism.
PAGE 2
Assembly Instructions
Model: ECO-6
Step 5
Remove (2) Doors (D1) from Upper Storage (D) (see Figure 3).
D
SIDE
DOOR
2x
PULL LEVER
TO RELEASE
HINGE
D1
Figure 3
D
Step 6
Place Upper Storage (D) on top of the Lower Cabinet (A)
Secure with (4) 1/4-20 x 1-3/4” Flat Head Screws (D2) (see Figure 4).
(Note:Make sure to have an assistant hold the Upper Storage
in position to keep it from falling off).
A
4x
D2
Step 7
IMPORTANT
Figure 4
Adjust the (4) Leveling Feet (A7) to the desired height using a
5mm allen wrench (see Figure 5).
You can mount the cabinet to the floor at this point by
mounting the (4) Floor Mounting Brackets (A8) to the floor
using proper fasteners for the floor being mounted to.
Both leveling the cabinet and mounting to the floor may be
done at a later time but be sure to do so before access to the
feet/floor brackets is unavailable (prior to reinstalling covers and
panels. Cabinets placed up against a wall is one case where you
should wait to mount the cabinet to the floor.
Figure 5
Step 8
Make electrical connections per the
ECO-6 Electrical Schematic &
Instruction sheets.
NOTE: Cabinets placed against a wall
must have electrical access cut through
the rear base or Lower Rear Panel.
A7
4x
A8
PAGE 3
Assembly Instructions
Model: ECO-6
Step 9A (Optional)
Mount the BDS-2571 Assistant Vacuum Package (shown)
underneath the sliding countertop using (4) #10-24 x 1-1/4”
allen screws using 5/32” Allen Wrench (see Figure 6). Attach
connections according to the unit manufacturers directions.
Step 9B (Optional)
Mount the BDS-2564 Doctors Control Package
(not shown) underneath the sliding countertop
using (4) #10-24 x 1-1/4” allen screws using 5/32”
Allen Wrench. Attach connections according to
the unit manufacturers directions.
Figure 6
Step 10
Install Upper/Lower Back Panels (A4) & (A5)
by securing (4) Allen Bolts (A6) to each
panel using a 4mm Allen Wrench (see Figure 7).
A6
A4
A5
Figure 7
D
Step 11
Install (4) Shelves (D3) (2 on each side) of Upper Storage (D)
by installing (4) shelf pins per shelf into holes on inside panels
(see Figure 8).
2x
2x
D3
4x
Figure 8
PAGE 4
Assembly Instructions
Model: ECO-6
Step 11
D
Install Upper Storage Doors (D1) to Upper Storage (D) (see Figure 9)
Install Door Handles (D4) to Upper Storage Doors (D1) using
M4 x 25mm Pan Head Screws (D5) (see Figure 9).
D1
2x
D4
D5
Step 12
Figure 9
Install (2) Bottom Covers (A3) to inside Lower Cabient (A)
(see Figure 10).
Install Shelf (A7) in Lower Cabinet (A) by installing
(4) Shelf Pins into holes on inside panels
(see Figure 10).
A1
A
Install (2) Doors (A1) (see Figure 10).
A2
Install (4) Drawers (A2) (see Figure 10).
2x
4x
A7
Figure 10
A3
Step 13
Install Clock/Timer (A8) using double sided tape. See Clock/timer
instructions for battery install and operation (see Figure 11).
A8
Installation Complete
Figure 11
PAGE 5
Electrical Schematic
Model: ECO-6
ECO-6 ELECTRICAL CONNECTIONS
ALL ELECTRICAL WIRING MUST BE DONE BY OWNER WITH LICENSED ELECTRICIAN
DUPLEX
RECEPTACLE
J-BOX
W
B
W
B
W
B
G
RECEPTACLE
REAR OF CABINET
Rev-091908
Electrical Instructions
Model: ECO-6
ECO-6 Electrical Instructions
IMPORTANT NOTE: Approved electrical components are used in the ECO-6 cabinet ; however,
the procedures described herein must be performed by a licensed electrician using approved
methods and materials according to the local code governing the installation site.
General Electrical Notes
·Each cabinet should be wired to a SEPARATE 15 Amp circuit.
·Unless otherwise specified, ALL WIRING supplied by the contractor must be APPROVED 12 Ga. AWG.
·Disconnect device must be provided in the branch circuit by electrician.
* You have the option of wiring a fluorescent light in this cabinet. Please contact a licensed
electrician for consultation.
Rev-100308
Rev-032709
Floor Template
Model: ECO-6