1
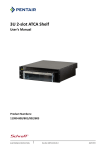
XL8000 User’s Guide
12 U AdvancedTCA Chassis
Document Revision 1.1
Ref. : M5202_TECH_0/ October 2005
Customer Service
Contact Information:
Kontron Canada, Inc.
616 Curé-Boivin
Boisbriand, Québec, Canada
J7G 2A7
Tel:
(450) 437-5682
(800) 354-4223
Fax:
(450) 437-8053
E-mail: [email protected]
Visit our site at:
www.kontron.com
© 2005 Kontron, an International Corporation. All rights reserved.
The information in this user’s guide is provided for reference only. Kontron does not assume any
liability arising out of the application or use of the information or products described herein. This
user’s guide may contain or reference information and products protected by copyrights or patents
and does not convey any license under the patent rights of Kontron, nor the rights of others.
Kontron is a registered trademark of Kontron. All trademarks, registered trademarks, and trade
names used in this user’s guide are the property of their respective owners. All rights reserved.
Printed in Canada. This user’s guide contains information proprietary to Kontron. Customers may
reprint and use this user’s guide in other publications. Customers may alter this user’s guide and
publish it only after they remove the Kontron name, cover, and logo.
Kontron reserves the right to make changes without notice in product or component design as
warranted by evolution in user needs or progress in engineering or manufacturing technology.
Changes that affect the operation of the unit will be documented in the next revision of this user’s
guide.
i
XL8000 User’s Guide
Contents
Customer Service ................................................................................i
Contents ..........................................................................................ii
Safety Instructions .......................................................................... vii
Before You Begin ..........................................................................................viii
Preventing Electrostatic Discharge .................................................................... ix
Working with Batteries..................................................................................... x
Preface .......................................................................................... xii
How to Use This Guide....................................................................................xiii
Customer Comments......................................................................................xiii
Advisory Conventions .................................................................................... xiv
Unpacking.................................................................................................... xv
Powering Up the System.................................................................................. xv
Adapter Cables .............................................................................................. xv
Storing Boards .............................................................................................. xv
Regulatory Compliance Statements .................................................................. xvi
Limited Warranty .......................................................................................... xvi
1.
2.
1.1
1.2
Product Description................................................................ 1-0
Product Overview ............................................................................... 1-1
What’s Included ................................................................................. 1-1
System Features .................................................................... 2-0
2.1
Hardware Platform.............................................................................. 2-1
2.1.1 Overview ....................................................................................... 2-1
2.1.2 Shelf Mechanical Dimensions ............................................................ 2-2
2.2
Backplane Description......................................................................... 2-3
2.2.1 Logical to Physical Slot Mapping ........................................................ 2-3
2.2.2 Base Interface ................................................................................ 2-3
2.2.3 Fabric Interface .............................................................................. 2-4
2.2.4 Synchronization Clocks .................................................................... 2-4
2.2.5 Update Channel Interface ................................................................. 2-4
2.2.6 Bused IPMB Interface ...................................................................... 2-4
2.2.7 Dedicated Shelf Manager Slots........................................................... 2-5
2.2.8 Shelf FRU SEEPROMs ........................................................................ 2-5
2.2.9 ATCA Backplane Expansion Connectors ................................................ 2-6
ii
XL8000 User’s Guide
2.3
Shelf Alarm Panel (SAP)......................................................................2-10
2.3.1 SAP Block diagram .........................................................................2-11
2.3.2 SAP Front panel components ............................................................2-12
2.3.3 SAP Serial Interfaces ......................................................................2-12
2.3.4 SAP Telco Alarms............................................................................2-13
2.3.5 SAP FRU LEDs ................................................................................2-13
2.3.6 SAP SEEPROM ................................................................................2-13
2.3.7 SAP Temperature sensor ..................................................................2-14
2.3.8 SAP Connectors and Indicators .........................................................2-14
2
2.3.9 SAP I C addresses...........................................................................2-16
2.3.10
SAP Serial Console Cables.............................................................2-17
2.4
Fan Trays .........................................................................................2-18
2.4.1 Cooling Capacity ............................................................................2-18
2.4.2 Fan tray block diagram....................................................................2-18
2.4.3 Removable Fan Tray........................................................................2-19
2.4.4 Fan speed control signal..................................................................2-19
2.4.5 Fan tray control board.....................................................................2-20
2.4.6 Redundant DC-DC fan power supply ...................................................2-20
2.4.7 Fan tray signals .............................................................................2-21
2.4.8 Fan tray Temperature sensor ............................................................2-21
2.4.9 Fan tray control board SEEPROM........................................................2-21
2.4.10
Fan tray Connectors and Indicators ................................................2-22
2
2.4.11
Fan Tray I C addresses .................................................................2-23
2.5
Shelf Power Distribution .....................................................................2-24
2.5.1 Power Distribution .........................................................................2-24
2.5.2 Fuse Protection .............................................................................2-24
2.6
Shelf Managers .................................................................................2-26
2.6.1 Introduction .................................................................................2-26
2.6.2 Shelf Manager Layout .....................................................................2-27
2.6.3 Ethernet Channels..........................................................................2-28
3.
2
2.6.4
Master-Only I C Bus ........................................................................2-29
2.6.5
2.6.6
2.6.7
2.6.8
2.6.9
2.6.10
2.6.11
2.6.12
2.6.13
2.6.14
Master-Only I C bus addresses ..........................................................2-30
Shelf Manager Console Serial Interface...............................................2-30
System Management Controller (ADM1026) ........................................2-31
Temperature Monitor (LM75 or DM75) ................................................2-31
Front panel RESET push button .........................................................2-31
Hardware Monitoring and Control ..................................................2-31
Hardware Address.......................................................................2-32
Redundancy Control ....................................................................2-32
Reprogramming the FLASH Memory in the ShMM-ACB-III....................2-33
Shelf Manager Connectors and Indicators........................................2-35
3.1
2
Appendix ............................................................................. 3-0
Getting Help...................................................................................... 3-1
iii
XL8000 User’s Guide
Safety Instructions
Contents
Before You Begin ........Erreur ! Signet non défini.
Preventing Electrostatic DischargeErreur ! Signet non défini.
Working with Batteries.Erreur ! Signet non défini.
vii
XL8000 User’s Guide
Before You Begin
Before handling the board, read the instructions and safety guidelines on the following pages to
prevent damage to the product and to ensure your own personal safety. Refer to the “Advisories”
section in the Preface for advisory conventions used in this user’s guide, including the distinction
between Warnings, Cautions, Important Notes, and Notes.
♦ Always use caution when handling/operating the computer. Only qualified,
experienced, authorized electronics service personnel should access the interior of
the computer. The power supplies produce high voltages and energy hazards, which
can cause bodily harm.
♦ Use extreme caution when installing or removing components. Refer to the
installation instructions in this user’s guide for precautions and procedures. If you
have any questions, please contact Kontron Technical Support.
WARNING
High voltages are present inside the chassis when the unit’s power cord is plugged
into an electrical outlet. Turn off system power, turn off the power supply, and
then disconnect the power cord from its source before removing the chassis cover.
Turning off the system power switch does not remove power to components.
WARNING
This product may contain CLASS 1 LASER PRODUCT
viii
XL8000 User’s Guide
Preventing Electrostatic Discharge
Static electricity can harm system boards. Perform service at an ESD workstation and follow proper
ESD procedure to reduce the risk of damage to components. Kontron strongly encourages you to
follow proper ESD procedure, which can include wrist straps and smocks, when servicing
equipment.
Take the following steps to prevent damage from electrostatic discharge (ESD):
♦ When unpacking a static-sensitive component from its shipping carton, do not remove
the component’s antistatic packing material until you are ready to install the
component in a computer. Just before unwrapping the antistatic packaging, be sure
you are at an ESD workstation or grounded. This will discharge any static electricity
that may have built up in your body.
♦ When transporting a sensitive component, first place it in an antistatic container or
packaging.
♦ Handle all sensitive components at an ESD workstation. If possible, use antistatic
floor pads and workbench pads.
♦ Handle components and boards with care. Don’t touch the components or contacts on
a board. Hold a board by its edges or by its metal mounting bracket.
♦ Do not handle or store system boards near strong electrostatic, electromagnetic,
magnetic, or radioactive fields.
ix
XL8000 User’s Guide
Working with Batteries
Care and Handling Precautions for Lithium Batteries
Your computer board may have a non rechargeable lithium battery.
Do not short circuit
♦ Do not heat or incinerate
♦ Do not charge
♦ Do not deform or disassemble
♦ Do not apply solder directly
♦ Do not mix different types or partially used batteries together
♦ Always observe proper polarities
x
XL8000 User’s Guide
Replacing Lithium Batteries
Exercise caution while replacing lithium batteries!
WARNING
Danger of explosion if battery is incorrectly replaced. Replace only with the same
or equivalent type recommended by the manufacturer. Dispose of used batteries,
following manufacturer’s instructions.
ATTENTION
Il y a danger d’explosion s’il y a remplacement incorrect de la batterie. Remplacer
uniquement avec une batterie du même type ou d’un type équivalent recommandé
par le constructeur. Mettre au rebut les batteries usagées conformément aux
instructions du fabriquant.
ACHTUNG
Explosionsgefahr bei falschem Batteriewechsel. Verwenden Sie nur die
empfohlenen Batterietypen des Herstellers. Entsorgen Sie die verbrauchten
Batterien laut Gebrauchsanweisung des Herstellers.
ATENCION
Puede explotar si la pila no este bien reemplazada. Solo reemplazca la pila con
tipas equivalentes segun las instrucciones del manifacturo. Vote las pilas usads
segun las instrucciones del manifacturo.
xi
XL8000 User’s Guide
Preface
Contents
How to Use This Guide........... Erreur ! Signet non défini.
Customer Comments............. Erreur ! Signet non défini.
Advisory Conventions ........... Erreur ! Signet non défini.
Unpacking.......................... Erreur ! Signet non défini.
Powering Up the System........ Erreur ! Signet non défini.
Adapter Cables .................... Erreur ! Signet non défini.
Storing Boards .................... Erreur ! Signet non défini.
Regulatory Compliance StatementsErreur ! Signet non défini.
Limited Warranty ................. Erreur ! Signet non défini.
xii
XL8000 User’s Guide
How to Use This Guide
This user’s guide is designed to be used as step-by-step instructions for installation, and as a
reference for operation, troubleshooting, and upgrades.
You can find the latest release of this User’s Guide at:
http://www.kontron.com or at: ftp://ftp.kontron.ca/support/
For the circuits, descriptions and tables indicated, Kontron assumes no responsibility as far as
patents or other rights of third parties are concerned.
The following is a summary of chapter contents:
♦ Chapter 1, Product Description
♦ Chapter 2, System Features
♦ Chapter 3, Appendix
Customer Comments
If you have any difficulties using this user’s guide, discover an error, or just want to provide some
feedback, please send a message to: [email protected]. Detail any errors you find. We
will correct the errors or problems as soon as possible and post the revised user’s guide on our Web
site. Thank you.
xiii
XL8000 User’s Guide
Advisory Conventions
Seven types of advisories are used throughout the user guides to provide helpful information or to
alert you to the potential for hardware damage or personal injury. They are Note, Signal Paths,
Related Jumpers, BIOS Settings, Software Usage, Cautions, and Warnings. The following is an
example of each type of advisory. Use caution when servicing electrical components.
Note :
Indicate information that is important for you to know
Signal Paths:
Indicate the places where you can fin the signal on the board
Related Jumpers:
Indicate the jumpers that are related to this sections
BIOS Settings :
Indicate where you can set this option in the BIOS
Software Usage :
Indicates how you can access this feature through software.
CAUTION
Indicate potential damage to hardware and tells you how to avoid the problem.
WARNING
Indicates potential for bodily harm and tells you how to avoid the problem.
Disclaimer: We have tried to identify all situations that may pose a warning or a caution condition
in this user’s guide. However, Kontron does not claim to have covered all situations that might
require the use of a Caution or a Warning.
xiv
XL8000 User’s Guide
Unpacking
Follow these recommendations while unpacking:
♦ Remove all items from the box. If any items listed on the purchase order are missing,
notify Kontron customer service immediately.
♦ Inspect the product for damage. If there is damage, notify Kontron customer service
immediately.
♦ Save the box and packing material for possible future shipment.
Powering Up the System
Before any installation or setup, ensure that the chasis is unplugged from power sources or
subsystems.
If you encounter a problem, verify the following items:
♦ Make sure that all connectors are properly connected.
If you are still not able to get your system running, contact our Technical Support for assistance.
Adapter Cables
Because adapter cables come from various manufacturers, pinouts can differ. The direct crimp
design offered by Kontron allows the simplest cable assembly. All cables are available from Kontron
Sales Department.
Storing Boards
Electronic boards are sensitive devices. Do not handle or store device near strong electrostatic,
electromagnetic, magnetic or radioactive fields.
xv
XL8000 User’s Guide
Regulatory Compliance Statements
This section provides the FCC compliance statement for Class A devices and describes how to keep
the system CE compliant.
FCC Compliance Statement for Class A Devices
This equipment has been tested and found to comply with the limits for a Class A digital
device, pursuant to part 15 of the FCC Rules. These limits are designed to provide
reasonable protection against harmful interference when the equipment is operated in a
commercial environment. This equipment generates, uses, and can radiate radio
frequency energy and, if not installed and used in accordance with the instruction
manual, may cause harmful interference to radio communications. Operation of this
equipment in a residential area is likely to cause harmful interference in which case the
user will be required to correct the interference at his own expense.
WARNING
This is a Class A product. If not installed in a properly shielded enclosure and used
in accordance with this User’s Guide, this product may cause radio interference in
which case users may need to take additional measures at their own expense.
Limited Warranty
Kontron Canada, Inc, (“The seller”) warrants its boards to be free from defects in material and
workmanship for a period of two (2) years commencing on the date of shipment. The liability of the
seller shall be limited to replacing or repairing, at the seller’s option, any defective units.
Equipment or parts, which have been subject to abuse, misuse, accident, alteration, neglect, or
unauthorized repair are not covered by this warranty. This warranty is in lieu of all other warranties
expressed or implied.
xvi
XL8000 User’s Guide
1. Product Description
Contents
1.1
1.2
Product Overview ....... Erreur ! Signet non défini.
What’s Included ......... Erreur ! Signet non défini.
1-0
XL8000 User’s Guide
1.1 Product Overview
This document is the User’s Manual for the XL800012U 14 Slot AdvancedTCA Shelf. It provides
technical information on the 14 Slot AdvancedTCA Shelf, which accepts 2 ATCA Base Interface Hub
boards, 12 ATCA Node boards, two Dedicated Shelf Managers, and a Shelf Alarm Panel.
The intended audience of this document is system integrators and hardware/software engineers
who are using the XL8000 12U 14 Slot ATCA Shelf.
1.2 What’s Included
This board is shipped with the following items:
1.
2.
3.
4.
One CD-ROM.
One XL8000 chassis.
Boards that have been ordered
Cables that have been ordered
If any item is missing or damaged, contact the supplier.
1-1
XL8000 User’s Guide
2. System Features
Contents
2.1
2.2
2.3
2.4
2.5
2.6
Hardware Platform......................................2-1
Backplane Description.................................2-3
Shelf Alarm Panel (SAP)............................. 2-10
Fan Trays ................................................ 2-18
Shelf Power Distribution ............................ 2-24
Shelf Managers ........................................ 2-26
2-0
XL8000 User’s Guide
2.1 Hardware Platform
This section defines the hardware platform of the 12U 14 slot AdvancedTCA Shelf.
2.1.1
Overview
The 14 slot AdvancedTCA Shelf implements the following features:
•
12U high x 15” x 17” form-factor Shelf
•
Mounting brackets for 19” cabinets
•
14 slot ATCA backplane with Full Mesh or Dual Star Center Fabric Interface, Dual Star Base
Interface, and bused or radial IPMB Interface
•
2 dedicated Shelf Manager slots that accept Schroff ShMM-ACB-III Shelf Managers
•
Cooling for 200W per Front Board and 15W per Rear Transition Module
•
3 Hot Swap fan trays, front pluggable
•
Air filter for filtering the inlet air
•
Shelf Alarm Panel (SAP): Alarm / signal interface and serial interface for shelf manager
2-1
XL8000 User’s Guide
2.1.2
Shelf Mechanical Dimensions
2-2
XL8000 User’s Guide
2.2 Backplane Description
The Schroff 14 slot AdvancedTCA Shelf incorporates a 14 slot ATCA monolithic backplane with two
dedicated Shelf Manager slots, one Shelf Alarm Panel (SAP) slot, three fan tray slots and two Power
Entry Module (PEM) slots.
2.2.1
Logical to Physical Slot Mapping
The physical slots are sequentially numbered from left to right. The logical slots are numbered from
1 through 14. See the figure below for the physical to logical slot mapping.
Physical slot
Logical slot
HW-Address (hex)
IPMB-Address (hex)
2.2.2
1
13
4D
9A
2
11
4B
96
3
9
49
92
4
7
47
8E
5
5
45
8A
6
3
43
86
7
1
41
82
8
2
42
84
9
4
44
88
10
6
46
8C
11
8
48
90
12
10
4A
94
13
12
4C
98
14
14
4E
9C
Base Interface
Logical Slots 1 & 2 are the Hub Slots for the Dual Star Base Interface. Base Interface Channel 1
(ShMC) of Logical Slot 1 is routed to the upper dedicated Shelf Manager slot on the ATCA Backplane.
Base Interface Channel 1 (ShMC) of Logical Slot 2 is routed to the lower dedicated Shelf Manager
2-3
XL8000 User’s Guide
slot on the ATCA Backplane. See section 6.5.5 of the PICMG® 3.0 Revision 1.0 AdvancedTCA® Base
Specification for details.
2.2.3
Fabric Interface
The Fabric Interface in the backplane is wired as a Dual Star or Full Mesh with a Full Channel
interconnecting each AdvancedTCA® slot. The hub slots are located at logical slots 1 and 2. See
section 6.6.3.1 of the PICMG® 3.0 Revision 1.0 AdvancedTCA® Base Specification for details.
Note :
Single Star, Dual Star, and Dual-Dual Star configurations are a subset of a Full Mesh
configuration. A Full Mesh shelf can be used as a Single Star or a Dual Star system by installing
combination Fabric and Base Interface Hub boards in Logical Slots 1 and or 2. For a Dual-Dual Star
configuration, logical slots 3 and or 4 are used as additional Fabric and Base Interface hub slots.
2.2.4
Synchronization Clocks
Synchronization clocks are bused between all 14 AdvancedTCA slots. See section 6.7 of the PICMG®
3.0 Revision 1.0 AdvancedTCA® Base Specification for details.
2.2.5
Update Channel Interface
Physical
Slot
Logical
Slot
Node
Node
Node
Node
Node
Node
Hub Slot
Hub Slot
Node
Node
Node
Node
Node
Node
The Update Channels are wired between adjacent backplane slots. See the figure below for the
Update Channel pairs. ATCA boards installed in Logical Slots 1&2 or 3&4 will be interconnected with
their Update Channel. These will usually be hub boards and the Update Channel can be used to pass
data or routing information between hubs. The Update Channel routing for the other slots is
configured to support connections between single slot ATCA boards. See section 6.8 of the PICMG®
3.0 Revision 1.0 AdvancedTCA® Base Specification for details.
1
2
3
4
5
6
7
8
9
10
11
12
13
14
13
11
9
7
5
3
1
2
4
6
8
10
12
14
Update
Channel
2.2.6
Bused IPMB Interface
The IPMB interfaces at each slot are wired as redundant buses. The IPMB interfaces are also bused
to both dedicated Shelf Manager slots on the ATCA Backplane.
2-4
XL8000 User’s Guide
2.2.7
Dedicated Shelf Manager Slots
The two slots at the far right side of the shelf are designed to accept Schroff ShMM-ACB-III Shelf
Management Controllers. The Dedicated Shelf Manager slots are wired to both IPMB buses, Base
Interface Channel 1 (ShMC) of the Base Interface Hub slots, and to the Fan Tray connectors FAN1,
FAN2 and FAN3. The Dedicated Shelf Manager Slots also have interconnected signals that allow the
ShMM-ACB-IIIs to run in a redundant configuration. See Schroff Shelf Management Mezzanine
(ShMM) ATCA Carrier Board-III Technical Specification for more details.
2.2.8
Shelf FRU SEEPROMs
WARNING
The ATCA-Backplane incorporates two 24LC256 SEEPROMs that are used by the
2
Dedicated Shelf Managers to store Shelf FRU data. Both SEEPROMs are at I C
2
2
address 0xa4 but on different I C buses. I C bus Channel1 of both Shelf Managers
2
is connected to SEEPROM1 (DM1) on the backplane, I C bus Channel2 is connected
to SEEPROM2 (DM2) on the backplane. Only the active shelf manager has access to
the SEEPROMs on the backplane.
2-5
XL8000 User’s Guide
2.2.9
ATCA Backplane Expansion Connectors
This section provides the definitions of all expansion connectors on the Control backplane.
Front view on backplane
Connector name
SAP
ACB1_J1
ACB1_J2
ACB2_J1
ACB2_J2
FAN1
FAN2
FAN3
Connector type
30pin DIN C/3
Metric C11
Metric AB22
Metric C11
Metric AB22
Mini-Fit 24-pin P/N 15-24-7241
Mini-Fit 24-pin P/N 15-24-7241
Mini-Fit 24-pin P/N 15-24-7241
Pinout and pin description see chapter “SAP“
Pinout and pin description see chapter “Shelf Managers“
Pinout and pin description see chapter “Shelf Managers“
Pinout and pin description see chapter “Shelf Managers“
Pinout and pin description see chapter “Shelf Managers“
Pinout and pin description see chapter “Fan Trays“
Pinout and pin description see chapter “Fan Trays“
Pinout and pin description see chapter “Fan Trays“
2-6
XL8000 User’s Guide
Rear view of backplane
2.2.9.1
TEMP_1 Connector
Connector TEMP_1 is a 1-row 4 pin 2.54mm pitch header. The Shelf exhaust temperature sensors
are connected to either of these connectors.
Pin
1
2
3
4
2.2.9.2
Signal name
I2C_PWR
PS_SDA0
PS_SCL0
GND
Description
3.3VDC power supply for Shelf I2C-bus devices
Master-Only I2C-bus channel 4, Serial Data
Master-Only I2C-bus channel 4, Serial Clock
Logic Ground
TEMP_2 Connector
Connector TEMP_2 is a 1-row 4 pin 2.54mm pitch header. Additional temperature sensors can be
connected to these connectors.
Pin
1
2
3
4
Signal name
I2C_PWR
FT_SDA
FT_SCL
GND
Description
3.3VDC power supply for Shelf I2C-bus devices
Master-Only I2C-bus channel 3, Serial Data
Master-Only I2C-bus channel 3, Serial Clock
Logic Ground
2-7
XL8000 User’s Guide
2.2.9.3
RING, Ringing Generator Connector
There are two redundant Ringing Generator buses in the backplane wired to the Zone 1 connector.
These buses can be used to distribute ringing voltage to line cards in the ATCA Shelf. See section
2.4.1.3 of the PICMG® 3.0 Revision 1.0 AdvancedTCA® Base Specification for details.
Pin
1
2
3
4
Signal name
RING A
RRTN A
RING B
RRTN B
2.2.9.4
METAL, Metallic Test Connector
There are two metallic test buses in the backplane wired to the Zone 1 connector. These test buses
can be used to connect line cards in the ATCA Shelf to internal or external test equipment. See
section 2.4.1.3 of the PICMG® 3.0 Revision 1.0 AdvancedTCA® Base Specification for details.
Pin
1
2
3
4
Signal name
MT2 TIP
MT2 RING
MT1 RING
MT1 TIP
2.2.9.5
IPMB_A Connector Connector IPMB_A is wired to the IPMB_A
bus.
Pin
1
2
3
4
5
Signal name
SCL_A15
GND
SDA_A15
I2C_PWR
Description
Bused IPMB A , Serial Clock
Logic Ground
Bused IPMB A, Serial Data
3.3VDC power supply for Shelf I2C-bus devices
-
2.2.9.6
IPMB_B Connector Connector IPMB_B is wired to the IPMB_B
bus.
Pin
1
2
3
4
5
Signal name
SCL B15
GND
SDA B15
I2C PWR
-
Description
Bused IPMB B , Serial Clock
Logic Ground
Bused IPMB B, Serial Data
3.3VDC power supply for Shelf I2C-bus devices
2-8
XL8000 User’s Guide
2.2.9.7
B3
PEM1 Connector
B2
B1
6
5
ENABLE
_PEM1
4
3
2
1
A1
A2
PEM_P1
PEM_P1_1
INT#
VRTN_A_1
-48V_A_1
D
VRTN_A_2
-48V_A_2
ENABLE
_PEM1
C
VRTN_A_2
-48V_A_2
res
res
GND
GND
VRTN_A_1
-48V_A_1
B
VRTN_A_2
-48V_A_2
res
res
GND
PS_SCL0
VRTN_A_1
-48V_A_1
A
VRTN_A_2
-48V_A_2
res
res
I2C_PWR
PS_SDA0
VRTN_A_1
-48V_A_1
2.2.9.8
B3
PEM2 Connector
B2
B1
6
5
ENABLE
_PEM1
4
3
2
1
A1
A2
PEM_P1
PEM_P1_1
INT#
VRTN_A_3
-48V_A_3
D
VRTN_A_4
-48V_A_4
ENABLE
_PEM1
C
VRTN_A_4
-48V_A_4
res
res
GND
GND
VRTN_A_3
-48V_A_3
B
VRTN_A_4
-48V_A_4
res
res
GND
PS_SCL0
VRTN_A_3
-48V_A_3
A
VRTN_A_4
-48V_A_4
res
res
I2C_PWR
PS_SDA0
VRTN_A_3
-48V_A_3
2.2.9.9
B3
A3
A3
PEM3 Connector
B2
B1
6
5
ENABLE
_PEM1
4
3
2
1
A1
A2
PEM_P1
PEM_P1_1
INT#
VRTN_B_1
-48V_B_1
D
VRTN_B_2
-48V_B_2
ENABLE
_PEM1
C
VRTN_B_2
-48V_B_2
res
res
GND
GND
VRTN_B_1
-48V_B_1
B
VRTN_B_2
-48V_B_2
res
res
GND
PS_SCL0
VRTN_B_1
-48V_B_1
A
VRTN_B_2
-48V_B_2
res
res
I2C_PWR
PS_SDA0
VRTN_B_1
-48V_B_1
2-9
A3
XL8000 User’s Guide
2.3 Shelf Alarm Panel (SAP)
The Shelf Alarm panel is mounted vertically at the top right side of the Shelf. It provides the
connectors for the serial console interfaces of the Shelf Managers, the telco alarm connector, the
2
telco alarm LEDs, the FRU LEDs and the telco alarm reset push button. The I C-bus devices on the
SAP are connected to the Master-Only I C-bus of both ACB-IIIs. The Master-only I C-bus is buffered
on the ACB-III by a LTC4300 device whose enable input is connected to the inverted /Active signal
of the ShMM-300 so that only the active shelf manager has access to the SAP.
2
2
2-10
XL8000 User’s Guide
2.3.1
SAP Block diagram
2-11
XL8000 User’s Guide
2.3.2
2.3.3
SAP Front panel components
Pos
Name
1
2
3
4
5
6
7
8
9
10
CN5
CN6
Push button
CN2
D9
D10
D11
D8
D7
D6
Function
Serial console connector for secondary (bottom) shelf manager
Serial console connector for primary (top) shelf manager
Telco alarm cutoff push button
Telco alarm connector
FRU LED1 (red)
FRU LED2 (red)
FRU LED3 (red)
Telco alarm LED minor (red)
Telco alarm LED major (red)
Telco alarm LED critical (red)
SAP Serial Interfaces
The SAP provides the RS-232 serial console interface connector on the front panel for both, the
primary and the secondary shelf manager, using an 8-pin modular receptacle (DTE). A full set of RS232 signals, including modem control, is provided. The signals are routed from CNx to the SAPbackplane and then to the first serial port of the ShMM-300 of the primary shelf manager (upper
slot) and routed from CNx to the SAP-backplane and then to the first serial port of the ShMM-300 to
the secondary shelf manager (bottom slot). The serial interface is implemented on the ShMM-300
using the built-in UART/modem port of the C5471.
Note :
The serial console is normally configured for 9600 baud, no parity, 8 data bits, and one stop bit.
See section “SAP” for the details of the serial console cable construction.
2-12
XL8000 User’s Guide
2.3.4
SAP Telco Alarms
2.3.4.1
Telco Alarm Interface
The SAP provides a Telco Alarm interface on the front panel Molex micro-DB15 connector (CN2),
part number 83612-9020. The Telco Alarm interface relay circuits are capable of carrying 60VDC or
30VAC at 1A.The SAP accepts timed pulse inputs for clearing Minor and Major alarm states (there is
no reset for the Critical state). Reset is accomplished by asserting a voltage differential from 3.3V to
48V for between 200 and 300ms. The acceptance voltage range is from 0 to 48VDC continuous
(handles up to 60VDC at a 50% duty cycle). The current drawn by a reset input does not exceed
12mA.
2.3.4.2
Telco Alarm LEDs
The SAP provides the Telco Alarm LEDs using the LEDs D6, D7, and D8. These LEDs are used to
indicate presence of Critical, Major, and Minor alarms. The LEDs function as follows:
State
2.3.4.3
Description
Off
No alarm triggered
On
Alarm triggered
Blinking
Alarm Cutoff (ACO) is activated
Telco Alarm Cutoff Push Button
The SAP provides a Telco Alarm Cutoff function with the Front Panel push button switch. This push
button activates the Alarm Cutoff (ACO) state. When ACO is activated, the active Alarm LEDs blinks
and all of the alarm relays are deactivated. This button does not clear alarms.
2.3.4.4
CN2 Telco Alarm Connector
The Front Panel alarm connector CN2 is a standard Micro-D15 connector (Molex P/N 836129020).
The mating connector is a Molex 83422-9014 or equivalent.
2.3.5
SAP FRU LEDs
2
The FRU LEDs are user defined and are connected to the PCA 9555 I C-bus I/O port on the SAP.
Please reference the Schroff Shelf Management Mezzanine (ShMM) ATCA Carrier Board-III Version
Technical Specification, DOC-SHMM-ACB-III-TS, for more information.
2.3.6
SAP SEEPROM
2
2
The SEEPROM is connected to the Master-Only I C-bus and is located at I C address 0xa6/0x53. It is
a Microchip 24LC256 device.
2-13
XL8000 User’s Guide
2.3.7
SAP Temperature sensor
2
2
The LM75 temperature sensor is connected to the Master-Only I C-bus and is located at I C address
0x96/0x4b
2.3.8
SAP Connectors and Indicators
This section details the SAP connectors and indicators.
2.3.8.1
LEDs
Designation
Signal Name
Color
Description
D6
L7
Red
Critical Alarm, from U3, I/O 0.7
D7
L6
amber
Major Alarm, from U3, I/O 0.6
D8
L5
yellow
Minor Alarm, from U3, I/O 0.5
D9
L0
red
FRU1, from U3, I/O 1.7
D10
L1
red
FRU2, from U3, I/O 1.6
D11
L2
red
FRU3, from U3, I/O 1.5
2.3.8.2
CN5, CN6, RS-232 Connector
The Front Panel serial connectors CN5 and CN6 are RJ45 DTE serial port with the pin definition
according to EIA/TIA-561:
Pin
RS-232
ShMM-300
Type
Description
1
DSR
DSR
In
Data Set Ready
2
DCD
DCD
In
Data Carrier Detect
3
DTR
DTG
Out
Data Terminal Ready
4
SG
GND
5
RxD
RXD0
In
Receive Data
6
TxD
TXD0
Out
Transmit Data
7
CTS
CTS
In
Clear To Send
8
RTS
RTS
Out
Request To Send
Signal Ground
2-14
XL8000 User’s Guide
2.3.8.3
CN2 Telco Alarm Connector
The Front Panel alarm connector CN2 is a standard Micro-D15 connector (Molex P/N 83612-9020)
with the following pin definition:
CN2 Pin
Name
Description
1
AMIR+
MinorReset+
2
AMIR-
MinorReset-
3
AMAR+
MajorReset+
4
AMAR-
MajorReset-
5
ACNO
CriticalAlarm - NO
6
ACNC
CriticalAlarm - NC
7
ACCOM
CriticalAlarm - COM
8
AMINO
MinorAlarm – NO
9
AMINC
MinorAlarm – NC
10
AMINCOM
MinorAlarm – COM
11
AMANO
MajorAlarm – NO
12
AMANC
MajorAlarm – NC
13
AMACOM
MajorAlarm – COM
14
APRCO
PwrAlarm – NO
15
APRCOM
PwrAlarm - COM
-
Gnd
Not utilized
,
2.3.8.4
CN1 Signal Connector Column
Pin
1
2
3
4
5
6
7
8
9
10
A
SDA_SAP
SCL_SAP
INV_ACTIVE_2
1_DSR
2_CD
1_CTS
2_TXD0
1_RXD1
GND
INV_ACTIVE_1
CN1 Signal Connector Column
B
GND
INT#
1_RXD0
1_DTR
2_DTR
2_CTS
1_TXD0
2_RTS
2_TXD1
NC
2-15
C
I2C_PWR
GND
2_RXD0
2_DSR
1_CD
1_RTS
1_TXD1
2_RXD1
NC
SHELF_GND
XL8000 User’s Guide
2.3.9
2
SAP I C addresses
The SAP board incorporates a 24LC256 SEEPROM to store FRU data, a LM75 temperature sensor for
2
measuring the board temperature and a PCA9555. Following table shows the I C-bus addresses.
Device
SEEPROM
LM75
PCA9555
Address
0xa6/0x53
0x96/0x4b
0x44/0x22
The PCA9555 device controls the status of the LEDs, reads the status of the push button switch and
controls the telco alarm relays. Following tables shows the functions of the I/O pins on the
PCA9555.
Function
PCA9555 I/O pins
State
0.0
Power Alarm to telco relays output
1 = relays powered
0.1
Minor Alarm to telco relays output
1 = relays powered
0.2
Major Alarm to telco relays output
1 = relays powered
0.3
Critical Alarm to telco relays output
1 = relays powered
0.4
N/C
Pulled High
0.5
Minor alarm LED (red) output
1 = On
0.6
Major alarm LED (red) output
1 = On
0.7
Critical alarm LED (red) output
1 = On
1.0
Alarm cutoff push button input
0 = push button pushed
1.1
Minor Clear input
0 = voltage applied to input pins
1.2
Major Clear input
0 = voltage applied to input pins
1.3
N/C
Pulled High
1.4
N/C
Pulled High
1.5
FRU3 LED output
1 = On
1.6
FRU2 LED output
1 = On
1.7
FRU1 LED output
1 = On
2-16
XL8000 User’s Guide
2.3.10
SAP Serial Console Cables
ShMM-ACB-III RJ45 to 9 Pin PC Serial Console Cable
RJ45 pin
RJ45 Signal Name
PC 9 pin D-Sub Female
Signal Name
1
DSR
4
DTR
2
CD
N/C
CD
3
DTR
6
DSR
4
Ground
5
Ground
5
RXD0
3
TX
6
TXD0
2
RX
7
CTS
7
RTS
8
RTS
8
CTS
RJ45 and 9 pin D-Sub connectors are viewed with the cable going away from you.
2-17
XL8000 User’s Guide
2.4 Fan Trays
2.4.1
Cooling Capacity
The 14 Slot ATCA shelf contains three front pluggable fan trays. Each fan tray contains two Papst
DV5214N/2 270 m3/h fans for cooling the front boards, rear ventilation is provided by guiding air
through backplane cutouts to the RTM section of the Shelf. This provides sufficient cooling for 14
200W Front Boards and 14 15W Rear Transition Modules. Since the RTMs are powered from the Front
Boards the total power consumption of the Front Board and RTM pair is limited to 200 W
2.4.2
Fan tray block diagram
2-18
XL8000 User’s Guide
2.4.3
Removable Fan Tray
The three modular fan trays can easily be removed after removing the fan tray cover at the front of the Shelf.
The fan trays plug into the ATCA-Backplane by a 24 pin Molex connector type Mini-Fit P/N 15-24-7241. The
mating receptacle on the Control Backplane is Molex type Mini-Fit part number 43879-0032 or equivalent.
The display module at the front of the fan tray provides a blue hot-swap LED, amber and red alarm LEDs, and a
green fan-tray-good LED as well as a hot swap push button.
2.4.4
Fan speed control signal
The PWM fan speed signal of the ADM1026 pin 18 is opto-isolated, converted into a 1.5V...10VDC fan speed
signal on the ShMM-ACB-III, and then fed to the fans on the fan trays. Normal fan speed control operates
between 1.5VDC (min. speed) and 10VDC (max. speed). All fans in the shelf run at the same fan speed. In case
of the absence of any ShMM-ACB-III in the shelf or in case of a short circuit on the fan control, the fans run at
max. speed. The following figure shows the characteristic fan speed curve.
2-19
XL8000 User’s Guide
2.4.5
Fan tray control board
The fan tray control board is mounted horizontally at the front of the fan tray. The display provides
a blue Hot Swap LED, a red alarm LED, a green fan tray OK LED and a Hot Swap push button. The fan
tray control board does not provide user access.
2.4.6
Redundant DC-DC fan power supply
The input voltage to the shelf may vary from –72VDC to –40.5 VDC. A 75 Watt DC-DC converter on
the fan tray control board provides a constant 24VDC to the so that the fan speed can be regulated.
It is fed from the redundant –48V_A and -48_B backplane power rails. The 24V output of each DCDC converter is fed to a 24V power rail on the backplane for redundancy. In case of a failure of one
DC-DC converter in a fan tray, power is provided by the DC-DC converters in the remaining two fan
trays. The following diagram shows the redundancy operation of the 24VDC fan voltage
2-20
XL8000 User’s Guide
2.4.7
Fan tray signals
The fan tray provides additional signals for voltage monitoring, switching-off the DC-DC converter
(to power down the fans) and provides a 24VDC OK signal. These signals are controlled by a
2
PCA9555 I C device.
Following table shows a list of the signals provided.
Signal
-48V_A bus voltage
24VDC OK (converter good)
description
Indicates the presence of the –48_A / VRTN_A on the backplane side of the
fan tray’s mains fuse
Indicates the presence of the –48_A / VRTN_A on the fan tray side of the fan
tray’s mains fuse
Indicates the presence of the –48_B / VRTN_B on the backplane side of the
fan tray’s mains fuse
Indicates the presence of the –48_B / VRTN_B on the fan tray side of the fan
tray’s mains fuse
Indicates the proper functioning of the DC-DC converter
24VDC Inhibit (converter off)
Turns off the DC-DC converter 24VDC output to stop the fans
-48V_A fan tray voltage
-48V_B bus voltage
-48V_B fan tray voltage
2.4.8
Fan tray Temperature sensor
2
A LM75 temperature sensor on the fan tray is connected to Channel 3 of the Master-Only I C-bus. It
2
provides the inlet temperature of the shelf and is located at the I C addresses 0x98 (left), 0x9a
(middle) and 0x9c (right)
2.4.9
Fan tray control board SEEPROM
2
The Microchip 24LC256 SEEPROM is connected to Channel 3 of the Master-Only I C-bus and is
located at I C addresses 0xa8 (left) 0xaa (middle) and 0xac (right).
2
2-21
XL8000 User’s Guide
2.4.10
Fan tray Connectors and Indicators
2.4.10.1
Designation
V65
V66
V67
V68
2.4.10.2
LEDs
Color
blue
amber
red
green
Description
Hot Swap LED
Alarm LED amber
Alarm LED red
Fan tray OK LED
Fan tray connector pinouts
Backplane connector type Mini-Fit P/N 15-24-7241
Pin #
1
2
3
4
5
6
7
8
9
Left fan tray
INT#
GND HA1
GND
I2C_PWR
Center fan tray
INT#
GND
GND
I2C_PWR
Right fan tray
INT#
GND
I2C_PWR
description
Interrupt Request (Master-Only I2C-bus)
Hardware HA1 address of fan trays
Logic Ground
3.3VDC power supply for Shelf I2C-devices
-48V_B_2
VRTN_B_2
-48V_B_4
VRTN_B_4
-48V_B_4
VRTN_B_4
-48VDC supply voltage
Voltage Return
+24V_DC
+24V_DC
+24V_DC
10
PWM_C
PWM_C
PWM_C
11
12
13
14
15
16
17
18
19
20
21
22
FANTK2
FANTK3
FANP0#
GND HA0
FT_SCL
FT_SDA
FANTK5
FANTK6
FANP1#
FT_SCL
FT_SDA
FANTK8
FANTK9
FANP2#
GND
FT_SCL
FT_SDA
24VDC power rail fan tray voltage
Opto Isolated PWM fan speed signal, collector (not
used on fan tray)
Fan tachometer outputs
Fan tachometer outputs
Fan Tray presence signal (3.3V = fan tray is missing)
Hardware HA0 address of fan trays
Master-Only I3C-bus channel 3
Master-Only I3C-bus channel 3
-48V_B_1
VRTN_B_1
-48V_B_1
VRTN_B_1
-48V_B_3
VRTN_B_3
-48VDC supply voltage
Voltage Return
24V_RTN
FAN_SPEED
24V_RTN
FAN_SPEED
24V_RTN
FAN_SPEED
23
PWM_E
PWM_E
PWM_E
24
FANTK1
FANTK4
FANTK7
24VDC return voltage
DC fan speed control input
Opto Isolated PWM fan speed signal, emitter (not
used on fan tray)
Fan tachometer outputs
X10, X20: fan connectors
Pin #
1
2
3
4
signal
FAN+ (24V)
FANGND
FANTK
FANSPEED
description
Redundant +24VDC fan power
Fan power GND
Tachometer output of fan
Fan speed input of fan
2-22
XL8000 User’s Guide
2.4.11
Fan Tray I C addresses
2
The fan tray board incorporates a 24LC256 SEEPROM to store FRU data, a LM75 temperature sensor
for measuring the board temperature and a PCA9555 for I/O. Geographic address pins on the fan
2
2
tray determine the I C addresses of the devices. The following table shows the I C device addresses.
Note :
The addresses are shown in 8 bit/7 bit format.
Fan Tray Location
Left
Center
Right
SEEPROM
0xa8/0x54
0xaa/0x55
0xac/0x56
LM75
0x98/0x4c
0x9a/0x4d
0x9c/0x4e
PCA9555
0x48/0x24
0xa4/0x25
0x4c/0x26
The PCA9555 device controls the status of the LEDs, reads the status of the push button switch,
reads the status if the 24VDC power supply, and can disable the output from the 24VDC power
supply. The following tables shows the functions of the I/O pins on the PCA9555.
PCA9555 I/O pins
0.0
0.1
0.2
0.3
0.4
0.5
0.6
0.7
1.0
1.1
1.2
1.3
1.4
1.5
1.6
1.7
Function
-48A bus voltage
-48A fan tray voltage
-48B bus voltage
-48B fan tray voltage
24VDC OK
24VDC inhibit
N/C
N/C
N/C
N/C
N/C
Green LED
Push-button switch
Red LED
Amber LED
Blue LED
State
0 = Voltage OK
0 = Voltage OK
0 = Voltage OK
0 = Voltage OK
0 = Voltage OK
0 = output inhibited
Pulled high
Pulled high
Pulled high
Pulled high
Pulled high
1 = On
1 = Out, 0 = pushed
1 = On
1 = On
1 = On
Configuration registers 6 and 7 in the PCA9555 control the direction of the I/O pins. Normally a 0xdf is
written to register 6 and a 0x17 is written to register 7. This will make all of the pins inputs except for 0.5,
1.7, 1.6, 1.5 and 1.3.
Configuration registers 4 and 5 in the PCA9555 control the inversion of the I/O pins. Normally a 0x00 is
written to register 4 and a 0x00 is written to register 5. This will make the polarity of all of the pins the same
as the bits in the registers
2-23
XL8000 User’s Guide
2.5 Shelf Power Distribution
2.5.1
Power Distribution
There are two plugable redundant PEMs (Power Entry Module) at the rear bottom side of the Shelf.
Each PEM provides power terminals for four 25A power feeds. There are two 30A fuses for each
power feed at –48V and VRTN. Power filtering consisting of filtered power terminals at the rear
panel of the PEM and a discrete line-filter is provided for each power input. The minimum input
voltage for the Shelf is –40.5 VDC and the maximum is –72 VDC. The shelf is capable of distributing
200 W to all 14 ATCA boards, 30 W to each Dedicated Shelf Manager and 75 W to each fan tray.
A PEM presence signal is grounded by a PEM and monitored by the shelf manager to indicate the
presence of the PEM in the Shelf.
A stud is provided at the rear side of the shelf that is wired to the Shelf’s Shelf Ground.
Each of the four redundant power feeds supplies power to a separate part of the backplane. The left
hub slot is powered by feed 2 and the right hub slot is powered by feed 3. Fan Tray 0 and Fan Tray 1
are powered by feed1 and Fan Tray 2 is powered by feed 3.
The figure below shows the power distribution of the four power feeds within the Shelf
2.5.2
Fuse Protection
The four feeds of each power supply are protected by a 30 A fuse in the –48V path and a 30 A fuse in
the VRTN path. The fuses are inside the PEM and can be exchanged after extracting the PEM from the
Shelf.
2-24
XL8000 User’s Guide
The following figure shows the position of the fuses inside the PEM:
Fuse
Protected Circuit
Value
F10
VRTN_1
30 A
F11
-48V_1
30 A
F20
VRTN_2
30 A
F21
-48V_2
30 A
F30
VRTN_3
30 A
F31
-48V_3
30 A
F40
VRTN_4
30 A
F41
-48V_4
30 A
2-25
XL8000 User’s Guide
2.6 Shelf Managers
2.6.1
Introduction
The 14 slot Shelf has bused IPMBs and is designed to work with Shelf Managers that are located in
the Dedicated Shelf manager slots. The following section describes the Schroff ShMM-ACB-III
Dedicated Shelf Manager which incorporates the IPM Sentry ShMM-300. See the Schroff Shelf
Management Mezzanine (ShMM) ATCA Carrier Board-III Technical Specification for more details.
The Shelf Manager Board also contains the Fan Controller for the three pluggable fan trays.
Note: If only one Dedicated Shelf Manager is installed it should be installed in the upper slot.
2-26
XL8000 User’s Guide
2.6.2
Shelf Manager Layout
2-27
XL8000 User’s Guide
2.6.3
Ethernet Channels
The ShMM-ACB-III provides two 10/100 Ethernet interfaces. The first Ethernet channel (ETH0) is routed to the
jumpers JP40 through JP43 and then to either the RJ-45 connector (CN6) on the front panel or to the
connector J2. The backplane routes this channel to the ShMC port on the corresponding Base Interface Hub
board. The second Ethernet channel (ETH1) is routed to connector J2. The backplane routes the second
channel to the other ShMM-ACB-III. The second Ethernet channel is used to exchange redundancy messages
between the ShMM-ACB-III. Both Ethernet ports support 10 Mb (10BASE-T) and 100 Mb (100BASE-TX)
connections. The ShMM-ACB-III provides two status LEDs for the first Ethernet channel (ETH0). The LEDs are:
• Yellow LED D2 indicates 100 Mb speed when lit
• Green LED D3 indicates link/activity when lit/blinking.
2-28
XL8000 User’s Guide
2
2.6.4
Master-Only I C Bus
2
The master-only I C bus is used internally on the ShMM-300 for the RTC and SEEPROM devices. The
2
2
ShMM-ACB-III also has a number of onboard I C devices connected to the master-only I C bus.
These devices read the slot’s Hardware Address, exchange the hardware status with the backup
ShMM-ACB-III and communicate with the System Management controller ADM1026. The masteronly I C bus is fed to a PCA9545 4-channel switch and then routed to backplane connector J2 and
then to the FRU SEEPROMs (Channel 1 and 2), to the exhaust temperature sensors and fan trays
2
2
(channel 3). The master only I C-bus is buffered by a LTC4300 device and is then routed to the SAP.
2
The Active signal of the ShMM-300 is used to enable the I C switch and the LTC4300 buffer so that
2
only the active Shelf Manager has access to the Shelf I C-bus devices.
2-29
XL8000 User’s Guide
2.6.5
2
Master-Only I C bus addresses
2
The following table lists all I C bus addresses that are assigned in the Shelf
I2C addr.
ShMM300
ACB-III
0x44 / 22
SAP
Channel 1
Channel 2
0x46 / 23
PCA9554 fan
tray 0 (left)
PCA9554 fan
tray 1 (center)
PCA9554 fan
tray 2 (right)
0x4a / 25
0x4c / 26
0x4e / 27
PCA9555 I/Osignals
ADM1026
0x5c / 2e
0x90 / 48
LM75 exhaust
temp. center
LM75 exhaust
temp. left
LM75 exhaust
temp. right
0x92 / 49
0x94 / 4a
0x96 / 4b
LM75 SAP
temperature
0x98 / 4c
LM75 fan tray 0
(left)
LM75 fan tray 0
(center)
LM75 fan tray 0
(right)
0x9a / 4d
0x9c / 4e
SEEPROM
0xa4 / 52
SEEPROM
backplane
0xa6 / 53
SEEPROM fan
tray 0 (left)
SEEPROM fan
tray 1 (center)
SEEPROM fan
tray 2 (right)
0xaa / 55
0xac / 56
0xe0 / 70
2.6.6
2.6.6.1
SEEPROM
backplane
SEEPROM
SAP
0xa8 / 54
0xd0 / 61
Channel 4
PCA9554 HWAddr
0x48 / 44
0xa0 / 50
Channel 3
PCA9555
Telco Alarms
RTC
DS1337
I2C-bus switch
PCA9545
Shelf Manager Console Serial Interface
RS-232 Console Interface
The ShMM-ACB-III provides an RS-232 console interface that provides a full set of the RS-232
signals, including modem control. These signals are routed to the ACB-III backplane connector and
then to a RS232 console interface connector (8-pin modular receptacle, DTE) on the front panel of
the SAP. The RS-232 connector is routed to the first serial port of the ShMM-300 and is
implemented using the built-in UART/modem port of the C5471.
The RS 232 signals are also routed to connector CN4 on the ACB-III.
2-30
XL8000 User’s Guide
Note :
The serial console is normally configured for 9600 baud, no parity, 8 data bits, and one stop bit.
2.6.7
System Management Controller (ADM1026)
The ShMM-ACB-III implements a thermal and system management controller function using the
2
Analog Devices ADM1026 device. The ADM1026 is connected to the master-only I C bus and resides
at 0x5c. The fan tachometer inputs, fan tray presence detection inputs, and the PWM output signals
are routed from the ADM1026 to the Fan Controller section of the ShMM-ACB-III, through the ATCA
backplane, and then to the fan Trays.
An onboard temperature sensor is built into the ADM1026. It provides readings of the chip
0
0
temperature with a 1 C resolution (8 bit) and a +/-3 C accuracy.
2.6.8
Temperature Monitor (LM75 or DM75)
The ShMM-ACB-III can implement a thermal watchdog function, using the National Semiconductor
LM75 device. Seven LM75 are installed inside the ATCA Shelf and connected to the temperature
sensor expansion connector “temp_1” on the ATCA-Backplane. An LM75 can provide temperature
readings with a programmable resolution (0.5..0.0625 C, 9..12 bit) and a +/-2 C accuracy.
0
2.6.9
0
Front panel RESET push button
The ShMM-ACB-III provides a front panel reset push-button. It is connected to the ShMM-300’s /MR
signal on ShMM-300 CN1 connector pin 61. The push-button can be accessed through the front
panel hole with a approx. 8 mm long pointed device.
2.6.10
Hardware Monitoring and Control
The ShMM-ACB-III provides hardware monitoring and control functions. The –48 VDC inputs on the
backplane side as well as the –48V DC on the ACB-III side of the fuses are connected to the
ADM1026 chip through optical-isolation devices. This allows to detect a missing supply voltage as
well as blown fuse on the ShMM-ACB-III See figure below.
Following table shows a list of the signals provided.
2-31
XL8000 User’s Guide
Signal
-48V_A bus voltage
-48V_A ACB-III voltage
-48V_B bus voltage
-48V_B ACB-III voltage
2.6.11
description
Indicates the presence of the –48_A / VRTN_A on the backplane side of
the ACB-III’s mains fuse. This signal is connected to pin 46 of the
ADM1026
Indicates the presence of the –48_A / VRTN_A on the ACB-III side of the
ACB-III’s mains fuse. This signal is connected to pin 44 of the ADM1026
Indicates the presence of the –48_B / VRTN_B on the backplane side of
the ACB-III’s mains fuse. This signal is connected to pin 45 of the
ADM1026
Indicates the presence of the –48_B / VRTN_B on the ACB-III side of the
ACB-III’s mains fuse. This signal is connected to pin 43 of the ADM1026
Hardware Address
The ShMM-ACB-III reads the Dedicated Shelf Manager slot Hardware Address and parity bit from
the backplane connector. The hardware address of the primary (upper) shelf manager is 0x08,
which is IPMB-address 0x10, the hardware address of the secondary (bottom) shelf manager is
0x98 (including parity bit), which is IPMB-address 0x12.
2.6.12
Redundancy Control
The ShMM-ACB-III supports redundant operation with automatic switchover using redundant
ShMM-ACB-IIIs. In a configuration where two ShMM-ACB-III are present, one acts as the active
Shelf manager and the other as a standby. The ShMMs monitor each other and either can trigger a
switchover if necessary.
2.6.12.1
Hardware Redundancy Interface
The hardware redundancy interfaces of the ShMM-ACB-III are as follows:
•
Cross connected ShMM-300 present input (PRES_L#) and output (PRES_R#)
•
Cross connected ShMM-300 health input (HLY_L#) and output (HLY_R#)
•
Cross connected negotiation input (SWR_L#) and output (SWR_R#)
•
Active output from the ShMM-300 (ACTIVE#) that is used by the ShMM-ACB-III to enable
interfaces that must be exclusively driven by the active ShMM-300, specifically, PWM and fan
tachometer buffers
•
Bi-color status LED (D12) using the SWS_LED_G# (Green) and SWS_LED_R# (Red) signals
•
The PRES_R# signal is grounded on the ShMM-ACB-III. This indicates the presence of the
ShMM-ACB-III in the Shelf to a redundant ShMM-ACB-III.
2-32
XL8000 User’s Guide
2.6.12.2
Board Presence
The ShMM-ACB-III grounds the PRES_L# output signal when it is installed into the ATCA backplane.
This provides an input (PRES_R#) into the other ShMM-ACB-III, which is responsible for taking
appropriate hardware action as well as signaling the condition to the software. The ShMM-ACB-III
provides a hot swap LED using the D13 blue LED. This LED indicates when it is safe to "remove" the
ShMM-300 from a live Shelf and functions as follows:
State
Condition
Off
The ShMM-ACB-III is not ready to be removed/disconnected from the Shelf
Blue
The ShMM-ACB-III is ready to be removed/disconnected from the Shelf
Long-blink
The ShMM-300 is activating itself
Short-blink
Deactivation has been requested
2.6.13 Reprogramming the FLASH Memory in the ShMMACB-III
This section describes the procedures for reprogramming the FLASH memory in the ShMM-ACBIII.
2-33
XL8000 User’s Guide
2.6.13.1
Introduction
The Shelf Management software is stored in three parts in the FLASH memory on the ShMM;
ARMboot, sentry.kernel, and sentry.rfs. The ARMboot program is usually permanent and allows the
user to configure the software and network environment of the ShMM and install new software from
a network server. Sentry.kernel is the ShMM’s Linux kernel and sentry.rfs is the ShMM’s root file
system.
2.6.13.2
Reprogramming the ShMM-ACB-III from a TFTP server
You can download new software from a TFTP server and install it into the ShMM-ACB-III. A TFTP
server is included with most UNIX and Linux systems. The new ShMM-ACB-III software is usually
stored on the /tftpboot directory on the TFTP server. Download the new ShMM-ACB-III software
(sentry.kernel and sentry.rfs) from http://www.a-tca.com/ software and save it in the /tftpboot
directory of the TFTP server.
The first Ethernet port of the ShMM-ACB-III must be connected to the TFTP server. An easy way to
do this is to set the JP40-JP43 jumpers in position 1-2 and connect an Ethernet cable between CN6,
the ShMM-ACB-III’s front panel Ethernet connector, and the TFTP server. You could also set the
JP40-JP43 jumpers in position 2-3 and connect the TFTP server to the ATCA Base Interface Hub.
Connect a serial terminal or emulator to the CN5 console port on the front of the ShMM-ACB-III.
Set the terminal to 9600, N, 8, 1. When the ShMM-ACB-III is first powered up a message is
displayed on the console that says: “Hit any key to stop autoboot:”. You must hit a key within 3
seconds to stop the autoboot. The ShMM-ACB-III will now allow you to interact with the ARMboot
program.
You must configure the TCP/IP address where the ShMM-ACB-III expects to find the TFTP server.
Enter the following commands on the ShMM-ACB-III console: (the text in bold is what you type)
ShMM # setenv serverip xxx.xxx.xxx.xxx (xxx.xxx.xxx.xxx is the TCP/IP address of the TFTP server)
ShMM # erase 1:9-70 ShMM # erase 2:1-70 ShMM # tftp 10400000 sentry.kernel ShMM # cp.b
10400000 20000 efec4 (the last number is the Bytes Transferred that was reported at the
completion of previous TFTP command and will vary with different software versions) ShMM # tftp
10400000 sentry.rfs ShMM # cp.b 10400000 120000 2ab840 (the last number is the Bytes
Transferred that was reported at the completion of previous TFTP command and will vary with
different software versions)
ShMM # reset
The ShMM-ACB-III will now reboot and run the new software.
Note :
Before you boot the ShMM-ACB-III after installing new software you will need to configure the
TCP/IP address and netmask with the following commands.
ShMM # setenv ipaddr xxx.xxx.xxx.xxx (xxx.xxx.xxx.xxx is the TCP/IP address of the ShMM-ACBIII)
ShMM # setenv netmask xxx.xxx.xxx.xxx (xxx.xxx.xxx.xxx is the netmask of the network
segment)
2-34
XL8000 User’s Guide
Note :
If your management client is not on the same network segment as the ShMM-ACB-III then you
may have to configure the network gateway TCP/IP address with the following command.
ShMM # setenv gateway xxx.xxx.xxx.xxx (xxx.xxx.xxx.xxx is the TCP/IP address of the
network’s gateway)
2.6.13.3
Reprogramming the ShMM-ACB-II with an ARM Injector
If you have a source or binary license for the ShMM-ACB-III software and have an ARM Injector you
can use the ARM Injector to install new software via the JTAG port. The ARM Injector connects to
CN3, the JTAG connector and to CN8, the ARM Injector connector. See:
http://www.montereylinux.com for more information.
2.6.14
Shelf Manager Connectors and Indicators
This section details the ShMM-ACB-III front panel connectors and indicators.
2-35
XL8000 User’s Guide
2.6.14.1
CN3 and CN8, ARM Injector Connectors
Connectors CN3 and CN8 on the ShMM-ACB-III provide connections to the JTAG port, the CMOSlevel data signals for the second serial port of the ShMM-300 (UART/IrDA port of the C5471), the
ShMM-300 reset line, the ShMM-300 mode input, and the JTAG target device selection signal. It is
compatible with the Pigeon Point Systems ARM Injector. The ARM Injector can be used to load new
firmware into the FLASH memory in the ShMM-300 and to debug the new software.
See: http://www.montereylinux.com for more information.
2.6.14.2
CN4 Serial interface connector
Connector CN4 provides the signals of Serial Console Interface 0. It is a metric 2mm pitch 14 way
connector. The Serial Console Interface 0 of the primary Shelf Manager (top slot) is also routed to
SAP connector CN6 and the Serial Interface connector 0 of the secondary Shelf Manager (bottom
slot) is also routed to SAP connector CN5.
Pin #
Signal
1
2, 4
RTS
Request To Send
GND-
Logic Ground
3
CTS
Clear To Send
5
TXD0
Serial Interface Transmit Data
7
RXD0
Serial Interface Receive Data
9
DTR
Data terminal Ready
11
CD
Carrier Detect
13
DSR
N/C
Data Set Ready
6, 8, 10, 12, 14
CN6, Front Panel 10/100 Ethernet Connector
2.6.14.3
The Front Panel Ethernet connector CN6 provides the following standard RJ-45 NIC pin definition:
Pin #
Ethernet Signal
ShMM-300 Signal
1
TX+
TX+
2
TX
TX
3
RX+
RX+
4, 5
6
7, 8
Unused pair; terminated on ShMM-ACB-III
RX
RX
Unused pair, terminated on ShMM-ACB-III
2.6.14.4
I C connector
2
2
2
The I C connector provides the SDA and SCL signals of the Master-Only I C-bus:
Pin #
1
2
Signal Name
SCL
Description
Master-Only I2C-bus Serial Clock
SDA
Master-Only I2C-bus Serial Data
2-36
XL8000 User’s Guide
3
GND
Logic Ground
4
+3.3V
ShMM-ACB-III 3.3VDC power supply
2.6.14.5
J1, Backplane Signal Connector
a
b
c
d
e
1
-48V_A
VRTN_A
NC
-48V_B
VRTN_B
2
3
4
Pin removed
SHELF_GND
Pin removed
Pin removed
SHELF_GND
Pin removed
Pin removed
SHELF_GND
Pin removed
Pin removed
SHELF_GND
Pin removed
Pin removed
SHELF_GN D
Pin removed
5
6
7
8
FANTK1
FANTK6
FAN_SPEED
Pin removed
FANTK2
FANTK7
NC
Pin removed
FANTK3
FANTK8
FAN_PWR
Pin removed
FANTK4
FANTK9
FAN_PWR_R TN
Pin removed
FANTK5
PWM_FAN_ C
PWM_FAN_ E
Pin removed
9
PEM_P1
I/O_1
SWR_R#
HLY_R#
SWR_L#
10
I/O_4
I/O_0
BD_SEL#
HLY_L#
HA7
11
AIR_FILT_PR
PEM_P2
I/O_2
I/O_3
PRES_1#
2.6.14.6
J2, Backplane Signal Connector
a
b
c
d
e
f
1
FANP0#
TXD0
TXD1
2
FANP1#
DTR
GND
FANP2#
INT#
GND
CI
DSR
3
CD
RTS
RXD1
HA[0]
CTS
4
RXD0
CF_SDA0
INV_ACTIVE
SDA_SAP
GND
5
CF_SCL0
SCL_SAP
GND
GND
FT_SDA
6
S1_TX+
S1_TX-
GND
S2_TX+
S2_TX-
7
S1_RX+
S1_RX-
GND
S2_RX+
S2_RX-
8
PS_SDA0
PS_SCL0
FT_SCL
CF_SCL1
NC
9
SCL_B15_R
SDA_B15_R
SCL_A15_R
SDA_A15_R
CF_SDA1
GND
GND
GND
GND
10
SDA_B16_R
SCL_B16_R
SDA_A16_R
SCL_A16_R
I2C_PWR
11
SDA_A3_R
SDA_B3_R
SCL_B3_R
SDA_B8_R
SCL_B8_R
12
SCL_A3_R
SDA_A5_R
SCL_A5_R
SDA_A8_R
SCL_A8_R
13
SDA_A1_R
SDA_B7_R
SCL_A1_R
SDA_A10_R
SCL_A10_R
GND
14
SCL_B7_R
SDA_A7_R
SCL_A7_R
SDA_A6_R
SCL_A6_R
15
SDA_A9_R
SDA_B14_R
SCL_B14_R
SDA_B10_R
SCL_B10_R
16
SCL_A9_R
SDA_A4_R
SCL_A4_R
SDA_B6_R
SCL_B6_R
17
CROSS_SDA_B
SDA_B11_R
SCL_B11_R
SDA_B4_R
SCL_B4_R
18
CROSS_SCL_B
SDA_A11_R
SCL_A11_R
SDA_A14_R
SCL_A14_R
19
SDA_A13_R
SCL_A13_R
SCL_B12_R
SDA_B12_R
SDA_B9_R
20
SDA_B1_R
SCL_B1_R
CROSS_SCL_A
CROSS_SDA_A
SCL_B9_R
21
SDA_B13_R
SDA_B5_R
SCL_B5_R
SDA_B2_R
SCL_B2_R
22
SCL_B13_R
SDA_A12_R
SCL_A12_R
SDA_A2_R
SCL_A2_R
2-37
GND
GND
GND
GND
GND
XL8000 User’s Guide
2.6.14.7
.-48V_A
VRTN_A
.-48V_B
VRTN_B
SHELF_GND
FANTK[1..9]
FAN_SPEED
FAN_PWR
FAN_PWR_RTN
PWM_FAN_C
PWM_FAN_E
PEM_P[1..2]
I/O_[0..4]
AIR_FILT_PR
SWR_R#
SWR_L#
HLY_R#
HLY_L#
BD_SEL#
PRES_1#
HA7
FANP#[0..2]
TXD[0..1]
RXD[0..1]
DTR
RTS
CD
DSR
CTS
INT#
CI
HA[0]
INV_ACTIVE
I2C_PWR
GND
S1_TX(+-)
S1_RX(+-)
S2_TX(+-)
S2_RX(+-)
CF_SCL[0..1]
CF_SDA[0..1]
FT_SCL
FT_SDA
PS_SCL0
PS_SDA0
SCL_SAP
SDA_SAP
SCL_A_14
SDA_A_14
SCL_A_[1..13, 15..16]
SDA_A_[1..13, 15..16]
SCL_B_14
SDA_B_14
SCL_B_[1..13, 15..16]
SDA_B_[1..13, 15..16]
CROSS_SCL_A
CROSS_SDA_A
CROSS_SCL_B
CROSS_SDA_B
NC
2.6.14.8
J1 and J2 pin description
.-48VDC supply A
Voltage return supply A
.-48VDC supply B
Voltage return supply B
Shelf Ground
Fan Tachometer Inputs
DC Fan Speed Control (1.5V = min. speed, 10V = max speed)
Fan DC power rail, generated on fan trays
Fan DC power rail return path
Opto isolated PWM fan speed signal, collector
Opto isolated PWM fan speed signal, emitter
PEM presence (3.3V = PEM is missing)
General purpose I/O pins for external signals
Air filter presence (connected to switch to detect a missing air filter)
Switchover signal from the other Shelf Manager
Switchover signal to the other Shelf Manager
Health of the other Shelf Manager
Health of this Shelf Manager
Tells the Shelf Manager that it has been seated
Board presence signal
Hardware address of Shelf Manager, bit 7
Fan Tray present (3.3V = fan tray is missing)
Serial interface transmit data
Serial interface receive data
Data Terminal Ready
Request To Send
Carrier Detect
Data Set Ready
Clear To Send
External Interrupt request (Master Only I2C-bus)
Shelf Intrusion signal
Hardware address of Shelf Manager, bit 0
This ShMM is in active mode (inverted signal of ShMM)
3.3V power for Shelf I2C-devices
logical ground
Ethernet interface to either front panel or hub-slot base interface (jumper configurable)
Ethernet interface to either front panel or hub-slot base interface (jumper configurable)
Ethernet interface to other Shelf Manager
Ethernet interface to other Shelf Manager
Master-Only I2C-bus Channel 1 and 2 (to backplane SEEPROM)
Master-Only I2C-bus Channel 1 and 2 (to backplane SEEPROM)
Master-Only I2C-bus Channel 3 (to fan trays)
Master-Only I2C-bus Channel 3 (to fan trays)
Master-Only I2C-bus Channel 4 (to PEMs)
Master-Only I2C-bus Channel 4 (to PEMs)
Master Only-I2C-bus to SAP
Master Only-I2C-bus to SAP
Serial Clock, IPMB A Channel 14 (for bused IPMB or radial IPMB to logical slot x)
Serial Data, IPMB A Channel 14 (for bused IPMB or radial IPMB to logical slot x)
Serial Clock, radial IPMB A (not used for bused IPMB)
Serial Data, radial IPMB A (not used for bused IPMB)
Serial Clock, IPMB B channel 14 (for bused IPMB or radial IPMB to logical slot x)
Serial Data, IPMB B channel 14 (for bused IPMB or radial IPMB to logical slot x)
Serial Clock, radial IPMB B (not used for bused IPMB)
Serial Data, radial IPMB B (not used for bused IPMB)
Serial Clock of IPMB A, cross-connected to serial clock of IPMB B of other Shelf Manager
Serial Data of IPMB A, cross-connected to serial clock of IPMB B of other Shelf Manager
Serial Clock of IPMB B, cross-connected to serial clock of IPMB A of other Shelf Manager
Serial Data of IPMB B, cross-connected to serial clock of IPMB A of other Shelf Manager
not connected
JP40-43, Shelf Manager Ethernet Jumpers
The ShMM-ACB-III can connect the primary Ethernet port, /dev/eth0, to either the CN6 front panel Ethernet
connector or to the J2 backplane signal connector.
2-38
XL8000 User’s Guide
Jumper
JP40
JP41
JP42
JP43
Name
Settings
TX0P
1-2
2-3
TX0N
1-2
2-3
RX0P
1-2
2-3
1-2
RX0N
2-3
Description
Connect TX0P signal from the ShMM (CN1) to Ethernet connector CN6
Connect TX0P signal from the ShMM (CN1) to the Backplane signal
connector (J2)
Connect TX0N signal from the ShMM (CN1) to Ethernet connector CN6
Connect TX0N signal from the ShMM (CN1) to the Backplane signal
connector (J2)
Connect RX0P signal from the ShMM (CN1) to Ethernet connector CN6
Connect RX0P signal from the ShMM (CN1) to the Backplane signal
connector (J2)
Connect RX0N signal from the ShMM (CN1) to Ethernet connector CN6
Connect RX0N signal from the ShMM (CN1) to the Backplane signal
connector (J2)
Note :
Pin 1 of the all jumpers is the square pin.
2.6.14.9
Shelf Manager LEDs
The ShMM-ACB-III provides the following Front Panel LEDs:
Designation
Signal Name
Color
D1
HS_LED
Blue
D2
LED_0A
Yellow
D3
LED_0B
Green
D12
D12
SWS_LED_R
SWS_LED_G
Red
Green
Description
Hot Swap ready, from ShMM-300, pin 125
First Ethernet port is operating at 100 Mb, from ShMM300 pin 27
First Ethernet port has a link when lit and is active when
blinking, from ShMM-300 pin 29
ShMM Status, from ShMM, pin 123
ShMM Status, from ShMM, pin 124
2-39
XL8000 User’s Guide
3. Appendix
Contents
3.0
Getting Help.............. Erreur ! Signet non défini.
3-0
XL8000 User’s Guide
3.1 Getting Help
At Kontron, we take great pride in our customers’ successes. We believe in providing full support at
all stages of your product development.
If at any time you encounter difficulties with your application or with any of our products, or if you
simply need guidance on system setups and capabilities, contact our Technical Support at:
CANADIAN HEADQUARTERS
Tel. (450) 437-5682
Fax: (450) 437-8053
If you have any questions about Kontron, our products, or services, visit our Web site at:
www.kontron.com
You also can contact us by E-mail at: [email protected]
Or at the following address:
Kontron Canada, Inc.
616 Curé Boivin
Boisbriand, Québec
J7G 2A7 Canada
3-1
XL8000 User’s Guide
RETURNING DEFECTIVE MERCHANDISE
Before returning any merchandise please do one of the following if your product malfunctions:
•
Call
1. Call our Technical Support department in Canada at (450) 437-5682. Make sure
you have the following on hand: our Invoice #, your Purchase Order #, and the
Serial Number of the defective unit.
2. Provide the serial number found on the back of the unit and explain the nature of
your problem to a service technician.
3. The technician will instruct you on the return procedure if the problem cannot be
solved over the telephone.
4. Make sure you receive an RMA # from our Technical Support before returning any
merchandise.
•
Fax
1. Make a copy of the request form on the following page.
2. Fill it out.
3. Fax it to us at: (450) 437-0304
•
E-mail
1. Send us an e-mail at: [email protected]. In the e-mail, you must include your
name, your company name, your address, your city, your postal/zip code, your
phone number, and your e-mail. You must also include the serial number of the
defective product and a description of the problem.
When returning a unit.
i)
In the box, you have to include the name and telephone number of a person whom we
can contact for further explanations if necessary when returning goods. Where
applicable, always include all duty papers and invoice(s) associated with the
item(s) in question.
ii)
Ensure that the unit is properly packed. Pack it in a rigid cardboard box.
iii)
Clearly write or mark the RMA number on the outside of the package you are returning.
iv)
Ship prepaid. We take care of insuring incoming units.
Kontron Canada Inc.
616 Curé Boivin
Boisbriand, Québec
J7G 2A7 Canada
3-2
XL8000 User’s Guide
Return to
Manufacturer
Authorization Request
Contact Name:
______________________________________________________________
Company Name:
______________________________________________________________
Street Address:
______________________________________________________________
City:
__________________________
Province/State:
_________________________
Country:
__________________________
Postal/Zip Code:
_________________________
Phone Number:
__________________________
Extension:
_________________________
Fax Number:
__________________________
E-Mail:
_________________________
P.O. #
Serial Number
Failure or Problem Description
(if not under
warranty)
Kontron Canada, Inc., 616 Curé Boivin, Boisbriand, Québec, Canada, J7G 2A7
Fax this form to Kontron’s Technical Support department in Canada at (450) 437-0304
3-3
XL8000 User’s Guide