Download CIX Telephone User Guide For Service Call
Transcript
CIX Telephone User Guide
For Service Call
250.753.8755 or 888.753.8755
[email protected]
www.itstelecom.ca
Page 1 of 9
Table of Contents
Buttons & Keys – Locations & Functions
3
Making a Call
Hot Dialing
Redial
Speed Dial
Speed Dial Programming
Directory
Paging
Record a Call
4
4
4
4
4
4
4
Answering and Handling a Call
Handset
Speaker
Switching Between Handset & Speakerphone
Microphone
Group Pickup
Call Transfer
Transfer a Call Directly to Voicemail (VM)
Transfer a Call Directly to VM with a DSS Button
5
5
5
5
5
5
5
6
Conference Calls
Setup a Conference Call
6
Hold Exclusive Hold
6
Park Park a Call
Retrieve a Parked Call
7
7
Volume Control
Adjust the Handset Volume
Adjust the Speaker Volume for
Internal/External Calls & Background Music
Adjust Ring Tone
7
7
7
Background Music
Enable Background Music on your Telephone Speaker
Cancel Background Music on your Telephone Speaker
7
7
Caller ID
7
Programming Flexible Buttons
8
Feature Operations (ON/OFF Feature Codes)
9
Time & Date, adjusting
9
Page 2 of 9
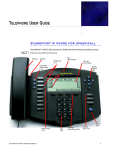
Buttons & Keys – Location & Functions
Message
When Msg LED flashes, press the key to call back the station or
voicemail device that activated the LED. This is the telephone’s
message waiting button.
Mute / Mic
Microphone button toggles between Mic and Mute. When Mic is lit,
handsfree communication is supported, when the Mic is press again
and light is off, Mute is enabled on the microphone in the handset &
speaker.
Speaker
Press to toggle the speaker ON/OFF. When Speaker LED is lit,
handsfree communication is supported.
To start a handsfree conversation; press the Speaker button, this
turns the red Speaker LED on. To terminate the call; press the
Speaker button again, this turns the red Speaker LED off.
Volume
Press & release (tap) the volume control bar to adjust volume levels.
Speed Dial
Press the Speed Dial key and enter 3-digit Speed Dial Access Code.
(System (200-999) or Station (100-109))
Speed Dial access codes must be setup before they can be accessed.
See instructions below.
Redial
Press the Redial key to dial the last telephone number called (internal or
external).and enter 3-digit Speed Dial Access Code.
If you have Automatic Line Selection, lift the handset first.
Conf/Trans
Press the Conference/Transfer key to add internal or external parties to a
conference call (up to 8 parties). Press Conference/Transfer and enter a
number to transfer a call to another party (on the CIX system).
Hold
Press the Hold key to place an internal or external call on hold.
Press the Hold key twice to place an internal or external call on Exclusive
Hold.
Page 3 of 9
Making a Call
Hot Dialing
1. Press 9 or select line
2. Dial number, once connected, you can continue with speakerphone or lift the handset
Redial
1. Press Redial, the last number you dialed with be called
Speed Dial (You will require a list showing the speed dial codes with the name and number you intend to
program prior to entering speed dial codes and for future reference for dialing the three digit codes)
Press Speed Dial button or * and the pre-programmed 3-digit Speed Dial Code
Speed Dial Programming
1.
2.
3.
4.
Leave the handset on the phone
Press #9876. The display shows USER PROGRAMMING MODE
Press Speed Dial button. The display shows SPEED DIAL MODE
Enter the system (200-999) or station (100-199) speed dial code. Enter ‘9’ and the telephone
number, then press Spkr (to erase a number press ‘#’, then Spkr)
5. Using the dial pad, enter the name of the speed dial (to erase press the softkey under the word
LEFT that is displayed on the LCD until the name is cleared)
6. Press Speed Dial button when done
Directory
Press DIR, choose
MY for Personal Speed Dial codes, you can then search by name
EXTR for External Speed Dial codes, you can then search by name
INTR for Internal Extension Numbers, you can then search by name
Paging
1. Press All Call Page or dial Intercom #30
2. Make your announcement
3. Press the release key to hang up
Recording a Call
**Note: Not available on all systems
If you would like to record a conversation for future reference, press the Record key, the key
lights will turn green and flash in unison with the line key that you are speaking on.
To stop recording, press the Record key again and the light will turn off.
If you stop the recording too soon and need to restart, press the Record key again. Each start
and stop will create a voice message in your mailbox.
Page 4 of 9
Answering and Handling a Call
Handset
If your telephone is programmed for Ringing Line Preference, lift the handset and the telephone
will automatically answer the ringing line.
If not, lift the handset and press the line key that is ringing in (flashing red LED).
Speaker
If your telephone is programmed for Ringing Line Preference, press Spkr and the telephone will
automatically answer the ringing line.
If not, press the line key that is ringing in (flashing red LED). Once connected you can continue on
the speakerphone or lift the handset.
Switching Between Handset and Speakerphone
Press Spkr and place the handset on-hook to switch from handset to speakerphone mode.
Lift the handset off-hook to switch from speakerphone to handset mode.
Microphone
To turn the Microphone On/Off when the speakerphone is active (Spkr LED is On), press Mic.
When the Microphone is On, the Mic LED is On, steady red. When Mic is Off, the LED is Off and
you cannot be heard through the microphone.
Group Pickup
Pick up the handset, press Group Pickup and the extension of the ringing phone
Call Transfer
1. While on a call, press TRANS. This puts the caller on hold. The line LED flashes green and
you hear internal dial tone
2. Internal Transfer – Press, STA., then dial the internal extension number, you can remain on the
line and announce the call or immediately hang up to transfer the call blindly
3. External Transfer – Press LINE, then the number where the call will be transferred to, you can
remain on the line and announce the call or immediately hang up to transfer the call blindly
If you receive voice mail or a busy signal, press the flashing line button to back out of the call
transfer and offer the caller the option to go to voicemail or take a message
To Transfer a Call Directly to Voice Mail (VM)
1. While on a call, press Cnf/Trn + # + 407 or VM Transfer button
2. Enter the Mailbox number + # and hang up (caller is connected to the voicemail box)
To Transfer a Call Directly to Voice Mail (VM) with a DSS Button
1. While on a call, press VM Transfer button
2. Press the DSS button and hang up (caller is connected to the voicemail box)
Page 5 of 9
Conference Calls
Depending on the number of telephone lines for incoming/outgoing calls available, a total of eight
parties (two internal, six external) can be connected.
The quality of connection will be affected by the line conditions of each individual party.
The internal user that initiates the conference is the Master. If the Master decides to exit the
conference, the first internal station that was added to the conference call becomes the Master.
To Conference Call with Two EXTERNAL LINES
1. While on a call, press Cnf/Trn. This puts the caller on hold. The line LED flashes green
2. Call another station or outside line
3. When the called party answers, press Cnf/Trn. Both LEDs flash green, press first called line
button, press Cnf/Trn again.
All parties are conferenced. If the second call was placed on a Line that appears on your
telephone, the LED also flashes green.
4. Repeat above steps to add additional callers to the conference
To Conference Call with One EXTERNAL LINE and an INTERNAL EXTENSION
1. While on a call, press Cnf/Trn. This puts the caller on hold. The line LED flashes green
2. Call an internal extension/station
3. When the called party answers, press Cnf/Trn .
If you receive a busy signal or no answer, press Cnf/Trn again to rturn to the original connection.
To put a Conference Call on Hold
The Conference Master can press the Hold button once (or twice for Exclusive Hold) to place the
conference call on hold. (Music-on-hold is suppressed and the LED flashes green) The other parties
can continue with the conference.
To re-join the conference, at any time, press the flashing green extension button. Upon returning
to the conference you will retain Master status.
Hold
To place a call on hold, press Hold. The LCD shows the line on hold and the held line LED flashes
green.
To retrieve the held call, press the held line button (flashing green LED).
If a held call is not retrieved within a specific amount of time, the call will ring back to on the set
that placed it on hold. The call remains camped-on to that station indefinitely, until it is retrieved
or the caller hangs up.
Exclusive Hold
This feature enables you to place a call on hold so that only you can retrieve it.
While on a call, press Hold twice. The line LED flashes green, all other stations see that line as in
use (steady red LED).
Page 6 of 9
Park a Call
1. While on a call, press Park. The LED flashes green (consultation-hold)
2. Specify the Park Orbit using the following: Press ‘*’ and the system automatically selects a
General Park Orbit between 7000-7019. The chosen orbit appears on the LCD
3. Hang up. The caller’s orbit number is shown. If the parked call is not retrieved within a specific
amount of time, the call rings back to your telephone and the LCD shows the line or extension
that is recalling along with the orbit number
Retrieve a Parked a Call
1. Press Park
2. Enter the Orbit number (7000-7019)
Volume Control
Volume Control - Adjust the Handset Volume
Lift the handset, press and hold the volume up/down key to adjust during a call. Volume defaults
upon hanging up.
Adjust the Speaker Volume for Internal/External Calls and Background Music
1. Press Spkr
2. Press an extension button – you hear dial tone
3. Press and hold the volume up/down key to adjust. Volume setting will be retained for all future
calls
Adjust Ring Volume
Ensure the set is idle (no incoming or outgoing calls) and the handset is on-hook. Press the volume
up/down key to set ring volume
Background Music
Enable Background Music on Your Telephone Speaker
Press INTERCOM, LED turns on
Press #490 + 01 + Spkr
Cancel Background Music on Your Telephone Speaker
Press INTERCOM, LED turns on
Press #491 + Spkr
Caller ID – Access/Review Log
To program a Caller ID Flexible Button: Press #9876, press HOLD
Press button you are programming to become the Caller ID button, enter 580
Press button you are programming to become the Caller ID button again, lift & replace handset
To access/review Caller ID Log: Press Caller ID button to scroll through all calls
Page 7 of 9
Programming Flexible Buttons
You can program spare Flexible Buttons for features of your choice. Commonly, spare keys are
programmed on One-Touch Speed Dials or Direct Station Select Keys (DSS Keys).
Program a Flexible Button type
1.
2.
3.
4.
5.
With the handset down, press #9876 to enter User Programming Mode.
Press the HOLD key (to set the key type)
Press the Flexible Button you want to program
Enter the Flexible Button Code from the list below
Press the Flexible Button again (shows green light) to save the setting: ‘Data Programmed”
will appear on your display
6. Lift and replace the handset to exit programming
Flexible Button Feature
Code
Flexible Button Feature
Code
Background Music
Do Not Disturb
One Touch
Record to VM
To Blank the Key
530 01 (01 is the BGM Source)
180
570
630
000
Caller ID (Access Logs)
Direct Station Select (DSS)
Page All Groups
Pause/Resume Recording
580
610
220
640
Program a Flexible Button as a One-Touch Speed Dial
1.
2.
3.
4.
5.
6.
7.
With the handset down, press #9876 to enter User Programming Mode
Press HOLD key (to set the key type)
Press the Flexible Button you want to program
Enter 570 then press the Flexible Button twice
Press 9 , enter the telephone number
Press the Flexible Button to save the entry
Lift and replace the handset to exit programming
Program a Flexible Button as DSS
1.
2.
3.
4.
5.
With the handset down, press #9876 to enter User Programming Mode
Press the HOLD key (to set the key type)
Press the Flexible Button you want to program
Enter the code for DSS (610), enter the extension/local number
Press the Flexible Button to save the entry
6. Lift and replace the handset to exit programming
BLANK a Programmed Flexible Button
1.
2.
3.
4.
5.
With the handset down, press #9876 to enter User Programming Mode
Press the HOLD key (to set the key type)
Press the Flexible Button you want to BLANK
Enter ‘000’
Press the Flexible Button again (shows green light) to save the setting: ‘Data Programmed”
will appear on your display
6. Lift and replace the handset to exit programming
Page 8 of 9
Feature Operations
(ON/OFF Feature Codes)
Feature
Background Music
Do No Disturb
ON Code
press Ext. button, press #490 01 #
#6091
OFF Code
press Ext. button, press #491
#6092
Time & Date
Adjust the Date Setting
Adjust the Time Setting
Leave the handset on the phone
Press #651, a confirmation tone is heard
Enter the date (YYMMDD)
Press #, a confirmation tone is heard
Press Spkr
Leave the handset on the phone
Press #652, a confirmation tone is heard
Enter the time (HHMMSS)
Press #, a confirmation tone is heard
Press Spkr
NOTES
Page 9 of 9


