1
Additional Instructions
Battery connection
If your VIGIL doesn’t start as stated in the manual disconnect the batteries for 1 minute.
This will allow the capacitor to have time to discharge. Then repeat step 1.
DELAY mode
Detection delay.
Delay between each event if necessary.
Example: Adjust the delay to 10 minutes.
Event is recorded at 6:00, next event to be recorded at 6:10
User’s Guide
Thank you to have chosen one of our Game Monitors VIGIL 650.
Event Capture on / off
After you have activated the event record, please take note that there is a 2 minute delay
before the VIGIL starts recording events.
4 AA Batteries
Use alkaline batteries because they are better in cold weather. Never use 9 volt batteries,
you can cause serious damage to the VIGIL.
Storage
After hunting season, store your vigil by removing the batteries and making sure that the
interior is dry. This will prevent damage due to oxydation.
Warranty
VIGIL Game Monitors has a 1 year warranty. Warranty service for VIGIL products may be
obtained by delivering the defective product, accompanied by a copy of the proof of
purchase date, to Circuitronique Estrie Inc Service center during the applicable warranty
period. Products returned to service center must be sent prepaid, insured and packaged
appriopriately for safe shipment. The repaired item will be shipped to customer, by
Circuitronique Estrie Inc. no later than (30) days after after receiving postage paid.
Available optionnal connections:
Camera
Camcorder
Computer
Here is your VIGIL serial number:
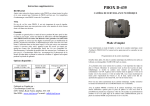
VIGIL is the result of the intensive
research by a special entreprise in
high hand electronic product
conceptions. It was designed to help
you to have more hunting success.
The VIGIL detects the movements of
your big game or humain within a
certain range and records the hour,
minutes, day, month and direction of
game.The VIGIL makes no noise, has
no string or light to draw attention to
its location.
The VIGIL is your guide. It solves the
problem of supervising a trail,
rubbing and scraped areas. Your
VIGIL is easy to use and has many
interesting features to help you to
have a better evaluation of your
hunting territory.
Made in Canada by:
Circuitronique Estrie Inc.
6291 Tellier, Rock Forest, Quebec, Canada J1N 3A8
Phone: ( 819 ) 864-4637 Fax: ( 819 ) 864-4637
WEB site: www.vigil.qc.ca
email: [email protected]
Step 1: Install batteries in Vigil and close the back door.
Event Resetting menu
<
When entering this menu you will see MEMORY / RESET
<
You will see language English. At this point you can choose either French or
<
Press F key to reset your VIGIL to 0 events
English by pressing A key. Press M key to continue.
<
Press the M key to pass to the next menu.
<
At the prompt V650 and the sentence on line 2 will scroll.
Delay Entry menu
<
‘ VIGIL made by CE Inc. 819-864-4637 www.vigil.qc.ca’
<
When entering this menu you will see DELAY / 10 MIN.
<
Press M key when you are ready to continue
<
Press F or A key to adjust the time of delay ( from 1 min to 60 minutes)
<
This sentence will scroll in the screen.
<
Press the M key to pass to the next menu
<
‘Enter your six digit passcode ’
Detection Zone Test menu
<
Press M Key when you are ready to continue.
<
When entering this menu you will see ALIGN
<
Press the F key to start the test. Step back from VIGIL off to one side and
Write your own 6 digit code here: __ __ __ __ __ __
advance slowly forward upon hearing sound from VIGIL, stop for 5-6 second
The code you enter will always be your code. Enter the six digits and read carefully the
after sound ends. Repeat this step.
instructions below.
<
With that you will know the detection area.
Security Code Entry
<
Press the M key to pass to the next menu
<
Press and release F key to move the cursor under the digit you want to set
Camera option menu
<
Press and release A key to enter the digit of your code
<
When entering in this menu you will see 35mm CAM / On.
<
to validate your six digit code the cursor needs to be under the last digit and
<
Pressing F key to choose the right camera you want to hook up.
after that press and release M key to validate.
<
If you choose VIDECAM press the A key to adjust the recording time (from
<
If you hear a beep with 2 tones your code has been validated
1to 60 minutes)
<
If you hear a beep with 1 tone your code has not been validated
<
Camera will be take a picture each time of the VIGIL recording an event.
<
( please try step 1 again )
<
Press the M key to pass to the next menu
Set monitoring time to the camera and camcorder
After you enter your six digit passcode you see READY IN 02:00.
<
When entering this menu you will see CAM ON / 24/24 at this time the
camera or camcorder is set to monitoring all time. If you want to set a precise
Event Browsing menu
time to come ON press A Key and set the time you want. After set the time to
By pressing the M key you will see EVENTS - 075 . To visualize each event press the F key, the
come ON press the F key to set the time to come off and by pressing the A
display will show EVENTS - 001 / 075 for the first event. Pressing the F key will show events in
key to adjust.
ascending order while the A key will display in descending order. Continue to press and release the
<
To return to monitoring 24/24 go to CAM ON menu and press A key until
F or A key to visualize the next event. Press the M key to pass to the next menu.
you see CAM ON 24/24 (just after 23:59)
<
Press M key to pass to the next menu
Date and Time Adjustment menu
Sensor menu
<
When entering this menu you will see ADJUST D & TIME
<
When entering this menu you will see SENSOR / 10.
<
By pressing the F key you will see Hour : Minute Month, date and under Hour
<
You can adjust the sensor by pressing key F or A
you can see the cursor. At this point you can adjust the hour by pressing A
<
The lower the number the smaller the game and the higher the number the big
key.
the game.
<
By pressing the F key you move the cursor under minute. By pressing A key
<
Press the M key and the VIGIL will be ready in 2 minutes.
you will adjust the minute.
Event Capture on / off menu
<
By pressing the F key you move the cursor under month. By pressing A key
<
Pressing the A key will turn on or off the capture of events
will adjust the month.
<
ON = Active
OFF = Desactiv (nonavtive)
<
By pressing the F key you move the cursor under day. By pressing the A key
you adjust the day.
<
Pressing the F key will show the adjusted Date and time
Memory - More than 650 events
Weatherproof - -20 to 70 Celcius
<
Press the M key to pass to the next menu.
Caracteristics
Battery Test menu
<
When entering this mode you will see BATTERY / TEST
<
Pressing F key starts the test if your batteries are good you will see GOOD
<
If not then you will see CHANGE
<
Press the M key to pass to the next menu.
Security - 6 number passcode
Battery consumption - 120 days or more
Range - Over 75 feet
Options - Camera. Camcorder and PC
Detection zone - 10 degrees
Warranty - 1 year parts and labor