1
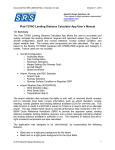
Government of Newfoundland Labrador Advanced Education and Skills User Guide Labour Market Programs Support System ( LaMPSS ) Version 1.0 July 2014 Labour Market Programs Support System (LaMPSS) User Guide Section 1 Introduction 2 Section 2 Login to LaMPSS 3 9 Section 3 Program Application Form Project Description Agreement Contacts Project Locations Target Groups Agreement Activities Project Budget Project Cashflow Supporting Documentation Section 4 Active Agreements 25 Section 5 Activity Reporting 27 Section 6 Financial Reporting 32 Section 7 Payment/Cheque History 36 Section 8 Organization Management 38 43 Organization Details User Management Contacts LaMPSS Support AES Employment Centre’s 1 | P a g e Section 1 : Introduction LaMPSS is an acronym for the “Labour Market Programs Support System”. LaMPSS is an online IT solution that is used by the Department of Advanced Education and Skills (AES), and also by you, our service providers, for the delivery of labour market programs. It has been designed as a comprehensive support system that will enable increased efficiency and effectiveness in government’s role in managing the labour market in Newfoundland and Labrador. The first phase of LaMPSS was implemented in November 2013. This release introduced a new tool for use in the administration of funding agreements. With the second phase of LaMPSS implementation AES has introduced additional self‐serve functionality for external organizations to apply for and report on funding agreements with AES. It is this self‐serve functionality that this guide supports. Currently, the self‐serve function of LaMPSS supports the delivery of the following programs: JobsNL Job Creation Partnerships Employment Assistance Services Labour Market Partnerships Community Partnerships Self‐Employment Assistance Coordinator Canada Jobs Grant Supported Employment School to Work Transitions Wage Subsidy Community Coordinator Linkages To access LAMPSS organization self-serve you will require a User-ID and password. If you have not been issued a User-ID and password one can be obtained by completing a LaMPSS Organization Registration Form (http://www.aes.gov.nl.ca/lmda/forms_and_resources.html) and forwarding it to your local Department of Advanced Education and Skills Employment Centre . Once your Registration has been processed you will receive an email with your User-ID and Password, as well as, an Organization ID. 2 | P a g e Section 2: Login to LaMPSS To log in to LaMPSS you can access the external login page at http://www.aes.gov.nl.ca/lampss_public/index.html . Before being taken to the login page, you will see a “splash” page. The splash page provides information on LaMPSS and a link to Login to LaMPSS. A few basic computer requirements are also listed. In order to use LaMPSS you will need: ‐a web browser with JavaScript enabled ‐a web browser with popup windows allowed from this website ‐an up‐to‐date version of Adobe Acrobat Reader (includes a link to a free download) You can continue on to the LaMPSS login by selecting “To Login to LaMPSS click here”. You will be taken to the LaMPSS Self‐Serve login page. Using the primary contact login information you received from LaMPSS Support you will enter your login information on this page. Enter your: ‐Organization ID ‐Self‐Serve User ID ‐Password 3 | P a g e Once your details have been entered, click the login button to continue. Each organization is identified by a unique, six digit ID. All of the organization contacts who use LaMPSS will also be associated with that organization ID. The User ID for each organization contact will be a unique combination of letters from their first name and last name. LaMPSS will suggest a User ID but the primary contact can customize the appearance of the User ID if desired. LaMPSS will initially assign each user a temporary password which can be changed after the first login. Please note that like many web applications there’s an option to reset your password if you have forgotten what it is. If you do not remember your password you can click on the Forgot Your Password button near the bottom of the page. The credentials you enter (Organization / User ID) will be verified and a new password will be sent to the primary email address on your account. So, if you forget your password you do not need to contact LaMPSS support. You can change it yourself. Also note the email for LaMPSS Support – [email protected]. Once logged in, LaMPSS users are taken to their User Homepage. Everyone with access to LaMPSS has an individual User Homepage. Each Organization also has an Organization Homepage. All self‐serve users for an organization have access to the Organization Homepage. Use the Organization Home link in the left navigation menu to see how you apply for funding under a program in LaMPSS. 4 | P a g e The Organization Homepage will display some basic information including any current funding agreements for your organization and any notifications assigned to your organization. The left navigation menu of the Organization homepage includes an Apply for Funding section which you can use to navigate to a list of programs and services available for funding through LaMPSS. 5 | P a g e When you select the Programs and Services page, a list of all available funding programs will be displayed. Click on any program name in the list to see a brief description of the program in a Program Information popup window. From the popup window you can see a brief description of the program objective which may help you determine whether or not it is appropriate for you to submit an application. There will also be a link to the program’s public website for more information and for you to access the program guidelines. Program guidelines will tell you what information should be included in each section of your Application Form. You can use the Apply Now button to continue with an application for the selected program or the cancel button to return to the list of programs and services. When you click on Apply Now, LaMPSS will generate an electronic application form for the program, customized for your organization. Another popup window will instruct you to click on a link to download the customized form. 6 | P a g e Please note, depending on how your browser is configured you may see a message at the top of your screen asking you to allow the download. If you do, click as instructed and the form will download. You must have Adobe version 9.3 or higher to work with LaMPSS Self‐Serve forms. 7 | P a g e When the download is complete you will be prompted to Open, Save or Cancel. Read the instructions and either open or save the form. We recommend that you choose save, which will allow you to specify both a file name and location on your PC where you would like to save your customized application form. One of the benefits of LaMPSS e‐forms is that you can work “offline” and develop your application without being logged into LaMPSS. When you begin working in the application form, a popup window will remind you that you need to save the form to your local computer and that it is important to remember where you save the file so you can open it and continue working on it later. Please Note: LaMPSS, like other web applications, will timeout after a period of inactivity. If you start something and are interrupted, LaMPSS will timeout after 20 minutes of inactivity. For example, if you are in the process of updating data and you stop to take a phone call or chat with a colleague, after 20 minutes LaMPSS will timeout and return you to the login page without saving your data. 8 | P a g e Section 3 : Program Application Form The “Before You Begin” section directs you to a website where you will be instructed to download/print a copy of the program guidelines. Program guidelines have been developed for all programs administered in LaMPSS. You can click on the link to access them. These guidelines provide: ‐a detailed description of the program ‐information on how to apply for funding ‐information on how to complete the application form ‐information on how to complete the financial and activity reports ‐information on any non‐standard program terms and conditions, and ‐definitions of any terminology specific to the program Think of the guidelines as telling you what needs to be said on and included with an application for funding under the program. As a best practice we suggest you gather all the information required to complete your agreement application before you start entering the details! The guidelines will help you determine what information you should be gathering. Also, these guidelines are part of the LaMPSS agreement contract . Your application form is customized to your organization and the program. Information about your organization will be prefilled, where appropriate, from information collected when you registered to use LaMPSS. The areas highlighted in red are places where you need to provide information specific to the agreement you are applying for. 9 | P a g e Sample Address The Project Description section of the application form can be thought of as your “elevator pitch” – the type of summary of the agreement that would be possible to deliver in the time span of an elevator ride. It is not a comprehensive description of every activity and cost, rather (as the form tells you) “a brief summary of your project”. This field is limited to approximately 300 words. Be aware that the text you enter here will be pulled into the new LaMPSS‐generated contract later in the agreement management lifecycle, after the application has been submitted and approved for funding. 10 | P a g e There are situations, specified in the guidelines, where you are requested / required to include additional materials with your application. The e‐form provides functionality to attach documents to the application form. You can attach a detailed project description/proposal on this page and other documents on the last page of the application form. The next section of the application form is the Agreement Contact section. By default, the application will identify the currently logged‐in user as the Agreement Contact. To change that contact to another member of your organization use the drop‐down list seen here and select <New…>. The drop‐down list will already include the names of all self‐serve users that have been setup for your organization. You can select one of them instead of creating a new one, if applicable. 11 | P a g e The contact information will be blanked out and you will be prompted to enter new data by the red highlighted boxes now showing on the form. Like any other document/file on your computer, you should remember to save your updates while you are working. As a best practice, each time you add content to your agreement application save the file so you do not lose any updates. The next section is the Project Locations. LaMPSS will identify the default address for the organization as a Project Location. You can use the Add Another Location / Remove This Location buttons to update the locations for the agreement. You must have at least one project location identified to submit the application. 12 | P a g e The next section is Target Groups. This section does not apply for all programs – only those that have been defined to include some participant tracking. When enabled, this section allows you to provide details about the total number of expected participants or those who will be served by the agreement. Depending on the program definition you may also be asked to select the specific target groups to be served. There is a long, master list of target groups available in LaMPSS. This page of the application form could change significantly from one program to the next. 13 | P a g e The next section is Agreement Activities. There will, by default, be one agreement activity section included in the Application Form. The Add an Activity button at the bottom of the first activity can be used to add additional sections, as required. Use the Activity Type drop‐down menu to select the activity specific to your project. When you select an activity a default description will auto‐populate onto the form in the Activity Type Definition section. This information is important as it will form the basis of your funding agreement should it be approved. 14 | P a g e You are instructed to provide a brief description for the activity – as per the instructions in the program guidelines. You will also provide a description of the expected results. You will need to select a start date and end date for each activity you add. 15 | P a g e In addition to the activity location, you may be required to indicate the expected number of participants, the expected number who will achieve employment and the activity budget/cost. Whether or not these fields are required will depend on the activity type selected. The next section is the Project Budget. The instructions at the top of this section asks you to identify, for each budget item, the total project cost as well as how much funding you are requesting. Additionally, for each set of budget items, identify your cash and in‐kind contributions. Please reference the program guidelines for additional information on what costs are eligible in each section of the budget. 16 | P a g e The e‐form provides some nice features to support entering your project budget. The form will automatically total the details you enter. As you populate the various cost categories the form will sub‐total and total the amounts. Some basic validations will also be performed when you submit the form. For example, if the total project cost less any cash or in‐Kind contributions does not equal the requested amount you will not be able to submit the application until you correct the amounts. Remember – the form is customized to the program so only those cost categories eligible under this program will appear on your electronic application form. There may be one or several pages of budget information and cost categories to complete, depending on the program. 17 | P a g e Please note the Project Cash Flow section will be required only for programs that have been defined in LaMPSS as requiring this information on the agreement application. In the space provided you will provide an estimate of when your requested funding will be spent. The agreement application also provides a place to identify who your signing officers are and what combination of those officers’ signatures is required to sign a legal agreement for your organization. While no hard‐copy, physical signature is required on the application form, the agreement contract will need to be signed by your legal signing officers, as detailed here. 18 | P a g e The last page of the application is where any supporting documentation should be attached. A list of documents required will be displayed. This could include documents such as a Detailed Project proposal, Detailed Budget Information, etc. You’ll add each of these supporting documents to this page of the application. Each time you add a document you’ll need to select a document topic from the drop‐down menu before you click the Attach a Document button. 19 | P a g e As you attach documents they will appear in the list of attached documentation. If necessary, documents can be removed/replaced prior to submission. No one file can exceed 1MB in size and the overall submission, including all attachments, cannot exceed 5MB. For additional information and assistance with LaMPSS self‐serve, you can access an online user guide by clicking on Help in the top menu bar of any LaMPSS screen. A table of contents, seen here, displays all of the possible topics and you can select a specific user guide to review the 20 | P a g e details of a process. For example, the online help includes a section on Electronic Form Fundamentals, with additional information such as a chart of the acceptable file types for documents. Finally, the last section is where you will submit the application. The instructions on the form tell you to enter your LaMPSS self‐serve information (Organization ID, Username, Password) and then click the Submit button. You do not need to log back into LaMPSS to submit the application. When you enter your login credentials and click the Submit Application button the form automatically connects to LaMPSS and submits the form – as long as you have an internet connection. When you submit an e‐form, LaMPSS will perform a few basic validations. It checks that the form is not older than 120 days, as well as making sure you have populated all of the required fields and attached the expected number of documents. This checking only confirms that the application is complete – verification of the content is performed by agreement management staff once the application is submitted. If a required field is not completed, LaMPSS will display a popup warning message indicating that one or more required fields are missing information. If the initial validations pass, a dialog box will ask you to confirm that you want to submit the application. It also explains that form submission may take several minutes (based on internet speed, size of the application and attachments, etc.) and not to close the form until the submission completes. You can click Proceed to complete the submission or Cancel to cancel and continue editing the form. Once the form submits successfully, a second dialog box seen here will appear to confirm that the application has been submitted. The Agreement ID for the newly created agreement application will be in the first line of this message. The Agreement ID is a unique, six‐digit identifier that you may want to take note of. 21 | P a g e You have now successfully completed your Application. As soon as LaMPSS receives your application, you will see the new agreement on your Organization Home Page. The new agreement will be in application status at this point in the agreement management lifecycle. As your agreement application moves through our business processes you will see the status change and you may receive notifications in situations where you need to take action. If you click on the Agreement ID you will be taken to another screen – the Agreement Homepage. Here you can view information about your funding agreement. The Agreement Homepage is the third “Homepage” you will have access to. The first is your User Homepage and the second is your Organization Homepage. 22 | P a g e The Agreement Homepage displays key information about the funding agreement. You will be able to see your agreement manager’s name, the office your agreement is assigned to, the current status of the agreement, etc. The left navigation menu on this page includes something called Agreement Tools where you can access any documents attached to your agreement. The Agreement Documents page under that Agreement Tools menu will display all of the documents that you attached to the funding application as well as a PDF of your submitted application. Any document added to LaMPSS is automatically converted to a PDF (Adobe) format to eliminate any problems with government or external users being able to view the documents attached to an agreement. 23 | P a g e As your agreement application moves through the agreement management lifecycle, other documents may appear on this Agreement Documents page. The agreement contract will be a document available for any agreements that are approved. Additionally, your AES agreement manager can choose to make other documents that they attach to the LaMPSS agreement management modules available to you as well. 24 | P a g e Section 4 : Active Agreements Once your application is approved and your agreement is made active you will be able to see the active status on your Organization Homepage. At this point in the lifecycle, government can begin issuing any planning payments and you will be expected to provide activity and financial reports, based on the timelines outlined in Schedule F of your agreement contract. When a scheduled report is due you will receive an action required notification on your Organization Homepage. The notification will tell you what period the report must cover and provide you with a link to navigate directly to where you can download the report to complete. The Notifications section of the Organization Homepage will display the action required notifications for your activity reports and financial reports. As you can see here, the text of the notification will tell you what period the report should cover. Simply click on the Action Required hyperlink to download your customized report. 25 | P a g e Similar to the agreement application, the LaMPSS Self‐Serve Form Download popup will appear. You will click on the link provided to download the form. A file loading icon will display on the screen while LaMPSS is downloading the report and then, like the application form, you will be asked to Open or Save the report. As a best practice we recommend you save the file to your local computer. 26 | P a g e Section 5: Activity Reporting Similar to the application, when the Activity Report opens you will be reminded to save a copy of the report to your local computer. The Before You Begin section will also remind you that it’s important to review and use the program guidelines. The guidelines provide details on how you should complete the report. Basic details about your agreement such as the project title, agreement start date and agreement end date will have been pre‐filled based on your agreement. Wherever possible, LaMPSS will pull information from the agreement into the report. 27 | P a g e Your report is also customized to cover the appropriate reporting period. You will see here in the Project Activities section that the appropriate start date and end date for each activity have already been filled in – LaMPSS lets you know what period this report covers. The report will request updates for each activity included in your project. You will notice LaMPSS has pre‐filled the activity type, description and expected results and even provides a reminder of the reporting requirements that were included in your Agreement Contract for each activity. On the next page, the red, highlighted fields on the form indicate where you need to provide information. 28 | P a g e The next section of the Activity Report will be target groups, but only if the program requires participant tracking. If not, this section will not be included on the report. You will see that LaMPSS will again pull information from the agreement, where possible. In this case it will pre‐fill the number of participants recorded to date and also show the expected numbers for the agreement. 29 | P a g e Like the application, you can also attach supporting documentation to the Activity Report form. Finally, there’s also a section for any general reporting notes you would like to add for the Agreement Manager to review. For Agreements utilizing ARMS as a case management tool (i.e. Community Partnerships), you should attach a copy of your ARMS report for the period. 30 | P a g e To submit the report you will follow very similar steps as you did to submit the application. You will need to enter your Organization ID, Username and Password directly into the form and submit. You will receive similar prompts and a dialog box to let you know that the report has been submitted successfully. The prompt that indicates your report was submitted successfully will also indicate that while your report has been received, it has not yet been approved. In other words, an Agreement Manager will review the contents of the report and let you know if any additional information is required. Please note, unlike the application, reports may only be submitted once! Also, a report cannot be submitted before the end of the period covered by the report in order to ensure the most accurate information is provided. If a report has already been submitted and an update is required, information can be provided to the AES Agreement Manager outside of LaMPSS (e.g. by email) and they will be able to add that information to the agreement in LaMPSS. 31 | P a g e Section 6 : Financial Reports From your Organization Home Page you will receive notice of a financial report being due. You will again be asked to download the customized form and will have the choice to save the form to your local computer. One of the benefits of downloading the form to your local computer instead of simply opening it is that it allows you to work on completing the information without being connected to LaMPSS. This could be helpful as it may require input from multiple people to complete a report. You can even email the downloaded report back and forth with someone before it is submitted! When you have completed all work on the report, you simply enter your login credentials and use the submit button to send the completed report to LaMPSS. 32 | P a g e Like the Activity Report, when the form opens you will be reminded to save a copy of the report to your local computer. The Before You Begin section will also remind you that it is important to review and use the program guidelines. The guidelines provide details on how you should complete the report including things like the ineligible cost listing. Basic details about your agreement such as the project title, agreement start date and agreement end date are once again pre‐filled based on your agreement. 33 | P a g e In the Financial Report section, you will be asked to enter the “Reported Amount This Period” for each cost category where you have had expenses. The form will limit the cost categories displayed to only the categories eligible as part of the program. Additionally, when there is an approved budget for a specific category the budget amount will be pre‐filled based on the Agreement Contract. Once one or more reports have been submitted, LaMPSS will calculate and display how much has been reported and approved by the Agreement Manager to date in each of the cost categories for the program. The next section of the report will ask you to update your project cash Flow, if the program you applied for requires a cash flow. 34 | P a g e The project cash flow will be pre‐filled to show each month of the agreement duration. The Starting Balance will be displayed in addition to any reported amounts for previous periods. The current reporting period will display the total of the amounts entered in the Financial Report section. You will provide values for future months in the text boxes seen here. LaMPSS will calculate a declining balance for the agreement, based on the cash flow amounts. The balance must be $0.00 after the final month or the report will not submit successfully. In this case, the cash flow needs to be adjusted to show when this organization plans to spend the remaining $400.00. If they will not spend the $400.00 balance an amendment can be performed to remove that money from the budget. To do this you must contact the AES Agreement Manager assigned to your Agreement. Please note, there is also a section on this page where any supporting documentation can be attached. This is very similar to the application form and activity report. 35 | P a g e Section 7 : Payment/Cheque History In the left navigation menu, in addition to the Agreement you will also have access to a screen called Cheque History. You can navigate to the Agreement Homepage for each of your organization’s funding agreements and then to the Cheque History screen. You have the ability to look at the cheque (payment) history for your agreements. Through the following screen you can see the payments that have been processed as well as search for a specific payment based on certain key fields. 36 | P a g e Through this interface you can confirm if a payment you were expecting has been processed. 37 | P a g e Section 8 : Organization Management Organization Details From the left navigation menu of the Organization Homepage you have access to a page called Organization Details. Self‐serve users with update privileges have the ability to maintain some of their own organization details – other fields can only be maintained by LaMPSS Support. With the exception of the “greyed out” fields, you are free to update your organization information as required. The first section the screen is Organization Details which includes information like your website, preferred communication method and accounting details. The other section is Addresses where one or multiple organization addresses may be listed. While you will not be able to update the default address for your organization , however, you can add a civic/alternate address on this page and update phone numbers. 38 | P a g e If one of the non‐editable fields requires an update, you will need to get in touch with LaMPSS Support who will advise you on the required steps /documentation required to change your LaMPSS registration information. LaMPSS Support can be contacted at [email protected] . Note: Should you wish to change your pay site address, organizational email address or banking information please ensure you contact LaMPSS Support. When you finish with your updates, do not forget to save your changes. To save a LaMPSS screen you simply need to click the Save button. You will be returned to the Organization Homepage when the save completes. User Management Before you add a new Self‐Serve User you need to consider what kind of access that user will require. What function do they perform for your organization? LaMPSS offers the choice of 3 Self‐Serve user access profiles: – Self‐Serve Full Update – Self‐Serve Partial Update – Self‐Serve View Only 39 | P a g e Please note, the Self Serve Full Update user profile can only be assigned by the LaMPSS Operations Support team. This profile will not be available for you to assign to users. Please contact LaMPSS Support if you need to change your Self Serve Full Update user. The Self Serve Full Update user profile should be assigned to those individuals with the knowledge and responsibility for managing who can do what in your organization. Ideally the people with this profile would be a PC/IT administrator type – your resident computer expert. The Self Serve Partial Update user profile should be assigned to those individuals who will be responsible for submitting electronic applications for funding and scheduled financial and activity reports. This would be the people who interact with the department during the Agreement Management Lifecycle. The Self Serve View Only user profile can be used for any person in your organization who needs to be aware of what’s going on with your agreements but is not responsible for any of the actions required for those agreements. This could be a board member or administrator who reconciles money, someone who needs to be aware of the agreements but not do anything in LaMPSS. From the Organization Homepage you will need to navigate to the Organization Contacts page in the left navigation menu to maintain self‐serve users for your organization. Please note, you must have the Self‐Serve Full Update role yourself to be able to make these changes. There is no limit to the number of users you may create. The only constraint is that only one user can be identified as the primary contact. If you identify a new user as the primary contact the previous primary contact will be replaced. They are still a valid LaMPSS user; however, they are no longer the primary contact. The Organization Contacts screen is also where you can de‐activate User IDs. If an individual leaves your organization you should use this page to remove their LaMPSS access. To setup a new self‐serve user ID, click the Add Another button. This will create a new, blank row of information. You should enter the basic details of the user being added including Last Name, First Name, Phone, Email, Title and Mobile. After you’ve completed this information (only Last Name, First Name and Email are required) and saved the changes you will see a new Create User ID link next to the newly created user. Follow this link to complete the process of creating the self‐serve user. 40 | P a g e The Self‐Serve User Details page allows you to select the appropriate security profile (Active Profile) for the new user. The profiles listed here are “Self Serve Inquiry” and “Self Serve User – Partial Update”. Additionally, changes can be made to the user’s first or last name, email, language preference and User ID from this page. 41 | P a g e When you save the screen, LaMPSS will display a message to let you know that the account has been created successfully and an email notification has been sent to the self‐serve user. The email contains the user’s login credentials and a temporary password that they will use to access LaMPSS for the first time. It is recommended that users change their temporary password when they first login to LaMPSS. 42 | P a g e Contacts: LaMPSS Support : [email protected] 1‐844‐252‐6777 Department of Advanced Education and Skills Employment Centre’s: Avalon St. John’s and area 1170 Topsail Road, Mount Pearl, NL 285 Duckworth Street, St. John's, NL Regatta Plaza Building, 80‐84 Elizabeth Ave., St. John’s, NL 17 Industrial Crescent, Carbonear, NL Carbonear Placentia/Dunville 1116‐1120 Main Street, Dunville, NL Central Clarenville 294 Memorial Dr., Clarenville, NL Bonavista Hayley Building, 122 Confederation Drive, Bonavista, NL Marystown The Farrell Building, 3 Mall Street, Marystown, NL Gander Fraser Mall, Gander, NL Lewisporte 224 Main Street, Lewisporte, NL Twillingate 25 Toulinquet Street, Twillingate, NL Grand Falls‐Windsor 42 Hardy Avenue, Grand Falls‐Windsor, NL Springdale 142 Little Bay Road, Springdale, NL Baie Verte College of the North Atlantic, 1 Terra Nova Road, Baie Verte, NL St. Alban’s Buffett Building, 43 Cromier Avenue, St. Alban's, NL Western Stephenville 29 Carolina Ave, Stephenville, NL Corner Brook 1‐3 Union Street, 2nd Floor, Corner Brook, NL Norris Point 2‐6 Hospital Lane, Norris Point NL Port Saunders Dobbin Building, Port Saunders, NL St. Anthony 398 Goose Cove Road, St. Anthony, NL Port aux Basques 239 Grand Bay West Road, Port aux Basques, NL 43 | P a g e Labrador Happy Valley‐Goose Bay 163 Hamilton River Road, Happy Valley‐Goose Bay, NL Wabush 4 Grenfell Drive, Wabush Plaza, Wabush, NL 32‐36 Lodge Bay Road, Mary’s Harbour, NL Mary's Harbour 44 | P a g e