
1
Diabetes Management Software
Glucose management maximized.
International User Guide
with OneTouch® Ping®
C1
Note:
•TheezManager® MAX Diabetes Management Software uses mmol/L as the blood glucose unit of
measurement.
•NotalldevicesrepresentedintheexamplescreensinthisUserguideareavailableinallcountries.
However,theversionofezManager® MAX Diabetes Management Software distributed in your area
willreferenceonlythosedevicesavailableinyourarea.
•ezManager®MAXDiabetesManagementSoftwaredisplaysallinsulindeliveryamountsinunits.
•Anydownloadedbloodglucosevaluesbelow1.1mmol/Lwillbedisplayedas1.0mmol/LinLogsand
Reports.Bloodglucosevaluesabove33.3mmol/Lwillbedisplayedas33.4mmol/L.
•TouseezManager® MAX Diabetes Management Software successfully, an understanding of basic
computer(PCorMac)skillsandtermsisnecessary,forexample“rightclick”,“mouseover”,“drop-down
box”,etc.
•Ifyoudownloadadevicethatissettomg/dLandezManager® MAX Diabetes Management Software
issettodisplayinmmol/L,thedisplayedvalueswillbeinmmol/L.
•TheremaybeslightdifferencesinhowinformationappearsonezManager® MAX Diabetes Management
Software screens when using a Mac as compared to a PC.
Technical and Clinical Help
If there is anything you do not understand in this User Guide, or if you need assistance with the
ezManager® MAX Diabetes Management Software, contact:
In Canada
Call 1-877-937-7867 Monday-Friday, during regular business hours (EST).
In the United Kingdom and Ireland
Call (free phone) 0800 055 6606 Monday-Friday, during regular business hours (United States EST).
All other countries
Call your local Animas® distributor.
i
Diabetes Management Software
Glucose management maximized.
Introduction
Animas® Corporation is committed to making diabetes management easier for you.
Werelyoninputfrompumpusers,diabetesexperts,healthcareprofessionalsand
engineerstodevelopproductsthatputsafety,performanceandreliabilityatthe
forefront of successful diabetes management. ezManager® MAX Diabetes
ManagementSoftwareisanexampleofthiscommitment.Itsdesignisbasedon
feedback from people with diabetes and healthcare professionals who wanted an
easierwaytotrackbloodglucosereadings,insulindeliveryandcarbohydrateintake.
ezManager® MAX Diabetes Management Software enhances your diabetes
self-managementplanwithexpandedreportingcapabilitiesandtheabilityto
download records from select Animas® Insulin Pumps and blood glucose meters.
Attheclickofamouse,youcanviewyourdiabetesdata,andvieworprintavariety
of easy-to-read reports. The program can also be used to upload* personal settings on
select Animas® Insulin Pumps.
Toviewalistofourproductsandservices:
In Canada,pleasevisitourwebsiteatwww.Animas.ca.
Indications for Use
The Animas® ezManager® MAX Diabetes Management Software is indicated for use
as an accessory to Animas®InsulinPumpsandspecifiedcommerciallyavailableblood
glucose meters. The software supports diabetes management by the patient and/or
healthcareprofessionalbyallowingforthereview,analysisandevaluationofinsulin
deliveryandbloodglucosehistoryinformation.
WARNING: ezManager® MAX Diabetes Management Software is not intended for
useinthetreatmentofextremehighorlowbloodglucose.Followyourhealthcare
team’srecommendationsfortreatmentofextremehighorlowbloodglucose.You
shouldnevermakechangestoyourtreatmentplanwithoutfirstconsultingyour
healthcare team.
*DownloadanduploadfeaturesarenotavailableonallAnimas® Insulin Pump
models.
iii
Note: Throughout this User Guide, ezManager® MAX Diabetes Management
Softwarewilloftenbereferredtoassimply“theProgram”.Similarly,“bloodglucose”
willoftenbereferredtoas“BG”,andAnimas® Insulin Pump(s) will often be referred
toas“thepump”or“pumps”.
IMPORTANT INFORMATION ABOUT UNITS OF MEASURE
Notallcountriesorregionsusethesameunitofmeasureforglucosereadingsas
theirstandard.Forexample,milligramsperdeciliter(mg/dL)isthestandardinthe
United States, while millimoles per liter (mmol/L) is the standard in Canada and
otherpartsoftheworld.Theconversion(multiplication)factortogofrommmol/L
unitstomg/dLunitsis18.Forexample,5.8mmol/Lconvertsto104mg/dL.
iv
Table of Contents
Chapter 1 System and Software Requirements . . . . . . . . . . . . . . . . . . . . . . .1
Desktop Application (Microsoft® Windows®). . . . . . . . . . . . . . . . . . . . . . . . . . . .1
Desktop Application (Mac OS®). . . . . . . . . . . . . . . . . . . . . . . . . . . . . . . . . . . . . . .1
Chapter 2 Getting Started . . . . . . . . . . . . . . . . . . . . . . . . . . . . . . . . . . . . . . . . . .3
Installation . . . . . . . . . . . . . . . . . . . . . . . . . . . . . . . . . . . . . . . . . . . . . . . . . . . . . . .3
Installing ezManager® MAX Diabetes Management Software . . . . . . . . . . . . .3
Registration . . . . . . . . . . . . . . . . . . . . . . . . . . . . . . . . . . . . . . . . . . . . . . . . . . . . . .6
Trial mode usage . . . . . . . . . . . . . . . . . . . . . . . . . . . . . . . . . . . . . . . . . . . . . . . . . . .7
Registering using the pump serial number . . . . . . . . . . . . . . . . . . . . . . . . . . . . .7
Registeringusinganactivationcode . . . . . . . . . . . . . . . . . . . . . . . . . . . . . . . . . .7
Opening and Closing the Program . . . . . . . . . . . . . . . . . . . . . . . . . . . . . . . . .8
Opening the Program . . . . . . . . . . . . . . . . . . . . . . . . . . . . . . . . . . . . . . . . . . . . . . .8
Entering login information (security feature enabled) . . . . . . . . . . . . . . . . . . . .9
Closing(exiting)theProgram . . . . . . . . . . . . . . . . . . . . . . . . . . . . . . . . . . . . . . . .9
Uninstalling ezManager® MAX Diabetes Management Software. . . . .9
Chapter 3 Setting up User Accounts . . . . . . . . . . . . . . . . . . . . . . . . . . . . . . . .11
Add(create)andsaveanewUserAccount. . . . . . . . . . . . . . . . . . . . . . . . . . . .11
EditanexistingUserAccount . . . . . . . . . . . . . . . . . . . . . . . . . . . . . . . . . . . . . . .12
DeleteanexistingUserAccount . . . . . . . . . . . . . . . . . . . . . . . . . . . . . . . . . . . . .13
OpenanexistingUserAccount. . . . . . . . . . . . . . . . . . . . . . . . . . . . . . . . . . . . . .13
Switch to another User Account . . . . . . . . . . . . . . . . . . . . . . . . . . . . . . . . . . . . .14
Chapter 4 Program Settings. . . . . . . . . . . . . . . . . . . . . . . . . . . . . . . . . . . . . . . .15
Global Settings . . . . . . . . . . . . . . . . . . . . . . . . . . . . . . . . . . . . . . . . . . . . . . . . . .15
Changing Global Settings. . . . . . . . . . . . . . . . . . . . . . . . . . . . . . . . . . . . . . . . . . .15
Security settings . . . . . . . . . . . . . . . . . . . . . . . . . . . . . . . . . . . . . . . . . . . . . . . . . .15
Enable Security . . . . . . . . . . . . . . . . . . . . . . . . . . . . . . . . . . . . . . . . . . . . . . . . . . .15
Creating and changing a password for the System Administrator. . . . . . . . .16
Creating a new System User . . . . . . . . . . . . . . . . . . . . . . . . . . . . . . . . . . . . . . . .16
InactivatinganexistingSystemUser . . . . . . . . . . . . . . . . . . . . . . . . . . . . . . . . .17
EditinganexistingSystemUser . . . . . . . . . . . . . . . . . . . . . . . . . . . . . . . . . . . . .17
DeletinganexistingSystemUser . . . . . . . . . . . . . . . . . . . . . . . . . . . . . . . . . . . .18
ViewSystemUserActivityLog. . . . . . . . . . . . . . . . . . . . . . . . . . . . . . . . . . . . . .18
User Account Info. . . . . . . . . . . . . . . . . . . . . . . . . . . . . . . . . . . . . . . . . . . . . . . .19
View User Account information . . . . . . . . . . . . . . . . . . . . . . . . . . . . . . . . . . . . .19
Chapter 5 The Basics. . . . . . . . . . . . . . . . . . . . . . . . . . . . . . . . . . . . . . . . . . . . . . .21
Program Task Bar Options. . . . . . . . . . . . . . . . . . . . . . . . . . . . . . . . . . . . . . . .21
File . . . . . . . . . . . . . . . . . . . . . . . . . . . . . . . . . . . . . . . . . . . . . . . . . . . . . . . . . . . . . .21
Logs . . . . . . . . . . . . . . . . . . . . . . . . . . . . . . . . . . . . . . . . . . . . . . . . . . . . . . . . . . . . .21
Reports . . . . . . . . . . . . . . . . . . . . . . . . . . . . . . . . . . . . . . . . . . . . . . . . . . . . . . . . . .21
Tools . . . . . . . . . . . . . . . . . . . . . . . . . . . . . . . . . . . . . . . . . . . . . . . . . . . . . . . . . . . .22
Help . . . . . . . . . . . . . . . . . . . . . . . . . . . . . . . . . . . . . . . . . . . . . . . . . . . . . . . . . . . . .22
Program Tabs . . . . . . . . . . . . . . . . . . . . . . . . . . . . . . . . . . . . . . . . . . . . . . . . . . .22
Print Preview Task Bar Options . . . . . . . . . . . . . . . . . . . . . . . . . . . . . . . . . . .23
Task Bar Icons . . . . . . . . . . . . . . . . . . . . . . . . . . . . . . . . . . . . . . . . . . . . . . . . . . .23
v
Table of Contents
Chapter 6 Download/Upload Tab . . . . . . . . . . . . . . . . . . . . . . . . . . . . . . . . . . .25
Downloading a pump . . . . . . . . . . . . . . . . . . . . . . . . . . . . . . . . . . . . . . . . . . . .25
Downloading a BG Meter. . . . . . . . . . . . . . . . . . . . . . . . . . . . . . . . . . . . . . . . .27
Changing current settings on the pump . . . . . . . . . . . . . . . . . . . . . . . . . . .29
Downloading settings from pump . . . . . . . . . . . . . . . . . . . . . . . . . . . . . . . . . . . .29
Creating,savingandprintingsettingsforthepump . . . . . . . . . . . . . . . . . . . .31
Uploading settings to the pump . . . . . . . . . . . . . . . . . . . . . . . . . . . . . . . . . . . . .32
Modifying the pump or meter-remote food database . . . . . . . . . . . . . . .35
Creatinganewdevicefooddatabase. . . . . . . . . . . . . . . . . . . . . . . . . . . . . . . . .36
Savingadevicefooddatabasefile . . . . . . . . . . . . . . . . . . . . . . . . . . . . . . . . . . .36
Openingadevicefooddatabasefile . . . . . . . . . . . . . . . . . . . . . . . . . . . . . . . . . .37
Changinganitemintheexistingdevicefooddatabase . . . . . . . . . . . . . . . . .37
Viewingandprintingadevicefooddatabase . . . . . . . . . . . . . . . . . . . . . . . . . .38
Deletingitemsfromanexistingdevicefooddatabase . . . . . . . . . . . . . . . . . . .39
AddingitemstoadevicefooddatabasefromtheMasterFoodDB . . . . . . . .40
Adding/creatingyourownfooditemsforthedevicefooddatabase . . . . . . .42
Uploadingadevicefooddatabasetothepump . . . . . . . . . . . . . . . . . . . . . . . .43
Uploadingadevicefooddatabasetothemeter-remote. . . . . . . . . . . . . . . . . .45
Downloadingthepumpfooddatabasefromthedevice. . . . . . . . . . . . . . . . . .46
Downloadingthemeter-remotefooddatabasefromthedevice . . . . . . . . . . .49
Changing the pump sounds . . . . . . . . . . . . . . . . . . . . . . . . . . . . . . . . . . . . . .51
Changing the factory pre-loaded sounds
with tunes from the Tunes Library or your own tunes . . . . . . . . . . . . . . . . . .52
Replacing pump tunes with the factory beep sounds . . . . . . . . . . . . . . . . . . .54
Restoring the settings and tunes to the pump . . . . . . . . . . . . . . . . . . . . . . . . .55
Chapter 7 Reports Tab. . . . . . . . . . . . . . . . . . . . . . . . . . . . . . . . . . . . . . . . . . . . .57
Selecting a Date Range. . . . . . . . . . . . . . . . . . . . . . . . . . . . . . . . . . . . . . . . . . . . .57
Logbook Report. . . . . . . . . . . . . . . . . . . . . . . . . . . . . . . . . . . . . . . . . . . . . . . . . .58
Line Chart Reports . . . . . . . . . . . . . . . . . . . . . . . . . . . . . . . . . . . . . . . . . . . . . . .60
Total Daily Dose Report. . . . . . . . . . . . . . . . . . . . . . . . . . . . . . . . . . . . . . . . . . . . .60
Blood Glucose Chart Report . . . . . . . . . . . . . . . . . . . . . . . . . . . . . . . . . . . . . . . . .61
Pie Chart Reports . . . . . . . . . . . . . . . . . . . . . . . . . . . . . . . . . . . . . . . . . . . . . . . .62
InsulinandBGDistributionReport-Overview . . . . . . . . . . . . . . . . . . . . . . . . .62
BG Distribution Report - Detail . . . . . . . . . . . . . . . . . . . . . . . . . . . . . . . . . . . . . .62
Basal/Bolus Distribution Report - Detail . . . . . . . . . . . . . . . . . . . . . . . . . . . . . . .63
Bolus Type Distribution Report - Detail . . . . . . . . . . . . . . . . . . . . . . . . . . . . . . .63
Pump Settings Reports . . . . . . . . . . . . . . . . . . . . . . . . . . . . . . . . . . . . . . . . . . .63
Pump Settings Report . . . . . . . . . . . . . . . . . . . . . . . . . . . . . . . . . . . . . . . . . . . . . .64
Pump Settings Comparison Report . . . . . . . . . . . . . . . . . . . . . . . . . . . . . . . . . . .64
Statistics Report . . . . . . . . . . . . . . . . . . . . . . . . . . . . . . . . . . . . . . . . . . . . . . . . .65
vi
Table of Contents
Chapter 8 Logs Tab. . . . . . . . . . . . . . . . . . . . . . . . . . . . . . . . . . . . . . . . . . . . . . . .67
Duplicate Values . . . . . . . . . . . . . . . . . . . . . . . . . . . . . . . . . . . . . . . . . . . . . . . . . .67
Selecting a Date Range. . . . . . . . . . . . . . . . . . . . . . . . . . . . . . . . . . . . . . . . . . . . .67
BG Log . . . . . . . . . . . . . . . . . . . . . . . . . . . . . . . . . . . . . . . . . . . . . . . . . . . . . . . . . .68
Add BG Log data . . . . . . . . . . . . . . . . . . . . . . . . . . . . . . . . . . . . . . . . . . . . . . . . . .68
Edit BG Log data (manual BG entries only) . . . . . . . . . . . . . . . . . . . . . . . . . . . .69
Delete BG Log data (manual BG entries only) . . . . . . . . . . . . . . . . . . . . . . . . . .69
ExcludeBGLogdata. . . . . . . . . . . . . . . . . . . . . . . . . . . . . . . . . . . . . . . . . . . . . . .69
Include BG Log data . . . . . . . . . . . . . . . . . . . . . . . . . . . . . . . . . . . . . . . . . . . . . . .70
Pump Settings Log . . . . . . . . . . . . . . . . . . . . . . . . . . . . . . . . . . . . . . . . . . . . . . .70
Meal Log . . . . . . . . . . . . . . . . . . . . . . . . . . . . . . . . . . . . . . . . . . . . . . . . . . . . . . . .71
Adding Meal data . . . . . . . . . . . . . . . . . . . . . . . . . . . . . . . . . . . . . . . . . . . . . . . . .71
Searching the Master Food DB . . . . . . . . . . . . . . . . . . . . . . . . . . . . . . . . . . . . . .72
Adding food items to the Master Food Database . . . . . . . . . . . . . . . . . . . . . . .73
Editing Meal data . . . . . . . . . . . . . . . . . . . . . . . . . . . . . . . . . . . . . . . . . . . . . . . . .74
Deleting Meal data . . . . . . . . . . . . . . . . . . . . . . . . . . . . . . . . . . . . . . . . . . . . . . . .74
Alarms Log . . . . . . . . . . . . . . . . . . . . . . . . . . . . . . . . . . . . . . . . . . . . . . . . . . . . . .74
Bolus Log . . . . . . . . . . . . . . . . . . . . . . . . . . . . . . . . . . . . . . . . . . . . . . . . . . . . . . .75
Adding Bolus Information. . . . . . . . . . . . . . . . . . . . . . . . . . . . . . . . . . . . . . . . . . .76
Editing Bolus Information . . . . . . . . . . . . . . . . . . . . . . . . . . . . . . . . . . . . . . . . . . .76
Deleting Bolus Information . . . . . . . . . . . . . . . . . . . . . . . . . . . . . . . . . . . . . . . . . .76
Notes Log . . . . . . . . . . . . . . . . . . . . . . . . . . . . . . . . . . . . . . . . . . . . . . . . . . . . . . .77
AddingNotes . . . . . . . . . . . . . . . . . . . . . . . . . . . . . . . . . . . . . . . . . . . . . . . . . . . . .77
EditingNotes . . . . . . . . . . . . . . . . . . . . . . . . . . . . . . . . . . . . . . . . . . . . . . . . . . . . .78
DeletingNotes . . . . . . . . . . . . . . . . . . . . . . . . . . . . . . . . . . . . . . . . . . . . . . . . . . . .78
Basal Log. . . . . . . . . . . . . . . . . . . . . . . . . . . . . . . . . . . . . . . . . . . . . . . . . . . . . . . .78
Prime Log . . . . . . . . . . . . . . . . . . . . . . . . . . . . . . . . . . . . . . . . . . . . . . . . . . . . . . .79
Total Daily Dose (TDD) Log . . . . . . . . . . . . . . . . . . . . . . . . . . . . . . . . . . . . . . .80
Suspend Log . . . . . . . . . . . . . . . . . . . . . . . . . . . . . . . . . . . . . . . . . . . . . . . . . . . .80
Chapter 9 Custom Composer Tab . . . . . . . . . . . . . . . . . . . . . . . . . . . . . . . . . .81
Creating a Custom Tune . . . . . . . . . . . . . . . . . . . . . . . . . . . . . . . . . . . . . . . . . . .81
Changing a Tune from the Tunes Library . . . . . . . . . . . . . . . . . . . . . . . . . . . . .82
vii
Table of Contents
Chapter 10 Tools Tab . . . . . . . . . . . . . . . . . . . . . . . . . . . . . . . . . . . . . . . . . . . . . .83
Exporting/Importing database records to/from the Program . . . . . . . .83
Exportingdatabaserecords(tobere-openedwiththeProgram) . . . . . . . . . .84
Importing database records (to be re-opened only with the Program) . . . . . .84
Purging the Program Database . . . . . . . . . . . . . . . . . . . . . . . . . . . . . . . . . . . . . .85
Customizing the Master Food Database . . . . . . . . . . . . . . . . . . . . . . . . . . . . . .86
Adding new food items to the Master Food Database . . . . . . . . . . . . . . . . . . .86
AddingservingsizestotheMasterFoodDatabase . . . . . . . . . . . . . . . . . . . . .87
Exporting/Importing Master Food Database files
to/from the Program . . . . . . . . . . . . . . . . . . . . . . . . . . . . . . . . . . . . . . . . . . . .88
ExportingMasterFoodDatabasefiles . . . . . . . . . . . . . . . . . . . . . . . . . . . . . . . .88
Importing Master Food Database files . . . . . . . . . . . . . . . . . . . . . . . . . . . . . . . .89
Index . . . . . . . . . . . . . . . . . . . . . . . . . . . . . . . . . . . . . . . . . . . . . . . . . . . . . . . . . . . . .91
viii
Chapter 1: System and Software Requirements
Desktop Application (Microsoft® Windows®)*
• IBM-compatiblePCrunningMicrosoft® Windows® 2000, Microsoft® Windows® XP,
or Microsoft® Windows® Vista®
• OneavailableUSBorSerialport
• 200MBfreeharddiskspace
• Minimum256MBRAM
• Wireless download cable for ezManager® MAX Diabetes Management Software**
(necessary only if you plan to download a pump)
• DownloadcablesforyourBGmeter(s)(necessaryonlyifyouplantodownloadaBGmeter)
–cablesareavailablefromtheBGmetermanufacturer
Desktop Application (Mac OS®)*
•
•
•
•
•
Apple® computer running Mac OS® 10.5
OneavailableUSBportwithserial-to-USBadapter(serial-to-USBadapternotincluded)
200MBfreeharddiskspace
Minimum256MBRAM
Wireless download cable for ezManager® MAX Diabetes Management Software**
(necessary only if you plan to download a pump)
• DownloadcablesforyourBGmeter(s)(necessaryonlyifyouplantodownloadaBGmeter)
–cablesareavailablefromtheBGmetermanufacturer
*Minimumcomputerscreenresolutionof1024x768isrecommended.
** Download accuracy not guaranteed unless the wireless download cable is used.
Note: If you plan on using the Custom Composer feature to create and upload tunes to a pump, you may
findithelpfultouseacomputerwithinternalorexternalaudiospeakers.
1
Chapter 2: Getting Started
Installation
Installing ezManager® MAX Diabetes Management Software
Note:YoumusthaveAdministratorrightsonyourcomputertoinstalltheProgram.Checkyourcomputer’s
operating system user manual for details on Administrator rights. Any authorized user can run the Program
after it has been installed.
1. Insert the ezManager® MAX Diabetes Management
Software CDintoyourCD-ROMdrive.
Microsoft® Vista® users – If User Account Control (UAC)
is turned on, a User Account Control screen may appear
displaying“Anunidentifiedprogramwantsaccesstoyour
computer”.ClickAllow.
Mac users –Youwillneedtomanuallystartthesetupfrom
the ezManager® MAX Diabetes Management Software CD.
DoubleclicktheezManagerMaxCDicononthedesktop,
and then locate and double click on the .dmg Installer file.
2. The Setup Wizard screen should appear after a few
seconds. Click Next.
Note: If the Setup Wizard screen does not appear, you can manually start the setup from the ezManager®
MAX Diabetes Management SoftwareCD.Findthe.exeinstallerfileicononyourCD-ROMdriveand
double click the icon.
3. OntheLicenseAgreementscreen,click“Iacceptthe
agreement”afteryouhavereadtheAgreement.Then
click Next.
Note: During the installation process, other screens not
described by these instructions may be displayed. Follow
the prompts to continue the installation.
3
Chapter 2: Getting Started
4. The Select Destination Directory screen lets you
choose where you want your Program files stored.
Click Next, unless you wish to change the default
directory. It is strongly recommended that you use
the default Destination Directory. If you choose
another destination directory, make note of it for
future reference.
5. This step is for PC users only. Mac users
should skip to step 6. The Select Start Menu
Folder screen lets you choose where you want
your Program shortcuts stored. Click Next, unless
you wish to change the Start Menu Folder.
6. The Select Additional Tasks screen lets you create a desktop icon for the Program. Click Next, unless
you do not want to create a desktop icon. Wait for the Program files to be installed on your computer.
4
Chapter 2: Getting Started
Note: Thenexttwodriverinstallationscreenswillappearin
English.
7. A pop up window will appear for the USB Serial Infrared
DeviceSetup,promptingyoutoinstallthedriverforyour
USBIRserialadaptor.ThisdriverisrequiredforyourUSB
wireless download cable to work. Click Next.
Then click Finish after installation is completed. The
driversforyourpumpdownloadcableareinstalled
automatically.
Mac users -Youwillneedtoinstallthesedrivers
manually. After software installation is complete, insert
the ezManager®MAXCDandnavigatetothe“drivers”
folder. Click on the folder and then the file inside the
foldertostartthedriverinstallation.Followtheprompts
toinstallthedrivers.
Microsoft® Vista® users -OntheUSBDriverLicenseAgreementscreenthatappearsduring
installation,click“Iacceptthetermsofthelicenseagreement”afteryouhavereadtheAgreement.
Then click Next.Followthepromptstoinstallthedriverandthenskip to step 8.
Note: If you reinstall or upgrade ezManager® MAX
Diabetes Management Software, this screen will appear
duringinstallation.Youhavetheoptionofeitherkeeping
anexistingProgramdatabase,orcreatinganewProgram
database. If you choose to create a new database, all
Accountsanddataintheexistingdatabasewillbeerased.
For new installations, click Next to continue with
installation.
5
Chapter 2: Getting Started
Note:IfyouhavemorethanoneUSBportonyour
computer, it is recommended that you use the same port
each time you plug in your wireless download cable. If you
plug the wireless download cable into a different USB port,
you will need to follow the installation prompts again.
8. On the Completing Setup Wizard screen, click Finish.
Once the installation is complete, an ezManagerMax icon
should appear on your desktop. To open the Program,
double click the icon. The first time you open the Program,
you will be prompted to register the Program with Animas®.
Youhavetheoptiontoregisternoworafteratrialuseperiod.
ThetrialperiodletsyouaccesstheProgramamaximumof
5times.Thenextsectionoutlinesyourregistrationoptions.
Registration
When you open the Program, you can register it in one of
two ways; either by entering the pump serial number, or by
enteringanactivationcodeprovidedviaemailfrom
Animas® Corporation.
1. Open the Program by double clicking the ezManagerMax icononyourdesktoporharddrive.
(PC users can also go to and click Start, Programs, ezManagerMax, ezManagerMax.exe.) The splash
screen will appear as the Program loads.
Microsoft® Vista® – If User Account Control (UAC) is
turned on, a User Account Control screen may appear
when the Program is opened, displaying the message
“Anunidentifiedprogramwantsaccesstoyour
computer”.Click Allow.
2. The Registration Form screen is displayed.
6
Chapter 2: Getting Started
Trial mode usage
YoumayaccesstheProgramamaximumof5timesin“trialmode”beforeregisteringtheProgram.
Ifyoudon’tregisterbythe5thtimeyouaccesstheProgram,youwillnotbeallowedtomovepastthe
Registration Form screen until you do so.
1. Click the button indicating you want to Continue in Trial Mode.
2. Click Register Later.
Registering using the pump serial number
Note:Youmustbecurrentlyconnectedtotheinternettoregisterusingthepumpserialnumber.
1. Click the button stating you received
ezManagerMax with the pump.
2. Enter the pump serial number (on the back of the
pump), including dashes.
3. Enter your first and last name (the name of person
who has been prescribed the pump).
4. Click Register Now.
Or, you can register using an activation code
Toreceiveanactivationcode,[email protected] with the following information:
•
•
•
•
•
Firstname
Lastname
Completeaddress
Daytimetelephonenumber
Pumpserialnumber
Yourrequestwillbeansweredwithin48businesshours.
7
Chapter 2: Getting Started
1. Whenyoureceiveyouractivationcodeviaemail,
click the button indicating you have an activation
code for ezManagerMax.
2. Enter the activation code exactly as it appears.
Copying and pasting the code directly from the email
into the Registration form is recommended.
3. Click Register Now.
Onceyouhavesuccessfullyregistered,theAccount
Selector screen is displayed. When you open the Program
for the first time, there will not be any accounts created or
displayed. Once accounts are created, the Account
Selector screen will display those accounts as shown in
thisexample.
Opening and Closing the Program
Opening the Program
1. Double click the ezManagerMax icononyourdesktoporharddrive.(PCuserscanalsogotoandclick
Start, Programs, ezManagerMax, ezManagerMax.exe.)
2. Onceyouhaveregistered(andloggedinifthesecurityfeatureisenabled),theAccountSelectorscreen
is displayed.
TheProgramshipstoyouwiththesecurityfeaturedisabled.However,youmayenablethesecurityfeature
if desired. For more information on security settings and to add additional System Users, first create a User
Account(seeChapter3)andthenenablethesecurityfeature(seeChapter4).
8
Chapter 2: Getting Started
Entering login information (security feature enabled)
1. If the security feature is enabled, the login screen
appears when you open the Program.
2. Enter your username and password. The username
andpasswordarecasesensitive,sotypethemexactly
astheyhavebeensetupbyyourSystemAdministrator.
3. Click Login.
4. The Account Selector screen is displayed.
Note: To access any other Program features, you must first
alwaysopenanexistingUserAccountbyhighlightingthat
User Account, and then clicking Open Account or double
clicking the highlighted User Account.
Closing (exiting) the Program
1. Clickthe“X”atthetoprightoftheProgramscreen.IfyouhaveopenedanexistingUserAccount,you
mayalsoexittheProgrambyclickingFile, Exit on the Program screen Task Bar (see Chapter 5).
2. IfyouhaveaReportorotherpopupwindowopen,firstclosethatwindowbyclickingthe“X”atthetop
rightoftheReportorwindow,andthenfollowstep1above.
The Program will back up the database each time you close
(exit)theProgram.
Uninstalling ezManager® MAX Diabetes Management Software
Note: If you uninstall the Program, all Program files will be deleted from your computer. This means any
data downloaded from a pump or BG meter, and any pump food database, settings or tune files you may
havesavedinanyoftheProgramfolderswillalsobedeleted.Youmaywishtosavethesefilestoanother
location if you plan to uninstall the Program so you can access them at a future date. See Chapter 10,
Tools Tab.
PC users-
Go to and click Start, Programs, ezManagerMax, ezManagerMax Uninstaller. Click Next on
theUninstallscreentoremovetheProgramfilesfromyourcomputer.
Mac users- Go to the Applications folder on your Mac and click on the ezManager MAX icon. Then
click on Move to Trash, or drag the icon to the Trash folder.
9
Chapter 3: Setting up Accounts
TheProgramletsyoucreateandstoreinformationformultipleUserAccounts.Youmustcreateatleastone
User Account before you can download a pump or BG meter, or access any other Program features.
Add (create) and save a new User Account
1. Open the Program by double clicking the
ezManagerMax desktop icon.
2. Enter your username and password,ifyouhave
enabled the security feature.
3. Click Add Account on the Account Selector screen.
4. On the Edit Account pop up window, first enter the
following information in the Account Info tab:
Requiredfields:
• LastName
• FirstName
Optional fields:
• MiddleName
• DoctorName
• UniqueUserAccountID(e.g.,socialsecurity
number, patient ID number, etc.)
• DateofBirth(Select the Month, Year, and Day in
that order. You must press Enter after selecting
the Year.)
• Gender
• AccountNotes
5. Then click the Treatment Goals tab, where you can
customize the following information:
•DayIntervals(times)andNames(labels)
•BGTreatmentGoalsforeachDayInterval
Day Intervals let you match meals to different blocks of
timethroughoutatypical24-hourperiod.DayIntervalswill
appearatthebottomofmostReportsasaquickreference.
YoumayusethedefaultDayIntervaltimesandnames,or
selectyourowntimesandnames.DayIntervalboxesmust
be filled in and not left blank to use the Program.
a. Asanexample,youmaychoosetoconsideranydatarecordedbetween6:00amand9:00amas
“Breakfast”,andanydatarecordedbetween9:00amand11:00amas“Snack”,etc.
b.YoucanchangeDayIntervalstimesandnamesbyclickinginsidetheboxes,andenteringyourchanges.
The first Day Interval always starts at midnight.
11
Chapter 3: Setting up Accounts
Note:DayIntervalsorganizeProgramdatadownloadedfromapumporBGmeterbasedonthe
timesanddatesoriginallyrecordedwiththosevalues.DayIntervalsdonotutilizeorchangeany
meal/mealtimeflagsthatmaybestoredwiththesevaluesinthepumporBGmeter.
Treatment Goals let you set BG targets. These BG targets
can be different from those stored in the pump, and will
appearatthebottomofmostReportsasaquickreference.
YoumayusethedefaultTreatmentGoalsorselectyourown
TreatmentGoals.TreatmentGoalboxesmustbefilledin
and not left blank to use the Program.
6. Onceyouhaveenteredthedesiredinformation,clickSavetosavetheUserAccountinformation.
Click Canceltodeletetheinformationorstartover.
Edit an existing User Account
1. On the Account Selector Screen, highlight the User
Account you wish to edit by clicking once on the name.
If you double click on the User Account, the Program will
open. To return to the Account Selector screen, see
Switch to another User Account later in this Chapter.
2. Click Edit Account.
3. Edit information as desired.
4. Click SavetosavetheUserAccountchanges.
Click Cancelifyoudonotwishtosavethem.
Note: To view User Account information once the account
has been opened, click the Settings tab, and then the
Account Info tab. User Account information can only be
changed by following the Edit an existing User Account
stepsoutlinedabove.
12
Chapter 3: Setting up Accounts
Delete an existing User Account
1. On the Account Selector Screen, highlight the User
Account you wish to delete by clicking once on the
name.
2. Click Delete Account.
3. A pop up window will appear asking you to confirm that
you would like to delete this User Account. Click Yes to
delete the User Account, or No to keep it.
Note:IfyoudeleteaUserAccount,alldatapreviously
stored for that User Account will be permanently deleted
and cannot be restored.
Open an existing User Account
1. On the Account Selector Screen, highlight the User Account you wish to open by clicking once on the
name. Then click Open Account, or double click the User Account you wish to open.
2. The Program is now opened to the Download/Upload tab.
3. ChecktheUserAccountnamedisplayedinredatthetoprightofthescreentobesureyouhavethe
correct User Account open.
13
Chapter 3: Setting up Accounts
Switch to another User Account
1. OnceyouhaveaUserAccountopen,therearetwowaysyoucanswitchtoanotherUserAccount.
a. Click the User Account name displayed in red at the top of the Program screen (this is a short
cut to the Account Selector screen). Continue with step 2 below.
or,
b. Click File, Switch Account from the Program screen Task Bar. Continue with step 2 below.
2. The Account Selector Screen is displayed.
3. Highlight the desired User Account and click Open Account, or double click the highlighted User
Account.
4. ChecktheUserAccountnamedisplayedinredatthetoprightofthescreentobesureyouhavethe
correct User Account open.
Note: When you switch User Accounts, the Program will open to the most recent screen you accessed. For
example,ifyouareintheLogs tab and you switch User Accounts, the new User Account will open in the
Logs tab.
14
Chapter 4: Settings
Global Settings
OnceyouhaveopenedaUserAccount,theGlobal Settings tabletsyouselectthesortorderforallexisting
UserAccounts.ThisfeatureisparticularlyusefulwhenyouhavemultipleUserAccountsestablished.
Note: Regardless of the time and date format you use on the pump and BG meter, the Program will display
times and dates according to the format settings on your computer’s operating system.
Changing Global Settings
1. Click the Settings tab.
2. Click the Global Settings tab.
3. Customize the User Account sort order, by clicking
on the desired choice.
Security settings
WhentheProgramisfirstinstalled,thesecurityfeaturewillbedisabled.ToprotecttheprivacyoftheUser
Accounts and their personal health information, you can enable the security feature so that only
designatedSystemUserscanaccessUserAccountinformation.Forexample,ahealthcareprovider’soffice
maywishtohavemultiplemembersofthestaff(SystemUsers)whocanaccesstheProgram.TheSystem
User Activity Log lets you see who has opened the Program.
Enable security
1.
2.
3.
4.
Click the Settings tab.
Click the Global Settings tab.
Click Enabled.
Close the Program and re-open it to see the login screen.
(The default System Administrator username is “admin”,
and the default password is left blank.)
15
Chapter 4: Settings
Creating and changing a password for the System Administrator
The System Administrator can add, delete and edit all System Users.
TheSystemAdministratorcannotbedeleted.YoucanonlychangetheSystemAdministratorpassword.
(The default System Administrator Username is “admin”, and the default password is left blank.) When you
edit the System Administrator password, write it down and keep it where you will not misplace
it. There is no way to reset the System Administrator password without re-installing a new
(empty) Program database. This means all data that has been downloaded and stored from all
accounts will be lost during the re-install. If your privacy policy permits, it is suggested you
enable Administrator rights for at least one other System User, in case you forget your System
Administrator password and you need to access the Program.
1. With any User Account open, click the Settings tab.
2. Click the Global Settings tab.
3. Click to highlight the row with the name System
Administrator.
4. Click Edit.
5. Write down your new System Administrator
password and keep it where you will not
misplace it.
6. Enter the new password and then re-enter it in the
ConfirmPasswordbox.
7. Click Save.
Note:Usernamesandpasswordsarecasesensitive.When
logging in, be sure to enter the username and password
exactlyasyouhavesetthemupinthestepsabove.
Creating a System User
When you login as the System Administrator, you can create additional System Users. If you create a
System User and check the Is Administratorbox,thatSystemUserhasAdministratorrightstoadd,
delete and edit other System User information, including changing the System Administrator password. If
youleavetheIs Administratorboxunchecked,thatSystemUsercanonlychangehis/herpassword.
1. Login as the System Administrator, or as a System User
with Administrator rights.
2. Open any User Account.
3. Click the Settings tab.
4. Click the Global Settings tab.
5. Click Add.
6. Enter the username. This will be the name used to login
to the Program.
7. Enter the user’s first and last names.
8. ChecktheboxnexttoIs ActivetoactivatethisSystem
User.
16
Chapter 4: Settings
9. CheckorunchecktheboxnexttoIs Administrator.Ifyouuncheckthisbox,thisSystemUsercan
onlychangehis/herpassword.Ifyoucheckthisbox,thisSystemUsercanadd,deleteandeditother
System User information, including changing the System Administrator password.
10. Eitherenterapasswordorleavethepasswordblank.
11. Click Save.
TheSystemUseryouhavejustcreatedcannowloginwiththeusernameyouhavesavedandthencreate
or change his/her password as desired.
Inactivating an existing System User
OnlySystemUserswhohaveAdministratorrightscaninactivateotherSystemUsers.
1. Login as System Administrator, or as a System User with Administrator rights.
2. Open any User Account.
3. Click the Settings tab.
4. Click the Global Settings tab.
5. Click the System Useryouwishtoinactivate.
6. Click Edit.
7. UnchecktheboxnexttoIs Active. This System User will no longer be able to login to the Program.
8. Edit the other System User fields as desired.
9. Click Save.
Editing an existing System User
OnlySystemUserswhohaveAdministratorrightscaneditotherSystemUserinformation.
1. Login as System Administrator, or as a System User
with Administrator rights.
2. Open any User Account.
3. Click the Settings tab.
4. Click the Global Settings tab.
5. Click the System User you wish to edit.
6. Click Edit.
7. Edit the System User fields as desired. The username
cannot be changed. If you wish to change a username,
you must login as a System Administrator, delete the
System User, and create a new System User with a new
username.
8. Click Save.
17
Chapter 4: Settings
Deleting an existing System User
OnlySystemUserswhohaveAdministratorrightscandeleteotherSystemUsers.
1. Login as System Administrator, or as a System User
with Administrator rights.
2. Open any User Account.
3. Click the Settings tab.
4. Click the Global Settings tab.
5. Click the System User you wish to delete.
6. Click Delete.
7. Click Yes.
View System User Activity Log
SystemUserswhohaveAdministratorrightscanviewand
printahistoryofthoseSystemUserswhohaveaccessed
theProgram.TheActivityLogshowseachtimeaUser
Account has been opened, along with the name, time, and
date of the System User who opened the account. This
ActivityLogcannotbeeditedordeleted.
1. Login as a System Administrator, or as a System User
with Administrator rights.
2. Open any User Account.
3. Click the Settings tab.
4. Click the Global Settings tab.
5. UnderSystemUserActivityLog,clickthedropdown
calendars to select a Date Range.
6. Click Print Preview.
7. TheSystemUserActivityLogReportisdisplayed.
8. Click the Print icon at the top of the Report to print the Log.
Note: See Chapter 5, Print Preview Task Bar Options.
18
Chapter 4: Settings
User Account Info
Youcanview User Account Settings once the User Account has been opened. User Account Information,
DayIntervals,andTreatmentGoalscanonlybechanged by following the Edit an existing User Account
steps outlined in Chapter 3.
View User Account information
1. With the desired User Account open, click the Settings tab.
2. Click the Account Info or Treatment Goals tabstoviewtheinformation.
19
Chapter 5: The Basics
Program Task Bar Options
OnceaUserAccountisopened,theProgramTaskBarappearsatthetopofthescreen.Youcanchoose
different Program tasks by clicking any selection from the drop down menus.
File
SwitchtoanotherUserAccountorexittheProgram.
Logs
Generate,viewandprintLogs.
Reports
Generate,viewandprintReports.
21
Chapter 5: The Basics
Tools
Importandexportdatabaserecords,purgedatabaserecords
tosavespace,andedittheMasterFoodDatabase.For
details on using these functions, see Chapter 10, Tools Tab.
Help
DisplaytheversionandregistrationstatusofyourProgram.
If you are using the Program in Trial mode, the number of
trialusesyouhaveleftbeforeyouhavetoregisterthe
Program will also be displayed.
Program Tabs
Most Programfunctionscanbeeasilyaccessedbyclickingthesetabs.Therearefivetabs.Seethe
following Chapters for details on using each tab.
•
•
•
•
•
22
Download/Upload
Reports
Logs
Settings
CustomComposer
Chapter 5: The Basics
Print Preview Task Bar Options
When you click Print Preview or GeneratetoviewReports,Logs,etc.anadditionalsetofTaskBar
Options appears on the top left of many screens. These Task Bar options let you choose different ways to
viewinformationonyourcomputerscreen,aswellasnavigatethroughscreenswithmultiplepages.You
canalsosaveandprintinformationthatiscurrentlydisplayed.
Task Bar Icons
• M
inimize(temporarilyclose),maximize(expand),shade(hide),
or close the Report screen
Note: These options will be displayed in English.
• Maximize(expand)theReportscreentofillyourcomputerscreen
viewingarea
• Minimize(temporarilyclose)theReportscreen
• Moveforwardorbackward
through Reports or Logs
with multiple pages
• Reload (refresh) the screen
• Print the Report or Log
• Save the Report or Log
(file) to your computer
• AdjustsizeofReportsor
Logs to fit computer screen
viewingarea
• Applymagnification
factorforviewing
Reports or Logs
23
Chapter 6: Download/Upload Tab
The Download/Upload tab lets you transfer data from a pump or BG meter to the Program. Once the
data are downloaded into the Program, you can use the Reports tab to track and trend insulin, BG and
carbohydratedata,eitherseparatelyortogether.Reportsmaybeviewed,printedorsavedinamore
convenientfileformatforlaterviewing.
YoumayalsousetheDownload/Upload tab to modify the
food database, settings, and tunes that are currently stored
in the pump.
Note: The pump must be in Suspend mode with the
screen display on(notblankor“asleep”)inorderto
establish communication and download or upload
information.Youmaywanttoextendthepumpdisplay
timeout to 60 seconds so the display will not go blank as
quickly.
Downloading a pump
Note: When downloading a pump be sure to set the pump date and time to match the computer date and time.
1. Login to the Program and open the desired User
Account.
2. Click the Download/Upload tab.
3. Click the Download Pump Data icon.
4. Clickthedropdownboxbeside“InsulinPumpModel”
and select the insulin pump model.
Note: The Program will remember the last pump model
downloaded and this will become the default selection for
this User Account.
5. Connect the wireless download cable to your computer.
6. “Scan all ports”isthedefaultCommunicationPortsselection.Ifyoudonotknowwhichcommunication
portsareavailable,thisistherecommendedselection.Ifyouknowwhichcommunicationportsare
available,selectaspecificcommunicationportbyclickingthedesiredportinthedropdownboxbeside
“CommunicationPort”.
25
Chapter 6: Download/Upload Tab
7. Disconnect from the pump and put it in Suspend mode.
Align it with the wireless download cable according
to the Instructions for Use included in the kit. Make
sure the pump is suspended and the display is not
blank (“asleep”).
8. Click Start. A pop up window will appear reminding
you to disconnect from and suspend the pump but
notletthedisplaygoblank(“asleep”).ClickOK to
continue.
9. When communication is established, the pump model
number and serial number will appear on the pop up
window.Aprogressbarandtextwilldisplaythe
upload/download progress. The download process may
take a few minutes.
Note: When communication is established and the pump
model number and serial number appear on the screen, the
pumpscreendisplaywillstay“awake”untilthe
download/upload is complete.
10. A pop up window will appear to notify you when the
download/upload is complete.
11. Resumepumpdeliveryandreconnectthepumpto
your body according to your healthcare team’s
guidelines.Ifyouextendedthepumpdisplaytimeout
setting, you may wish to change it back to your
preferred setting.
12. Youcannowviewthedownloadedpumphistoryby
looking at Reports or Logs (see Chapters 7 and 8).
Note:Whenyoudownloaddatafromthepump,thepumpdeliveryhistoryandcurrentpumpsettingswill
be transferred.
26
Chapter 6: Download/Upload Tab
If you get a pop up window with the error message
displayed here, the Program was unable to find a pump for
downloading.
Check the following and retry.
a. Be sure the pump is in Suspend mode and the
display is not blank (“asleep”).
b. Tryextendingthepumpdisplaytimeoutsettingto60
seconds so it takes longer for the pump display to go
blank(“asleep”).
c. CheckthatyouhavethepumpIRwindowaligned
with the wireless download cable according to the
Instructions for Use included with the kit.
Downloading a BG Meter
Note: When downloading a BG meter be sure to set the BG meter date and time to match the computer
date and time.
TheProgramautomaticallyadjustsforDaylightSavingTimechanges.Ifyoudonotchangethetimeon
yourmeterbeforethe2amDaylightSavingTimechange,historyrecordsbetween1amand2amonthe
meterwillbedisplayedashavingbeentakenbetween12amand1am.
The Program lets you download data from a specified list of BG meters. By downloading BG meter data, you
can use the Reports tabtotrackandtrendinsulinandcarbohydratedataalongwithBGlevels.Onlyvalid
BGvalues(alongwiththeirrecordeddatesandtimes)aredownloadedtotheProgram.Controlsolution
results and any BG meter records associated with testing errors will not be downloaded to the Program.
1. Login to the Program and open the desired User Account.
2. Click the Download/Upload tab.
3. Select the Download Meter Data icon.
4. Clickthedropdownboxbeside“BGMeterModel”andselect the BG meter model.
BG Meters that are compatible*
with the Program
OneTouch® InDuo®
OneTouch® Basic®
OneTouch® Profile®
OneTouch® Ultra®
OneTouch® Ultra® 2
OneTouch® UltraSmart®
OneTouch® SureStep®
OneTouch® UltraMini®
OneTouch® Ping®
Contour®
Breeze® 2
Ascensia® DEX®
Ascensia® DEX® 2
Ascensia® Elite®
*Ascensia® meters are not compatible with Mac OS® and OneTouch® UltraMini® meters are not compatible with Microsoft® Windows® Vista® as of
this printing.
27
Chapter 6: Download/Upload Tab
5. “Scan all ports”isthedefaultCommunicationPortsselection.Ifyoudonotknowwhich
communicationportsareavailable,thisistherecommendedselection.Ifyouknowwhich
communicationportsareavailable,selectaspecificcommunicationportbyclickingthedesired
portinthedropdownboxbeside“CommunicationPort”.
6. Connect the BG meter download cable to your
computer according to the manufacturer’s
instructions.
7. Clicktheboxtosynch(match)theBGmeterdateand
time with your computer date and time.
Note:Bycheckingthisbox,youaresimplychangingthe
current date and time setting on your BG meter to match
the date and time on your computer. This will not impact
the original dates and times that are stored with your BG
valuesinyourBGmetermemory.
8. Click Start. If your BG meter must be turned on or off to download data, a pop up window will appear
to remind you.
9. The Program will search for the BG meter.
10. When communication is established, the confirmation
will appear on the Meter Download screen. A progress
bar will display the upload/download progress.
11. When the download/upload is complete, a pop up window will appear to notify you.
12. YoucannowviewthedownloadedBGmeterhistorybylookingatReportsorLogs.
28
Chapter 6: Download/Upload Tab
Downloading a BG Meter
If the error message shown here appears when
downloading a BG meter, it means the Program was
unable to find a BG meter for downloading.
Check the following and retry.
a. Besureyouhaveselectedthecorrectmetermodel
fromtheBGMeterModeldropdownbox.
b. CheckthatyouhaveconnectedtheBGmeter
properly to the download cable according to the BG
meter manufacturer’s instructions.
c. Make sure that your meter is turned on or off
according to the BG meter manufacturer’s
instructions for downloading.
Changing current settings on the pump
In addition to changing settings directly on the pump, you can also change them using the Program in one
of two ways: 1) first download the settings into the Program, make the changes, and then upload the new
settings to the pump or 2) display the settings for the pump model in the Program, make the changes, and
then upload the new settings to the pump. The first option is better if you are only making a few changes
tothepumpsettings.Withbothoptions,thenewpumpsettingswillreplacetheprevioussettingswhen
youuploadthem.Itisagoodideatosavethenewpumpsettingsbeforeuploadingsoyouwillhavethem
availableforfuturereference.
Downloading settings from pump
1. Login to the Program and open the desired account.
2. Click the Download/Upload tab.
3. Click the Configure Settings icon.
4. Clickthedropdownboxbeside“InsulinPumpModel”
and select the insulin pump model.
Note:Onceyouhaveselectedapumpmodel,theProgram
will remember the pump model and this will become the
default selection for this User Account.
5. Connect the wireless download cable to your
computer.
6. “Scan all ports”isthedefaultCommunicationPorts
selection. If you do not know which communication
portsareavailable,thisistherecommendedselection.
Ifyouknowwhichcommunicationportsareavailable,
select a specific communication port by clicking the
desiredportinthedropdownboxbeside
“CommunicationPort”.
7. Click Start.
29
Chapter 6: Download/Upload Tab
8. Disconnect from the pump and put it in Suspend mode. Align it with the wireless download cable
according to the Instructions for Use included in the kit. Make sure the pump is suspended and the
displayisnotblank(“asleep”).
9. On the Pump Setup screen click Download Settings
from Device. A pop up window will appear reminding
you to disconnect from and suspend the pump but
notletthedisplaygoblank(“asleep”).ClickOK to
continue.
10. While the Program is searching for the
communication port and pump, the status at the
bottom of this screen will display Searching.
11. When communication is established, the pump model
number and serial number will appear at the bottom of
thiswindow.Aprogressbarandtextwilldisplaythe
download/upload progress. The download process may
take a few minutes.
Pump Serial
Number
Pump Model
30
Chapter 6: Download/Upload Tab
12. A pop up window will appear to notify you when the download/upload is complete.
13. When the download is complete, the current pump
settings are displayed on the Pump Setup screen.
14. Resumepumpdeliveryandreconnectthepump
according to your healthcare team’s guidelines. If you
extendedthepumpdisplaytimeoutsetting,youmay
wish to change it back to your preferred setting.
15. Click the tabs on the Pump Setup screen to change
the settings as directed by your healthcare team.
16. Seethenextsectionforcreating,savingandprinting
settings for the pump.
Creating, saving and printing settings for the pump
Note: The Program will only display settings options that are compatible with the pump model you select.
Forexample,theAnimas® IR 1200 Insulin Pump only allows upload of data for the Personal Information
screen. The Animas® 2020 and OneTouch® Ping® Insulin Pumps allow upload of most pump settings.
1. Login to the Program and open the desired User
Account.
2. Click the Download/Upload tab.
3. Click the Configure Settings icon.
4. Clickthedropdownboxbeside“InsulinPumpModel”
and select the insulin pump model.
5. Click Start.Youdonothavetoestablish
communications to create settings.
31
Chapter 6: Download/Upload Tab
6. The Pump Setup screen is displayed. Enter the pump settings as directed by your healthcare team.
Clickthetabs(Basic,Advanced,ezCarb/ezBG,Basal)fordifferentsettingscategories.
7. Touploadthesesettingstothepump,seenextsectionUploading settings to the pump.
8. Youcansave your settings as a file for later
referenceand/oruploadbyclickingSave at the top
right of the Pump Setup screen and naming the file
asyouusuallywould.Thefilewillbesavedasan.aps
(Animas® Pump Settings) file and cannot be opened
by any program other than ezManager® MAX
Diabetes Management Software.
9. Youcanview this file by clicking Print Preview at
the top right of the Pump Setup screen.
10. Youcanprint this file by clicking the Printer icon at
thetopleftofthePrintPreviewscreen.
Uploading settings to the pump
1. Login to the Program and open the desired User
Account.
2. Click the Download/Upload tab.
3. Click the Configure Settings icon.
4. Clickthedropdownboxbeside“InsulinPumpModel”
and select the insulin pump model.
5. Connect the wireless download cable to your computer.
32
Chapter 6: Download/Upload Tab
6. “Scan all ports”isthedefaultCommunicationPortsselection.Ifyoudonotknowwhich
communicationportsareavailable,thisistherecommendedselection.Ifyouknowwhich
communicationportsareavailable,selectaspecificcommunicationportbyclickingthedesired
portinthedropdownboxbeside“CommunicationPort”.
7. Click Start.
8. Ifyouhavejustcreatedormadethechangesthatare
displayedonthePumpSetupscreen,skipthenexttwo
steps and proceed to step 11.
9. Ifyouwishtoopenapumpsettingsfileyoupreviously
saved,clickOpen on the Pump Setup screen. A pop
up window will appear to remind you that opening the
savedsettingsfilewilleraseanydatacurrentlyonthe
Program screen. Click Yes to continue.
10. Select the file you wish to open from the Open File pop
up window.
33
Chapter 6: Download/Upload Tab
11. The pump settings are displayed in the Pump Setup
screen. Check that the settings on the Pump Setup
screen are the ones you wish to upload.
12. Disconnect from the pump and put it in Suspend
mode. Align it with the wireless download cable
according to the Instructions for Use included in the kit.
Make sure the pump is suspended and the display is
notblank(“asleep”).
13. Click Upload Settings to Device. A pop up window
will appear reminding you to disconnect from and
suspend the pump but not let the display go blank
(“asleep”).ClickOK to continue.
14. When communication is established, the pump model
number and serial number will appear on the Pump
Settingsscreen.Aprogressbarandtextwilldisplaythe
download/upload progress.
Pump Serial
Number
Pump Model
34
Chapter 6: Download/Upload Tab
15. When the download/upload is complete, a pop up
window will appear to notify you.
16. Double check the settings on the pump to be sure
theymatchthechangesrequestedbyyourhealthcare
team.Ifyouextendedthepumpdisplaytimeout
setting, you may wish to change it back to your
preferred setting.
17. Resumepumpdeliveryandreconnectthepumpaccordingtoyourhealthcareteam’sguidelines.
Modifying the pump or meter-remote food database
TheMasterFoodDatabaseallowsyoutomanagefooditemsandcreatedevicefooddatabases.Animas®
Insulin Pumps and OneTouch® Ping®Meter-Remotesarepre-loadedwithablank(empty)devicefood
database.YoucancreateadevicefooddatabasewiththeProgrambycreatingallnewfooditemsand
addingthemtothe“Favorites”categoryinspecifiedpumpsandinvariouscategoriesinthemeter-remote.
Youwillneedthecorrectnutritionalinformationforanyitemsyoucreate.TheMasterFoodDatabase
includedwiththeProgramisalsoblank(empty).Thedevicefooddatabasecanbeuploadedtoyourdevice
for use. When you use the ezCarb/CarbSmart feature on the pump or meter-remote, you can access the food
database for carb amounts.
Thenextfewsectionsreviewhowtomodifyand/orcreatethedevicefooddatabase.
Note:Itisimportantthatyoufirstsavethenew(subset)databasefilebeforeuploadingsoyouwillhaveit
availableforfuturereference.
35
Chapter 6: Download/Upload Tab
Creating a new device food database
Note:Ifyouarecurrentlyworkingwithadevicefood
database and then click New to create a new database, you
willoverwritethedatabaseyouareworkingwith.Ifyouare
workingwithmorethanonedevicefooddatabase,always
savethemasseparatefilesanddonotcreateanew
databasewhileworkinginanexistingone.
1. Login to the Program and open the desired User
Account.
2. Click the Download/Upload tab.
3. Click the Configure Food DB icon.
4. Clickthedropdownboxbeside“PumporMeterModel”
and select the device (insulin pump model or meter-remote model).
5. Click Start.
6. To create a new database, click NewatthetoprightoftheDeviceFoodDBscreen.
7. Add items as outlined in this Chapter.
8. Reviewyournewdatabaseforaccuracyandsavethefile.
Saving a device food database file
1. With the desired device food database displayed
in the Device Food DB screen, click Save at
the top right of the screen.
2. Selectalocationandsavethedevicefooddatabaseas
younormallywouldsaveafile.Thefilewillbesavedas
an .apf file and cannot be opened by any program
other than ezManager® MAX Diabetes
Management Software.
Note:Ifyouhavenotsavedthedevicefooddatabasefile
and a connection is lost while uploading the database, the
devicefooddatabasewillbelostandyoumustcreateanew
one.
36
Chapter 6: Download/Upload Tab
Opening a device food database file
1. Login to the Program and open the desired User
Account.
2. Click the Download/Upload tab.
3. Click the Configure Food DB icon.
4. Clickthedropdownboxbeside“PumporMeterModel”
and select the device (insulin pump model or
meter-remote model).
5. Click Start.
6. To open a device food databaseyouhavecreatedand
saved,clickOpenatthetoprightoftheDeviceFoodDB
screen.
7. The pop up window at right will be displayed.
8. Click Yes to continue or click Noifyouhavenotsaved
thedevicefooddatabasethatiscurrentlydisplayed.
Savethedevicefooddatabasebeforecontinuing.
Note:Ifyouarecurrentlyworkingwithadevicefooddatabaseandthenopenasavedfooddatabase,the
fileyouopenwilloverwritethedatabaseyouarecurrentlyworkingwith.Ifyouareworkingwithmorethan
onedevicefooddatabase,alwayssavethemasseparatefilesanddonotopenaseconddevicedatabase
whileworkingonanexistingone.
9. OntheOpenFilescreen,selectthedevice
databasefilefromitssavedlocation.
Changing an item in the existing device food database
Tochangeitemsintheexistingpumpfooddatabase,youmustfirstdownloadthedatabasefromthepump,
oropenasavedfileyouwishtochange.
1. Login to the Program and open the desired User Account.
2. Click the Download/Upload tab.
3. Click the Configure Food DB icon.
4. Clickthedropdownboxbeside“PumporMeterModel”andselect the device (insulin pump model
or meter-remote model).
37
Chapter 6: Download/Upload Tab
5. Click Start.
6. Openthedatabaseyouwishtoworkwith,eitherbyopeningasavedfileorbydownloadingitfromthe
pump as outlined in this Chapter.
7. WiththefooddatabasedisplayedontheDeviceFoodDBscreen,clicktheitemyouwishtochange.
8. Click Delete Selected Item(s).Seeprevioussection Deleting items from an existing device food
database.
9. Click either Add Item from DB or Add Custom Item and change the information as desired.
Seefollowingsectionsforinformationonhowtoadditemstothedevicefooddatabase.
10. Whenfinished,reviewyourchangesforaccuracyandsavethefile.
Viewing and printing a device food database
1. Login to the Program and open the desired User
Account.
2. Click the Download/Upload tab.
3. Click the Configure Food DB icon.
4. Clickthedropdownboxbeside“PumporMeterModel”
and select the device (insulin pump model or meterremote model).
5. Click Start.
6. To viewadevicefooddatabase,firstopenthefileor
create a new database as outlined in this Chapter.
Click Print Preview.
7. Click the Printer icon on the top left of the Print
Previewscreen.
8. Select your printer and print as you normally would.
Note:Ifyouarecurrentlyworkingwithadevicefood
databaseandthenclickNewtocreateanewdatabase,you
willoverwritethedatabaseyouareworkingwith.Ifyouare
workingwithmorethanonedevicefooddatabase,always
savethemasseparatefilesanddonotcreateanew
databasewhileworkingonanexistingone.
38
Chapter 6: Download/Upload Tab
Deleting items from an existing device food database
1. Login to the Program and open the desired User Account.
2. Click the Download/Upload tab.
3. Click the Configure Food DB icon.
4. Clickthedropdownboxbeside“PumporMeterModel”andselect the device (insulin pump model
or meter-remote model).
5. Click Start.
6. Open the database you wish to work with, either by
openingasavedfileorbydownloadingitfromthe
pump as outlined in this Chapter.
7. To delete items, click the items you wish to delete.
Press and hold the Ctrl and Alt keys on your computer
while clicking, to select more than one item for
deletion. Press and hold the Ctrl and Shift keys on your
computer while clicking, to select groups of adjacent
items for deletion.
8. Click Delete Selected Items. A pop up window will
appear. Click Yes to continue.
9. Yourselecteditemswillbedeletedfromthisdevice
food database. This feature only deletes items in the file
currentlydisplayedintheDeviceFoodDatabase
screen. Items are not deleted from the Program Master
Food Database or from any other food database files
youhavesaved.
10. To delete all items for an entire Food category, click the
desired category on the left.
11. All items for that food category will be displayed. Click
Delete All Category Items. A pop up window will
remind you to be sure you want to delete the items.
Press Yes to continue.
12. TheitemsthatarecurrentlydisplayedontheDevice
Food DB screen will be deleted.
13. Whenfinished,reviewyourchangesforaccuracyand
savethefile.
39
Chapter 6: Download/Upload Tab
Adding items to a device food database from the Master Food DB
Note:Customers cancreatetheirowncustomizeddevicefooddatabasebyusingtheFavoritescategory-
seenextsectionAdding/creating your own food items for the device food database.
1. Login to the Program and open the desired User Account.
2. Click the Download/Upload tab.
3. Click the Configure Food DB icon.
4. Clickthedropdownboxbeside“PumporMeterModel”and select the device (insulin pump model
or meter-remote model).
5. Click Start.
6. Openthedatabaseyouwishtoworkwith,eitherbyopeningasavedfileorbydownloadingitfromthe
pump as outlined in this Chapter.
Note:Youcanonlyadditemstoadevicefooddatabasethatisnotfull.TheAnimas® IR 1200 Plus Insulin
Pumpfooddatabasewillholdamaximumof250items.TheAnimas® 2020 Insulin Pump food database will
holdamaximumof500items.TheOneTouch® Ping®Meter-Remotewillholdamaximumof500items.
Eachcategorywillholdamaximumof255items.If you wish to add or switch items in a device food
database that is already full, you must first delete items and then add as outlined below.
7. OntheDeviceFoodDBscreen,clickAdd Item from
DB. The Master Food DB window is displayed. All
items in the Program Master Food Database are shown,
in alphabetical order.
The Master Food Database is empty and you can create
your own. See the sections Creating a new device food
database file and Adding/creating your own food items
for the device food database, in this Chapter.
To search by category,usethedropdownboxatthe
top right of the screen and select the desired category.
40
Chapter 6: Download/Upload Tab
To search by keyword, enter the word in the Find all
items containing field and click Find.Ifyouhavea
single category selected, the search will only look in
thatcategory.Intheexampleatright,“Fries”isthe
keywordand“Fast&Packaged”isthecategory
selected. If you want to search the entire database by
keyword,besuretoselect“All”asthecategory.
8. Click to highlight the food item you wish to add to
thedevicefooddatabase.Itwillbe displayedinthebox
on the right side of the Master Food DB screen.
9. Iftherearemultipleservingsizesfortheitemyouhave
selected, click to highlight the desired serving size.
10. Click Add Item to Food DB.
11. The Food Item Name pop up window is
displayed.
12. Choosefromtheavailablecategories.Thisselection
determines which category the item will be stored in
thepump.TheFoodItemNamepopupwindowisalso
whereyouabbreviatetheitemnameandservingsize
so that they fit on the pump display screen. The pump
displayscreendoesnothaveasmuchspacefortextas
your computer screen. Food item names are limited to
12 characters (including spaces) on the pump display
screen.Servingsizenamesarelimitedto8characters
(including spaces).
13. Abbreviate the Item Name and Serving Size as
desired.Youcannotchangenutritionalvaluesor
servingsizes.
Whenyouabbreviatefoodnamesandservings,makesure
they will still make sense to you when they appear on the
pump display.
14. Click Add.
41
Chapter 6: Download/Upload Tab
15. Repeat for remaining food items.
16. Whenfinishedcreatingthedevicefooddatabase,click
Close.
17. The Device Food DB screen is displayed.
18. Review your additions for accuracy.
19. Save as a file and then upload to the pump or
meter-remote according to the instructions in this
Chapter.
Adding/creating your own food items for the device food database
Youcancreateyourownfooditemstobeusedinthedevicefooddatabaseifyouhavethecorrect
nutritionalinformation.FooditemsyoucreatecanbeaddedtotheFavoritescategoryforspecifiedpumps
and to any food category for the meter-remote. This section tells you how to create your own food database
by adding items to a food category.
1. Openthedevicefooddatabaseyouwishtoworkwith
(orclickNewontheDeviceFoodDBscreen).Youcan
use other categories on your meter-remote for food
items by first creating a Master Food Database in the
Program. See Chapter 10, Tools Tab.
2. OntheDeviceFoodDBscreen,clickAdd Custom
Item.
3. The Device Custom Food Item pop up window is displayed. Enter the information for your custom
food item.
Note:AllfieldsoftheDeviceCustomFoodItempopupwindowmustbefilledin.
42
Chapter 6: Download/Upload Tab
4. Click Add. A pop up window will appear to confirm
that an item was added. Click OK.
5. The Device Food DB windowisdisplayed.Your
custom item will be added to the selected category as
shownintheexampleatright.
6. Toaddadditionalfooditems,repeatthestepsabove.
7. Whenfinishedaddingitems,reviewyouradditions
for accuracy.
8. Save as a file and then upload to the pump according
to the instructions in this Chapter.
Note:ToaddfavoritestotheMasterFoodDatabaseseeChapter10,Tools Tab.
Uploading a device food database to the pump
Note:Ifyouhavenotsavedthedevicefooddatabaseandaconnectionislostwhileuploadingthe
database,thedevicefooddatabasewillbelostandyoumustcreateanewone.Tosavethedevicefood
database, click SaveinthetoprightoftheDeviceFoodDBscreenandsavethefileasyounormallywould.
1. Login to the Program and open the desired User
Account.
2. Click the Download/Upload tab.
3. Click the Configure Food DB icon.
4. Clickthedropdownboxbeside“PumporMeterModel”
and select your insulin pump model.
5. Connect the wireless download cable to your computer.
Whenyouuploadadevicefooddatabase,itreplaces
(deletes)thedevicefooddatabasecurrentlystoredonthe
pump.
6. “Scan all ports”isthedefaultCommunicationPorts
selection. If you do not know which communication
portsareavailable,thisistherecommendedselection.
Ifyouknowwhichcommunicationportsareavailable,
select a specific communication port by clicking the
desiredportinthedropdownboxbeside
“CommunicationPort”.
7. Click Start.TheDeviceFoodDBscreenwillappear.
8. Click Openandselectthedesireddevicefood
databaseyouhavesaved.Itwillbedisplayedinthe
DeviceFoodDBscreen.
9. Checkthatthedevicefooddatabasedisplayedisthe
one you wish to upload.
43
Chapter 6: Download/Upload Tab
10. Disconnect from the pump and put it in Suspend mode. Align it with the wireless download cable
according to the Instructions for Use included in the kit. Make sure the pump is suspended and
the display is not blank (“asleep”).
11. Click Upload Food DB to Device.Thisdevicefood
database will be uploaded to the pump and replace the
devicefooddatabasecurrentlystoredonthepump.
The warning screen shown here will appear first, reminding
youthatuploadingadevicefooddatabasetothepumpwill
replace (delete) all food items currently stored in the pump.
12. A pop up window will appear reminding you to
disconnect from and suspend the pump but not let the
displaygoblank(“asleep”).ClickOK to continue.
13. When communication is established, the pump model
numberandserialnumberwillappearontheDevice
Food DB screen. A progress bar will display the
upload/download progress. Depending on how many
itemsyouhaveenteredintothedevicefooddatabase,
thiscouldtakeseveralminutes.Youcanviewitems
being uploaded at the top of the screen.
14. When the download/upload is complete, a pop up
window will appear to notify you.
15. Resumepumpdeliveryandreconnectthepump
according to your healthcare team’s guidelines. If
youextendedthepumpdisplaytimeoutsetting,you
may wish to change it back to your preferred setting.
44
Chapter 6: Download/Upload Tab
Uploading a device food database to the meter-remote
Note:Ifyouhavenotsavedthedevice food database and a connection is lost while uploading the
database, the devicefooddatabasewillbelostandyoumustcreateanewone.Tosavethedevice food
database, click SaveinthetoprightoftheDeviceFoodDBscreenandsavethefileasyou
normally would.
1. Login to the Program and open the desired User
Account.
2. Click the Download/Upload tab.
3. Click the Configure Food DB icon.
4. Clickthedropdownboxbeside“PumporMeter
Model”andselect your meter-remote model.
5. Connect the device to the download/upload cable.
6. “Scan all ports”isthedefaultCommunicationPorts
selection. If you do not know which communication
portsareavailable,thisistherecommended
selection. If you know which communication ports
areavailable,selectaspecificcommunicationportby
clickingthedesiredportinthedropdownboxbeside
“CommunicationPort”.
7. Click Start.
8. Open the database you wish to upload.
9. Check that the device food database displayed is the
one you wish to upload.
10. Check that the device download/upload cable is
connected to your computer.
When you upload a devicefood database, it replaces
(deletes) the devicefood database currently stored on the
meter-remote.
11. Click Upload Food DB to Device. The devicefood
database will be uploaded to the meter-remote and
replace the food database currently stored in the
meter-remote.
The warning screen shown here will appear first,
reminding you that uploading a devicefood database to
the meter-remote will replace (delete) all food items
currently stored in the meter-remote.
45
Chapter 6: Download/Upload Tab
A pop up window will appear reminding you to
make sure the meter-remote is turned on. Click OK to
continue.
12. When communication is established, the meter-remote
modelandserialnumberwillappearontheDeviceFood
DB screen. A progress bar will display the
upload/download progress. Depending on how many
itemsyouhaveenteredintothemeter-remotefood
database,thiscouldtakeseveralminutes.Youcanview
items being uploaded at the top of the screen.
When the download/upload is complete, a pop up
window will appear to notify you.
Downloading the pump food database from the device
Tochangeitemsinthedevicefooddatabase,youmustfirstdownloadthedatabasefromthepump,or
openasavedfiledyouwishtochange.
1. Login to the Program and open the desired User Account.
2. Click the Download/Upload tab.
3. Click the Configure Food DB icon.
4. Clickthedropdownboxbeside“PumporMeterModel”
and select the insulin pump model.
5. Connect the wireless download cable to your computer.
46
Chapter 6: Download/Upload Tab
6. “Scan all ports”isthedefaultCommunicationPorts
selection. If you do not know which communication
portsareavailable,thisistherecommendedselection.
Ifyouknowwhichcommunicationportsareavailable,
select a specific communication port by clicking the
desiredportinthedropdownboxbeside
“CommunicationPort”.
7. Click Start.
8. TheDeviceFoodDBscreenisdisplayed.Thecategory
names listed on the left side of the screen cannot be
changed.
9. Disconnect from the pump and put it in Suspend
mode. Align it with the wireless download cable
according to the Instructions for Use included in the kit.
Make sure the pump is suspended and the display is
notblank(“asleep”).
10. Click Download Food DB from Device.
A pop up window will appear to remind you that
downloading the food database from the pump will
erase any data currently displayed on the Program
screen. Click Yes to continue.
A pop up window will appear reminding you to
disconnect from and suspend the pump but not let
thedisplaygoblank(“asleep”).ClickOK to continue.
47
Chapter 6: Download/Upload Tab
11. The food items currently stored in the pump food
database will be downloaded. Depending on how many
fooditemsarestored,thiscouldtakeseveralminutes.
YoucanviewitemsbeingdownloadedontheDevice
Food DB screen. The number after each category name
tellsyouhowmanyfooditemshavebeenstoredforthat
category.
12. When the download/upload is complete, a pop up
window will appear to notify you.
13. Resumepumpdeliveryandreconnectthepumpaccordingtoyourhealthcareteam’sguidelines.Ifyou
extendedthepumpdisplaytimeoutsetting,youmaywishtochangeitbacktoyourpreferredsetting.
Note:OnceyouhavedownloadedthefooddatabasefromthepumptotheProgramandsaveditasafile,
theProgramstatuschangesfrom“Connected”to“Disconnected”.Youcanresumepumpdeliveryand
reconnect the pump while you make changes to the food database downloaded from the pump.
To change items in the food database, see Changing an item in the existing device food database earlier in
this Chapter.
48
Chapter 6: Download/Upload Tab
Downloading the meter-remote food database from the device
Tochangeitemsinthedevicefooddatabase,youmustfirstdownloadthedatabasefromthemeter-remote,
oropenasavedfileyouwishtochange.
1. Login to the Program and open the desired User Account.
2. Click the Download/Upload tab.
3. Click the Configure Food DB icon.
4. Clickthedropdownboxbeside“PumporMeterModel”
and select the meter-remote model.
5. Connect the meter-remote download cable to your
computer.
6. Connect the meter-remote to the download cable
according to the manufacturer’s instructions.
7. “Scan all ports”isthedefaultCommunicationPorts
selection. If you do not know which communication ports
areavailable,thisistherecommendedselection.Ifyou
knowwhichcommunicationportsareavailable,selecta
specific communication port by clicking the desired port
inthedropdownboxbeside“CommunicationPort”.
8. Click Start.
9. TheDeviceFoodDBscreenisdisplayed.Thecategory
names listed on the left side of the screen cannot be
changed.
49
Chapter 6: Download/Upload Tab
10. Click Download Food DB from Device.
A pop up window will appear to remind you that
downloading the food database from the meter-remote
will erase any data currently displayed on the Program
screen. Click Yes to continue.
A pop up window will appear reminding you to
make sure the meter is turned on. Click OK to
continue.
11. The food items currently stored in the meter-remote
food database will be downloaded. Depending on how
manyfooditemsarestored,thiscouldtakeseveral
minutes.Youcanviewitemsbeingdownloadedonthe
DeviceFoodDBscreen.Thenumberaftereach
categorynametellsyouhowmanyfooditemshave
been stored for that category.
50
Chapter 6: Download/Upload Tab
12. When the download/upload is complete, a pop up
window will appear to notify you.
Note:Onceyouhavedownloadedthefooddatabasefromthemeter-remotetotheProgram,theProgram
statuschangesfrom“Connected”to“Disconnected”.Youcannowsavethefooddatabaseasafileand
make changes to it.
To change items in the food database, see Changing an item in the existing device food database earlier in
this Chapter.
Changing the pump sounds
The Program lets you change the factory pre-loaded sounds in select Animas® Insulin Pump models (IR
1200 with software upgrade, Animas® 2020, and OneTouch® Ping®) with tunes from the Program Tunes
Library,orwithnewtunesyoucompose(seeChapter9).Youmaychangesoundsforanyorallofthefour
soundcategories(Alarms,Reminders,WarningsandAlerts)inthepump.Youcanaddtunestoplayasyour
initial audible notification of some Alarms, Warnings, Reminders and Alerts. For safety reasons, you cannot
removesoundscompletelyfromthepump.
Note: A tune will only play once (your initial notification,) and then the pump will resume its usual,
progressiveaudible/vibenotificationsequence.Iftheconditionisnotconfirmedand/ortheappropriate
actiontaken,thepumpsafetysystemprogressestohighvolumeandvibratemodewithinonehourfor
Warnings and Alarms. Only certain Alerts can use a tune for the initial notification. The following Alerts,
Reminders, Warnings and Alarms will play a tune as the initial notification:
Alerts
•LowBG
•HighBG
•1-Weekdaymust
beactivetochange
basal display
•BasalEditNotSaved
Reminders
•AllReminders(2-time
of day, 1-Check BG)
Alarms
•EmptyCartridge
•OcclusionDetected
•AutoOFF
Warnings
•Suspended
•ExceedsMaxBasal
•ExceedsMaxBolus
•ExceedsMaxDaily
•LowCartridge
•Boluscanceledby
user button press
•LowBattery
•NoPrime
•Batterychange
requiresPrime/Rewind
51
Chapter 6: Download/Upload Tab
Changing the factory pre-loaded sounds with tunes from the Tunes Library or your own tunes
1. Login to the Program and open the desired User Account.
2. Click the Download/Upload tab.
3. Select your insulin pump model.
4. Click the Configure Pump Tunes icon.
5. Connect the wireless download cable to your
computer.
6. “Scan all ports”isthedefaultCommunicationPorts
selection. If you do not know which communication
portsareavailable,thisistherecommendedselection.
Ifyouknowwhichcommunicationportsareavailable,
select a specific communication port by clicking the
desiredportinthedropdownboxbeside
“CommunicationPort”.
7. Click Start.
8. On the Upload Tunes window, select the desired
sound category. This is the type of pump sound you
are changing (Alerts, Reminders, Warnings, or Alarms).
9. Click Open.
10. Click the Tunes Library folder and double click the
desired tune file. A pop up window will appear to
indicate that the tune was successfully opened from
the file. Click OK.
Note:Youcancreateyourowntunefilesandsavethemtouploadtothepump.SeeChapter9,Custom
Composer Tab.
52
Chapter 6: Download/Upload Tab
11. The tune file you selected is now displayed on the
Upload Tunes screen. Click Play if you wish to listen to
the tune (be sure your computer speakers are turned on).
Note:Thesoundqualityoftunesonyourcomputerislikely
to be richer than on the pump.
12. Disconnect from the pump and put it in Suspend
mode. Align it with the wireless download cable
according to the Instructions for Use included in the
kit. Make sure the pump is suspended and the
pump display is not blank (“asleep”). Check that
the Tune file displayed is the one you wish to upload
byeitherreviewingthenameofthetuneorby
clicking Play to hear it.
13. Click Upload.
14. A pop up window will appear to remind you that
uploading this tune will replace the current pump tune
for the sound category selected.
15. A pop window will appear reminding you to
disconnect from and suspend the pump but not let
thedisplaygoblank(“asleep”).ClicktheOK button to
continue.
53
Chapter 6: Download/Upload Tab
16. When the upload is complete, the pop up window will
display a confirmation message. Repeat for remaining
sound categories, if desired.
Replacing pump tunes with the factory beep sounds
Forsafetyreasonsyoucannotcompletelyremovesoundsfromthepump.However,youcanreplacethe
currentpumptuneswiththefactorydefaultbeepsoundsby“removing”tunes.
1. Login to the Program and open the desired User Account.
2. Click the Download/Upload tab.
3. Select your insulin pump model.
4. Click the Configure Pump Tunes icon.
5. Connect the wireless download cable to your computer.
6. “Scan all ports”isthedefaultCommunicationPortsselection.Ifyoudonotknowwhichcommunication
portsareavailable,thisistherecommendedselection.Ifyouknowwhichcommunicationportsare
available,selectaspecificcommunicationportbyclickingthedesiredportinthedropdownboxbeside
“CommunicationPort”.
7. Click Start.
8. On the Upload Tunes pop up window, select the desired sound category. This is the type of pump
sound you are changing (Alerts, Reminders, Warnings, or Alarms).
9. Disconnect from the pump and put it in Suspend mode.
Align it with the wireless download cable according to
the Instructions for Use included in the kit. Make sure
the pump is suspended and the pump display is not
blank (“asleep”). On the Upload Tunes pop up window,
click Remove. A pop up window will remind you that
removingthistunewillrestorethesoundforthiscategory
to the factory beep tones.
54
Chapter 6: Download/Upload Tab
10. A pop up window will remind you to disconnect from
and suspend the pump but not let the pump display
goblank(“asleep”).
11. When communication is established, the pump model
number and serial number will appear on the Upload
Tunes pop up window. A progress bar will display the
upload/download progress.
12. When complete, a pop up window will display a
confirmation message. Repeat for remaining sound
categories, if desired.
13. Resumepumpdeliveryandreconnectthepump
according to your healthcare team’s guidelines. If you
extendedthepumpdisplaytimeoutsetting,youmay
wish to change it back to your preferred setting.
Restoring the settings and tunes to the pump
When you install the Program on your computer, a back up file is also installed that contains the factory
defaultsfortunes.Thisfolderresidesonyourcomputerinthesameplacethatyouselectedtohavethe
Program files stored. The default location is your Local Disk (C:/ Program Files). The folder is named
ezManager Max / My Files / Pump Defaults. The file for the original tune is Fur Elise.
To access these original files, click Open on the
Upload Tunes pop up window.
Note:Uploadingthefactorydefaultfileswilloverwritethe
tunes that are currently loaded on the pump.
55
Chapter 7: Reports Tab
The ReportstabletsyougenerateseveralReportsbasedondatayouhavedownloadedfromthepumpand
BGmeter,andanydatayouhavemanuallyenteredintotheProgram.
AllReports(excepttheLogbookReportandPumpSettings
Reports) will display a legend at the bottom. The first three
rows in the legend will display pump settings for the User
Account that is opened, including Insulin to Carb (I:C)
ratios,InsulinSensitivityFactors(ISF)andBGTargets,for
different times of day. This information will be included in
Reports only after a pump has been downloaded for a
particular User Account.
The last row in the legend displays the Treatment Goals
that were set up when the User Account was created. If the
Treatment Goals were not changed when the User Account
was created, the default Program Treatment Goals will be
displayed.
Note:Reportscanbesavedinseveraldifferentformats,including.pdf,.html,.csvand.xlsfiles.Duetothe
complexityofformattingReports,itisrecommendedyousaveReportsonlyas.pdffiles.Thisfileformatwill
helpensurethebestqualityforviewingandprintingreports.Tosaveanexistingfileinadifferentformat,
open a Report and click Save.OntheSaveFilepopupwindow,namethefileandselectafiletypefromthe
drop down menu. Click Savetosavethefiletothedesiredlocation.
Selecting a Date Range
TheDateRangewilldeterminehowmanydaysarecoveredinReportsandLogs.Onceyouhaveopeneda
User Account, you can select the Date Range two different ways.
a. To select a custom date range, click the drop down
boxnexttothestartdatetodisplaythecurrentmonth
calendar. Select a start date by clicking a calendar day.
Clickingthedropdownboxnexttothemonthoryear
allowsyoutomoveforwardorbackwardintime.
Select an end date by clicking another calendar day.
57
Chapter 7: Reports Tab
b. To select a pre-set time period,clickthedropdownboxnextto“SelectPeriod”andchoosefromthe
pre-settimeperiodsavailable.
Available pre-set time periods
Note:OnceyouselectaDateRange,itappliesforaslongasyouhavetheProgramopen,evenifyou
switchtoanotherUserAccount.YoucanchangetheDateRangeeachtimeyouopenanewUserAccount,
if you wish. Once you close the Program and re-open it, the default Program Date Range will be used (last
7days).TheLogbookReportdisplaysonlycomplete24-hourperiods.SoifyouselectaDateRangethat
includes the current day, that data will not appear.
Logbook Report
The Logbook Report includes any or all of the following:
• BGinformation
• Carbohydrateinformation
• Bolusinformation
• Basalinformation
• PumpEventinformation
• Statisticalinformation
1. Login to the Program and open the desired User
Account.
2. Click the Reports tab.
3. Select the desired Date Range.
4. Click the Logbook Report icon.
5. The Logbook Report will display the information as
designatedbythecheckedboxes.Tocustomize how
data are displayed on the Logbook Report, check or
uncheck the items as desired.
58
Chapter 7: Reports Tab
6. Once you are satisfied with your settings, click
Generate. The longer the Date Range you select, the
longeritwilltaketogeneratetheReport.Forexample,a
Reportcoveringamonthofdatawilltakelongerto
generatethanaReportcoveringonlyaweekofdata.
7. To save the report, click the Save icon at the top left of
the Report screen.
8. To print the report, click the Printer icon at the top left
of the Report screen.
When you view Reports on your computer screen, you
can use the scroll bars on the bottom and at the right to
adjusttheviewingarea.Youcanalsochange the viewing
sizebyclickingtheZoomRatiodropdownbox,orbyusing
the Fit Page icons at the top of the Report screen. To move
through multiple pages of a Report, click the forward and
backward arrows at the top left of the Report screen.
Youcanview additional “hidden” information that might
behelpfulbysimplyplacingyourcursoroveravaluewithout
clicking the value.
Forexample,ifyouplaceyourcursoroveraBG,BasalorCarbohydratevalue,thetime the value was
recorded will be displayed.
IfyouplaceyourcursoroveraPumpEvent,thetime and type of event that was recorded will be
displayed.
Logbook abbreviations:
Record Types
Abbreviations
Rec
BOL
BOT
BGT
CHO
BAS
EVT
Definition
Record Type
Bolus record
Bolus Type record
BG Type record
Carbohydrate record
Basal record
Eventrecord
Bolus Types
Abbreviations
INJ
NOR
AUD
EXT
EBG
CSN
CSE
Definition
Manual Injection
NormalBolus
Audio Bolus
ExtendedBolus
ezBG generated Bolus
ezCarb→Normal
ezCarb→Extended
Event Record Types
Abbreviations
S
F
T
A
Definition
Suspend
Fill Cannula
Temp Basal
Alarm
59
Chapter 7: Reports Tab
The bottom row of the Logbook Report shows averages
for each time slotforBG,Bolus,andCarbohydratevalues.
The far right column of the Logbook Report shows totals
for each dayforBolus,BasalandCarbohydratevalues.The
BG value in the far right columnshowstheaverageBG
for that day.
Line Chart Reports
1. Login to the Program and open the desired User
Account.
2. Click the Reports tab.
3. Select the desired Date Range.
4. Click the Line Charts icon.
TwoLineChartReportsareavailable,theTotalDailyDose
Report and the Blood Glucose Chart Report.
Total Daily Dose Report
The Total Daily Dose report displays basal, bolus, and total (basal plus bolus) insulin per day. Only data
that have been downloaded from the pump will show in this Report. Data downloaded from
another device or that have been entered manually into the Program via the Insulin Log will not
be displayed on this Report.
1. Double check the User Account selected and Date
Range.
2. Click Generate to create the report.
3. To save the report, click the Save icon at the top of the
Report screen.
4. To print the report, click the Printer icon at the top of
the Report screen.
Youcanview additional “hidden” information that
mightbehelpfulbysimplyplacingyourcursoroveravalue
without clicking the value.
60
Chapter 7: Reports Tab
Blood Glucose Chart Report
TheBloodGlucoseChartReportdisplaysactualBGvaluesandtheaveragedailyBGlevel.BGvaluesare
color coded to correspond with the Treatment Goals shown at the bottom of the Report. Red triangles
(pointingup)indicateaBGvalueaboveTreatmentGoals.GreencirclesindicateBGvalueswithin
TreatmentGoals.Bluetriangles(pointingdown)indicateBGvaluesbelowTreatmentGoals.Blacksquares
(connectedwithablackline)representtheaveragedailyBGlevel.Ifonly1dayisselectedfortheDate
Range,asingleblacksquarewillappear.
1. Double check the User Account selected and Date
Range.
2. Click Generate to create the report.
3. To save the report, click the Save icon at the top of the
Report screen.
4. To print the report, click the Printer icon at the top of
the Report screen.
By viewing the Report on your computer or by printing
the Report, you can quickly see how BG values
compare to the Treatment Goals in the legend at the
bottom of the page.
Youcanview additional “hidden” information by
placingyourcursoroveradatapointwithout clicking on the
data point.
61
Chapter 7: Reports Tab
Pie Chart Reports
1. Login to the Program and open the desired User
Account.
2. Click the Reports tab.
3. Select the desired Date Range.
4. Click the Pie Charts icon.
FourPieChartReportsareavailable.TwoReportsofferthe
optionofviewingbytimeofday,orbydayoftheweek.
Insulin and BG Distribution Report - Overview
TheInsulinandBGDistributionReportOverviewdisplaysthreecolor-codedpiechartreports:BG
Distribution(valuescomparedtoTreatmentGoals),InsulinDistribution(basalv.bolus),andBolus
Distribution(typesofbolusdeliveries).Actualpercentagesandthenumberofrecordsthatmakeupthose
percentages are displayed below each pie chart.
1. Double check the User Account selected and Date
Range.
2. Click Generate to create the report.
3. Tosavethereport,clicktheSave icon at the top of the
Report screen.
4. To print the report, click the Printer icon at the top of
the Report screen.
BG Distribution Report - Detail
TheBGDistributionReportdisplaysBGvaluesascomparedtoTreatmentGoals.Youcanviewthedata
either by time of day, or day of the week. Actual percentages and the number of records that make up those
percentages are displayed below each pie chart.
1. Double check the User Account selected and Date
Range.
2. Select the desired option for display by time of day, or day
of the week.
3. Click Generate to create the report.
4. Tosavethereport,clicktheSave icon at the top of the
Report screen.
5. To print the report, click the Printer icon at the top of
the Report screen.
62
Chapter 7: Reports Tab
Basal/Bolus Distribution Report - Detail
TheBasal/BolusDistributionReportdisplaysbasaldeliveryamountscomparedtobolusdeliveryamounts
for each day of the week. Actual percentages and the number of records that make up those percentages
are displayed below each pie chart.
1. Double check the User Account selected and Date
Range.
2. Click Generate to create the report.
3. Tosavethereport,clicktheSave icon at the top of the
Report screen.
4. To print the report, click the Printer icon at the top of
the Report screen.
Bolus Type Distribution Report-Detail
TheBolusTypeDistributionReportdisplaysacomparisonofbolustypes.Youcanviewthedataeitherby
time of day, or by day of the week. Actual percentages and the number of records that make up those
percentages are displayed below each pie chart.
1. Double check the User Account selected and Date
Range.
2. Select the desired option of time of day, or day of the
week.
3. Click Generate to create the report.
4. Tosavethereport,clicktheSave icon at the top of the
Report screen.
5. To print the report, click the Printer icon at the top of
the Report screen.
Pump Settings Reports
The Pump Settings Reports display the settings
downloaded from the pump, either from a single download
or as a comparison from two different download dates.
1. Login to the Program and select the desired User
Account.
2. Click the Reports tab.
3. Select the desired Date Range.
4. Click the Pump Settings Report icon.
63
Chapter 7: Reports Tab
Pump Settings Report
The Pump Settings Report displays the pump settings from a single download of the pump.
1. Double check the User Account selected and Date
Range.
2. Fromthedropdownbox,selectthedesireddownload
date.
3. Click Generate to create the report.
4. Tosavethereport,clicktheSave icon at the top of the
Report screen.
5. To print the report, click the Printer icon at the top of
the Report screen.
Pump Settings Comparison Report
The Pump Settings Comparison Report compares pump settings downloaded at two different times, and
indicateswithared“X”ifsettingschangedfromonedownloadtothenext.
1. Double check the User Account selected and Date
Range.
2. FromtheDownload1dropdownbox,selectthedesired
download date.
3. FromtheDownload2dropdownbox,selectthedesired
download date.
4. Click Generate.
5. Tosavethereport,clicktheSave icon at the top of the
Report screen.
6. To print the report, click the Printer icon at the top of
the Report screen.
64
Chapter 7: Reports Tab
Statistics Report
The Statistics Report displays statistical information on the data types you select. Choose which data
categoriesaredisplayedbyclickingtheboxesintheleftcolumn.Selectwhichstatisticalinformationis
displayedbyclickingtheboxesintherightcolumn.
1. Login to the Program and select the desired User
Account.
2. Click the Reports tab.
3. Select the desired Date Range.
4. Click the Statistics Report icon.
5. Customize the data to be displayed by checking or
uncheckingtheboxes.
6. Click Generate to create the report.
7. Tosavethereport,clicktheSave icon at the top of the
Report screen.
8. To print the report, click the Printer icon at the top of
the Report screen.
65
Chapter 8: Logs Tab
Logs Tab
The Logs tabletsyouviewdownloadeddatafromaBGmeterandpump,alongwithanymanuallyentered
data, in a simple tabular (rows and columns) format. Only manually entered data can be edited or
deleted. Data that is downloaded from a pump or BG meter cannot be edited or deleted.
Note:Logscanbesavedinseveraldifferentformats,including.pdf,.html,.csvand.xlsfiles.Tosavean
existingfileinadifferentformat,openaLogandclickSave.OntheSaveFilepopupwindow,namethefile
and select a file type from the drop down menu. Click Savetosavethefiletothedesiredlocation.File
formattingmaynotbepreservedwhenconvertingonefiletypetoanother.Youmayneedtoreformatthe
new(.csvor.xls)filesothecolumnsandrowsareconsistent.
Duplicate Values
The Program will identify any duplicate records downloaded
from a pump and BG meter, and store only one of those
records in the Program Logs. BG data records are
considered duplicates if the same data was recorded in the
BG meter and pump within 3 minutes of one another, on
the same day.
Selecting a Date Range
TheDateRangeyouselectwilldeterminehowmanydaysarecoveredinReportsandLogs.Onceyouhave
opened a User Account, you can select the Date Range two different ways.
a. To select a Date Range,clickthedropdownboxnexttothestartdatetodisplaythecurrentmonth
calendar.Selectastartdatebyclickingacalendarday.Clickingthedropdownboxnexttothemonth
oryearallowsyoutomoveforwardorbackwardintime.Selectanenddatebyclickinganother
calendar day.
b. To select a pre-set time period,clickthedropdownboxnextto“SelectPeriod”andchoosefrom
thepre-settimeperiodsavailable.
Available pre-set time periods
67
Chapter 8: Logs Tab
Note:OnceyouselectaDateRange,itappliesforaslongasyouhavetheProgramopen,evenifyou
switchtoanotherUserAccount.YoucanchangetheDateRangeeachtimeyouopenanewUserAccount,
if you wish. Once you close the Program and re-open it, the default Program Date Range will be used (last 7
days).
BG Log
BG data downloaded from a pump and BG meter will be
displayedintheBGLog.YoucanmanuallyenterBGdata,
and edit BG data on a limited basis in this Log.
1. Login to the Program and select the desired User
Account.
2. On the Logs tab, click the BG Log icon.
3. Click the Refresh icon, if you change the Date Range.
4. UsethescrollbarontherighttomovethroughtheLog.
5. ToviewtheLogasitwillappearwhenprinted,click
Print Preview at the top right of the Log screen.
6. TosavetheLog,clicktheSave icon at the top left of the
PrintPreviewscreen.
7. To print the Log, click the Printer icon at the top left of
thePrintPreviewscreen.
Add BG Log data
1. To manually enter BG information to the Log, click Add.
2. The BG Value window pops up.
3. Clickthedropdownboxforthedateandchangeas
desired.
4. Clickthetimeanddateboxesandchangeasdesired.
Be sure to leave a space after the time and then
enter AM or PM, if you are using 12 hour time format.
5. EntertheBGvalueintothevaluebox.
6. Click SavetosavetheinformationorCancel if you do
notwishtosaveit.
7. The new data will immediately appear in the Log .
68
Chapter 8: Logs Tab
Edit BG Log data (manual BG entries only)
BG values that have been downloaded from a pump or BG meter cannot be edited or changed.
TheseBGvalueshave“pump”or“meter”intheSourcecolumnintheBGLog.
1. ToeditaBGLogentry,highlightthedesiredvalueandclickEdit.
2. The BG Value window pops up.
3. Change the information as desired and click SavetosavetheinformationorCancel if you do not wish
tosaveit.
Delete BG Log data (manual BG entries only)
OnlymanuallyenteredBGvaluescanbedeleted.However,BGvaluesthathavebeendownloadedfroma
pumporBGmetercanbeexcludedsotheywillnotbeusedincalculatingaveragesanddisplayingtrends
inReports.SeenextsectionExclude BG Log data.
1. To delete a manual entry in the BG Log, highlight the
desired row and click Delete.
2. When asked if you would like to delete this information,
click Yes to delete or No to keep the information in the
Log.
3. If you click Yes to delete, the entry is permanently deleted.
Exclude BG Log data
YoucanexcludedownloadedBGvaluesfrombeingusedincalculatingaveragesanddisplayingtrends
inReports.Thismaybehelpfulifyoususpectafingerstickcheckgaveyouafalseresult.Forexample,
youmightrealizeyouforgottowashyourhands,causingafalseinaccuratereading,andasubsequent
fingerstickcheckprovidedamoreaccurateavalue.
1. ToexcludeaBGLogentry,clickthedesiredrowto
highlight it.
2. Right-click the highlighted row (Mac users should
press the Ctrl key and click the highlighted row).
69
Chapter 8: Logs Tab
3. Click Exclude.
4. The row will display a red strike-through line and the
valuewillnotbeusedtocalculateaveragesordisplay
trends in Reports.
Include BG Log data
Youcanchoosetore-includeBGvaluesthathadbeenpreviouslyexcluded.
1. Click the desired row to highlight it.
2. Right-click the highlighted row (Mac users should press the Ctrl key and click the highlighted row).
3. Click Include.
4. Theredstrike-throughlinewilldisappearandthevaluewillbere-includedtocalculateaveragesand
display trends in Reports.
Pump Settings Log
Only data downloaded from a pump will show in the Pump Settings Log. Each download date and time,
along with pump serial number and pump model will be displayed. You cannot manually enter or edit
data in this Log.
1. Login to the Program and select the desired User
Account.
2. On the Logs tab, click the Settings Log icon.
3. Select the desired Date Range.
4. UsethescrollbarontherighttomovethroughtheLog.
5. Toviewpumpsettings,click the desired download
row.
6. Click Print Preview.
70
Chapter 8: Logs Tab
7. TosavetheLog,clicktheSave icon at the top left of the
PrintPreviewscreen.
8. To print the Log, click the Printer icon at the top left of
thePrintPreviewscreen.
Meal Log
MealdatadownloadedfromapumpwillbedisplayedintheMealLog.Youcanmanuallyentermealdata,
and edit meal data on a limited basis in this Log. Meal records downloaded from a pump cannot be
edited or deleted.
1. Login to the Program and select the desired User
Account.
2. On the Logs tab, click the Meal Log icon.
3. Select the desired Date Range.
4. UsethescrollbarontherighttomovethroughtheLog.
5. ToviewtheLogasitwillappearwhenprinted,click
Print Preview.
6. TosavetheLog,clicktheSave icon at the top left of the
PrintPreviewscreen.
7. To print the Log, click the Printer icon at the top left of
thePrintPreviewscreen.
Adding Meal data
1.
2.
3.
4.
5.
To manually add meal data, click Add.
The Meal Entry window pops up.
Select the date and time as desired.
Click Add Entry.
The Master Food DB window will pop up.
6. All foods in the database are listed alphabetically.
Select desired food item.Seenextsection Searching
the Master Food Database.
7. Foodswithmorethanoneservingsizeoptionwilldisplay
thevariousservingsizesintheServingboxontheright.
Click to highlight the desired serving size.
71
Chapter 8: Logs Tab
8. Click Add Item to Meal.
9. The Meal Item windowpopsup.Iftheactualserving
sizeyouhaveeatenisnotanoption,youcanchange
theservingsizeusingthemultiplierfield.The
multiplier field increases or decreases the current
servingsize(andassociatednutritionalinformation)
bywhateverfactoryouenterinthebox.Forexample,
amultiplierof2willdoublethecurrentservingsize,
whileamultiplierof.5willcutthecurrentservinginhalf.
10. Click Add.
11. The Meal Entry windowpopsup.Reviewthe
information for accuracy.
12. If you wish to add more items to the Meal Log,
click Add Entry and repeat these steps.
13. When you are finished adding meal data, click Save.
14. The item is immediately added to the Meal Log.
Searching the Master Food DB
To search foods in database by category, click the
categorydropdownboxinthetoprightcornerofthe
Master Food DB screen. Select the desired food item.
FollowthestepsaboveforaddingmealdatatotheMeal
Log.
72
Chapter 8: Logs Tab
To search food items by keyword, enter a word (or simply
a few letters) describing a food item into the Find all items
containingbox.ClickFind.Yourmatcheswillbedisplayed
inthefoodlist.Forexample,ifyoutypedin“fries”,allfood
itemscontainingtheletters“fries”willbedisplayed.You
can narrow your keyword search further by selecting a
singlecategoryinsteadof“All”fromthecategorydrop
downbox.Selectdesiredfooditem.Followthestepsabove
for adding meal data to the Meal Log.
Adding food items to the Master Food Database
To add a new item into the Master Food Database, click
Add Item to Food DB.Enterthenameofthefood,serving
size, and the nutritional information that corresponds to that
serving.Aftercheckingthatyourentriesareaccurate,click
Add. The entries will be automatically added to the
Favoritescategory.TheycanalsobeaddedtoyourMeal
Log by first clicking on the item, and then clicking Add
Item to Meal.
To add an additional serving sizetoanexistingfooditem
in the Master Food Database, click the desired food item,
then click Add Serving to Food DB.TheAddServingto
FoodDBwindowwillpopup.Thefieldnextto“Name”
should match the name of the food to which you are adding
onadditionalservingsize.Entertheservingsize,andthe
nutritional information. Click Add when you are finished.
73
Chapter 8: Logs Tab
Editing Meal data
Only manually entered meal records can be edited.Thesemealentrieshave“manual”intheType
column in the Meal Log. Meal Log entries that are downloaded from a pump (and cannot be edited) display
“pump”intheTypecolumn.
Click the meal entry you wish to edit.
Click Edit.
The Meal Entry window pops up.
Click the item in the Food Item Name window.
Click Edit Entry.
The Meal Item window pops up.
Edit the name, serving size, or multiplier field.
Nutritionalinformationcannotbeedited.
Click Save.
The Meal Entry window is displayed. If desired,
changethetimeanddatebyusingtheboxesatthetop
left of the screen.
10. Click Save.
1.
2.
3.
4.
5.
6.
7.
8.
9.
Deleting Meal Data
Only manually entered meal records can be deleted.
Thesemealentrieshave“manual”intheTypecolumnin
the Meal Log. Meal Log entries that are downloaded from a
pump(andcannotbeedited)have“pump”intheType
column.
1. Click the meal entry you wish to delete.
2. Click Delete.
3. When asked if you would like to delete this information,
click YestodeleteorNotokeeptheinformationinthe
Log.
Alarms Log
Only data downloaded from a pump will be displayed in
the Alarms Log. Each Alarm and Warning, along with date,
timeandtypeisdisplayed.Youcannotmanuallyadd,delete
or edit data in this Log.
1. Login to the Program and open the desired User
Account.
2. On the Logs tab, click the Alarms Log icon.
3. Click the Refresh icon, if you change the Date Range.
74
Chapter 8: Logs Tab
4. UsethescrollbarontherighttomovethroughtheLog.
5. ToviewtheLogasitwillappearwhenprinted,click
Print Preview.
6. TosavetheLog,clicktheSave icon at the top left of the
Print Preview screen.
7. To print the Log, click the Printer icon at the top left of
the Print Preview screen.
Bolus Log
Bolus data downloaded from a pump will be displayed in the Bolus Log. Bolus records downloaded from the
pump cannot be edited or deleted. Bolus Log entries that are downloaded from the pump (and cannot be
edited)have“pump”intheSourcecolumnintheBolusLog.Youcanmanuallyenterbolusdata,andedit
bolus data on a limited basis in this Log.
1. Login to the Program and open the desired User
Account.
2. On the Logs tab, click the Bolus Log icon.
3. Select the desired Date Range.
4. UsethescrollbarontherighttomovethroughtheLog.
5. ToviewtheLogasitwillappearwhenprinted,click
Print Preview.
6. TosavetheLog,clicktheSave icon at the top left of the
Print Preview screen.
7. To print the Log, click the Printer icon at the top left of
the Print Preview screen.
75
Chapter 8: Logs Tab
Adding Bolus Information
1. To manually add information to the Log, click Add.
2. The Bolus Value window pops up.
3. Clickthedropdownboxforthedateandchangeas
desired.
4. Change the date and time as desired. Be sure to leave
a space after the time and enter AM or PM, if you
are using 12 hour time format.
5. Enteryourbolusvalueintothevaluebox.
6. Selectthetypeofbolusfromthedropdownbox.
7. Enterthedurationofthebolus,ifanExtendedboluswas
used.
8. Click SavetosavetheinformationorclickCancel if you
donotwishtosaveit.
9. The new data will immediately appear in the Log .
Editing Bolus Information
Only manually entered bolus records can be edited.
Bolus Log entries that are downloaded from a pump (and
cannotbeedited)have“pump”intheSourcecolumninthe
Bolus Log.
1. To edit a manually entered bolus record, highlight the
desired entry and click Edit.
2. The Bolus Value window pops up.
3. Change the information as desired and click Save to
savetheinformationorclickCancel if you do not wish to
saveit.
Deleting Bolus Information
Only manually entered bolus records can be deleted.
Bolus Log entries that are downloaded from a pump (and
cannotbeedited)have“pump”intheSourcecolumninthe
Bolus Log.
1. To delete a bolus entry, highlight the desired entry and
click Delete.
2. When asked if you would like to delete this information,
click Yes to delete or No to keep the information in the
Log.
3. The bolus information will be immediately and
permanently deleted from the Log. The deleted records
cannot be restored.
76
Chapter 8: Logs Tab
Notes Log
Only information you enter manually will be displayed in the Notes Log.YoumightusethisLog
tonotethingsthatmayhaveaffectedBGreadingsorcausedyoutosetatemporarybasalrate,etc.For
example,youmightenteranoteindicatingthatyouhadfeltillforacoupleofdays,whichmighthave
contributed to BG readings outside your target.
1. Login to the Program and open the desired User
Account.
2. On the Logs tab, click the Notes Log icon.
3. Select the desired Date Range.
4. UsethescrollbarontherighttomovethroughtheLog.
5. ToviewtheLogasitwillappearwhenprinted,click
Print Preview.
6. TosavetheLog,clicktheSave icon at the top left of the
Print Preview screen.
7. To print the Log, click the Printer icon at the top left of
the Print Preview screen.
Adding Notes
1. To manually add information to the Log, click Add.
2. Clickthedropdownboxforthedateandchangeas
desired.
3. Change the date and time as desired. Be sure to leave
a space after the time and enter AM or PM, if you
are using 12 hour time format.
4. EnteryournoteintheNoteBox.
5. Click SavetosavetheinformationorCancel if you do
notwishtosaveit.
6. The new data will immediately appear in the Log.
77
Chapter 8: Logs Tab
Editing Notes
1. To edit a note, highlight the desired note and click Edit.
2. Change the information as desired and click Save to
savetheinformationorCancelifyoudonotwishtosaveit.
Deleting Notes
1. To delete a note, highlight the desired note and click
Delete.
2. When asked if you would like to delete this information,
click Yes to delete or No to keep the information in the
Log.
3. The note will be immediately deleted from the Log.
Basal Log
Only data downloaded from a pump will be displayed in the Basal Log. Each Basal rate change, along with
date, time and type is displayed in this Log.
Note:TheBasalLogshowsbasalratechangesonly.Toviewbasaldeliveries,opentheTDD(TotalDaily
Dose)Log.Youcannotmanuallyadd,deleteoreditdatainthisLog.
Note:Whennobasalisbeingdelivered,theBasalLogwillshowanentrywith0units.Thiscanhappenfor
the following reasons:
•
•
•
•
•
•
•
•
78
Cartridgechange
Batterychange
Suspend
Alarm
Basalsegmentsetto0
Basaleditscreenaccessed
Primemenuaccessed
Lossofprime
Chapter 8: Logs Tab
1. Login to the Program and open the desired User
Account.
2. On the Logs tab, click the Basal Log icon.
3. Select the desired Date Range.
4. UsethescrollbarontherighttomovethroughtheLog.
5. ToviewtheLogasitwillappearwhenprinted,click
Print Preview.
6. TosavetheLog,clicktheSave icon at the top of the
Print Preview screen.
7. To print the Log, click the Printer icon at the top left of
the Print Preview screen.
Prime Log
Only data downloaded from a pump will be displayed in the
PrimeLog.EachPrimeandFillCannulaevent,alongwith
the amount, date and time, is displayed. You cannot
manually add, delete or edit prime data in this Log.
1. Login to the Program and open the desired User
Account.
2. On the Logs tab, click the Prime Log icon.
3. Select the desired Date Range.
4. UsethescrollbarontherighttomovethroughtheLog.
5. ToviewtheLogasitwillappearwhenprinted,click
Print Preview.
6. TosavetheLog,clicktheSave icon at the top left of the
Print Preview screen.
7. To print the Log, click the Printer icon at the top left of
the Print Preview screen.
79
Chapter 8: Logs Tab
Total Daily Dose (TDD) Log
Only data downloaded from a pump will be displayed in
the TDD Log. Each Total Daily Dose record, with basal and
bolusinsulinaswellasdate,isdisplayed.Youcannot
manually add, delete or edit data in this Log.
1. Login to on the Program and open the desired user
Account.
2. On the Logs tab, click the TDD icon.
3. Select the desired Date Range.
4. UsethescrollbarontherighttomovethroughtheLog.
5. ToviewtheLogasitwillappearwhenprinted,click
Print Preview.
6. TosavetheLog,clicktheSave icon at the top left of the
Print Preview screen.
7. To print the Log, click the Printer icon at the top left of
the Print Preview screen.
Suspend Log
Only data downloaded from a pump will be displayed in the
Suspend Log. Each Suspend and Resume record, with time
anddate,isdisplayed.Youcannotmanuallyadd,deleteor
edit data in this Log.
1. Login to the Program and open the desired User
Account.
2. On the Logs tab, click the Suspend Log icon.
3. Select the desired Date Range.
4. UsethescrollbarontherighttomovethroughtheLog.
5. ToviewtheLogasitwillappearwhenprinted,click
Print Preview.
6. TosavetheLog,clicktheSave icon at the top left of the
Print Preview screen.
7. To print the Log, click the Printer icon at the top left of
the Print Preview screen.
80
Chapter 9: Custom Composer Tab
The Custom Composer tab lets you create custom tunes for the pump. These tunes can be used for certain
alerts, reminders, warnings and alarms on the pump. Custom Composer can be used with the Animas® IR
1200 with software upgrade, Animas® 2020 and OneTouch® Ping® Insulin Pumps. The pump can play up to
25 notes (including pauses).
ThekeysatthebottomoftheProgramscreenrepresentavirtualkeyboard.Youcancreateauniquetune
by using your mouse to click the keys. As you click, the notes appear on the music staff (blank sheet of
music at the top of the Program screen).
Note:Thesoundqualityoftunesonyourcomputerislikelytobericherthanonthepump.
Creating a Custom Tune
Note: Be sure your computer speakers are turned on.
1. Login to the Program and open the desired User
Account.
2. Click the Custom Composer tab.
3. Select the duration (length) to be used for notes and
pauses (between notes) from the selections in the
Durationbox.
4. Click the desired key to select the notes. There are 3
octaveselections.
5. Once you click a key, the note will appear on the staff
and the note will play.
6. Continue to select notes to create a complete tune.
7. Youcanalsoinsertapause,or“rest”afteranote.
The duration you selected in step 3 applies to both
notes and pauses. To insert a pause with a different
duration, click the desired duration and click Pause.
The pause symbol will appear on the staff.
8. If you would like to delete a note, click Delete. The last
note or pause on the staff will be deleted. Continue to
delete notes/pauses as needed.
9. To delete the entire tune, click New. A pop up window
will ask you to confirm you wish to delete the current
tune.
10. Onceyouhavefinishedplacingthenotesonthestaff,
click Play to listen to your tune.
81
Chapter 9: Custom Composer Tab
11. Onceyouhavecompletedyourtune,clickSave.
Nameyourfileandsaveitasyounormallywouldonyour
computer.Thefilewillbesavedasan.ezt(eztunes)file
and cannot be opened by any program other than
ezManager® MAX Diabetes Management Software.
12. Follow the instructions in Chapter 6 for uploading the
tune to the pump.
Changing a Tune from the Tunes Library
Note:IfyouchangeoneofthetunesfromtheProgram’sTunesLibrary,besuretosaveitwithadifferent
filename.IfyouchangeatunefromtheTunesLibraryanddonotsaveitwithadifferentfilename,you
cannot restore the original tune.
1. Login to the Program and open the desired User Account.
2. Click the Custom Composer tab.
3. Click Open. A pop up window will ask you to confirm you wish to open a new tune.
4. Click Tunes Library.
5. Double click the desired tune file. The tune is now displayed on the Custom Composer screen.
6. Changethetuneasdesiredusingthevirtualkeyboardoptionsdescribedintheprevioussection.
82
Chapter 10: Tools Tab
The Tools tabletsyoumanagethesizeoftheProgramdatabasebyimporting,exporting,andpurging
databaserecordsasdesired.YoumayalsousetheTools tab to customize the Master Food Database.
Exporting/Importing database records to/from the Program
Note:ALLrecordsfortheUserAccountandDateRangeselectedwillbeexported,includingpump
settings.
ExportedfilescanonlybeviewedoncetheyareimportedbackintotheProgram.Yourhealthcareteam
mayrequestthesoftware(atnocharge)fromtheirlocalAnimas®representativeorbycallingoneofthe
appropriatetelephonenumbersforyourregionlistedonthebackcoverofthisUserGuide.Youmayalso
saveProgramLogsandReportsasa.pdforotherfileformatthatcanbeeasilyopenedbyotherswithout
havingtoinstalltheProgram.
Exporting database records (to be re-opened with the Program)
Programdatabaserecordsdatacanbeexportedintoonehighlycompressedfile.Ifyouwishtopassword
protectyourfilebeforesendingviaemail,youshould“zip”theexportedfileandpasswordprotectit.You
canfindinformationon“zipping”filesbysearchingtheinternet.
1. Login to the Program and open the desired Account.
2. Click Tools on the Program screen Task Bar.
3. Click Export.
4. TheSaveFilewindowwillpopup.Specifyalocation
tosavethe file.
5. Nameyourfile and click Save.
83
Chapter 10: Tools Tab
8. A pop up window will appear confirmingthattheexport
is completed.
9. The resulting filenamewillhavean.ezd(ezdata)
extension.Youcanattachthisfile to an email and send it
to your healthcare team.
Importing database records (to be re-opened only with the Program)
Note:BesureyouhavethecorrectUserAccountopenbeforeyouimport.ALLrecordsfortheUser
Account and Date Range selected will be imported, including pump settings.
1. With the desired User Account open, click Tools on the
Program screen Task Bar.
2. Click Import.
3. The Open File window will pop up. Double click the file
you wish to import.
4. A progress bar will show the status of the import.
The import process may take a few minutes.
84
Chapter 10: Tools Tab
5. A pop up window will appear confirming the Import is
completed.
6. Toviewthedata,selecttheDateRangethatcorresponds
tothedatabaserecordsyouhaveimported.
Purging the Program Database
TheProgramletsyoumanuallypurge(delete)alldatabaserecordsolderthanaspecifieddate,intheevent
youneedtofreeupspaceonyourharddrive.Mostpeopleshouldrarely(ifever)usethisfeaturebecause
theProgramstoresalargenumberofrecordsusingonlyasmallamountofharddrivespace(memory).You
can either purge records from a single User Account or from all User Accounts.
Note: If you purge records from the Program database, they
are permanently deleted and cannot be restored.
1. With the desired User Account open, click Tools on the
Program screen Task Bar.
2. Click Purge DB.
3. Select the date before which all records will be purged.
4. Select delete records from the selected account or
from all accounts.
5. Click Purge.
6. A pop up window will appear asking you to confirm you
wish to purge the records. Click Yes to continue.
7. This may take some time if you are purging a lot of
records.
85
Chapter 10: Tools Tab
8. A pop up window will appear that confirms the Purge is
completed. Click OK.
Customizing the Master Food Database
TheMasterFoodDatabaseisasingleProgramFilethatisavailabletoeveryoneusingtheProgram.Any
changes you make to the Master Food Database will apply to anyone using the Program from that point
forward, no matter which User Account is currently open. YoucanaddyourownfooditemstotheMaster
FoodDatabase,oraddadditionalservingsizestoexistingitems.Newfooditemscanonlybeaddedtothe
Favoritescategory.YoucannotdeletefooditemsfromtheMasterFoodDatabase.
Adding new food items to the Master Food Database
1. With any User Account open, click Tools on the Program
screen Task Bar.
2. Click Master Food DB.
3. The Master Food DB window will pop up.
4. Click Add Item to Food DB. The Add Item to
Food DB window will pop up.
86
Chapter 10: Tools Tab
5. Add items as desired with nutritional information.
6. Click Add.
7. The Master Food DB window re-appears with the
Favoritescategorydisplayingtheitemyouhavejust
added.
8. Repeat for additional items or click Closetoexit.
Adding serving sizes to the Master Food Database
1. With any User Account open, click Tools on the
Program screen Task Bar.
2. Click Master Food DB.
3. The Master Food DB window will pop up.
4. Click the item for which you would like to add an
additionalservingsize.
5. Click Add Serving to Food DB.TheAddServingto
Food DB window will pop up.
87
Chapter 10: Tools Tab
6. Addtheservingsizeasdesired.Youmustalsoenter
the corresponding nutritional information.
7. Click Add.
8. The Master Food DB window re-appears with the
newservingsizedisplayedtotheright.
9. Checktheservingsizeyouhaveaddedandreviewthe
nutritional information for accuracy.
10. Repeat for additional items or click Closetoexit.
Exporting/Importing Master Food Database Files
to/from the Program
Exporting Master Food Database Files
TheMasterFoodDatabaseFilecanbeexportedinordertoback-uptheinformationortotransferthefile.
1.
2.
3.
4.
88
With any User Account open, click Tools on the Program screen Task Bar.
Click Master Food DB.
The Master Food DB window will pop up.
Click Export Food DB.
Chapter 10: Tools Tab
5. TheSaveFilewindowwillpopup.Specifyalocationto
savethefile.
6. NameyourfileandclickSave. The file type should
be .ezf.
7. Aprogressbarwillshowthestatusoftheexport.
Theexportprocessmaytakeafewminutes.
8. ApopupwindowwillappearconfirmingtheExportis
completed.
Importing Master Food Database files
AnexistingMasterFoodDatabasefilewitha.ezfextensioncanbeimportedintotheProgram.
Note: Importing a Master Food Database file will replace the entire Master Food Database currently in the
Program.
1.
2.
3.
4.
With any User Account open, click Tools on the Program screen Task Bar.
Click Master Food DB.
The Master Food DB window will pop up.
Click Import Food DB.
89
Chapter 10: Tools Tab
5. A pop up window will appear asking you to confirm you
wish to import the master food database. Click Yes to
continue.
6. The Open File window will pop up.
7. Double click the file you wish to import. The file type
should be .ezf.
8. A progress bar will show the status of the import.
The import process may take a few minutes.
9. A pop up window will appear confirming the Import is
completed.
90
Index
A
account selector screen . . . . . . . . . . . . . . . . . . . . . . . 11
add new item to the master food database . . . . . . . 73
addadditionalservingsize
toanexistingfooditem . . . . . . . . . . . . . . . . . . . . . . 73
add(create)andsaveanewuseraccount . . . . . . . 11
add bg log data . . . . . . . . . . . . . . . . . . . . . . . . . . . . . . 68
adding bolus information . . . . . . . . . . . . . . . . . . . . . . 76
addingitemstoadevicefooddatabase
from the master food database . . . . . . . . . . . . . . . . 40
adding meal data . . . . . . . . . . . . . . . . . . . . . . . . . . . . 71
adding notes . . . . . . . . . . . . . . . . . . . . . . . . . . . . . . . . 77
adding food items to the master food database . . . 73
administrator rights . . . . . . . . . . . . . . . . . . . . . . . . . . . 3
alarms/warnings log . . . . . . . . . . . . . . . . . . . . . . . . . . 74
deleting bolus information . . . . . . . . . . . . . . . . . . . . . 76
deleting meal data . . . . . . . . . . . . . . . . . . . . . . . . . . . 74
deleting notes . . . . . . . . . . . . . . . . . . . . . . . . . . . . . . . 78
download cables for bg meter . . . . . . . . . . . . . . . . . . 28
download meter data icon . . . . . . . . . . . . . . . . . . . . . 27
download meter-remote food database
fromdevice . . . . . . . . . . . . . . . . . . . . . . . . . . . . . . . . 49
download pump data icon . . . . . . . . . . . . . . . . . . . . . 25
downloadpumpfooddatabasefromdevice . . . . . . 46
download/upload tab . . . . . . . . . . . . . . . . . . . . . . . . . 25
downloading a pump . . . . . . . . . . . . . . . . . . . . . . . . . 25
downloading a bg meter . . . . . . . . . . . . . . . . . . . . . . 27
download settings from pump . . . . . . . . . . . . . . . . . 29
E
basal log . . . . . . . . . . . . . . . . . . . . . . . . . . . . . . . . . . . . 78
basal/bolus distribution report . . . . . . . . . . . . . . . . . 63
bg chart report. . . . . . . . . . . . . . . . . . . . . . . . . . . . . . . 61
bg distribution report - detail . . . . . . . . . . . . . . . . . . 62
bg log . . . . . . . . . . . . . . . . . . . . . . . . . . . . . . . . . . . . . . 68
bolus log . . . . . . . . . . . . . . . . . . . . . . . . . . . . . . . . . . . . 75
bolus type distribution report - detail . . . . . . . . . . . . 63
editanexistinguseraccount . . . . . . . . . . . . . . . . . . 12
edit bg log data . . . . . . . . . . . . . . . . . . . . . . . . . . . . . . 69
editinganexistingsystemuser . . . . . . . . . . . . . . . . 17
editing bolus information. . . . . . . . . . . . . . . . . . . . . . 76
editing meal data . . . . . . . . . . . . . . . . . . . . . . . . . . . . 74
editing notes . . . . . . . . . . . . . . . . . . . . . . . . . . . . . . . . 78
enable security . . . . . . . . . . . . . . . . . . . . . . . . . . . . . . 15
excludingbglogdata . . . . . . . . . . . . . . . . . . . . . . . . . 69
exportingdata . . . . . . . . . . . . . . . . . . . . . . . . . . . . . . . 83
C
G
B
changinganitemintheexistingdevice
food database . . . . . . . . . . . . . . . . . . . . . . . . . . . . . . 37
changing current settings on pump. . . . . . . . . . . . . 29
changing tunes . . . . . . . . . . . . . . . . . . . . . . . . . . . . . . 51
closing(exiting)ezmanager®max . . . . . . . . . . . . . . . 9
configure food database icon . . . . . . . . . . . . . . . . . . 36
configure pump tunes icon . . . . . . . . . . . . . . . . . . . . 52
configure settings icon. . . . . . . . . . . . . . . . . . . . .29, 31
createitemsfornewdevicefooddatabase . . . . . . . 42
creating a custom tune . . . . . . . . . . . . . . . . . . . . . . . 81
creatinganewdevicefooddatabasefile . . . . . . . . 36
creating a new system user. . . . . . . . . . . . . . . . . . . . 16
creating and changing a password
for the system administrator . . . . . . . . . . . . . . . . . . 16
creating,savingandprintingpumpsettings. . . . . 31
custom composer tab . . . . . . . . . . . . . . . . . . . . . . . . . 81
customizing the master food database . . . . . . . . . . 86
D
global settings . . . . . . . . . . . . . . . . . . . . . . . . . . . . . . . 15
I
importing data. . . . . . . . . . . . . . . . . . . . . . . . . . . . . . . 84
inactivatinganexistingsystemuser . . . . . . . . . . . . 17
include bg log data . . . . . . . . . . . . . . . . . . . . . . . . . . . 70
installing ezmanager®max . . . . . . . . . . . . . . . . . . . . . 3
insulinandbgdistributionreport-overview . . . . . 63
L
line chart reports . . . . . . . . . . . . . . . . . . . . . . . . . . . . . 60
logbook report . . . . . . . . . . . . . . . . . . . . . . . . . . . . . . . 58
login information . . . . . . . . . . . . . . . . . . . . . . . . . . . . . . 9
logs tab . . . . . . . . . . . . . . . . . . . . . . . . . . . . . . . . . . . . . 67
M
meal log . . . . . . . . . . . . . . . . . . . . . . . . . . . . . . . . . . . . 71
multiple user accounts . . . . . . . . . . . . . . . . . . . . . . . . 11
dayintervals . . . . . . . . . . . . . . . . . . . . . . . . . . . . . . . . 11 N
delete bg log data . . . . . . . . . . . . . . . . . . . . . . . . . . . . 69 notes log . . . . . . . . . . . . . . . . . . . . . . . . . . . . . . . . . . . . 77
deleteitemsfromdevicefooddatabase . . . . . . . . . 39
deletinganexistingsystemuser . . . . . . . . . . . . . . . 18
deletinganexistinguseraccount . . . . . . . . . . . . . . 13
91
Index
O
open pump settings file . . . . . . . . . . . . . . . . . . . . . . . 33
openanexistinguseraccount . . . . . . . . . . . . . . . . . 13
openingadevicefooddatabasefile . . . . . . . . . . . . . 37
opening and closing ezmanager®max . . . . . . . . . . . 8
P
password . . . . . . . . . . . . . . . . . . . . . . . . . . . . . . . . . . . 16
pie chart reports . . . . . . . . . . . . . . . . . . . . . . . . . . . . . 62
pre-loadeddevicefooddatabase . . . . . . . . . . . . . . . 35
prime log . . . . . . . . . . . . . . . . . . . . . . . . . . . . . . . . . . . 79
printingadevicefooddatabasefile . . . . . . . . . . . . . 38
pump settings comparison report . . . . . . . . . . . . . . 64
pump settings log . . . . . . . . . . . . . . . . . . . . . . . . . . . . 70
pump settings reports . . . . . . . . . . . . . . . . . . . . . . . . 64
purge database records . . . . . . . . . . . . . . . . . . . . . . . 85
R
reference master food database . . . . . . . . . . . . .86, 87
registration . . . . . . . . . . . . . . . . . . . . . . . . . . . . . . . . . . 6
replace tunes with factory beep sounds . . . . . . . . . 54
reports tab . . . . . . . . . . . . . . . . . . . . . . . . . . . . . . . . . . 57
restoring factory default settings
and tunes to the pump . . . . . . . . . . . . . . . . . . . . . . . 55
S
savingadevicefooddatabase . . . . . . . . . . . . . . . . . 36
searching the master food database . . . . . . . . . . . . 72
security settings . . . . . . . . . . . . . . . . . . . . . . . . . . . . . 15
selecting a date range . . . . . . . . . . . . . . . . . . . . .57, 67
setting up user accounts . . . . . . . . . . . . . . . . . . . . . . 11
settings for pump . . . . . . . . . . . . . . . . . . . . . . . . . . . . 31
statistics report . . . . . . . . . . . . . . . . . . . . . . . . . . . . . . 65
suspend log . . . . . . . . . . . . . . . . . . . . . . . . . . . . . . . . . 80
switch to another user account . . . . . . . . . . . . . . . . 14
system administrator . . . . . . . . . . . . . . . . . . . . . . . . . 16
systemandsoftwarerequirements . . . . . . . . . . . . . . 1
92
T
tab options . . . . . . . . . . . . . . . . . . . . . . . . . . . . . . . . . . 22
task bar options . . . . . . . . . . . . . . . . . . . . . . . . . . . . . . 21
tools tab . . . . . . . . . . . . . . . . . . . . . . . . . . . . . . . . . . . . 83
total daily dose (tdd) log . . . . . . . . . . . . . . . . . . . . . . . 80
total daily dose report . . . . . . . . . . . . . . . . . . . . . . . . . 60
treatment goals . . . . . . . . . . . . . . . . . . . . . . . . . . . . . . 11
U
uninstalling ezmanager®max . . . . . . . . . . . . . . . . . . . 9
uploaddevicefooddatabasetometer-remote . . . . 45
uploaddevicefooddatabasetopump . . . . . . . . . . . 43
uploading pump tunes . . . . . . . . . . . . . . . . . . . . . . . . 52
uploading settings to pump . . . . . . . . . . . . . . . . . . . 32
using custom composer . . . . . . . . . . . . . . . . . . . . . . . 81
V
viewaccountsettings . . . . . . . . . . . . . . . . . . . . . . . . 19
viewloginactivity . . . . . . . . . . . . . . . . . . . . . . . . . . . 18
viewingadevicefooddatabase . . . . . . . . . . . . . . . . 38
Distributed in Canada by:
200WhitehallDrive
Markham,ON
L3R OT5
Tel:1866406-4844
Fax:1866406-4033
Web: www.Animas.ca
Manufactured by:
200LawrenceDrive
West Chester, PA 19380 USA
Tel:610-644-8990
1-877-YES-PUMP(1-877-937-7867)
www.Animas.com
CoveredbyU.S.patent7,179,226
© 2010, Animas Corporation.
P/N410-113-51Rev.B2010/05
Microsoft®, Windows®, and Vista® are trademarks
of Microsoft Corporation.
Apple® and Mac OS® are trademarks of Apple
Corporation.
C4


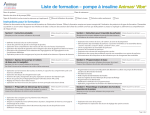


![Animas 2020 Insulinpumpe Handbuch [ - 2.6 MB]](http://vs1.manualzilla.com/store/data/006724865_1-055dda2762712b0186a185391654dcd9-150x150.png)