1
Operating Instructions
Network Disk Recorder
WJ-NV300K
WJ-NV300K/G
Model No.
ERROR
REC
OPERAT
E
ALARM
BUZZER
STOP
Network
Disk Rec
order WJ
-NV300
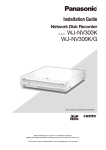
(This illustration represents WJ-NV300K.)
Before attempting to connect or operate this product,
please read these instructions carefully and save this manual for future use.
The model number is abbreviated in some descriptions in this manual.
CONTENTS
Preface........................................................................4
Features..................................................................4
About the user manuals..........................................4
System requirements for a PC................................5
Trademarks and registered trademarks..................5
Abbreviations..........................................................5
Restrictions when using this product......................6
Before using this product............................................7
About the face matching function (option)..............7
Motion detection (VMD) function............................7
Time display of recorded images............................7
Response to the mouse operations........................7
Black screen displayed when playing recorded
images.....................................................................8
Recording operation................................................8
Event type...............................................................8
Basic operations..........................................................9
Setup menu...............................................................11
Configure the minimum settings [Easy Start]............12
Configure the basic settings [Basic setup]................16
Display the basic setup pages..............................16
Set up date & time and language
[Date/Language]....................................................16
Camera setup [Camera]........................................19
Set up recording/events [REC & event].................39
Configure the settings relating to monitors
[Monitor]....................................................................49
Set up the main monitor [Main monitor]................49
Configure the settings relating to sub monitors
[Sub monitor].........................................................50
Configure other settings relating to monitors
[Advanced setup]..................................................51
Configure the settings relating to network
[Network]...................................................................52
Configure the basic network settings [Basic]........52
Procedure to register information for the
"Viewnetcam.com" service...................................54
Configure the settings relating to the mail
notification [e-Mail]................................................55
Configure the Panasonic alarm protocol settings
[Panasonic alarm protocol]....................................57
Configure the settings relating to NTP/
SNMP synchronization [NTP/SNMP]....................58
Configure the settings relating to the user
management [User management].............................59
Configure the basic settings relating to user
management [Basic]..............................................59
Register, edit or delete the user information
[User registration]..................................................61
Edit the administrator information
[Administrator setup].............................................63
Configure the settings relating to maintenance
[Maintenance]............................................................64
Check the system information such as the
version [System information].................................64
Confirm the hard disk drive information
[HDD information]..................................................64
Configure the settings and operations relating to
the system [System management]........................66
Register the licenses for the recorder and the
Additional Business Intelligence Kit
[Registration Key]..................................................68
Manage the hard disk drives [HDD management]....71
How to display the "HDD management" page......71
Check the hard disk drive information
[HDD information]..................................................72
Format the hard disk drives [Format HDD]...........72
About the removal process and the link
process of hard disk drives...................................73
About the change of the HDD operational
mode.....................................................................73
Configure the settings relating to the
extra functions [Extra function].................................75
Lists of the setting items (Setup menu).....................76
About the error logs and the network logs................91
Error logs...............................................................91
About the network log...............................................93
Operation window.....................................................94
Ctrl (control) screen display...................................94
Sub monitor (monitor for display of live
images only)..........................................................99
Basic operations......................................................100
Logout.................................................................101
Use an SD memory card.........................................102
Login operation at startup.......................................103
Monitor live images.................................................104
About the operation panel...................................104
Switch between control screen and wide view
screen..................................................................108
1-screen display..................................................109
Display images from cameras on a
multiscreen..........................................................110
Display or hide the camera title...........................111
Use digital zoom..................................................111
Operate the camera................................................112
Camera control panel..........................................112
Panning/Tilting....................................................113
Zooming..............................................................114
Move to home position.......................................114
Focus adjustment................................................114
Iris (brightness) adjustment.................................115
Auto mode...........................................................115
Register camera preset positions.......................116
Move camera preset positions............................116
Register home position.......................................117
2
Execute auto back focus.....................................117
Set up mask areas...............................................118
Zoom/Focus adjustment.....................................118
Initial position setup............................................119
Event function.........................................................120
Action to be taken upon an event occurrence....120
Stop buzzer beeping...........................................121
Cancel the alarm action......................................122
Cancel the error action........................................122
Record images........................................................123
Record images (schedule recording)...................123
Play recorded images..............................................124
Playback operation panel....................................125
Play images from a designated point......................127
Play image recorded at a designated
date & time..........................................................127
Play the latest recorded image............................128
Playback by designating a timeline.....................129
Search and play.......................................................131
Play images selected from logs (log search).......131
Search and play recorded images triggered by
motion detection (VMD search)...........................132
Copy recorded images............................................135
Format SD memory card.....................................138
Play back copied images with this recorder...........139
Configure the network settings...............................140
Configure the network settings of the
recorder...............................................................140
Configure the network settings of the PC...........140
Network security of the recorder.............................143
The security function of the recorder..................143
Enhance network security...................................143
Display the operation window.................................145
About the operation window...................................146
Top Page.............................................................146
Control panel.......................................................147
Camera selection panel.......................................148
Setup panel.........................................................149
Status display area..............................................150
Download operation area....................................151
[CAM] tab............................................................151
[HDD] tab.............................................................152
Monitor live images.................................................153
Display images on a 1-screen.............................153
Display images on a 4-screen (multiscreen)........154
Operate the camera................................................155
Panning/Tilting....................................................155
Zooming..............................................................155
Focus adjustment................................................156
Iris (brightness) adjustment.................................156
Register preset positions....................................156
Move to preset positions.....................................156
Auto mode...........................................................157
Event function.........................................................158
Action to be taken upon an event occurrence....158
Cancel the alarm action......................................159
Cancel the error action........................................159
Play recorded images..............................................160
Play image recorded at a designated
date & time..............................................................162
Search and play recording events
(REC event search)..................................................163
Motion detection search and playback
(VMD search)...........................................................165
Copy recorded images............................................167
Download recorded images currently being
played......................................................................169
Check a list of copied recorded images..................170
Play back the copied/downloaded images on a
PC............................................................................172
To play recorded images copied on the media
device..................................................................172
Play recorded images downloaded using a web
browser...............................................................172
Install the viewer software...................................173
Uninstall the viewer software..............................173
How to use the viewer software..........................174
Setup.......................................................................177
Basic operations.................................................177
Configure the settings.........................................177
Update the firmware............................................178
Notification by e-mail..............................................179
Alarm mail...........................................................179
Warning mail........................................................179
Troubleshooting.......................................................181
Glossary..................................................................185
3
Preface
Features
The network disk recorders WJ-NV300K and WJ-NV300K/G (hereinafter, recorders) are designed for use within
a surveillance system, and record images/audio from up to 32 network cameras (hereinafter, cameras) on the
hard disk drives. Number of cameras to be used in the system (9 cameras in basic system) can be increased to
16, 24 and 32 (maximum) by purchasing the additional camera kit (WJ-NVE30, WJ-NVE30W).
Model No.
HDD slot(s)
Number of initial CHs/Maximum
number of CHs
RAID function
WJ-NV300K
2
16CH/32CH
Available (*)
WJ-NV300K/G
2
9CH/32CH
Available (*)
(*) RAID5 or RAID6 mode is available when the Extension Unit (WJ-HDE400) is connected. But the HDD of the
Extension Unit is not available for the mirroring mode.
This recorder supports connection with a monitor equipped with the HDMI (High-Definition Multimedia Interface) connector.
Connection using an HDMI cable (optional) offers display of playback/live images with superior quality.
It is possible to operate cameras from this recorder to display images from multiple cameras or switch cameras
from which images are to be displayed, etc.
The optional parts described in this installation guide are based on information as of May, 2014. Contact your
dealer for further information.
About the user manuals
There are 4 sets of operating instructions for the WJ-NV300K, WJ-NV300K/G as follows.
Installation Guide:
Contains descriptions of how to install/connect this product with devices and descriptions about "Easy start".
Operating Instructions (PDF: this document):
Contains descriptions of how to configure the required settings and how to operate
this product.
Both operations/configurations using the interface on the product and using a PC via
a network are provided.
Quick Reference Guide: Contains descriptions of how to operate functions frequently used.
Operating Instructions of Additional Business Intelligence Kit (PDF):
Contains descriptions of how to use WJ-NVF30, WJ-NVF30W (option), how to register
the license, how to configure the settings and how to operate.
Adobe® Reader® is required to read the PDF files on the provided CD-ROM. When Adobe® Reader® is not
installed on the PC, download the latest Adobe® Reader® from the Adobe web site and install it.
Depending on descriptions, the model name of this recorder may be omitted as "NV300" in the manuals and on
the setup. The screens used in these operating instructions show the case in which WJ-NV300K is used and 16
cameras are connected.
Refer to "readme.txt" on the provided CD-ROM for further information about the dedicated software (option)
that receives and displays the event and error information, compatible cameras and their versions.
Refer to the Panasonic support website (http://security.panasonic.com/pss/security/support/index.html) for latest information about the compatible cameras and functions to be added or changed by firmware upgrade.
4
System requirements for a PC
It is recommended to operate this product using a PC that meets the following system requirements.
OS:
Microsoft® Windows Vista®, Microsoft® Windows® 7*1, Microsoft® Windows® 8.1
Web browser:
Windows® Internet Explorer® 11 (32-bit)
Windows® Internet Explorer® 10 (32-bit)
Windows® Internet Explorer® 9 (32-bit)
Windows® Internet Explorer® 8 (32-bit)
Windows® Internet Explorer® 7 (32-bit)
CPU:
Intel® CoreTM i7-860
Memory:
4 GB or more
Monitor:
1024 x 768 pixels or more, 24-bit True color or better
Network interface:
10BASE-T/100BASE-TX/1000BASE-T 1 port
Audio:
Sound card (When using the audio function)
Others:
CD-ROM drive: It is necessary to refer to the operating instructions on the provided
CD-ROM.
DirectX® 9.0c or later
Adobe® Reader®: CD-ROM drive: It is necessary to refer to the operating instructions
on the provided CD-ROM.
*1 Windows® XP compatibility mode is unavailable.
Important:
• If using a PC that does not meet the above system requirements, it may cause problems such as slow
imaging or the browser becomes inoperable.
• Microsoft® Windows® 7 Starter is not supported.
Note:
• Refer to "Notes about versions of Windows®/Internet Explorer®" (PDF) for further information about system
requirements for a PC and precautions when using Microsoft® Windows® 8.1, Microsoft® Windows® 7,
Microsoft® Windows Vista® or Microsoft® Internet Explorer®.
• Refer to the Panasonic support website (http://security.panasonic.com/pss/security/support/index.html) for
information about the latest operation verification of the supported operating systems and web browsers.
Trademarks and registered trademarks
• Adobe, Acrobat Reader and Reader are either registered trademarks or trademarks of Adobe Systems
Incorporated in the United States and/or other countries.
• Microsoft, Windows, Windows Vista, Internet Explorer, ActiveX, and DirectX are either registered trademarks
or trademarks of Microsoft Corporation in the United States and/or other countries.
• Microsoft product screen shot(s) reprinted with permission from Microsoft Corporation.
• Intel and Intel Core are trademarks or registered trademarks of Intel Corporation in the United States and
other countries.
• HDMI, the HDMI logo and High-Definition Multimedia Interface are trademarks or registered trademarks of
HDMI Licensing LLC in the United States and other countries.
• SDHC Logo is a trademark of SD-3C, LLC.
• All other trademarks identified herein are the property of their respective owners.
Abbreviations
The following abbreviations are used in this manual.
Microsoft® Windows® 8.1 is described as Windows 8.
Microsoft® Windows® 7 is described as Windows 7.
5
Microsoft® Windows Vista® is described as Windows Vista.
Windows® Internet Explorer® 11, Windows® Internet Explorer® 10, Windows® Internet Explorer® 9, Windows®
Internet Explorer® 8 and Windows® Internet Explorer® 7 are described as Internet Explorer.
SDHC/SD memory card is described as SD card or SD memory card.
Network cameras are described as cameras.
Restrictions when using this product
When using this product, some functions have the following restrictions. Before using this product, keep the
following in mind.
When displaying live images from the
camera
When recording images
• The actual time of recording trigger (event occurrence time, start time of the schedule recording,
etc.) and the recording start time (time displayed
on the recording event list) may not exactly be the
same.
• When pre-event recording is set to be performed,
pre-event recording duration may be longer than
the set duration.
• Black screen may be displayed for the first several
seconds (*) when the following operations are performed while displaying live images.
• When live images are displayed (by switching
camera, etc.)
• When image is zoomed in or out
When playing recorded images
When copying images
• First several seconds (*) may be skipped when the
following operations are performed while playing
recorded images.
• When cameras are switched
• When image is zoomed in or out (When operating to zoom in/out a paused recorded image,
image of several seconds later than the displayed image may be zoomed in.)
• When the playback button is clicked again
while playing images
• When the first frame is displayed by starting
the frame by frame playback during pausing
• Playback may be performed in several seconds
intervals (*) when the following operations are performed. Refer to the description of operations
during playback on pages 125 and 161 for how to
control playback.
• Reverse playback
• Fast playback/Fast reverse playback
• Reverse frame playback
• When playing images by designating date & time,
playback may start from a point several seconds*
before/after the specified time or from the first
frame of the next record.
• When the latest recorded image is played, playback may start from a point several seconds
before/after a point that is 30 seconds before the
latest recorded image.
• When the frame rate is set to 60 ips or 30 ips,
recorded images may not be played smoothly.
Copying of recorded images may start from a point
several seconds (*) before the designated start time
when copying recorded images.
When downloading recorded images
Downloading of recorded images may start from a
point several seconds (*) earlier than the designated
start time.
* Time (seconds) differs depending on the refresh
interval setting of the camera (0.2 - 5 seconds). To
shorten time lag, set the refresh interval of the camera shorter.
Refer to the operating instructions of the camera for
information about the refresh interval setting.
When using an SD memory card/
external storage device
If operations are performed soon after an SDHC/SD
memory card is inserted, it may take time to recognize the media. It also may take time if the capacity
size of the inserted media is large.
6
Before using this product
About the face matching function (option)
By registering the license of the additional business intelligent kit, the face matching function, that detects faces
whose features are closed to the registered faces by comparing face images in live image with the registered
face images, will become available. The matching accuracy varies depending on installation, settings and
adjustment of the camera, ambient environment and object. Matching of facial features may therefore not work
under the following conditions:
• When illumination is not uniform, for example, outdoors
• Faces are interrupted by such objects as medical masks, sunglasses or helmets.
• Faces are not directed to the front side.
• Photographic subjects are moving quickly.
• Under the influence of strong external light (such as the headlights of a car, rising sunlight or setting sunlight)
* Configure the settings of the camera supporting this function before attempting to use the face matching
function.
Motion detection (VMD) function
The motion detection (VMD) function of cameras detects motions referring to changes of luminance (brightness)
in areas set in advance.
The motion detection function will not effectively work in the following situations or may sometimes be malfunctioning.
• When there is a very little difference in luminance (brightness) between a background and a subject
• When brightness of images is low such as at night
• When a subject moves very slow
• When a subject is very small
• When the amount of rays of light incidence changes frequently such as at a window or outdoors.
• When light such as sunlight or car headlight comes from outside
• When a fluorescent lamp flickers
• When a subject has depth
When configuring the motion detection settings, check the function performance both in daytime and at night
after appropriately configuring the area settings and the sensitivity settings according to the camera installation
conditions and possible movement of subjects. When the detection function does not work or false detection
occurs, use a sensor separately. Refer to the operating instructions of the camera for further information.
Time display of recorded images
When displaying recorded images, the displayed date & time may sometimes skips. This is not malfunction.
The displayed date & time on the monitor and the recorder may sometimes not be exactly the same. This is
also not malfunction.
Response to the mouse operations
While this recorder is processing multiple operations at the same time, the response to the operations from the
connected mouse may temporarily become slow. This is not malfunction.
7
Black screen displayed when playing recorded images
In the following cases, a black screen may be displayed during playing recorded images. However, this is not
malfunction.
• When changing cameras or screen patterns during playback or pausing
• When skipping/reverse skipping during playback
• When fast forwarding/reverse fast forwarding during playback
• When the latest recorded image is played while displaying images on a multiscreen
• When going to the next recording event list by fast forwarding/reverse fast forwarding or skipping/reverse
skipping during playback
• When playback operation is affected by another operation (such as when receiving multiple alarms sequentially or while copying is being performed simultaneously)
Recording operation
It is possible to connect up to 32 cameras to the recorder and record images from them on the hard disk drives.
The following recording operations are available.
Schedule recording:
Recording that is automatically performed at the designated time range on the designated day(s) of the week
Event recording:
Recording that is automatically performed when an event occurs (such as terminal
alarm/camera site alarm/command alarm, etc.)
Important:
• Recording may not be performed for around 3 seconds in the following cases. However, this is not a malfunction.
• When the settings are changed and the setup menu is closed during recording
• When the resolution, image quality or the frame rate is changed during recording
Event type
The following event recording types are displayed in list form on the web browser:
SCH: Schedule recording
The following are detailed event recording types.
COM: Displayed when a command alarm occurred
TRM: Displayed when a terminal alarm occurred
SITE: Displayed when a camera site alarm occurred
PRE: Pre-event recording
8
Basic operations
To operate this product, use the mouse (provided) connected to the mouse connection port on the rear of this
product.
It is also possible to perform operations and some settings of the recorder from the web browser. For the setup
items that can be configured and operated using the web browser, refer to pages 76 and 145.
Step 1
Step 3
Connect the provided mouse to the mouse connection port on the rear side of the recorder.
→→ The mouse cursor will be displayed on the main
monitor.
Click the [Setup] button.
→→ The top screen of the setup menu will be displayed.
Step 2
Left-click the desired buttons and tabs on the screen.
(Hereinafter, "Left-click..." will be described as
"Click..." in this document.)
When the entry field has the [D] and [C] buttons or
the [C] button, the setting value can be changed
using the mouse wheel.
When no operation is made for 10 seconds or more,
the mouse cursor will be hidden. The mouse cursor
will be displayed again when the mouse is moved.
Note:
• If a setting window is in a list form and the [C]
button exists on the title column, it is possible to
change all the settings in the same row at the
same time.
9
About the operation of on-screen keyboard
Use the on-screen keyboard to enter characters for the setting items. When clicking the [
] icon beside the
entry field, the on-screen keyboard will be displayed, and it will become possible to enter characters by clicking
the character keys on the keyboard.
On-screen keyboard screen
Entry field
Language selection pull-down menu
Click the [C] button to select the language for
character entry.
[Del all] button
Deletes all the characters in the entry field.
[←]/[→] button
Move the cursor in the entry field to either direction.
[Delete] button
Deletes a character pointed by the cursor in the entry
field.
[A/a] button
This button changes the characters to be entered
between capital letters and small letters.
[Next] button
Changes the keys to be displayed for character entry.
The displayed keys are changed as follows:
Keys for the language selected by the language
selection pull-down menu → Combination characters
→ Special characters
[Enter] button
Determines the entered characters and closes the onscreen keyboard.
Note:
• Basic operations are also applied to the "Login"
window and registration window for license.
• Click the [×] button to close the window without
determining the entered characters.
10
Setup menu
Configuration of each setting item in the setup menu should be completed in advance to use this recorder.
The setup menu has the following levels for the setting items. On "Easy Start", the minimum settings required
to operate the recorder will be performed, but other settings will remain default. On the [Basic setup] or
[Advanced setup] page, the settings can be customized in accordance with a variety of operational modes.
The following is the example of the setup menu that describes the features and operations.
The setup menu will be displayed when clicking the [Setup] button (☞ page 94) at the upper right corner of the
operational screen on the main monitor.
The buttons of the setup pages will be displayed on the left column of the setup menu.
u
q
e
r
w
t
i
y
o
q [Home] button
It is possible to return to the top screen (☞ page
9) of the setup menu from any setup page.
u Hierarchical display
The name of the current setup page will be displayed in the hierarchy. The tab name will also be
included.
w Setup menu panel
Displays buttons of the setup pages.
i Setup page
Displays each setup page. If the current setup
page is composed of two or more tabs, it is possible to change the page display by clicking the
tabs.
e [Easy Start] button
It is possible to configure the minimum settings
required to operate the recorder, such as date &
time and camera registration.
o [Exit] button
Applies the settings to the recorder and closes
the setup menu to return to the operational
screen.
r [Basic setup] – Setup page buttons
Each "Basic setup" page will be displayed.
t [Advanced setup] button
The buttons to open the corresponding setup
pages of the "Advanced setup" menu will be displayed. When clicking this button again, the buttons will be hidden.
Except for some cases, the descriptions of this document follow the hierarchical display and setup pages.
Important:
• If the settings are applied, all login users will be
forcibly logged out.
y [Advanced setup] – Setup page buttons
Each "Advanced setup" page will be displayed.
11
Configure the minimum settings [Easy Start]
The minimum settings required to operate the recorder, such as the date & time, camera registration, recording,
can be configured on the setup menu - the "Quick setup" menu - "Easy Start".
First, configure the minimum settings on "Easy Start", and to configure more advanced settings, go to each
setup page.
Available settings on "Easy Start"
• Date & time of the recorder
• Camera registration
• Order change of the registered camera numbers
• Recording frame rate and image quality
* Other settings will remain default or will be conformed to the camera settings.
* To reset the time, do not use "Easy Start", and go to "Basic setup" menu - "Date/Language" page.
[Date]
Set the current date. Select the year, month and day
from the calendar.
[<<Y]/[Y>>] button: Selects the previous or next year.
[<M]/[M>] button: Selects the previous or next month.
Step 1
Click the [Easy Start] button on the top screen of the
setup menu.
Refer to "Basic operations" (☞ page 9) for how to display the setup menu.
[Time]
Set the current time.
Step 3
Click the [Apply] button after setting the date & time.
→→ The second will be set to "00".
[Set time zone]
Select your time zone.
GMT-12:00 - GMT+13:00
Default: GMT-5:00 (WJ-NV300K)
GMT (WJ-NV300K/G)
Marking the checkbox for [Activate the Daylight saving time setting] will active daylight saving time.
Step 4
Click the [Next] button.
→→ The camera registration window opens.
→→ The setup menu for the date & time will be displayed.
Step 5
Step 2
Register the cameras connected to the recorder.
Set the date & time.
12
Note:
• To use the existing IP address of the connected
cameras, refer to "Detect cameras for registration
[Detect cameras]" (☞ page 20) instead of this section.
• Before the settings, register the cameras into the
network. Only the cameras added by license registration will be detected even though more cameras than the registered license number are connected.
It is recommended to disconnect unnecessary
cameras.
• Cameras shall be connected to the Camera/PC
port. Cameras will not be detected if they are connected to the PC port.
[Results]
New: Displayed when the camera is newly connected to the recorder.
Replaced: Displayed when the camera has been
replaced by another one.
Added: Displayed when the camera connection is
added to the recorder.
Registered: Displayed when the camera has
already been registered.
Lost: Displayed when the registered camera is not
detected.
Blank: No camera is detected.
Note:
• If "Lost" is displayed or the column is left blank,
check if the power of the camera is turned on, and
make sure that cables are properly connected.
[New] button
Detects all the connected cameras.
The models and results of the detected cameras will
be displayed. Make sure that the model numbers of
all the connected cameras are being displayed.
Step 6
Click the [Next] button.
→→ IP address will be given to the cameras newly
connected, replaced or added, and the images
from the camera will be displayed on the operational screen.
[Addition] button
Detects only the added or replaced cameras.
The models and results of the detected cameras will
be displayed. Make sure that the model numbers of
all the added or replaced cameras are being displayed.
Note:
• On "Easy Start", it is impossible to register the
cameras in other subnets via the same router.
• For the security enhancement, changing of the IP
address of the camera will become impossible
when 20 minutes have passed after the power is
turned on. Perform the camera detection within 20
minutes, or turn off the power of the camera and
turn it on again if more than 20 minutes has
passed. Refer to the operating instructions of the
camera for further information.
When 20 minutes have passed after the power of
the camera is turned on, "ONVIF" may be
detected depending on the models of Panasonic
cameras. In such a case, turn off the power of the
camera and turn if on again to perform the camera
detection.
• When "On" is selected for the "DHCP" setting of
the detected cameras, the recorder will forcibly
change the setting to "Off" to give the IP
addresses automatically.
• When the [Cancel] button is clicked, the top
screen of "Easy Start" (the menu to set the date &
time) without applying the camera detection result
will be displayed.
Important:
• The system will assign new IP addresses to all the
connected cameras (including currently-operated
cameras) by clicking [New] button.
• Cameras newly added after the operation start will
be registered in the default settings. To conform
the settings to those of the registered cameras,
perform the settings for the added cameras.
• For the video encoder (WJ-GXE500), only the
camera connected to CH1 will be detected. The
channels CH2 to CH4 are needs to be registered
from the setup menu.
[Camera]
Up to 32 cameras can be connected. By registering
the licenses (☞ page 68), number of the cameras can
be increased to 16, 24 or 32.
[Model]
When Panasonic network cameras are used, the
model numbers will be displayed.
13
[Refresh] button
Obtain the latest camera image after interchanging
cameras.
Step 7
When you wish to change the registered camera
numbers, it is possible to change the order of the
camera numbers.
[Exit] button
Exits the setup menu and returns to the top screen of
the setup menu.
[Next] button
Proceeds to the settings for recording.
Step 8
Perform the settings for recording. If the settings are
performed on "Easy Start", the settings will be
applied to all the cameras.
Images from the cameras will be displayed on the
monitor from the upper left corner to the right in order
of the camera number (1, 2 ... 16: The monitor screen
will change according to the number of the camera in
use; 9 cameras on 9-screen, 16 cameras on
16-screen, and 24 or 32 cameras on 2 of 16-screen)
To interchange camera numbers, drag the camera
image to be moved with the mouse and drop on the
desired position.
If the camera titles are to be interchanged as well,
mark the "Also change camera titles" checkbox.
[Camera status]
The model numbers and statuses of each camera will
be displayed in a list.
Displaying image: Displays the images from the camera using the IP address that is newly registered
or that has already been registered.
Changing IP address: Images are being obtained
from the camera whose IP address has been
changed.
Undetectable: Cannot obtain images from the camera.
Authentication error: Failed in the authentication to
display images from the camera.
[Frame rate]
Select the recording frame rate.
1 ips/ 3 ips/ 5 ips/ 10 ips/ 15 ips/ 30 ips
Default: 10 ips
Note:
• To apply 60 ips, configure on "Advanced recording setup" on the "Recording setup" tab under
"REC & event" of "Basic setup".
[Image quality]
Selects the image quality of recorded images.
NQ (Normal): Standard quality
FQ (Fine): High quality
SF (Super Fine): Super fine quality
XF (Extra Fine): Extra fine quality
Default: FQ
Important:
• If "Undetectable" is displayed, check the camera
connections, and retry the camera registration.
• If "Authentication error" is displayed, initialized the
camera and retry the camera registration by referring to the operating instruction of the camera.
• If the registered camera is not correctly detected
or if you wish to change the camera settings,
change the registered information on the "Basic
setup" menu - the "Camera" page - the "Camera
registration" tab. (☞ Page 19)
Note:
• If "XF" is selected when the compression method
of the camera is "MJPEG", "SF" will be set
instead of "XF".
14
[Referenced recording days]
Calculates and displays the total number of days for
which recording on the hard disk drives is available.
Note:
• The referenced recording days will be calculated
based on the assumption that recording is started
on Monday.
• The HDD consumption for the event recording will
be excluded.
• If a camera manufactured by other than
Panasonic is used, the value of "Referenced
recording days" will not be displayed.
• When configured to perform recording in high resolution and high quality, recording may sometimes
not be performed at the specified rate. When
there may be possibility to fail recording at the
specified rate while using only Panasonic cameras, the confirmation window will be displayed.
Step 9
Click the [Exit] button.
→→ Saves the settings and returns to the top screen
of the setup menu.
15
Configure the basic settings [Basic setup]
The basic settings of the recorder such as date & time and recording mode, etc. can be configured on the
"Basic setup" page.
The "Basic setup" page provides access to the [Date/Language], [Camera] and [REC & event] pages.
Display the basic setup pages
Click the desired button on the setup menu.
[Date/Language] button: Displays the "Date/Language" page. Perform settings such as date & time and
daylight saving time.
[Camera] button:
Displays the "Camera" page. Perform registration and setup of network cameras.
[REC & event] button: Displays the "REC & event" page. Set up the recording schedules, cameras and the
face matching function.
Set up date & time and language [Date/Language]
The "Date/Language" page has the [Date & time adjustment], [Date & time settings] and [Language] tabs.
[Date & time adjustment] tab
Set the current date & time. Refer to "Configure the minimum settings [Easy Start]" (☞ page 12).
16
[Date & time settings] tab
Perform settings such as date & time format, time zone, daylight saving time, and time adjustment method.
[Daylight saving time]
Determine how to switch to/from daylight saving time.
The asterisk "*" will be displayed before date & time
during daylight saving time.
Out: No changeover to daylight saving time.
Auto: Automatic changeover to daylight saving
time according to the daylight saving time
changeover settings.
Default: Auto
[Daylight saving time table]
Set the start (In)/end (Out) date & time of daylight saving time.
Clicking the [Setup >] button will open the "Daylight
saving time table" window.
n Display format
Select a display format for the current date & time.
Note:
• "Date & time display" on the [Camera setup] tab
(☞ page 23) corresponds to the display format
settings on this tab.
[Date]
Select a date/time display format. (Example: March 1,
2014)
yyyy/mm/dd: 2014/03/01
Mmm/dd/yyyy: Mar/01/2014
dd/Mmm/yyyy: 01/Mar/2014
mm/dd/yyyy: 03/01/2014
dd/mm/yyyy: 01/03/2014
Default: Mmm/dd/yyyy (WJ-NV300K)
dd/mm/yyyy (WJ-NV300K/G)
Enter the start (In) and end (Out) date & time for daylight saving time. The calendar will be displayed by
clicking the [
] icon. Refer to the instructions "Configure the minimum settings [Easy Start]" (☞ page 12)
for how to perform the setting.
Up to 10 times and dates can be set for the changeover to daylight saving time.
[Time]
Select a time display format. (Example: 3 o’clock in
the afternoon)
24 h: 15:00:00
12 h: 03:00:00 PM
Default: 12 h (WJ-NV300K)
24 h (WJ-NV300K/G)
To delete the set times and dates for switching to
daylight saving time, select the number to be deleted
from "Table to delete", and click the [Delete] button.
To return to the previous page, click the [Back] button.
n Time zone
Select the time zone and shift to/from daylight saving
time.
Important:
• Setting is impossible when the interval between
start (In)/end (Out) is less than an hour.
[Set time zone]
Select your time zone.
GMT-12:00 - GMT+13:00
Default: GMT-5:00 (WJ-NV300K)
GMT (WJ-NV300K/G)
17
[Auto time adjustment]
Select a method of auto clock adjustment from the
following.
Off:Does not adjust the time automatically.
On:Receives a signal from the ALARM/CONTROL connector on the rear panel of the
recorder and adjusts the clock. When the signal is received and if the clock is within 29
minutes ± the hour, the time will be adjusted to
00 minutes 00 seconds.
Default: Off
[Language] tab
Select the display language for the main monitor and for the web browser on the PC.
[Language]
Japanese/ English/ Français/ Español/ Deutsch/
Italiano/ Русский/ Português
Default: English
18
Camera setup [Camera]
The "Camera" page has 2 tabs; the [Camera registration] tab and the [Camera setup] tab.
[Camera registration] tab
Perform settings such as the network settings of the camera (IP address and port number), and the display
position on the main monitor.
When performing the initial settings, displays camera information detected/set on the "Easy Start".
[Change the display position of camera]
The camera numbers can be interchanged. When the
[Setup >] button is clicked, the "Change the display
position of camera" window opens to edit the settings. (☞ Page 22)
[Detect cameras]
The cameras connected to a network can be
detected for registration. (☞ Page 20)
[Registered information]
Change the "Model", "IP address" and "Compression".
When the [Setup >] button is clicked, the "Registered
information" window opens to edit the settings.
(☞ page 21)
In the event of communication trouble with the camera, one of the following error messages is displayed
for "Error information".
Connection error: The communication with the
camera disconnected.
Authentication error: The user authentication of
the camera failed.
Camera error: The response from the camera is
incorrect.
Note:
• When an error message is displayed, check the
camera connections and settings (☞ operating
instructions of the camera). If the problem cannot
be solved, register the camera again on "Easy
Start". (☞ Page 12)
19
Detect cameras for registration [Detect cameras]
Clicking the [Setup >] button of "Detect cameras" on the [Camera setup] tab will display the following window.
After editing the settings, click the [OK] button to save the settings and return to the [Camera registration] tab.
[Results]
New: Displayed when the camera is newly connected
to the recorder.
Replaced: Displayed when the camera has been
replaced by another one.
Added: Displayed when the camera connection is
added to the recorder.
Registered: Displayed when the camera has already
been registered.
Lost: Displayed when the registered camera is not
detected.
Blank: No camera is detected.
Note:
• Before the settings, register the cameras into the
network. Even though it is possible to detect up to
64 cameras, only the number of the cameras that
covered by the license registration can be registered.
[IP address]
Displays the IP addresses configured for the detected
cameras.
[Auto addressing]
The IP addresses of the cameras whose checkboxes
are marked will be automatically configured.
[Port selection]
Select the port to which the camera to be detected is
connected.
[Start IP address]
Specify the start IP address and order when setting
the IP address automatically.
[New] button
Detects all the connected cameras. The models,
results of the detected cameras and IP addresses will
be displayed.
Note:
• It is impossible to register the cameras in other
subnets via the same router.
• For the security enhancement, changing of the IP
address of the camera will become impossible
when 20 minutes have passed after the power is
turned on. Refer to the operating instructions of
the camera for further information.
• When "On" is selected for the "DHCP" setting of
the detected cameras, the recorder will forcibly
change the setting to "Off" to give the IP
addresses automatically.
• If the IP address of the camera is set to be
assigned automatically, an IP address will be
assigned to the camera when the [OK] button is
clicked.
• Click the [Cancel] button to return to the [Camera
registration] tab without applying the camera
detection result.
[Addition] button
Detects only the added or replaced cameras. The
models, results of the detected cameras and IP
addresses will be displayed.
[No.]
Up to 32 cameras can be connected. It is possible to
increase the number of the camera to 16, 24 or 32 by
registering the license.
[Select]
Mark the checkboxes of cameras to register.
The vacant number will be fulfilled by the subsequent
camera.
[Model]
When Panasonic cameras are used, the model numbers will be displayed.
20
Change the registered information [Registered information]
Click the [Setup >] button for "Registered information" on the [Camera registration] tab to display the following
items.
After editing the settings, click the [OK] button to save the settings and return to the [Camera registration] tab.
Note:
• When selecting "MJPEG" for "Compression", the
live image transmission rate and the frame rate
will be changed automatically to "5 ips". (☞ Page
39)
• When selecting "H.264" for "Compression", it will
become possible to select "XF" for the image
quality setting.
• Depending on the model of the camera, the camera may reboot when the compression method is
changed. The reboot will be detected as a communication error, but that is not a malfunction.
[Camera]
Up to 32 cameras can be connected. By registering
the license for additional cameras, the number of
cameras can be increased up to 16, 24, or 32.
(Default: 16 for WJ-NV300K, 9 for WJ-NV300K/G.)
[User name]
Enter the user name for accessing the cameras and
logging in using the on-screen keyboard (☞ page 10).
Register the user name whose access level is
"Administrator".
[Model]
The model of a registered camera will be displayed.
(Blank: Camera is not registered)
Click the [C] button to select the camera model from
the camera categories. Refer to the "readme.txt" on
the provided CD-ROM for camera categories.
It is unnecessary to change it for normal use.
[Password]
Enter the password to be used for the user whose
name has been registered as "User name" (☞ page
10). (Up to 32 alphanumeric characters)
[Port No.]
Set a port number from 1 - 65535 for use by the camera.
Default: 80
[Address]
An address already in use will be displayed. The
address can be changed using the on-screen keyboard (☞ page 10). Enter up to 255 alphanumeric
characters including hyphens (-) and periods (.).
[Table to delete]
To delete registration information or remove a previously connected camera, either select the camera
number and click the [Delete] button, or set the IP
address of the respective camera to
"000.000.000.000".
Note:
• Entering "http://" is not necessary if the host name
is entered.
[Compression]
Select the image compression method.
H.264/ MJPEG
Note:
• Enter the port number in five digits, right aligned.
(Example: When the port number is 80, enter
"00080".) The leading zeros are omitted here.
21
Interchange camera numbers [Change the display position of camera]
Click the [Setup >] button for "Change the display position of camera" on the [Camera registration] tab to display the following items.
Images from the cameras will be displayed on the monitor from the upper left corner to the right in order of the
camera number (1, 2 ... 16: The monitor screen will change according to the number of the camera in use; 9
cameras on 9-screen, 16 cameras on 16-screen, and 24 or 32 cameras on 2 of 16-screen.)
To interchange camera numbers, drag the camera image to be moved with the mouse and drop on the desired
position.
If the camera titles are to be interchanged as well, mark the "Also change camera titles" checkbox.
[Refresh] button
Obtain the latest camera image after interchanging
cameras.
[Back] button
Save the settings and return to the [Camera registration] tab.
22
[Camera setup] tab
Transmit the date & time and text displayed on an image, the refresh rate, the VMD alarm and the Light control
mode etc. settings to the camera. Click the [Setup >] button for each item to open the respective setup window.
Note:
• The settings of some models of Panasonic cameras only can be configured. Refer to the "readme.txt" on
the provided CD-ROM about the supported cameras. Some functions are not supported depending on the
models of the connected cameras. For further information about detailed specifications, refer to the operating instructions of the cameras in use.
• It is impossible to check the current settings using this recorder.
23
Set up date & time display [Date & time display]
Select the date & time display position for each camera and transmit it to the cameras to change the camera
settings.
Clicking the [Setup >] button for "Date & time display" on the [Camera setup] tab will display the following
items.
■ Camera selection
Select the camera to which the date & time display
setting is to be sent. Mark the checkbox of the camera to which the setup information is to be transmitted.
[Transmission] button
Transmit the date & time setting to the camera.
Once transmission is completed and the setting has
been applied to the camera, "OK" will be displayed in
the "Results" field. If the display reads "Authentication error", etc., the camera connection or the setting
may have failed.
■ Setting items
[Display]
Choose whether or not to display the date & time. If
date & time display is activated, date & time will be
displayed on camera images and will also be
recorded with the recorded images.
To transmit the settings to the camera, mark this
item, and select either of the following.
On: Date & time displayed
Off: Date & time not displayed
[Back] button
Click the button after completing the settings. The
screen returns to the [Camera setup] tab.
Note:
• The display format corresponds to the settings on
the [Date & time settings] tab (☞ page 17).
[Position]
Select the position to display the date & time on the
images.
If the setting is to be transmitted to the camera, mark
this item to select the display position.
L-Upper/ L-Lower/ R-Upper/ R-Lower
Note:
• The position to display the title edited on "Display
Title" (☞ page 25) is the same as the "Position"
selected here to display the date & time edited on
"Date & time display".
24
Set up OSD [Display Title]
Determine whether to display the title and select the title to display for each camera, the settings will be
changed after the settings have been transmitted to the camera.
Clicking the [Setup >] button for "Display Title" on the [Camera setup] tab will display the following items.
• [Display Title]
Enter a character string to be displayed on the
image using the on-screen keyboard. (☞ Page 10)
(Up to 16 alphanumeric characters)
Available characters: 0-9, A-Z, ! # $ % ( )* + , - . / :
;=?
• [Camera title]
Display the camera title registered on the [Main
monitor] tab of the monitor page (☞ page 49).
• [Copy] button
The camera title registered on the [Main monitor]
tab of the monitor page can be used as display
title. Clicking this button will copy the camera title
to the "Display Title" field.
■ Setting items
[Display]
Select whether or not to display the title on camera
images. If title display is activated, the title will be displayed on camera images and will also be recorded
with the recorded images.
To transmit the settings to the camera, mark this
item, and select either of the following.
On: Title displayed
Off: Title not displayed
• [Back] button
Click the button after completing the settings.
This will close the window.
■ Camera Selection
Select the camera to which the setting of the "Display
title" is to be sent.
Mark the checkbox of the camera to which the setup
information is to be transmitted.
[Display Title]
To transmit the settings to the camera, mark this
item, and edit the title displayed on the image. Clicking the [Edit >] button will display the following title
editing window:
[Transmission] button
Transmit the setting of the "Display title" to the camera.
Once transmission is completed and the setting has
been applied to the camera, "OK" will be displayed in
the "Results" field.
If the display reads "Authentication error", etc., the
camera connection or the setting may have failed.
[Back] button
Click the button after completing the settings.
The screen returns to the [Camera setup] tab.
25
Set up how to turn on or off the indicators [Indicator]
Select how to turn on or off the link indicator, access indicator or status indicators for each camera and transmit the information to the cameras to change the camera settings.
Clicking the [Setup >] button for "Indicator" on the [Camera setup] tab will display the setup page.
[Indicator]
On: All the indicators will light in accordance with
the status.
On(Access): Only the live indicator will light when
images are viewed.
Off: All the indicators will light off.
■ Camera Selection
Select the camera to which the "Indicator" setting is
to be sent.
Mark the checkbox of the camera to which the setup
information is to be transmitted.
[Transmission] button
Transmit the setting of the "Indicator" to the camera.
Once transmission is completed and the setting has
been applied to the camera, "OK" will be displayed in
the "Results" field.
If the display reads "Authentication error", etc., the
camera connection or the setting may have failed.
[Back] button
Click the button after completing the settings.
The screen returns to the [Camera setup] tab.
26
Set the camera image transmission priority [Transmission priority]
Select the transmission priority setting for each camera and transmit the information to the cameras to change
the camera settings.
Clicking the [Setup >] button for "Transmission priority" on the [Camera setup] tab will display the setup page.
■ Camera Selection
Select the camera to which the setting of the "Transmission priority" is to be sent.
Mark the checkbox of the camera to which the setup
information is to be transmitted.
[Transmission] button
Transmit the setting of the "Transmission priority" to
the camera.
Once transmission is completed and the setting has
been applied to the camera, "OK" will be displayed in
the "Results" field.
If the display reads "Authentication error", etc., the
camera connection or the setting may have failed.
[Transmission priority]
Select the transmission mode for H.264 images from
the following.
The "Transmission priority" will be configured based
on the markings of the checkboxes of "H.264(1)" and
"H.264(2)".
Frame rate: H.264 images will be transmitted with
the frame rate specified in "Frame rate".
Advanced VBR: H.264 images will be transmitted
with the frame rate specified in "Frame rate".
When this parameter is selected, this product
transmits images while adjusting the average
of transmission amount in the period specified
in "Control time period" to match it to the
specified bit rate.
[Back] button
Click the button after completing the settings.
The screen returns to the [Camera setup] tab.
[Burst tolerance level]
Select the allowance of "Max bit rate (per client)" for
the H.264 bit rate from the following.
High, Middle, Low
[Control time period]
Select the period of controlling H.264 bit rate to be
recorded from the following.
1 h, 6 h, 24 h, 1 week
27
Set up Max bit rate [Max bit rate (per client)]
Select the bit rate per a client when the compression method of the camera is H.264 for each camera and
transmit the information to the cameras to change the camera settings.
Clicking the [Setup >] button for " Max bit rate (per client) " on the [Camera setup] tab will display the setup
page.
[Max bit rate (per client)]
64 kbps/ 128 kbps/ 256 kbps/ 384 kbps/
512 kbps/ 768 kbps/ 1024 kbps/ 1536 kbps/
2048 kbps/ 3072 kbps/ 4096 kbps/ 6144 kbps/
8192 kbps
■ Camera Selection
Select the camera to which the setting of the "Max bit
rate (per client)" is to be sent.
Mark the checkbox of the camera to which the setup
information is to be transmitted.
[Transmission] button
Transmit the setting of the "Max bit rate (per client)"
to the camera.
Once transmission is completed and the setting has
been applied to the camera, "OK" will be displayed in
the "Results" field.
If the display reads "Authentication error", etc., the
camera connection or the setting may have failed.
[Back] button
Click the button after completing the settings.
The screen returns to the [Camera setup] tab.
Important:
• When the bit rate is changed, the camera image
transmission will temporarily pause. During the
pause, recording will not be performed.
28
Set up the refresh interval [Refresh interval]
Select the image refresh interval for each camera and transmit it to the cameras to change the camera settings.
Clicking the [Setup >] button for "Refresh interval" on the [Camera setup] tab will display the setup page.
[Refresh interval]
Select an interval to update the image display. If used
in a network environment where frequent errors
occur, shorten the refresh interval to reduce image
distortions. However, the refresh interval may be
longer than the set value.
0.2 s/ 0.5 s/ 1 s/ 2 s/ 3 s
■ Camera Selection
Select the camera to which the setting of the "Refresh
interval" is to be sent.
Mark the checkbox of the camera to which the setup
information is to be transmitted.
[Transmission] button
Transmit the setting of the "Refresh interval" to the
camera.
Once transmission is completed and the setting has
been applied to the camera, "OK" will be displayed in
the "Results" field.
If the display reads "Authentication error", etc., the
camera connection or the setting may have failed.
[Back] button
Click the button after completing the settings.
The screen returns to the [Camera setup] tab.
Important:
• Image transmission from the camera will temporarily be canceled and no image will be recorded
during this period if the setting to change the
refresh interval is transmitted to the camera.
29
Set up the method of camera installation [Upside-down]
Select the method of installation for each camera and transmit the information to the cameras to change the
camera settings.
Clicking the [Setup >] button for " Upside-down " on the [Camera setup] tab will display the setup window.
[Upside-down]
On (desktop): Select this when the camera is to
be installed with the dome side up.
Off (ceiling): Select this when the camera is to be
installed with the dome side down.
Wall: Select this when the camera is to be
installed on a wall.
■ Camera Selection
Select the camera to which the setting of the
"Upside-down" is to be sent.
Mark the checkbox of the camera to which the setup
information is to be transmitted.
[Transmission] button
Transmit the setting of the "Upside-down" to the
camera.
Once transmission is completed and the setting has
been applied to the camera, "OK" will be displayed in
the "Results" field.
If the display reads "Authentication error", etc., the
camera connection or the setting may have failed.
[Back] button
Click the button after completing the settings.
The screen returns to the [Camera setup] tab.
Note:
• To flip the camera image vertically, select the "Off
(ceiling)".
• If a fisheye camera is registered, "Off (ceiling)" will
be set. Select "Wall" to install the camera on the
wall.
30
Set up pan/tilt-flip [Pan/tilt-flip]
Select the pan/tilt-flip function for each camera and transmit the information to the cameras to change the camera settings.
Clicking the [Setup >] button for "Pan/tilt-flip" on the [Camera setup] tab will display the setup page.
[Pan/tilt-flip]
Select whether or not to activate the pan/tilt-flip function that can achieve camera controllability equal to
360° endless cameras.
On: The pan/tilt-flip function will work.
Off: The pan/tilt-flip function will not work.
■ Camera Selection
Select the camera to which the setting of the "Pan/
tilt-flip" is to be sent.
Mark the checkbox of the camera to which the setup
information is to be transmitted.
[Transmission] button
Transmit the setting of the "Pan/tilt-flip" to the camera.
Once transmission is completed and the setting has
been applied to the camera, "OK" will be displayed in
the "Results" field.
If the display reads "Authentication error", etc., the
camera connection or the setting may have failed.
[Back] button
Click the button after completing the settings.
The screen returns to the [Camera setup] tab.
31
Set up Super Dynamic [Super Dynamic (Wide dynamic range)]
Select the Super Dynamic function for each camera and transmit the information to the cameras to change the
camera settings.
Clicking the [Setup >] button for "Super Dynamic (Wide dynamic range)" on the [Camera setup] tab will display
the setup page.
[Super Dynamic (Wide dynamic range)]
Select "On" or "Off" to determine whether or not to
activate the super dynamic function.
On(High): The super dynamic function will work.
When "On (High)" is selected, the tone level
will be compensated to emphasize the contrast.
On:The super dynamic function will work. When
"On" is selected, the tone level will be compensated to emphasize the sensitivity.
Off:The super dynamic function will not work.
■ Camera Selection
Select the camera to which the setting of the "Super
Dynamic" is to be sent.
Mark the checkbox of the camera to which the setup
information is to be transmitted.
[Transmission] button
Transmit the setting of the "Super Dynamic" to the
camera.
Once transmission is completed and the setting has
been applied to the camera, "OK" will be displayed in
the "Results" field.
If the display reads "Authentication error", etc., the
camera connection or the setting may have failed.
[Back] button
Click the button after completing the settings.
The screen returns to the [Camera setup] tab.
32
Set the adaptive black stretch function of the camera [Adaptive black stretch]
Determine whether to enable the adaptive black stretch function for each camera. The settings will be changed
after the settings have been transmitted to the camera.
Clicking the [Setup >] button for "Adaptive black stretch" on the [Camera setup] tab will display the setup window.
Important:
• When "On" is selected for "Adaptive black
stretch", noise in dark area in image may increase
and the periphery of the border between the dark
area and the bright area will be displayed brighter/
darker than the other brighter/darker area in the
image.
[Adaptive black stretch]
By using the adaptive black stretch function, dark
area in the image will turn brighter by the digital
image processing.
On: The adaptive black stretch function will be
enabled.
Off: The adaptive black stretch function will be
disabled.
■ Camera Selection
Select the camera to which the setting of the "Adaptive black stretch" is to be sent.
Mark the checkbox of the camera to which the setup
information is to be transmitted.
[Transmission] button
Transmit the setting of the "Adaptive black stretch" to
the camera.
Once transmission is completed and the setting has
been applied to the camera, "OK" will be displayed in
the "Results" field.
If the display reads "Authentication error", etc., the
camera connection or the setting may have failed.
[Back] button
Click the button after completing the settings.
The screen returns to the [Camera setup] tab.
33
Set the back light compensation function of the camera [Back light compensation
(BLC)]
Determine whether to enable the back light compensation function for each camera. The settings will be
changed after the settings have been transmitted to the camera.
Clicking the [Setup >] button for "Back light compensation (BLC)" on the [Camera setup] tab will display the
setup window.
[Back light compensation (BLC)]
When "On" is selected for "Super Dynamic", this
function is not available.
The back light compensation function masks the
brighter area in image and compensates exposure in
silhouette created by back light.
On: Mask area will automatically be set.
Off: Mask area will not be set automatically. It is
necessary to set mask areas manually.
■ Camera Selection
Select the camera to which the setting of the "Back
light compensation (BLC)" is to be sent.
Mark the checkbox of the camera to which the setup
information is to be transmitted.
[Transmission] button
Transmit the setting of the "Back light compensation
(BLC)" to the camera.
Once transmission is completed and the setting has
been applied to the camera, "OK" will be displayed in
the "Results" field.
If the display reads "Authentication error", etc., the
camera connection or the setting may have failed.
[Back] button
Click the button after completing the settings.
The screen returns to the [Camera setup] tab.
34
Set up Light control mode [Light control mode]
Select how to control the amount of light for each camera and transmit the information to the cameras to
change the camera settings.
Clicking the [Setup >] button for "Light control mode" on the [Camera setup] tab will display the setup page.
[Light control mode]
Outdoor scene: Depending on the brightness
level (illuminance), the iris will automatically be
controlled together with the shutter speed
adjustment to control light.
Indoor scene: The shutter speed will automatically
be adjusted to prevent flicker caused by fluorescent light. (For the 50 Hz areas)
Indoor scene (60 Hz): Same as "Indoor scene"
above. (For 60 Hz areas)
■ Camera Selection
Select the camera to which the setting of the "Light
control mode" is to be sent.
Mark the checkbox of the camera to which the setup
information is to be transmitted.
[Transmission] button
Transmit the setting of the "Light control mode" to
the camera.
Once transmission is completed and the setting has
been applied to the camera, "OK" will be displayed in
the "Results" field.
If the display reads "Authentication error", etc., the
camera connection or the setting may have failed.
[Back] button
Click the button after completing the settings.
The screen returns to the [Camera setup] tab.
Note:
• When "Outdoor scene" is selected, flicker may
occur when a subject is under fluorescent lighting.
35
Set the automatic slow shutter of the camera [Auto slow shutter (Maximum
shutter)]
Select the auto slow shutter setting for each camera and transmit the information to the cameras to change the
camera settings.
Clicking the [Setup >] button for "Auto slow shutter (Maximum shutter)" on the [Camera setup] tab will display
the setup page.
Note:
• When "Max. 16/30 s" is selected, the electronic
sensitivity will automatically be enhanced up to 16
times.
• When "Off" is selected for "Gain", this function is
not available.
[Auto slow shutter (Maximum shutter)]
The auto slow shutter adjusts the sensor storage time
to enhance the electronic sensitivity.
The following are available setting values.
Off(1/30 s)/ Max. 2/30s/ Max. 4/30s/ Max. 6/30s/
Max. 10/30s/ Max. 16/30s
■ Camera Selection
Select the camera to which the setting of the "Auto
slow shutter" is to be sent.
Mark the checkbox of the camera to which the setup
information is to be transmitted.
[Transmission] button
Transmit the setting of the "Auto slow shutter" to the
camera.
Once transmission is completed and the setting has
been applied to the camera, "OK" will be displayed in
the "Results" field.
If the display reads "Authentication error", etc., the
camera connection or the setting may have failed.
[Back] button
Click the button after completing the settings.
The screen returns to the [Camera setup] tab.
Important:
• When the auto slow shutter is set, the frame rate
may drop. Noise or white dots (scratches) may
also be seen in image.
36
Set the black and white switchover of the camera [Day & Night (electrical)]
Select the day and night setting for each camera and transmit the information to the cameras to change the
camera settings.
Clicking the [Setup >] button for "Day & Night(electrical)" on the [Camera setup] tab will display the setup window.
[Day & Night(electrical)]
Select a method of how to switch between B/W
image and color image from the following.
Off: Color images will always be displayed.
Auto: Color images will be switched to B/W
images when the lighting intensity around the
camera becomes approx. 1.0 lx or less. It may
take time until color images are switched to
B/W images.
■ Camera Selection
Select the camera to which the setting of the "Day &
Night(electrical)" is to be sent.
Mark the checkbox of the camera to which the setup
information is to be transmitted.
[Transmission] button
Transmit the setting of the "Day & Night(electrical)" to
the camera.
Once transmission is completed and the setting has
been applied to the camera, "OK" will be displayed in
the "Results" field.
If the display reads "Authentication error", etc., the
camera connection or the setting may have failed.
[Back] button
Click the button after completing the settings.
The screen returns to the [Camera setup] tab.
37
Set up VMD alarm [VMD alarm]
Select the VMD function for each camera and transmit the information to the cameras to change the camera
settings.
Clicking the [Setup >] button for "VMD alarm" on the [Camera setup] tab will display the setup page.
[VMD alarm]
Select whether or not to use the VMD (VMD: Video
Motion Detection) alarm function when a change
(movement) is detected in the image. Refer to the
operating instructions of the camera in use for how to
configure the VMD alarm.
On: Detects alarms.
Off: Does not detect alarms.
[Detection sensitivity]
1 (low) - 15 (high)
■ Camera Selection
Select the camera to which the setting of the "VMD
alarm" is to be sent.
Mark the checkbox of the camera to which the setup
information is to be transmitted.
[Transmission] button
Transmit the setting of the "VMD alarm" to the camera.
Once transmission is completed and the setting has
been applied to the camera, "OK" will be displayed in
the "Results" field.
If the display reads "Authentication error", etc., the
camera connection or the setting may have failed.
[Back] button
Click the button after completing the settings.
The screen returns to the [Camera setup] tab.
38
Set up recording/events [REC & event]
The "REC & event" page has 3 tabs; the [Recording setup] tab, the [Event setup] tab and the [Advanced setup]
tab.
Recording setup tab [Recording setup]
Configure the settings relating to schedule recording. Set the day(s), time table(s), frame rate and image quality
for recording.
[Advanced >] button
The "Advanced schedule setup" page will be displayed. In addition to 3 schedule recordings, 3 event
recordings can be set up. The schedule settings can
be set up to 2 patterns. (☞ Page 40)
■ Recording setup (All cameras)
Set the recording frame rate and image quality. The
settings will be applied to all cameras.
[Frame rate]
Select the recording frame rate.
1 ips/ 3 ips/ 5 ips/ 10 ips/ 15 ips/ 30 ips
Default: 10 ips
■ Schedules
Recording will be performed according to the schedules set in advance. Select the day(s) of the week and
the time table(s).
Important:
• When the compression method of the camera is
MJPEG, 10 ips, 15 ips and 30 ips are unavailable.
The default is "5 ips".
[Days to record]
Select the day(s) of the week to record. Mark the
checkbox(es) of the day(s) of the week to record.
[Image quality]
Select the recording image quality.
NQ (Normal): Standard quality
FQ (Fine): High quality
SF (Super Fine): Super fine quality
XF (Extra Fine): Extra fine quality
Default: FQ
[Schedule to record]
3 time tables for schedule recording can be set up for
"[Time table 1]". The time bar indicates 24 hours in
steps of 15 minutes.
Click the desired position on the time bar to designate the start and end time. When the time is designated, the time bar turns red.
Note:
• If "XF" is selected when the compression method
of the camera is "MJPEG", "SF" will be set
instead of "XF".
Note:
• At the default, schedule recording has been set
for 24 hours on Time table 1. To delete the designated start and end time, right-click the timetable.
• The recording time table can be set by dragging
the start and end time on the time bar with the
mouse.
• Be sure to set so that there is no overlap between
the 3 time tables. When attempting to set the
same time as already set on another time bar, the
time immediately before or after the overlapping
time will be set.
39
[Referenced recording days]
Calculates and displays the total number of days for
which recording on the hard disk drives is available.
• When configured to perform recording in high resolution and high quality, recording may sometimes
not be performed at the specified rate. When
there may be possibility to fail recording at the
specified rate while using only Panasonic cameras, the confirmation window will be displayed.
Note:
• The referenced recording days will be calculated
based on the assumption that recording is started
on Monday.
• The HDD consumption for the event recording will
be excluded.
• If a camera manufactured by other than
Panasonic is used, the value of "Referenced
recording days" will not be displayed.
• "*" preceding an item indicates that the item has
been changed on the "Advanced recording setup"
page.
[Advanced >] button
The "Advanced recording setup" will be displayed.
Each camera can be set up separately for recording.
(☞ Page 42)
Configure the advanced settings for schedule recording
[Advanced schedule setup]
Up to 2 schedules can be set. Up to 3 of the schedule recording or event recording can be set for each schedule on each of Time table 1 and 2.
Clicking the [Advanced >] button in the "Schedules" field will open the "Advanced schedule setup" page.
[Event recording duration]
Set the recording duration in the event that an alarm
occurs.
2 s/ 5 s/ 10 s/ 20 s/ 30 s/ 1 min/ 2 min/ 3 min/
5 min/ 10 min/ 15 min
Manual: Recording will continue while receiving
an alarm input signal. Recording will be performed for at least 8 seconds.
Ext.: Alarm output will continue until the alarm
action is reset.
Default: 30 s
[Pre-event duration]
Set the recording duration before an alarm occurs.
0 s/ 5 s/ 10 s/ 15 s
Default: 0 s
■ Days to record
Select the actions to be taken on each day of the
week based on a time table. [●] indicates the
selected state, [b] the unselected state.
Time table1: Recording according to Time table 1.
Time table2: Recording according to Time table 2.
Off: Neither schedule nor event recording will take
place.
Note:
• The actual recording time may sometimes be
longer than the duration selected for this setting.
• Pre-event recording is not performed when "0 s"
is selected.
• When images are set to be recorded together with
audio, the audio may not be recorded at the
beginning of the pre-event recording.
• Actual duration for the pre-event recording will
approx. 5 seconds even if "10 s" or "15 s" is
selected for "Pre-event duration" when recording
with high resolution, high quality and high frame
rate.
■ Event recording
Set the recording duration in the event that an alarm
occurs and the recording duration before an alarm
occurs.
40
■ Schedule to record
3 schedule recordings and 3 event recordings each
can be set up on Time table 1 and 2. Within the same
time table, event recording has priority over schedule
recording.
[Schedule recording] (☞ Page 40)
[Event recording]
Set the time table for recording in the event that an
alarm occurs. Alarm that falls into a time table that
has not been set up will not trigger recording. Refer
to page 39 for how to configure the time bar.
[e-Mail]
To send an alarm e-mail when an event occurs, mark
this item.
[Panasonic alarm protocol]
Mark the checkbox of this item to automatically transmit information on an event that occurs to a PC using
the Panasonic alarm protocol.
[Previous] / [Next]
The schedule settings to be configured will be
switched over.
[Back] button
Click the button after completing the settings. The
screen returns to the [Recording setup] tab.
41
Set up recording for individual cameras [Advanced recording setup]
Set up items such as the image capture size, frame rate and image quality for individual cameras.
Clicking the [Advanced >] button on the [Recording setup] tab will open the advanced setup page.
[Rate] (Frame rate) (☞ Page 39)
Note:
• The 60 ips is available depending on the camera
model and settings of compression and image
capture size.
• The images of "60 ips" can be displayed in one
screen if a monitor compatible with 1920×1080 p/
60 Hz (720×480 p/60 Hz) is used as a main monitor. (The images on the main monitor other than
1-screen and on the sub monitor are displayed in
"30 ips".)
[Quality] (Image quality) (☞ page 39)
[Model]
The model number of the connected camera will be
displayed.
(Blank: Camera is not registered)
[Audio]
Select whether or not to record audio together with
images.
On: Audio will be recorded.
Off: Audio will not be recorded.
Default: Off
[Compression]
The compression method selected when registering
camera will be displayed.
[Schedule]
Select a schedule in which the desired recording to
be performed is included.
Schedule 1: Recording will be performed according to the settings for schedule 1.
Schedule 2: Recording will be performed according to the settings for schedule 2.
Default: Schedule1
[Image capture size]
Select a resolution for images to be recorded.
<When the aspect ratio is 4:3>
QVGA(320x240)/ VGA(640x480)/
SXVGA(1280x960)/ SVGA(800x600)/
QXGA(2048×1536)
<When the aspect ratio is 16:9>
QVGA(320x180)/ HVGAW(640x360)/
HD(1280x720)/ FHD(1920x1080)
Default: VGA(640x480)
[Referenced recording days] (☞ Page 40)
[Back] button
Click the button after completing the settings. The
screen returns to the [Recording setup] tab.
Important:
• The available image capture sizes may differ
depending on the model of the camera and the
compression method.
Note:
• When configured to perform recording in high resolution and high quality, recording may sometimes
not be performed at the specified rate.
• Depending on the model of the camera, the camera may reboot when the image capture size is
changed. The reboot will be detected as a communication error, but that is not a malfunction.
42
Configure event-related settings [Event setup] tab
Configure event-related settings such as the alarm output duration and buzzer duration.
[Auto reset time]
Set the time for automatically resetting the alarm
action.
2 s/ 5 s/ 10 s/ 20 s/ 30 s/ 1 min/ 3 min/ 5 min
Ext.: The alarm action will not automatically reset.
Refer to the "Cancel the alarm action" (☞ page
122) for further information about how to cancel the alarm action.
Default: Ext.
Note:
• If the time set for "Output duration" or "Buzzer
duration" is longer than that set for "Auto reset
time", the time set for "Auto reset time" will be
applied.
■ Alarm action
Configure alarm-related items such as alarm output
duration and alarm auto reset.
[Message display]
Select whether or not to display a message on a PC
connected to a network when an alarm occurs.
On: Display a message.
Off: Does not display a message.
Default: On
[Output duration]
Select the output duration for the alarm signal output
from the terminal on the recorder’s rear panel when
an alarm occurs. When "0 s" is selected, alarm signals will not be output.
0 s/ 2 s/ 5 s/ 10 s/ 20 s/ 30 s/ 1 min
Ext.: Alarm output will continue until the alarm
action is reset. Refer to the "Cancel the alarm
action" (☞ page 122) for further information
about how to cancel the alarm action.
Rec.: Output of the alarm signal will continue during event recording.
Default: 2 s
[Main monitor action]
While the main monitor is displaying the operation
window, select whether or not to switch to 1-screen
display in association with alarm occurrence.
On: Switch the monitor display in association with
alarm occurrence.
On(ACK/RESET): Switches the monitor display
linking with the alarm confirmation and resetting.
Off: Does not switch the monitor display.
Default: Off
[Buzzer duration]
Set the duration of the buzzer sound when an alarm
occurs. When "0 s" is selected, the buzzer will not
sound.
0 s/ 2 s/ 5 s/ 10 s/ 20 s/ 30 s/ 1 min
Ext.: The buzzer will keep on sounding until the
alarm action is reset. Refer to the "Cancel the
alarm action" (☞ page 122) for further information about how to cancel the alarm action.
Rec.: The buzzer will keep on sounding during
event recording.
Default: 2 s
Note:
• When "On(ACK/RESET)" is selected, the monitor
will not be switched and keeps displaying the
same camera images even when a different alarm
occurred while the main monitor action is enabled.
When the alarm reset signal is input to the
ALARM/CONTROL connector, the monitor
switches and shows the different camera images.
If multiple alarms occur while the main monitor
action is enabled, the camera number will be
memorized in sequence.
• The images from the camera selected for
"Recording camera" of "Advanced setup" are displayed on a 1-screen.
43
[Event type]
Displayed when "On" or "On(ACK/RESET)" is
selected for "Main monitor action".
A event type to be linked is selected.
• The main monitor action will not be activated
while recorded images are being played back or
the setup menu is being displayed.
• When the auto reset time have passed, it will
return to the previously displayed screen. (When
the mouse is operated while the main monitor
action is being taken, it will not return to the previously displayed screen.)
[Display]
Displayed when "On" or "On(ACK/RESET)" is
selected for "Main monitor action".
It selects the display in which the main monitor action
to be displayed.
Ctrl screen: Displays in the Ctrl screen.
Wide view: Displays in the Wide view.
Advanced event setup
Configure advanced settings for individual alarm types (terminal alarm, camera site alarm, command alarm, and
face matching alarm*). Clicking the [Advanced >] button for each item will open the respective "Advanced
setup".
*O
nly when the license of the additional business intelligence kit (WJ-NVF30, WJ-NVF30W) is registered
44
Set up terminal alarm [Advanced terminal alarm setup]
Configure the settings relating to the recording triggered by an alarm signal supplied to the ALARM/CONTROL
connector of the recorder from an external alarm device such as a door sensor.
Configure the necessary settings for each alarm input terminal of the ALARM/CONTROL connector on the rear
panel of the recorder.
Note:
• When many cameras are registered and "All" is
selected for "Recording camera", the start of
alarm recording may be delayed depending on the
cameras. It is recommended to perform pre-event
recording.
[Preset]
Select the camera preset position (001 to 256) to
which the camera is to be moved when an alarm signal is received. If "---" is selected, the camera will not
be moved to a preset position.
[Terminal output]
Choose whether or not to output an alarm signal from
the alarm output terminal of the ALARM/CONTROL
connector on the recorder’s rear panel when an alarm
signal is received.
On: Outputs alarm signals.
Off: Does not output alarm signals.
Default: On
■ Advanced terminal alarm setup
[Mode]
Select the action to be taken when an alarm signal is
supplied.
Recording & alarm action: Performs all event
actions according to the settings.
Recording only: Only recording, filing of event
logs, and moving the camera to a preset position will be performed.
Off: Only filing of event logs will be performed.
Default: Recording & alarm action
[Terminal input]
Select the terminal status for supplying an alarm signal to the alarm terminal.
N.O. (Normally Open): Signals will be supplied
when short-circuited.
N.C. (Normally Close): Signals will be supplied
when open-circuited.
Default: N.O.
[Alarm logs]
Determine whether or not to save the alarm logs.
Save: Logs will be saved.
Not save: Logs will not be saved.
Default: Save
[Back] button
Click the button after completing the settings. The
screen returns to the [Event setup] tab.
[Setup by terminal]
Set up individual terminals numbered from 1 to 9.
[Recording camera]
Select the camera for recording. When "Off" is
selected, recording will not be performed.
All: Applies all the registered cameras for recording.
Default: Camera number associated with the terminal
number
Note:
• Refer to the "Operate the camera" section (☞
page 112) for further information about the camera preset positions.
45
Set up camera site alarm [Advanced camera site alarm setup]
Set up the action to be taken when a Panasonic alarm protocol received from a camera triggers camera site
alarm.
Refer to the "Set up terminal alarm [Advanced terminal alarm setup]" section (☞ page 45) for further information
about the items available for "Advanced camera site alarm setup"; "Mode" and "Alarm logs", and also "Recording camera", "Preset" and "Terminal output" under "Setup by camera".
[Back] button
Click the button after completing the settings. The
screen returns to the [Event setup] tab.
Set up command alarm [Advanced command alarm setup]
Set up the action to be taken when a command alarm signal received from a PC that is connected via a network protocol triggers command alarm.
Refer to the "Set up terminal alarm [Advanced terminal alarm setup]" section (☞ page 45) for further information
about the items available for "Advanced command alarm setup"; "Mode" and "Alarm logs", and also "Recording camera", "Preset" and "Terminal output" under "Setup by command number".
[Back] button
Click the button after completing the settings. The
screen returns to the [Event setup] tab.
46
Set up face matching alarm [Advanced face matching alarm setup]
The settings for this function will become available by registering the license of the additional business intelligent kit (WJ-NVF30, WJ-NVF30W: optional). Configure the settings relating to the face matching alarm that will
be triggered when a previously registered face image is detected among the camera’s live images. Refer to
"About the face matching function" (☞ page 7) for details and cautions for use regarding the face matching
function. Refer to the operating instructions (PDF) of the Additional Business Intelligence Kit for further information about face matching alarm.
Refer to the operating instructions (PDF) of the Additional Business Intelligence Kit for further information about
how to configure the settings.
Register face images [Face registration]
Use this page to register new face images, to check already registered face images or to assign names to the
face images.
Refer to the operating instructions (PDF) of the Additional Business Intelligence Kit for further information about
how to configure the settings.
47
Configure the advanced settings for recording and events [Advanced setup]
Configure the special settings related to recording on this tab. Set up the recording mode, alarm disarm duration and Panasonic alarm port number (the port number for incoming site alarm).
[Recording mode]
Determine whether or not to stop all recording
actions. Set to "Off", primarily to stop access to the
HDD before turning off the power.
On: Performs recording.
Off: Stops all recording actions.
Default: On
Important:
• If "Off" is selected, be sure to return the setting to
"On" when resuming operation.
[Alarm disarm duration]
Set the period to suspend event actions for the case
that the same kind of event (terminal alarm, camera
site alarm, command alarm, face matching alarm)
occurs repeatedly at the same camera.
2 s/ 3 s/ 5 s/ 10 s
Default: 2 s
[Panasonic alarm port number]
Specify the number of the port to be used for receiving site alarm.
Default: 1818
Note:
• Enter the port number in five digits, right aligned.
(Example: When the port number is 80, enter
"00080".) The leading zeros are omitted here.
48
Configure the settings relating to monitors [Monitor]
The settings relating to the display of the main monitor or sub monitor connected to the recorder and the monitor of the PC connected via a network are configured on the setup menu - the "Advanced setup" menu - the
"Monitor" page.
The settings relating to image switching such as multiscreen display and sequence display of live images are
also configured on this page.
The "Monitor" page has 3 tabs; the [Main monitor] tab, the [Sub monitor] tab and the [Advanced setup] tab.
Set up the main monitor [Main monitor]
Perform settings relating to the main monitor display such as the display position of the camera title.
■ Camera title
[Display]
Determine whether or not to display the camera title
on the main monitor.
On: Displays the camera title.
Off: Does not display the camera title.
Default: On
[Position]
Select the position to display the camera title on
images.
L-Upper/ L-Lower/ R-Upper/ R-Lower
Default: R-Upper
[Camera title]
Enter a camera title to display for each camera using
the on-screen keyboard (☞ page 10). (Up to 14 characters)
Note:
• When using together with the date and time display to be set on the camera (☞ page 23) or OSD
(Display Title, ☞ page 25), adjust the position to
be displayed to not to overlap with them.
• The camera title configured on this setting will not
be embedded on recorded images.
49
Configure the settings relating to sub monitors [Sub monitor]
Set up the sub monitor by selecting the camera images to display, the image display duration, etc.
[Camera selection]
Select the cameras to be included in the sequence
display.
Mark the checkbox next to the desired camera. The
selected cameras will be displayed in numerical
order.
Note:
• When "4-screen live sequence", "9-screen live
sequence" or "16Screen" is selected for "Mode",
images from the first 4, 9 or 16 selected cameras
will be displayed regardless of the order of the
camera number.
■ Display settings
Set the display sequence for camera images (image
switching).
[Secret view]
Secret view is a function that causes the camera
image displayed on a 1-screen or the selected camera image on a multiscreen on the main monitor to be
displayed as a black screen on the sub monitor.
Determine whether or not to use secret view.
On: Enables the secret view function.
Off: Disables the secret view function.
Default: Off
[Mode]
Select how to display images from the cameras.
1-screen live sequence: Images from the cameras
will sequentially be switched and displayed on
1-screen.
4-screen live sequence: Images from the cameras
will sequentially be switched and displayed on
4-screen.
9-screen live sequence: Images from the cameras
will sequentially be swiitched and displayed on
9-screen.
Switch by alarm terminal input: Switches camera
1 to 9 to display images on 1-screen according to the signal input triggered by the terminal
alarms from terminal 1 to 9.
16Screen: Images from the cameras will be displayed on16-screen without switching the
screen.
Note:
• While "1-screen live sequence" is being performed, the secret view images will be skipped
(not displayed).
• The image on the sub monitor may momentarily
go black when images are switched on the main
monitor.
[Duration]
Set the interval (duration) for switching camera
images.
3 s/ 5 s/ 10 s
Default: 5 s
Note:
• The terminal status (N.O. or N.C.) for supplying an
alarm signal to the alarm terminal depends on the
settings for "Terminal input" of "Advanced terminal alarm setup" (☞ page 45).
50
Configure other settings relating to monitors
[Advanced setup]
Configure the audio output setting of the monitor, and select the screen pattern buttons to be displayed on
wide view.
[Stretch images to fit the areas in control screen
display]
Mark the checkbox to enlarge the vertical size of
images with the aspect ratio of 16:9 to fit into the
image display area on the control screen.
Note:
• When the images are enlarged with this setting,
camera control or VMD search may sometimes
not work properly in accordance with the specified coordinates or areas.
[Display images in 16:9 aspect ratio on the web
browser window]
Mark the checkbox to display the images in the web
browser window with the aspect ratio of 16:9.
■ Audio output camera
The camera channel whose audio is output from the
recorder will be fixed. To fix the camera channel,
select the camera whose audio is to be output from
the recorder.
Selected camera: Does not fix the camera channel (The recorder will output the audio of the
camera whose images are being displayed.)
Cam.1 - Cam.32: Fixes the camera channel (The
recorder will always output the audio of the
selected camera.)
Default: Selected camera
[Detect a power-off of the sub monitor]
When the sub monitor is to be used and the checkbox is marked, the error action will be taken if the sub
monitor is disconnected or the power is off.
[Stop receiving the live image if both HDMI monitors are not connected]
When the checkbox is marked, reception of live
image from the camera will automatically be stopped
and reduce the load of the network camera if both the
main monitor and the sub monitor (HDMI) are not
connected or if the power is off.
■ Select multiscreen buttons displaying on wide
view operation panel
The button whose checkbox is marked will be displayed on the wide view operation panel.
[Hide the camera title of the sub monitor]
When the checkbox is marked, the camera title will
not be displayed on the sub monitor.
■ Other setup
[Display live camera image in high resolution
(SXVGA/HD) on 1-screen display]
When the checkbox is marked, images from the camera on 1-screen will be displayed with SXVGA or HD.
Refer to the "readme.txt" for compatible cameras.
[Auto-hide the status display panel and the operation panel in wide view]
Mark the checkbox to display or hide the status display panel and the operation panel in wide view in
association with whether the mouse cursor is displayed or hidden.
51
Configure the settings relating to network [Network]
The settings relating to the network of the recorder are configured on the setup menu - the "Advanced setup"
menu - the "Network" page.
The "Network" page has [Basic], [e-Mail], [Panasonic alarm protocol] and [NTP/SNMP] tabs.
Configure the basic network settings [Basic]
The basic settings relating to the network can be configured on this tab.
Note:
• Enter the address octets and port numbers right-aligned. (Example: When the port number is 80, enter
"00080".) The leading zeros are omitted here.
■ Network Setup [Camera/PC port]
Configure the network settings of the recorder.
[Line speed]
Specify the line speed for data transmission.
Auto: Line speed will be applied automatically.
100M-Full: 100 Mbps full-duplex
100M-Half: 100 Mbps half-duplex
10M-Full: 10 Mbps full-duplex
10M-Half: 10 Mbps half-duplex
Default: Auto
[IP address]
The IP address of the recorder will be displayed.
To change the IP address, click the [D]/[C] button.
Default: 192.168.0.250
[Subnet mask]
Select the subnet mask in accordance with the
recorder’s network environment. Enter in the same
way as the IP address.
Default: 255.255.255.0
Important:
• When the setup menu is closed after changing the
line speed, the recorder will automatically reboot.
■ DNS Setup
The settings relating to DNS (Domain Name System)
can be configured on this tab.
[Default gateway]
Select the address for the default gateway in accordance with the recorder’s network environment. Enter
in the same way as the IP address.
Default: 192.168.0.1
[DNS]
Determine whether or not to use the DNS.
Off:Does not use the DNS.
Manual: When using DNS, it is possible to search
IP addresses by host name.
Default: Off
52
When using the "Viewnetcam.com"
service
[Primary server address]
[Secondary server address]
When the DNS is used, select the IP addresses for
the primary and secondary DNS server. Enter in the
same way as the IP address.
Default: 0.0.0.0
[Domain name]
Enter the domain name of the recorder. The first character of the domain name should be an alphabetical
character.
Enter 3 to 63 alphanumeric characters including
hyphens (-) and periods (.).
Default: localdomain
[Personal(Product) URL]
The URL of the camera registered for "Viewnetcam.
com".
When accessing the menu again after performing the
initial settings, the temporary URL will be displayed.
[Your account link]
The URL of the registration window for the "Viewnetcam.com" service will be displayed.
Register the information in the registration window to
enroll in the "Viewnetcam.com" service.
■ DDNS Setup
Select the DDNS service to determine whether or not
to use DDNS.
Off: Does not use the DDNS function.
Viewnetcam.com: Uses the "Viewnetcam.com"
service.
Dynamic DNS update: Uses Dynamic DNS
Update (RFC2136 compliant).
Default: Off
[Access interval]
Select the interval to access the "Viewnetcam.com"
service server to check the IP address and the host
name from the following.
10 min/ 20 min/ 30 min/ 40 min/ 50 min/ 1 h
Default: 1 h
Important:
• If using a third party DDNS service, it is necessary
to set the port forwarding for the router before
use.
• About Dynamic DNS Update (RFC2136 compliant)
Operation not using "Viewnetcam.com" service
but using a third party DDNS service is not guaranteed. We are not responsible for any troubles or
accidents on the circumstances where the camera is used arising out of such services.
If using a third party DDNS service (not using the
"Viewnetcam.com"), refer to the DDNS service
provider for its configuration.
Note:
• "Viewnetcam.com" is a Dynamic DNS service
designed for use with Panasonic Network
Cameras. Refer to the "Viewnetcam.com" website
(http://www.viewnetcam.com/) for further information about the service.
53
Procedure to register information for the "Viewnetcam.com"
service
When using "Dynamic DNS Update"
Step 1
Access the URL displayed on "Your account link"
from the PC connected to the Internet.
→→ The registration window for "Viewnetcam.com"
will be displayed.
[Host name]
Enter the host name to be used for the Dynamic DNS
Update service.
Available number of characters: 250 characters
Enter in the form of "(host name). (domain name)".
Default: NWDR
Step 2
Register the information for "Viewnetcam.com" by
following the instructions of the wizard.
→→ When the registration window is not displayed,
check that the PC is being connected to the Internet, and click the reload button of the browser.
When the message is displayed to inform that the
registration is successful, close the registration
window.
The URL selected at the time of registration can
be used for recorder access. However, this URL
is unavailablewhen accessing the recorder from
the PC connected to the same network (LAN).
Note:
• Refer to the network administrator for further
information about the available host names.
[Access interval]
Select the interval to access the Dynamic DNS
Update service server to check the IP address and
the host name from the following.
10 min/ 20 min/ 30 min/ 40 min/ 50 min/ 1 h/ 6 h/
24 h
Default: 1 h
Note:
• When the registration for the "Viewnetcam.com"
service is completed, the URL of the recorder registered for "Personal(Product) URL". It may take
up to around 30 minutes until the URL of the registered recorder is validated.
• To cancel the enrollment in the "Viewnetcam.
com" service, access the "Viewnetcam.com"
website (http://www.viewnetcam.com/) later.
• It is possible to check the information registered
for the "Viewnetcam.com" service by accessing
the URL displayed beside "Your account link".
When the URL is not displayed, check that the
recorder is being connected to the Internet, exit
the menu, and display this tab again to check the
information.
• If access often fails due to the change in the global address of router, set a smaller value for
"Access interval".
■ Other setup
Click the [Advanced >] button to set bandwidth control, HTTP port number, and FTP port number.
The setup menu (advanced) will be displayed.
[HTTP port number]
Specify the HTTP port number to be used to send
images from the recorder.
It is unnecessary to change it for normal use.
1 - 65535
Default: 80
54
Note:
• Depending on the network settings, network communication may not be established if the HTTP
port number has been changed. In this case, refer
to the administrator of each network.
• The following numbers and the FTP port number
are unavailable for the HTTP port number.
20, 21, 23, 25, 42, 53, 67, 68, 69, 79, 105, 110,
123, 161, 162, 546, 547, 995, 10001, 10002,
10003, 10004, 10005, 10006, 10007
[Attach the alteration detection code (FTP)]
Determine whether or not to attach the alteration
detection code to the recorded images to be downloaded from an FTP server.
Off: Does not attach the alteration detection code.
On: Attaches the alteration detection code.
Default: Off
■ Network Setup [PC port]
Configure the network settings for the PC port of this
product.
[FTP port number]
Designate the FTP port number of the recorder.
It is unnecessary to change it for normal use.
1 - 65535
Default: 21
[IP address]
Default: 0.0.0.0
[Subnet mask]
Default: 0.0.0.0
Note:
• The following numbers and the HTTP port number
are unavailable for the FTP port number.
20, 23, 25, 42, 53, 67, 68, 69, 79, 80, 105, 110,
123, 161, 162, 546, 547, 995, 10001, 10002,
10003, 10004, 10005, 10006, 10007
[Back] button
Click this button after completing the settings.
Configure the settings relating to the mail notification [e-Mail]
The settings of alarm mail notice, the settings of error report mail (☞ page 179) and the settings to use the mail
functions can be configured on this tab.
[SMTP port number]
Enter the port number of the SMTP server.
1 - 65535
Default: 25
[POP server address]
Enter an IP address or name of the POP server to be
used for POP before SMTP authentication. The name
of the POP server is available only when "Manual" is
selected for "DNS" on the [Basic] tab accessed from
the "Advanced setup" menu - the "Network" page of
the setup menu. Enter up to 255 alphanumeric characters including hyphens (-) and periods (.).
[SMTP server address]
Enter an IP address or a name of the SMTP server to
send e-mails. The name of the SMTP server is available only when "Manual" is selected for "DNS" on the
[Basic] tab accessed from the "Advanced setup"
menu - the "Network" page of the setup menu. Enter
up to 255 alphanumeric characters including hyphens
(-) and periods (.).
[Authentic method]
Select the authentication method to send e-mails
from the following.
None/ POP before SMTP/ SMTP
Default: None
55
[Authentic method - User name]
Enter the user name to be required for the authentication. Enter up to 32 alphanumeric characters excluding "&" listed in the description of "Note".
[Authentic method - Password]
Enter the password to be required together with the
user name for the authentication. Enter up to 32
alphanumeric characters excluding "&" listed in the
description of "Note". An entered character for the
password will be displayed as "*" or "•".
Note:
• Available characters are as follows.
ABCDEFGHIJKLMNOPQRSTUVWX
YZabcdefghijklmnopqrstuvwxyz
0 1 2 3 4 5 6 7 8 9 ! # $ % &‘ ( ) * + ,- . / : ; < = > ?
@[¥]^_`{|}~
[Sender’s address]
Enter the mail address of a sender. Entered mail
addresses will be displayed in the "From" (sender)
line. Enter up to 127 alphanumeric characters including hyphens (-), periods (.), @, and _.
Default: NWDR
[SSL]
Alarm mails or error report mails will be encrypted
and transmitted. When "On" is selected, "SMTP" will
be set for the authentication method. Set the user
name and password for the authentication.
On: Uses the SSL.
Off: Does not use the SSL.
Default: Off
[Destination address - Address1 - Address4]
Enter the mail addresses of the recipients of the alarm
mail and the warning mail (☞ page 179). Enter up to
255 alphanumeric characters including hyphens (-),
periods (.), @, and _.
Check the desired mail type (Warning/Alarm) to be
sent.
Up to 4 destination addresses can be registered.
56
Configure the Panasonic alarm protocol settings
[Panasonic alarm protocol]
The settings to notify the PC of the event and error information when an event or an error occurs can be configured on this tab.
To display the event and error information, it is necessary that the software (option) is installed on the recipient
PC.
Refer to the "readme.txt" on the provided CD-ROM for details on the software.
[Port number(to PC)]
Enter the port number of the recipient PCs.
It is usually not necessary change the default.
Default: 1818
[Retry]
Set the number of retry attempts for the transmission
to the PC.
0 - 8 (times) (In steps of times)
Default: 2
Note:
• If the transmission to the PC fails, increase the
number of retry attempts.
[Destination address - Address1 - Address8]
Enter the addresses of the recipient PCs. Enter the IP
address or host name for "Address1" - "Address8".
The host name is available only when "Manual" is
selected for "DNS" on the [Basic] tab accessed from
the "Advanced setup" menu - the "Network" page of
the setup menu.
Up to 8 destination addresses can be registered.
Enter up to 255 alphanumeric characters including
hyphens (-) and periods (.).
57
Configure the settings relating to NTP/SNMP synchronization
[NTP/SNMP]
The settings to synchronize the system clock with the NTP (Network Time Protocol) and SNMP (Simple Network Management Protocol) server can be configured on this tab.
Note:
• Entering "http://" is not necessary if the server
name is entered.
■ SNMP setup
Set this item to check the status of the recorder by
connecting to the SNMP server.
Enter the items using the alphanumeric characters
listed in "Note" (☞ page 56) and symbols.
[Community]
Enter a name used for SNMP authentication (up to 32
alphanumeric characters).
■ NTP setup
[Time adjustment]
Select "On" or "Off" to determine whether or not to
adjust the time according to the NTP server.
On:Adjusts the time automatically.
Off:Does not adjust the time automatically.
Default: Off
[System name]
Enter a name (up to 255 alphanumeric characters) for
management of the recorder by the SNMP system.
Example: No.1
[Location]
Enter a location where the recorder is installed. (up to
255 alphanumeric characters)
Example: 2F
Important:
• Inaccuracy of time stamp on recorded images due
to inaccurate clock adjustment of this product
may cause operational problems. When the system operation requires an accurate time setting,
use the NTP auto time adjustment using an NTP
server.
[Contact]
Enter the contact information such as a mail address
of an administrator of this recorder. (up to 255 alphanumeric characters)
[Primary server address]
[Secondary server address]
Enter the address or name of the NTP server when
adjusting the time using the NTP server.
The name of the NTP server is available only when
"Manual" is selected for "DNS" on the [Basic] tab
accessed from the "Advanced setup" menu - the
"Network" page of the setup menu.
Enter up to 255 alphanumeric characters including
hyphens (-) and periods (.).
Important:
• It is possible to run the recorder as an NTP server
to be referred by the cameras. In this case, set the
port number of the camera to "123". Refer to the
operating instructions of the connected camera
for information on how to configure the settings of
the camera.
58
Configure the settings relating to the user
management [User management]
The settings such as user authentication On/Off, administrator registration and operation levels can be configured on the setup menu - the "Advanced setup" menu - the "User management" page.
The "User management" page has [Basic], [User registration] and [Administrator setup] tabs.
Configure the basic settings relating to user management
[Basic]
The settings relating to login when using the mouse, user authentication for network operations, and user levels
can be configured on this tab.
[Auto logout]
Set the time to wait until auto logout when no operations are made while displaying live images.
Off: Does not logout to the recorder automatically.
After 1 min/ After 3 mins/ After 5 mins/
After 30 mins
Default: Off
Note:
• When "On" is selected for "Auto login", the user
will not be logged out automatically even if other
values than "Off" is selected for "Auto logout".
When logout is performed (☞ page 101), login will
be automatically performed by the user registered
in "Auto login user".
• To prevent inappropriate operations, it is recommended to select settings other than "Off" for
"Auto logout".
■ Operation
Configure the settings to enable auto login when turning on the recorder.
[Auto login]
Select "On" or "Off" to determine whether or not to
activate the auto login function.
On: Logs in to the recorder automatically.
Off: Does not log in to the recorder automatically.
Login is required when operating the recorder
from the logout status.
Default: On
■ Network
Determine whether or not to require user authentication for operating the recorder from a PC.
[User authentication]
Select "On" or "Off" to determine whether or not to
authenticate the user.
On: Login followed by user authentication
Off: Login without user authentication
Default: On
[Auto login user]
When "On" is selected for "Auto login", the users registered as auto login users in this setting can log in to
the recorder automatically. An auto login user should
be one of the users registered in the recorder.
Default: ADMIN
■ User level settings
Set up the operations allowed at each user level
(administrator/manager/operator/viewer) by marking
the respective checkboxes. To stop a user from operating certain functions, do not check the respective
function. The setting for the administrator cannot be
changed. The system can also be set up to allow only
live operation (image switching) after logout.
[Quick login]
Select "On" or "Off" to determine whether to enter or
select the user name.
Off: User name needs to be entered.
On: Log in by selecting a displayed user name.
Default: Off
59
Note:
• Only a user logged in as "Administrator/Manager"
can change the user level settings.
At the default, operations allowed at the user level
are as follows:
Administrator/Manager: Possible to perform all
the operations (Administrators)
Operator: Possible to perform a part of the settings of the recorder and alarm reset (Head of
operators)
Viewer: Possible to monitor or play the images
(Operators)
* Administrators and managers can perform all
operations. The difference between an administrator and a manager is that an administrator
has priority over a manager; if both perform the
same operation at the same time, that of the
administrator will have priority.
• The screenshot shows the default.
• When a user tries to operate a function that is not
checked (restricted function), the login window
may sometimes be displayed to prompt a user
with the required user level to log in.
Restrictable operations
It is possible to allow or restrict the following operations for each user.
Operation
Description
Camera operation
Camera images displayed on the main monitor can be changed.
Camera control
Camera control such as panning and tilting can be performed.
Search and playback
Recorded images can be played back and searched by VMD search.
Copy
Recorded images can be copied to storage media such as an SD memory
card.
Alarm reset
An alarm action can be canceled.
Error reset
An error action can be canceled.
Setup
Setup menus can be displayed and the settings can be configured.
Camera image display
The image and audio data of all cameras can be displayed/output. To set
up the display of camera images, click the [Setup >] button. (☞ Set up the
user level for individual cameras)
* It is recommended to restrict "Setup" to the administrator.
60
Set up the user level for individual cameras
Select the cameras allowed for operation by each user level (operator/viewer/logged out) by marking the
respective checkboxes.
Remove the check mark from any cameras not to be displayed. The setting for the administrator/manager cannot be changed.
[Back] button
Click the button after completing the settings. The
screen returns to the [Basic] tab.
Register, edit or delete the user information
[User registration]
Use this tab to register, edit or delete user names and passwords.
[User name]
Enter the user name using the on-screen keyboard
(☞ page 10). Enter 5 to 14 alphanumeric characters
for the name.
[Password]
Enter the user password using the on-screen keyboard (☞ page 10). Enter 5 to 8 alphanumeric characters for the password. The registered password will
be displayed as "*****" regardless of what is entered.
Important:
• For enhanced security, change the password on a
regular basis.
■ Register new user
Register user information such as a user name, password and operation level.
The maximum number of users that can be registered
is 16.
61
[Level]
Display the operation level of a user.
Operable functions can be set on the [Basic] tab
(☞ page 59).
Manager/ Operator/ Viewer
*A
dministrator and manager both have the same
level, but the administrator has the higher priority.
Default: Operator
[Delete] button
Deletes the selected user.
[Default screen]
Select a startup screen to be displayed after login.
Cam.1 - Cam.32: Displays an image from the
selected camera channel on a 1-screen.
4Screen-A/ 4Screen-B/ 4Screen-C/ 4Screen-D/
4Screen-E/ 4Screen-F/ 4Screen-G/ 4Screen-H/
9Screen/ 16Screen-A/ 16Screen-B/
1-screen(Wide view)/ 4Screen(Wide view)/
9Screen(Wide view)/ 16Screen(Wide view)
(Refer to the "Operation window" section (☞ page
96) for further information about each setting
value.)
Default: 4Screen-A
Note:
• Available settings for "Default screen" varies
depending on the number of the cameras covered
by the licenses.
• When a monitor that is not selected in the "Select
multiscreen buttons displaying on wide view operation panel" option (under "Advanced setup"
under "Monitor") is set as the default screen,
"4Screen-A" will be displayed as the default
screen.
• When "9Screen", "16Screen" or any of wide view
screen is selected, the default screen on the web
browser of the PC will be set to 4-screen with live
images from camera 1 to 4.
[Registration] button
Select this button to newly register the edited user
information.
■ Edit user information
Edit or delete the user information that has been registered.
Select the user whose user information is to be edited
or deleted. To edit items, proceed as for new user
registration.
[Edit] button
Registers the edited user information.
62
Edit the administrator information [Administrator setup]
The administrator information relating to the password and default screen, etc. can be registered on this tab.
Important:
• For enhanced security, make sure to change the
administrator name and password from the
default. Change the password periodically.
[Password (Retype)]
Enter the password that has been set for "Password"
again for confirmation.
[Level]
Display the operation level of an administrator. It is
impossible to change the setting value for an administrator. "Administrator" has been set for the administrator.
[Administrator name]
Enter the administrator name using the on-screen
keyboard (☞ page 10). Enter 5 to 14 alphanumeric
characters for the administrator name.
Default: ADMIN
[Default screen]
Select a startup screen to be displayed after login.
(☞ Page 62)
[Edit] button
Register the edited administrator information.
[Password]
Enter the administrator password using the on-screen
keyboard (☞ page 10). Enter 5 to 8 alphanumeric
characters for the password.
The registered password will be displayed as "*****"
regardless of what is entered.
Default: 12345
63
Configure the settings relating to maintenance [Maintenance]
The version of the recorder and disk information is displayed, and the settings relating to hard disk drives can
be configured on the setup menu - the "Advanced setup" menu - the "Maintenance" page. It is also possible to
initialize the setup data of the setup pages, check the system logs and register the license on this page.
The "Maintenance" page has [System information], [HDD information] and [System management] tabs.
Check the system information such as the version
[System information]
The version (of the software and hardware), serial number, network information (MAC address, IP address, line
speed), temperature inside the recorder and highest temperature inside the recorder, etc. are displayed on this
tab.
Note:
• System information will not be updated while the
"Maintenance" page is being displayed.
• Besides the setting value for "Line speed", the
actual line speed will be displayed in "( )".
Confirm the hard disk drive information [HDD information]
Capacity of the hard disk drive and the running time of this product or the extension unit (EXT1, EXT2), time
range of the recorded images, etc. will be displayed.
Note:
• HDD information will not be updated while the
"Maintenance" page is being displayed.
[Operation mode of HDD]
Operation mode of HDD will be displayed.
Refer to page 73 for further information.
Note:
• The progress rate will be displayed during mirroring recovery.
[Capacity]
Displays the capacities of the hard disk drives.
[Operation]
Displays the operating time of the hard disk drives.
64
[Status]
Displays the statuses of the hard disk drives.
Normal: Hard disk drives that are operating normally
Playback-only: Hard disk drives for playback use
only (Recording is unavailable.)
Removed: Hard disk drives that are excluded
from operation due to fault
Error: Hard disk drives that have become faulty
during the format process
Blank: No HDD connected
Added: HDD cannot be used until it is formatted/
installed (Displayed only when in the mirroring
mode)
N/A: HDD that is not available with the currently
used HDD operation mode.
[Recorded time range]
Displays the time range of the images recorded on
the hard disk drives.
Note:
• When using in RAID5/RAID6 mode, "Capacity",
"Status" and "Recorded time range" will be displayed in the "HDD1" section of each extension
unit. Running time will be displayed for each hard
disk drive respectively.
[Overwrite cycle]
Calculates and indicates the overwriting cycle of the
hard disk drives, based on the past recording performance (the date & time of the oldest recorded
data, the current date & time and the capacity of the
hard disk drive).
Note:
• While overwriting recording is being performed,
the overwriting cycle will be calculated based on
the date & time of the oldest recorded data and
that of the newest recorded data.
• The more often the recording was performed in
the past, the more accurate the calculation of
overwriting cycle will be.
• When the recording conditions are changed or
when data is automatically deleted, the overwriting cycle will not be indicated accurately.
65
Configure the settings and operations relating to the system
[System management]
The settings relating to the actions at an error occurrence and auto data deletion from hard disk drives can be
configured on this tab. It is also possible to display the logs on this page. In addition, general maintenance,
such as license registration, setting initialization and firmware upgrade, can be performed on this tab.
[Network link down detection]
Select "On" or "Off" to determine whether or not to
detect the network disconnection on the network port
of the recorder.
On: Detects the network disconnection.
Off: Does not detect the network disconnection.
Default: Off
[HDD hour meter warning]
If the operation time of a hard disk drive reaches a
specified level, a warning will be performed. When
"Off" is selected, warning will not be performed.
Off/ 10000h/ 20000h/ 30000h/ 40000h/ 50000h
Default: 20000 h
■ System setup
[Error output duration]
Select the duration to output a signal to notify the
external devices of an error (HDD error camera error,
recorder error, recording error or network error).
When "0 s" is selected, the signal is not output.
0 s/ 2 s/ 5 s/ 10 s/ 20 s/ 30 s/ 1 min
Ext.: When "Ext." is selected, the signal will keep
on being output until the error is reset.
Default: 2 s
[Auto data delete]
Select to determine how many days should have
passed from the recorded day to delete data automatically from the hard disk drive.
Off/ 1 day/ 2 days/ 3 days/ 4 days/ 5 days/ 6
days/ 7 days/ 8 days/ 9 days/ 10 days/ 14 days/
30 days/ 45 days/ 60 days/ 90 days/ 120 days/
150 days/ 180 days
Default: Off (Does not delete the data automatically.)
Note:
• Refer to the "Cancel the error action" section (☞
page 122) for how to reset the error.
[Auto camera time synchronization]
When a date changes, the clock of the cameras will
be synchronized with the clock of this product.
On: Synchronized
Off: Not synchronized
Default: On
[Error buzzer duration]
Configure the settings to sound a buzzer at an error
occurrence. When "0 s" is selected, buzzer will not
sound.
0 s/ 2 s/ 5 s/ 10 s/ 20 s/ 30 s/ 1 min
Ext.: When "Ext." is selected, the buzzer that
started sounding at an error occurrence will
keep on sounding until the buzzer is stopped.
Default: 2 s
Note:
• Refer to the "Stop buzzer beeping" (☞ page 121)
for further information about how to stop buzzer
beeping.
66
■ Logs
The following logs can be checked.
• Access log: Logs of accessing the recorder
• Network log: Logs of network errors
About the network log
The network error logs (occurrence date & time and
error details) will be displayed in list form.
Up to 100 logs are saved. When more than 100 logs
are filed, the older logs will be overwritten by the
newer logs. In this case, the oldest log is the first to
be overwritten. Refer to page 91 for further information about the error logs.
To check each log, click the [View >] button.
Note:
• Information will not be updated while logs are
being displayed.
■ Functions for maintenance
License is added to operate the recorder. In addition,
settings and operations are also performed for maintenance of the recorder.
Note:
• When using an unformatted SDHC/SD memory
card or an SDHC/SD memory card formatted with
a PC or another device, it is necessary to format it
with this recorder. Refer to page 138 for how to
format.
About the access log
The date & time when logged in/out for the recorder,
the user name, and the IP address will be displayed.
Up to 100 logs are saved.
When more than 100 logs are filed, the older logs will
be overwritten by the newer logs. In this case, the
oldest log is the first to be overwritten.
**LOGIN/**LOGOUT: A user has logged in/out the
recorder.
CONFIG LOGIN/CONFIG LOGOUT: A host has
logged in/out the "HDD management" page.
UPDATE SETTINGS: Settings have been
changed.
POWER ON: The power of the recorder has been
turned on.
POWER ON(UPDATE): The recorder is rebooted
after the software is updated.
POWER ON(RESTART SWITCH): The recorder is
rebooted by pushing the Restart button.
BEFORE TIME CHANGE MANUALLY: Before the
system clock has been changed
AFTER TIME CHANGE MANUALLY: Just after the
system clock has been changed
BEFORE TIME CHANGE BY NTP: Before the system clock has been changed by NTP
AFTER TIME CHANGE BY NTP: Just after the
system clock has been changed by NTP
** indicates a user name or an IP address.
[Registration of license]
To use the recorder, it is necessary to obtain the
"Registration Key" from the key management system
and to register the license. Up to 32 cameras can be
added by registering the license of the additional
camera kit.
Contact your dealer for additional cameras. Clicking
the [Setup >] button will open the registration window
to register the license. (☞ Page 68)
[Reset all settings]
Initializes the setting data. Click the [Execute >] button to display the confirmation window for starting
initialization.
Note:
• The following setting items will not be reset to the
default or loaded.
• HTTP port number
• FTP port number
• Network port
• DNS Setup
• License number
[Save data (to SD card)]
Saves the setting data on the SD memory card. Click
the [Execute >] button to display the confirmation
window to start saving.
67
[Load data (from SD card)]
Loads the setting data saved in an SD memory card
on the recorder. Click the [Execute >] button to display confirmation window to start loading.
[Firmware update]
Updates the software saved on an SD memory card
to the recorder to upgrade the firmware.
Click the [Execute >] button to display the confirmation window to start initializing.
Only an administrator can execute the firmware
update.
[Save face data (to SD card)]
Saves the face matching data on the SD memory
card. Click the [Execute >] button to display the confirmation window to start saving. (When the license of
the additional business intelligence kit is registered)
Note:
• Contact your dealer for further information about
the firmware update.
[Load face data (from SD card)]
Loads the face matching data saved in an SD memory card on the recorder. Click the [Execute >] button
to display confirmation window to start loading.
(When the license of the additional business intelligence kit is registered)
[Other]
The page to save the maintenance data will open.
(☞ Page 70)
Register the licenses for the recorder and the Additional
Camera Kit [Registration Key]
The licenses to operate the recorder and activate the extra functions are registered. The license that covers 9
cameras to use is provided with this product at the point of purchase. By registering licenses of the additional
camera kit, number of the available cameras will increase to 16, 24 or 32.
To register the options, the "Registration Key" that can be obtained from the Key Management System is
required. Refer to the provided "Activation Key Card" to obtain the "Registration Key" of this product. Refer to
the "Activation Key Card" of the additional camera kit (WJ-NVE30, WJ-NVE30W) for how to obtain the "Registration Key" to add cameras.
Important:
• After registering the "Registration Key" for the recorder or that for the Additional Business Intelligence Kit,
be sure to click the [Restart] button to reboot the recorder. The license will not be effective before the
recorder is rebooted.
• When the Registration Key of this product is registered
• When the registration key of the additional camera kit or any other additional/extension kit is registered
• The added cameras shall be registered on "Easy start" (☞ page 12) . Each setting value is the default.
Configure each setting according to your needs.
[Entry information of the key management system]
This is the ID number required to obtain the "Registration Key". The Activation Key Card provided with
the recorder describes how to access the key management system.
[Registration of license]
Register the "Registration Key" to operate the
recorder and activate the extra functions.
68
[Product - Registration Key]
Enter the "Registration Key" obtained from the key
management system. When the [Registration >] button next to the entry field is clicked, the registration
window to register the license. When using the
recorder for the first time, be sure to register the
"Registration Key".
[Back] button
By clicking this button when license is not activated
or when only "Dealer’s information" is changed, the
display will return to the [System management] tab.
[Additional camera - Registration Key1-2]
(WJ-NV300K)
[Additional camera - Registration Key1-3]
(WJ-NV300K/G)
To add cameras, enter the registration key of the
additional camera kit. Entering "Registration Key1",
"Registration Key2" and "Registration Key3" will
increase the number of the available cameras to 16,
24 and 32 respectively. Refer to the "Activation Key
Card" of the additional camera kit for how to obtain
the "Registration Key" to add cameras. When the
[Registration] button next to the entry field is clicked,
the registration window to register the license.
[Additional business intelligence - Registration
Key]
When activating the extra functions, enter "Registration Key". Refer to the operating instructions (PDF) of
the Additional Business Intelligence Kit for further
information.
[Optional extension for Fisheye network camera]
When activating the extra functions, enter "Registration Key". Read "Extensive Options.pdf" on the CDROM provided with this product.
Note:
• When the license registration is completed, click
the [Restart] button. The recorder will reboot and
the registered license will become effective.
[Dealer’s information]
Up to two pieces of information, such as a dealer
name and its telephone number, can be registered
using the on-screen keyboard (☞ page 10). Registration is possible for a maximum of 32 characters for
each entry field.
Click the [Restart] button after entering the items. The
recorder will reboot, and the settings will be applied.
69
Save logs onto the SD memory card/correct the clock of the cameras [Other]
All logs can be saved onto the SD memory card, and the time and date setting on the camera can be synchronized with this product.
Important:
• Since this setting will change the settings of all
cameras, please take an extra caution in case that
the settings of each camera are customized individually.
[Save maintenance data (to SD card)]
Save all logs onto the SD memory card.
Saving of the logs will start by executing on the confirmation window displayed by clicking the
[Execute >] button.
Note:
• When using an unformatted SDHC/SD memory
card or an SDHC/SD memory card formatted with
a PC or another device, it is necessary to format it
with this recorder. Refer to page 138 for how to
format.
• If operations are performed soon after an SD
memory card is inserted, it may take time to recognize the SD memory card. It also may take time
if the capacity size of the inserted SD memory
card is large.
[Synchronize the camera's time with this unit]
Time and date of all the registered cameras will be
synchronized with the clock of this product. The time
and date synchronization will be executed when the
setting is completed after executing on the confirmation window displayed by clicking the [Execute >]
button.
[Synchronize the camera's settings with this unit]
Reconfigure the settings of all the registered cameras
based on the setting information of this product. The
time and date synchronization will be executed when
the setting is completed after executing on the confirmation window displayed by clicking the [Execute >]
button.
70
Manage the hard disk drives [HDD management]
The operations relating to the hard disk drives such as checking the capacity of each recording area and formatting the drives can be performed on the "HDD management" page of the setup menu - the "Advanced
setup" menu.
Important:
• All other operations such as recording and playback will stop when the "HDD management" page is displayed.
• Displaying the "HDD management" page forcibly logs out any other users currently logged in to the
recorder.
How to display the "HDD management" page
Click the [Operation] button to return from the "HDD
management" page to the operational screen.
Step 1
Click the [HDD management] button of the setup
menu - the "Advanced setup" menu.
→→ The window with the administrator name and
password entry fields will be displayed. The window is also displayed when a user has already
logged in as the administrator.
Step 2
Click the [OK] button after entering "Administrator
name" and "Password" of an administrator.
→→ The "HDD management" page will be displayed.
71
Check the hard disk drive information [HDD information]
The capacities, operation time and statuses of the hard disk drives are displayed.
Refer to the setup menu - the "Advanced setup" menu - the "Maintenance" page - the [HDD information] tab for
further information about the items displayed on the [HDD information] tab. (☞ Page 64)
Format the hard disk drives [Format HDD]
Hard disk drives are formatted. It is necessary to initialize the HDD after replacing the HDD.
Important:
• When a hard disk drive is formatted, all the recorded images will be erased.
Step 1
Click the [Execute >] button for "Format HDD" on the
[General] tab - [HDD management] page.
→→ The window to format hard disk drives will be displayed.
Step 2
Check the hard disk drives to format in the "Format"
field, and click the [Start] button.
When "OK" is displayed on the "Results" field, click
the [Back] button.
When "Error" is displayed, format the hard disk drives
again.
Step 2
72
About the removal process and the link process of hard disk
drives
When replacing hard disk drives, it is necessary to perform the removal process/ the link process.
Be sure to consult the dealer for the removal, installation, and the related process of hard disk drives.
Important:
• When the link process is performed, the data will be erased.
About the change of the HDD operational mode
About the HDD operational mode
Single mode: Mirroring mode:
RAID5 mode:
RAID6 mode:
Images and audio from the cameras will be recorded on the HDD of this product in
order.
The same images and audio from the cameras will be recorded on the 2 HDDs of this
product. When one of the 2 HDDs is replaced with a new one, it is possible to copy
data on the other HDD to the replaced HDD. The HDDs of the extension unit are not
available for this mode.
Even if one of the HDDs becomes faulty, recorded images can be recovered using the
other remaining HDDs in this mode. The HDDs of this product are not available. 3 or
more HDDs are required in the extension unit.
Even if 2 of the HDDs become faulty, recorded images can be recovered using the
other remaining HDDs in this mode. The HDDs of this product are not available. 4 or
more HDDs are required in the extension unit.
Change the operation mode of HDD [Change the operation mode of HDD]
Step 1
Step 2
Click the [Execute >] button on the "Change the operation mode of HDD" section.
→→ The "Change the operation mode of HDD" window will be displayed.
Select the desired operation mode of HDD, and then
click the [Start] button.
Important:
• When the operational mode of HDD is changed
(except the case that the operational mode is
changed from the mirroring mode to the single
mode), all data on the HDDs will be erased.
• The capacity of the HDD in the mirroring mode will
become almost half if compared with the single
mode.
• When the operational mode of HDD is changed
from the mirroring mode to the single mode, the
status of the HDD will turn to "Playback-only".
• When "Operation mode of HDD" is changed, the
recorder will be automatically rebooted.
Step 2
73
Note:
• When one of the HDDs is replaced in the mirroring
mode, "Add" will be displayed in the status information section of "HDD information". The newly
replaced HDD will start working in the mirroring
mode when "Add HDD" is executed. In this case,
all data on the replaced HDD will be erased.
• It is not possible to change the mode directly from
"Mirroring mode" to "RAID5 mode" or "RAID6
mode" (and vice versa). When changing the mode,
make sure to change it to "Single mode" once,
then change it to the desired one.
74
Configure the settings relating to the extra functions [Extra function]
The settings relating to the extra functions such as the statistical processing are configured and the statistical
processing data can be saved on an SDHC/SD memory card on the "Extra function" page of the setup menu the "Advanced setup" menu.
The "Extra function" page has the [Business intelligence] tab.
Refer to the operating instructions (PDF) of the Additional Business Intelligence Kit for further information about
how to configure the settings.
75
Lists of the setting items (Setup menu)
Quick setup (Easy Start)
Tab
Date & time
adjustment
Recording
setup
Setting item (including those of the
"Advanced setup" menu)
−
Available range
Default
2013/1/1 0:00 - 2037/12/31
23:59
20nn/mm/1 0:00
("nn" and "mm" are
calculated base on the
serial number of the
recorder.)
GMT-5:00 (NV300K),
GMT (NV300K/G)
Set time zone
GMT-12:00, GMT-11:00,
GMT-10:00, GMT-9:00,
GMT-8:00, GMT-7:00,
GMT-6:00, GMT-5:00,
GMT-4:30, GMT-4:00,
GMT-3:30, GMT-3:00,
GMT-2:00, GMT-1:00,
GMT, GMT+1:00, GMT+2:00,
GMT+3:00, GMT+3:30,
GMT+4:00, GMT+4:30,
GMT+5:00, GMT+5:30,
GMT+5:45, GMT+6:00,
GMT+6:30, GMT+7:00,
GMT+8:00, GMT+9:00,
GMT+9:30, GMT+10:00,
GMT+11:00, GMT+12:00,
GMT+13:00
Activate the Daylight saving time*1
Recording setup Frame rate
(The same setting
for all cameras)
Image quality
Referenced recording
days
Checked/Not checked
1 ips, 3 ips, 5 ips, 10 ips, 15 ips,
30 ips
XF, SF, FQ, NQ
(Calculated result will be
displayed.)
Checked
10 ips
FQ
(Calculated result will be
displayed.)
Basic setup
(Remarks: "●" are the setting items configured on "Easy Start". "d" are the setting items configured
from the web browser.)
Menu/Tab
Setting item (including those of the
"Advanced setup" menu)
Available range
Default
Date & time
adjustment
Date & Time
2013/1/1 0:00 - 2037/12/31
23:59
20nn/mm/1 0:00
("nn" and "mm" are
calculated base on
the serial number of
the recorder.)
Date & time
settings
Display format Date
Remarks
Date/Language
Time zone
●
d
yyyy/mm/dd, Mmm/dd/yyyy, Mmm/dd/yyyy
dd/Mmm/yyyy, mm/dd/yyyy, (NV300K),
dd/mm/yyyy
dd/mm/yyyy
(NV300K/G)
d
Time
24 h, 12 h
12 h (NV300K),
24 h (NV300K/G)
d
Set time zone
Refer to "Set time zone" of
"Quick setup (Easy Start)".
Refer to "Set time
zone" of
"Quick setup (Easy
Start)".
d
Daylight saving time
Out, Auto
Auto
d
76
Menu/Tab
Date & time
settings
Setting item (including those of the
"Advanced setup" menu)
Available range
Default
Time zone
Daylight saving time
table (In)
2013/1/1 0:00 - 2037/12/31
23:59
2014/3/9 2:00 AM
(NV300K)*2
2014/3/30 1:00
(NV300K/G)*3
d
Daylight saving time
table (Out)
2013/1/1 0:00 - 2037/12/31
23:59
2014/11/2 2:00 AM
(NV300K)*4
2014/10/26 1:00
(NV300K/G)*5
d
Off, On
Off
d
Auto time adjustment
Remarks
*1 Marking the checkbox for [Activate the Daylight saving time] is the same as selecting "Auto" for "Daylight saving time".
*2 The second Sunday in March, 2:00 AM this year and subsequent years
*3 The last Sunday in March, 1:00 this year and subsequent years
*4 The first Sunday in November, 2:00 AM this year and subsequent years
*5 The last Sunday in October, 1:00 this year and subsequent years
Language
Camera
Camera
registration
Camera setup
Language
Japanese/ English/ Français/ English
Español/ Deutsch/ Italiano/
Русскийd/ Português
d
Model
(Indication only)
(Indication only)
d
Address
(Indication only)
(Indication only)
d
Compression
(Indication only)
(Indication only)
d
Error information
(Indication only)
(Indication only)
d
Registered
information
Model
Model number of the camera (Blank)
d
Address
(Address)
(Blank)
Compression
H.264, MJPEG
(Blank)
User name
(Text will be entered.)
(Blank)
●
d
d
d
Password
Port No.
Display (check box)
Display (drop-down
list)
Position (check box)
Position (drop-down
list)
Camera selection
Display (check box)
Display (drop-down
list)
Display Title (check
box)
Display Title
Camera selection
Indicator
Camera selection
Transmission priority
H.264(1)
H.264(2)
Burst tolerance level
Control time period
Camera selection
(Text will be entered.)
(Port No.)
Checked/Not checked
Off, On
(Blank)
80
d
d
Date & time
display
Display title
Indicator
Transmission
priority
Checked/Not checked
L-Upper, L-Lower, R-Upper,
R-Lower
Checked/Not checked
Checked/Not checked
Off, On
Checked/Not checked
(Text will be entered.)
Checked/Not checked
On, On(Access), Off
Checked/Not checked
Frame rate, Advanced VBR
Checked/Not checked
Checked/Not checked
High, Middle, Low
1 h, 6 h, 24 h, 1 week
Checked/Not checked
77
(Blank)
Menu/Tab
Camera setup
Setting item (including those of the
Available range
"Advanced setup" menu)
Max bit rate
Max bit rate (per client) 64 kbps, 128 kbps,
(per client)
256 kbps, 384 kbps,
512 kbps, 768 kbps,
1024 kbps, 1536 kbps,
2048 kbps, 3072 kbps,
4096 kbps, 6144 kbps,
8192 kbps
Camera selection
Checked/Not checked
Refresh
Refresh interval
0.2 s, 0.5 s, 1 s, 2 s, 3 s
interval
Camera selection
Checked/Not checked
Upside-down Upside-down
On (desktop), Off (ceiling),
Wall
Camera selection
Checked/Not checked
Pan/tilt-flip
Pan/tilt-flip
Off, On
Camera selection
Checked/Not checked
Super
Dynamic
(Wide dynamic
range)
Adaptive black
stretch
Super Dynamic
(Wide dynamic range)
Camera selection
Off, On, On (High)
Adaptive black stretch
Off, On
Camera selection
Checked/Not checked
Off, On
Light control
mode
Outdoor scene, Indoor
scene, Indoor scene(60 Hz)
Checked/Not checked
Camera selection
REC & event
Recording
setup
Remarks
Checked/Not checked
Back light
Back light
compensation compensation (BLC)
(BLC)
Camera selection
Light control mode
Default
Checked/Not checked
Auto slow
shutter
(Maximum
shutter)
Auto slow shutter
(Maximum shutter)
Day & Night
(electrical)
Day & Night (electrical) Off, Auto
Camera selection
Checked/Not checked
VMD alarm
VMD alarm
Off, On
Camera selection
Checked/Not checked
Detection sensitivity
1(Low), 2, 3, 4, 5, 6, 7, 8, 9,
10, 11, 12, 13, 14, 15(High)
Schedule1
Days to record
Schedule1
Schedule to
record
Mon, Tue, ..., Sun
Checked/Not checked
Checked
Time table1-Schedule
recording (Schedule
bar)
--:--, 00:00 - 24:00
Recording
setup (All
cameras)
Frame rate
●
Image quality
1 ips, 3 ips, 5 ips, 10 ips, 15
ips, 30 ips
XF, SF, FQ, NQ
Schedule bar 1:
00:00 - 24:00
Schedule bar 2: --:-- --:-Schedule bar 3: --:-- --:-10 ips
FQ
●
Referenced recording
days
(Calculated result will be
displayed.)
Camera selection
Off(1/30 s), Max. 2/30s,
Max. 4/30s, Max. 6/30s,
Max. 10/30s, Max. 16/30s
Checked/Not checked
78
(Calculated result
will be displayed.)
Menu/Tab
Recording
setup
Setting item (including those of the
"Advanced setup" menu)
Schedule1
Days to record (Mon,
Advanced
Tue, ..., Sun)
setup
Event recording (Event
recording duration)
Available range
Default
Remarks
Time table1, Time table2, Off Time table1
d
2 s, 5 s, 10 s, 20 s, 30 s, 1
min, 2 min, 3 min, 5 min, 10
min, 15 min, Manual, Ext.
0 s, 5 s, 10 s, 15 s
30 s
d
0s
d
Schedule bar 1:
00:00 - 24:00
Schedule bar 2: --:-- --:-Schedule bar 3: --:-- --:-Schedule bar 1:
00:00 - 24:00
Schedule bar 2: --:-- --:-Schedule bar 3: --:-- --:-Schedule bar 1: Not
checked
Schedule bar 2: Not
checked
Schedule bar 3: Not
checked
Schedule bar 1: Not
checked
Schedule bar 2: Not
checked
Schedule bar 3: Not
checked
Schedule bar 1: --:-- --:-Schedule bar 2: --:-- --:-Schedule bar 3: --:-- --:-Schedule bar 1: --:-- --:-Schedule bar 2: --:-- --:-Schedule bar 3: --:-- --:-Schedule bar 1: Not
checked
Schedule bar 2: Not
checked
Schedule bar 3: Not
checked
Schedule bar 1: Not
checked
Schedule bar 2: Not
checked
Schedule bar 3: Not
checked
d
Event recording (Preevent duration)
--:--, 00:00 - 24:00
Schedule to record
(Time table1-Schedule
recording-Schedule
bar)
Schedule to record
(Time table1-Event
recording)
--:--, 00:00 - 24:00
Schedule to record
(Time table1-Event
recording-e-Mail)
Checked/Not checked
Schedule to record
(Time table1-Event
recording-Panasonic
alarm protocol)
Checked/Not checked
--:--, 00:00 - 24:00
Schedule to record
(Time table2-Schedule
recording-Schedule
bar)
Schedule to record
(Time table2-Event
recording)
--:--, 00:00 - 24:00
Schedule to record
(Time table2-Event
recording-e-Mail)
Checked/Not checked
Schedule to record
(Time table2-Event
recording-Panasonic
alarm protocol)
Checked/Not checked
79
d
d
d
d
d
d
d
Menu/Tab
Recording
setup
Setting item (including those of the
"Advanced setup" menu)
Schedule2
Days to record (Mon,
Advanced
Tue, ..., Sun)
setup
Event recording (Event
recording duration)
Available range
Default
Remarks
Time table1, Time table2, Off Time table1
d
2 s, 5 s, 10 s, 20 s, 30 s, 1
min, 2 min, 3 min, 5 min, 10
min, 15 min, Manual, Ext.
0 s, 5 s, 10 s, 15 s
30 s
d
0s
d
Schedule bar 1: --:-- --:-Schedule bar 2: --:-- --:-Schedule bar 3: --:-- --:-Schedule bar 1: --:-- --:-Schedule bar 2: --:-- --:-Schedule bar 3: --:-- --:-Schedule bar 1: Not
checked
Schedule bar 2: Not
checked
Schedule bar 3: Not
checked
Schedule bar 1: Not
checked
Schedule bar 2: Not
checked
Schedule bar 3: Not
checked
Schedule bar 1: --:-- --:-Schedule bar 2: --:-- --:-Schedule bar 3: --:-- --:-Schedule bar 1: --:-- --:-Schedule bar 2: --:-- --:-Schedule bar 3: --:-- --:-Schedule bar 1: Not
checked
Schedule bar 2: Not
checked
Schedule bar 3: Not
checked
Schedule bar 1: Not
checked
Schedule bar 2: Not
checked
Schedule bar 3: Not
checked
d
Event recording (Preevent duration)
--:--, 00:00 - 24:00
Schedule to record
(Time table1-Schedule
recording-Schedule
bar)
Schedule to record
(Time table1-Event
recording)
--:--, 00:00 - 24:00
Schedule to record
(Time table1-Event
recording-e-Mail)
Checked/Not checked
Schedule to record
(Time table1-Event
recording-Panasonic
alarm protocol)
Checked/Not checked
--:--, 00:00 - 24:00
Schedule to record
(Time table2-Schedule
recording-Schedule
bar)
Schedule to record
(Time table2-Event
recording)
--:--, 00:00 - 24:00
Schedule to record
(Time table2-Event
recording-e-Mail)
Checked/Not checked
Schedule to record
(Time table2-Event
recording-Panasonic
alarm protocol)
Checked/Not checked
80
d
d
d
d
d
d
d
Menu/Tab
Recording
setup
Setting item (including those of the
"Advanced setup" menu)
Advanced
Model
recording
setup
Compression
Image capture size
Alarm action
Default
(Registered information will
be displayed.)
(Registered
information will be
displayed.)
(Registered
information will be
displayed.)
VGA(640x480)
d
10 ips
●
d
●
d
d
d
d
(Registered information will
be displayed.)
Remarks
d
d
Quality
When the aspect ratio is 4:3
QVGA(320x240),
VGA(640x480),
SXVGA(1280x960)
SVGA(800x600),
QXGA(2048×1536)
When the aspect ratio is
16:9
QVGA(320x180),
HVGAW(640x360),
HD(1280x720),
FHD(1920x1080)
1 ips, 3 ips, 5 ips, 10 ips, 15
ips, 30 ips, 60 ips
XF, SF, FQ, NQ
Audio
Off, On
Off
Schedules
Schedule1, Schedule2
Schedule1
Referenced recording
days
Output duration
(Calculated result
will be displayed.)
2s
Message display
(Calculated result will be
displayed.)
0 s, 2 s, 5 s, 10 s, 20 s, 30 s,
1 min, Ext., Rec.
0 s, 2 s, 5 s, 10 s, 20 s, 30 s,
1 min, Ext., Rec.
2 s, 5 s, 10 s, 20 s, 30 s, 1
min, 3 min, 5 min, Ext.
Off, On
Main monitor action
Off, On, On(ACK/RESET)
Off
Event type
Checked/Not checked
Display
Ctrl screen, Wide view
Terminal alarm:
Checked
Camera site alarm:
Checked
Command alarm:
Checked
Face matching
alarm: Checked
Ctrl screen
Off, Recording only,
Recording & alarm action
Save, Not save
Recording & alarm
action
Save
Setup by terminal
(Recording camera)
Off, Cam.1, ..., Cam.32, All
Setup by terminal
(Preset)
Setup by terminal
(Terminal output)
Setup by terminal
(Terminal input)
001 - 256, ---
Camera number
associated with the
terminal number
---
Off, On
On
d
N.O., N.C.
N.O.
d
Rate
Event setup
Available range
Buzzer duration
Auto reset time
Advanced
Mode
terminal alarm
setup
Alarm log
81
FQ
d
2s
d
Ext.
d
On
d
d
d
d
d
d
d
d
Menu/Tab
Event setup
Setting item (including those of the
"Advanced setup" menu)
Advanced
Mode
camera site
alarm setup
Alarm log
Advanced
command
alarm setup
Setup by camera
(Recording camera)
Setup by camera
(Preset)
Setup by camera
(Terminal output)
Mode
Alarm log
Setup by command
number (Recording
camera)
Setup by command
number (Preset)
Setup by command
number (Terminal
output)
Mode
Advanced
face matching Alarm log
alarm setup
Setup by camera (Face
matching output)
Face
Registration list
registration
(Sensitivity)
Registration list (Face
image)
Registration list
(Appearance)
Registration list (Name)
Registration list
(Matching)
Setup area
Advanced
setup
Available range
Default
Off, Recording only,
Recording & alarm action
Save, Not save
Recording & alarm
action
Save
Off, Cam.1, ..., Cam.32
Camera number
d
d
001 - 256, ---
---
d
Off, On
On
d
Off, Recording only,
Recording & alarm action
Save, Not save
Recording & alarm
action
Save
d
Off, Cam.1, ..., Cam.32
Camera number
d
d
001 - 256, ---
---
d
Off, On
On
d
Off, Alarm action
Off
Save, Not save
Save
Off, On
On
d
d
d
1(Low), 2, 3, 4, 5(High)
3
Undefined
Undefined
(Indication only)
(Indication only)
(Text will be entered.)
Person001 ...
Person100
Off
On, Off
(Desired area on the screen)
Recording mode
Off, On
Matching area1: All
area
Matching area2 - 4:
Undefined
On
Alarm disarm duration
2 s, 3 s, 5 s, 10 s
2s
Panasonic alarm port number
(Port No.)
1818
82
Remarks
d
d
d
d
Advanced setup
Menu/Tab
Monitor
Main monitor
Setting item (including those of
the "Advanced setup" menu)
Available range
Default
Camera title
Display
Off, On
On
Position
L-Upper, L-Lower, R-Upper,
R-Lower
(Text will be entered.)
R-Upper
Camera title
Sub monitor
Display
settings
Duration
1-screen live sequence, 4-screen 1-screen live
sequence
live sequence, 9-screen live
sequence, Switch by alarm
terminal input, 16Screen
3 s, 5 s, 10 s
5s
Camera selection
Checked/Not checked
Mode
Secret view
Other setup
Not checked
Off, On
Off
Selected camera
1-screen
Selected camera, Cam.1, ...,
Cam.32
Checked/Not checked
Checked, Fixed
4-screen
Checked/Not checked
Checked
6-screen
Checked/Not checked
Not checked
9-screen
Checked/Not checked
Checked
16-screen
Checked/Not checked
Checked
24-screen
Checked/Not checked
Not checked
32-screen
Advanced setup Audio output camera
Select
multiscreen
buttons
displaying on
wide view
operation
panel*
CAM1, ..., CAM32
Remarks
d
d
d
d
d
d
d
d
Checked/Not checked
Not checked
1-screen (pillar box) Checked/Not checked
Not checked
4-screen (pillar box) Checked/Not checked
Not checked
9-screen (pillar box) Checked/Not checked
Not checked
12-screen (pillar
box)
16-screen (pillar
box)
3-screen (unequally
divided)
9-screen (unequally
divided)
16-screen (unequally divided)
Display live camera
image in high
resolution (SXVGA/
HD) on 1-screen
display
Auto-hide the
status display
panel and the
operation panel in
wide view
Stretch images to
fit the areas in
control screen
display
Display images in
16:9 aspect ratio
on the web
browser window
Checked/Not checked
Not checked
d
d
d
d
d
d
d
d
d
d
d
Checked/Not checked
Not checked
d
Checked/Not checked
Not checked
d
Checked/Not checked
Not checked
d
Checked/Not checked
Not checked
d
Checked/Not checked
Not checked
d
Checked/Not checked
Not checked
d
Checked/Not checked
Not checked
d
Checked/Not checked
Not checked
d
83
Menu/Tab
Setting item (including those of
the "Advanced setup" menu)
Advanced setup Other setup
Detect a power-off
of the sub monitor
(HDMI)
Stop receiving the
live image if both
HDMI monitors are
not connected
Hide the camera
title of the sub
monitor
Available range
Default
Remarks
Checked/Not checked
Checked
d
Checked/Not checked
Not checked
d
Checked/Not checked
Not checked
d
* "16Screen", "12Screen (pillar box)", "16Screen (pillar box)" and "16Screen (unequally divided)" will be
displayed on the setting menu when the registered licenses cover 16 cameras.
* "24Screen" will be displayed on the setting menu when the registered licenses cover 24 cameras.
* "32Screen" will be displayed on the setting menu when the registered licenses cover 32 cameras.
Menu/Tab
Network
Basic
Setting item (including those of
the "Advanced setup" menu)
Network
Setup
[Camera/PC
port]
DNS Setup
DDNS Setup
Advanced
setup
Network
Setup [PC
port]
Available range
Default
IP address
(IP address)
192.168.0.250
Subnet mask
(IP address)
255.255.255.0
Default gateway
(IP address)
192.168.0.1
Line speed
Auto, 100M-Full, 100M-Half,
10M-Full, 10M-Half
Off, Manual
Auto
Off
Primary server
address
Secondary server
address
Domain name
(IP address)
0.0.0.0
d
d
(IP address)
0.0.0.0
d
(Text will be entered.)
localdomain
DDNS
Off, Viewnetcam.com, Dynamic
DNS update
10 min, 20 min, 30 min, 40 min,
50 min, 1 h
(Text will be entered.)
Off
d
d
1h
d
NWDR
d
10 min, 20 min, 30 min, 40 min,
50 min, 1 h, 6 h, 24 h
(Port No.)
1h
d
80
(Port No.)
21
d
d
d
DNS
Access interval
(Viewnetcam.com)
Host name
(Dynamic DNS)
Access interval
(Dynamic DNS)
HTTP port number
FTP port number
Attach the
Off, On
alteration detection
code (FTP)
IP address
(IP address)
0.0.0.0
Subnet mask
(Subnet mask)
0.0.0.0
Default gateway
(Indication only)
(Indication only)
Line speed
(Indication only)
(Indication only)
84
Off
Remarks
d
d
d
d
d
d
d
d
Menu/Tab
e-Mail
Panasonic alarm
protocol
NTP/SNMP
User management
Basic
Setting item (including those of
the "Advanced setup" menu)
e-Mail setup SMTP server
address
SMTP port number
POP server address
Authentic method
User name
Password
Sender's address
SSL
Destination address
(Address)
Destination address
(Warning)
Destination address
(Alarm)
Panasonic
Port number(to PC)
alarm
Retry
protocol
Destination address
(Address)
NTP setup
Time adjustment
Primary server
address
Secondary server
address
SNMP setup Community
System name
Location
Contact
Available range
Default
Remarks
(Text will be entered.)
(Blank)
d
(Port No.)
(Text will be entered.)
None, POP before SMTP, SMTP
(Text will be entered.)
(Text will be entered.)
(Text will be entered.)
Off, On
(Text will be entered.)
25
(Blank)
None
(Blank)
(Blank)
NWDR
Off
(Blank)
d
d
d
d
d
d
d
d
Checked/Not checked
Checked
d
Checked/Not checked
Checked
d
(Port No.)
0, ..., 8
(Text will be entered.)
1818
2
(Blank)
d
d
d
Off, On
(Text will be entered.)
Off
(Blank)
d
d
(Text will be entered.)
(Text will be entered.)
(Text will be entered.)
(Text will be entered.)
(Blank)
(Blank)
(Blank)
(Blank)
d
d
d
d
Operation
On
ADMIN
d
d
Off
Off
d
d
User authentication
Camera operation
Off, On
(Select from the registered user
names.)
Off, On
Off, After 1 min, After 3 mins,
After 5 mins, After 30 mins
Off, On
Checked/Not checked
d
d
Camera control
Checked/Not checked
Search and
playback
Checked/Not checked
On
Manager:
(Checked, Fixed)
Operator:
(Checked, Fixed)
Viewer:
(Checked, Fixed)
Logged out:
Checked
Manager:
(Checked, Fixed)
Operator:
Checked
Viewer: Not
checked
Logged out: (Not
checked, Fixed)
Manager:
(Checked, Fixed)
Operator:
Checked
Viewer: Checked
Logged out: (Not
checked, Fixed)
Auto login
Auto login user
Quick login
Auto logout
Network
User level
settings
85
d
d
Menu/Tab
Basic
User registration
Setting item (including those of
the "Advanced setup" menu)
User level
Copy
settings
Available range
Default
Checked/Not checked
Manager:
(Checked, Fixed)
Operator: Not
checked
Viewer: Not
checked
Logged out: (Not
checked, Fixed)
Manager:
(Checked, Fixed)
Operator:
Checked
Viewer: Not
checked
Logged out: (Not
checked, Fixed)
Manager:
(Checked, Fixed)
Operator:
Checked
Viewer: Not
checked
Logged out: (Not
checked, Fixed)
Manager:
(Checked, Fixed)
Operator: Not
checked
Viewer: Not
checked
Logged out: (Not
checked, Fixed)
Manager:
(Checked, Fixed)
Operator:
Checked
Viewer: Checked
Logged out:
Checked
(Blank)
(Blank)
Operator
4Screen-A
Alarm reset
Checked/Not checked
Error reset
Checked/Not checked
Setup
Checked/Not checked
Camera image
display
Checked/Not checked
Register new
user
User name
Password
Level
Default screen*
Edit user
information
User name
(Text will be entered.)
(Text will be entered.)
Manager, Operator, Viewer
Cam.1, ... , Cam.32,
4Screen-A, 4Screen-B,
4Screen-C, 4Screen-D,
4Screen-E, 4Screen-F,
4Screen-G, 4Screen-H, 9Screen,
16Screen-A, 16Screen-B,
1Screen (Wide view), 4Screen
(Wide view), 9Screen (Wide
view), 16Screen (Wide view)
(Select from the registered user Undefined
names.)
(Text will be entered.)
(Blank)
Manager, Operator, Viewer
Undefined
Password
Level
86
Remarks
d
d
d
d
d
d
d
d
d
d
d
d
Menu/Tab
User registration
Setting item (including those of
the "Advanced setup" menu)
Edit user
Default screen*
information
Administrator setup Administrator name
Password
Password (Retype)
Level
Default screen*
Available range
Default
Remarks
Cam.1, ... , Cam.32,
4Screen-A, 4Screen-B,
4Screen-C, 4Screen-D,
4Screen-E, 4Screen-F,
4Screen-G, 4Screen-H, 9Screen,
16Screen-A, 16Screen-B,
1Screen (Wide view), 4Screen
(Wide view), 9Screen (Wide
view), 16Screen (Wide view)
(Text will be entered.)
(Text will be entered.)
(Text will be entered.)
Administrator
Cam.1, ... , Cam.32,
4Screen-A, 4Screen-B,
4Screen-C, 4Screen-D,
4Screen-E, 4Screen-F,
4Screen-G, 4Screen-H, 9Screen,
16Screen-A, 16Screen-B,
1Screen (Wide view), 4Screen
(Wide view), 9Screen (Wide
view), 16Screen (Wide view)
(Blank)
d
ADMIN
12345
12345
Administrator
4Screen-A
d
d
d
d
d
*A
vailable settings for "Default screen" varies depending on the number of the cameras covered by the
licenses. The following are available settings depending on the number of the cameras covered by the registered licenses.
16 cameras or more: 4Screen-D, 16Screen-A, 16Screen (Wide view)
24 cameras or more: 4Screen-E, 4Screen-F, 16Screen-B
32 cameras: 4Screen-G, 4Screen-H
Menu/Tab
Setting item (including those of
the "Advanced setup" menu)
Available range
Default
Maintenance
System information Software version1
(Indication only)
(Indication only)
Software version2
(Indication only)
(Indication only)
Software version EXT1
(Indication only)
(Indication only)
Software version EXT2
(Indication only)
(Indication only)
Hardware version
(Indication only)
(Indication only)
Serial number
(Indication only)
(Indication only)
Network port
[Camera/PC
port]
MAC address
(Indication only)
(Indication only)
IP address
(Indication only)
(Indication only)
Line speed
(Indication only)
(Indication only)
Network port
[PC port]
MAC address
(Indication only)
(Indication only)
IP address
(Indication only)
(Indication only)
Internal temperature
(Indication only)
(Indication only)
Highest temperature
(Indication only)
(Indication only)
HDD1 temperature
(Indication only)
(Indication only)
HDD1 Highest temperature
(Indication only)
(Indication only)
HDD2 temperature
(Indication only)
(Indication only)
HDD2 Highest temperature
(Indication only)
(Indication only)
87
Remarks
d
d
d
d
d
d
d
d
d
d
d
d
d
d
d
d
d
Menu/Tab
HDD information
System
management
Setting item (including those of
the "Advanced setup" menu)
Capacity
Available range
(Indication only)
(Indication only)
Operation
(Indication only)
(Indication only)
Status
(Indication only)
(Indication only)
Recorded time range
(Indication only)
(Indication only)
Overwrite cycle
(Indication only)
(Indication only)
System setup Error output
duration
Error buzzer
duration
Network link down
detection
HDD hour meter
warning
Auto data delete
0 s, 2 s, 5 s, 10 s, 20 s, 30 s, 1
min, Ext.
0 s, 2 s, 5 s, 10 s, 20 s, 30 s, 1
min, Ext.
Off, On
2s
d
d
d
d
d
d
2s
d
Off
d
20000 h
d
Off
d
On
d
Logs
Off, 10000 h, 20000 h, 30000 h,
40000 h, 50000 h
Off, 1 day, ..., 10 days, 14 days,
30 days, 45 days, 60 days, 90
days, 120 days, 150 days, 180
days
Off, On
Auto camera time
synchronization
Access log (Date & (Indication only)
Time / Log)
Network log (Date & (Indication only)
Time / Log)
MPR ID
(None)
Entry
information of
the key
management Activation Key No.
system
Default
(Indication only)
(Indication only)
Registration ID
(None)
ProductRegistration Key
Registration Key 1
(Text will be entered.)
(Unique number
given to the
device)
Refer to the
Activation Key
Card.
Refer to the
Activation Key
Card.
(Blank)
(Text will be entered.)
(Blank)
Registration Key 2
(Text will be entered.)
(Blank)
Registration Key 3
(WJ-NV300K/G)
Registration Key
(Text will be entered.)
(Blank)
Additional
business
intelligence
Optional
Registration Key
extension for
Fisheye
network
camera
Dealer's information
(Text will be entered.)
(Blank)
(Text will be entered.)
(Blank)
(Text will be entered.)
(Blank)
Functions for
maintenance
Reset all settings
(None)
(None)
Save data (to SD
card)
Load data (from SD
card)
Save face data (to
SD card)
Load face data
(from SD card)
(None)
(None)
(None)
(None)
(None)
(None)
(None)
(None)
Registration
of license
Additional
camera
(None)
88
Remarks
d
Menu/Tab
System
management
HDD management
General
Setting item (including those of
the "Advanced setup" menu)
Functions for Download face data
maintenance (Only available for
Web browser)
Upload face data
(Only available for
Web browser)
Firmware update
HDD
information
Available range
Default
Remarks
(None)
(None)
d
(None)
(None)
d
(None)
(None)
d
Other
(None)
(None)
Capacity
(Indication only)
(Indication only)
Operation
(Indication only)
(Indication only)
Status
(Indication only)
(Indication only)
(Indication only)
(Indication only)
d
d
d
d
(Indication only)
(Indication only)
d
(Indication only)
(Indication only)
d
(Indication only)
(Indication only)
d
Checked/Not checked
Not checked
d
(Indication only)
(Indication only)
d
(Indication only)
(Indication only)
(Indication only)
(Indication only)
(Indication only)
(Indication only)
Checked/Not checked
Not checked
(Indication only)
(Indication only)
(Indication only)
(Indication only)
(Indication only)
(Indication only)
(Indication only)
(Indication only)
Checked/Not checked
Checked
(Indication only)
(Indication only)
(Indication only)
(Indication only)
(Indication only)
(Indication only)
(Indication only)
(Indication only)
(Indication only)
(Indication only)
Single mode, Mirroring mode,
RAID5 mode, RAID6 mode
(Blank)
Recorded time
range
Format HDD HDD information
(Capacity)
HDD information
(Operation)
HDD information
(Status)
HDD information
(Format)
HDD information
(Results)
Remove HDD HDD information
(Capacity)
HDD information
(Operation)
HDD information
(Status)
HDD information
(Remove)
HDD information
(Results)
Add HDD
HDD information
(Capacity)
HDD information
(Operation)
HDD information
(Status)
HDD information
(Add)
HDD information
(Results)
Change the
HDD information
operation
(Capacity)
mode of HDD HDD information
(Operation)
HDD information
(Status)
HDD information
(Results)
Operation mode of
HDD
89
Menu/Tab
Extra function
Business
intelligence
Setting item (including those of
the "Advanced setup" menu)
Available range
Default
Accumulate statistics data
Off, On
Off
People
counting
Detection area
x: 0 – 1280, y: 0 - 960
Matching area
Face
matching /
Age and
gender
judgement
Save
Start
statistics data
(to SD card)
End
x: 0 – 1280, y: 0 - 960
Detection area1:
All area
Detection area24: No setting
Detection area1:
All area
Detection area24: No setting
Start
Download
statistics data
(Only
End
available for
Web browser)
2013/1/1 0:00 - 2037/12/31
23:59
2013/1/1 0:00 - 2037/12/31
23:59
2013/1/1 0:00 - 2037/12/31
23:59
2013/1/1 0:00 - 2037/12/31
23:59
90
The day before
"End"
The date & time
when this tab is
displayed
The day before
"End"
The date & time
when this tab is
displayed
Remarks
d
d
d
About the error logs and the network logs
Error logs
This section describes the display contents on the status display panel of the main monitor, the logs of error
occurrence (error logs) and their details.
The display contents of each error logs are common between the main monitor and the web browser.
• "x" indicates the extension unit number.
• "y" indicates the HDD (hard disk drive) number.
• "f" indicates the cooling fan number.
• "cc" indicates the camera number.
Output from
connector
Display of the status
display panel
Error log
Thermal error warning
Thermal error: MAIN
Thermal error: EXTx
Thermal error: MAIN
Thermal error: EXTx
Recorder error
FAN warning
Fan error: MAIN-f
Fan error: EXTx-f
Fan error: MAIN-f
Fan error: EXTx-f
Recorder error
Network camera error detection
Communication error:
Cam.cc
Communication error:
Cam.cc
Camera error
Network camera error recovery
–
Communication recovered:
Cam.cc
–
Network camera error detection (audio)
Audio communication error:
Cam. cc
Audio communication error:
Cam. cc
Camera error
Network camera error recovery (audio)
–
Audio communication
recovered: Cam. cc
–
Video loss (Notification of video input
signal loss occurred on the encoder)
Video loss: Cam.cc
Video loss: Cam.cc
Camera error
Video loss recovery (Notification of
video input signal loss recovered on
the encoder)
–
Video recovered: Cam.cc
–
Recording error detection
Recording error
Recording error (RCA)
Recording error (AGT)
Recording error (WCK)
Recording
error
SMART warning
SMART warning: MAIN-y
SMART warning: EXTx-y
SMART warning: MAIN-y
SMART warning: EXTx-y
HDD error
Slow response
Slow response: MAIN-y
Slow response: EXTx-y
Slow response: MAIN-y
Slow response: EXTx-y
HDD error
HDD hour meter warning
Hour meter warning: MAIN-y
Hour meter warning: EXTx-y
Hour meter warning: MAIN-y
Hour meter warning: EXTx-y
HDD error
HDD skip*1
–
HDD skip: MAIN-y
HDD skip: EXTx-y
HDD skip: EXTx
–
HDD write error
–
Write error: MAIN-y
Write error: EXTx-y
–
HDD read error
–
Read error: MAIN-y
Read error: EXTx-y
–
Alteration detection
Altered: Cam.cc
Altered: Cam.cc
Recorder error
Remove auto links (per HDD)
HDD removed: MAIN-y
HDD removed: EXTx-y
HDD logically removed:
MAIN-y
HDD logically removed:
EXTx-y
HDD error
HDD format error
Format error: MAIN-y
Format error: EXTx-y
Format error: MAIN-y
Format error: EXTx-y
HDD error
HDD removal error (Properly
recognized HDD was removed without
proper operations.)
Swap warning: MAIN-y
Swap warning: EXTx-y
Swap warning: MAIN-y
Swap warning: EXTx-y
HDD error
Reboot (Related to CPU)
–
System reboot(CPU)
–
Description
91
Description
Display of the status
display panel
Error log
Output from
connector
Reboot (Related to DEC)
–
System reboot(DEC)
–
Reboot (Related to NW error)
–
System reboot(NW error)
–
Failed to write data on the media
Copy error
Write error: SD card
Write error: COPY
–
Failed to read the data from the media
–
Read error: SD card
Read error: COPY
–
Copy media FULL
–
No available space: SD card
No available space: COPY
–
Number of data on the copy medium
exceeded
–
Over limitation: SD card
Over limitation: COPY
–
Face data error
Face data error
Face data error
–
NW link error
Network link error
–
Network error
Line speed warning (When line speed
becomes "Half" while "Auto" is being
set)
Line speed warning
Line speed warning
–
When time is not adjusted due to the
time difference of 1000 second or more
from the NTP server
Skip time adjustment
Skip time adjustment
–
Failed to resolve an address of
Panasonic alarm protocol from DNS
–
Address error: PANASONIC
ALARM
Network error
No response from a notified address of
Panasonic alarm protocol
–
No response: PANASONIC
ALARM
Network error
Undefined error of Panasonic alarm
protocol
–
Other error: PANASONIC
ALARM
Network error
Remove auto links (per unit)
HDD removed: EXTx
HDD logically removed:
EXTx
HDD error
RAID5 Format error
Format error: EXTx
RAID5 Format error: EXTx
HDD error
RAID6 Format error
HDD error
Format error: EXTx
RAID6 Format error: EXTx
RAID5
1down*2
RAID5 1down: EXTx
RAID5 1down: EXTx
RAID5
2down*2
RAID5 2down: EXTx
RAID5 2down: EXTx
RAID6
1down*2
RAID6 1down: EXTx
RAID6 1down: EXTx
RAID6
2down*2
RAID6 2down: EXTx
RAID6 2down: EXTx
RAID6
3down*2
RAID6 3down: EXTx
RAID6 3down: EXTx
HDD RAID5 Recovery failure
RAID5 Recovery failure:
EXTx
RAID5 Recovery failure:
EXTx
HDD error
HDD RAID6 Recovery failure
RAID5 Recovery failure:
EXTx
RAID6 Recovery failure:
EXTx
HDD error
Parameter initialization error
–
Invalid unit: EXTx
HDD error
Reboot (No extension unit connection
detected)
–
System reboot(EXT)
–
Undetected sub monitor
Undetected sub monitor
Undetected sub monitor
–
Complete mirroring recovery
–
Complete mirroring recovery
–
Complete RAID5 recovery
–
Complete RAID5 recovery:
EXTx
–
Complete RAID6 recovery
–
Complete RAID6 recovery:
EXTx
–
*1 "HDD skip" is the function that continues recording on another hard disk drive even if an error occurs, such
as an HDD write error.
*2 Refer to the operating instructions of the extension unit for recovering from RAID down.
92
About the network log
This section describes the details on the network logs and their details. The network logs are displayed by
selecting the "Maintenance" page - [System management] tab - "Network log" on the setup menu or the web
browser of a PC that is connected to the recorder.
Contents to be displayed are the same as when using the web browser.
Description
Network log
Output from
connector
NW link error
NETWORK LINK ERROR
Network error
E-mail transmission complete
<SMTP>MAIL_SEND
–
SMTP authentication error
<SMTP>SMTP_ATTEST_ERR
Network error
POP3 authentication error
<SMTP>POP3_ATTEST_ERR
Network error
Failed to resolve POP3 server address from DNS
<SMTP>POP3_ADD_ERR
Network error
Failed to find POP3 server
<SMTP>POP3_SVR_ERR
Network error
Failed to resolve SMTP server address from DNS
<SMTP>SMTP_ADD_ERR
Network error
Failed to find SMTP server
<SMTP>SMTP_SVR_ERR
Network error
MAIL FROM command error
<SMTP>MAIL_FROM_ERR
Network error
RCPT TO command error
<SMTP>RCPT_TO_ERR
Network error
Other errors for SMTP
<SMTP>OTHER_ERR
Network error
FTP server transfer complete
<FTP>SVR_FWD_OK
–
Other error for FTP
<FTP>OTHER_ERR
Network error
Synchronization with the NTP server complete
<NTP>GET_TIME_OK
–
Failed to resolve NTP server address from DNS
<NTP>SVR_ADD_ERR
Network error
Synchronization with the NTP server failed (Time is not
synchronized.)
<NTP>TIME_INVALID
Network error
Failed to adjust the time
<NTP>SET_TIME_ERR
Network error
Failed to find NTP server
<NTP>SVR_ERR
Network error
Other errors for NTP
<NTP>OTHER_ERR
Network error
Password error for SNMP user name
<SNMP>USER_PASS_ERR
Network error
SNMP object inquiry failure
<SNMP>OBJ_ERR
Network error
Other errors for SNMP
<SNMP>OTHER_ERR
Network error
Password error for HTTP user name
<HTTP>USER_PASS_ERR
Network error
HTTP download failure
<HTTP>DOWNLOAD_ERR
Network error
HTTP request invalid
<HTTP>REQUEST_ERR
Network error
Other errors for HTTP
<HTTP>OTHER_ERR
Network error
Failed to resolve the DDNS server address from DNS.
<DDNS>SVR_ADD_ERR
Network error
No response from the DDNS server.
<DDNS>SVR_ERR
Network error
Same host name has registered.
<DDNS>HOST_NAME_ERR
Network error
Undefined error.
<DDNS>OTHER_ERR
Network error
93
Operation window
The recorder can be operated using the provided mouse connected to the mouse connection port on the rear
side of the recorder. When operating the recorder using a web browser, refer to "Network" (☞ page 52).
Ctrl (control) screen display
The control screen is the default screen at startup. The main operations of the recorder are performed from this
screen.
q
e
w
r
Ctrl screen
This screen will be displayed after startup. Main operations of this product can be performed on this screen.
q Image display area
Displays images from the camera. (☞ Page 104)
w Status display panel
Displays the statuses of the recorder. Also displays alarm/error status and remedies. (☞ Page
98)
e Operation panel
Used to switch between screens, to play back
recordings, operate the camera and so on. Displays the current date & time.
r [Wide view] button
Switches the main monitor to wide view display.
94
Wide view display
This view offers a large image display area, especially suited for monitoring live images. However, operations
are restricted.
q
w
e
q Image display area
Displays images from the camera. (☞ Page 104)
r
e Operation panel
Switches between screens and screen patterns.
Displays the current date & time.
w Status display panel
Displays the statuses of the recorder. Also displays alarm/error status and remedies. (☞ Page
98)
When clicking alarm button or error button, this
panel may be displayed overlapped on the operation panel.
r [Ctrl screen] button
Switches the main monitor to control screen display.
Image display area
Displays live images and playback images on the control screen. Only live images can be displayed on the wide
view screen.
Camera selection
frame
Date & time
Camera title
Camera title/date & time
The set camera title will be displayed. The display
position can be selected from upper-left ("L-Upper"),
lower-left ("L-Lower"), upper-right ("R-Upper") and
lower-right ("R-Lower"). The default display position
is "R-Upper". (Default: Upper right). Date & time will
be displayed as set on the camera.
Camera selection frame
Displays the camera being operated. When using
1-screen/4-screen display (☞ pages 109 and 110),
the cameras can be operated with the mouse.
95
Image display area
The number of images that can be displayed on the multiscreen differs for the control screen and the wide view
screen.
Number of the multi-screen selection buttons to be displayed will also vary depending of the number of the registered licenses.
Screen display
Ctrl screen
Status
Live
Play
Wide view display
Live
Multiscreen buttons
Camera license number
9
16
24
32
1-screen
○
○
○
○
4-screen
○
○
○
○
9-screen
○
–
–
–
16-screen
–
○
○
○
1-screen
○
○
○
○
4-screen
○
○
○
○
9-screen
–
–
–
–
16-screen
–
–
–
–
1-screen
○
○
○
○
4-screen
○
○
○
○
6-screen
○
○
○
○
9-screen
○
○
○
○
16-screen
–
○
○
○
24-screen
–
–
○
○
32-screen
–
–
–
○
1-screen (pillar box)
○
○
○
○
4-screen (pillar box)
○
○
○
○
9-screen (pillar box)
○
○
○
○
12-screen (pillar box)
–
○
○
○
16-screen (pillar box)
–
○
○
○
3-screen (unequally divided)
○
○
○
○
9-screen (unequally divided)
○
○
○
○
16-screen (unequally divided)
–
○
○
○
○: Multi-screen selection buttons will be displayed.
–: Multi-screen selection buttons will not be displayed.
Note:
• It is possible to select whether to display or hide the wide view multi-screen selection button. Refer to the
"Configure other settings relating to monitors" section (☞ page 51) for further information.
• "24Screen" and "32Screen" will be come available only when not all of the cameras are selected at the
"Cam. select" under "Sub monitor".
In the image display area, the startup screen to be displayed upon login (default screen) can be set for each
login user individually.
The available screens that can be set as the default screen are as follows. Refer to page 62 for how to configure the default screen.
Cam.1 to Cam.32:
Each camera displayed on a 1-screen
4Screen-A:
Camera 1 to 4 displayed on a 4-screen
4Screen-B:
Camera 5 to 8 displayed on a 4-screen
96
4Screen-C:
4Screen-D:
4Screen-E:
4Screen-F:
4Screen-G:
4Screen-H:
9Screen:
16Screen-A:
16Screen-B:
1-screen (Wide view):
4-screen (Wide view):
9-screen (Wide view):
16-screen (Wide view):
Camera 9 to 12 displayed on a 4-screen
Camera 13 to 16 displayed on a 4-screen
Camera 17 to 20 displayed on a 4-screen
Camera 21 to 24 displayed on a 4-screen
Camera 25 to 28 displayed on a 4-screen
Camera 29 to 32 displayed on a 4-screen
Camera 1 to 9 displayed on a 9-screen
Camera 1 to 16 displayed on a 16-screen
Camera 17 to 32 displayed on a 16-screen
1-screen display in wide view
4-screen display in wide view
9-screen display in wide view
16-screen display in wide view
Note:
• If any of the default screen other than "Cam.1" - "Cam.32" or "4Screen-A" - "4Screen-H" is selected, the
4-screen that automatically displays images from camera 1 to camera 4 will become the default screen of
the web browser on the PC.
97
About the status display panel
Normal operation
w
e
In case of alarm/error (When the associated buttons are displayed)
t
q
w
i
e
r
y
u
q Status display area
Recorder status indications and their details are shown in the table below. In the event that the recorder
enters several statuses at the same time, these are displayed in their order of priority. If both statuses have
the same priority, the one that occurred last will be displayed.
Status
Description
Example
Priority
Live
Live images are being displayed.
6 (Low)
During playback
Recorded images are being played.
6
In the process of RAID
recovery
Currently in the process of RAID recovery.
5
Copying
Data is being copied. Copying progress is displayed in %.
4
Formatting SD
SD memory card is being formatted.
4
Formatting HDD
HDD is being automatically formatted.
3
In the alarm state
Indicates an alarm occurrence. Detailed information of the
alarm will be displayed.
2
In the error state
Indicates that an error has occurred. A detailed description
of the error content will be displayed.
1 (High)
w Alarm buttons
(When the face matching function is not used:
)
Indicate that an alarm has occurred. Turn red in the alarm state. Clicking the buttons will toggle between
displaying/not displaying buttons such as the alarm log button and the alarm reset button.
<Face matching function>
If the face matching function has been configured for use, the following display functions and operations are
available:
No face matching alarm
Face matching alarm is being issued
e Error button
Indicate that an error has occurred. Turn yellow in the error state. Clicking the buttons will toggle between
displaying/not displaying buttons such as the error log button and the error reset button.
98
r Alarm log display button
The alarm logs are displayed on the operation panel of the control screen. Up to 750 alarm logs are saved.
When more than 750 logs are filed, the older logs will be overwritten by the newer logs. In this case, the oldest log is the first to be overwritten.
t Alarm reset button
Cancels the alarm action. Clickable only in the alarm state.
y Error log display button
The error (trouble) logs are displayed on the operation panel of the control screen. Up to 1000 error logs are
saved. When more than 1000 logs are filed, the older logs will be overwritten by the newer logs. In this
case, the oldest log is the first to be overwritten.
u Error reset button
Cancels the error (trouble) action. Clickable only in the error state.
i Face display (Thumbnail) button
The latest face matching results are displayed on the operation panel of the control screen. (☞ Operating
Instructions of WJ-NVF30, WJ-NVF30W)
Sub monitor (monitor for display of live images only)
Important:
• Configuration and operation of the recorder from the sub monitor is not possible.
Live images from the specified cameras can be displayed on 1-screen or 4-screen/9-screen/16-screen on the
sub monitor. When several cameras are selected on 1-screen or 4-screen/9-screen, camera images will be
switched sequentially at the selected switching interval (sequence display). In addition, camera images can be
switched according to the signal input triggered by a terminal alarm. (☞ Page 50)
Note:
• The date & time and camera also appear on the camera image displayed on the sub monitor, but some
characters may be cut off.
• To display images, it is necessary to select the cameras to be displayed in the setup menu in advance. The
recorder is not configured to display camera images by default.
• Depending on the selected switching interval, a black screen may appear before camera images are displayed.
• When the secret view function is selected, the single screen on the main monitor or selected images on a
multiscreen will not be displayed.
• While "1-screen live sequence" is being performed, the secret view images will be skipped (not displayed).
• The image of a camera where an error has occurred will not be displayed.
• The size of displayed images will be fit into the screen regardless of the aspect ratio. When the aspect ratio
of the sub monitor (BNC) is 4:3, the vertically long images will be displayed compared with the images of the
sub monitor (HDMI).
• Depending on whether enabling or disabling the display switchover or the re-encoding transmission of the
main monitor, the frame rate or the resolution of camera images on the sub monitor may vary, or the sub
monitor may momentarily go black. Likewise, when the camera images on the sub monitor switches, the
frame rate or the resolution of camera images on the main monitor may vary, or the main monitor may
momentarily go black.
99
Basic operations
To operate, use the mouse connected to the recorder to move the mouse cursor displayed on the main monitor
and left-click the buttons or tabs displayed on the screen. (Hereinafter, "Left-click..." will be described as
"Click..." in this document.)
In lines where the [D]/[C] buttons are displayed, the value on which the cursor is placed can be changed by
turning the mouse wheel. For example, when setting date & time, the hours, minutes and seconds can be
changed.
The shape of the mouse cursor will change as follows depending on the display screen and mouse operation.
: Normal operation
: When dragging a camera number panel (wide view screen)
Note:
• When no operation is made for 10 seconds or more, the mouse cursor will be hidden. The mouse cursor will
be displayed again when the mouse is moved.
• It is impossible to connect a mouse to the mouse connection port if the connector from the mouse is upside
down. When it is hard to connect, check the upside down position of the connector.
About the operation of on-screen keyboard
Setting items can be entered using the on-screen keyboard. When clicking the [
] icon beside the entry field,
the on-screen keyboard will be displayed, and it will become possible to enter characters by clicking the character keys on the keyboard.
On-screen keyboard screen
Entry field
Language selection pull-down menu
Click the [C] button to select the language for
character entry.
[Del all] button
Deletes all the characters in the entry field.
[←]/[→] button
Move the cursor in the entry field to either direction.
[Delete] button
Deletes a character pointed by the cursor in the entry
field.
[A/a] button
This button changes the characters to be entered
between capital letters and small letters.
100
[Next] button
Changes the keys to be displayed for character entry.
The displayed keys are changed as follows:
Keys for the language selected by the language
selection pull-down menu → Combination characters → Special characters
[Enter] button
Determines the entered characters and closes the onscreen keyboard.
Note:
• Basic operations are also applied to the "Login"
window and the window for entering a password.
• Click the [×] button to close the window without
determining the entered characters.
Logout
Click the [Logout] button. To log out, click the [OK] button in the confirmation window displayed.
Note:
• If "On" is selected for the "Auto login" (☞ page 59), login will be automatically performed by the user registered in "Auto login user" in the logged-out state.
101
Use an SD memory card
Insert an SD memory card (option)
Step 1
Open the SDHC/SD memory card slot cover.
Pull the tab
down.
SDHC/SD memory
card slot cover
Step 2
Insert a SD memory card to the slot until it clicks.
Hearing a click means that the card is properly
inserted.
When inserting an SD memory card,
confirm that the label on the SD
memory card is upside and only the
upper right corner of the card has different shape.
Step 3
Close the SDHC/SD memory card slot cover.
Note:
• When removing the SD memory card from the
slot, push the card until it clicks and pull it out
straight. When pulling out the SD memory card,
hold both edges with your fingers.
• The SDHC/SD memory card slot cover is
designed to come off when an excessive force is
applied. In this case, attach the slot cover to the
original position.
102
Login operation at startup
When "Off" is selected for "Auto login" (☞ page 59), the recorder will start up in the logged-out state after completing the system check.
When the operation window is displayed on the main monitor, enter a user name and password as follows:
Note:
• The default administrator name and password are
as follows.
Step 1
Click the [Login] button on the operation screen.
→→ The "Login" window will be displayed.
Administrator name: ADMIN
Password
: 12345
Step 2
Enter a user name and password. For character entry,
refer to "About the operation of on-screen keyboard"
(☞ page 100).
• Refer to page 61 for how to register users.
Note:
• When "On" is selected for "Quick login", the user
name can be selected from the pull-down menu.
The password entered will be displayed as "*"
marks.
• In the logged-out state or when a user other than
administrative or manager privileges is logged, the
login window will be displayed if tries to operate
an unauthorized function.
• To enhance the security, change the default
administrator name and password before running
the recorder. Change the password periodically.
Refer to page 63 for how to change the password.
• To log out, click the [Logout] button on the operation screen.
• When a user logs out during copying, the copying
will be canceled. (When operating the recorder
using a web browser, it will take around 90 seconds until copying is stopped after the web
browser is closed.) When the auto logout function
is activated, logout will be executed when the
specified time have passed after copying is completed.
• Displaying images in the logged-out state
After startup with "Auto login" set to "Off", the
"4Screen-A" will be displayed.
When logging out during the login process, the
same screen as right before logout will be displayed.
(Which camera images the user is authorized to
display depends on the user level set up.)
• When "On" is selected for "Auto login", it is
unnecessary to perform the operations described
on this page.
Step 3
Click the [OK] button.
→→ When the entered user name and password are
correct, the login window will disappear and the
login button will change to the logout button.
When the entered user name and password are
incorrect, the error window will be displayed.
Close the error window and log in again.
103
Monitor live images
When the recorder started up, live images from cameras will be displayed according to the configured settings.
Live images from cameras are displayed via the recorder.
Image data
Network cameras
Main monitor (HDMI)
Recorder
Sub monitor (BNC)
Sub monitor (HDMI)
It is possible to display live images on a 1-screen or on a multiscreen. Depending on the configuration of the
sub monitor, the cameras can automatically be switched and images from the cameras can be displayed on
1-screen or 4-screen. (☞ Page 50)
When displaying images from the camera for which "On" is selected for "Audio" under "Recording setup" (☞
page 42), audio captured by the camera will be output. When displaying images on a multiscreen, audio from
the selected camera will be heard.
Note:
• Depending on the camera in use or network environment, the audio of live images from the camera may be
delayed, but that may not affect the audio output from recorded images.
• Update processing of audio data will be performed to synchronize live images with audio.
Due to the processing, the audio of live images from the camera may be momentarily interrupted, but that
may not affect the audio output from recorded images.
About the operation panel
Operations with live images differ depending on whether they are performed on the control screen or on the
wide view screen.
Control screen / Operation panel
Camera number panel
Multiscreen buttons
Digital zoom buttons
Mute button
104
Camera number panel
Depending on the number of the registered licenses
of the additional camera kit, the screen pattern will
change to 9-/16-/24-/32-screen.
When the registered licenses cover 9 or 16 cameras,
camera-related information, such as camera’s registration status, camera title and recording status, etc.
will be displayed.
Camera number:
(Character color)
White: Camera is registered.
Gray: Camera is not registered.
(Background color)
Aqua: Image display area is displaying
images
Blue: Camera is registered and image display area is not displaying images.
Gray: R
ecording is not possible or camera is
not registered.
Camera title: Shows the first 8 characters of the
previously entered camera title.
(Character color)
Same as camera number
(Background color)
Red: Event recording is being performed.
Gray: Camera is not registered.
Recording indicator: Lights red when recording is
being performed. Display of [
] indicates a
connection error.
Camera title: Shows the first 5 characters of the previously entered camera title.
(Character color)
White: Camera is registered.
Gray: Camera is not registered.
(Background color)
Aqua: Image display area is displaying images
Blue: Camera is registered and image display
area is not displaying images.
Gray: Recording is not possible or camera is
not registered.
Red: Event recording is being performed.
Multiscreen buttons
The 1-screen/4-screen/16-screen buttons are displayed.
When the registered license covers 9 cameras, the
9-screen button will be displayed instead of the
16-screen button.
Digital zoom buttons
When displaying images on a 1-screen or 4-screen,
the images can be enlarged/reduced. (☞ Page 111)
Mute button
Each click of this button toggles between mute and
mute cancel of the camera audio.
When the registered licenses cover 24 or 32 cameras,
no camera number will be displayed and camerarelated information will be provided only by camera
title display and the recording indicator.
105
Wide view operation panel
Camera number panel
Camera number panel
Depending on the number of the registered licenses
of the additional camera kit, the screen pattern will
change to 9-/16-/24-/32-screen.
Multiscreen buttons
Multiscreen buttons
The screen pattern buttons will be displayed as follows.
When the registered licenses cover 9 or 16 cameras,
camera-related information, such as camera’s registration status, alarm status and recording status, etc.
will be displayed.
Camera number [CAM]:
(Character color)
White: Camera is registered.
Gray: Camera is not registered.
(Background color)
Aqua: Image display area is displaying
images
Blue: Camera is registered and image display area is not displaying images.
Gray: Recording is not possible or camera is
not registered.
Alarm display [ALM]: Lights red when event
recording is being performed
Recording indicator [REC]: Lights red when
recording is being performed.
Camera license Multiscreen buttons
number
9
16
24
32
When the registered licenses cover 24 or 32 cameras,
the alarm display [ALM] and the recording indicator
[REC] will not be displayed and camera-related information will be provided only by camera number display.
Camera number [CAM]:
(Character color)
White: Camera is registered.
Gray: Camera is not registered.
(Background color)
Aqua: Image display area is displaying
images
Blue: Camera is registered and image display area is not displaying images.
Gray: Recording is not possible or camera is
not registered.
Red: Event recording is being performed.
106
Note:
• It is possible to hide/display the multi-screen
selection buttons on the operation panel. Refer to
the "Configure other settings relating to monitors"
sections (☞ page 51) for further information.
• When 5 or more multi-screen selection buttons
are displayed, it is possible to switch the position
of displayed buttons using the left/right buttons or
the slider.
• The 24-screen and 32-screen display are not
available for the sub monitor. (If any of the cameras listed in the "Camera selection" of the "Sub
monitor" tab is selected, the sub monitor will be
used.)
Change the camera display position on the screen
The default camera display positions are as follows:
1-screen (16:9)
4-screen (16:9)
1
1
6-screen (4:3)
2
2
1
1
2
2
9-screen (16:9)
3
3
1
1
3
3
16-screen (16:9)
2
2
6
6
3
3
7
7
4
4
8
8
9
9
13
13
10
10
14
14
11
11
15
15
12
12
16
16
1
1
7
7
13
13
19
19
2
2
8
8
14
14
20
20
4-screen (4:3)
2
2
3
3
4
4
3
3
9
9
15
15
21
21
4
4
10
10
16
16
22
22
6
6
32-screen
5
5
11
11
17
17
23
23
6
6
12
12
18
18
24
24
1
1
2
2
3
3
1
1
2
2
3
3
4
4
4
4
5
5
6
6
5
5
6
6
7
7
8
8
7
7
8
8
9
9
9
9
10
12
11 12
10 11
2
2
1
1
2
2
3
3
4
4
5
5
4
4
5
5
6
6
7
7
8
8
9
9
1
1
16-screen (4:3)
1
1
5
5
9
9
13
13
2
2
6
6
10
10
14
14
3
3
7
7
11
11
15
15
4
4
8
8
12
12
16
16
16-screen (4:3)
3
3
6
6
8
8
3
3
8
8
16
16
24
24
32
32
12-screen (4:3)
9-screen (4:3)
2
2
1-screen (4:3)
1 2
2 3
3 4
4 5
5 6
6 7
7
1
9
10
11
12
13
14
15
9 10 11 12 13 14 15
17
17 18
18 19
19 20
20 21
21 22
22 23
23
25
26
27
28
29
30
25 26 27 28 29 30 31
31
9-screen (4:3)
3-screen (4:3)
1
1
5
5
24-screen (4:3)
1
1
5
5
1
1
4
4
4
4
1
1
7
7
9
9
2
2 3
3 4
4
5
6 7
7
1
5
6
1
8
8 9
9 10
10
11
12
13
14
15
16
11 12 13 14 15 16
It is possible to change the camera image by dragging & dropping the number of the camera number panel (1
to 16) onto the desired display position.
Note:
• When a camera is assigned to a screen segment to which another camera is already assigned, the image of
the camera originally assigned to that position will disappear.
• The assigned camera position is retained even if the recorder is rebooted (note however that initializing the
settings will also reset the camera positions to the defaults).
• The audio of the camera assigned to the top left position will be output.
• If "Mute" was selected on the control screen, no audio will be output.
• The size of displayed images will be fit into the screen regardless of the aspect ratio.
• The images transmitted from following cameras can only be displayed on up to 4-screen.
• Cameras whose "Compression" is set for "JPEG" and "Image capture size" for "QXGA(2048x1536)"
• Cameras whose "Compression" is set for "H.264" and "Image capture size" is for "QXGA(2048x1536)",
with a sub monitor selecting 1-screen. (In 1-screen sequence, the next camera image to be displayed
after the currently displayed image is included.)
107
Switch between control screen and wide view screen
Camera images will be displayed on a full screen.
[Wide view] button of the control screen
[Ctrl screen] button of the wide view screen
Step 1
Click the [Wide view] button (☞ page 94) on the operation window.
→→ Images from the camera will be displayed on a full
screen. The 1-screen is displayed by default.
Step 2
To return from the full screen to the control screen,
click the [Ctrl screen] button.
→→ The display reverts to the control screen. The
image display area corresponds to the default
screen set up by the login user. When a wide view
screen is set as the default screen, "4Screen-A"
will automatically be applied.
108
Note:
• Clicking the [Wide view] button again will switch
to the multiscreen displayed before.
1-screen display
Live images from cameras can be displayed on a 1-screen.
Displaying images on a control screen
Step 1
When displaying in a multi-screen, click the 1-screen
button of the "Multiscreen select".
→→ The image will be displayed on a 1-screen.
Step 2
Click the camera number panel of the desired image
from the camera.
→→ The background color of the selected camera
number will turn aqua, and live images will be displayed.
Camera No. box in the control screen
Note:
• Another way to display images on a 1-screen is to
double-click the camera number panel of the
camera to be selected in the image display area.
• In the multiscreen display area, double-clicking
the camera selection frame is also possible to display an image on a 1-screen.
• The audio of the camera whose images are being
displayed will be output. (It is possible to fix audio
to be output on "Audio output camera" under
"Advanced setup" under "Monitor".)
• At the default, black zones will be displayed on
the top and bottom of images with the aspect
ratio of 16:9. Refer to page 51 for the setting to
enlarge the vertical size of displayed images.
Displaying images on a wide view
Note:
• The audio of the camera whose images are being
displayed will be output. (It is possible to fix audio
to be output on "Audio output camera" under
"Advanced setup" under "Monitor".)
Step 1
When displaying in a multi-screen, click the 1-screen
button of the "Multiscreen select".
→→ The image will be displayed on a 1-screen.
Step 2
Drag the camera No. to be displayed over the live
image and drop it.
→→ The background color of the selected camera
number will turn aqua, and live images will be displayed.
Camera No. box in the wide view screen
109
Display images from cameras on a multiscreen
Live images from cameras can be displayed on a multiscreen.
Displaying images on a control screen
Step 1
Click one of the [Multiscreen select] buttons.
→→ Live images from cameras will be displayed on a
multi-screen.
Displaying images on a control screen
• 4-Screen button
Each click of a button switches to the next 4
screens in the sequence: camera 1 to 4 → camera 5 to 8 → camera 9 to 12 → camera 13 to 16.
• 9-Screen button, 16-Screen button
All images from camera 1 to 9 (or camera 1 to 16)
will be displayed.
When the registered licenses cover 24 or 32 cameras, images from the cameras will be displayed
and switched on 16-screen (camera 1-16 → camera 17-24 (32)).
Note:
• After having switched from multiscreen to
1-screen display, double-clicking the image display area will display the multiscreen displayed
before switching screens.
• It is also possible to switch the images displayed
on the 4-screen/16-Screen by clicking the camera
number panel with the 4-screen/16-Screen displayed. (When the panel of camera 5 is clicked
with the 1- to 4-screen displayed, the images of
camera 5 to 8 will be displayed)
• The audio of the selected camera will be output.
(It is possible to fix audio to be output on "Audio
output camera" under "Advanced setup" under
"Monitor".)
• In case of 9 camera licenses, cameras will be
switched as follows by clicking the 4-screen button:
Camera 1 to 4 → camera 5 to 8 → camera 9
(image displayed in the top left segment only) →
camera 1 to 4
• At the default, black zones will be displayed on
the top and bottom of images with the aspect
ratio of 16:9. Refer to page 51 for the setting to
enlarge the vertical size of displayed images.
• The images transmitted from following cameras
can only be displayed on up to 4-screen.
• Cameras whose "Compression" is set for
"JPEG" and "Image capture size" for
"QXGA(2048x1536)"
• Cameras whose "Compression" is set for
"H.264" and "Image capture size" for
"QXGA(2048x1536)", with a sub monitor
selecting 1-screen. (In 1-screen sequence, the
next camera image to be displayed after the
currently displayed image is included.)
Displaying images on a wide view
Step 1
Note:
• The audio of the camera assigned to the top left
position will be output. (It is possible to fix audio
to be output on "Audio output camera" under
"Advanced setup" under "Monitor".)
Click one of the [Multiscreen select] buttons.
→→ Live images from cameras will be displayed on a
multiscreen.
[Multiscreen select] button of the wide view screen
110
Display or hide the camera title
It is possible to display/hide the camera title displayed on the monitor.
Note:
• The setting to display/hide the camera title will be
retained until the power is turned off. Once the
power is turned off and on again, the camera title
will be displayed on system start.
• The camera title displayed on the sub monitor can
be hidden regardless of this operation. Refer to
the "Configure other settings relating to monitors"
section (☞ page 51) for further information.
Step 1
Each time the [OSD] button is clicked, the camera
title displayed on the main monitor and the sub monitor (HDMI) will be hidden/displayed alternately.
On-screen display button (OSD)
Use digital zoom
Images on the 1-screen and 4-screen can be digitally zoomed. It is also possible to move the zoomed area
within the displayed image.
Note:
• Digital zoom is not available on the wide view screen and on the 9-Screen/16-screen.
• To use this function on the 4-screen, do so after first selecting the desired camera image. To select a camera, click the camera number panel or the camera image. Once a camera has been selected, the selection
frame will be displayed around the camera image.
Note:
• Clicking a point in the zoomed image makes the
clicked point the center of the image.
• If "Enable camera control with mouse" on the
camera control panel (☞ page 112) is not
checked, the digital zoom factor can also be
changed by placing the cursor on the image in the
image display area and turning the mouse wheel.
In this case, the point where the mouse cursor is
positioned will become the zoom center.
Step 1
Confirm that the image display area is displayed on
the 1-screen or 4-screen.
(when displaying on the 4-screen, select the camera
whose image is to be zoomed)
Step 2
Click the digital zoom buttons [×2] [×4] [×8].
→→ The displayed image will be enlarged x2/x4/x8
centering on the center point of the screen.
Digital zoom buttons
Step 3
Click the digital zoom button [x1] to cancel the digital
zooming.
Note:
• Digital zoom is automatically canceled by other
operations such as selecting another camera or
changing the screen pattern.
111
Operate the camera
When displaying live images from a camera with the panning/tilting function on a 1-screen or 4-screen, the following camera operations are available.
Note:
• It may be impossible to operate the camera or some functions may be inoperable depending on the model
of the camera.
• Operations are performed from the operation window. When working with the wide view screen, open a
1-screen or 4-screen operation window by clicking the [Ctrl screen] button in the bottom right corner of the
screen.
• For a fixed camera, the buttons on the camera control panel and other controls will be disabled.
Camera control panel
Operate the cameras displayed as selected (inside selection frame) in the image display area. On the 1-screen,
the camera whose image is currently displayed, can be operated. On the 4-screen, click the camera number
panel on the operation panel, or select a camera image by clicking it in the image display area.
Control buttons
Control buttons
Move (pan/tilt) the camera in the clicked direction.
Keeping the button pressed will move the camera
continuously.
[Detail] button
Display the "Camera control [Advanced]" panel, and
perform any of the following camera operations.
[Zoom] button
Adjusts the zoom factor.
[Home position/Call] button
Move the camera to the home position.
[Enable camera control with mouse] checkbox
When this item is checked, pan/tilt (clicking) and
zoom (mouse wheel) can be controlled with the
mouse on the selected camera image.
Note:
• When this checkbox is marked, digital zooming
(☞ page 111) by turning the mouse wheel operation is not possible. When the camera control
panel is inoperable for the fixed camera, the digital zoom can be performed by turning the mouse
wheel even when the checkbox is checked.
[Focus] button
Adjust the focal point.
[Brightness] button
Adjusts the lens iris of the camera.
Auto mode
Activates the auto mode function of the camera.
112
[Position]
Registers the current orientation of the camera as a
preset position. Moves the camera to a previously
registered preset position.
[Back] button
Closes the "Camera control [Advanced]" and returns
to the camera control panel.
[Setup] button
Displays the camera setup window for registering a
home position (☞ page 117) and executing auto back
focus (☞ page 117).
Note:
• Controlling the cameras is not possible on the
wide view screen and on the 9-Screen/16-screen.
Panning/Tilting
Adjusts the horizontal/vertical position of the camera.
Step 1
When displaying the images on a 4-screen, select the
desired cameras.
Step 2
Click the [Control] button.
Click the desired point to be located at the center of
the angular field of view. The camera will move to
locate the clicked point as the center point in the
image display area.
113
Note:
• To enable operations in the displayed camera
image from the recorder, check "Enable camera
control with mouse" on the camera control panel.
Zooming
Zoom the displayed camera image in/out by zooming the camera lens. Depending on the models of the connected cameras, the available zooming factors may be different. Refer to the operating instructions of the camera for further information.
Note:
• To enable operations in the displayed camera
image from the recorder, check "Enable camera
control with mouse" on the camera control panel.
• When selecting an area in the image display area
by dragging the mouse, the selected area will be
located at the center of the image display area
and the zoom ratio will be adjusted automatically.
Step 1
When displaying the images on a 4-screen, select the
desired cameras.
Step 2
Click the [–] button or the [+] button.
Alternatively, adjust the zoom by placing the mouse
pointer on the image and turning the mouse wheel.
Click the [x1] button to reset the zoom factor to x1.
Move to home position
Move the camera to a previously registered home position. The home position needs to be registered in
advance. (☞ Page 117)
Step 1
When displaying the images on a 4-screen, select the desired cameras.
Step 2
Click the [Call] button to move to the home position.
Focus adjustment
Adjusts the focal point. The auto focus function is available.
Step 1
Step 3
When displaying the images on a 4-screen, select the
desired cameras.
Click the [Near] or [Far] button.
When the [Auto] button is clicked, focus will automatically be adjusted.
Step 2
Click the [Detail] button.
→→ The "Camera control [Advanced]" panel will be
displayed. (☞ Page 112)
114
Iris (brightness) adjustment
Adjusts the lens iris of the camera.
Step 1
Step 3
When displaying the images on a 4-screen, select the
desired cameras.
Click the [–] or [+] button.
It is possible to reset the set brightness by clicking
the [Reset] button.
Step 2
Click the [Detail] button.
→→ The "Camera control [Advanced]" panel will be
displayed. (☞ Page 112)
Auto mode
Activates the auto mode function of the camera.
Step 1
Step 4
When displaying the images on a 4-screen, select the
desired cameras.
Step 2
Click the [Start] button to start the selected auto
mode function.
Click the [Stop] button to turn off the auto mode function.
Click the [Detail] button.
→→ The "Camera control [Advanced]" panel will be
displayed. (☞ Page 112)
Note:
• Refer to the operating instructions of the connected camera for further information about the
auto mode function of the camera.
Step 3
Click the auto mode button [C] of the camera, and
select one of the following auto modes:
Auto track: The camera will automatically track an
object moving on the screen.
Auto pan: The camera direction will automatically
move (pan) between the start point and end
point set in advance.
Preset sequence: The camera will move (pan) to
the preset positions registered in advance in
order of the preset position number (numerical
order).
Patrol: The camera will trace the manually
recorded panning pattern.
115
Register camera preset positions
Register the current camera position as a preset position. The preset positions can be registered only when
using a camera supporting the preset position function.
Step 1
Step 4
When displaying the images on a 4-screen, select the
desired cameras.
Click the [D]/[C] button in the [Position] box to select
a preset number. Select a preset number (1 - 256) to
be registered.
Step 2
Step 5
Click the [Detail] button.
→→ The "Camera control [Advanced]" panel will be
displayed. (☞ Page 112)
Click the [Regist] button.
→→ The camera direction will be registered to the
selected preset position number.
Step 3
Move the direction of the camera to the position to be
registered using the panning/tilting function of the
camera. (☞ Page 113)
Move camera preset positions
Move the camera to the registered preset position. It is necessary to register preset positions in advance.
Step 1
Step 4
When displaying the images on a 4-screen, select the
desired cameras.
Step 2
Click the [Call] button.
→→ The camera direction will move to the preset position corresponding to the selected preset position
number.
Click the [Detail] button.
→→ The "Camera control [Advanced]" panel will be
displayed. (☞ Page 112)
Note:
• A non-registered preset number can be selected,
but the camera will not move even if the [Call] button is clicked.
Step 3
Click the [D]/[C] button in the [Position] box to select
a preset number. Select a preset number (0 - 256) to
be registered. Selecting preset position number 0 will
move the camera to home position.
116
Register home position
The home position is set with the camera positioned at an already registered preset position.
Step 1
Step 4
Register the camera preset positions on the "Camera
control [Advanced]" panel. (☞ Page 112)
Click the [Regist] button.
→→ The selected preset number will be registered as
the home position.
Step 2
Step 5
Click the [Setup] button.
→→ The camera setup window will be displayed.
(☞ page 113)
Click the [Back] button.
→→ The camera setup window closes, and the display
returns to the "Camera control [Advanced]" panel.
Step 3
Click the [D]/[C] button in the [Position] box to select
a preset number to register as the home position.
Select a preset number (1 - 256) to be registered.
Note:
• On some Panasonic camera models, preset position number 0 is registered as home position.
Refer to the "readme.txt" on the provided
CD-ROM about the supported cameras.
Execute auto back focus
The auto back focus function starts to automatically adjust back focus based on a subject located in the center
of the screen by clicking the execute button. For further information about this function, refer to the operating
instructions of the camera in use.
Step 1
Step 3
When displaying the images on a 4-screen, select the
desired cameras.
Click the [Execute] button next to "Auto back focus".
Step 4
Step 2
Display the "Camera control [Advanced]" panel
(☞ page 112), and click the [Setup] button.
→→ The camera setup window (☞ page 113) will be
displayed.
Click the [Back] button.
→→ The camera setup window closes, and the display
returns to the "Camera control [Advanced]" panel.
117
Set up mask areas
Set up mask areas of the camera. For further information about this function, refer to the operating instructions
of the camera in use.
Step 1
Step 4
Click the [Setup] button.
→→ The camera setup window will be displayed.
(☞ page 113)
Click the [End] button.
→→ The mask area setting will be completed and the
grid will disappear.
Step 2
Step 5
Click the [Start] button.
→→ A grid will appear over the image display area and
the segments designated as mask areas are covered with white translucent masks.
Click the [Back] button.
→→ The camera setup window closes, and the display
returns to the "Camera control [Advanced]" panel.
Note:
• It is possible to reset all the mask area settings by
clicking the [Reset] button.
Step 3
Click a segment in the image display area.
→→ Each click of the segment toggles between On
and Off for the mask area setting.
Zoom/Focus adjustment
Adjust zooming or focusing of the camera. For further information about this function, refer to the operating
instructions of the camera in use.
Step 1
Click the [Setup] button.
→→ The zoom/focus adjustment screen will be displayed.
Step 2
Zooming can be adjusted by clicking the [–] button,
the [x1] button or the [+] button.
Focusing can be adjusted by clicking the [Near] button, the [Reset] button or the [Far] button.
Step 3
Click the [Back] button.
→→ The screen will return to the camera setting page.
118
Initial position setup
Tilting degree adjustment, vertical angle adjustment, horizontal adjustment of image clipping position can be
performed. For further information about this function, refer to the operating instructions of the camera in use.
Step 1
Click the [Setup] button.
→→ The initial position setup window will be displayed.
Step 2
Adjust the position using the buttons or by clicking on
the image.
Step 3
Click the [Set] button.
→→ The adjusted position will be saved on the camera.
Step 4
Click the [Back] button.
→→ The screen will return to the camera setting page.
119
Event function
The recorder will take an event action when any of the following events occur.
• Terminal alarm:An event when an alarm input signal is supplied from an external device such as a
door sensor to the alarm input terminal on the rear of the recorder.
• Camera site alarm:
An event when an alarm (camera terminal alarm, etc.) is detected by a camera.
• Command alarm:
An alarm when receiving an alarm from a PC, etc. via a network.
• Face matching alarm:Alarm issued when a face contained in a live image matches an already registered
facial image.
Important:
• Face matching alarm does not apply event recording.
Note:
• Refer to the Operating Instructions of the Additional Business Intelligence Kit for further information about
the setting conditions or restrictions of the face matching function. Face matching alarm is available only
when the face matching function has been configured for use.
Action to be taken upon an event occurrence
When the recorder recognizes an event, it will take an event action according to the set action mode.
Event action mode
In the event modes shown below, the recorder takes one of the following event actions when an event occurs.
The event action mode can be configured on the setup menu. (☞ Page 45)
Recording & alarm action:
Performs all event actions according to the settings. ("A" in the following table)
Recording only:
Performs only recording, filing alarm logs, and moving to camera presets. ("B" in the
following table)
Alarm action:
Performs only alarm actions according to the settings. ("C" in the following table)
Off:
Files only alarm logs. ("D" in the following table)
* "Alarm action" can be selected only for the face matching alarm.
A different event action will be taken depending on the selected event action mode. Refer to a system administrator for further information.
Event action
Mode*1
Description
A
B
C
D
Recording
Start event recording
Recording will start according to the recording
duration configured on the setup menu.
●
●
×
×
Define pre-event recording
Camera images recorded before an event occurs can
be associated with the event and saved on the hard
disk.
●
●
×
×
Move the camera to the
preset position
Move the camera to the preset position registered in
advance.
●
●
×
×
Blink the alarm indicator
The alarm indicator on the front panel will start
blinking.
b
×
b
×
Alarm action
120
Event action
Description
Mode*1
A
B
C
D
Alarm action
Sound the buzzer
The buzzer will start sounding for the duration set in
advance.
●
×
●
×
Outputs alarm signals
Output signals will be sent from the ALARM/CONTROL
connector at the rear of the recorder.
●
×
●
×
Display event information on
the main monitor
The event type and terminal/camera number will be
displayed on the status display panel. At the same time,
the alarm button turn red.
The alarm icon will be displayed on the event error
display area of the web browser.
b
×
b
×
b
b
b
×
Display the alarm message
on a web browser
A window that notifies of an event occurrence will be
displayed on the web browser.
* The alarm message displayed last has priority. To close
the window, click the [x] button.
●
×
●
×
Record the alarm logs*3
Date & time of the event and event information will be
recorded in a log list.
●
●
●
●*2
Send a mail that notifies of
an event occurrence
An e-mail notifying of the event and its date & time (alarm
mail) will be sent to registered e-mail addresses (up to 4).
●
×
●
×
Provide an alarm notification
to a PC according to the
Panasonic alarm protocol
setting
When an event occurs, a notification will be sent to a PC
in accordance with the settings made under [Panasonic
alarm protocol]. (☞ Page 41, 57)
●
×
●
×
Display the images on a
1-screen when an alarm
occurs
Display the images recorded by the camera associated
with the alarm number on a 1-screen
●
×
●
×
Display the alarm icon on a
web browser
*1 ○: Takes action regardless of the setting, ●: takes action in accordance with the setting, ×: takes no
action
*2 Since the face matching function is not performed when "Mode" - "Advanced face matching alarm set up"
is set to "Off", there is no entry made into the log either.
*3 When "On" is selected for the "Attach alarm information" setting of the camera, i-VMD type information will
be displayed in the alarm log. For further information, refer to the operating instructions of the camera in
use.
Stop buzzer beeping
The buzzer sounding to announce an alarm or error can be stopped from the recorder’s front panel.
Step 1
Press the [BUZZER STOP] button.
ERROR
REC
OPERATE
ALARM
Note:
• The buzzer can also be stopped by canceling the
alarm action or error action. (☞ Page 122) The
[BUZZER STOP] button does not reset any of the
other alarm actions.
BUZZER STOP
COPY
MOUSE
→→ The buzzer will stop.
121
Cancel the alarm action
The recorder will take an alarm action according to the settings configured in advance when an event occurs in
the alarm mode (ALM). Information of the occurred alarm will be displayed on the status display panel of the
main monitor. (☞ Page 98) To reset the alarm action, click the [Alarm] button on the status display panel, and
click the alarm [Reset] button.
When an item other than "Ext." is selected for "Auto reset time" on the "Event setup" tab under "REC & event"
on the setup menu (☞ page 43), the following actions will automatically be taken, unless the alarm action is
canceled by clicking the alarm [Reset] button.
• The alarm indicator on the front panel will stop blinking and light steadily.
• The alarm status display on the main monitor will disappear.
• The sounding buzzer and the alarm output will stop.
Note:
• When the alarm action is canceled, the event
recording will stop and return to the operational
status just before the event occurred.
Step 1
Click the [Alarm] button displayed on the main monitor, and click the alarm [Reset] button.
→→ The alarm action will be canceled and the alarm
indicator will go off.
Cancel the error action
When an error (trouble) occurred on the recorder, the recorder will take the error action (a series of actions that
notifies of the error occurrence). Information of the occurred error will be displayed on the status display panel
of the main monitor. (☞ Page 98) To cancel an error action, first click the [Error] button on the status display
panel and then the displayed error [Reset] button.
Note:
• When an error occurs, take remedial action by following the instructions displayed on the error log panel (☞
page 131). The error indicator on the front of the recorder will go off when the cause of the error has been
eliminated.
122
Record images
Live images can be recorded on the recorder. Images from up to 32 cameras can be simultaneously recorded
with this recorder.
Network cameras
Image data
HDD
Recorder
Record images (schedule recording)
Recording can be automatically started and stopped according to a previously specified schedule. Refer to
page 39 for schedule recording.
Note:
• When event recording is triggered by an alarm during the schedule recording, event recording has the
higher priority. Refer to the "Recording mode and its priority" section below for further information about the
priority of the recording mode.
• To stop schedule recording, stop the recording on the setup menu. Refer to page 48 for further information.
• In case of a network error, the image of the camera where the communication error has occurred will not be
recorded. Recording starts when the network error is recovered. If the status in which the communication
with the camera is disconnected recovers within around 40 seconds, error logs will not be saved.
• Schedule-recorded image data will be divided into multiple files every hour on the hour. In that moment,
recording may sometimes be interrupted around for 1 second.
Recording mode and its priority
There are 3 recording modes. The recording modes and their priority levels are as follows.
When two or more recordings with different recording modes started simultaneously, only recording with the
higher priority will start.
Recording mode
Priority
Event recording
1
Schedule recording
2
Pre-event recording
3
123
Play recorded images
Display the images recorded on the recorder’s hard disk on the main monitor.
Playback operation can be made while recording. Playback of images can be controlled from the operation display area.
Refer to page 125 and following pages for playback operation.
Image data
Main monitor
HDD
Recorder
Note:
• When playing recorded images on a 1-screen, audio recorded together with these images will be output.
• When displaying recorded images on a multiscreen, audio from the camera to be displayed on a screen will
be heard.
• No audio will be output when playing back in fast forward/fast reverse.
• The camera image can be changed by clicking the camera number (1 to 32) during playback.
• The Multiscreen select button, digital zoom button, Mute button and OSD button remain effective during
playback. Refer to "Monitor live images" (☞ page 104) for further information.
• When displaying images recorded at the following setting values of resolution and frame rate on each segment of a multiscreen, the images will be played back with the selected refresh interval.
Resolution (Image capture size)
Frame rate
Display
QXGA
30 ips
4-screen
FHD, HD
60 ips
4-screen
QXGA
10 ips, 15 ips
4-screen (sub monitor display or re-encoding
transmission enabled)
FHD, HD
30 ips
4-screen (sub monitor display or re-encoding
transmission enabled)
SXVGA, SVGA
30 ips
4-screen (sub monitor display or re-encoding
transmission enabled)
QXGA
30 ips
1-screen (sub monitor display and re-encoding
transmission enabled)
FHD
60 ips
1-screen (sub monitor display and re-encoding
transmission enabled)
FHD
10 ips, 15 ips
4-screen (sub monitor display and re-encoding
transmission enabled)
• Different values selected for resolution and frame rate will cause the data size of the playback images on the
multiscreen to differ considerably, which may result in non-synchronized playback. In this case, pause and
then restart playback (☞ page 125).
• At the default, black zones will be displayed on the top and bottom of images with the aspect ratio of 16:9
when images are played back on the control screen. Refer to page 51 for the setting to enlarge the vertical
size of displayed images.
• The size of displayed images will be fit into the screen regardless of the aspect ratio when images are
played back on a full screen.
124
Playback operation panel
In playback mode, operation buttons are displayed on the playback operation panel. In addition to the operation buttons, the playback operation panel displays the playback status.
Normal status (during display of live images)
Image playback status
Playback pause status
The functions of the buttons are as follows:
Function
Example
Operation
Playback button
Plays recorded images.
Clicking this button while playback is paused will cancel the pause
status.
When the playback button is clicked during fast playback/fast
reverse playback, the playback speed will be x1.
Stop button
Playback will stop and live images will be displayed when this button is clicked during playback/pause.
Pause button
Playback will be paused when this button is clicked during playback.
Pause will be canceled when this button is clicked during playback/pause.
Captured image button
Saves images paused during playback on SD memory card.*
Clickable only while playback is paused on a 1-screen. When this
button is clicked, the button will turn gray, and images will be
saved. The SD memory card can be removed when the button
becomes available.
Next image/Previous
image button
When the next image button is clicked during pausing, the next
frame is played and paused.
When the previous image button is clicked during a pause, the
previous frame is played and paused.
Note:
• When playing H.264 images, some frames of recorded images
will not be displayed. Reverse frame-by-frame playback will be
performed with the refresh interval setting of the camera.
125
Function
Example
Fast forward/Fast
reverse button
Operation
Playback speed of fast playback will be changed in the following
order each time the fast forward button is clicked:
Step2 (Approx. 2x) → Step3 (Approx. 4x) → Step4 (Approx. 8x) →
Step5 (Approx. 16x) → Step6 (Approx. 32x) → Step7 (Approx. 48x)
Playback speed of fast reverse playback will be changed in the
following order each time the fast reverse button is clicked:
Step2 (Approx. 2x) → Step3 (Approx. 4x) → Step4 (Approx. 8x) →
Step5 (Approx. 16x) → Step6 (Approx. 32x) → Step7 (Approx. 48x)
The playback speed will be displayed on the playback status display.
Note:
• When playing H.264 images, some frames of recorded images
will not be displayed. Except for x2 fast playback speed, fast
playback/fast reverse playback will be performed with the
refresh interval setting of the camera.
Next record/Previous
record button
Clicking the next record button will play back the next later
recording.
Clicking the previous record button will play back the next earlier
recording.
When there is no next/previous recorded image to be skipped to,
the current playback will continue.
Go to last button
When this button is clicked, playback of the latest recorded
images will start. The starting point is around 30 seconds before
the date & time of the latest recorded images.
Playback status display
The status of the recorder such as the playback status, pause status etc. will be displayed.
The playback speed will be displayed in fast forward/fast reverse
mode.
Wide view button
When this button is clicked during playback, the recorded images
will be displayed on a full screen. Clicking the [Ctrl screen] button
during playback on a full screen will return the image display to
the previous status.
Non-display button
(Displayed during playback on a full screen)
Hides the playback operation panel and the date & time operation
panel. These panels can be displayed again by the mouse operations.
About captured images
The images captured by clicking the image capture button and saved on an SD memory card will not be displayed with this recorder.
To display those images on a PC monitor, the data format and destination to save are as follows:
File format for recorded images: JPEG (DPOF-compatible)
Destination to save:
SD memory card [DCIM]\100_PANA\P1000001.JPG
P1000002.JPG, ...
* The folder will be created from 100_PANA to 999_PANA. If the folder already contains the file P1000999.JPG,
a folder with a new number will be created.
126
Play images from a designated point
It is possible to start playback from a designated date & time or the latest recorded image.
Play image recorded at a designated date & time
Start playback by designating the date & time of a recorded image on the date & time operation panel.
Date & time operation panel (normal display)
Playback button
Calendar
Step 1
Step 4
Click the [D]/[C] button in the [Playback] box to set
the date & time to be played.
To stop playback and return to live images, click the
[Live] button or the stop button on the playback operation panel.
→→ Playback will stop, and live images will be displayed.
Step 2
Select the month from the calendar in which date &
time of the image to play back is included.
Click the [<<Y]/[Y>>] button to change the year and
the [<M]/[M>] button to change the month.
Note:
• The current date is displayed in aqua.
Step 3
Click the date & time of the image to play back from
the calendar.
→→ The frame around the selected date turns green,
and playback starts at the designated date &
time.
The date & time operation panel will turn to the
playback display (☞ page 129) and the playback
operation panel will be displayed on lower section
of the date & time operation panel (☞ page 125).
Note:
• Unless you want to change the date & time on the
calendar, click the playback button.
127
Note:
• Playback can also be stopped and live images
can also be displayed by the following operations:
• Clicking the [x] button on the date & time operation panel (playback display)
• Changing the playback medium
• When there is no image stored under the entered
date & time, proceed as follows:
• When there are images recorded after the designated date & time, the oldest image recorded
after the designated date & time will be played.
• When there are no images recorded after the
designated date & time, the newest image
recorded before the designated date & time
will be played.
Play the latest recorded image
When this button is clicked, playback of the latest recorded images will start. The starting point is around 30
seconds before the date & time of the latest recorded images.
Date & time operation panel (normal display)
Step 1
Click the [Go to last] button.
→→ Playback of the latest recorded images will start.
The date & time operation panel will change to
playback display (☞ page 129). At the same time,
the playback operation panel (☞ page 125) is displayed at the bottom of the date & time operation
panel.
Step 2
To stop playback and return to live images, click the
[Live] button or the stop button on the playback operation panel.
→→ Playback will stop, and live images will be displayed.
Note:
• Playback can also be stopped and live images
can also be displayed by the following operations:
• Clicking the [x] button on the date & time operation panel (playback display)
• Changing the playback medium
• When clicking the [Go to last] button while displaying images on a 4-screen, the recorded image
may not be displayed depending on the timing. In
this case, click the [Go to last] button again.
128
Playback by designating a timeline
When playback starts, the date & time operation panel will change to playback display.
This section explains how to use the timeline display to designate a playback date & time by operating the playback slider.
Date & time operation panel (playback display)
Scale selection button
Jump buttons
Display range selection
button
Playback slider
Display range selection
button
Timeline
The playback display shows available recorded images and displays these on a timeline sorted by type. It is
possible to change the type of recorded images displayed on the timeline, change the timeline scale, and designate the recorded image to play.
[REC Event]
Mark the checkboxes of different types of recorded
images and display them on a timeline. If changes are
made during playback, playback will be paused and a
new search will be performed.
Schedule: Schedule-recorded images will be displayed in pink
Event: Event-recorded images will be displayed in
red
Note:
• To display the result of the motion detection
search, it is necessary to configure the settings of
the connected cameras that support the motion
detection search function in advance.
Refer to the "readme.txt" on the provided CDROM about the supported cameras. Refer to the
operating instructions of the camera in use for
further information.
[Information/VMD]
When this box is checked, the time zone recorded
when the VMD function was activated (motion was
detected in an image) will be displayed in blue on the
timeline. (Playback will be paused.)
Periods for which no recorded images are available
will be displayed in black.
[Advanced setup] button
Display the advanced setup panel and change event
types and other information displayed on the timeline.
(☞ Page 130) Playback will be paused.
[Scale selection] button
Select a timeline display covering 2 hours (2 h), 8
hours (8 h) or 24 hours (24 h).
[Display range selection] button
The timeline will be displayed in accordance with the
setting of the scale selection button.
129
[Playback slider]
Displays the time during playback. Drag and drop the
playback slider to a desired time on the timeline to
start playback from that time.
Note:
• The playback slider may not soon move to the
desired position.
[Jump interval]/Jump buttons
Move the playback point by a given amount of time
and play back from that point. Clicking the [<] / [>]
buttons will move the playback point by the amount
of time specified under [Jump interval].
Available ranges: 10 s/ 15 s/ 30 s/ 60 s/ 180 s/ 300 s
[Playback of audio]
This item is displayed when the recorder is set up to
lock in a camera with audio output. If this checkbox is
marked, the audio associated with the displayed
image will be output. (☞ Page 51)
Change event types and other information displayed on the timeline
[Advanced setup]
[Event type]
Set event types to be displayed on the timeline. To
display event-recorded images on a timeline, mark
their checkboxes.
Refer to page 120 for further information about each
alarm.
[VMD sensitivity adjustment]
Set the sensitivity for the motion detection displayed
on the timeline. Sensitivity increases in the steps
shown below.
Low → Mid → High → All
[Back] button/[X] button
Click this button to return to the date & time operation
panel (playback display).
130
Search and play
Search a desired recorded image and play it. There are the following 2 searching methods.
• Play images selected from alarm and error logs (Log search)
• Search and play images recorded triggered by the motion detection of the camera (VMD search)
Play images selected from logs (log search)
Display the alarm log list or error log list, and click a date & time to play the corresponding recorded images.
Note:
• The corresponding recorded data that is displayed in the selected log list cannot be played if the data has
already been overwritten or erased.
Step 1
Click the [Alarm] button or [Error] button on the status
display panel.
→→ The corresponding [Log] buttons will be displayed.
Step 2
Click the [Log] button.
→→ The alarm log panel or error log panel will be displayed. It is possible to switch between list pages
by clicking the [Previous]/[Next] buttons.
Note:
• Up to 1000 error logs are saved. When more than
1000 logs are filed, the older logs will be overwritten by the newer logs. In this case, the oldest log
is the first to be overwritten.
Step 3
Select the line with the desired list, and click the playback button on the playback operation panel.
(☞ page 125)
→→ Playback will start from a point approx. 5 seconds
before the date & time selected.
Note:
• Playback can also be started by double-clicking
the desired date & time line.
• To start playback from the beginning of the preevent recording when the "Pre-event duration"
setting is longer than 5 seconds, click the playback button, and then click the previous record
button.
Note:
• Up to 750 alarm logs are saved. When more than
750 logs are filed, the older logs will be overwritten by the newer logs. In this case, the oldest log
is the first to be overwritten.
131
Step 4
Note:
• Playback can also be stopped and live images
can also be displayed by the following operations:
• Clicking the [x] button on the date & time operation panel (playback display)
• Clicking the [Live] button on the date & time
operation panel (playback display)
• Changing the playback medium
To stop playback and return to live images, click the
stop button on the playback operation panel.
(☞ page 125)
→→ Playback will stop, and live images will be displayed.
Search and play recorded images triggered by motion
detection (VMD search)
Search images recorded with a camera supporting the VMD search function by the date motion was detected
and play them. Click a date & time on the result list to play corresponding recorded images.
Important:
• To perform the motion detection search, it is necessary to configure the settings of the connected cameras
that support the motion detection search function in advance. Refer to the "readme.txt" on the provided
CD-ROM about the supported cameras. Refer to the operating instructions of the camera in use for further
information.
Step 1
Display the images from the camera to search on a
1-screen. (☞ Page 109)
Step 3
Designate the time range to search.
Set the year, month, day and time of the start and
end point by clicking the respective [D]/[C] buttons.
Step 2
Note:
• It is also possible to set the start point and end
point of the search range by clicking the [Start]/
[End] buttons after selecting the desired time in
the [Playback] box and clicking the desired date
on the calendar.
Click the [Search] button on the playback operation
panel. (☞ Page 125)
→→ The VMD search panel is displayed.
132
Step 4
Note:
• Playback can also be stopped and live images
can also be displayed by the following operations:
• Clicking the [x] button on the date & time operation panel (playback display)
• Clicking the [Live] button on the date & time
operation panel (playback display)
• Changing the playback medium
Click the [Search] button.
→→ This will run a VMD search within the designated
search range and display a list of results. It is
possible to switch between list pages by clicking
the [Previous]/[Next] buttons.
Note:
• Up to 100 logs are saved in the list. When more
than 100 logs are filed in the search result, ">
100" will be displayed.
• The VMD search function searches the entire
camera image by default. To designate a search
area, click the [Setup] button next to [Detection
area / Mask duration] on the "VMD search setup"
panel. (☞ Page 134)
• It may take some time until the search results are
displayed.
Step 5
Select the line with the desired list, and click the playback button on the playback operation panel.
(☞ page 125)
→→ Playback will start from the date & time selected.
Note:
• Playback can also be started by double-clicking
the desired date & time line.
Step 6
To stop playback and return to live images, click the
stop button on the playback operation panel.
→→ Playback will stop, and live images will be displayed.
133
Set up VMD areas, etc. [VMD search setup]
Set up VMD areas within images and a mask duration.
Step 1
Note:
• As the detection areas will be set up to match the
image display area divided into 16x16 segments,
the top left and bottom right detection areas may
not be exactly as designated.
• It is impossible to delete the detection area that
has been set. To change the detection area setting, perform Step 3 again.
Display the images from the camera to search on a
1-screen. (☞ Page 109)
Step 2
Click the [Setup] button next to [Detection area /
Mask duration].
→→ The "VMD search setup" panel will be displayed.
Step 4
If VMD search takes too much time or the search produces too many results, set a mask duration to
reduce the search frequency. When mask duration is
set, no motion detection will be performed from the
time motion is detected to the time mask duration is
set.
To set, click the [C] button next to [Mask duration
setup] on the advances setup panel.
Mask duration: 1 s/ 5 s/ 10 s/ 30 s/ 1 min/ 5 min/
10min
Default: 1 s
Step 3
Click 2 points of the upper left and lower right to create a square to be set as the area on the displayed
image.
→→ The set area will be displayed in gray, and the
area will become subject to be searched for
motion detection.
Step 5
Click the [Back] button or the [x] button.
→→ The display returns to the VMD search panel.
134
Copy recorded images
Copy images recorded by the recorder onto SD memory card or external storage devices (External HDD and
USB memory).
It is recommended to make back-up copies on a regular basis for unexpected situations such as malfunction of
the hard disk drives. Personal information may be included in copied images. Take an extra caution to handle
and manage the medium used for copying to prevent from information leakage.
It is impossible to copy recorded images when the recorder is in the following statuses.
• When the copy window is being opened by other user via a network
• When the SD memory card or external storage device is being selected by another user via a network
• When the media other than hard disk drives is selected
The copied recorded images can be played on the recorder or on a PC using the dedicated viewer software.
The viewer software will be automatically copied to an SD memory card or an external storage device on which
recorded images are copied. Refer to page 174 for how to operate the viewer software. Refer to page 139 for
how to play the copied recorded images on the recorder.
Note:
• To copy recorded images onto an SD memory card, it is necessary to format an unformatted SD memory
card or an SD memory card formatted with another device on this recorder. (☞ Page 138)
• When copying images onto an external storage device, format the device first before starting copying.
• Required time for copying varies depending on the data size to be copied. It will take longer time to copy
recorded images when they were recorded with a larger image capture size, in a higher quality or at a higher
frame rate even though the same number of cameras and the same duration are set for copying.
• Copying of recorded images may sometimes be performed incorrectly when there exist 2 or more images
recorded at the same date & time resulting in change of the date & time setting or the auto time adjustment
function.
• In the following cases, the copying currently being performed will stop.
• When any of the settings of the recorder is changed
• When a user who started manual copy logged out (It will take around 90 seconds until copying is
stopped after the web browser is closed.)
• When the original data (source for copying) is lost (overwritten or malfunction of the hard disk drive)
Important:
• This product cannot play images copied on an external storage device, Use the dedicated viewer software
to play them.
Step 1
Insert an SD memory card to this product or connect
an external storage device to the copy port "COPY".
(☞ Page 102)
Step 2
Click the [Copy] button on the operation panel of the
main monitor.
→→ The copy panel will be displayed (if in playback
mode, playback will be paused).
135
Note:
• The copy panel cannot be displayed in the web
browser when it has already been opened by
another user. When copying is already underway,
the copy cancel window will be displayed.
Note:
• To attach a code for alteration detection, click the
[Advanced] button. On the advanced setup window, set [Attach the alteration detection code] to
"On".
Step 3
The following items can be set up for copying of
recorded data:
Item
Camera selection
Description
Check the number of the camera
whose recorded data is to be copied.
Checking [Check all] will copy the
recorded data of all cameras.
Copy drive
Indicates the copy destination.
Date & Time range Specify times and dates to define the
range for copying recorded data. Set
the year, month, date & time of the
start point and end point.
It is also possible to set the start point
and end point of the filter range by
clicking the [Start]/[End] buttons after
clicking the desired date on the
calendar and then selecting the
desired time in the [Playback] box.
Assign a
Check this item to assign a password
password
to the copied data.
The password will be required to play
back copied data that is password
protected.
Free
The remaining space of the storage
medium will be displayed.
Data size
The total volume of all recorded
images to be copied (including the
viewer software) will be displayed.
* Indicated as *.** GB while the data
volume is being calculated.
• Clicking the [Back] button will return to the copy
panel.
Step 4
Click the [Copy] button on the copy panel.
→→ If the [Assign a password] checkbox has been
marked, the password entry screen will be displayed.
Otherwise proceed to Step 6.
136
Step 5
Enter the password, and then click the [Next] button.
For character entry, refer to "About the operation of
on-screen keyboard" (☞ page 100).
• Enter 5 to 8 alphanumeric characters for a password.
• To confirm the password, enter the same password again into the "Retype" column.
• To save the entered password, check "Memorize
password temporarily". The next time data is copied, the password entry window will open with the
password already filled in. The password will be
retained in memory until the power of the recorder
is turned off.
→→ The copy start confirmation window will be displayed.
Step 6
Click the [OK] button in the copy start confirmation
window.
→→ "Copying" is displayed in the status display area,
and copying will start. When copying is completed, "Copying" will go off.
137
Important:
• Do not disconnect the SD memory card or the
external storage device when copying is being
performed. Otherwise the data stored on the SD
memory card or the external storage device could
be lost.
• If the copy destination lacks sufficient remaining
storage capacity, copying will continue until the
medium is full. Use a medium with sufficient storage capacity to avoid left over data that is not
copied.
• Copying will be performed in the following order:
Viewer Software → Images → Audio Depending
on the designated time range for copying and the
remaining space of the storage medium, images
and audio may not be copied.
• Clicking the [Copy] button during the copying
process will display the copy cancel confirmation
window, allowing you to cancel copying. Copying
continues while the copy cancel confirmation window is displayed.
• Do not turn off the power of the recorder while
copy is in progress. If the power is turned off while
copying, the storage media copied on will become
unusable.
• Recorded images (data) of up to 1 million can be
copied onto the external device connected to the
copy port "COPY". However, it is impossible to
copy any more data exceeding these limits even
when there is a sufficient remaining capacity.
Format SD memory card
To copy recorded images onto an SD memory card, an unformatted SD memory card or an SD memory card
formatted with a PC or another device is required to be formatted with this product.
Important:
• Formatting will delete all data and setup information stored on an SD memory card. Image data once
deleted cannot be restored.
• This product cannot format the external storage device connected to the copy port "COPY". Format the
medium using a PC.
Step 1
Click the [Copy] button on the operation panel of the
main monitor. (☞ Page 135)
→→ The copy panel will be displayed.
Step 2
Click the [Advanced] button. (☞ Page 135)
→→ The setup menu (advanced) will be displayed.
Step 4
Click the [OK] button.
→→ Formatting of the SD memory card will start, and
a window indicating that formatting is in progress
will be displayed.
When formatting is completed, the format completion window will be displayed.
Important:
• Do not turn off the power of the recorder while
formatting is in progress.
Step 3
Click the [Execute >] button for "SD card format".
→→ The confirmation window will be displayed.
138
Play back copied images with this recorder
Display a list of recorded images copied onto an SD memory card (copied data), select recorded images from
the list, and play them. It is possible to search for copied data using filters.
Important:
• Recorded images copied on the external storage connected to the copy port "COPY" cannot be played.
Note:
• It is also possible to set the start point and end
point of the filter range by clicking the [Start]/[End]
buttons after selecting the desired time in the
[Playback] box and clicking the desired date on
the calendar.
Step 1
Insert an SD memory card on which the recorded
data are copied. (☞ Page 102)
Step 2
Select [SD] of the "Disk/Medium" on the playback
operation panel.
→→ The media playback panel will be displayed. Up
to 10000 logs are saved in the list. When more
than 10000 logs are filed in the search result, ">
10000" will be displayed.
Step 4
Click the [Filtering] button.
→→ A list of search results for the specified filter criteria is displayed. It is possible to switch between
list pages by clicking the [Previous]/[Next] buttons.
Step 5
Select the line with the desired date & time, and click
the playback button on the playback operation panel.
→→ Playback will start from the date & time selected.
If the multiscreen was displayed, it will change to
the 1-screen.
Note:
• Playback can also be started by double-clicking
the desired date & time line.
• If the selected copied data is password protected,
the password entry screen will be displayed. Enter
the assigned password, and click the [OK] button.
If the wrong password is entered, the copied data
cannot be played back. For character entry, refer
to "About the operation of on-screen keyboard"
(☞ page 100).
Step 3
To filter the number of items displayed on the copied
data list, proceed as described below.
To play back without filtering, proceed to Step 5.
Filtering by camera
Mark the checkbox for [Filtering by camera]. Filtering
will be applied to the camera whose image is displayed.
Filter by designating date & time
Specify the filter range by designating a date & time.
To specify the filter range, set the year, month, day
and time of the start and end point by clicking the
respective [D]/[C] buttons.
Step 6
To stop playback and return to live images, click the
stop button on the playback operation panel.
→→ Playback will stop, and live images will be displayed.
Note:
• Playback can also be stopped and live images
can also be displayed by the following operations:
• Clicking the [x] button on the media playback
panel.
• Clicking the [Live] button on the date & time
operation panel (playback display)
• Changing the playback medium
139
Configure the network settings
The recorder can be operated using a mouse or from a web browser on a PC (excluding certain functions and
settings). On the following pages, operation from a web browser, setting up the PC and related matters will be
described.
When operating the recorder using a web browser, it is necessary in advance to configure the network settings
of the recorder and a PC.
When the network settings of the PC are as follows, it is unnecessary to configure the settings. It is possible to
configure the settings and operate the recorder using a web browser after completing the connection.
IP address: 192.168.0.2 - 192.168.0.249, 192.168.0.251 - 192.168.0.254
Subnet mask: 255.255.255.0
Default gateway: 192.168.0.1
When the settings are configured differently from the above, configure the network settings of the recorder or a
PC.
Configure the network settings of the recorder
The network settings of the recorder can be configured on the "Network" page - the [Basic] tab of the setup
menu.
Refer to the chapter relating to the [Basic] tab of "Network" of the setup menu on page 52 for how to operate.
Configure the network settings of the PC
The TCP/IP setting of the PC shall be changed to conform to the settings of the recorder. When using the
recorder with the default (IP address:192.168.0.250), set the IP address of the PC to "192.168.0.xxx (a number
from 2 to 254 except 250 (this recorder))".
The settings described in these operating instructions are based on the standard settings for Windows 7. Refer
to the operating instructions of the respective OS for further information.
Step 1
Important:
• Log in to the PC as an administrator.
Click "Control Panel" on the start menu.
→→ "Control panel" will be displayed.
140
Step 2
Step 4
Click "View network status and tasks".
Click [Properties]
→→ The "Network and Sharing Center" window will be
displayed.
Step 3
Click "Local Area Connection".
→→ The "Local Area Connection Properties" window
will be displayed.
Step 5
Click "Internet Protocol Version 4 (TCP/IPv4)", and
then [Properties].
→→ The "Local Area Connection Status" window will
be displayed.
→→ The "Internet Protocol Version 4 (TCP/IPv4) Properties" window will be displayed.
141
Step 6
Select [Use the following IP address] and set "IP
address" and "Subnet mask" as follows:
• IP address: 192.168.0.9
• Subnet mask: 255.255.255.0
Depending on the network configuration, it is necessary to configure "Default gateway". Contact the system administrator for further information about the
settings.
Step 7
Click the [OK] button and close the window.
142
Network security of the recorder
The security function of the recorder
q Access restriction by the user authentication
It is possible to restrict users to access the recorder by selecting "On" for "User authentication". (☞ Page 59)
w Access restriction by changing the HTTP port number
By changing the HTTP port number, it is possible to prevent illegal access such as a port scanning, etc.
(☞ page 54)
Important:
• Design and enhance security countermeasures to prevent leakage of information such as image data,
authentication information (user name and password), alarm mail information, FTP server information, etc.
Perform the countermeasure such as the access restriction using the user.
• After the unit is accessed by the administrator, make sure to close the web browser for added security.
• Change the administrator password periodically for added security.
Enhance network security
It is possible to enhance the network security by dividing the subnet using a router to authenticate users twice
(by the recorder and by the router). When connecting the recorder to an unsecured network, secure the network connection by installing a VPN (Virtual Private Network) device, etc. between the recorder and the host
PC.
Important:
• The settings for the network security vary depending on the network to which the recorder is to be connected such as an intranet or Internet service provider. Refer to a network administrator for further information about the network security.
[Connection example]
IP address: 192.168.1.1
Subnet mask: 255.255.255.0
Router
Router
Network
IP address: 192.168.1.100
Subnet mask: 255.255.255.0
Default gateway: 192.168.1.1
IP address: 192.168.0.1
Subnet mask: 255.255.255.0
IP address: 192.168.0.250
Subnet mask: 255.255.255.0
Default gateway: 192.168.0.1
COPY
MOUSE
Recorder
PC
By using a firewall, etc., it is possible to use packet filtering and protocol filtering to enhance the network security.
143
[Connection example]
Firewall
Router
IP address: 192.168.1.1
Subnet mask: 255.255.255.0
Router
Network
IP address: 192.168.0.1
Subnet mask: 255.255.255.0
Switching hub
IP address: 192.168.1.100
Subnet mask: 255.255.255.0
Default gateway: 192.168.1.1
COPY
MOUSE
Recorder
PC
IP address: 192.168.0.250
Subnet mask: 255.255.255.0
Default gateway: 192.168.0.1
144
Display the operation window
Boot the PC and operate the recorder using a web browser.
Step 1
Step 3
Start the web browser.
Enter the user name and password registered in the
recorder, and then click the [Login] button.
Step 2
Enter the IP address or URL assigned to the recorder
into the address box, and then press the [Enter] key.
→→ The authentication window will be displayed. The
authentication window will not be displayed when
"Off" is selected for "User authentication" on the
[Basic] tab of "User management" of the setup
menu.
Important:
• Refer to a system administrator for further information about the set IP address.
• Do not attach "0" before the numbers when entering IP address.
Example:
○: 192.168.0.50
×: 192.168.0.050
• If a message is displayed on the information bar,
see page 184.
→→ The top page will be displayed.
Note:
• When the top page is displayed for the first time,
the install wizard of the ActiveX control required to
display images from the camera will be displayed.
Follow the instructions of the wizard.
• The ActiveX control and the viewer software (☞
page 172) will be installed at the same time.
• When any ActiveX control for a Panasonic
recorder other than this product is already
installed, uninstall "WebVideo ActiveX" from
"Uninstall a program" and then install ActiveX
control for this product. (☞ Page 172)
• When the installation wizard is displayed each
time displaying other page even though installation of ActiveX control for this product has been
completed, reboot the PC.
• The ActiveX control used on each PC should be
licensed individually. Refer to your dealer for the
software licensing.
145
Important:
• Refer to a network administrator for the set user
name and password.
• Refer to page 61 for how to register users.
• The default administrator name and password are
as follows.
Administrator name: ADMIN
Password
: 12345
• To enhance the security, change the administrator
name and password before running the recorder.
Change the password periodically. Refer to page
61 for how to change the password.
• Refer to page 184 when a message is displayed
on the information bar or when an unnecessary
status bar or scroll bar is displayed on the window.
About the operation window
Top Page
Status display area
Current time display area
Image display area
Download operation area
[CAM] tab
[HDD] tab
[Control] button
Displays operations such as searching for and copying recorded images, search results and log information.
It can also be used to switch camera images between
display of live images on a multiscreen, wide screen,
etc.
[Cam. select] button
Can be used for camera operations such as switching
camera images.
[Setup] button
Can be used to configure the settings of the recorder.
Refer to the "Settings of this product" section starting
from page 9 for setup items and their further information. Refer to page 177 for basic operations.
Image display area
Playback images and live images will be displayed.
The camera title is displayed at the upper left and the
date & time (the current date & time of the camera’s
clock when displaying live images and the date &
time when the images were recorded when playing
recorded images) at the upper right. Clicking the
camera title while displaying images on a multiscreen
will display images from the respective camera on a
1-screen.
At the default, the aspect ratio of each screen segment is 4:3. Refer to page 51 for the setting to
change the aspect ratio to 16:9.
Download operation area
Downloads the images currently being played and the
viewer software.
Status display area
The current status of the recorder such as playback
status, recording status, etc. will be displayed.
[CAM] tab
Camera operations such as zooming, focusing, auto
mode, etc. can be performed on this tab.
Current time display area
The current date & time will be displayed.
[HDD] tab
Can be used to play back or operate recorded
images.
146
Control panel
The following operation panels will be displayed when the [Control] button is clicked.
List display
area
[Multiscreen] box
Images recorded using up to 4 cameras can be
played simultaneously on a multi-screen. Each click
of the button switches to the next 4 screens in the
sequence: camera 1 to 4→camera 5 to 8→camera 9
to 12→camera 13 to 16.
Disk/Medium
Select a destination folder to store the current playing
images.
HDD/SD
[Wide view] box
Displays live or recorded images on a full-screen.
(☞ Page 154)
[Digital zoom] box
Camera image displayed on a 1-screen will be displayed in the proportion of the clicked zoom ratio button.
[x1]: x1, [x2]: x2, [x4]: x4
[Search] box
Use this button to search recorded images. The
search result will be displayed in the list display area.
• [REC event] button
Select [HDD] for "Disk/Medium" to display this
button. The recording event search window will
be displayed.
• [VMD] button
Select [HDD] for "Disk/Medium" to display this
button. The motion detection search window will
be displayed.
• [Copy data] button
Select [SD] for "Disk/Medium" to display this button. The copy data search window will be displayed.
[Copy] box
Select [HDD] for "Disk/Medium" to display this button.
The copy data window will be displayed by clicking
this button. Use this button to manually copy
recorded images onto an SD memory card or an
external storage device.
[Log] box
Select a log for display.
Clicking the buttons will display the respective logs in
the list display area.
Displayed logs: Alarm log, error log, access log, and
network log
147
• [Close] button
Close the window displaying log information.
List display area
Number of data: Displays the total number of listed
data.
No: The number will be displayed in the order of
occurrence.
Date & Time: Date & time when an event or trouble occurred will be displayed.
Log: Details of the occurred event are displayed.
The following are the maximum number of logs
that can be saved. When the number of logs
exceeds the limit, the older logs will be overwritten by the newer logs. In this case, the oldest log is the first to be overwritten.
Alarm logs: Up to 750
Error logs: Up to 1000
Access logs: Up to 100
Network log: Up to 100
Clicking date & time in the list can start playback from
that date & time. (When clicking date & time in the log
information, playback will be started from a point
approx. 5 seconds before the date & time selected.)
To display search results or a list of copied data, refer
to "Search and play recording events" (☞ page 163)
and "Check a list of copied recorded images" (☞
page 170), respectively.
Note:
• To start playback from the beginning of the preevent recording when the "Pre-event duration"
setting is longer than 5 seconds, click the playback button, and then click the previous record
button.
• The corresponding recorded data that is displayed in the selected log list or log information
cannot be played if the data has already been
overwritten or erased.
Camera selection panel
Clicking the [Cam. select] button will display the operation panel shown below. Switch the image display area
and select camera images.
Camera selection box
For the [Multiscreen] box, [Wide view] box and [Digital zoom] box, refer to "Control Panel" (☞ page 147).
Camera selection box
Clicking the camera title will display images from the
selected camera on a 1-screen in the image display
area.
148
Setup panel
The following setup panel will be displayed when the [Setup] button is clicked. The settings such as the date &
time display of the recorder can be configured.
Refer to the "Settings of this product" section starting from page 9 for setup items and their further information.
Refer to page 177 for basic operations.
[Date/Language] button
Displays the "Date/Language" page. Perform settings
such as date & time and daylight saving time.
[Camera] button
Displays the "Camera" page.
Perform registration of network cameras.
[Extra function] button
Download the statistics data of the additional business intelligence functions.
(This button will be displayed after registering the
license for the recorder.)
Refer to the Operating Instructions of the Additional
Business Intelligence Kit for further information.
[REC & event] button
Displays the "REC & event" page. Configure the settings relating to the recording schedules and alarms.
[Monitor] button
Configure the settings relating to the main monitor
and the sub monitor.
[Network] button
Configure the settings relating to the network.
[User management] button
Register, edit or delete the user information. The
administrator information can also be changed.
[Maintenance] button
Displays the system information of the recorder.
[HDD management] button
Hard disk drives can be formatted.
149
Status display area
Live/playback status display area
Other status display area
Recording indicator
Live/playback status display area
The status of an image (live image/recorded image)
will be displayed. The following information will be
displayed:
: Indicates that live images are being displayed.
: Indicates that playback images are being
displayed.
: Indicates that reverse playback images are
being displayed.
: Indicates that fast playback images are
being displayed.
: Indicates that fast reverse playback images
are being displayed.
: Indicates that a paused image is being displayed.
: Indicates that recorded images/audio are
being downloaded.
: Indicates that downloading of recorded
images/audio is completed.
[Step 1] - [Step 7]
Indicates the playback speed.
: Normal playback speed (1x)
: Approx. 4x playback speed
: Approx. 8x playback speed
: Approx. 16x playback speed
: Approx. 32x playback speed
: Approx. 48x playback speed
: Approx. 96x playback speed
: Indicates filtering of recording events.
Recording indicator
Indicates the status of recording.
: Indicates that recording is being performed.
: Indicates that recording is not being performed.
Other status display area
Indicates the following statuses.
: Indicates that the camera is inoperable
since a user with a higher priority is currently
operating the camera.
: Indicates that copying is being performed.
: Indicates that recorded images are being
deleted. (Auto deletion only)
: Indicates that face matching is being performed (only if the face matching function
has been set up).
: Indicates that the statistical processing is
being performed.
Alarm button [ALM]
This button will be displayed when an event occurs.
The alarm action will be canceled by clicking this button.
Error button [ERR]
This button will be displayed when an error occurs.
The error action will be canceled by clicking this button.
: Indicates that the HDD is selected as
playback media.
: Indicates that the SD memory card is
selected as playback media.
: Indicates that the formatting of SD memory card, external storage devices or
HDD is in progress.
: Indicates that recovery of the mirroring/
RAID is in progress
150
Download operation area
[Start]/[End] setup
[Start]/[End] setup
Specify the time range for downloading images and
audio by setting a start and end time. This operation
is available only during playback on a 1-screen.
(☞ Page 169)
[Viewer] button
Download the viewer software for playing the downloaded images and audio.
[Download] button
Downloads recorded images and audio at the designated date & time.
[CAM] tab
When displaying live images from a camera with the panning/tilting function, the following camera controls are
available. Depending on the model of the camera, some operations may not work.
Control buttons/Control pad
[Zoom] box
Zooming can be adjusted by clicking the [–] button
(wide) or the [+] button (tele). Click the [x1] button to
reset the zoom factor to x1.
Control buttons/Control pad
Clicking the buttons around the control pad can move
(pan/tilt) a camera in the clicked direction. Clicking
inside the control pad also can adjust the vertical/horizontal position (pan/tilt) of the displayed images.
Panning/ tilting speed will be faster if a clicked point
gets farther from the center point of the control pad.
[Focus] box
Focusing can be adjusted by clicking the [Near] button or the [Far] button. The auto focus function can
be performed by clicking the [Auto] button.
[Auto mode] box
Select the auto mode function of the camera. Select
the auto mode function (Auto track, Auto pan, Preset
sequence, or Patrol) of the camera by clicking the [C]
button, and then click the [Start] button. Click the
[Stop] button to stop the auto mode function.
[Brightness] box
The brightness (lens iris) can be adjusted by clicking
the [–] (darker) button or the [+] (brighter) button. It is
possible to reset the adjusted brightness by clicking
the [Reset] button.
151
[Preset Position] box
• [Regist] button
Register the current camera position as a preset
position.
Select a preset position number (1 - 256) by clicking the [C] button after moving the camera to a
position to be registered as a preset position, and
then click the [Regist] button. It is impossible to
register the position as "Home".
• [Call] button
Moves the camera to the preset position registered in advance.
Select a preset position number (Home, 1 - 256)
by clicking the [C] button, and then click the [Call]
button. It is necessary to register preset positions
in advance to move the camera to the preset
positions.
[HDD] tab
[Play]/[Rev play] button
Plays recorded images in forward or reverse.
[FF]/[FR] button
Plays recorded images at high speed in forward or
reverse.
Playback speed of fast playback will change in the
following order each time this button is clicked:
Step2 (Approx. 4x) → Step3 (Approx. 8x) →Step4
(Approx. 16x) → Step5 (Approx. 32x) →Step6
(Approx. 48x) → Step7 (Approx. 96x)
[Next record]/[Prev record] button
Skips to the next recorded image or previous
recorded image and plays it.
[Next image]/[Prev image] button
Clicking this button during playback/pausing will display the next or previous frame and playback will be
paused.
[Pause] button
Playback will be paused when this button is clicked
during playback. Playback will start when this button
is clicked during pause.
[Stop] button
Stops playback and displays live images.
[Go to last] button
The starting point of playback is approx. 30 seconds
before the date & time of the latest recorded images.
[Date search] box
Start playback by designating the desired date & time
of image. Click the [C] button and determine the
desired date & time.
Clicking the [Date search] button will play back the
images corresponding to the selected date.
152
Monitor live images
Live images will be displayed in the web browser window. It is possible to display live images on a 1-screen or
a 4-screen (multiscreen) and to expand the image display area across the full screen.
Display images on a 1-screen
To display live images on a 1-screen, take the following procedures.
Step 1
Click the [Cam. select] button. (☞ Page 146)
→→ A list of the registered cameras will be displayed
in the [Camera selection] box.
Step 2
Select the title of the camera.
→→ Live images from the selected camera will be displayed.
Note:
• Selecting a camera from the right-click pop-up
menu also will display images from the selected
camera.
• Clicking the [Go to last] button on the [HDD] tab
while displaying live images will start playback
from a point around 30 seconds before the latest
recorded image of the camera currently being displayed.
Use digital zoom
Enlarges the displayed live images.
When playing recorded images on a 1-screen, click a button in the [Digital zoom] box.
[x1] button: Displays live images with x1 zoomed size.
[x2] button: Displays live images with x2 zoomed size.
[x4] button: Displays live images with x4 zoomed size.
Clicking a point in the zoomed image makes the clicked point the center of the image.
153
Display images in wide view
Display live images across the full screen. When working on a 1-screen, click the [Wide view] button (the operation panel will disappear).
To return the wide view image to the original size, right-click on the image and select "Ctrl screen" from the displayed menu.
Note:
• To enlarge the displayed live images, also right-click on the live images and select "Wide view" from the displayed menu.
Display images on a 4-screen (multiscreen)
Live images from cameras will be displayed on a 4-screen.
Step 1
Click the [Cam. select] button.
→→ A list of the registered cameras will be displayed
in the [Camera selection] box. (☞ Page 148)
Step 2
Click the [Multiscreen] button.
→→ Live images from the cameras (registered as a
group) will be displayed on a 4-screen.
Step 3
Each click of the [Multiscreen] button switches to the
next 4 screens in the sequence: camera 1 to 4→camera 5 to 8→camera 9 to 12→camera 13 to 16...
(The sequence depends on the number of the camera
licenses.)
Step 4
Click a camera title in the [Camera selection] box or
the camera title displayed on the image to display on
a 1- screen again.
→→ The display returns to the 1-screen.
154
Note:
• To change the screen pattern to a multi-screen,
right-click on the live images and select the item
from the displayed menu.
• Selecting "Wide view" from the right-click menu
will enlarge the displayed images on a 4-screen.
• Clicking the [Go to last] button on the [HDD] tab
while displaying live images will start playback
from a point around 30 seconds before the latest
recorded image of the camera currently being displayed.
• When playing recorded images on a 4-screen, the
audio of the camera assigned to the top left
screen segment will be output.
• When starting VMD search while displaying
images on a multiscreen, the camera image displayed in the top left screen segment will be
searched.
Operate the camera
When displaying live images from a camera with the panning/tilting function, the following camera controls are
available. It may be impossible to operate the camera or some functions may be inoperable depending on the
model of the camera.
• Panning/Tilting:
Adjusts the horizontal/vertical position of the camera.
• Zoom:
Zoom in/out the displayed image.
• Focus:
Adjust the focal point.
• Brightness:
Adjusts the lens iris of the camera.
• Preset position operation:Move the camera to the preset position (that is determined on the camera’s
setup menu and registered in the recorder).
• Auto mode:
Activates the auto mode function of the camera.
To operate the camera, display the [CAM] tab of the top page.
Control buttons/Control pad
Panning/Tilting
When displaying live images on a 1-screen, moves a camera horizontally/vertically in the following ways.
Control buttons
Click to move (pan/tilt) a camera in the clicked direction.
Control pad
Click to move (pan/tilt) a camera in the clicked direction. Panning/ tilting speed will be faster if a clicked point
gets farther from the center point of the control pad.
Note:
• Click the desired point to be located at the center of the angular field of view. The camera will move to
locate the clicked point as the center point in the image display area.
Zooming
Zoom in/out the displayed image. Depending on the models of the connected cameras, the available zooming
factors may be different. Refer to the operating instructions of the camera for further information.
Zooming can be adjusted by clicking the [–] button (wide) or the [+] button (tele). Click the [x1] button to reset
the zoom factor to x1.
Note:
• It is possible to adjust zooming by turning the mouse wheel.
• When selecting an area in the image display area by dragging the mouse, the selected area will be located
at the center of the image display area and the zoom ratio will be adjusted automatically.
155
Focus adjustment
Adjusts the focal point. The auto focus function is available.
Focusing can be adjusted by clicking the [Near] button or the [Far] button.
The auto focus function can be performed by clicking the [Auto] button.
Iris (brightness) adjustment
Adjusts the lens iris of the camera.
The brightness (lens iris) can be adjusted by clicking the [–] (darker) button or the [+] (brighter) button. It is possible to reset the adjusted brightness by clicking the [Reset] button.
Register preset positions
Registers the current camera position as a preset position. Camera supporting the preset position function can
be used.
Step 1
Perform the pan/tilt operation to move the camera to
the position to be registered.
Step 3
Click the [Regist] button.
→→ The preset position will be registered under the
selected preset number.
Step 2
Click the [C] button in the [Preset Position] box to
select a preset number (1 - 256). (It is impossible to
register the position as "Home".)
Move to preset positions
Moves the camera to the preset position registered in advance. Preset positions need to be registered in
advance.
Step 1
Click the [C] button in the [Preset Position] box to
select a preset number (Home, 1 - 256).
Step 2
Click the [Call] button.
→→ The camera moves to the registered preset position respective to the selected preset number.
156
Auto mode
Activates the auto mode function of the camera.
Step 1
Click the [C] button in the [Auto mode] box, and then
select the desired auto function from the following.
Auto track: The camera will automatically track an
object moving on the screen.
Auto pan: The camera direction will automatically
move (pan) between the start point and end
point set in advance.
Preset sequence: The camera will move (pan) to
the preset positions registered in advance in
order of the preset position number (numerical
order).
Patrol: The camera will trace the manually
recorded panning pattern.
Step 2
Click the [Start] button to start the selected auto
mode function of the camera.
Click the [Stop] button to turn off the auto mode function.
Note:
• Refer to the operating instructions of the connected camera for further information about the
auto mode function of the camera.
157
Event function
The recorder will take an event action when any of the following events occur.
Terminal alarm:
An event when an alarm input signal is supplied from an external device such as a
door sensor to the alarm input terminal on the rear of the recorder.
Camera site alarm:
An event when an alarm (camera terminal alarm, etc.) is detected by a camera.
Command alarm:
An alarm when receiving an alarm from a PC, etc. via a network.
Face matching alarm*: Alarm issued when a face matches an already registered facial image.
* When the license of the additional business intelligence kit is registered
Note:
• Operations such as registration of facial images, display of face matching results, and starting and stopping
the face matching function are not possible from a web browser, regardless of whether the recorder is set
up for use of this function. Refer to the Operating Instructions of the Additional Business Intelligence Kit for
further information about the setting conditions or restrictions of the face matching function.
Action to be taken upon an event occurrence
When the recorder recognizes an event, it will take an event action according to the set action mode.
Refer to the "Event action" (☞ page 120) for further information about the event action and action mode.
The actions that can be set up and checked from a PC when an event occurs are described below.
Display the alarm message
A window that notifies of an event occurrence will be displayed.
Click the [OK] button or the [x] button to close the window. When several events occur at the same time, the
information for the event that occurred last will be displayed.
Display the alarm button
The [ALM] button will be displayed in the status display area. The alarm action will be canceled by clicking [ALM] button. (☞ Page 159)
Display the error button
The [ERR] button will be displayed in the status display area. The error action will be canceled by clicking [ERR] button. (☞ Page 159)
Provide an alarm notification to a PC according to
the Panasonic alarm protocol setting
When an event or an error occurs, information about
the event/ error will automatically be notified to the
registered PC according to the "Panasonic alarm protocol" setting. To receive a notification and display
the contents, it is necessary to install the dedicated
software (option).
Refer to the "readme.txt" on the provided CD-ROM
about the dedicated software.
Send a mail that notifies of an event occurrence
A mail that notifies of the event occurrence with the
date & time of the event occurrence will be sent
(Alarm mail).
Up to 4 destination addresses for the alarm mail can
be registered.
158
Cancel the alarm action
To cancel the alarm action manually, click the [ALM] button in the status display area.
→→ The alarm action will be canceled. The event recording will stop and return to the operational status just
before the event occurred.
Cancel the error action
When an error (trouble) occurred on the recorder, the recorder will take the error action (a series of actions that
notifies of the error occurrence). An error display window providing information on the error that occurred will
be displayed on the web browser. To cancel the error action manually, close the error display window, and click
the [ERR] button in the status display area.
→→ The error action will be canceled.
Note:
• When an error occurs, take remedial action by following the instructions displayed on the error log panel (☞
page 131). The error indicator on the front of the recorder will go off when the cause of the error has been
eliminated.
159
Play recorded images
Display camera images recorded on the recorder’s hard disk. There are 2 ways to play recorded images as follows. Play image recorded at a designated date & time. Search and play recorded images. Playback operation
can be made while recording.
Step 1
Click the [HDD] tab on the top page of the operation
window.
→→ The [HDD] tab will be displayed.
Step 2
Click the [Play] button.
→→ Playback of a recorded image will be performed.
The "Playback" indication and the "Step 1" indication will be displayed on the status display
area.
Playback will start from the point at which the last
playback was stopped (date & time).
Step 3
Click the [Stop] button on the [HDD] tab.
→→ "Playback" and "Step 1" will disappear from the
status display area, and playback will stop. Live
images from the camera will be displayed on the
image display area.
160
Note:
• When displaying images on a 1-screen, audio
assigned to the camera from which images are
currently being displayed will be heard. When displaying images on a multiscreen, audio assigned
to the camera from which images are displayed
on the upper left corner will be heard.
• When starting playback for the first time after
login, playback will start from a point around 30
seconds before the latest recorded image.
While recording, the playback starts 30 seconds
prior to the current time.
• When both a web browser and the viewer software are active, playback of audio may not be
performed correctly. To play audio correctly, use
either the web browser or the viewer software and
close the other.
• When load to be processed is too heavy for the
recorder (such as when many cameras are connected, images (live/playback) are displayed on
many windows (segments)), playback speed may
become slow or playback may stop for a while.
• When displaying images on a multiscreen, playback will be performed while skipping the actual
recording.
• When playing images recorded at a higher frame
rate and images recorded at a lower frame rate
together on a multiscreen, there will be a widening
gap between the displayed times.
• Playback images and audio may sometimes not
be synchronized exactly.
• The camera image can be changed by clicking the
[Cam. select] button and the camera title during
playback.
• It is possible to switch 1-screen to a multi-screen
during playback by clicking the [Multiscreen] button.
• When clicking a camera title on the image displayed on a multiscreen, images from the camera
whose camera title is clicked will be displayed on
a 1-screen.
About playback operation
The following operations are available during playback:
Function
[Play]/[Rev play] button
Example
/
Operation
• Plays recorded images.
• Plays back recorded images in reverse.
* Playback and reverse playback may not work when the [Play] or
[Rev play] button is clicked while recording images at a lower
frame rate.
[Stop] button
• Playback will stop and live images will be displayed when this
button is clicked during playback.
[Pause] button
• Playback will be paused when this button is clicked during
playback.
• Playback will resume when this button is clicked during pause.
[FF]/[FR] button
/
• Playback speed of fast playback will be changed in the following
order each time the [FF] button is clicked:
Step2 (Approx. x4) → Step3 (Approx. x8) →Step4 (Approx. x16)
→ Step5 (Approx. x32) →Step6 (Approx. x48) → Step7 (Approx.
x96)
• Playback speed of fast reverse playback will be changed in the
following order each time the [FR] button is clicked:
Step2 (Approx. x4) → Step3 (Approx. x8) →Step4 (Approx. x16)
→ Step5 (Approx. x32) →Step6 (Approx. x48) → Step7 (Approx.
x96)
• The playback speed will be displayed on the playback status
display.
* When playing H.264 images, some frames of recorded images
will not be displayed. Fast playback/fast reverse playback of
images will be performed with the refresh interval setting of the
camera.
[Next record]/[Prev record]
button
/
• When the [Next record] button is clicked, playback point will skip
to the start time of the next recorded images.
• When the [Prev record] button is clicked, playback point will skip
to the start time of the previous recorded images.
* When there is no next/previous recorded image to be skipped
to, the current playback will continue. In this case, playback time
of the current playback may sometimes be displayed as around
for 1 minute ago.
[Next image]/[Prev image]
button
/
• The next frame will be displayed when the [Next image] button is
clicked during playback/pause, and playback will pause.
• The previous frame will be displayed when the [Prev image]
button is clicked during playback/pause, and playback will
pause.
* When playing H.264 images, some frames of recorded images
will not be displayed. Reverse frame-by-frame playback will be
performed with the refresh interval setting of the camera.
[Go to last] button
• When this button is clicked, playback of the latest recorded
images will start. The starting point is around 30 seconds before
the date & time of the latest recorded images.
While recording, the playback starts 30 seconds prior to the
current time.
* When the [Go to last] button is clicked while recording images at
a lower frame rate, playback of the latest recorded images may
be paused or images may not be displayed.
Refer to the page 147 for further information about the [Multiscreen], [Digital zoom] and [Wide view].
161
Play image recorded at a designated date & time
Start playback by designating the desired date & time
of a recorded image. Playback operation can be
made while recording.
Step 1
Click the [Cam. select] button on the top page of the
operation window, and select a camera for playback
from the camera selection box. (☞ Page 148)
Step 2
Click the [HDD] tab. (☞ Page 146)
Step 3
Click the [C] button and determine the date & time of
the desired images.
Step 4
Click the [Date search] button.
→→ "Playback" and "Step 1" will be displayed in the
status display area, and playback will start from
the image corresponding to the designated date
& time.
(About playback operation: "Play recorded
images" (☞ page 161))
Note:
• When playing H.264 image by designating date &
time, playback may start from a point several seconds before or after the designated date & time.
• When no recorded image found at the designated
date & time, playback of images recorded after
and at the closest to the designated date & time
will start.
162
Search and play recording events (REC event search)
Search the recording event list for a recording event and play it back.
Important:
• To use recording event search, "HDD" must be selected for [Disk/Medium].
It is also possible to filter recording events using the search filters.
• Face matching alarm cannot be played back by recording event search on the web browser. Start playback
from the alarm log list. (☞ Page 147)
[Camera]
Searches for images recorded with each selected
camera. Mark the checkbox corresponding to the
desired camera. When the checkbox for [All] is
marked, the checkboxes of all cameras can be
marked.
Step 1
Click the [Control] button on the top page (☞ page
146) of the operation window, and click the [REC
event] button in the [Search] box.
→→ The recording event search window will be displayed.
Step 3
Click the [OK] button.
→→ "FILTERING" appears in the status display area,
and the filtered result will be displayed in the list
display area.
Step 2
Specify the search conditions (filters).
[Date & time range]
Select a time range by designating a start and end
date & time. The designated time range will be
searched.
[REC event]
Searches for images recorded by the selected
recording mode only. Check the checkbox corresponding to the desired event type. When the checkbox for [All] is marked, the checkboxes of all of the
following events can be marked:
Schedule [SCH]: Recording by the schedule
recording event
Terminal alarm [TRM]: Recording triggered by a
terminal alarm
Command alarm [COM]: Recording triggered by a
command alarm
Camera site alarm [CAM]: Recording triggered by
camera site alarm
163
[Total]
Displays the total number of searched data. When
more than 10001 data matched, the ">10000" indication will be displayed.
[All list] button
Cancels filtering and displays all recording events.
[Refresh] button
Updates the list to the latest one.
[Prev page] button
Displays the previous page of the list.
[Next page] button
Displays the next page of the list.
[Date & Time]
Start time of recording will be displayed.
[Cam]
The camera which recorded the images will be displayed.
[Evt]
Event type will be displayed. (☞ Page 163)
[HDD]
The hard disk drive number in which the corresponding recorded images are stored will be displayed.
[Audio]
When audio is attached to recorded images, the
audio icon will be displayed.
Note:
• The [All list] button will become unavailable during
playback. To use the [All list] button, stop playback and click it.
• When many cameras are connected, the recording start time of each camera may sometimes not
be the same.
Step 4
Click the date & time of the desired recording event.
→→ Playback of recorded images of the selected
recording event will start. (About playback operation (☞ page 161))
164
Motion detection search and playback (VMD search)
Search for recorded images from images recorded triggered by the VMD function of cameras by designating a
time range. Click a date & time on the result list to play corresponding recorded images.
Important:
• To perform the VMD search, it is necessary to configure the settings of the connected cameras that support
the motion detection function in advance. Refer to the "readme.txt" on the provided CD-ROM about cameras supporting the VMD search function. Refer to the operating instructions of the camera in use for further
information.
Step 1
Step 3
Click the [Control] button on the top page (☞ page
146) of the operation window, and click the [VMD]
button in the [Search] box.
→→ The "VMD search" window will be displayed. Display of live images and display of playback
images will be paused.
Set up a VMD area. Drag the mouse on the screen.
→→ A frame will be displayed, and the area within the
frame will be set as VMD search area.
Note:
• To delete the created area, click the [Delete area]
button.
Step 2
Specify the search conditions (filters).
[Camera]
Select the camera for VMD search.
[Date & time range]
Select a time range by designating a start and end
date & time. The designated time range will be
searched.
Step 4
Click the [OK] button.
→→ The VMD search will start. The search result will
be displayed in the list display area. (☞ Page 163)
It may sometimes take time to complete the
search.
Important:
• In the result list of the VMD search, the audio icon
will not be displayed in the "Audio" column even if
audio is attached to the recorded images.
[Mask duration]
Select the time span to be searched.
165
Step 5
Click the date & time of the desired recording event.
→→ Playback of recorded images of the selected
recording event will start. (About playback operation (☞ page 161))
Note:
• Up to 100 logs are saved in the list. When more
than 100 logs are filed in the search result, ">
100" will be indicated.
• Recorded images will be played on a 1-screen. To
play on a multi-screen, click the [Multiscreen] button after starting playback.
• When starting the VMD search while displaying
images on a multiscreen, the camera whose
images are displayed at the upper left corner will
become subject to the VMD search.
166
Copy recorded images
Copy images recorded by the recorder onto SD
memory card or external storage devices. It is recommended to make back-up copies on a regular basis
for unexpected situations such as malfunction of the
hard disk drives. Refer to page 135 for further information about the copy function. Refer to page 172 for
information on how to play copied images.
Step 3
Specify the detailed conditions of recorded images to
be copied. Specify the information to be set as conditions.
Step 1
Click the [Control] button on the top page (☞ page
146) of the operation window.
Step 2
Click the button in the [Copy] box.
[Date & time range]
Designate the start date & time and the end date &
time of recorded images to be copied. Click the [C]
button, and then designate date & time.
[Camera]
Select the camera you wish to copy. Mark the checkbox next to the desired camera. When the checkbox
for [All] is marked, the checkboxes of all cameras can
be marked.
[Copy drive]
Select the SD memory card or the external storage
device (connected to the copy port) as the copy destination.
Mark the checkbox corresponding to either of "HDD
>> SD" or "HDD>>Copy port".
→→ The "Copy" window will be displayed.
[Alteration detection]
Determine whether or not to attach the alteration
detection code to the recorded images to be copied.
When the alteration detection code is attached, it is
possible to check if the copied recorded images have
been altered or not when playing the copied recorded
images using the viewer software. Click the [C] button, and then select "On" or "Off".
167
[Password]
To copy with password protection, mark the corresponding checkbox and enter a password. (5 to 8
alphanumeric characters) The password will be
required to play back the copied data.
[Data size]
When the [Measurement] button is clicked, size of the
data to be copied will be displayed.
[Free]
The remaining capacity of the destination medium
(SD memory card/external storage device) will be displayed.
Step 4
When the [OK] button is clicked, the confirmation
window will be displayed. Then click the [OK] button
on the displayed confirmation window.
→→ The data copy window will close.Copying will
start and the "COPY" icon will be displayed in the
status display area. When copying is complete,
the "COPY" icon will disappear.
168
Important:
• Do not remove the SD memory card during copying on the SD memory card. It may damage data
on the SD memory card.
• When copying to an external storage device is
being performed, do not disconnect the external
storage device. Otherwise the data stored on the
external storage device could be lost.
• When the copy end time is set earlier than the
start time, copying will not start even when the
[OK] button is clicked.
• When copy medium lacks enough storage space,
data will be copied until the copy medium is full.
Use a medium with sufficient storage capacity to
avoid left over data that is not copied.
• Copying will be performed in the following order:
Viewer Software → Images → Audio Depending
on the designated time range for copying and the
remaining space of the storage medium, images
and audio may not be copied.
• When clicking the button in the [Copy] box during
copying, the confirmation window for cancellation
of the current copying will be displayed. It is possible to cancel the current copying on this window.
• Do not turn off the power of the recorder while
copy is in progress. If the power is turned off while
copying, the storage media copied on will become
unusable.
• Recorded images (data) of up to 1 million can be
copied onto the SD memory card or the external
device connected to the copy port "COPY".
However, it is impossible to copy any more data
exceeding these limits even when there is a sufficient remaining capacity.
• When another user operating the recorder has
opened the copy panel or when the destination
medium has been selected by another user, the
copy window cannot be displayed.
Download recorded images currently being played
Designate the start point and the end point of recorded images currently being played and download images to
a PC.
When downloading recorded images, recorded images and audio will be downloaded as an image data file
(filename.n3r) and an audio data file (filename.n3a) respectively. Refer to page 172 for information on how to
play downloaded recorded images.
Important:
• Note when downloading that, due to limitations of Internet Explorer, the free disk space of the PC must be 2
or more times the size of the file to be downloaded.
• When download is canceled in the process of the download, it is impossible to properly play the downloaded file on a PC.
Step 1
Step 5
Click the [HDD] tab on the top page (☞ page 146) of
the operation window.
Select "On" or "Off" for "Password" to determine
whether or not to download images with audio and to
determine whether or not to attach an alteration
detection code to recorded images to be downloaded. When assigning a password, enter 5 to 8
alphanumeric characters for the password. When the
setting is completed, click the [OK] button.
Step 2
Play back the recorded images on a 1-screen.
Click the [Start] button in the download operation
area at the playback point where the download is to
start. Another way to start the download is to click
the start time box and enter date & time.
→→ The date & time of the start point will be displayed
next to the [Start] button.
→→ The file download window will be displayed.
Step 3
Click the [End] button in the download operation area
at the playback point where the download is to end.
Another way to end the download is to click the end
time box and enter date & time.
→→ The date & time of the end point will be displayed
next to the [End] button.
Note:
• It is possible to designate up to 20 minutes of the
time range per download.
Step 4
Step 6
Click the [Save] button.
→→ The window to specify the save destination will be
displayed.
Step 7
Create a new folder in the desired directory and click
the [Save] button.
→→ Recorded images and audio will be downloaded
as an image data file (filename.n3r) and an audio
data file (filename.n3a) respectively.
Click the [Download] button.
→→ The "Download" window will be displayed.
Note:
• When "With audio" is selected, the "Download"
window will be displayed again after the download
is complete.
• If a message is displayed on the information bar,
see page 184.
• When playing on a multiscreen, it is impossible to
download recorded images.
169
Check a list of copied recorded images
Display a list of data (recorded images) copied on an SD memory card, and then select a recorded image to
play from the list. It is possible to search for copied data using filters. Available filters are "Date & time range"
and "Camera".
Step 1
Insert an SD memory card on which the recorded
data are copied. (☞ Page 102)
Step 2
[Camera]
Searches for images recorded with each selected
camera. Mark the checkbox corresponding to the
desired camera. When the checkbox for [All] is
marked, the checkboxes of all cameras can be
marked.
Click the [Control] button on the top page (☞ page
146) of the operation window.
Step 3
Select "SD" for "Disk/Medium" in the [Search] box,
and then click the [Copy data] button.
→→ The copy data search window will be displayed.
Step 4
Specify the search conditions (filters).
Step 5
Click the [OK] button.
→→ Copied data matching the search criteria will be
displayed on the list display window.
[Total]
Displays the total number of searched data. When
more than 10001 data matched, the ">10000" indication will be displayed.
[All list] button
Cancels filtering and displays all recording events.
[Refresh] button
Updates the list to the latest one.
[Prev page] button
Displays the previous page.
[Date & time range]
Select a time range by designating a start and end
date & time. The designated time range will be
searched.
[Next page] button
Displays the next page.
[Date & Time]
Start time of recording will be displayed.
[Cam]
A camera used for recording will be displayed.
170
[Evt]
Event type will be displayed. (☞ Page 163)
[Audio]
Nothing will be displayed here.
Important:
• Do not remove the SD memory card during playback of copied data on the SD memory card. It
may damage data on the SD memory card.
Note:
• When checking a list after inserting the other SD
memory card, select "HDD" for "Disk/Medium" in
the [Search] box first and then select "SD".
• Refer to page 172 for information on how to play
copied images.
171
Play back the copied/downloaded images on a PC
When recorded images are copied/downloaded, recorded images and audio will be copied/downloaded as an
image data file (filename.n3r) and an audio data file (filename.n3a) respectively into the copy/download destination. It is possible to play, save and print the copied/downloaded data files using the dedicated viewer software.
To play recorded images copied on the media device
To play images copied on the media device, double-click the executable file (ND_Viewer.exe) to launch the
viewer software. The executable folder is copied in the following folder together with recorded images.
Copying on an SD memory card
Folder: [Drive]: \PRIVATE \MEIGROUP \PSS \NVR \ND_Viewer
When the copy destination is an external storage device
Folder: [Drive]: \Panasonic\NVR\ND_Viewer
Refer to page 174 for how to use the viewer software.
Note:
• The viewer software copied onto the media device can be launched without installation on a PC. When copying the viewer software to another folder or another PC, copy all the files contained in ND_Viewer.exe.
Play recorded images downloaded using a web browser
To play back images downloaded from the web browser, start the installed viewer software. If the PC used for
downloading has ActiveX control installed, the viewer software will have been installed at the same time (☞
page 145). If another PC is used for playback, it is necessary to download the viewer software and install it on
the PC.
Refer to page 174 for how to use the viewer software.
Download the viewer software
Step 1
Click the [Viewer] button in the download operation
area on the top page (☞ page 146) of the operation
window. (☞ Page 151)
→→ The file download window will be displayed.
Step 2
Click the [Save] button.
→→ The window to specify the save destination will be
displayed.
Step 3
Create a new folder in the desired directory and click
the [Save] button.
→→ The viewer software will be downloaded.
172
Install the viewer software
When the older version of the viewer software is installed on a PC, uninstall it before installing the newer version.
Step 1
Step 2
Double-click the downloaded file (wvasetup.exe).
→→ The installer launches. Follow the instructions of
the installation wizard.
Click the [Install] button.
→→ The Installation will start. When installation is
complete and the completion window is displayed, click the [Finish] button.
Note:
• If agreed to the displayed license agreement,
select "I accept the terms in the license agreement".
• Select "Anyone who uses this computer (all
users)". Installation is possible even if the "User
Name" field and the "Organization" field on the
"Customer Information" page are left blank.
• Select "Complete" if the "Setup Type" page is displayed.
Uninstall the viewer software
Step 1
Open "Uninstall a program" in "Control Panel".
Step 2
Select "WebVideo ActiveX" (the program to be
deleted) from the presently installed programs, and
then right-click on it. Select "Uninstall" from the displayed right-click menu.
→→ The uninstaller launches.
Step 3
Complete the uninstallation by following the instructions of the wizard.
Note:
• When the viewer software is uninstalled, the
ActiveX control will be uninstalled at the same
time.
173
Note:
• When the viewer software is installed, the ActiveX
control will be installed at the same time.
How to use the viewer software
Select "ND_Viewer" from the start menu ("All programs" – "Panasonic" – "Network Disk Recorder" – "ND_
Viewer") or double-click the ND_Viewer icon on the desktop.
For images copied on an SD memory card or external storage devices, double-click the executable file (ND_
Viewer.exe) to launch the viewer software (see page 172 for the filing location of the executable file).
Playback operation
button
Search box
Image display
area
List display
area
Playback operation window when images are displayed on a full screen
Select recorded images currently being played
Step 1
Click the [ ] button.
→→ The "Open" window will be displayed.
Note:
• Do not change the file name of the copied or
downloaded image data. If the file name is
changed, the file information will not be displayed
correctly.
• It is possible to select multiple files (up to 100
files) by clicking the desired files while holding
down the [Ctrl] key or the [Shift] key and display
all of them in a list by drag & drop.
• The files can be sorted by start date & time in
ascending or descending order by clicking the
header of the list display area,
• To add image data to the list display area, rightclick the list and select [Add file] from the menu
displayed. When the window for opening files is
displayed, proceed to Step 2. The image data
added will be displayed on the sorted list.
Step 2
Select the downloaded image data file (filename.n3r),
and click the [Open] button. Another way to select a
file is to drag and drop it onto the viewer software
without first displaying the window for opening files,
→→ The information on the file selected in the list display area will be displayed.
Date & Time: Displays a start time and an end
time for copying the recorded images.
Cam: Displays the camera number.
174
• When the number of displayed image data files
has reached 100, no more files can be added. The
total number of selected image data files is displayed under "Total:" on the list.
• Clicking the [ ]button will delete all data displayed on the list. Another way to clear the list is
to right-click the list and select [Clear all list].
• When there is a data in the same directory as the
viewer software or the "data" folder in the same
directory, the data will automatically be loaded for
playback.
• It is possible to change the aspect ratio of the
image display area by selecting the ratio from
. Select the setting in accordance with
the aspect ratio and the image capture size of the
image data.
Playback downloaded images
Use the playback operation button to play downloaded images. If the same camera channel is displayed on the
list, the next list image in playback mode or the previous list image in reverse playback mode will be played
back consecutively. If the same camera channel is not displayed on the list, playback will stop, the image display area will turn black and playback will be paused.
Note:
• When starting playback of password protected data, the password entry screen will be displayed. Enter the
required password.
• Clicking the [
] button in playback (or the [
] button in reverse playback) will play the next (or
previous) images on the list of the camera whose images are currently being played back.
• Clicking the [ ] button will enlarge the image. Clicking the [ ] button will reset the image to its original
size.
• If there is audio data (filename.n3a), the [ ]/[ ] buttons will be displayed. Click these buttons to play
back with or without audio.
• When a web browser and the viewer software are running at the same time, audio may not be played properly. To play audio correctly, use either the web browser or the viewer software and close the other.
• Playback images and audio may sometimes not be synchronized exactly.
• When the [Search] button is clicked after selecting "Date & Time" and "Camera(ch)" in the search box, playback of the image data of the selected camera data will start from the top of the data corresponding to the
selected date & time.
• Clicking the [ ] button will display the image on a full screen. Clicking the [Restore] button on the operation window or pressing the [Esc] key on the keyboard will return the image display to the previous status.
• Clicking the [Hide] button or right-clicking the mouse can hide the playback operation window.
• Mark the "Smooth" checkbox to display the fast playback images more smoothly. The fast playback speed
may be limited depending on the performance of the PC in use or process status.
175
Detect alterations
It is possible to detect alterations in data (☞ page 169) if a code for alteration detection has been attached to
the downloaded data.
When data to which the alteration code has been added is selected, the [ALT CHECK] button will be displayed.
Clicking the button starts alteration detection and displays the result in a window.
[OK (Not Altered)]:
No alteration was detected.
[NG (Altered)]:
Alteration was detected.
Save still images
Save an image displayed in the image display area as a JPEG file on a PC.
Step 1
Click the [ ] button.
→→ The "Save As" window will be displayed.
Step 2
Enter the file name and select "Save as type: JPEG (*.
jpg)". Designate the folder and click the [Save] button.
→→ The image data will be saved.
Save image data (copy)
Save selected image data (filename.n3r) in any folder on the PC.
Step 2
Step 1
Right-click the list and select [Copy] from the displayed menu.
→→ The "Save As" window will be displayed.
Designate the folder name and destination drive and
click the [Save] button.
→→ The image will be copied and saved.
Note:
• It is not possible to operate the viewer software
while copy is in progress.
Print the displayed image
Print the image displayed in the image display area.
Pause playback at the desired point and click the [
] button. When printing an image whose extension is
"n3r", the date & time when paused using the viewer software will be printed.
176
Setup
Basic operations
Step 1
Click the [Setup] button.
Step 3
Click the button for the desired submenu.
Step 4
Configure each setting item. Click the [Set] button
after completing the settings.
→→ The settings will be applied. When moving to
another page without clicking the [Set] button, the
configured settings will be canceled.
Important:
• If the settings are applied, other login users will be
forcibly logged out.
• If the settings relating to the user management are
applied, all login users will be forcibly logged out.
• Recording may not be performed for around 4
seconds just after the settings are applied.
Step 2
Click the button for the desired menu.
Note:
• If the license for the Additional Business
Intelligence Kit has been registered, it is possible
to save the statistics data on a PC. Refer to the
Operating Instructions of the Additional Business
Intelligence Kit for further information about the
statistical processing and how to operate.
Configure the settings
It is possible to configure the settings of the recorder using a web browser.
Refer to page 76 for setup items that can be configured from the web browser and their further information.
177
Update the firmware
To update the firmware of the recorder to the latest version, proceed as follows.
Refer to page 68 for the operations when the firmware is saved on the SD memory card.
Step 1
Download the firmware of the latest version onto a
hard disk drive of a PC.
Step 2
Click the [Maintenance] button and then click the
[System management] tab.
Step 3
Designate the downloaded firmware by clicking the
[Browse...] button of "Firmware update".
Step 4
Click the [Execute >] button.
→→ The confirmation window will be displayed to start
the update procedure.
Note:
• Contact your dealer for further information about
the firmware update.
178
Notification by e-mail
Alarm mail
The camera/PC port address are indicated in an alarm mail as follows.
Contents of the alarm mail (example)
In NV300 (192.168.0.250), alarm was occurred.
Occurrence date and time: xxxx-xx-xx xx:xx:xx GMT+xx:xx (Example. 2010-1-1 12:00:00 GMT+9:00)
Alarm descriptions:Alarm descriptions, camera channel or alarm number will be described.
(Example: SITE ALARM 5ch)
URL:
http://192.168.0.250/
Warning mail
The following mail will be sent to notify of a trouble occurrence to a registered address when the trouble
occurs.
NV300 (192.168.0.250) Status notification
Occurrence date and time: xxxx-xx-xx xx:xx:xx GMT+xx:xx (Example. 2010-1-1 12:00:00 GMT+9:00)
Status: MAIN THERMAL ERROR
Indication
Description
Date & time
Date & time when the trouble occurred will be displayed.
Status
The description of the trouble will be displayed. xx indicates the camera number, x indicates the unit
number, y indicates the HDD number
Thermal trouble:
Main unit: MAIN THERMAL ERROR
Extension unit: EXTx THERMAL ERROR
Alteration detected:
ALTERED xxch
HDD smart warning:
Main unit: MAIN-y SMART WARNING
Extension unit: EXTx-y SMART WARNING
HDD slow response:
Main unit: MAIN-y SLOW RESPONSE
Extension unit: EXTx-y SLOW RESPONSE
HDD hour meter warning:
Main unit: MAIN-y HOUR METER WARNING
Extension unit: EXTx-y HOUR METER WARNING
Auto remove of link:
Main unit: MAIN-y LOGICALLY REMOVED
Extension unit: EXTx-y LOGICALLY REMOVED
Cooling fan error:
Main unit: MAIN FANy ERROR
Extension unit: EXTx FANy ERROR (y indicates the fun number)
NW camera error detection:
CAM xx COMMUNICATION ERROR
Network camera error detection (audio):
CAM xx COMMUNICATION ERROR(AUDIO)
NW camera error recovery:
CAM xx COMMUNICATION RECOVERED
Network camera error recovery (audio):
CAM xx COMMUNICATION RECOVERED(AUDIO)
HDD remove error:
Main unit: MAIN-y SWAP WARNING
Extension unit: EXTx-y SWAP WARNING
Format error:
Main unit: MAIN-y SINGLE FORMAT ERROR
Extension unit: E
XTx-y SINGLE FORMAT ERROR
EXTx RAID5 FORMAT ERROR
EXTx RAID6 FORMAT ERROR
179
Indication
Description
Status
RAID5 1down:
EXTx RAID5 1 DOWN
RAID5 2down:
EXTx RAID5 2 DOWN
RAID6 1down:
EXTx RAID6 1 DOWN
RAID6 2down:
EXTx RAID6 2 DOWN
RAID6 3down:
EXTx RAID6 3 DOWN
HDD RAID5 Recovery failure:
EXTx RAID5 RECOVERY FAILURE
HDD RAID6 Recovery failure:
EXTx RAID6 RECOVERY FAILURE
Copy media FULL:
SD MEMORY CARD FULL
COPY MEDIUM FULL
Number of data on the copy medium
exceeded:
OVER LIMITATION ON SD MEMORY CARD
OVER LIMITATION ON COPY MEDIUM
Starting mirroring recovery
MIRROR RECOVERY START
Starting RAID5 recovery
EXTx-y RAID5 RECOVERY START
Starting RAID6 recovery
EXTx-y RAID6 RECOVERY START
Complete mirroring recovery
MIRROR RECOVERY COMPLETE
Complete RAID5 recovery
EXTx RAID5 RECOVERY COMPLETE
Complete RAID6 recovery
EXTx RAID6 RECOVERY COMPLETE
180
Troubleshooting
Before asking for repairs, check the symptoms with the following table.
Contact your dealer if a problem cannot be solved even after checking and trying the solution in the table or a
problem is not described below.
Symptom
Cause/solution
Recording cannot be performed.
• Is "On" is selected for "Recording mode"?
Check whether the settings are appropriate.
48
• Are the settings of the schedules appropriate?
Check whether the settings are appropriate.
40
• Are there any recorded images on the hard disk drives?
Check if there are recorded images.
72
Cannot play back images.
Audio is not output from the camera.
Or audio is accompanied by noise.
Cannot control the cameras.
The message "Please insert a
medium." is displayed even after an
SD memory card or an external
storage device is inserted.
Reference
• Users who have logged into the system may not be
authorized to playback images recorded on the hard
disk drives.
Check the user level settings of these users.
60
• Users who have logged into the system may not be
authorized to display the images from cameras.
Check the user level settings of these users.
60
• Is the audio encoding format of the camera set to
"G.726(32kbps)"?
This recorder supports "G.726(32kbps)" only. Check
the setting of the connected camera.
−
• Is other than "Selected camera" selected for "Audio
output camera" in the "Monitor" - "Advanced setup"
tab?
Check whether the setting is appropriate.
51
• Check whether the camera numbers and IP addresses
that are displayed on the setup menu - the "Advanced
setup" menu - the [Camera] page - [Camera registration] tab.
19
• Check if the user name and password has correctly
been entered on the setup menu - the "Advanced
setup" menu - the [Camera] page - [Camera registration] tab.
21
• If operations are performed soon after an SD memory
card or an an external storage device is inserted, it may
take time to recognize the media. Close the message
window and wait for a while before retry.
The alarm buttons are the "Face
• Are the settings configured as follows?
matching stopped" state even
Compression: H.264
though no operations are performed Image capture size: SXVGA (1280 x 960)
to stop the face matching function. Frame rate: 5 ips
Image quality: SF
The face matching function will become unavailable if
the settings are changed. Check whether the settings
are appropriate.
181
−
42
Symptom
Cannot access from the web
browser.
Cause/solution
• Is the Ethernet cable firmly connected to the
10BASE-T, 100BASE-TX or 1000BASE-T port?
Confirm the cable is firmly connected.
Installation
Guide
• Is the connection indicator of the network port lit?
When it is not lit, connection to a LAN is not established or a network is not working correctly.
Confirm that the connection indicator of the network
port is lit. Refer to the system administrator if it is not
lit.
Installation
Guide
• Is the valid IP address set?
Refer to a system administrator for further information
about the settings.
52
• Are you accessing the wrong IP address?
Check the connection as follows.
>ping "IP address of this unit" If there is reply from this
unit, the connection is normal. If not, check the settings of the IP address and the subnet mask.
−
• Is the same IP address provided to other devices?
Refer to a system administrator for further information
about the settings.
52
• Are there contradictions between the address and the
network subnet to be accessed?
When the recorder and the client (PC) are on the same
subnet, is the same subnet set for the IP addresses of
the recorder and the PC? Or is "Use Proxy Server" for
the settings of the browser checked? When accessing
the recorder in the same subnet, entering the address
of the recorder in the "Don’t Use Proxy For These
Addresses" box is recommended.
52
• Depending on the traffic of the network, there might be
difficulties in displaying images. Press the [F5] button
on the keyboard to request images.
−
• Isn't the network traffic heavy?
These symptoms may occur when the network traffic
is heavy.
−
• It may be possible that a pop-up blocker other than
Internet Explorer is activating. Check the installed software and cancel the pop-up blocker.
−
The image displayed on the
browser is not being refreshed.
Image refresh of the browser is
slow.
Response of the browser is slow.
A pop-up is not displayed on the
browser.
Cannot close the authentication
window displayed when displaying
the operation window.
Reference
• Are the correct user name and password entered?
Confirm the correct user name and password.
61, 62
Audio is interrupted during playback using the viewer software.
• When playing images recorded at a higher frame rate,
audio may sometimes be played interrupted.
−
Cannot play the downloaded
recorded images.
• When any setting of the setup menu has been changed
during the download, the download will be canceled
automatically. In this case, the downloaded file is not a
complete file and it is impossible to play it.
−
182
Symptom
An error message is displayed when
trying to launch the viewer software
by dragging and dropping multiple
files onto it.
When displaying images on a multiscreen, images from two cameras
or more are displayed in sequence
on a screen of multiscreen.
When switching cameras during live
image display, images becomes
coarse for a moment or the size of
characters displayed on image from
the camera changes.
Cause/solution
• Decrease the number of the selected files or select files
after launching the viewer software.
• This may occur due to the display adapter and driver
combination. When this occurred, update the driver of
the display adapter to the latest version first.
• If updating the driver does not solve the problem,
adjust the hardware acceleration as follows. The
following are descriptions when using Windows 7.
1. After closing all web browser windows, right-click on
the desktop and select "Screen resolution" from the
displayed pop-up menu.
2. Click "Advanced settings" on the "Screen resolution"
window.
3. Select the [Troubleshoot] tab, and click the [Change
settings] button.
4. Disable the DirectDraw acceleration by adjusting the
performance level of "Hardware acceleration" on the
"Display Adapter Troubleshooter" window.
This product automatically change the resolution setting of
the camera according to the screen pattern of the main
monitor or the sub monitor. Depending on the timing, resolution of images from the previously selected camera
before switching may remain being applied for a moment
after switching. In addition, depending on the camera
model, the size of character may look different after
switching since the size of character is different for each
resolution.
183
Reference
−
−
−
Message displayed on the information bar
Depending on the operation system in use, the following may occur. Follow the instructions below when the following occurred. By performing the following solutions, other applications may not be affected.
The "Information Bar" expressed in the following symptom and solutions will be displayed just below the
address bar only when there is information to communicate.
Information Bar
Symptom
Cause/solution
Reference
The following message is displayed
on the information bar.
"Pop-up blocked. To see this popup or additional options, click
here…"
• Click the information bar and select "Always Allow Popups from This Site". When the warning window is displayed, click the [Yes] button.
−
The following message is displayed
on the information bar.
• Click the information bar and select "Install ActiveX
"This site might require the followControl...".
ing ActiveX control: 'wvasetup.exe' Click the "Install" button on the displayed "Security
from 'Panasonic System Networks
Warning" window.
Co., Ltd.'. Click here to install..."
−
• Click the information bar and select "Download File...".
When downloading fails even though you selected
"Download File...", perform the following operation.
The following message is displayed
Click "Internet Options" on the Tools menu of Internet
on the information bar.
Explorer, and then click the [Security] tab. Then, click
"To help protect your security,
the [Custom Level…] button to open the "Security SetInternet Explorer blocked this site
ting" window. Under "Downloads", select "Enable" for
from downloading files to your
"Automatic prompting for file downloads". Then click
computer. Click here for options..."
the [OK] button.
When the warning window is displayed, click the [Yes]
button.
−
The following message is displayed
on the information bar when tried to
execute a downloaded file.
"The publisher could not be verified.
Are you sure you want to run this
software?"
• Click the [Run] button.
−
Unnecessary status bar or scroll bar
is displayed on the pop-up window.
An URL is displayed on the pop-up
title bar and the title is not displayed completely.
• Click "Internet Options" on the Tools menu of Internet
Explorer, and then click the [Security] tab. Then, click
the [Custom Level…] button to open the "Security
Setting" window. Under "Miscellaneous", select
"Enable" for "Allow script-initiated windows without
size or position constraints". Click the [OK] button.
When the warning window is displayed, click the [Yes]
button.
• In addition, when using Internet Explorer 7.0, select
"Enable" for "Allow websites to open windows without
address or status bars".
−
184
Glossary
ActiveX Control
A software module developed by Microsoft. It is used
to add functions, downloaded from a web server via
the Internet or intranet, to Internet Explorer. The
recorder uses it to display video.
Bit rate
Indicates how many bits of data can be processed or
transmitted in a unit of time. Generally, the units are in
bps, or bits per second. Used to indicate the compression rate of video and audio data, and how much
data a communications line can send and receive in 1
second.
Broadband router
Router used to access the Internet via high-speed
ADSL or fiber optic lines.
Event
Indicates an occurrence that causes the recorder to
take an event action. Events include terminal alarm,
command alarm, camera site alarm and face matching alarm, etc.
Event action
A specific action to be taken at an event occurrence.
When "ALM" is selected, the occurrence of an event
is announced by displaying a notification on the monitor, lighting the status indicators and sounding the
buzzer. When "ADM" is selected, the occurrence of
an event will not be announced and only recording
and filing of event logs will be performed. In OFF
mode, only an event log is filed.
Camera operation
Operations of the camera connected to the recorder
such as pan and tilt (horizontal and vertical position),
zooming, focusing, brightness (iris adjustment), preset motions (movement towards a set horizontal and
vertical position) and auto functions (automatic camera rotation, etc.).
Event recording
Function for starting recording automatically when an
event occurs. Event recording includes Pre-event
recording that records images before the event and
event recording that records images after the event.
DDNS (Dynamic DNS)
A technology for dynamically translating DNS server
information to enable the transfer of only differences
in information between DNS servers (refer to "DNS").
Default gateway
Network device used as a gateway for networks,
such as a local network, to access PCs on an external network.
DHCP (Dynamic Host Configuration Protocol)
A protocol that enables PCs to automatically get
information from a server needed for accessing a network.
Digital zoom
The function that enlarges live images and playback
images during playback. The digital zoom enlarges
the images by the recorder and is separate from the
zoom function included as part of the camera operations for enlarged images.
DNS (Domain Name System)
The long lists of numbers or IP addresses that are
used in network environments are difficult to remember, which makes them impractical. This is why PCs
are given an easy-to-follow name (domain name)
which is converted to an IP address before they are
communicated with. The DNS provides translation
between domain names and IP addresses.
Face matching
Refers to a function that detects facial features of
people in images and matches them against similar
facial features recorded earlier. The recorder can be
set up to output an alarm signal when the detection
result is positive.
FHD(Full HD)
Resolution with 1920 x 1080 pixels.
Firewall
A type of security used when accessing outside networks like the Internet. A PC is used to prevent computers outside a local network from accessing the
network.
Frame rate (ips)
Refers to the unit that determines the smoothness
with which the recorded images are played back.
"ips" indicates the number of recorded frames in 1
second. The higher the number, the smoother the
movement, but the available recording time becomes
shorter.
185
FTP (File Transfer Protocol)
A protocol that is commonly used for transferring files
over the Internet.
Full duplex
Communications method that allows simultaneous
sending and receiving by transmitting in both directions using an independent sending line and receiving
line.
Global (IP) address
IP address assigned to each device connected to the
Internet that is equivalent to an address on the
Internet. IP address is required for Internet communications. In contrast, IP address freely available to
assigned to each device within an intranet is called as
"Private (IP) address".
H.264
One of the compression methods of moving images.
Half duplex
Communications method that switches between
sending and receiving using a single communications
line.
HD(High Definition)
Resolution with 1280 x 720 pixels.
HDD
Stands for Hard Disk Drive (a high capacity storage
device). This product uses hard disk drives instead of
video tapes for recording.
HVGAW(Half VGA Wide)
Resolution with 640 x 360 pixels.
LAN (Local Area Network)
A communications network for connecting PCs, printers and other network devices in a relatively small
area such as in a building or floor of a building or
campus in which data is transferred.
MAC address (Media Access Control address)
Fixed physical address assigned to network devices.
Devices send and receive data based on this.
M-JPEG
Indicates a video format to sequentially transmit
JPEG images from cameras.
Some cameras phrase this video codec as just
"JPEG".
Multiscreen display
This product can display multiple camera simultaneously while displaying live images or playback images. Displaying of images from 4 cameras or from 16
cameras simultaneously is called as the 4-screen display or 16-screen display respectively.
NAT (Network Address Translation)
A technology for sharing a single global address
between two or more PCs.
NTP (Network Time Protocol)
A protocol developed to accurately maintain time
among hosts on the Internet.
Image quality
Image quality varies depending on the compression
rate. In this product, the following image qualities
(compression rates) are available and they can be
selected for each camera. XF (Extra Fine: Extra fine
quality), SF (Super Fine: Super high quality), FQ (Fine:
High quality), NQ (Normal: Standard quality)
Internet
A global system of interconnected computer networks. It is required to contract with an Internet service provider to connect to the Internet.
IP address (Internet Protocol Address)
The identification number assigned to PCs connected
via IP networks such as the Internet or an Intranet, or
to individual communications devices. Do not assign
the same address to multiple devices, especially on
the Internet.
Pillar box
A display format to which blank space is added to
both sides of the video to maintain the aspect ratio.
Plug-in software
Small programs used to add functions to application
software.
POP 3
A protocol for receiving e-mail stored on a server on
the Internet or an Intranet.
POP 3 Server
A server that supports POP3, currently the most
widely used mail sending protocol.
186
Port number
A sub address set below the IP address to connect
multiple parties simultaneously for communication
(TCP, UDP, etc.) on the Internet.
Router
Placed in between different networks, a router sends
data to the proper destination via network. If data on
the network is addressed to an external network,
routers send the data to the outside of the network
after judging the optimum sending route.
Primary (DNS) server
DNS servers usually have more than 2 systems and
the primary server is the main system.
Private (IP) address
IP address assigned when connecting primarily to
LAN. Private IP addresses can be assigned freely on
a network and do not require a formal application.
However, because private IP addresses cannot be
used to access the Internet, a router or other device it
is necessary to assign a global IP address.
Protocol
A set of rules that allows the exchange of data
amongst different types PCs with information. The
Internet uses the TCP/IP protocol as its base and
information is transferred following http and ftp protocols depending on the application.
QVGA
Resolution with 320 x 240 (320 x 180) pixels.
QXGA
Resolution with 2048 x 1536 pixels.
RAID5
Even if a HDD becomes faulty, correct data can be
read from the remaining HDDs since 3 or more HDDs
are logically regarded as a single HDD and parity data
(error correction code data) is automatically attached.
Recorded images can be recovered by replacing the
failed HDD. 3 or more HDDs are required.
RAID6
Even if 2 HDDs become faulty, recorded images can
be recovered using the remaining HDDs since RAID6
has 2 parity data (error correction code data). 4 or
more HDDs are required.
Schedule recording
Function that automatically starts video and audio
recording on a preset time schedule.
SD memory card (Secure Digital memory card)
A small, lightweight and removable storage device
having a large capacity.
Secondary (DNS) server
DNS servers usually have more than 2 systems and
the secondary server is the sub system. If there is
trouble with the primary server, the secondary server
takes over.
SMTP (Simple Mail Transfer Protocol)
A protocol for sending e-mail on the Internet or an
Intranet. Used when transferring mail between servers or when clients send mail to the server.
SMTP authentication (Simple Mail Transfer
Protocol authentication)
SMTP mail transfer protocol appended with a user
authentication function. It authenticates passwords
and user accounts between SMTP servers and clients. Both SMTP servers and clients must support
SMTP authentication.
SMTP server
A server that supports SMTP, currently the most
widely used mail transfer protocol.
SNMP (Simple Network Management Protocol)
A protocol for monitoring and managing networked
communications devices, such as routers, PCs, cameras and Network Disk Recorders via a network.
Resolution (Image capture size)
Resolution refers to the degree of fineness and quality
of the camera pictures recorded by this product.
In this product, it indicates the number of pixels used
in the image displayed on the screen. A horizontal
resolution of 640 pixels and a vertical resolution of
480 pixels is expressed as 640x480.
Subnet mask/Subnet prefix length
Numerical value to define whether to use several bits
for a network address to distinguish among subnet IP
addresses in a network. According to the values,
devices can determine which part of the address is
the network address and which part is the host
address.
187
Subnet
A small network used as a unit of administration when
a larger network is divided into smaller networks.
Large networks in corporations, for example, the network can be broken down into smaller networks
called "subnets" to make the network more manageable and lines used more efficiently. In this case,
these smaller networks are called subnets.
SVGA(Super VGA)
Resolution with 800 x 600 pixels.
SXVGA
Refers to a resolution of 1280x960 pixels.
TCP/IP (Transmission Control Protocol/Internet
Protocol)
The standard network protocol for the Internet and
Intranets.
Time zone
A time zone is a region or a country that has uniform
standard time.
URL (Uniform Resource Locator)
An address for locating information resources such as
documents and images on the Internet.
VGA (Video Graphic Array)
Resolution with 640 x 480 pixels.
VMD (Motion detection) search
The function that automatically detects motion in
images. In this product, it is possible to search for
date & time of motion detection in recorded images.
VPN
Service used to make public lines as private lines.
Many companies are using this as a new medium of
communication instead of costly private lines.
Depending on service, VPN also provides a secure
line using authentication technology and encryption.
WAN
Allows physically separated PCs, such as between
the head office and a branch office, to connect via a
phone line or private line data for exchanging.
Web browser
A software application which enables to display web
pages. Microsoft Internet Explorer is one of the most
widely used web browser.
188
For U.S. and Canada:
For Europe and other countries:
Panasonic System Communications Company of North America,
Unit of Panasonic Corporation of North America
Panasonic Corporation
www.panasonic.com/business/
For customer support, call 1.800.528.6747
Two Riverfront Plaza, Newark, NJ 07102-5490
Panasonic Canada Inc.
5770 Ambler Drive, Mississauga, Ontario, L4W 2T3 Canada
(905)624-5010
www.panasonic.ca
© Panasonic System Networks Co., Ltd. 2014
http://panasonic.net
Importer's name and address to follow EU rules:
Panasonic Testing Centre
Panasonic Marketing Europe GmbH
Winsbergring 15, 22525 Hamburg, Germany
N0314-2084
PGQP1659XA