1
Complete Solutions in Emergency Lighting STANILITE
Complete Solutions in Emergency Lighting Doc No: 29-01069
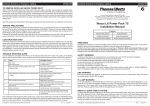
Using Stanilite light weight cantilever wall mount bracket WQFCLL: Refer Figure: 5 for installation of cantilever light weight wall mount bracket WQFCLL. The cantilever light weight bracket is manufactured from 1.5mm stainless steel and is powder coated low sheen black.
In Figure: 5 “A” indicates conduit adaptors can be fitted to these faces. Installer must ensure proper sealing of any penetration to the base to maintain the IP rating of the unit. The necessary hardware (screws, nuts and washers) are supplied with the bracket. The Figure: 3 shows how the supplied hardware is used when installing the cantilever light weight wall bracket to the nylon base.
Thomas & Betts Australasia. ABN 062 074 810 898
Head Office: Unit D3, 3-29 Birnie Avenue, Lidcombe NSW 2141, Australia
Manufacturing: 23a Nyrang Street, Lidcombe NSW 2141, Australia
Telephone: (+61) 1300 666 595 Facsimile: (+61) 1300 666 594
A
Quickfit Weatherproof Exit /
LED Quickfit Weatherproof Housing
Installation Manual
A
153
132
Wall fixings
not supplied
A
A
STANILITE
Weatherproof fixings
supplied with bracket
108
What’s Inside the box
4 holes
8.5 dia
274
466
574 max position
534 min position
Figure 5: Showing installation detail of cantilever light weight wall mount bracket
CONSTRUCTION SITES
Continuously switching on and off the unit’s mains supply during the installation process (due to building works or for some other reason),
could cause the unit’s to discharge and charge their batteries many times over a short period. This may shorten the life of both the battery
and the lamp/s. Thomas & Betts does not recommend such practices and may not honour any warranty on the life of the batteries or the
lamps when subjected to such harsh operating conditions. The unit’s are designed to be regularly discharge tested once every 6 months
as per AS/NZS2293.2. Deliberate consistent discharge testing is considered an abuse of the fittings. In order to prevent damage to the
battery or lamp, leave the unswitched active circuit turned off at the circuit breaker until the emergency lighting is required on the site.
TROUBLE SHOOTING GUIDE
If you’ve installed and connected the unit as per the instructions listed earlier and it doesn’t work properly, please refer to the Quickfit
Installation Manual’s Trouble Shooting Guide.
1. Glass Filled Nylon Base
Qty: 1
2. Acrylic/Polycarbonate Diffuser
Qty: 1
3. Millennium Quickfit Frame
Qty: 1
4. Diffuser (Qty 2 if unit is double sided)
Qty: 1
5. Back Plate (if unit is single sided)
Qty: 1
6. Nut M 6 Hex S Steel
Qty: 4
7. Screw 10 x 1/2 Mush Nib Steel
Qty: 2
8. Screw M 6 x 16 S Steel Socket Cap
Qty: 4
9. Screw M 6 x 16 S Steel Pan Philips Head
Qty: 4
10. Warranty Information
Qty: 1
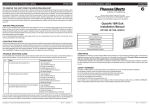
GREETINGS
Congratulations on choosing to use this Thomas & Betts product covered by our unique Through-Life Support system. This document is
designed to assist you during the installation of this product, so for the safety of yourself and others Thomas & Betts recommends
that you read this document thoroughly before commencing installation.
The Quickfit range of fittings as the name implies, are designed to be fitted quickly. These are advanced pieces of electronic equipment
and when treated with due care and maintained through regular and appropriate servicing, will perform without trouble for many years
to come.
If the unit still doesn’t work after checking these possible causes, contact Thomas & Betts Service in Australia on 1300 666 595, Monday
to Friday, 8.30am to 4.30pm (AEST) and ask for help. Our trained service personnel will usually be able to take your call immediately and
assist you in resolving your difficulty. Thomas & Betts is committed to providing valuable Through-Life Support for its products.
SAFETY WARNING
© Copyright 2013. Thomas & Betts Australasia ABN: 062 074 810 898.
© Copyright 2013. Thomas & Betts Australasia ABN: 062 074 810 898.
Rev: 5.0
15 April 2013
4
In Australia and New Zealand, only licensed electricians are permitted by law to work with 240 Volt electrical installations.
Do not attempt to install or connect this product unless you are a licensed electrican.
Turn off and isolate the electrical supply before connecting this fitting to the building wires.
Do not touch the terminals of the terminal block when the light fitting is energised.
The only user serviceable parts are the lamp/s.
Do not tamper with the fitting or the warranty will be void.
As the installer, it is your responsibility to ensure compliance with all relevant building and safety codes, (ie: AS3000, AS/NZS2293).
Refer to the applicable standards for data and mains cabling installation procedures and requirements.
Rev: 5.0
15 April 2013
1
Complete Solutions in Emergency Lighting STANILITE
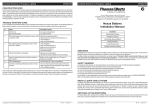
Complete Solutions in Emergency Lighting Remove the unit from the packing box and inspect it for damage or imperfections. If any damage is found, do not install the unit,
but replace it carefully into the packing box and notify the Thomas & Betts Product Support Hotline in Australia on 1300 666 595.
2.
If all looks okay, proceed for installation. Take the the nylon base and drill holes to suit (refer Figure: 1). Base mounting screws
are not supplied with the unit. Use appropriate screws as required depending on your installation ie: wall or ceiling. Installer must
ensure proper sealing of any penetration to the base to maintain the IP rating of the unit.
“A”
“B”
“C”
“D”
“A”
In Figure: 2 “A” indicates conduit adaptors can be fitted to these faces. Installer must ensure proper sealing of any penetration to the base to maintain the IP rating of the unit. The necessary hardware (screws, nuts and washers) are supplied with the bracket. Figure: 3 shows how the supplied hardware is used when installing the wall bracket to the nylon base.
M6 x 16 SS SKT HD screw
Drill to suit for ceiling mount.
Drill to suit for conduit entry.
Drill to suit for standard junction box mounting or top side conduit entry.
Drill to suit for wall mounting.
Also drill to suit for wall mount using Stanilite wall mount bracket part number: WQFWM.
Mounting Bracket
Weatherproof fitting
282
B
M6 SS flat washer
Wall mounting face
A
B
A
C
B
90
A
155
B
Figure 3: Showing details of supplied hardware to be used with the bracket
Wall Mount Cantilever Options
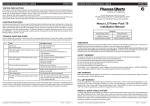
Using Stanilite heavy duty cantilever wall mount bracket WQFCLH: For robust cantilever wall mounting use Stanilite heavy duty bracket part number WQFCLH. Refer following Figure: 4 for installation of cantilever heavy duty wall mount bracket. The cantilever heavy duty bracket is manufactured from 6.0mm mild steel, hot zinc dipped and is powder coated low sheen black.
D
240
Figure 1: Glass Filled Nylon Base, drill to suit for mounting
3.
Install the ceiling bracket inside the base unit using 2 screws 10 x 1/2 mush nib steel supplied with the unit. For mains wiring and
installation details of the Quickfit, please refer to the Quickfit Installation Manual.
4.
Once the Quickfit is installed into the mounting bracket, you can install the enclosure into the base using either the socket cap or
pan Philips head stainless steel M 6 x 16 screws and nuts supplied with the unit.
A
A
153
110
A
A
A
Wall fixings
not supplied
Weatherproof fixings
supplied with bracket
A
Bracket clearance on “clipsal” circular junction box
A
Alternate
fixing position
A
Wall Mount Options
Without using any wall mount bracket: Drill holes in the base to suit (refer Figure 1, hole position “D”) for wall mount installation without using any bracket. Use appropriate screws as required. Installer must ensure proper sealing of any penetration to the base to maintain the IP rating of the unit.
A
Rubber sealing washer
M6 SS hex nut
24
A
D
“A” indicates conduit adaptors
can be fitted in these faces
150
274
Bracket is manufactured from 2.0mm stainless steel and
powercoated low sheen black
Alternate fixing position
4 holes
11.0 dia
Weatherproof fixings
supplied with bracket
466
580 max position
540 min position
102
Wall fixings
not supplied
274
STANILITE
Using Stanilite wall mount bracket WQFWM: For robust wall mounting use Stanilite wall mounting bracket part number WQFWM. Refer Figure: 2 for installation of wall mount bracket. The bracket is manufactured from 2.0mm stainless steel and is powder coated low sheen black.
INSTALLATION INSTRUCTIONS
1.
Figure 4: Showing installation detail of cantilever heavy duty wall mount bracket
In the above Figure: 4 “A” indicates conduit adaptors can be fitted to these faces. Installer must ensure proper sealing of any penetration to the base to maintain the IP rating of the unit. The necessary hardware (screws, nuts and washers) are supplied with the bracket. The Figure: 3 shows how the supplied hardware is used when installing the cantilever heavy duty wall bracket to the nylon base.
4 holes 8.5 dia
466
Figure 2: Showing installation detail of wall mount bracket
© Copyright 2013. Thomas & Betts Australasia ABN: 062 074 810 898.
Rev: 5.0
15 April 2013
2
© Copyright 2013. Thomas & Betts Australasia ABN: 062 074 810 898.
Rev: 5.0
15 April 2013
3