1
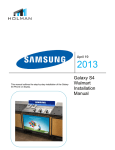
2013 Visions Installation Manual Technical Assistance 1.855.441.6965 Page | 1 TABLE OF CONTENTS Required Supplies & Contents Scope of Work – Checklist Disposing of Existing POS Unit Installing New Unit Initial Keyboard Pairing Setting up Samsung TV Setting up Galaxy Tab Setting up the Blu-ray player Connecting Blu-ray to Samsung TV Playing Video Discs Allshare Play Screen Playing Files from a USB Device Disabling Anynet on the TV & Blu-ray Player Sign-Off Sheet 2 3 4 5,6 7 8 9 - 11 12 13 14 15 16,17 18,19 20 Page | 2 CONTENTS, REQUIRED SUPPLIES REQUIRED SUPPLIES: 1. Standard Tool Kit 2. 9/16th Open-ended wrench 3. 9/16th Socket with extension CONTENTS* 1. Samsung Table with: a. Samsung Galaxy Tab b. Samsung Wireless Keyboard 2. Samsung TV 3D Blu-ray Disc 3. Samsung 2012 Demo USB Device 4. Return label 5. UPS Envelope/Box (for Touchscreen) 6. 1 Security Bit 7. 1 – 25ft Extension Cord 8. 1 – 10ft Extension Cord 9. 1 – 6ft Wire Race Cover 10. 1 Roll of Double-sided Tape 11. 6 Plastic Cable Clamps with Screws 12. 1 Visions Associate Manual – To be given to the store Manager before leaving *HOLMAN to provide Page | 3 SCOPE OF WORK CHECKLIST: o Remove existing POS unit o Remove Tablet and/or Touchscreen and place in envelope/box with shipping label o Place unused extension cord in envelope/box to return o Install Samsung Table o Pair Samsung Tablet and wireless keyboard with TV o Connect Blu-ray player and load 3D content disc o Connect store feed where available. If not available, install and setup content to play from USB key o Test all of the above o Clean area and dispose of old POS Unit, garbage and palette o Give Visions Store Associate Manual to Manager o Ask Manager to complete Sign-Off Sheet o Take photos of complete installation o Call UPS for store pick-up of envelope/box with devices o Email Sign-off Sheet and photos to [email protected] Page | 4 REMOVING EXISTING POS UNIT UPON ARRIVAL 1. Please speak with Manager before beginning installation a. Find out location of display b. If POS Unit is stored in the warehouse please ask Manager to access unit c. If Tablets and Touchscreens (ELO) have been removed, please retrieve devices from Manager and follow instructions below PLEASE NOTE: Some units only contain Tablets while others have both a Tablet and a Touchscreen. UNDER NO CIRCUMSTANCES ARE TABLETS AND TOUCHSCREENS TO BE LEFT WITH STORE). IF A UNIT HAD A TABLET OR TOUCHSCREEN THAT IT IS MISSING PLEASE MAKE NOTE OF THIS. 2. Locate existing unit 3. Unplug any power cables to unit 4. Remove Tablet before Touchscreen using standard wrench, if applicable 5. Place Tablet and/or Touchscreen in shipping envelope/box to return to HOLMAN 6. Place provided bill of lading on envelope 7. Dispose of old POS Unit, garbage and palette when installation is complete Page | 5 INSTALLING NEW UNIT 1. Unpack new POS table removing all protective packaging 2. Carefully unpack metal holder with 3D glasses making sure not to bend or scratch 3D glasses 3. Unpack extension cords and wire race cover 4. Remove velcroed Sintra panel from bottom of table 5. Locate power outlet in existing store wall and determine the length of the extension cord required (10ft or 25ft) PLEASE RETURN UNUSED EXTENSION CORD WITH DEVICES (IN ENVELOPE or BOX 6. Feed male end of extension cord through the left leg of the table leaving the female end accessible 7. Run extension cord from table leg directly to power outlet along floor if adjacent to wall – Cover visible cord with wire race cover. If power outlet is at back of display, run extension cord from table leg straight across to adjacent wall (cover visible cord with wire race cover) and secure the rest of the cord along wall using plastic cable clamps and screws every 3 feet PLEASE NOTE: Excess cord to be managed in table leg (to provide a clean and tidy display). Page | 6 INSTALLING NEW UNIT 8. Plug power cord from tablet into female end of extension cord 9. Remove nuts and back up plate from metal 3D glass holder 10. Place metal 3D glass holder spokes in allotted holes in table to the right of the keyboard 11. You will need a 9/16th open-ended wrench and a 9/16th socket with extension 12. Replace back up plate and secure nuts to the table using the tools mentioned above 13. Replace sintra panel 14. Using the security bit provided remove keyboard in order to begin setting up the technical configurations 15. Once technical configuations are complete, replace keyboard in security bracket securing with security bit Page | 7 INITIAL KEYBOARD PAIRING 1. Turn on the Samsung TV and remove the 2 back brackets holding the wireless keyboard to the unit. 2. Turn on the wireless keyboard (The wireless keyboard has a power switch located at the back of unit), and move it to the direction of the Samsung TV. (approximately 30cm - 4m) 3. Hold the "PAIRING" button located at the back of the keyboard for 2 seconds until the bluetooth and battery indicators begin to blink alternately for 5 minutes. This will indicate the wireless keyboard is trying to pair with the Samsung TV. 4. The bluetooth and battery indicators blink twice at the same time and stop blinking when pairing succeeds. (Move you finger around the trackpad, if you see a mouse pointer on the TV screen the wireless keyboard has successfully been paired.) 5. Place the wireless keyboard back onto the unit and screw the back bracket back Page | 8 SETTING UP SAMSUNG TV 6. Tap twice on the trackpad located on the wireless keyboard 7. The "Go To" window will pop up. Navigate using the trackpad or keyboard directional buttons to the "MENU" option. 8. Next, Select "Network" 9. Navigate to "Wi-Fi Direct". Once it starts scanning start setting up the Galaxy Tab. Page | 9 SETTING UP GALAXY TAB 10. Power on the Galaxy Tab by pushing the power button located at the top left of the device. Once the Galaxy Tab is fully loaded exit out of Surelock by tapping the screen 5 times. A password box will appear and type in the following "12345678" 11. Select "Exit Surelock" 12. On the Home screen navigate to "Settings" section. 13. Select "More Settings" > "Wi-Fi Direct" 14. Turn on the "Wi-Fi Direct" by clicking the tab switch located to the left of the title. When turned on it will scan for devices when you see the Samsung TV click on the title. Page | 10 SETTING UP GALAXY TAB 15. Select and confirm the Samsung TV to establish a connection. 16. Next, look on the Samsung TV and confirm the connection with the wireless keyboard by selecting "OK". (If the Samsung TV has timed out its scanning process from step 9. just hit "Refresh" using the wireless keyboard.) 17. Coming back to the Galaxy Tab, on the Home screen navigate to the "Surelock" application. 18. Select "OK, Got it!" Page | 11 SETTING UP GALAXY TAB 17. Check box "Use by default for this action" and select "SureLock". 18. Test the connection to the Samsung TV by opening the "Gallery" application on the home screen and select a photo you wish to display on the Samsung TV 19. To Display the photo on the Samsung TV select the icon in the top corner of the photo and choose the Samsung TV from the list to view. Page | 12 SETTING UP THE BLU-RAY PLAYER FRONT PANEL REAR PANEL Page | 13 CONNECTING BLU-RAY TO SAMSUNG TV 20. Connect an HDMI cable from the HDMI Out jack on the back of the blu-ray player to the HDMI IN jack on the Samsung TV. • Do not connect the power cord to the wall outlet until you have made all the other connections Page | 14 PLAYING VIDEO DISCS 21. Press the ⏏ button to open the disc tray. 22. Push a disc gently into the disc tray with the disc's label facing up. 23. Press the ⏏ button to close the disc tray. Playback starts automatically. 24. If playback does not start automatically, press the ⏏ button on the remote or see “The AllShare Play Screen” below. Page | 15 ALLSHARE PLAY SCREEN 25. To access the AllShare Play Main screen, select AllShare Play on the Home screen. 26. Scroll to the video section and then to the inserted disc, and then select the disc 27. Continue to the Blu-ray Main Menu. 28. Navigate to the All Play button, and select it. Page | 16 PLAYING FILES FROM A USB DEVICE ** WHERE STORE FEED IS NOT AVAILABLE** Follow these steps 29. Make sure the Samsung TV and the wireless keyboard are on. (The wireless keyboard has a power switch located at the back of unit.) 30. Connect the USB device to the USB port located on the back or side of the Samsung TV. The "New Device Connected" pop-up will appear. 31. Use the arrow buttons on the wireless keyboard to select Videos and press the enter button 32. When the videos get listed create a playlist by pushing the "TOOLS" button 33. Select "Add to playlist" Page | 17 PLAYING FILES FROM A USB DEVICE 34. Select "Select All" 35. Select "Add" 36. Select "Create New" 37. Give the playlist a name and select "Done" 38. Once the videos are playing select "TOOLS" on the wireless keyboard and navigate to repeat mode and select "All". Page | 18 DISABLING ANYNET ON THE SAMSUNG TV & BLU-RAY PLAYER DIRECTIONS FOR SAMSUNG TV 39. Using the wireless keyboard push the "MENU" button located on the keyboard to the left of the spacebar to open the menu settings. 40. Navigate to "System" 41. Select "Anynet+ (HDMI-CEC) 42. Disable the Anynet+ (HDMI-CEC) by turning it to the "Off" state ** To exit out of the menu push the "Esc" button until menu closes. ** Page | 19 DISABLING ANYNET ON THE SAMSUNG TV & BLU-RAY PLAYER DIRECTIONS FOR SAMSUNG BLU-RAY PLAYER ** Make sure you on the correct HDMI source ** 43. Using the Blu-ray remote control push the "HOME" button 44. Navigate to "Settings" 45. Navigate to "System" 46. Select "Anynet+ (HDMI-CEC) 47. Disable the Anynet+ (HDMI-CEC) by turning it to the "Off" state ** To exit out of the menu push the "Esc" button until menu closes. ** Page | 20 SIGN-OFF SHEET HOLMAN, As per the installation requirements of our store, I have examined the display unit and it has been installed properly and the devices are in working order. Please Check the Following: Samsung Table – has this been installed without damages? o Tablet, wireless keyboard and 3D glasses present and installed? Samsung Wireless Keyboard o Has this been paired properly and can you control the TV? Samsung 3D Blu-ray Player o Has this been connected properly? o Are you able to play and view the 3D content? o 3D glasses, are they powered and functional? Samsung Tab2 10.1” o Is this powered and charging properly? o Are you able to display pictures and videos onto the TV? Samsung TV o If store feed is available, has this been set as the default source? o Where store feed is not available, has a USB key with content been setup to loop? Store #: Address: Notes: Store Manager Name: Signature: Date: