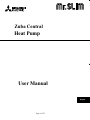
1
Zuba Central
Heat Pump
User Manual
EnglishU
Page 1 of 23
Introduction
The Zuba-Central is a Heat Pump using Hyper Heat technology. The Zuba-Central
consists of outdoor unit and multi position ducted air handling indoor unit which are
connected together and controlled by a PAR 21MAA controller.
Application
Constant energy price increases in Canada and around the globe is increasing the
consumer’s requirements to source more efficient ways to cool and heat their homes.
The Zuba-Central Hyper Heat Pump can save energy and reduce greenhouse gas
emissions due to its high seasonal operation efficiency in both cooling and heating
seasons. In addition to this the new two phases liquid gas injection technology allows
high heating output at ambient temperatures below -30°C. The system is available with
auxiliary back-up heating options of hydronic hot water, electrical resistance heat or SCR
ducted heater.
Emergency Auxiliary back-up heat is also activated in case of system malfunction.
Page 2 of 23
Contents
Safety Precautions
Zuba-Central controller --PAR21MAA
Screen Configuration
Setting the Day of the Week and Time
Operation
Timer
Error Codes indication
User maintenance
3
5
6
8
9
11
22
23
Safety Precautions
• Before installing the unit, make sure you read all the “Safety Precautions”.
• The “Safety Precautions” provide very important points regarding safety.
Make sure you follow them.
• Please report to or obtain necessary permits from Local Electrical authority
before connection to the system
Symbols used in the text
Warning:
Describes precautions that should be observed to prevent danger of injury or death
to the user
Caution:
Describes precautions that should be observed to prevent damage to the unit
Page 3 of 23
Warnings:
• For appliances when installed should not be accessible to the general public.
• The unit must not be installed by the user. Ask the dealer or an authorized
company to install the unit. If the unit is installed improperly, water leakage,
electric shock or fire may result.
• Do not stand on, or place any items on the unit.
• Do not splash water over the unit and do not touch the unit with wet hands.
An electric shock may result.
• Do not spray combustible gas close to the unit. Fire may result.
• Do not place a gas heater or any other open-flame appliance where it will
be exposed to the air discharged from the unit. Incomplete combustion may
result.
• Do not remove the front panel or the fan guard from the outdoor unit or the
panels from the indoor unit when it is running.
• When you notice exceptionally abnormal noise or vibration, stop operation,
turn off the power switch, and contact your dealer.
• Never insert fingers, sticks etc. into the intakes or outlets.
• If you detect odd smells, stop using the unit, turn off the power switch and
consult your dealer. Otherwise, a breakdown, electric shock or fire may
result.
• This system is NOT intended for use by children or infirm persons without
supervision.
• Young children must be supervised to ensure that they do not play with the
air conditioner.
• If the refrigeration gas blows out or leaks, stop the operation of the system,
thoroughly ventilate the room, and contact your dealer.
Caution:
• Do not use any sharp object to push the buttons, as this may damage the
remote controller.
• Never block or cover the indoor or outdoor unit’s intakes or outlets.
Disposing of the unit
• When you need to dispose of the unit, consult your dealer.
Page 4 of 23
Zuba-Central controller
Page 5 of 23
How to use the Zuba-Central controller
Screen Configuration
Page 6 of 23
Screen Types
For details on setting the language for the remote controller display, refer to
section 8. Function Selection.
The initial language setting is English.
• Function Selection of remote controller:
Set the functions and ranges available to the remote controller (timer
functions, operating restrictions, etc.)
• Set Day/Time
Set the current day of the week or time.
• Standard Control Screens
View and set the air conditioning system’s operating status
• Timer Monitor
View the currently set timer (weekly timer, simple timer, or Auto Off
timer)
• Timer Setup
Set the operation of any of the timers (weekly timer, simple timer, or Auto
Off timer).
A.
B.
C.
D.
How to change the screen
Hold down both the Mode button and the Timer On/Off button for 2
seconds.
Press the Timer Menu button.
Press the Mode (Return) button.
Press either of the Set Time buttons (Back or Ahead)
To return to main screen
Hold down both the Mode button and the Timer On/Off button for 2
seconds.
Page 7 of 23
4. Setting the Day of the Week and Time
Note: The day and time will not appear if clock use has been disabled at Function
Selection of remote controller.
1. Press the or
Set Time button (11) to show display [2].
2. Press the Timer On/Off (Set Day) button (9) to set the day.
Each press advances the day shown at [3]:
3. Sun > Mon > ...> Fri > Sat.
4. Press the appropriate Set Time button (11) as necessary to set the time.
As you hold the button down, the time display (at 4) will increment first in
one-minute intervals, then in ten-minute intervals, and then in one-hour
intervals.
5. After making the appropriate settings at Steps 2 and 3, press the Filter
button (4) to lock in the values.
6. Press the Mode button (2) to exit
Page 8 of 23
5. Operation
5.1. Turning ON/OFF
<To Start Operation>
Press the ON/OFF button.
• The ON lamp [1] and the display area will light up or come on.
Note: When the unit is restarted, initial settings are as follows.
Remote Controller settings
Mode
Temperature setting
Last operation mode
Last set temperature
<To Stop Operation>
Press the ON/OFF button again.
• The ON lamp [ 1] and the display area go off.
Page 9 of 23
5.2. Mode select
Press the operation mode (
in [2] above.
) button and select the operation mode displays
Cool Mode
Drying mode
Fan mode
Heating mode
Automatic (cooling/heating) mode <Only heat pump type>
Ventilation mode
Only indicated on Wired remote controller when LOSSNAY
connected
5.3. Temperature setting
To decrease the room temperature:
Press button (3) to set the desired temperature. The selected temperature is
displayed [3].
To increase the room temperature:
Press button (3) to set the desired temperature. The selected temperature is
displayed [3].
• Available temperature ranges are as follows:
Cooling/Drying: 19 - 30 °C, 67 - 87 °F
Heating:
17 - 28 °C, 63 - 83 °F
Automatic:
19 - 28 °C, 67 - 83 °F
• The display blinks either 8 °C - 39 °C, 46 °F - 102 °F to inform you if the room
temperature is lower or higher than the displayed temperature.
5.4. Fan speed setting
Pressing the Fan Speed button will display the follow
“NOT AVAILABLE” message
The ZUBA Central has fixed speeds for Heating and Cooling.
Page 10 of 23
6. Timer
6.1. For Wired Remote-controller
You can use Function Selection of remote controller to select which of three types
of timer to use:
(1) Weekly timer,
(2) Simple timer, or
(3) Auto Off timer
6.1.1. Weekly Timer
The weekly timer can be used to set up to eight operations for each day of the
week.
• Each operation may consist of any of the following:
ON/OFF time together with a temperature setting, or
ON/OFF time only, or
Temperature setting only
• When the current time matches a set time point, the timer performs the set
operation.
Time setting resolution for this timer is one minute.
Note:
*1. Weekly Timer/Simple Timer/Auto Off Timer cannot be used at the same time.
*2. The weekly timer will not operate when any of the following conditions are in
effect.
• The timer feature is off;
• The system is in a malfunction state;
• Test run is in progress;
• Remote controller is in self-check mode or remote controller check;
• the user is in the process of setting a function or setting the timer;
• the user is in the process of setting the current day of the week or time;
• System is under central control
Specifically, the system will not carry out operations (unit on, unit off or
temperature setting) during these conditions.
Page - 11 - of 23
<How to Set the Weekly Timer>
1. Be sure that you are at a standard control screen, and that the weekly timer
indicator [1] is shown in the display.
2. Press the Timer Menu button (12), so that the “Set Up” appears on the screen
(at [2] ). (Note that each press of the button toggles the display between “Set
Up” and “Monitor”.)
3. Press the Timer On/Off (Set Day) button (9) to set the day. Each press
advances the display at [3] to the next setting, in the following sequence:
“Sun Mon Tues Wed Thurs Fri Sat” >“Sun” >...> “Fri” > “Sat”> “Sun Mon
Tues Wed Thurs Fri Sat”...
4. Press the
Operation button ( (7) or (8) ) as necessary to select the
appropriate operation number (1 to 8) [4] .
* Your inputs at Steps 3 and 4 will select one of the cells from the matrix
illustrated below.
(The remote-controller display at left shows how the display would appear
when setting Operation 1 for Sunday to the values indicated below.)
Page - 12 - of 23
Note:
By setting the day to “Sun Mon Tues Wed Thurs Fri Sat”, you can set the
same operation to be carried out at the same time every day.(Example:
Operation 2 above, which is the same for all days of the week.)
Page - 13 - of 23
<Setting the Weekly Timer>
5. Press the appropriate Set Time button (11) as necessary to set the desired time (at [5]).
* As you hold the button down, the time first increments in minute intervals, then in tenminute intervals, and then in one-hour intervals.
6. Press the ON/OFF button (1) to select the desired operation (ON or OFF), at [6].
* Each press changes the next setting, in the following sequence:
No display (no setting) “ON” < > “OFF”
7. Press the appropriate Set Temperature button (3) to set the desired temperature at [7].
* Each press changes the setting, in the following sequence: No display (no setting)
75 <>77 ... 84<> 87 53 < ...> 73 No display.
(Available range: The range for the setting is 12 °C, 53 °F to 30 °C, 87 °F. The actual
range over which the temperature can be controlled, however, will vary according to the
type of the connected unit.)
8. After making the appropriate settings at Steps 5, 6 and 7, press the Filter button (4) to
lock in the values.
To clear the currently set values for the selected operation, press and quickly release the
Check (Clear) button (10) once.
• The displayed time setting will change to “—:—”, and the On/Off and temperature
settings will all disappear.
• (To clear all weekly timer settings at once, hold down the Check (Clear) button (10) for
two seconds or more. The display will begin blinking, indicating that all settings have
been cleared.)
• Note: Your new entries will be cancelled if you press the Mode (Return) button (2)
before pressing the Filter button (4) . If you have set two or more different operations
for exactly the same time, only the operation with the highest Operation No. will be
carried out.
9. Repeat Steps 3 to 8 as necessary to fill as many of the available cells as you wish.
10. Press the mode (Return) button (2) to return to the standard control screen and complete
the setting procedure.
11. To activate the timer, press the Timer On/Off button (9), so that the “Timer Off”
indication disappears from the screen. Be sure that the “Timer Off” indication is no
longer displayed.
* If there are no timer settings, the “Timer Off” indication will blink on the screen.
Page - 14 - of 23
<How to View the Weekly Timer Settings>
1. Be sure that the weekly timer indicator is visible on the screen (at [1]).
2. Press the Timer Menu button (12) so that “Monitor” is indicated on the screen (at [8]).
3. Press the Timer On/Off (Set Day) button (9) as necessary to select the day you wish to
view.
Operation button ((7) or (8)) as necessary to change the timer
4. Press the
operation shown on the display (at [9]).
* Each press will advance to the next timer operation, in order of time setting.
5. To close the monitor and return to the standard control screen, press the Mode (Return)
button (2).
<To Turn Off the Weekly Timer>
Press the Timer On/Off button (9) so that “Timer Off” appears at [10].
<To Turn On the Weekly Timer>
Press the Timer On/Off button (9) so that the “Timer Off” indication (at [10]) goes dark.
6.1.2. Simple Timer
You can set the simple timer in any of three ways.
• Start time only: The air conditioner starts when the set time has elapsed.
• Stop time only: The air conditioner stops when the set time has elapsed.
• Start & stop times: The air conditioner starts and stops at the respective elapsed times.
The simple timer (start and stop) can be set only once within a 72-hour period.
Page - 15 - of 23
The time setting is made in hour increments.
Note:
*1. Weekly Timer/Simple Timer/Auto Off Timer cannot be used at the same time.
*2. The simple timer will not operate when any of the following conditions is in
effect. The timer is off; the system is in malfunction state; a test run is in
progress; the remote controller is undergoing self-check or remote controller
check; the user is in the process of selecting a function; the user is in the process
of setting the timer; the system is under central control. (Under these conditions,
On/Off operation is prohibited.)
<How to Set the Simple Timer>
1. Be sure that you are at a standard control screen, and that the simple timer
indicator is visible in the display (at [1]).
When something other than the Simple Timer is displayed, set it to SIMPLE
TIMER using the function selection of remote controller (see 8.[3] (3)) timer
function setting.
Page - 16 - of 23
2. Press the Timer Menu button (12), so that the “Set Up” appears on the screen
(at [2]). (Note that each press of the button toggles the display between “Set Up”
and “Monitor”.)
3. Press the ON/OFF button (1) to display the current ON or OFF simple timer
setting. Press the button once to display the time remaining to ON, and then
again to display the time remaining to OFF. (The ON/OFF indication appears at
[3]).
• “ON” timer: The air conditioner will start operation when the specified number of
hours has elapsed.
• “OFF” timer: The air conditioner will stop operation when the specified number
of specified number of hours has elapsed.
4. With “ON” or “OFF” showing at [3]: Press the appropriate Set Time button (11)
as necessary to set the hours to ON (if “ON” is displayed) or the hours to OFF (if
“OFF” is displayed) at [4].
• Available Range: 1 to 72 hours
5. To set both the ON and OFF times, repeat Steps 3 and 4.
* Note that ON and OFF times cannot be set to the same value.
6. To clear the current ON or OFF setting: Display the ON or OFF setting(see
step 3) and then press the Check (Clear) button(10) so that the time setting
clears to “—” at [4]. (If you want to use only an ON setting or only an OFF setting,
be sure that the setting you do not wish to use is shown as “—”.)
7. After completing steps 3 to 6 above, press the Filter button (4) to lock in the
value.
Note: Your new settings will be cancelled if you press the Mode (Return) button
before pressing the Filter (4) button.
8. Press the Mode (Return) button (2) to return to the standard control screen.
9. Press the Timer On/Off button (9) to start the timer countdown. When the timer
is running, the timer value is visible on the display. Be sure that the timer value is
visible and appropriate.
<Viewing the Current Simple Timer Settings>
1. Be sure that the simple timer indicator is visible on the screen (at [1]).
2. Press the Timer Menu button (9), so that the “Monitor” appears on the screen
(at [5]).
• If the ON or OFF simple timer is running, the current timer value will appear at [6].
• If ON and OFF values have both been set, the two values appear alternately.
3. Press the Mode (Return) button (2) to close the monitor display and return to
the standard control screen.
Page - 17 - of 23
<To Turn Off the Simple Timer>
Press the Timer On/Off button (9) so that the timer setting no longer appears on
the screen (at [7]).
<To Turn On the Simple Timer>
Press the Timer On/Off button (9) so that the timer setting becomes visible at [7].
Examples
When ON and OFF times have both been set at the simple timer then, operation
and display are as indicated below
Example 1: Start the timer with ON time set earlier than OFF time
ON Setting: 3 hours
OFF Setting: 7 hours
Page - 18 - of 23
Example 2: Start the timer with OFF time set earlier than ON time
ON Setting: 5 hours
OFF Setting: 2 hours
This timer begins countdown when the air conditioner starts and shuts the air
conditioner off when the set time has elapsed.
Available settings run from 30 minutes to 4 hours in 30-minute intervals.
Note:
*1. Weekly Timer/Simple Timer/Auto off Timer cannot be used at the same time.
*2. The Auto Off timer will not operate when any of the following conditions is in
effect. The timer is off; the system is in malfunction state; a test run is in
progress; the remote controller is undergoing self-check or remote controller
check; the user is in the process of selecting a function; the user is in the process
of setting the timer; the system is under central control. (Under these conditions,
On/Off operation is prohibited.)
<How to Set the Auto Off Timer>
1. Be sure that you are at a standard control screen, and that the Auto Off timer
indicator is visible in the display (at 1). When something other than the Auto Off
Timer is displayed, set it to AUTO OFF TIMER using the function selection of
remote controller (see 8.[4]-3 (3)) timer function setting.
2. Hold down the Timer Menu button (12) for 3 seconds so that the “Set Up”
appears on the screen (at 2). (Note that each press of the button toggles the
display between “Set Up” and “Monitor”.)
3. Press the appropriate Set Time button (11) as necessary to set the OFF time
(at 3).
Page - 19 - of 23
4. Press the Filter button (4) to lock in the setting.
Note:
Your entry will be cancelled if you press the Mode (Return) button (2) before
pressing the Filter button (4).
5. Press the Mode (Return) button (2) to complete the setting procedure and
return to the standard control screen.
6. If the air conditioner is already running, the timer starts countdown immediately.
Be sure to check that the timer setting appears correctly on the display.
<Checking the Current Auto Off Timer Setting>
1. Be sure that the “Auto Off” is visible on the screen (at 1).
2. Hold down the Timer Menu button (12) for 3 seconds so that “Monitor” is
indicated on the screen (at 4).
• The timer remaining to shutdown appears at 5.
3. To close the monitor and return to the standard control screen, press the Mode
(Return) button (2).
<To Turn off the Auto off Timer>
Hold down the Timer On/Off button (9) for 3 seconds so that “Timer Off” appears
(at [6]) and the timer value (at [7]) disappears.
Alternatively, turn off the air conditioner itself. The timer value (at [7]) will
disappear from the screen.
Page - 20 - of 23
<To Turn On the Auto Off Timer>
Hold down the Timer On/Off button (9) for 3 seconds. The “Timer Off” indication
disappears (at 6), and the timer setting comes on the display (at 7).
Alternatively, turn on the air conditioner. The timer value will appear at 7.
Page - 21 - of 23
7 Error Codes indication
If the ON lamp and error code are both blinking: This means that the system
is out of order and operation has been stopped (and cannot resume). Take
note of the indicated unit number and error code, then switch off the power
to the system and call your dealer or service provider.
If only the error code is blinking (while the ON lamp remains lit): Operation
is continuing, but there may be a problem with the system. In this case, you
should note down the error code and then call your dealer or servicer for
advice.
Note : If you have entered contact number to be called in the event of a
problem, push the Check button to display it on the screen.
Page - 22 - of 23
User maintenance
Clean or replace filter monthly during heating and cooling season
Replace the filter annually.
Caution
• Before you start cleaning, stop operation and turn OFF the power supply.
Cleaning the filters
• Clean the filters using a vacuum cleaner. If you do not have a vacuum
cleaner, tap the filters against a solid object to knock off dirt and dust.
Page - 23 - of 23