1
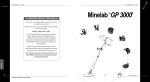
MINELAB
User Manual
© 2004 Minelab Electronics Pty Ltd
This document contains proprietary information that is protected by copyright. Apart from any use as
permitted under the Copyright Act 1968, no part may be reproduced by any process without written
permission from Minelab Electronics Pty Ltd, 118 Hayward Avenue, Torrensville, SA 5031, Australia.
WARNING. This document contains Minelab Electronics Pty Ltd rights, technical data or restricted
rights data, or both. Patents and trademarks apply.
Discla ime r
The Minelab metal detector discussed in this operating manual has been expressly designed and
manufactured as a quality hobbyist metal detector and is recommended for use in coin, treasure and
general metal detection in non-hazardous environments. This metal detector has not been designed
for use as a mine detector or as a live munitions detection tool.
Please read the operating manual prior to using your new detector.
Contact Details:
Minelab USA
871 Grier Drive, Suite B1
Las V egas, Nevada 89119
UNITED STATES OF AMERICA
email: [email protected]
tel: +1-702-891 8809
Minelab Electronics Pty Ltd
PO Box 537 Torrensville Plaza
South Australia 5031
AUSTRALIA
email: [email protected]
tel: +61-8-8238 0888
Minelab International Limited
Laragh, Bandon
Co. Cork
IRELAND
email: [email protected]
tel: +353-23 52101
www.minelab.com
MINELAB
table of contents
www.minelab.com
1.
INTRODUCING THE QUATTRO MP
3
1.1.
Multi-frequency-Full Band Spectrum (FBS) Technology
4
1.2.
Quattro Technical Specifications
5
2.
ASSEMBLING YOUR DETECTOR
6
Step 1 - Connecting the Search Coil
6
Step 2 - Shaft Assembly
6
Step 3 - Connecting the Shaft Assembly
7
Step 4 - Armrest Assembly
7
3.
SEARCH COILS
8
4.
BATTERIES
9
4.1.
Removal/Replacement of Battery Pack
9
4.3.
Recharging NiMH Battery Pack
10
4.4.
Battery Indicator
10
5.
HEADPHONES
11
6.
QUICK START
11
7.
CONTROL PANEL
12
7.1.
Power (On/Off)
12
7.2.
Display Meter
12
7.3.
Detect Modes
14
7.4.
Menu/Select +/-
16
7.5.
Accept/Reject
16
7.6.
Pinpoint
16
p1
table of contents
www.minelab.com
7.7.
Noise Cancel
16
8.
MENU SETTINGS
17
8.1.
Sensitivity
18
8.2.
Volume
18
8.3.
Threshold
18
8.4.
Noise Cancel
19
8.5.
Contrast
19
8.6.
Trash Density
19
9.
DISCRIMINATION
21
9.1.
Modifying Discrimination Scale
21
10.
DETECTOR SOUNDS
23
11.
USING YOUR QUATTRO MP
23
12.
TROUBLESHOOTING
24
13.
GLOSSARY OF TERMS
25
14.
PRE-SET SETTINGS
26
p2
1. Introducing the Quattro MP
www.minelab.com
1. Introducing the Quattro MP
Thank you for purchasing the Minelab Quattro MP (multi-purpose) metal detector.
The Minelab Quattro MP has been designed with "powerful simplicity" in mind. The Quattro
MP has four pre-set detect modes for turn on and go operation, and also features
customizable programs which you can save with your own personal settings.
The Quattro MP will locate valuable metal objects such as gold, coins, jewelry and other
metallic items. The detector’s easy-to-use control panel enables anyone, from beginner to
expert, to start detecting immediately after assembling your detector.
We recommend you use the NEW Quattro MP in one of the four selectable factory pre-set modes
initially to become familiar with its operation. These settings have been optimized to provide
you with excellent programs suitable for most applications.
Built rugged for years of treasure hunting enjoyment, Minelab stands behind their entire
line of metal detectors. To ensure getting the most from the Quattro MP, we recommend
that you read this User Manual to help assemble, take care of and learn how to operate your
new detector.
Minelab Electronics thanks you, and wishes you every success in your treasure hunting.
If you have any questions or comments regarding the Minelab Quattro MP or any other
Minelab product, please feel free to contact us via your local Authorized Minelab dealer,
or write to us:
Contact Minelab:
Minelab USA
871 Grier Drive, Suite B1
Las Vegas, Nevada 89119
USA
email: [email protected]
tel: 1-702-891 8809
Minelab Electronics Pty Ltd
PO Box 537 Torrensville Plaza
South Australia 5031
AUSTRALIA
email: [email protected]
tel: 61-8-8238 0888
Minelab International Limited
Laragh, Bandon
Co. Cork
IRELAND
email: [email protected]
tel: 353-23 52101
Please Note:
Since there may be a variety of options available for
this detector, equipment may vary according to
the model or items ordered with your detector.
Certain descriptions and illustrations may differ
(in this manual) from the exact model that you
purchased. In addition, Minelab reserves the right to
respond to ongoing technical progress by introducing
changes in design, equipment and technical
features at any time.
p3
1. Introducing the Quattro MP
www.minelab.com
1.1. Multi-frequency-Full Band Spectrum (FBS) Technology
When developing the Quattro MP, Minelab’s scientists looked at developing a truly easy to use yet
extremely powerful multi-purpose metal detector. Discussions with seasoned treasure hunters from
around the world identified a number of possible enhancements for operators. Features of the
Quattro MP detector include:
• Remarkable detection depth
• Accurate identification of targets at great depths
• Enhanced detection of desired targets among iron "trash"
• Enhanced detection capabilities when searching salt-water beaches
Most detectors on the market operate on a single (or dual) frequency, ranging up to 70 kilohertz
(kHz). Although this technology has served the industry well for years, Minelab’s scientists found that
a frequency that worked well in one area would often offer only marginal performance when used in
another location. Ground mineralization, trash content, and target size all had an effect on how
effective a detector transmitting a single or dual frequency would operate.
Full Band Spectrum technology combined with a powerful new microprocessor gives you:
1.1.1. Greater detecting depth
• Consistent sensitivity over a wide range of targets
• Circuitry that reduces interference from electromagnetic sources
• More accurate identification of target characteristics
The Full Band Spectrum (FBS) circuit automatically transmits multiple frequencies ranging from
1.5 kHz to 100 kHz simultaneously. This increased frequency range means that the signal received
from the detector coil is analyzed from a wide range of responses. This information is relayed to
the operator via the speaker or headphones and the control panel’s display as an audio or visual
target response.
Put simply, Minelab’s unique FBS technology means deeper, more sensitive, and more
accurate detecting.
1.1.2. Ground Compensation
The Quattro MP uses a sophisticated approach to the elimination of signals caused by ground
mineralization. Unlike other forms of ground balancing that require constant readjustment,
FBS technology uses advanced digital filtering to eliminate the influence of ground signals.
1.1.3. Operating Frequencies
A metal detector’s electromagnetic operating frequencies are measured in kiloHertz (kHz).
Low signal frequencies (e.g. 1.5 kHz) penetrate deepest, but sensitivity to smaller targets is low.
On the other hand, higher frequencies (e.g. 100 kHz) have a more shallow depth of penetration but
high sensitivity to small targets.
The Quattro MP’s multiple-frequency operation provides the advantage of both.
p4
www.minelab.com
1.2. Quattro MP Technical Specifications
Length Unextended
43 inches (1100mm)
Length Extended
55 inches (1358mm)
Shipping Weight
3 lb 7 oz (1700g) excluding batteries
Coil
10.5 inch (264mm)
Audio Output
Internal speaker or headphones
Headphone Input
Transmission
1/4 inch (6.3mm) stereo jack
Full Band Spectrum. Simultaneous multiple
frequency transmission ranging from
1.5kHz –100kHz
Ground Rejection
Ground compensation – advanced digital filtering
Discrimination
Linear –10 to +40 discrimination options
Visual Display
64 x 128 pixel liquid crystal display (LCD)
Detect Modes
4 (Coin; Coin/Jewelry; Relic; All Metal)
Pinpoint
Yes - Visual and audio
Personal Modes
4 programmable/save
Automatic Noise Cancel (Scanning)
Yes
Trash Density Settings
2 (High/Low)
Target Depth Meter
Yes (0-12 or more inches)
Battery Meter
Batteries
Yes (with audible low battery warning)
1600 or 1800 mAh NiMH rechargeable
battery pack (Varies by country/region) or
12V Alkaline pack. (Cells not included).
Patents
US 4890064, US 5537041, US 5506506
Optional Accessories
Alkaline or NiMH battery pack
Mains charger
Car charger
Control Box Cover
Coil Cover
Carry Bag
8 inch (200mm) "Double D" waterproof Coil
p5
2. assembling your detector
www.minelab.com
2. Assembling Your Detector
To assemble your Minelab Quattro MP,
follow steps 1 to 4 below.
Step 1 - Connecting the Search Coil
To attach the search coil to the lower shaft:
1. Plug the two rubber washers (1) into the holes on either
side of the coil yoke (2).
2. Place the search coil (3) on a flat surface with the front of
the coil facing away from you, and check that the open side
of the yoke is facing the ground.
3. Slide the yoke into the yoke bracket on top of the coil.
4. Insert plastic bolt (4) through the search coil’s yoke
bracket and the coil yoke. Fasten with the yoke
nut (5) provided, being careful not to damage the thread
of the nut by over-tightening. This may need to be
loosened to adjust the coil to a comfortable detecting angle.
Caution: DO NOT attempt to disconnect the coil cable where
it enters the search coil itself as this cable is direct wired into the
coil and is not dismountable. Any attempt to disconnect this
cable will void your coil warranty.
Step 2 - Shaft Assembly
1. Release the shaft camlock lever (6) before
inserting the lower shaft (7).
2. Feed the coil cable (8), which is inside the lower
shaft all the way through the inside of the upper shaft (9).
Make sure the longer side of the bevelled shaft (10)
is at the back of the control box.
Note: When exchanging the
standard coil with an accessory coil
like the 8", it may be easier to pull
the cable through the lower shaft
using a length of string or cord.
Once this is completed you should
be able to see approximately 4 inches
(100mm) of cable between the coil yoke
and the search coil. This is the slack
necessary to allow adjustment to the angle
of the search coil.
3. Slide the lower shaft entirely into the upper shaft until the camlock
rests against the yoke.
4. Pull the coil cable’s metal connector (11) through the open end of the upper shaft
until it ‘dangles’ from the opening.
p6
www.minelab.com
Step 3 - Connecting the Shaft Assembly
To connect the shaft assembly to the handle assembly:
5. Release the control box
camlock lever (12) to the
open position.
6. Push the coil cable
connector into the socket
(13) underneath the handle
assembly control box.
Ensure the connector’s threaded bracelet
is firmly secured.
7. Extend the lower shaft from the upper
shaft by approximately 6 inches (15cm)
to prevent the coil cable ‘bunching’.
8. Push the upper shaft firmly into the control box until you
feel it has reached the back of the control box, making sure that
the control box camlock lever is in the released position.
9. Secure the upper shaft in position by locking the control box
camlock (12).
10. Adjust the shaft to the desired length for your height and
then lock with shaft camlock lever (6).
11. Tilt the search coil to the most comfortable angle, keeping in mind
it will need to be parallel to the ground during detecting.
Note: To avoid difficulty securing the control box camlock lever (step 9),
ensure the shaft camlock is released to allow greater shaft movement.
Step 4 - Armrest Assembly
To adjust the armrest assembly:
12. Loosen the screw (i) in the center of the armrest
(turning counter-clockwise).
13. Place your arm into position and slide the armrest
back (ii) so that it is comfortable under your elbow.
14. Tighten screw (clockwise) to lock into position.
2.1.1. Fitting the armrest strap
15. Thread the strap through the buckle openings (iii).
16. Clip both buckles into the openings at each outer side
of the armrest.
17. Test by sliding your arm underneath the strap and
resting your forearm on the armrest.
18. Loosen strap by tilting the edge of the buckle out to
release it from the armrest. Undo the Velcro and pull the buckle outwards
(towards yourself.) Clip the buckle back into place and tighten the strap by pulling up.
The next time you use your detector, all you will need to do is click the buckle back
into the armrest.
p7
3. search coils
www.minelab.com
3. Search Coils
The function of the search coil is to transmit electromagnetic
signals into the ground, and receive the response.
The Quattro MP is supplied with a 10.5 inch open web "Double D"
search coil. Double D is the common term used to describe the
two internal coil windings which overlap each other, producing a
blade like search pattern. The advantages of Double D coils are
very good ground cancelling abilities, and very good ground
coverage, as the coil has an even detection range along its entire
length. Because of this, the operator is only required to slightly
overlap each sweep, to ensure all targets at maximum depth are
recovered.
The 10.5" coil is excellent for general searching. There is an
optional 8" coil available that provides greater sensitivity to small
targets, and improved performance in high trash areas.
Both coils are epoxy filled, so they can be submersed in
water, but care must be taken to ensure the control box
remains dry.
To replace the search coil:
1. Undo control box camlock and disconnect the coil cable
from the control box.
2. Separate the two shaft assemblies by releasing the shaft
camlock and sliding the lower shaft out.
3. Loosen the plastic nut and remove the bolt from the yoke
bracket.
4. Gently pull the coil cable from inside the yoke/lower shaft.
5. Carefully feed the new coil cable into the yoke and lower shaft.
Continue to feed the cable into the shaft until the connector is
visible at the top of the shaft.
Note: It may be easier to pull the cable through the lower shaft
using a length of string or cord.
Once this is completed you should be able to see approximately
4 inches (100mm) of cable between the coil yoke and the search
coil. This is the slack necessary to allow adjustment to the angle
of the search coil.
6. Re-attach the yoke and the search coil.
7. Reconnect cable to control box (as directed in Connecting the
shaft assembly, page 7).
Caution: DO NOT attempt to remove the coil cable from
the search coil. Any attempt to disconnect will void
your coil warranty.
Note: For ease of changing colis, it is advised that
each coil be fitted to its own lower shaft.
p8
4. batteries
www.minelab.com
4. Batteries
The Minelab Quattro MP has both Alkaline and NiMH battery
packs available as either standard or accessory items.
The NiMH 1600 mAh battery pack will power the detector for up to
12.5 hours of constant use and the NiMH 1800 mAh battery pack for
14 hours.
Eight good quality, fresh, 1.5V AA alkaline batteries will power the
Quattro MP for up to 14 hours of constant use.
Unlike Nickel Cadmium batteries, the NiMH battery pack DOES NOT
have to be discharged before recharging. Whenever the detector has
been unused for a lengthy period, recharge the battery pack to ensure
full performance. There is no limit to the time the battery pack can be
left on charge.
Removal instructions apply to both types of battery packs.
4.1. Removal/Replacement
of Battery Pack
To Remove the Battery Pack:
1. Turn Detector off.
2. Lift the rubber cap of the battery handle assembly.
3. Raise the yellow tab. This releases the spring-loaded
battery pack.
4. Remove battery pack from handle assembly.
To Replace the Battery Pack, slide the pack into the
compartment until it ‘clicks’ into place.
4.2. Inserting Alkaline Batteries
1. Slide back the sliding door of the alkaline battery pack in the
direction of the arrow.
2. Install 8 good quality fresh AA alkaline batteries in the direction
of the arrows located inside the battery pack
3. Close the sliding battery door and re-install into
battery handle compartment.
p9
4. batteries
www.minelab.com
4.3. Charging the NiMH Battery Pack
To charge your battery, only use the Minelab charger designed for your NiMH battery.
Using other chargers may damage your battery and will void the product warranty.
Wall/Mains Charger
The NiMH battery pack is sold in the discharged
condition. It is necessary to charge it before
operating the detector.
1. Plug the mains charger into the wall socket.
2. Insert the mains charger plug into the socket at
the tapered end of the battery pack. Leave for about
18 hours to fully charge.
3. Remove the battery charger plug from the battery
pack, ready for use.
Note: You may find that the first couple of times you charge your battery, you may
not achieve the full hours of operation. The batteries will reach their full capacity after
several recharge cycles.
Car Charger
4. Insert the car charger plug into the cigarette lighter socket of your vehicle.
5. Insert the car charger plug into the socket at the tapered
end of the battery pack. A small light on the car charger
illuminates indicating that the car charger is in operation.
6. Leave the battery to charge for about 18 hours for a complete
charge. If the battery was not completely discharged, the charging
time will be shorter.
The car charger is provided with a 3AG 2Amp fast fuse for short circuit protection, which
can be accessed by unscrewing the tip of the cigarette lighter plug.
Note: Charging the battery beyond full capacity will not damage the NiMH battery pack, but
it could gradually discharge your car battery.
Safety Tip: Do not attempt to disassemble the NiMH battery pack. If disposing of pack, do
not incinerate. Contact your local authorities to enquire about disposal or recycling facilities.
4.4. Battery Indicator
A battery indicator is displayed on the Quattro MP detect screen. The battery will be fully
shaded at maximum battery charge. When this shaded area decreases to the left hand side,
the detector will begin to emit a low battery warning sound. When this low battery warning
is heard, there will be only a few minutes of life left in the batteries.
It is recommended that the batteries be replaced or recharged as soon as possible to avoid
missing any targets. When the battery symbol is completely
un-shaded and flashing, the detector will sound an alarm before
displaying the message ‘FLAT BATTERY SHUTDOWN’ and
turning itself off.
To start detecting again, remove the battery and replace with a fully charged battery.
p10
5. headphones
www.minelab.com
5. Headphones
The use of headphones while treasure hunting can reduce
the distraction of external noise and allow the operator to hear
softer target signals. While the use of headphones is not necessary
during operation, the reduced power demands of the headphones
will extend battery life.
The 1/4" socket for the headphone plug is
located in the top right of the rubber seal at
the top of the handle assembly. The headphones
may be plugged into this socket or unplugged at
any stage of operation.
We would recommend a comfortable feeling
headphone with a high (32+) ohm rating.
Minelab’s Custom Koss headphones available as an
accessory are rated at 100 ohm.
6. quick start
6. Quick Start
• Simply turn on the Quattro MP by pressing the POWER button.
• On the initial start-up, your detector will default to the factory COIN mode.
• To select a different factory pre-set Detect mode, press and release the appropriate mode button.
• The
icon next to the corresponding preset mode, indicates that a factory preset mode has
been selected. The detector will apply the factory determined discrimination pattern, and audio
response for that mode.
• Press the NOISE CANCEL button and wait the 20 seconds it takes to select the most
stable channel.
• Once the sound sequence is completed, you can start detecting!
p11
7. control panel
www.minelab.com
7. Control Panel
1. Power (On/Off)
2. Display Meter
3. Detect Modes
a. Coin Mode
b. Coin & Jewelry Mode
c. Relic Mode
d. All Metal Mode
4. Menu/Select
5. -/+ (Minus / Plus)
6. Accept/Reject
7. Pinpoint
8. Noise Cancel
7.1. Power (On/Off)
Press and release the POWER button (1) to turn your detector on/off. On first time
start-up, your detector will default to the COIN mode and you can begin detecting.
When you turn your detector on following your first time use, the detector will start
with the previous setting, from when the detector was last used.
To start the detector in the ‘Factory Preset’ mode, (recommended in your first
few outings) press and hold the POWER button (approximately 5 seconds), until the
Factory Preset message is displayed on the screen..
7.2. Display Meter
A. Battery Power Icon
B. Graphic Identification Bar
C. Discrimination Pattern
D. Target Cursor
E. Target ID Number
F. Target Icons
G. Depth Gauge
H. Mode Indicator
p12
7. control panel
www.minelab.com
7.2.1. Battery Power icon
At the top right-hand corner of the screen is an icon of a battery (A). This shows the level of stored
power in your battery. A fully charged battery shows the icon as fully shaded. As the power in the
battery is used the shaded area depletes until a fully discharged battery is un-shaded.
7.2.2. Graphic Identification Bar
Located across the base of the screen is a horizontal bar graph (B) and serves a number of
purposes. It shows the operator the discrimination pattern (C), which has been set.
> Dark bars (C) show the areas of rejection. This means certain unwanted target types will be
rejected (or ignored) by the detector.
> The Light bars show areas of acceptance. This means the detector will recognize and signal
the user, when certain desirable targets are found.
> When a target is detected, a triangular cursor (D) will flash three times above a hollow bar, the
location of which corresponds to the ID number (E) (see below) shown in the meter.
7.2.3. ID Number
When a target is detected while searching, a number (E) appears on the left side of the meter
identifying the characteristics of the target.
ID numbers range from -10 through to +40 and are the detectors numerical identification of
the type of target that has been located. Different target types will bring up different numbers.
Tip: You can practice getting familiar with your Quattro MP by selecting different coins and
jewelry and passing each one over the coil a number of times and noting the different numbers
each type will produce.
Note: These same ID numbers can be used by the operator to make alterations to the
discrimination pattern (see 9.1.2) and will also be useful in recognizing common targets.
7.2.4. Target Icons
Similar to the ID numbers, the Quattro MP will also indicate the likely target type located, using a
select number of generic icons (F). At times the meter may display two icons at once, indicating
that the characteristics of the target located is similar to that of a number of targets.
Note: Target icons only appear in the COIN and COIN/JEWELRY modes.
p13
7. control panel
www.minelab.com
7.2.5. Depth Reading
Located in the center of the meter is a vertical bar (G), which predicts the likely depth of the
target. On shallow targets, the cursor is very high or close to the top, and the bar becomes almost
fully shaded, whereas for deep targets the cursor is quite close to the bottom, and the bar is
only partially filled.
The full depth of the bar is equal to 12" plus, meaning that the
target will be greater than 12" deep. If the bar is only half
shaded, the depth of the target is likely to be about 6" deep.
Information on the target’s depth is very useful if detecting in
sensitive areas like sports grounds or parks. By using the depth
meter you can concentrate on a specific depth of the soil, which
can improve your success rate.
7.2.6. Overload
If the target is too big or too close to the coil to be classified, the word OVERLOAD will appear on
the display screen. This is accompanied by a rapid continuous buzzing sound. Detect the target
again by lifting the coil slightly higher and you will often get an accurate response.
7.3. Detect Modes
There are four factory pre-set ‘Detect’ modes and four save modes available for searching.
Each mode is customized with the optimum settings, to allow you to find the types of objects
described by the detect mode name. The four detect modes are:
- Coin (3a)
- Coin/Jewelry (3b)
- Relic (3c)
- All Metal (3d)
In some locations, there may be a specific pattern to the type of targets found in the area. For
example, an old house or building site may have certain areas where a certain junk type has been
concentrated, or other areas where it is more likely coins have been lost. On the beach, foil and
modern coins are more plentiful on the dry sand, whereas less junk and more gold jewelry are
located on the wet sand.
Due to the different types of targets you may expect in certain areas, you will often prefer a
different discrimination pattern for each area. With the Minelab Quattro MP, you have the choice
to search in one of the factory pre-set discrimination patterns, or you can create and save your
own patterns to suit the different areas you commonly search.
Start – Up
On the initial start-up, your detector will default to the factory COIN Mode.
To select a different factory pre-set Detect mode, press and release the appropriate mode button.
The
icon (H) next to the corresponding preset mode, indicates that a factory preset mode has
been selected. The detector will apply the factory determined discrimination pattern, and audio
response for that mode.
QUICK START: Simply turn on the Quattro MP by pressing the POWER button (1), select one of
the four preset modes (3a; b; c;or d), press the NOISE CANCEL (8) and you can commence
detecting straight away.
p14