1
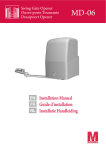
Swing Gate Opener
Ouvre-porte Tournante
Draaipoort Opener
EN
FR
NL
MD-05
Installation Manual
Guide d’installation
Installatie Handleiding
Standard Installation - Configuration De Base - Standaard Opstelling
1
Photocells (optional)
Cellules photoélectriques (optionelles)
Infrarood detectoren (optioneel)
2
Control box
Boîte de contrôle
Besturingskast
3
Alarm lamp (optional)
Lampe d’alerte (optionelle)
Alarm lamp (optioneel)
Technical Data - Données Techniques - Technische Gegevens
Power supply
Alimentation
Voeding
220VAC -> 24VDC
150W 50Hz
Motor power
Puissance de moteur
Motor vermogen
80W 3A
24VDC
Rotational speed
Vitesse de rotation
Toerental
1500 rpm
Rod specifications
Specifications du cylindre
Drijfstang specificaties
1.6 cm/s
max 300 mm
Gate limitations
Limitations des portes
Eigenschappen per poort
max 3m (2x)
max 300 kg
Operating temperature
Temperature de service
Werkingstemperatuur
-20°C ~ 50°C
Protection class
Classe de protection
Beveiligingsklasse
MD-05 2/18
IP44
IP55
M-DOORS © 2010
Package List
Dimensions - Afmetingen
M-DOORS © 2010
MD-05 3/18
Installing and adjusting
Installation et réglage
Installatie en afstelling
EN Connecting the rear bracket
FR Faites la liaison du support arrière
NL De achterste steun aansluiten
EN Connecting the front bracket
FR Faites la liaison du support avant
NL De voorste steun aansluiten
EN
FR
NL
MD-05 4/18
Angle of connection can be different according to the situation
L’angle de la liaison peut différer selon la situation
Aansluitingshoek kan verschillen naargelang de omstandigheden
M-DOORS © 2010
Different material or structure of the post needs different way to fix the rear bracket
Matérial ou structure different de la poste a besoin d’une autre façon de fixer le support arrière
Bevestiging van de achterste beugel moet worden aangepast afhankelijk van het materiaal
EN Brick post
FR Post en brique
NL Bakstenen paal
EN
FR
NL
Concrete post
Post en béton
Beton paal
EN Attach the motors
FR Joindre les moteurs
NL Bevestig de motors
EN
FR
NL
M-DOORS © 2010
Releasing the motor
Libérer le moteur
De motor ontkoppelen
MD-05 5/18
Insure that the front and rear brackets are at the same level
Assurez les supports avant et arrière sont à la même hauteur
De voorste en achterste beugel dienen op dezelfde hoogte te hangen
Fixing the front bracket
Fixer le support avant
De voorste beugel bevestigen
MD-05 6/18
M-DOORS © 2010
Control box installation
Installation de la boîte de contrôle
Installatie van de besturingskast
Power supply
Alimentation
Voeding
220VAC (± 10%)
50Hz
Transformer
Transformateur
Transformator
220VAC / 24VDC
120W
Accessories max load
Charge max des accessoires
Max belasting van de accessoires
Operating temperature
Température de service
Werkingstemperatuur
-20°C ~ 60°C
Protection fuse
Protection par fusible
Beveilingingszekering
10A
Photocell protection fuse
Fusible des cellules
Detector beveiligingszekering
2A
Continual running time
Durée continue
Maximale looptijd
*
EN Auto-stop when the running gate meets with resistance
FR Auto-stop lorsque la porte en cours d'exécution rencontre une résistance
NL Auto-stop als de bewegende poort een weerstand ontmoet
*
EN The driving force of the motor can be programmed
FR La force du moteur peut être programmé
NL De drijfkracht van de motor kan ingesteld worden.
*
EN Single or double leaf control can be selected
FR Simple ou double feuilles contrôle peuvent être sélectionné
NL Instelbaar voor enkele of dubbele poort
*
24VDC
500mA
5 min
Optional 24V accessories can be connected (Backup battery, photocell, flash lamp, e-lock, key-lock,
EN push-button ...)
Accessoires optionelles de 24V peut être connectée (batterie de secours, cellule photo-électrique, lampe
FR d’alerte, e-lock, bouton-poussoir ...)
Optionele 24V accessoires kunnen rechtstreeks aangesloten worden (backup batterij, infrarood detectoren,
NL alarmlamp, e-lock, sleutelschakelaar ...)
M-DOORS © 2010
MD-05 7/18
Electrical diagram
Diagramme électrique
Electrisch diagram
1
EN "LIGHT" for flash lamp (24V DC)
FR "LIGHT" pour lampe d’alerte (24V DC)
NL "LIGHT" voor alarmlamp (24V DC)
2
EN "MOTOR1", "MOTOR2" for 2 motors 24V DC
FR "MOTOR1", "MOTOR2" pour 2 moteurs de 24V DC
NL "MOTOR1", "MOTOR2" voor 2 motors 24V DC
3
EN "LIMIT1", "LIMIT2" for the magnetic limit switch on motor1, motor2
FR "LIMIT1", "LIMIT2" pour l’intérupteur limite magnétique sur motor1, motor2 (hors de fonction)
NL "LIMIT1", "LIMIT2" voor magnetische stopschakelaar op motor1, motor2
4
EN "PHOTOCELL" for infrared interrupt detection device
FR "PHOTOCELL" pour dispositif de détection infrarouge interruption
NL "PHOTOCELL" voor infrarood detectie-apparaat
5
EN "BUTTON" for wall switch. "PUSH1" controls double-leaf, "PUSH2" controls single leafs (check priority)
FR "BUTTON" pour intérupteur. "PUSH1" contrôle deux feuilles, "PUSH2" contrôle feuille simple (voyez priorité)
NL "BUTTON" voor schakelaar. "PUSH1" bedient 2 poorten, "PUSH2" bedient poorten apart (check prioriteit)
6
EN "E_LOCK" for electronic lock, can be converted with electronic lock switch (24V)
FR "E_LOCK" pour serrure électronique, peuvent être convertis avec le commutateur de verrouillage électronique (24V)
NL "E_LOCK" voor electronisch slot, kan omgevormd worden voor electronisch sleutelslot (24V)
MD-05 8/18
M-DOORS © 2010
Connecting the motors to the control box
Raccordement du moteur à la boîte de contrôle
Aansluiten van de motoren aan de besturingskast
M-DOORS © 2010
MD-05 9/18
Electrical connections
Connections électriques
Electrische aansluitingen
EN Power connection
FR Raccordement à l'alimentation
NL Stroomvoeding
EN
FR
NL
EN Motor connection
FR Raccordement des moteurs
NL Aansluiting van de motoren
Motor connection for single-leaf
Raccordement du moteur pour feuille simple
Aansluiting van de motoren voor een enkele poort
EN For a single-leaf gate, the motor must be connected with 'MOTOR1" and the "dip 2" on "S5" must be "OFF"
FR Pour une seule porte-feuille, le moteur doit être relié avec le tag "MOTOR1" et le pendage "2" sur "S5" doit être "OFF"
NL Voor een enkele poort moet de motor aangesloten worden op "MOTOR1" en de "dip 2" op "S5" op "OFF" staan.
EN
FR
NL
Motor connection for double-leaf
Raccordement du moteur pour feuille double
Aansluiting van de motoren voor een dubbele poort
For a double-leaf gate, first it must be confirmed wich leaf has the first priority for opening. This leaf must be
EN connected to "MOTOR1", the other leaf must be connected to "MOTOR2". The "dip2" on "S5" must be "ON".
Pour une porte à deux battants, d'abord elle doit être confirmée qui a des feuilles la première priorité pour l'ouverture. Cette
FR
feuille doit être connecté à "Moteur1", la feuille d'autres doit être connecté à "MOTOR2". Le "DIP2" on "S5" doit être "ON".
Voor een dubbele poort moet eerst de poort worden gekozen die als eerste dient te openen. Deze poort moet
NL
worden aangesloten op "MOTOR1", de andere poort op "MOTOR2". De "dip 2" op "S5" moet op "ON" staan.
EN
FR
NL
Connection of magnetic limit switch
Raccordement de l’intérupteur magnétique arrêt
Aansluiting van magnetische stopschakelaar
If no limit switch, terminals must be
EN short-connected
S'il n'y a pas de course, les bornes
FR doivent être de courte connectés
Indien geen stopschakelaar moeten
NL de terminals kortgesloten worden
MD-05 10/18
EN For closing limit switch only
FR Pour une limite de clôture seule
NL Enkel stopschakelaar voor sluiten
EN For opening and closing limit switch
FR Pour des limites de clôture et d'ouverture
NL Stopschakelaar voor openen en sluiten
M-DOORS © 2010
Adjust the limit switch
Régler le fin de course
Stopschakelaar instellen
EN
FR
NL
The sensor switch limit
Le capteur de fin de course
De stopschakelaar sensor
There are two sensors inside the opener, one is for the opening limit,
EN the other for the closing limit. The sensors can be glided.
Il ya deux capteurs à l'intérieur de l'ouvre, on est à la limite d'ouverture,
FR
l'autre pour la course de fermeture. Les capteurs peuvent être glissé.
Er zitten twee sensors in de opener, een voor de open limiet, de andere
NL
voor de sluit limiet. De sensors kunnen verschoven worden.
EN
FR
NL
Adjust the closing limit
Régler la limite de clôture
De sluit limiet aanpassen
If the closing limit is earlier than needed, move the limit switch
EN towards the gate connection. If the closing limit is later than needed,
move the limit switch away from the gate connection.
Si la limite de clôture est antérieure à celle nécessaire, déplacer la
FR course vers la borne de grille. Si la limite de fermeture est plus tardive
que nécessaire, déplacez le fin de course loin de la borne de grille.
Als de sluit limiet te vroeg staat ingesteld, schuif de stopschakelaar
NL dichter bij de poort koppeling. Als de sluit limiet te laat staat ingesteld,
schuif de stopschakelaar weg van de poort koppeling.
EN
FR
NL
Adjust the opening limit
Régler la limite de l'ouverture
De open limiet aanpassen
If the opening limit is earlier than needed, move the limit switch away
EN from the gate connection. If the opening limit is later than needed,
move the limit switch towards the gate connection.
Si la limite de l'ouverture est antérieure à celle nécessaire, déplacer le fin
FR de course loin de la borne de grille. Si la limite de l'ouverture est plus tard
que de besoin, déplacer le commutateur limite vers la borne de grille.
Als de open limiet te vroeg staat ingesteld, schuif de stopschakelaar
NL weg van de poort koppeling. Als de open limiet te laat staat ingesteld,
schuif de stopschakelaar dichter bij de poort koppeling.
M-DOORS © 2010
MD-05 11/18
Transmitter coding and decoding
Le codage et le décodage du transmetteur
Zender coderen en decoderen
Press the “learn button” (the “learn-LED” lights up). Press the button wich you choose on the transmitter till
EN the “learn-LED” flashes and goes out. Now the transmitter is coded. Other transmitters can be coded the same
way. Caution: the gate will be controlled immediately!
Appuyez sur “learn button” (le “learn-LED” s’allume). Ensuite appuyez le bouton de transmetteur que vous voulez
FR utiliser, jusqu’ au temps le “learn-LED” flashe et s’éteint. Maintenant, le transmetteur est codé. Autres transmetteurs
peuvent être codé utilisant la même méthode. Attention: la porte sera contrôlé immédiatement!
Druk op de “learn-knop” (tot de “learn-LED” brandt). Druk op de knop van de afstandsbediening die dient ingesteld te
NL worden tot de “learn-LED” knippert en uitgaat. Nu is de knop op de afstandsbediening ingesteld. Andere afstandsbedieningen
kunnen op dezelfde manier worden ingesteld. Opgelet: de poort zal onmiddellijk bediend worden!
Erasing transmitter codes: Press the “learn-button” and hold on until the “learn-LED” goes out. Now all
EN transmitter codes are erased.
Effacer le code: Appuyez sur “learn button” jusqu’au temps que le “learn led” s’éteint. Maintenant, tous les code
FR appris sont éffacés.
Afstandsbedieningen verwijderen: Druk op de “learn-knop” en houd deze ingedrukt tot de “learn-LED” uitgaat.
NL Nu zijn alle ingestelde afstandsbedieningen verwijderd.
Connection of the photocells
Connection des cellules photoélectriques
Aansluiting van de infrarood detectoren
Electronic lock power select
MD-05 12/18
M-DOORS © 2010
Dip-switch settings
Paramètres de dip-switch
Dip-switch instellingen
Single-leaf without automatic closing function. "PUSH1" controls single-leaf gate as
EN Open-Stop-Close-Stop. "PUSH2" is not available for single-leaf.
Feuille simple sans fonction de fermeture automatique. "PUSH1" contrôles seule
FR porte-feuille comme Open-Stop-Close-Stop. "PUSH2" n'est pas disponible.
Bediening van enkele poort zonder automatische sluitfunctie. "PUSH1" bedient de
NL poort als Open-Stop-Close-Stop. "PUSH2" is niet beschikbaar voor een enkele poort.
EN Single-leaf with automatic closing function. "PUSH1" only opens the gate. "PUSH2"
is not available for single-leaf.
FR Feuille simple avec fonction de fermeture automatique. "PUSH1" ouvre la porte
seulement. "PUSH2" n'est pas disponible pour une seule feuille.
Bediening van enkele poort met automatische sluitfunctie. "PUSH1" opent enkel de
NL poort. "PUSH2" is niet beschikbaar voor een enkele poort.
Double-leaf without automatic closing function. "PUSH1" controls double-leaf gate as
EN Open-Stop-Close-Stop. "PUSH2" controls single-leaf gate as Open-Stop-Close-Stop.
Feuilles doubles sans fonction de fermeture automatique. "PUSH1" contrôles les deux
FR feuilles tandis que "PUSH2" contrôles une seule feuille comme Open-Stop-Close-Stop.
Bediening van dubbele poort zonder automatische sluiting. "PUSH1" bedient de
NL twee poorten, "PUSH2" een enkele poort als Open-Stop-Close-Stop.
EN Double-leaf with automatic closing function. "PUSH1" only opens the gates as
Open-Open-Open... "PUSH2" controls single-leaf gate as Open-Stop-Close-Stop.
FR Feuilles doubles avec fonction de fermeture automatique. "PUSH1" ouvre seulement les
portes. "PUSH2" contrôles une seule feuille comme Open-Stop-Close-Stop.
Bediening van dubbele poort met automatische sluiting. "PUSH1" opent enkel de poort,
NL "PUSH2" een enkele poort als Open-Stop-Close-Stop.
EN ELECTRO-LOCK function enabled.
FR Fonction ELECTRO-LOCK activé.
NL ELECTRO-LOCK functie ingeschakeld.
EN ELECTRO-LOCK function disabled.
FR Fonction ELECTRO-LOCK désactivé.
NL ELECTRO-LOCK functie uitgeschakeld.
*
EN "PUSH1" (push button) : The numerical value on the LED display will increase by 1 with every push.
FR "PUSH1" (bouton-pousoir) : La valeur numérique sur l'écran LED augmentera de 1 à chaque poussée.
NL "PUSH1" (drukknop) : De numerieke waarde op het LED-display neemt toe met 1 bij elke druk.
*
EN "PUSH2" (push button) : The numerical value on the LED display will decrease by 1 with every push.
FR "PUSH2" (bouton-poussoir) : La valeur numérique sur l'écran LED diminura de 1 à chaque poussée.
NL "PUSH2" (drukknop) : De numerieke waarde op het LED-display telt af met 1 bij elke druk.
M-DOORS © 2010
MD-05 13/18
Control box menu steps
Ménu du boîte de contrôle
Menu-stappen van de besturingskast
Press “SET” button
Poussez le bouton “SET”
Druk op de “SET” knop
LED shows "P1" (running time) - preset to 20
seconds. Modify?
LED affiche "P1" (temps de fonctionnement) FR
réglée sur 20 secondes. Modifier?
LED toont "P1" (looptijd) -standaard ingesteld
NL op 20 seconden. Bewerken?
EN
YES
NO
after modification
après modification
na wijziging
Press “SET” button
Poussez le bouton “SET”
Druk op de “SET” knop
LED shows "P2" (low-speed start time) - preset
to 10 seconds. Modify?
LED affiche "P2" (temps de démarrage à basse
FR
vitesse) - réglée sur 10 secondes. Modifier?
LED toont "P2" (start tijd op trage snelheid) NL standaard ingesteld op 10 seconds. Bewerken?
Press "PUSH1" or "PUSH2" to adjust the running
time. First measure time of opening or closing by
EN
seconds. Remember this time value and program
the parameter.
Appuyez sur "PUSH1" ou "PUSH2" pour régler le
temps d'exécution. Mesure le temps d'ouverture ou
FR fermeture par secondes. Rappelez-vous cette valeur
du temps et programme le paramétre.
Druk op "PUSH1" or "PUSH2" om de looptijd
te bewerken. Meet eerst de open- of sluittijd in
NL seconden . Onthoud deze tijd in seconden en stel
deze parameter in.
EN
YES
NO
after modification
après modification
na wijziging
Press “SET” button
Poussez le bouton “SET”
Druk op de “SET” knop
LED shows "P3" (force of opening and closing)
- preset to 10. Modify?
LED affiche "P3" (vigueur de l'ouverture et la
FR
fermeture) - réglée sur 10. Modifier?
LED toont "P3" (open- en sluitkracht) NL standaard ingesteld op 10. Bewerken?
EN
NO
see next page
voir la page suivante
zie volgende pagina
MD-05 14/18
Press "PUSH1" or "PUSH2" to adjust the
EN parameter.
Appuyez sur "PUSH1" ou "PUSH2" pour réglée le
FR paramètre.
Druk op "PUSH1" of "PUSH2" om deze parameter
NL in te stellen.
YES
Press "PUSH1" or "PUSH2" to adjust the force of
opening and closing. Note: over-force or underEN
force will both make the safety system work
unproperly.
Appuyer sur "PUSH1" ou "PUSH2" pour régler la
force d'ouverture et clôture. Note: plus de force ou
FR moins de force va rendre le système de sécurité au
travail pas correctement.
Druk op "PUSH1" of "PUSH2" om de open- en
sluitkracht aan te passen. Nota: teveel of te weinig
NL kracht kan de veiligheid van het systeem in gedrang
brengen.
after modification
après modification
na wijziging
M-DOORS © 2010
Control box menu steps (continuation)
Ménu du boîte de contrôle (suite)
Menu-stappen van de besturingskast (vervolg)
Press “SET” button
Poussez le bouton “SET”
Druk op de “SET” knop
LED shows "P4" (interval time between left and
right leaf) - preset to 2 seconds. Modify?
LED affiche "P4" (interval time between left and
FR
right leaf) - réglée sur 2 secondes. Modifier?
LED toont "P4" (interval tussen linkse en rechtse
NL poort) - standaard 2 seconden. Bewerken?
EN
YES
NO
after modification
après modification
na wijziging
Press “SET” button
Poussez le bouton “SET”
Druk op de “SET” knop
LED shows "P5" (auto-closing time delay) preset to 10 seconds. Modify?
LED affiche "P5" (délai de fermeture
FR
automatique) - réglée sur 10 secondes. Modifier?
LED toont "P5" (auto-sluit vertraging) NL standaard ingesteld op 10 seconds. Bewerken?
Press "PUSH1" or "PUSH2" to adjust the
EN parameter.
Appuyez sur "PUSH1" ou "PUSH2" pour réglée le
FR paramètre.
Druk op "PUSH1" of "PUSH2" om deze parameter
NL in te stellen.
EN
NO
Press “SET” button
Poussez le bouton “SET”
Druk op de “SET” knop
YES
"DIP1" on "S5" must be "ON". Press "PUSH1" or
EN "PUSH2" to adjust the parameter.
"DIP1" sur "S5" doit être "ON". Appuyer sur
FR "PUSH1" ou "PUSH2" pour régler le paramètre.
"DIP1" op "S5" dient op "ON" te staan. Druk op
NL "PUSH1" of "PUSH2" om de parameter te veranderen.
after modification
après modification
na wijziging
BEEP .. BEEP .. BEEP
EXIT
M-DOORS © 2010
MD-05 15/18
Troubleshooting
Problem
Possible cause
gate opens/closes
and stops before
opening/closing
entirely
rmotor isn't placed correctly
rlimit switch isn't positioned
correctly
rmaximum run-time of the motor
controller isn't programmed for a
long enoug time (P1 in program
mode)
rpower limit is too low, wind load on
the gate demands more power for
the motor.
rgate moves not as easely as it
should be
while using the
remote controller,
nothing happens
short range of the
remote control
nothing happens,
not even when used
manually
MD-05 16/18
Solution
rPlace the motor according to plan
rreadjust the close and open limit
rreadjust the maximum run-time of the
motor controller
rincrease the power
rcontact your distributor
rremote control is't programmed in
the motor controller
rbattery of the remote control is
empty
rmalfunction of remote control
rprogram the remote control by using
the learn function in the controller
rreplace battery
rcontact your distributor
rcontroller is too low installed,
without the use of an external
antenna
rtension conductors are close to the
internal antenna
rmalfunction of the remote control
rraise controller or use an optional
external antenna
rmove the tension conductor to a more
suitable distance.
rcontact your distributor
rpower failure/ fuse broken
(display in controller doesn't blink
anymore)
rfirst check what the cause of the
broken fuse can be
rre-activate fuse / replace fuse in
controller
M-DOORS © 2010
Dépannage
Problème
Cause possible
Solution
porte s'ouvre ou
se ferme et arrête
avant s'ouvrir ou se
fermer totalement
rle moteur n'est pas placé
correctement
rle fin du course n'est pas positioné
correctement
rle temps du cours maximum sur
le controlleur du moteur n'est pas
programmé assez long(P1 au mode
de programmation)
rla limite de force est trop base, le
moteur a besoin de plus de force à
cause de la charge du vent
rla porte s'ouvre/ se ferme trop
lourdement
rPlace le moteur comme prévu
rajuste le fin du course
rajoute assez du temps aux temps de
cours maximum
rAugmente la force
rContacte votre distributeur
rien s'arrive
pendant utiliser le
télécommande
rtélécommande n'est pas
programmée dans le controlleur
rla batterie de la télécommande est
vide
rla télécommande est cassée
rProgrammez la télécommande dans le
controlleur
rRemplacez la batterie
rContactez votre distributeur
la distance
d'utilisation est pas
si loin
rcontrolleur est installé trop bas sans
utilser une antenne externe
rdes conducteurs de tension se
trouvent trop près de l'antenne
interne
rla télécommande est défait
rAugmentez le controlleur ou utilisez
une antenne externe optionele
rDéplacez les conducteurs de tension à
une distance accepttable.
rContactez votre distributeur
La porte ne fait
rien, même par
utiliser le boûton
d'ouverture
manuele
rL'alimentation d'énérgie est arrêté
/ le fusible est défait (display du
controlleur ne clignote plus)
rd'abord constatez la cause du fusible
défait
rrallumez le fusible/ remplacez le
fusible de controlleur
M-DOORS © 2010
MD-05 17/18
Probleemoplossing
Probleem
Mogelijke oorzaak
Oplossing
poort draait open
en stopt voordat
ze volledig open /
toe is
• motor niet correct geplaatst
• limit switch niet correct
gepositioneerd
• maximum looptijd op motor
controller niet lang genoeg
geprogrammeerd (P1 in
programmatie mode)
• krachtlimiet te laag, windlast op
poort vraagt meer kracht aan motor
• poort loopt te stroef / zwaar
• plaats motor volgens plan
• stel de open en close switchen af
• stel voldoende maximum looptijd in
• verhoog krachtinstelling
• raadpleeg uw plaatser
bij bediening
afstandbediening
gebeurt er niets
• afstandbediening niet
geprogrammeerd in controller
•
• afstandbediening defect
• programmeer afstandbediening mbv
learn functie in controller
•
• raadpleeg uw verdeler
slecht bereik
afstandbedieningen
• controller zeer laag gemonteerd
zonder gebruik te maken van
externe antenne
• spanningsvoerende geleiders naast
de interne antenne geleid
• afstandbediening defect
• verhoog controller of gebruik
optionele antenne
• verleg spanningsvoerende geleiders
naar voldoende afstand.
• raadpleeg uw verdeler
er gebeurd niets
ook niet met
bediening manuele
drukknop opening
• spanning is uitgevallen / zekering
defect (display in controller
knippert niet meer )
• allereerst kijk na wat de oorzaak kan
zijn van defecte zekering
• zet zekering terug op / vervang
zekering in controller
M-DOORS bvba
Brechtsebaan 40
B-2900 Schoten
E-mail: [email protected]
Web: www.m-doors.be
Fax:
Tel.:
+32 3 645 74 69
+32 475 76 09 88