1
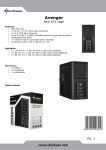
SIDE 16 AVENGER
Sidemount System
User Manual
Version 1.0, August 10th, 2015
Disclaimer
This document is proprietary to Scubatech Sp. z o. o. ("Scubatech") and no ownership rights
are hereby transferred. No part of this document shall be used, reproduced, translated,
converted, adapted, stored in a retrieval system, communicated or transmitted by any
means, for any commercial purpose, including without limitation, sale, resale, licence, rental
or lease, without the prior express written consent of Scubatech.
Scubatech does not make any representations, warranties or guarantees, express or implied,
as to the accuracy or completeness of the manual. Users must be aware that updates and
amendments will be made from time to time to the manual. It is the user's responsibility to
determine whether there have been any such updates or amendments. Neither Scubatech
nor any of its directors, officers, employees or agents shall be liable in contract, tort or in any
other manner whatsoever to any person for any loss, damage, injury, liability, cost or
expense of any nature, including without limitation incidental, special, direct or consequential
damages arising out of or in connection with the use of the manual.
Should you have any questions or comments regarding this manual, please contact:
Scubatech Sp. z O.O.
Ul. Lubieszyńska 2
72-006 Mierzyn
Poland
Tel/Fax: +48 91 453 00 17
Mobile: +48 605 662 795
Email: [email protected]
Web: www.scubatech.pl
SIDE 16 Sidemount System - User Manual
Table of Contents
Disclaimer ............................................................................................................................ 2
Table of Contents ................................................................................................................ 3
Introduction ......................................................................................................................... 4
Safety Precautions .............................................................................................................. 5
Definition of Notes, Warnings and Cautions ....................................................................... 5
General Warnings................................................................................................................ 6
Technical data ..................................................................................................................... 7
Overview .............................................................................................................................. 8
Front view ......................................................................................................................... 8
Back view .......................................................................................................................... 9
Configuring the SIDE 16 AVENGER ..................................................................................10
Overview...........................................................................................................................10
Adapting the harness ........................................................................................................10
Recommendations for tank rigging....................................................................................14
Tank configuration ............................................................................................................16
How to attach a tank to the SIDE 16 AVENGER ...............................................................17
Left tank ........................................................................................................................17
Right tank ......................................................................................................................17
Instructions for maintenance and care .............................................................................18
Before the dive..................................................................................................................18
After the dive.....................................................................................................................19
Page 3
SIDE 16 Sidemount System - User Manual
Introduction
Scubatech gear is the result of many years of research and development, and Scubatech
has utilized proven materials and design to maximize reliability and performance.
This manual is intended as a guide for the end user.
The sidemount system described here is designed and intended for divers who have
successfully completed a special training course for sidemount diving and who are aware of
the distinctive features of this product.
This system must NOT be used by untrained persons, not familiar with sidemount diving or
diving in general.
Should you have any further questions, please contact your dealer, the distributor in your
country or Scubatech Sp. z. o.o.
Page 4
SIDE 16 Sidemount System - User Manual
Safety Precautions
This manual provides an overview on the usage of the Scubatech SIDE 16 AVENGER
Sidemount System.
Please read each section completely and carefully PRIOR to using this system.
This will familiarize you with the product features.
Pay close attention to all WARNINGS, CAUTIONS, and NOTES that are intended to draw
your attention to items of importance.
Definition of Notes, Warnings and Cautions
Note
Emphasizes important information and hints.
Warning
Indicates any situation or technique that may result in potential damage to
the product, or that renders the product unsafe, if instructions are not
followed correctly.
Caution
Indicates a procedure or situation, that may result in serious injury or
death for the user, if instructions are not followed correctly.
Page 5
SIDE 16 Sidemount System - User Manual
General Warnings
Please read the following carefully!
The Scubatech SIDE 16 AVENGER Sidemount System is intended for divers trained
in sidemount diving. If you are not trained, please refer to a local or national diving
association, offering such training courses.
As with all diving equipment, improper use or misuse of this system can lead to injury
or death.
This system is not a life jacket. It will not stabilize the person wearing it on the
surface. It will not provide a head-up position for unconscious persons.
Don’t use the system as your sole way of buoyancy compensation.
This system is intended for temperature conditions between 1 °C and 40 °C.
Always inspect this system before diving.
Should it not function properly, DO NOT DIVE.
Always adapt your choice of tanks to the maximum lifting capacity of this system
(16 l). The manufacture recommends using 2 x 80 cft aluminium cylinders.
Page 6
SIDE 16 Sidemount System - User Manual
Technical data
Buoyancy: 16 kg/35 lbs
4 Integrated weight pockets and 2 external weight pockets on the waist belt
Max. weight pocket capacity: 19 kg
Flexible stitched harness plate
Adjustable waist belt and shoulder straps
Adjustable crotch strap
5 D-Rings (stainless steel)
2 sliding D-rings
dump valve left or right, depending on inflator mounting
rear dump valve
K-type inflator (33 cm/13'') standard. Extra 50cm inflator hose in set.
Inflator can be mounted left or right
Detachable beaver tail
Material: Cordura 2000
Ready to use with all hardware and bungees needed
EC type examination by:
Polski Rejestr Statków S. A.
(www.prs.pl)
Notified body no. 1463
Certificate CW/PPE/218/2013
This product complies with
- PN-EN 1809:2001
- PN-EN 250:2003/A1:2007
Page 7
SIDE 16 Sidemount System - User Manual
Overview
This chapter describes the general setup and the features of the
SIDE 16 AVENGER Sidemount System.
Front view
1 – Shoulder straps
2 – Inflator bungee mount
3 – Tank bungees
4 – Inflator (positioned right or left)
5 – Extra dump valve (inter changeable with the inflator)
6 – 4 integrated weight pockets (2.5 kg each)
7 – 2 sliding D-rings
8 – Flexible stitched harness plate
Page 8
SIDE 16 Sidemount System - User Manual
Back view
1 – Fixed D-rings on waist belt
2 – Detachable beaver tail (4 SS bolts and delrin nuts)
3 – Crotch strap
4 – Battery mount on crotch strap
Page 9
SIDE 16 Sidemount System - User Manual
Configuring the SIDE 16 AVENGER
Overview
The SIDE 16 AVENGER Sidemount System is delivered pre-assembled and only needs to
be adapted to your size and diving gear.
Note
The proper configuration for your individual needs might take some time,
but it is worth it. With a thorough configuration, you will gain a perfect trim,
so you can enjoy all the advantages of sidemount diving.
Adapting the harness
Wearing your diving suit, put on the SIDE 16 AVENGER.
Tighten the shoulder belts by adapting their length. Do not over-tighten – they should
fit comfortably, but close to the body. The shoulder straps can be adjusted on top or
on the flexible harness plate. Easy and quick adjustment can best be made on top,
e.g. for teaching purposes etc.
Adjusting the shoulder straps on top of the
bladder.
Adjusting the shoulder straps at the
flexible harness plate.
Page 10
SIDE 16 Sidemount System - User Manual
Adapt the position of the waist belt buckle. The waist strap can be made out of 1
continuous piece of webbing (as it comes standard) or can be made out of 2 separate
pieces of webbing connected at the flexible harness plate.
Note
Do not shorten the waist belt by cutting it, if you are not sure about the fit
or when you are not the only person using the SIDE 16 AVENGER.
If you want to cut the waist belt, make sure the cut end is sealed with a
lighter or similar, to avoid fray.
Adapt the length of the crotch strap. It is recommended to keep a snug fit, in order to
hold down the rear end of the SIDE 16 AVENGER while in a horizontal position.
Closely observe the harness adaption during the first dives and change it, when
necessary.
The 2 D-rings on the shoulder straps should be positioned just above the nipple line.
The tri-glide with bungee on the right shoulder strap is intended to hold the inflator
head. Adjust the position of the tri-glide and length of the bungee in a way that the
inflator hose crosses the chest and has a snug fit but not too tight. When
repositioning the inflator to the other side, also reposition the tri-glide and the bungee
accordingly.
The battery mount on the crotch straps should be positioned, putting the battery pack
just beneath the butt cheeks.
The 2 tank bungees provide a twisting motion of the tanks in order to make them fit
snuggly next to the body. The length of these bungees determine the degree of
twisting and how snug the tanks will fit to the body. This is a personal choice and
should be tried out during a few test dives.
Note
Start with putting knots in the bungees and do some test dives until you
have the desired length, before you cut them. 10cm (between the knot
and shoulder strap, when wearing the harness) is a good starting point.
Page 11
SIDE 16 Sidemount System - User Manual
Tank bungees in fixed position with retainer
bungee on tri-glide.
Tank bungee held in place with floating
retainer bungee.
The tank bungees can be hold into place with either a fixed retainer bungee (fixed
with a tri-glide) or with a floating bungee around the shoulder straps. The position of
the fixed retainer bungee partially helps positioning the tank valve in the ideal place:
just under the armpits.
The sliding D-rings can either positioned with the D-ring facing forward (preferred for
aluminium tanks) or with the D-ring facing backwards (preferred for heavier steel
tanks). During the dive these sliding D-rings or moved forward to compensate for the
tanks getting lighter during the dive because of gas consumption. This will avoid the
tanks sticking out too much above or below the body line.
Page 12
SIDE 16 Sidemount System - User Manual
When the 4 integrated weight pockets or not sufficient, 2 more trim pockets can be
added to the waist belt. The kit comes standard with 2 trim pockets of each 2.5 kg.
Bigger trim pockets (4.5 kg) can be purchased as accessory.
The beaver tail can be detached by unscrewing the 4 SS bolts and delrin nuts. This
beaver tail can be replaced with 2 Avenger rear D-rings (available as accessory).
Page 13
SIDE 16 Sidemount System - User Manual
Recommendations for tank rigging
It is recommended to use 80 cft aluminium tanks with expendable mono valve (or any other
valve with a small extension on the opposite side of the tank knob). Use a right and left valve.
Rigging using standard nylon mono tank belts:
To prepare your tanks, you need 2 standard tank belts, 2 big bolt snaps (stainless steel), 2
tri-glides, some nylon rope and optionally 4 bungees or MDS tank bands.
Attach the nylon rope to the bolt snap as
shown.
Attach the bolt snap to the tank belt by using
the tri-glide.
Attach the tank belt with the bolt snap to the tank.
Note
The distance from the top of the valve to the bolt snap determines the
position of the tank. The ideal position is just under the armpits. Do some
test dives to determine the desired distance of the bolt snap.
Start with the bolt snap in the same line as the extension on the tank
valve. The position of the bolt snap on the outline of the tank determines
the amount of twisting of the tank. The twisting should position the tank
valves (tank knobs facing outwards) in a more or less horizontal position
when diving. Do a few test dives to determine the desired twisting motion.
Optionally, attach 2 bungees or MDS tank bands to the tank, in order to stow away the
regulator hoses during transport.
Page 14
SIDE 16 Sidemount System - User Manual
Rigging using SS tank belts:
To prepare your tanks, you need 2 SS tank belts, 2 big bolt snaps (stainless steel), some
nylon rope and optionally 4 bungees or MDS tank bands.
Attach the nylon rope to the bolt snap as shown. The rope is clammed between the SS tank
band and the tank itself.
Optionally, attach 2 bungees or MDS tank bands to the tank, in order to stow away the
regulator hoses during transport.
Page 15
SIDE 16 Sidemount System - User Manual
Tank configuration
There are numerous ways to configure your diving tanks. Different diving organisations and
instructors have different opinions and strategies regarding this topic. Hence, the following
configuration is just an example.
Note
Sidemount diving requires a special adapted set of regulators, e.g. the
Scubatech R2 Tec Sidemount set.
These regulators include special swivel adapters, matching hose lengths
and small SPGs.
Left tank
Page 16
Right tank
SIDE 16 Sidemount System - User Manual
How to attach a tank to the SIDE 16 AVENGER
Note
Normally, sidemount tanks are attached in the water. Hence, deposit your
tanks carefully in the water or nearby, so you can easily grab them.
Please note that even an empty aluminium tank DOES NOT FLOAT!
Left tank
In the water, attach the bolt snap of the left tank to the left sliding D-ring of your SIDE
16 AVENGER.
Lead the left SIDE 16 AVENGER tank bungee from the outside over the valve and
over the extension of the valve.
Connect the inflator hose.
Lead the regulator hose behind your neck to your right and put the regulator necklace
around your neck.
Right tank
Attach the bolt snap of the right tank to the right sliding D-ring of your SIDE 16
AVENGER.
Lead the right SIDE 16 AVENGER tank bungee from the outside over the valve and
over the extension of the valve.
Connect the dry suit hose (if any).
If you use a long hose on the right side, lead it in front of you to the left, then around
your neck, so it comes from the right. Make sure the long hose is not trapped by the
dry suit inflation hose.
Note
During the dive, pay attention to your trim (your horizontal position in the
water). If necessary, adjust your trim for the next dive by changing the
weight positions and the positions of bolt snaps on the tank belts.
Page 17
SIDE 16 Sidemount System - User Manual
Instructions for maintenance and care
Due to its quality, your SIDE 16 AVENGER Sidemount System will function reliably for many
years. Nevertheless, a certain maintenance and care is required, to keep the system in this
condition.
Before the dive
Please observe the following, to prepare your SIDE 16 AVENGER Sidemount System for a
safe dive.
Caution
Do not dive with your SIDE 16 AVENGER Sidemount System, if you are
not convinced about its safety.
Connect a pressurized inflator hose to the inflator and make sure, that the inflator is
working properly (manual inflation, automatic inflation, deflation).
Make sure that the inflator clip is undamaged and working properly.
Check the inflator connection and the corrugated inflator hose for leaks (e.g. by
holding it under water).
Inflate the SIDE 16 AVENGER and make sure that there are no leaks.
Check the quick release valve and make sure that it works properly.
Check the belts and bungees for signs of wear and tear.
Make sure, that the SIDE 16 AVENGER Sidemount System has been adapted to
your size and your diving suit.
Make sure, that the weight pockets hold the correct amount of weight.
Page 18
SIDE 16 Sidemount System - User Manual
After the dive
To keep your SIDE 16 AVENGER Sidemount System in optimal condition, please carry out
the following steps after each day of diving (especially after diving in salt water).
Use the inflator mouthpiece to fill the SIDE 16 AVENGER at least 1/3 with clean fresh
water.
Inflate the SIDE 16 AVENGER fully (manually or via an inflator hose) and disperse
the water in the bladder by rotating, turning and shaking it.
Hold the SIDE 16 AVENGER upside down, detach the inflator clip, hold the inflator
straight down, and drain the water by pressing the inflator release button.
Externally rinse the SIDE 16 AVENGER with clean fresh water.
Note
It is recommended to add some disinfectant fluid to the rinsing water
every now and then. This special kind of cleaning product is available in
diving stores.
Inflate the SIDE 16 AVENGER partially and let it dry outside the direct sunlight.
Store the SIDE 16 AVENGER in a cool, dry place outside the direct sunlight.
Transport the SIDE 16 AVENGER in a separate case or bag, away from sharp items,
that might damage it. Do not put heavy objects on the SIDE 16 AVENGER .
Page 19