1
733169
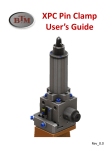
User Guide: TPC Clamps
Covers standard TPC42, TPC52, TPC62, and TPC82 clamp models.
Covers four standard sizes: 42, 52, 62, 82mm
One clamp model for single or dual arms
Uses TRILOK locking mechanism
®
CORPORATION
www.BTMcorp.com
810-364-4567
tpc clamp user guide
Table of Contents
Safety ................................................................................................................................................................ 3
Introduction ......................................................................................................................... 3
Features & Specifications ................................................................................................ 3
Design Guidelines ............................................................................................................... 4
Application Approval Process ........................................................................................... 4
Maximum Allowable Weight on Clamp Arm Assembly ............................................. 5
Clamping Force ................................................................................................................... 6
Permissible Clamp Offset Distance ............................................................................... 6
Force Output Formulas ........................................................................................ 6
Arm Deflection Under Load .................................................................................. 7
Application Guide ............................................................................................................... 8
The TRI-LOK Mechanism ................................................................................................... 8
How to mount the clamp: ............................................................................................. 8
Mounting the TPC Clamp as a Precision Backup .................................................... 9
Mounting the TPC Clamp as a Part Trap .................................................................. 9
Mounting the TPC Clamp as a Toggle Clamp ............................................................... 9
How To Order .............................................................................................................. 10-11
How to Read the Label ................................................................................................. 10
TPC42 Dimensions ................................................................................................... 11-12
TPC52 Dimensions .......................................................................................... 13-14
TPC62 Dimensions .............................................................................................. 15-16
TPC82 Dimensions ................................................................................................. 17-18
Welding on Clamp Arms ................................................................................................. 20
Removal and Remounting of the Clamp Arm .................................................... 20
Arm Mounting Options .................................................................................................... 21
Changing the Arm Degree of Opening ................................................................... 22-23
Status Controller Switch Options ............................................................................... 24
Manually Unlocking the TPC Clamp .............................................................................. 25
Preventative Maintenance ............................................................................................ 25
Air Supply .................................................................................................................. 25
Use of Flow Controls ...................................................................................................... 25
Fixed Orifices .................................................................................................................. 25
Ordering Spare Parts ................................................................................................ 25
TPC42 Components .................................................................................................. 26-27
TPC52 Components ................................................................................................ 28-29
TPC62 Components .............................................................................................. 30-31
TPC82 Components ......................................................................................................... 32-33
FMEA .................................................................................................................................. 34-38
Warranty: ........................................................................................................................... 39
Disclaimer: BTM Reserves the right to ammend the contents of this manual without notice. Contact BTM to verify the latest revision.
BTM CORPORATION • 300 DAVIS ROAD • MARYSVILLE, MI 48040 • Tel: 810-364-4567 • Fax: 810-364-6178 • www.BTMcorp.com
Safety
Caution!
Always disconnect air and electrical supply lines before working on or around power clamps!
Introduction
Thank you for selecting BTM’s patented TPC model power clamp. Our goal is to provide our customers with the best value
in power clamps available. This User’s Guide is intended to help you get the most value from the product; please read it
through carefully. If you have questions, call BTM at 810-364-4567. For service issues call our service pager at
810-340-3500 to leave a message and we will promptly return your call.
TPC Clamp Features
• Patented TriLok Mechanism for precision clamping and higher inertia loads.
• Sealed Mechanism - Lubricated for Life of Clamp
• Cushions Standard on Both Advance and Retract Ends
• Self Pumping Slide Rod Lubrication
• Integral Cylinder with Heavy Wall
• Body is constructed of Hard Coated Aircraft Aluminum
• Pin Arm Drive for versatile arm positioning & simplified arm change
• One clamp model for single and dual arm clamps
• Access to manually unlock clamp linkage
• Integrated proximity switches do not need to be readjusted when arm opening is changed.
• Top and Bottom porting
TPC Clamp Specifications
• Equivalent Bore Sizes: 42.0mm [1.65”], 52.0mm [2.00”], 62.0mm [2.50”], & 82.0mm [3.25”] DIA.
• Easily Adjustable arm opening 30°, 45°, 60°, 75°, 90°, 105°, 120°
• Maximum cylinder stroke for 120° arm opening = TPC42 ~ 52.8mm [2.08”]
TPC52 ~ 70.28mm [2.77”]
TPC62 ~ 93.1mm [3.66”]
TPC82 ~ 118.8mm [4.68”]
• Approx. Weight (without arms): TPC42 ~ 2.0 kg [4.5 lbs], TPC52 ~ 3.8 kg [8.4lbs], TPC62 ~ 5.7 kg [12.6 lbs],
TPC82 ~ 13.6 kg [30.0 lbs]
• Operating Pressure: 2.75 to 7 BAR [40 to 100 PSI] (lubricated or non-lubricated compressed air)
~ Use Flow Controls to Reduce Impact.
• Holding Torque without Air = TPC42 ~ 165 Nm [122 ft-lbs]
TPC52 ~ 290 Nm [214 ft-lbs]
TPC62 ~ 450 Nm [330 ft-lbs]
TPC82 ~ 745 Nm [550 ft-lbs]
• Clamping Torque at Hub = TPC42 ~ 43.4 Nm [32 ft-lbs @ 5.5 BAR [80 PSI]
TPC52 ~ 89.5 Nm [66 ft-lbs @ 5.5 BAR [80 PSI]
TPC62 ~ 257.6 Nm [190 ft-lbs @ 5.5 BAR [80 PSI]
TPC82 ~ 496.2 Nm [366 ft-lbs @ 5.5 BAR [80 PSI]
• Clamp interchangability tolerance: ±0°15’ (Clamp to Clamp)
• Arm repeatability in closed position: ±0°3’
BTM CORPORATION • 300 DAVIS ROAD • MARYSVILLE, MI 48040 • Tel: 810-364-4567 • Fax: 810-364-6178 • www.BTMcorp.com
tpc clamp user guide
Design Guidelines
BTM TPC model clamps, when properly applied, will meet the requirements of the warranty. Selecting the proper size clamp
is based on both force and cycle time requirements. The cycle time is affected by the amount of mass on the moving arm
assembly. The recommended cycle time is 1 second to open and 1 second to close for a 120° opening clamp.
·
·
·
Determine the clamp size required for the application. (Determined by force output requirements - see p. 6)
·
·
Determine the Center of Gravity of the clamp arm assembly and its straight line distance to the clamp pivot.
·
When the requirements of the chart are met, the clamp is protected from misapplication by an internal fixed orifice
which prevents the clamp from moving too fast causing premature failure. Operating a clamp outside the charted
limits will void the warranty.
·
Determine the closed clamp arm position and the degree of opening required. Be aware of clearance issues with
other tooling and the clamp body itself when determining degree of opening. (see p. 21)
·
Orient the clamp in the required mounting position relative to the arm pivot. Consider hose and wire connections,
and accessibility to proximity switches.
·
Reference the BTM provided template drawings for information on clamp mounting dimensions, arm styles, available
arm openings, and port and proximity switch positions. Contact BTM to ensure that your template drawing is up to
date.
Determine the design of the clamp arm assembly, including the arm, shims, and clamping detail (N/C block).
Determine the required distance the clamp arm pivot must be located from the clamping point due to the arm length
and shape required.
Use the charts for each clamp to determine if the size clamp will be adequate to support the clamp arm assembly.
If not, choose a larger size clamp. (see p. 5)
Application Approval Process
Line
tanc
Dis
e
nce
ista
Center of Gravity
of Clamp Arm
Assembly
Dist2
ight
Stra
D
ne
Please contact BTM’s authorized Distributors to
certify proper application of its TPC clamps. The
figure depicted to the right shows the typical
information that is required for application
approval. Certification will include an assessment
of the cycle rate and the weight of the clamp arm
assembly. Any misapplications will be noted,
and must be corrected to recieve certification.
The warranty is dependant on certification of
the application.
i
ht L
aig
Str
Dist1
Dist3
Mass @ CG = ____
BTM CORPORATION • 300 DAVIS ROAD • MARYSVILLE, MI 48040 • Tel: 810-364-4567 • Fax: 810-364-6178 • www.BTMcorp.com
Maximum Allowable Weight on Clamp Arm Assembly
Refer to the charts below for model specific information regarding the recommended allowable weight on the arm at
given distances from the pivot. The distance from Pivot Point is the straight line distance from the centerline of the clamp
at the pivot point to the center of gravity of the clamp arm assembly. The center of gravity is figured using the weight
of the arm plus the total weight mounted on the arm. When using dual arms, add the weight of the second arm to the
total weight.
TPC 42
TPC 52
4.1
4.1
3.6
3.6
2.7
2.7
WEIGHT = kg
1.8
1.4
2.3
1.8
1.4
0.9
0.9
0.5
0.5
0.0
0.0
50.0
75.0
100.0
127.0
150.0
25.0
DISTANCE FROM PIVOT POINT "A" = mm
50.0
TPC 62
13.6
5.0
12.2
127.0
150.0
10.9
CONSULT BTM CORPORATION
FOR ANY APPLICATIONS
ABOVE THE CURVE.
CONSULT BTM CORPORATION
FOR ANY APPLICATIONS
ABOVE THE CURVE.
9.5
4.0
WEIGHT = kg
3.5
3.0
8.1
6.8
5.4
4.1
2.5
225.0
250.0
275.0
430.0
200.0
400.0
175.0
380.0
150.0
350.0
127.0
330.0
100.0
300.0
75.0
280.0
50.0
250.0
25.0
200.0
1.4
0.0
175.0
2.7
150.0
WEIGHT = kg
100.0
TPC 82
5.5
4.5
75.0
DISTANCE FROM PIVOT POINT "A" = mm
225.0
WEIGHT = kg
2.3
25.0
CONSULT BTM CORPORATION
FOR ANY APPLICATIONS
ABOVE THE CURVE.
3.2
CONSULT BTM CORPORATION
FOR ANY APPLICATIONS
ABOVE THE CURVE.
3.2
DISTANCE FROM PIVOT POINT "A" = mm
DISTANCE FROM PIVOT POINT "A" = mm
BTM CORPORATION • 300 DAVIS ROAD • MARYSVILLE, MI 48040 • Tel: 810-364-4567 • Fax: 810-364-6178 • www.BTMcorp.com
tpc clamp user guide
Clamping Force
PIVOT
POINT
“A”
Length
TPC 42 Clamping Force
TPC 52 Clamping Force
16500 x Line Pressure (BAR)
Length (mm) from POINT “A” to the center line of
clamping contact area on clamp arm
BAR
BAR
7910 x Line Pressure (BAR)
10 x Line Pressure (PSI)
Length (in) from POINT “A” to the center line of
clamping contact area on clamp arm
PSI
PSI
4.8 x Line Pressure (PSI)
TPC 62 Clamping Force
92000 x Line Pressure (BAR)
Length (mm) from POINT “A” to the center line of
clamping contact area on clamp arm
BAR
BAR
Length (in) from POINT “A” to the center line of
clamping contact area on clamp arm
TPC 82 Clamping Force
46500 x Line Pressure (BAR)
28.5 x Line Pressure (PSI)
Length (mm) from POINT “A” to the center line of
clamping contact area on clamp arm
55 x Line Pressure (PSI)
Length (in) from POINT “A” to the center line of
clamping contact area on clamp arm
PSI
PSI
Length (mm) from POINT “A” to the center line of
clamping contact area on clamp arm
Length (in) from POINT “A” to the center line of
clamping contact area on clamp arm
Permissible Clamp Offset Distance
TPC 42
TPC 52
A = 30.0mm
A = 37.5mm
TPC 62
TPC 82
A = 75mm
A = 150mm
A
A
A
A
BTM CORPORATION • 300 DAVIS ROAD • MARYSVILLE, MI 48040 • Tel: 810-364-4567 • Fax: 810-364-6178 • www.BTMcorp.com
Arm Deflection Under Load
Force on arm at “X” distance from pivot resulting in 0.13mm [.005”] Maximum deflection.
0.13mm
"X"
TPC 82
TPC 42
“X” (mm)
“X” (mm)
Force (N)
125
88
100
144
“X” (mm)
200
75
TPC 52
Force (N)
370
165
340
205
Force (N)
310
267
250
156
280
365
225
200
250
449
200
245
220
623
175
289
190
1005
150
378
160
1397
2073
3065
TPC 62
“X” (mm)
Force (N)
125
113
100
165
125
489
130
75
290
100
734
100
BTM CORPORATION • 300 DAVIS ROAD • MARYSVILLE, MI 48040 • Tel: 810-364-4567 • Fax: 810-364-6178 • www.BTMcorp.com
tpc clamp user guide
Application Guide
The TRI-LOK Mechanism:
BTM’s patented TRI-LOK Mechanism can be used as a clamp, a part trap, or a precision back up.
Slide
Ways of Using the TRI-LOK Mechanism
Link
When in the full
closed position, the
clamp mechanism
is engaged and
locks at three
points. It will
not unlock if air
pressure is lost.
Toggle Clamp
Hub
Precision Backup
This surface repeats its position with
a high degree of accuracy (±0° 3’)
throughout the life of the clamp.
When used for clamping
the workpiece, the arm
is shimmed so that the
TRI-LOK mechanism
is not engaged. The
locking takes place
within the linkage.
Standard
Clamp
Arms
Toggle Clamp
Part Trap
How to Mount the Clamp
Oval style TPC clamps have standard NAAMS style mounting hole patterns. Always use dowel pins in
addition to the mounting screws to maintain accurate location. Mounting screws should be tightened
to the following torques:
TPC42 = [M6 Screw]
TPC52 = [M8 Screw]
TPC62 = [M10 Screw]
TPC82 = [M12 Screw]
15 Nm (11 ft-lbs)
37 Nm (27 ft-lbs)
72 Nm (53 ft-lbs)
126 Nm (93 ft-bls)
Weldments or other mounting provided for the clamp must be of sufficient rigidity to allow consistent
delivery of the force required by the application.
BTM CORPORATION • 300 DAVIS ROAD • MARYSVILLE, MI 48040 • Tel: 810-364-4567 • Fax: 810-364-6178 • www.BTMcorp.com
Mounting the TPC Clamp as a Toggle Clamp
When used for clamping the workpiece, the arm is shimmed so that the TRI-LOK
mechanism is not engaged. The locking takes place within the linkage.
Mounting the TPC Clamp as a Precision Backup
When using the TPC clamp as a precision backup, allow the clamp to fully close and
engage the Tri-Lok mechanism. Because of the precision of the Tri-Lok mechanism,
the TPC clamp will repeat its closed arm position ±0° 3’. Due to this precision, it is not
necessary to use an external hard stop on the backup arm to maintain position. If an
external hard stop is used, do not put more than 0.13mm [.005”] of press on the hard stop.
Over-shimming of the hard stop could cause the clamp to remain locked in the closed
position even after air pressure is applied to open the clamp. When mounting the backup clamp, do not rotate the clamp 1° forward as this could have the same effect as an
over-shimmed condition.
Mounting the TPC Clamp as a Part Trap
When used as a part trap, the clamp arm should be allowed to come fully closed, engaging
the Tri-Lok mechanism. Shim the clamping detail to achieve the desired amount of
clearance between the clamping detail and the part. When shimming the clamp detail,
you should allow for the addition, or removal of shims to account for variances in the part
thickness.
BTM CORPORATION • 300 DAVIS ROAD • MARYSVILLE, MI 48040 • Tel: 810-364-4567 • Fax: 810-364-6178 • www.BTMcorp.com
tpc clamp user guide
How To Order
Use the following nomenclature to order TPC Clamps. See BTM provided drawing templates for more information.
clamp
left arm
switch
right arm
-arm location
--
-arm orientation
arm callout codes
clamp callout codes
DC
switch style
-arm position
BTM number --
-arm location
--
-hub connection type
arm orientation
-arm opening
--
-port option
arm position
-clamp size
BTM number --
-clamp series
TPC 42 G 120 P - 799308H 180 A L - 799308H 180 A R -
switch callout codes
clamp series
btm arm number
TPC
leave left or right arm blank if single arm desired.
switch style
clamp size
arm position
DC
Port Option
N = N.P.T.
G=G
arm orientation
AC
Arm Opening (degrees)
30, 45, 60, 75, 90, 105, 120
arm location
42, 52, 62, 82
Hub Connection Type
P = Pin Hub
0, 45, 90, 135, 180, 225, 270
A = standard
B = inverted
NS = No Switch
(INCLUDES COVERS & SCRS.)
L = left side of clamp (viewed from front)
R = right side of clamp (viewed from front)
arm connection style
P = pin hub
Use either arm position callout (L or R) for a single arm clamp. Use both arm position callouts for a dual arm clamp.
Note: If an order option is not required, leave it out of the order number. DO NOT use zeros (0) as place holders.
How To Read the label
Job Number
®
Date : Date clamp was shipped from BTM.
CORPORATION
www.btmcorp.com
Job Number : Used for tracing information.
Model Number : Indicates Clamp size, port type, degree of arm
opening, arm number, arm position and location, and switch number.
P.O. : Distributor purchase order to BTM.
Date
Model #
The label affixed to a BTM clamp contains the following information:
C55286
1
2008-07-21
TPC42-G-120-799302H-135AL/R-SCDC
Prod Description:
P.O....: 12345
Tag # .:
B0123
Phn:810-364-4567
Typical BTM TPC clamp label
Tag # : Indicates customer purchase order.
Contact Information : Distributor identification and contact number.
10
BTM CORPORATION • 300 DAVIS ROAD • MARYSVILLE, MI 48040 • Tel: 810-364-4567 • Fax: 810-364-6178 • www.BTMcorp.com
How To Order reference sheet
Clamp
Clamp Size
TPC42
Dimensions: see. p. 12-13
TPC52
Dimensions: see. p. 14-15
TPC62
Dimensions: see. p. 16-17
TPC82
Dimensions: see. p. 18-19
Port Option - See Dimensions for more info. (TPC42= p.12, TPC52= p.14, TPC62= p.16, TPC82= p.18)
Switch
DC Switch
No Switch
AC Switch
Arms
Arm orientation
Arm Location
See pg. 21
for max arm
opening tables
Arm Position
Right Arm
Dual Arms
Left Arm
270
“A” Position
225
See pg. 21
for max arm
opening tables
“B” Position
180
0
135
45
Clamp Shown in Closed Position
90
BTM CORPORATION • 300 DAVIS ROAD • MARYSVILLE, MI 48040 • Tel: 810-364-4567 • Fax: 810-364-6178 • www.BTMcorp.com
11
tpc clamp user guide
21.0
87.2
RIGHT ARM
LOCATION
TPC42 Dimensions
40.0
40.0±0.2
CENT.
DUAL ARM DIMENSIONS
36.0
LEFT ARM
LOCATION
60.0
53.50
48.8
35.00±0.03
SINGLE ARM DIMENSIONS
41.0
30.0
16.0
41.8
PIVOT POINT "A"
30.00±0.05
40.0
50.00±0.05
25.0
90.5
DIRECTION OF
CLAMPING
9.00±0.05
20.0
10.0
7.0 REF.
4X M6X1.0 -6H TAP 12.0
NEAR AND FAR SIDE
40.00±0.05
20.00±0.03
215.9
2X 6.0 H7 10.0
NEAR AND FAR SIDE
2X M6X1.0 -6H TAP 12.0
NEAR AND FAR SIDE
1/8 NPT OR G1/8 PORT
CLAMP OPEN
NEAR/FAR SIDE
40.0±0.1
25.00±0.03
6.5
14.1
228.4
SWITCH PACKAGE
AC SHOWN
1/8 NPT OR G1/8 PORT
CLAMP CLOSE
NEAR/FAR SIDE
12
BTM CORPORATION • 300 DAVIS ROAD • MARYSVILLE, MI 48040 • Tel: 810-364-4567 • Fax: 810-364-6178 • www.BTMcorp.com
TPC42 Clamp Arms
6.0 F7 THRU TYP.
9.0 THRU TYP.
0
G
D
E
F
C
A
B
16.0±0.03
H
15.0
15mm OFFSET CLAMP ARMS
37.0
R17.5
34.0
45mm OFFSET CLAMP ARMS
67.0
45.0
Arm Style
Arm Type
BTM Number
15mm Offset
Machined
799308H
799309H
45mm Offset
Machined
“H”
“A”
“B”
“C”
“D”
“E”
90
80.00
65.00
50.00
120
110.00
95.00
“F”
“G”
80.00
65.00
50.00
95.00
80.00
65.00
50.00
799310H
150
140.00
125.00
110.00
799311H
90
80.00
65.00
50.00
799312H
120
140.00
125.00
110.00
95.00
80.00
65.00
50.00
799313H
150
140.00
125.00
110.00
95.00
80.00
65.00
50.00
BTM CORPORATION • 300 DAVIS ROAD • MARYSVILLE, MI 48040 • Tel: 810-364-4567 • Fax: 810-364-6178 • www.BTMcorp.com
13
tpc clamp user guide
100.0
MAX.
TPC52 Dimensions
RIGHT ARM
LOCATION
48.0±0.2
CENT.
LEFT ARM
LOCATION
84.0
80.00
DIRECTION OF
CLAMPING
65.0
45.00±0.03
5.00±0.05
29.0
50.0
PIVOT POINT "A"
2X
8 H7
12.0
4X M8X1.25
-6H TAP 16.0
63.5±0.10
40.00±0.05
36.50±0.05
9.0 REF.
13.00±0.10
11.00±0.10
115.5
45.00±0.03
32.00±0.10
55.00±0.10
15.00±0.10
30.00±0.02
48.00±0.05
24.00±0.03
2X
8.0 H7 THRU ALL
6.5
2X M8X1.25-6H TAP THRU ALL
262.5
275.0
1/4-18 NPT OR G1/4 PORT
CLAMP OPEN
NEAR & FAR SIDE
SWITCH PACKAGE
AC SHOWN
1/4-18 NPT OR G/14 PORT
CLAMP CLOSE
NEAR & FAR SIDE
14
BTM CORPORATION • 300 DAVIS ROAD • MARYSVILLE, MI 48040 • Tel: 810-364-4567 • Fax: 810-364-6178 • www.BTMcorp.com
TPC52 Clamp Arms
H
F
0
G
D
E
C
B
A
Ø8.0 F7 THRU
Ø11.0 THRU
50.0
20.0 (PLAIN) 25.0 (MACHINED)
R21.5
34.0
75.0
50.0
(MACHINED)
45.0
(PLAIN)
R21.5
34.0
Arm Style
Arm Type
NAAMS Code
BTM Number
“H”
20mm Offset
Plain
ACA211M
733211H
90.0
ACA213M
733213H
150.0
45mm Offset
Plain
ACA221M
733221H
90
ACA223M
733223H
150.0
25mm Offset
Machined
ACA216M
733216H
90
80.00
65.00
50.00
ACA218M
733218H
150.0
140.00
125.00
110.00
ACA226M
733226H
90.0
80.00
65.00
50.00
ACA228M
733228H
150.0
140.00
125.00
110.00
50mm Offset
Machined
“A”
“B”
“C”
“D”
“E”
“F”
“G”
95.00
80.00
65.00
50.00
95.00
80.00
65.00
50.00
BTM CORPORATION • 300 DAVIS ROAD • MARYSVILLE, MI 48040 • Tel: 810-364-4567 • Fax: 810-364-6178 • www.BTMcorp.com
15
tpc clamp user guide
115.3
MAX.
TPC62 Dimensions
RIGHT ARM
LOCATION
54.0±0.2
CENT.
LEFT ARM
LOCATION
88.1
80.00
77.0
55.00±0.03
DIRECTION OF
CLAMPING
36.9
10.00±0.05
63.6
PIVOT POINT "A"
36.5±0.05
55.00±0.05
63.5±0.10
11.0±0.10
13.00±0.10
32.00±0.10
55.00±0.1
9.5 REF.
142.5
45.00±0.03
15.00±0.10
2X 8 H7 12.0
4X M8X1.25 -6H TAP 16.0
30.00±0.02
2X
54.00±0.05
27.00±0.03
316.0
10 H7 - THRU
7.5
2X M10X1.5-6H TAP
THRU ALL
1/4-18 NPT OR G1/4 PORT
CLAMP OPEN
NEAR & FAR SIDE
328.5
SWITCH PACKAGE
AC SHOWN
1/4-18 NPT OR G/14 PORT
CLAMP CLOSE
NEAR & FAR SIDE
16
BTM CORPORATION • 300 DAVIS ROAD • MARYSVILLE, MI 48040 • Tel: 810-364-4567 • Fax: 810-364-6178 • www.BTMcorp.com
TPC62 Clamp Arms
U
O N M L K J
0
I H G F E D C B A
Ø8.0F7
Ø11.0
25.0±0.03
55.00
20.0
(PLAIN)
25.00
(MACHINED)
50.0
R27.0
100.00
65.0
(PLAIN)
70.00
(MACHINED)
R27.0
50.0
Arm Style
Arm Type
20mm
Offset
Plain
65mm
Offset
Plain
25mm
Offset
Machined
70mm
Offset
Machined
NAAMS
Code
BTM
Number
ACA014M
723114H
165.0
ACA016M
723116H
225.0
285.0
“U”
“A”
“B”
“C”
“D”
“E”
“F”
“G”
“H”
“I”
“J”
“K”
ACA018M
723118H
ACA026M
723126H
165.0
ACA028M
723128H
225.0
ACA030M
723130H
285.0
ACA020M
723120H
165.0
155.00
140.00
125.00
110.00
95.00
80.00
65.00
ACA022M
723122H
225.0
215.00
200.00
185.00
170.00
155.00
140.00
125.00
110.00
95.00
80.00
65.00
ACA024M
723124H
285.0
275.00
260.00
245.00
230.00
215.00
200.00
185.00
170.00
155.00
140.00
125.00
ACA032M
723132H
165.0
155.00
140.00
125.00
110.00
95.00
80.00
65.00
ACA034M
723134H
225.0
215.00
200.00
185.00
170.00
155.00
140.00
125.00
110.00
95.00
80.00
65.00
ACA036M
723136H
285.0
275.00
260.00
245.00
230.00
215.00
200.00
185.00
170.00
155.00
140.00
125.00
“L”
“M”
“N”
“O”
110.00
95.00
80.00
65.00
110.00
95.00
80.00
65.00
BTM CORPORATION • 300 DAVIS ROAD • MARYSVILLE, MI 48040 • Tel: 810-364-4567 • Fax: 810-364-6178 • www.BTMcorp.com
17
tpc clamp user guide
140.7
TPC82 Dimensions
RIGHT ARM
LOCATION
76.0
CENT. ±0.2
LEFT ARM
LOCATION
117.0
113.00
DIRECTION OF
CLAMPING
95.0
PIVOT POINT "A"
70.00 ±0.03
15.00
±0.05
47.5
79.6
50.00
±0.05
65.00
±0.05
90.0
±0.1
15.00
±0.10
11.5 REF.
50.00
±0.10
190.4
25.00
±0.10
50.00
±0.02
75.00 ±0.03
21.00 ±0.10
80.00
±0.10
2XØ8H7 12.0
4X M10X1.5-6H TAP 20.0
8.0
76.00 ±0.05
38.00 ±0.03
2X Ø12 H7 THRU ALL
2X M12X1.75-6H TAP
THRU ALL
412.5
1/4-18 NPT OR G1/4 PORT
CLAMP OPEN
NEAR & FAR SIDE
425.0
SWITCH PACKAGE
AC SHOWN
1/4-18 NPT OR G/14 PORT
CLAMP CLOSE
NEAR & FAR SIDE
18
BTM CORPORATION • 300 DAVIS ROAD • MARYSVILLE, MI 48040 • Tel: 810-364-4567 • Fax: 810-364-6178 • www.BTMcorp.com
TPC82 clamp arms
U
Q P O NM L K J I H G F E D C B A
0
Ø8F7 THRU ALL
Ø11.0 THRU ALL
32.00±0.03
60.0
R37.0
20.0
(PLAIN)
70.0
25.0
(MACHINED)
105.0
65.0
(PLAIN)
70.0
(MACHINED)
R37.0
70.0
Arm Style
Arm
Type
20mm
Offset
Plain
65mm
Offset
Plain
25mm
Offset
Machined
70mm
Offset
Machined
NAAMS
Code
BTM No.
“U”
ACA122M
7232122H
215.0
ACA124M
7232124H
275.0
ACA126M
7232126H
335.0
ACA142M
7232142H
215.0
ACA144M
7232144H
275.0
ACA146M
7232146H
335.0
ACA132M
7232132H
ACA134M
7232134H
ACA136M
“A”
“B”
“C”
215.0
205.00
190.00
175.00
275.0
265.00
250.00
235.00
7232136H
335.0
325.00
310.00
295.00
ACA152M
7232152H
215.0
205.00
190.00
ACA154M
7232154H
275.0
265.00
ACA156M
7232156H
335.0
325.00
“D”
“E”
“F”
“G”
“H”
“I”
“J”
“K”
“L”
160.00
145.00
130.00
115.00
100.00
85.00
220.00
205.00
190.00
175.00
160.00
280.00
265.00
250.00
235.00
175.00
160.00
145.00
130.00
115.00
250.00
235.00
220.00
205.00
190.00
175.00
160.00
310.00
295.00
280.00
265.00
250.00
235.00
220.00
“M”
145.00
130.00
115.00
100.00
85.00
220.00
205.00
190.00
175.00
160.00
145.00
100.00
85.00
145.00
130.00
115.00
100.00
85.00
205.00
190.00
175.00
160.00
145.00
“N”
“O”
“P”
“Q”
130.00
115.00
100.00
85.00
130.00
115.00
100.00
85.00
BTM CORPORATION • 300 DAVIS ROAD • MARYSVILLE, MI 48040 • Tel: 810-364-4567 • Fax: 810-364-6178 • www.BTMcorp.com
19
tpc clamp user guide
Welding on Clamp Arms:
Remove the clamp arm before welding on it, or attach the ground cable directly to the arm so as not to pass current through
the bearings of the clamp mechanism. Damage to the clamp mechanism as a result of welding on the arm will not be
warranted.
Arm Mounting Features:
The BTM TPC clamp features a patented pin drive hub which simplifies arm changes and provides quick and easy positioning
of the arm on either side of the clamp. Simply install the arm on one side of the clamp, and the cap on the other side, or install
two arms on the same clamp. The (8) pins allow for easy positioning of the arm at 450 increments. The machined surface of
the arm may be turned to face either way (“A” or “B” position).
Left Arm Position
Dual Position
Right Arm Position
“A” Position
Arm Screw Torque
TPC42 = [M6 Screw]
9.5 Nm (7 lb-ft)
TPC52 = [M8 Screw]
23 Nm (17 lb-ft)
TPC62 = [M10 Screw] 45 Nm (33 lb-ft)
TPC82 = [M12 Screw] 79 Nm (58 lb-ft)
“B” Position
Clamp Shown in Closed Position
TPC Arm Mount Kits
These kits are automatically applied to your clamp order when you specify your arm configuration in the order code. For reference only.
Single Arm Mount Kit
Includes Arm Screw, Nut & Pin Cap.
Dual Arm Mount Kit
Includes Arm Screw and Nut.
Arm Mount Kits
Clamp
BB
AA
AA
BB
Arm Kit
A
B
C
D
Pin Cap
Single Arm
41.0
30.0
SHCS: M6x1.0
X 65
M6 Flex-Loc Nut
799305A
Dual Arm
46.0
36.0
SHCS: M6x1.0
X 70
M6 Flex-Loc Nut
---
Single Arm
46.2
36.8
SHCS: M8X1.25
X 75
M8 Flex-Loc Nut
Thin Ht.
795505A
Dual Arm
52.4
45.7
SHCS: M8X1.25
X 90
M8 Flex-Loc Nut
Thin Ht.
---
Single Arm
56.7
43.4
SHCS: M10X1.5
X 90
M10 Flex-Loc
Nut Thin Ht.
795605A
Dual Arm
57.4
52.6
SHCS: M10X1.5
X 100
M10 Flex-Loc
Nut Thin Ht.
---
Single Arm
74.0
58.0
SHCS: M12X1.75
X 120
M12 Flex-Loc
Nut Thin Ht.
795705A
Dual Arm
71.0
71.0
SHCS: M12X1.75
X 130
M12 Flex-Loc
Nut Thin Ht.
---
TPC42
PIN
PIN CAP
CAP
CC
TPC52
CC
TPC62
DD
DD
TPC82
20
BTM CORPORATION • 300 DAVIS ROAD • MARYSVILLE, MI 48040 • Tel: 810-364-4567 • Fax: 810-364-6178 • www.BTMcorp.com
Arm Mounting Options
270
225
All clamps are shown in the closed position. The maximum counter-clockwise arm
opening value is noted in degrees for the specified arm positions. Arm positions which
interfere with the clamp body in either the close or open positions are not shown.
TPC42
TPC52
TPC62
TPC82
Standard arm Orientation
Arm Mounting
Position Code
15
Offset Arm
45
Offset Arm
Arm Mounting
Position Code
15
Offset Arm
45
Offset Arm
0
N/A
120°
0
N/A
N/A
45
120°
120°
45
N/A
N/A
90
120°
120°
90
120°
120°
135
120°
90°
135
120°
120°
180
90°
45°
180
120°
120°
225
45°
N/A
225
90°
105°
270
N/A
N/A
270
45°
60°
Standard arm Orientation
20 & 25
Offset Arm
45 & 50
Offset Arm
Arm Mounting
Position Code
20 & 25
Offset Arm
45 & 50
Offset Arm
0
120°
120°
0
N/A
N/A
45
120°
120°
45
N/A
N/A
90
120°
120°
90
N/A
N/A
135
90°
75°
135
120°
120°
180
45°
30°
180
120°
120°
225
N/A
N/A
225
90°
105°
270
N/A
N/A
270
45°
60°
135
45
90
Inverted arm Orientation
Arm Mounting
Position Code
20 & 25
Offset Arm
65 & 70
Offset Arm
Arm Mounting
Position Code
20 & 45
Offset Arm
65 & 70
Offset Arm
0
120°
120°
0
N/A
N/A
45
120°
120°
45
N/A
N/A
90
120°
120°
90
N/A
N/A
135
90°
75°
135
120°
120°
180
45°
30°
180
120°
120°
225
N/A
N/A
225
75°
105°
270
N/A
N/A
270
30°
60°
Standard arm Orientation
0
Inverted arm Orientation
Arm Mounting
Position Code
Standard arm Orientation
180
Inverted arm Orientation
Inverted arm Orientation
Arm Mounting
Position Code
20 & 25
Offset Arm
65 & 70
Offset Arm
Arm Mounting
Position Code
20 & 25
Offset Arm
65 & 70
Offset Arm
0
N/A
120°
0
N/A
N/A
45
120°
120°
45
N/A
N/A
90
120°
120°
90
N/A
N/A
135
105°
75°
135
120°
120°
180
60°
30°
180
120°
120°
225
N/A
N/A
225
75°
105°
270
N/A
N/A
270
30°
60°
BTM CORPORATION • 300 DAVIS ROAD • MARYSVILLE, MI 48040 • Tel: 810-364-4567 • Fax: 810-364-6178 • www.BTMcorp.com
21
tpc clamp user guide
Changing the Arm Degree of Opening
TPC clamps are normally shipped unlocked and the degree of opening is set to the customer specified degree of opening.
Note: if the specified arm position does not allow this degree of opening, the clamp arm will be shipped loose.
Tools Required: TPC42: 4mm allen wrench, 5mm allen wrench
TPC52: 5mm allen wrench, 5mm allen wrench
TPC62: 5mm allen wrench, 6mm allen wrench
TPC82: 8mm allen wrench, 10mm allen wrench
Caution!
Always disconnect air and electrical supply lines before working on or around power clamps!
To Change the Degree of Arm Opening oN a TPC Clamp:
a. Make sure that the clamp is in the full open position by pulling back on the arm. If there is no arm on the clamp, use a
screwdriver as a lever arm by placing the shaft between the arm mounting pins.
(See page 25 for instructions on how to manually unlock the TPC clamp when the air supply is disconnected.)
b. Remove the (4) socket head cap screws which fasten the cylinder end cap to the clamp body and remove the end cap.
(You may have to tap the end cap loose from the roll pins with a soft blow hammer.)
Cylinder End Cap Screws
TPC42 = 4mm allen wrench
TPC52 = 5mm allen wrench
TPC62 = 5mm allen wrench
TPC82 = 8mm allen wrench
(You may have to tap the end cap loose
from the roll pins with a soft blow
hammer in order to remove it.)
Roll Pins
22
BTM CORPORATION • 300 DAVIS ROAD • MARYSVILLE, MI 48040 • Tel: 810-364-4567 • Fax: 810-364-6178 • www.BTMcorp.com
c. Unscrew and remove the stroke spacer. Keep washer for re-use.
Align stroke spacer with piston by matching the
pin in the piston with the groove in the spacer.
(The roll pin in the spacer should point toward
the switch as shown)
d. Install a new stroke spacer, and torque the screw into place to the specified torque.
NOTE: A cushion alignment tool must be used to prevent the cushion from rotating when the screw is tightened.
Contact BTM for more information.
Torques
Clamp
Spacer
Endcap
Screw
Torque
Screw
Torque
TPC42
M6
15 Nm (11 lb-ft)
M5
8.8 Nm (6.5 lb-ft)
TPC52
M6
15 Nm (11 lb-ft)
M6
15 Nm (11 lb-ft)
TPC62
M8
32 Nm (24 lb-ft)
M6
15 Nm (11 lb-ft)
TPC82
M12
100 Nm (75 lb-ft)
M10
71.9 Nm (53 lb-ft)
30O Spacer
120O Spacer
Stroke spacers are available for clamp openings
from 30O to 120O. See the chart to the right for
available stroke spacers by clamp model.
Stroke Limiters
Spacer
TPC42
TPC52
TPC62
TPC82
30°
799304A
795504A
795604A
795704A
45°
799301B
795501B
795601B
795701B
60°
799301C
795501C
795601C
795701C
75°
799301D
795501D
795601D
795701D
90°
799301E
795501E
795601E
795701E
105°
799301F
795501F
795601F
795701F
120°
799301G
795501G
795601G
795701G
BTM CORPORATION • 300 DAVIS ROAD • MARYSVILLE, MI 48040 • Tel: 810-364-4567 • Fax: 810-364-6178 • www.BTMcorp.com
23
tpc clamp user guide
Status Controller Switch Options
Status controller switch options are shown below. To replace a status controller switch, disconnect the air pressure to the
clamp. Remove the four switch plate screws (2) and the screw which retains the status controller body (3). Lift up the switch
plate (1) and carefully lift out the switches, removing them from the clamp body. Insert the switches of the replacement status
controller through the clearance hole in the switch plate. Insert the switches into the recesses in the clamp body. Replace the
switch plate (1), making sure that the lead wires are positioned in the machined grooves so they are not pinched between the
plate and the clamp body. Tighten all the screws (note the torque values on the diagram below). Visually check the clamp to
ensure that it was reassembled correctly.
2
Torque Info:
M5 Screw = 8.8 Nm (6.5 lb-ft)
1
3
Switches
24
DET.
QTY.
Description
1
1
Switch Cover Plate
2
4
M5 x 10 LG. S.H.C.S.
3
1
Prox Switch
BTM No.
TPC42
TPC52
799301SCDC
795501SCDC
TPC62
TPC82
795601SCDC
795701SCDC
018490
AC
DC
025558
024216
BTM CORPORATION • 300 DAVIS ROAD • MARYSVILLE, MI 48040 • Tel: 810-364-4567 • Fax: 810-364-6178 • www.BTMcorp.com
Manually Unlocking the TPC Clamp
To unlock the TPC clamp, make sure that the air supply is disconnected. Remove the front cover plug and and tap the
linkage with a delrin punch to unlock the mechanism. Apply blue loctite to the threads of the plug. Replace the plug and
tighten to 34 Nm (25 lb-ft).
Delrin Punch
Remove Plug
(8mm hex recess)
Tap to unlock
The TPC clamp can also be unlocked by applying air pressure to the rod side of the
cylinder with a rubber tipped nozzle.
Caution: Stay clear of clamp arm!
Preventative Maintenance
BTM TPC model power clamps are lubricated for life at the factory. The cylinder seals are self lubricating and do not require
in line air lubrication.
Air Supply
BTM TPC model power clamps are designed to operate on 2.75 to 7 bars (40 to 100 psi) of clean, lubricated or non-lubricated
air. Note: Once lubricated air is used, it must continue to be used for the life of the clamp.
Use of Flow Controls
TPC model clamps have built in, non-adjustable, cylinder cushions. Flow control valves are not required if the weight of the clamp
arm assembly falls within the charted specifications on page 5. Flow control valves may be added per customer preference
or specification to reduce slamming of the clamp arm. Flow controls should be adjusted to achieve the required cycle rate,
not exceeding the maximum rate of 1 second to open and 1 second to close for a 120O opening clamp. Cycling the clamp
faster than the maximum rate may result in premature failure and will void the warranty. If additional control is required for
sequencing of multiple clamps, flow control valves can be added to adjust the cycle rate.
Fixed Orifices
TPC model power clamps employ fixed orifices which are machined into the ports in both the end cap and in the clamp body.
These orifices are intended to protect the clamp from operating in excess of the recommended cycle rate relative to the mass
of the arm.
NOTE: Enlarging the clamps integral fixed orifices will void the warranty.
Ordering Spare Parts
Due to the conditions of the clamp warranty, the unit is generally exchanged or repaired at the factory. If spare parts are
required, contact BTM or a BTM Authorized Distributor. See the following page for a comprehensive list of TPC clamp
components. BTM recommends stocking proximity switches, hub o-rings, unlock plugs, arm mounting pins, bolts, and
flex-loc nuts.
BTM CORPORATION • 300 DAVIS ROAD • MARYSVILLE, MI 48040 • Tel: 810-364-4567 • Fax: 810-364-6178 • www.BTMcorp.com
25
27
29
28
31
30
tpc clamp user guide
TPC42 Components
Seal Kit
12
14
7
13
4
5
26
20
17
16
26
25
23
24
22
21
19
11
18
15
10
33
34
6
32
3
2
1
STATUS CONTROLLER
SWITCH PACKAGE
SEE BTM No. 799300SCDC (DC BTM/TURCK) &
799300SCAC (AC BTM/TURCK)
8
799300SK
9
TPC42
BTM CORPORATION • 300 DAVIS ROAD • MARYSVILLE, MI 48040 • Tel: 810-364-4567 • Fax: 810-364-6178 • www.BTMcorp.com
TPC42 Components
DET.
QTY.
Description
BTM No.
Chart “A” - TPC42 Body
Description
BTM Number
1
1
TPC42: Body
CHART “A”
2
2
TPC42: Pin Hub
799303A
TPC42: Body - 1/8 NPT
799301A
3
6
TPC42: Arm Mount Pin
799306A
TPC42: Body - G1/8
PD202701A
4
2
Urethane O-Ring
038179
5
2
O-Ring .866 ID x .030
036944
6
2
SHCS: M3x 0.5 x 25
017266
7
1
TPC42: Drive Arm - Split Hub
799312A
.400
727011A
8
1
TPC42: Slide Block
799310A
.395
727016A
9
1
TPC42: Piston Rod
799309A
.390
727017A
10
1
Front Cushion
CHART “B”
.385
727018A
11
1
TPC42: Piston
799307A
.380
727019A
12
2
TPC42: Link
799311A
.375
727020A
13
2
TPC42: Link Pin
799313A
.370
727021A
14
4
External Retaining Ring
036942
.365
727022A
15
1
3/16 DIA. x 1/2 LG. Roll Pin
012629
.360
727023A
16
2
1/4 DIA x 5/8 LG. Roll Pin
006245
.355
727024A
17
2
Polypak Seal
028853
.405
727031A
18
1
O-RING
004769
.410
727032A
19
1
TPC42: Stroke Limiter
CHART “C”
.415
727033A
20
1
Washer - .395 x .290 x .062
019130
.420
727034A
21
1
SHCS: M6 x 1.0 x 50
014741
.425
727035A
22
1
TPC42: End Cap
CHART “D”
23
2
Parker V6 Cushion Seal
018092
24
4
SHCS: M5 x 0.8 x 30
016452
25
1
SEAL: O-RING, 2-033 N674-70
018093
30°
799304A
26
2
1/8 DIA. x 1/2 LG. ROLL PIN
016350
45°
799301B
27
1
UPCP - Unlock Plug
772601A
60°
799301C
28
1
MUCP52: Front Cover
741701A
75°
799301D
29
1
TPC42: Front Cover Gasket - CORK/BUNA-N
799301J
90°
799301E
30
1
O-RING
001417
105°
799301F
31
4
SHCS: M4x0.7 x 10
018371
120°
799301G
32
1
1/8 NPT LEVL - Seal Pipe Plug
014269
33
1
Polyseal: SQB
019186
34
1
Parker U-CUP Packing
018085
Chart “B” - Front cushion
Cushion “A” Lengths
BTM Number
Chart “C” - TPC42 Stroke Limiter
Description
BTM Number
Chart “D” - TPC42 End Cap
Description
BTM Number
1/8 NPT
799302A
G1/8
PD204702A
BTM CORPORATION • 300 DAVIS ROAD • MARYSVILLE, MI 48040 • Tel: 810-364-4567 • Fax: 810-364-6178 • www.BTMcorp.com
27
28
31
30
27
tpc clamp user guide
7
29
TPC52 Components
Seal KitS
12
795500SK
9
5
4
24
22
25
23
26
19
21
20
15
14
17
10
16
11
34
3
33
32
6
2
1
STATUS CONTROLLER
SWITCH PACKAGE
SEE BTM No. 795500SCDC (DC BTM/TURCK) &
795500SCAC (AC BTM /TURCK)
8
18
13
TPC52
28
BTM CORPORATION • 300 DAVIS ROAD • MARYSVILLE, MI 48040 • Tel: 810-364-4567 • Fax: 810-364-6178 • www.BTMcorp.com
TPC52 Components
DET.
QTY.
Description
BTM No.
Chart “A” TPC42 Body
Description
BTM Number
1
1
TPC52: Body
CHART “A”
2
2
TPC52: Pin Hub
795503A
TPC52: Body - 1/4 NPT
795501A
3
8
TPC52: Arm Mount Pin
795506A
TPC52: Body - G1/4
795801A
4
2
Urethane O-Ring
018694
5
2
O-Ring 1.134 ID x .030
033939
6
2
SHCS: M3x 0.5 x 30
018471
7
1
TPC52: Drive Arm
795508A
.400
727011A
8
1
TPC52: Slide Block
795507A
.395
727016A
9
1
TPC52: Piston Rod
727002A
.390
727017A
10
1
Front Cushion
CHART “B”
.385
727018A
11
1
TPC52: Piston
727001A
.380
727019A
12
2
TPC52: Link
795509A
.375
727020A
13
2
TPC52: Link Pin
795510A
.370
727021A
14
1
3/16 DIA. x 1/2 LG. Roll Pin
012629
.365
727022A
15
2
1/4 DIA. x 3/4 LG. Roll Pin
001058
.360
727023A
16
2
Polypak Seal
019127
.355
727024A
17
1
O-Ring
004769
.405
727031A
18
4
External Retaining Ring
001237
.410
727032A
19
1
TPC52: Stroke Limiter
CHART “C”
.415
727033A
20
1
Washer - .395 x .290 x .062
019130
.420
727034A
21
1
SHCS: M6 x 1.0 x 50
014741
.425
727035A
22
1
TPC52: End Cap
CHART “D”
23
2
Parker V6 Cushion Seal
018092
24
4
SHCS: M6 x 1.0 x 35
016228
25
1
O-RING
018666
30°
795504A
26
2
1/8 DIA. x 1/2 LG. ROLL PIN
016350
45°
795501B
27
1
UPCP - Unlock Plug
772601A
60°
795501C
28
1
MUCP62: Front Cover
737003A
75°
795501D
29
1
TPC52: Front Cover Gasket - CORK/BUNA-N
795501J
90°
795501E
30
1
O-RING
001417
105°
795501F
31
4
SHCS: M4x0.7 x 10
018371
120°
795501G
32
1
1/8 NPT LEVL - Seal Pipe Plug
014269
33
1
Polyseal: SQB
019186
34
1
Parker U-CUP Packing
018085
Chart “B” Front cushion
Cushion “A” Lengths
BTM Number
Chart “C” TPC52 Stroke Limiter
Description
BTM Number
Chart “D” TPC52 End Cap
Description
BTM Number
1/4 NPTF
795502A
G1/4
795802A
BTM CORPORATION • 300 DAVIS ROAD • MARYSVILLE, MI 48040 • Tel: 810-364-4567 • Fax: 810-364-6178 • www.BTMcorp.com
29
23
25
26
24
27
30
20
21
10
14
17
34
16
33
11
15
32
3
6
1
2
4
5
STATUS CONTROLLER
SWITCH PACKAGE
SEE BTM No. 795600SCDC (DC BTM/TURCK) &
795600SCAC (AC BTM /TURCK)
18
2
13
9
12
8
TPC62
19
22
TORQUE SCREW TO 32 N-m [24 lb-ft]
USE BLUE (SEMI-PERMANENT)
LOCTITE ON THREADS
795600SK
7
30
29
28
17
31
tpc clamp user guide
TPC62 Components
Seal KitS
BTM CORPORATION • 300 DAVIS ROAD • MARYSVILLE, MI 48040 • Tel: 810-364-4567 • Fax: 810-364-6178 • www.BTMcorp.com
TPC62 Components
DET.
QTY.
Description
BTM No.
Chart “A” TPC62 Body
Description
BTM Number
1
1
TPC62: Body
CHART “A”
2
2
TPC62: Pin Hub
795613A
TPC42: Body - 1/4 NPT
795610A
TPC62: Body - G1/4
795901A
3
8
TPC62: Arm Mount Pin - Dual
726001J
4
2
Urethane O-Ring
018695
5
2
O-Ring
012133
6
2
SHCS: M4x 0.7 x 30
018485
7
1
TPC62: Drive Arm
795612A
.225
8
1
TPC62: Slide Block
795611A
.230
726027A
9
1
TPC62: Piston Rod
726002A
.235
726026A
10
1
Front Cushion
CHART “B”
.240
726025A
11
1
TPC62: Piston
726001A
.245
726024A
12
2
TPC62: Link
795608A
.250
726023A
13
2
TPC62: Link Pin
795614A
.255
726022A
14
1
3/16 DIA. x 1/2 LG. Roll Pin
012629
.260
726021A
15
1
1/4 DIA x 3/4 LG. Roll Pin
001058
.265
726020A
16
2
Polypak Seal
019128
.270
726010A
17
1
O-RING
001417
.275
726030A
18
4
External Retaining Ring
001238
.280
726031A
19
1
TPC62: Stroke Limiter
CHART “C”
.285
726032A
20
1
Washer - .500 x .377 x .06
019131
.290
726033A
21
1
1/4 DIA. x 1” LG. Roll Pin
000875
.295
726034A
22
1
SHCS: M8 x 1.25 x 50
018512
23
1
TPC62: End Cap
CHART “D”
24
2
Parker V6 Cushion Seal
017538
25
4
SHCS: M6 x 1.0 x 40
015764
30°
795604A
26
1
O-RING
020606
45°
795601B
27
2
1/8 DIA. x 1/2 LG. ROLL PIN
016350
60°
795601C
28
1
Unlock Plug
772601A
75°
795601D
29
1
Front Cover
741801A
90°
795601E
30
1
Front Cover Gasket
795601J
105°
795601F
31
4
SHCS M4X0.7 X 12
017973
120°
795601G
32
1
1/8 NPT LEVL - SEAL PIPE PLUG
014269
33
1
Polyseal: SQB
019187
34
1
Parker U-CUP Packing
017536
Chart “B” Front cushion
Cushion “A” Lengths
BTM Number
726028A
Chart “C” TPC62 Stroke Limiter
Description
BTM Number
Chart “D” TPC62 End Cap
Description
BTM Number
1/4 NPT
795602A
G1/4
795902A
BTM CORPORATION • 300 DAVIS ROAD • MARYSVILLE, MI 48040 • Tel: 810-364-4567 • Fax: 810-364-6178 • www.BTMcorp.com
31
32
23
26
24
TORQUE SCREW TO 100 N-m [75 lb-ft]
USE BLUE (SEMI-PERMANENT)
LOCTITE ON THREADS
27
19
22
20
21
14
17
10
16
11
15
33
35
34
3
6
2
4
STATUS CONTROLLER
SWITCH PACKAGE
SEE BTM No. 795700SCDC (DC BTM/TURCK) &
795700SCAC (AC BTM /TURCK)
5
1
TPC82
25
TORQUE SCREW TO
77 N-m [57 lb-ft]
795700SK
USE GREEN (PERMANENT)
LOCTITE ON THREAD
18
9
13
12
TPC82 Components
8
7
32
28
31
29
30
tpc clamp user guide
Seal KitS
BTM CORPORATION • 300 DAVIS ROAD • MARYSVILLE, MI 48040 • Tel: 810-364-4567 • Fax: 810-364-6178 • www.BTMcorp.com
TPC82 Components
DET.
QTY.
Description
BTM No.
Chart “A” TPC82 Body
Description
BTM Number
1
1
TPC82: Body
CHART “A”
2
2
TPC82: Pin Hub
795703A
TPC82: Body - 1/4 NPT
795701A
3
6
TPC82: Arm Mount Pin
795706A
TPC82: Body - G1/4
796001A
4
2
Urethane O-Ring
018696
5
2
O-Ring
018093
6
2
SHCS: M4x 0.7 x 40
018487
7
1
TPC82: Drive Arm
795708A
.395
726522A
8
1
TPC82: Slide Block
795707A
.400
726514A
9
1
TPC82: Piston Rod
726502A
.405
726531A
10
1
Front Cushion
CHART “B”
.410
726532A
11
1
TPC82: Piston
726501A
.415
726533A
12
2
TPC82: Link
795709A
.420
726534A
13
2
TPC82: Link Pin
795710A
.425
726535A
14
1
3/16 DIA. x 1/2 LG. Roll Pin
012629
.430
726536A
15
2
1/4 DIA x 3/4 LG. Roll Pin
001058
.435
726537A
16
2
Polypak Seal
019129
.440
726538A
17
1
O-RING
003411
18
4
External Retaining Ring
027576
19
1
TPC82: Stroke Limiter
CHART “C”
20
1
Washer - .700 x .564 x .072
019132
30°
795704A
21
1
1/4 DIA. x 1 3/8 LG Roll Pin
018049
45°
795701B
795701C
Chart “B” Front cushion
Cushion “A” Lengths
BTM Number
Chart “C” TPC82 Stroke Limiter
Description
BTM Number
22
1
SHCS: M12 x 1.75 x 75
016250
60°
23
1
TPC82: End Cap
CHART “D”
75°
795701D
24
2
Parker V6 Cushion Seal
018461
90°
795701E
25
4
SHCS: M10 x 1.5 x 50
017050
105°
795701F
120°
795701G
26
1
O-RING
018459
27
2
3/16 DIA. x 5/8 LG. ROLL PIN
001645
28
1
UPCP - Unlock Plug
772601A
29
1
TPC82: Front Cover
795701J
30
1
TPC82: Front Cover Gasket - CORK/BUNA-N
795702J
31
1
O-RING
001417
32
4
SHCS: M4x0.7 x 12
017973
33
1
1/8 NPT LEVL - Seal Pipe Plug
014269
34
1
Polypak Seal
019430
35
1
Polypak Seal
034347
Chart “D” TPC82 End Cap
Description
BTM Number
1/4 NPT
795702A
G1/4
796002A
BTM CORPORATION • 300 DAVIS ROAD • MARYSVILLE, MI 48040 • Tel: 810-364-4567 • Fax: 810-364-6178 • www.BTMcorp.com
33
tpc clamp user guide
BTM Corporation
Ass'y. Number:
Ass'y. Description:
Potential Failure Mode and Effects Analysis
Machinery FMEA (MFMEA)
QF 4.2.2 REV.2
Prepared By: A. Sanders
Customer:
BTM Standard
B/P Date/Lev: 7/18/2008
Various
Tri-Lok Clamp
Approved By:
Current Design &
Machinery Controls
D
e
t
R
P
N
Provide material clamping Loss of clamping
torque
for fabrication systems
located in welding
environments (1700 to 2280
in-lbs. Torque @ 60 to 80
P.S.I.)
If BTM design guidelines
are maintained
Workpiece not
held with enough
force and/or parts
slip from fixture
during work
Degraded output
and/or impaired
performance
5
Defective, Worn
or damaged
piston seals
MTTR 30 min
1
(P) Parker Polypak
seals used
(D) Air bypass
detected at valve
(D) Visual check of
arm movement
5
25
5
Broken Piston
attachment screw
MTTR 30 min
1
3
(P) No grease
applied under
screw
(P) Torque setting =
24 ft-lbs
(D) Sensing of Prox
target in
open/closed
position
15
3
Clamp Arm
attachment screw
over-torqued
MTTR 10 min
1
(P) Always use
calibrated torque
wrench when
attaching clamp
arm
(D) Visual check of
arm movement
5
15
5
Broken Trilok
mechanism part
(Drive arm, link,
etc.)
MTTR 30 min
Replace Clamp
1
(P) Always refer to 2
User's Guide for
maximum loads
attached to arm
(P) Machined
orifice in end cap
and body
(D) Sensing of Prox
target in
open/closed
position
10
4
Defective or
damaged
proximity sensor
seals
MTTR 10 min
Replace seal
1
(D) Air bypass
detected around
switch cover plate
(D) Visual check of
arm movement
5
20
5
Defective, Worn
or damaged
piston seals
MTTR 30 min
1
(P) Parker Polypak
seals used
(D) Air bypass
detected at valve
(D) Visual check of
arm movement
5
25
5
Broken Piston
attachment screw
MTTR 30 min
1
(P) No grease
3
applied under
screw
(P) Torque setting =
24 ft-lbs
(D) Sensing of Prox
target in
open/closed
position
15
Recommended
Corrective
Action(s)
Person Responsible
& Completion Date
Action(s) Taken
TPC62 Tri-Lok Clamp
Remain locked in the
clamped or closed position
if air pressure is lost (4000
in-lbs. Torque Holding
Capacity)
If BTM design guidelines
are maintained
Will not remain
Workpiece may
locked in closed fall out of fixture in
position when air
overhead
is lost
applications
Machinery
breakdowns
Date printed: 7/18/2008 2:47 PM
34
Document name: MFMEA795600A.xls (UNCONTROLLED COPY)
Page 1 of 5
BTM CORPORATION • 300 DAVIS ROAD • MARYSVILLE, MI 48040 • Tel: 810-364-4567 • Fax: 810-364-6178 • www.BTMcorp.com
New Det
S
e
v
New RPN
Potential Effect(s)
of Failure
New Occ
Potential Cause(s)/
Mechanism(s) of O
c
Failure
c
Potential Failure
Mode(s)
New Sev
Action Results
Subsystem Name/Function &
Performance Requirements
BTM Corporation
Ass'y. Number:
Ass'y. Description:
Potential Failure Mode and Effects Analysis
Machinery FMEA (MFMEA)
QF 4.2.2
Prepared By: A. Sanders
BTM Standard
Customer:
B/P Date/Lev: 7/18/2008
Various
Tri-Lok Clamp
REV.2
Approved By:
Provide a precision backup Loss of locational Workpiece out of
location of a nest block or
repeatability to
specification
fixture block
N/C surface
Degraded output,
(90 deg. +/-3' Repeatability)
partial or
(90 deg. +/-15'
complete loss of
interchangeability)
function
If BTM design guidelines
are maintained
Date printed: 7/18/2008 2:47 PM
Current Design &
Machinery Controls
D
e
t
R
P
N
3
Clamp Arm
attachment screw
over-torqued
MTTR 10 min
1
(P) Always use
calibrated torque
wrench when
attaching clamp
arm
(D) Visual check of
arm movement
5
15
5
Broken Trilok
mechanism part
(Drive arm, link,
etc.)
MTTR 30 min
Replace Clamp
1
(P) Always refer to 2
User's Guide for
maximum loads
attached to arm
(P) Machined
orifice in end cap
and body
(D) Sensing of Prox
target in
open/closed
position
10
4
Defective or
damaged
proximity sensor
seals
MTTR 10 min
Replace seal
1
(D) Air bypass
detected around
switch cover plate
(D) Visual check of
arm movement
5
20
5
Defective, Worn
or damaged
piston seals
MTTR 30 min
1
(P) Parker Polypak
seals used
(D) Air bypass
detected at valve
(D) Visual check of
arm movement
5
25
5
Broken Piston
attachment screw
MTTR 30 min
1
(P) No grease
3
applied under
screw
(P) Torque setting =
24 ft-lbs
(D) Sensing of Prox
target in
open/closed
position
15
3
Clamp Arm
attachment screw
over-torqued
MTTR 10 min
1
(P) Always use
calibrated torque
wrench when
attaching clamp
arm
(D) Visual check of
arm movement
5
15
5
Broken Trilok
mechanism part
(Drive arm, link,
etc.)
MTTR 30 min
Replace Clamp
1
(P) Always refer to 2
User's Guide for
maximum loads
attached to arm
(P) Machined
orifice in end cap
and body
(D) Sensing of Prox
target in
open/closed
position
10
Recommended
Corrective
Action(s)
Document name: MFMEA795600A.xls (UNCONTROLLED COPY)
Person Responsible
& Completion Date
Action(s) Taken
New Det
S
e
v
Potential Cause(s)/
Mechanism(s) of O
c
Failure
c
Page 2 of 5
BTM CORPORATION • 300 DAVIS ROAD • MARYSVILLE, MI 48040 • Tel: 810-364-4567 • Fax: 810-364-6178 • www.BTMcorp.com
35
New RPN
Potential Effect(s)
of Failure
New Occ
Potential Failure
Mode(s)
New Sev
Action Results
Subsystem Name/Function &
Performance Requirements
tpc clamp user guide
BTM Corporation
Ass'y. Number:
Ass'y. Description:
Potential Failure Mode and Effects Analysis
Machinery FMEA (MFMEA)
QF 4.2.2 REV.2
Prepared By: A. Sanders
Customer:
BTM Standard
B/P Date/Lev: 7/18/2008
Various
Tri-Lok Clamp
Approved By:
Arm rotates less
Provide arm rotation to
than required
allow clearance of material
as it is loaded and unloaded
into the fixture (30 to 120
degree arm rotation
available)
If
BTM design guidelines are
maintained
Part interferes
with arm when
loading or
unloading
Machinery
breakdowns,loss
of production
during operation
Surrounding
equipment
interferes with
arm Machinery
breakdowns,loss
of production
during operation
Arm remains in
closed position
when open signal
is sent
Part remains in
fixture
unintentionally
Loss of
production
during operation,
loss of function
Date printed: 7/18/2008 2:47 PM
36
Potential Cause(s)/
Mechanism(s) of O
c
Failure
c
Current Design &
Machinery Controls
D
e
t
R
P
N
4
Defective or
damaged
proximity sensor
seals
MTTR 10 min
Replace seal
1
(D) Air bypass
detected around
switch cover plate
(D) Visual check of
arm movement
5
20
5
Defective, Worn
or damaged
piston seals
MTTR 30 min
1
(P) Parker Polypak
seals used
(D) Air bypass
detected
(D) Visual check of
arm movement
5
25
5
Broken Piston
attachment screw
MTTR 30 min
1
(P) No grease
3
applied under
screw
(P) Torque setting =
24 ft-lbs
(D) Sensing of Prox
target in
open/closed
position
15
3
Clamp Arm
attachment screw
over-torqued
MTTR 10 min
1
(P) Always use
calibrated torque
wrench when
attaching clamp
arm
(D) Visual check of
arm movement
5
15
5
Broken Trilok
mechanism part
(Drive arm, link,
etc.)
MTTR 30 min
Replace Clamp
1
(P) Always refer to 2
User's Guide for
maximum loads
attached to arm
(P) Machined
orifice in end cap
and body
(D) Sensing of Prox
target in
open/closed
position
10
4
Defective or
damaged
proximity sensor
seals
MTTR 10 min
Replace seal
1
(D) Air bypass
detected around
switch cover plate
(D) Visual check of
arm movement
5
20
5
Defective, Worn
or damaged
piston seals
MTTR 30 min
1
(P) Parker Polypak
seals used
(D) Air bypass
detected at valve
(D) Visual check of
arm movement
5
25
5
Broken Piston
attachment screw
MTTR 30 min
1
(P) No grease
3
applied under
screw
(P) Torque setting =
24 ft-lbs
(D) Sensing of Prox
target in
open/closed
position
15
Recommended
Corrective
Action(s)
Document name: MFMEA795600A.xls (UNCONTROLLED COPY)
Person Responsible
& Completion Date
Action(s) Taken
Page 3 of 5
BTM CORPORATION • 300 DAVIS ROAD • MARYSVILLE, MI 48040 • Tel: 810-364-4567 • Fax: 810-364-6178 • www.BTMcorp.com
New Det
S
e
v
New RPN
Potential Effect(s)
of Failure
New Occ
Potential Failure
Mode(s)
New Sev
Action Results
Subsystem Name/Function &
Performance Requirements
BTM Corporation
Ass'y. Number:
Ass'y. Description:
Potential Failure Mode and Effects Analysis
Machinery FMEA (MFMEA)
QF 4.2.2
Prepared By: A. Sanders
Customer:
BTM Standard
B/P Date/Lev: 7/18/2008
Various
Tri-Lok Clamp
REV.2
Approved By:
Part will not be
clamped in next
cycle
Loss of
production
during operation,
loss of function
Surrounding
equipment
interferes with
arm Machinery
breakdowns,loss
of production
during operation
Date printed: 7/18/2008 2:47 PM
Current Design &
Machinery Controls
D
e
t
R
P
N
3
Clamp Arm
attachment screw
over-torqued
MTTR 10 min
1
(P) Always use
calibrated torque
wrench when
attaching clamp
arm
(D) Visual check of
arm movement
5
15
5
Broken Trilok
mechanism part
(Drive arm, link,
etc.)
MTTR 30 min
Replace Clamp
1
(P) Always refer to 2
User's Guide for
maximum loads
attached to arm
(P) Machined
orifice in end cap
and body
(D) Sensing of Prox
target in
open/closed
position
10
4
Arm remains in
open position
when close signal
is sent
Potential Cause(s)/
Mechanism(s) of O
c
Failure
c
Defective or
2
(D) Machine
damaged
controls will
proximity sensor
inherently be
alerted of damaged
MTTR 10 min
sensor
Replace
Proximity Sensor
3
24
4
Defective or
damaged
proximity sensor
seals
MTTR 10 min
Replace seal
1
(D) Air bypass
detected around
switch cover plate
(D) Visual check of
arm movement
5
20
5
Defective, Worn
or damaged
piston seals
MTTR 30 min
1
(P) Parker Polypak
seals used
(D) Air bypass
detected at valve
(D) Visual check of
arm movement
5
25
5
Broken Piston
attachment screw
MTTR 30 min
1
(P) No grease
3
applied under
screw
(P) Torque setting =
24 ft-lbs
(D) Sensing of Prox
target in
open/closed
position
15
3
Clamp Arm
attachment screw
over-torqued
MTTR 10 min
1
(P) Always use
calibrated torque
wrench when
attaching clamp
arm
(D) Visual check of
arm movement
5
15
5
Broken Trilok
mechanism part
(Drive arm, link,
etc.)
MTTR 30 min
Replace Clamp
1
(P) Always refer to 2
User's Guide for
maximum loads
attached to arm
(P) Machined
orifice in end cap
and body
(D) Sensing of Prox
target in
open/closed
position
10
Recommended
Corrective
Action(s)
Document name: MFMEA795600A.xls (UNCONTROLLED COPY)
Person Responsible
& Completion Date
Action(s) Taken
New Det
S
e
v
Page 4 of 5
BTM CORPORATION • 300 DAVIS ROAD • MARYSVILLE, MI 48040 • Tel: 810-364-4567 • Fax: 810-364-6178 • www.BTMcorp.com
37
New RPN
Potential Effect(s)
of Failure
New Occ
Potential Failure
Mode(s)
New Sev
Action Results
Subsystem Name/Function &
Performance Requirements
tpc clamp user guide
BTM Corporation
Ass'y. Number:
Ass'y. Description:
Potential Failure Mode and Effects Analysis
Machinery FMEA (MFMEA)
QF 4.2.2 REV.2
Prepared By: A. Sanders
Customer:
BTM Standard
B/P Date/Lev: 7/18/2008
Various
Tri-Lok Clamp
Approved By:
4
Current Design &
Machinery Controls
D
e
t
R
P
N
Defective or
2
(D) Machine
damaged
controls will
proximity sensor
inherently be
alerted of damaged
MTTR 10 min
sensor
Replace
Proximity Sensor
3
24
4
Defective or
damaged
proximity sensor
seals
MTTR 10 min
Replace seal
1
(D) Air bypass
detected around
switch cover plate
(D) Visual check of
arm movement
5
20
Stop arm from
fully opening
Partial or
complete loss of
function
5
Incorrect
machining of
clamp arm u-cut
MTTR 15 min.
Replace STC
clamp arm
2
(P) ES Testing,
2
Functional test
each clamp,
Preship validation (D)
Sensing of Prox
target in
open/closed
position
20
Clamp is
Excessive noise,
"slamming' in
Machinery
open or closed
breakdowns
positions
Excessive noise
2
No flow controls
are installed or
misadjusted
MTTR 30 min
Add or adjust
flow controls
2
Arm interferes
with clamp body
Date printed: 7/18/2008 2:47 PM
38
Potential Cause(s)/
Mechanism(s) of O
c
Failure
c
(P) Machined
orifice in end cap
and body
(D) Noise will be
evident.
2
Recommended
Corrective
Action(s)
Person Responsible
& Completion Date
Action(s) Taken
8
Document name: MFMEA795600A.xls (UNCONTROLLED COPY)
Page 5 of 5
BTM CORPORATION • 300 DAVIS ROAD • MARYSVILLE, MI 48040 • Tel: 810-364-4567 • Fax: 810-364-6178 • www.BTMcorp.com
New Det
S
e
v
New RPN
Potential Effect(s)
of Failure
New Occ
Potential Failure
Mode(s)
New Sev
Action Results
Subsystem Name/Function &
Performance Requirements
Warranty:
BTM Corporation warranties its TPC Clamps against defects in material and workmanship
for for the life of the tool/program for which the clamp was originally sold.
This warranty is limited to replacing or repairing at BTM’s option, F.O.B. BTM’s factory, any part found
by BTM to be defective in materials and/or workmanship. Any application of a BTM product outside
the intended use of the product shall not be warranted by BTM Corporation. Furthermore, BTM will not
be liable for any expenses incurred for repairs or replacement made outside BTM’s facilities without
written consent (or damages arising out of such replacements or repairs). Under no circumstances
will BTM be held responsible for any consequential damages.
The warranty is limited to the repair or replacement of the defective part(s) and does not include
installation.
This warranty is the only warranty extended by the seller in connection with any sale made
hereunder and is in lieu of all other warranties, express, implied or statutory including warranties of
merchantability and fitness for purpose.
BTM CORPORATION • 300 DAVIS ROAD • MARYSVILLE, MI 48040 • Tel: 810-364-4567 • Fax: 810-364-6178 • www.BTMcorp.com
39
®
CORPORATION
TPC Clamp Features
• Patented TriLok Mechanism for precision clamping and higher inertia loads.
• Sealed Mechanism - Lubricated for Life of Clamp
• Cushions Standard on Both Advice and Retract Ends
• Self Pumping Slide Rod Lubrication
• Integral Cylinder with Heavy Wall
• Body is constructed of Aircraft Aluminum, Hard coated
to a Rockwell C-70 for Excellent Wear Characteristics
• Pin Arm Drive for versatile arm positioning & simplified
arm change
• One clamp model for single and dual arm clamps
• Access to manually unlock clamp linkage
• Integrated proximity switches do not need to be
readjusted when arm opening is changed
• Top and Bottom porting - 1/4 NPT or G 1/4
For more information, or to see our full line of products, please visit:
www.BTMcorp.com