1
Family Tree Builder
User's Guide
Version 2.0
2
Important Notice
Family Tree Builder User's Guide
Important Notice
© 2007 MyHeritage, Ltd. All Rights Reserved.
All intellectual property rights in this publication are owned by MyHeritage, Ltd.
and protected by United States copyright laws, other applicable copyright laws
and international treaty provisions. MyHeritage, Ltd. retains all rights not
expressly granted. No part of this publication may be reproduced in any form
whatsoever or used to make any derivative work without prior written approval
by MyHeritage, Ltd.
No representation of warranties for fitness for any purpose other than what is
specifically stated in this guide is made either by Family Tree Builder, Inc. or by
its agents.
MyHeritage, Ltd. reserves the right to revise this publication, and/or make
improvements or changes in the product(s) and/or the program(s) described in
this documentation at any time without prior notice.
Any software on removable media described in this publication is furnished
under a license agreement included with the product as a separate document. If
you are unable to locate a copy, please contact MyHeritage, Ltd. and a copy
will be forwarded to you.
MyHeritage, Ltd. is a registered trademark.
Other product and company names mentioned herein may be the trademarks of
their respective owners.
Table of Contents
Family Tree Builder User's Guide
Table of Contents
Chapter 1, Introduction............................................................... 15
Introducing Family Tree Builder ................................................. 17
What is Genealogy?................................................................... 19
Definition of Genealogy ............................................................................ 19
The Rise of Genealogy ............................................................................. 19
Distributing Your Family Tree .................................................... 21
Doing Your Research................................................................. 23
Choosing Your Goal ................................................................................. 23
Family History Begins at Home................................................................. 23
Best Starting Point: You............................................................................ 23
Next Step: Your Relatives......................................................................... 24
Achieving Success.................................................................................... 24
Documents and Photographs ................................................................... 25
Read up on Family History: Join a Society ............................................... 25
Pick the Right Tools .................................................................................. 26
Share and Enjoy ....................................................................................... 26
Chapter 2, Quick Tour................................................................. 27
Tree View ................................................................................... 29
Person Card.............................................................................................. 31
3
4
Table of Contents
Family Tree Builder User's Guide
People List.................................................................................................35
Right-Click Menu in the People List...........................................................44
Menu Bar.................................................................................... 49
File Menu...................................................................................................50
Edit Menu ..................................................................................................51
View Menu.................................................................................................52
Person Menu .............................................................................................54
Family Menu ..............................................................................................57
Charts Menu ..............................................................................................58
Reports Menu ............................................................................................59
Favorites Menu..........................................................................................60
Research Menu .........................................................................................61
Tools Menu................................................................................................62
Help Menu .................................................................................................63
Toolbar ....................................................................................... 64
Generations View Control .........................................................................66
Right-Click Menu Options .......................................................... 68
Chapter 3, Getting Started.......................................................... 81
Using Family Tree Builder.......................................................... 84
Step 1: Downloading Family Tree Builder .................................................85
Step 2: Launching Family Tree Builder .....................................................85
Step 3: Registering as a Member of MyHeritage.com...............................85
Step 4: Creating Your First Project............................................................86
Step 5: Defining Your First Family.............................................................87
Step 6: Defining People.............................................................................87
Step 7: Generating Charts and Reports ....................................................88
Table of Contents
Family Tree Builder User's Guide
Step 8: Publishing and Inviting Visitors..................................................... 88
Creating Your First Project......................................................... 89
Adding a Family ......................................................................... 94
Describing a Person................................................................... 98
Expanding the Family .............................................................. 116
Double-Clicking on an Empty Family Card ............................................. 116
Right-clicking on a Person’s Card........................................................... 118
Using the Add Person Button ................................................................. 119
Defining New Children in the Family Tree .............................................. 120
Adding an Existing Child to a Family ...................................................... 122
Adding Another Family ........................................................................... 123
Editing Information ................................................................... 124
Editing a Person ..................................................................................... 125
Editing a Family ...................................................................................... 126
GEDCOM and Family Tree Builder.......................................... 134
Entering Dates ......................................................................... 137
Date Field ............................................................................................... 138
Citations ................................................................................... 141
Chapter 4, Handling Photos and Other Media........................ 145
Overview .................................................................................. 148
Media Types............................................................................. 150
Photos in Tree View................................................................. 151
Photos View ............................................................................. 152
Photos People List ................................................................... 154
5
6
Table of Contents
Family Tree Builder User's Guide
Photos List ............................................................................... 156
Photos Display Options ...........................................................................158
Quick Find Options ..................................................................................163
Photos Handling Options.........................................................................164
Query Options (Advanced Find) ..............................................................165
Adding New Photos ................................................................. 169
Editing a Photo......................................................................... 173
Photo Information ....................................................................................175
Viewer Window ........................................................................ 188
Photos Menu Bar ..................................................................... 190
Photos Menu ...........................................................................................190
Query Menu.............................................................................................191
Virtual Cemetery ...................................................................... 192
Chapter 5, Charts ...................................................................... 195
Displaying a Chart.................................................................... 197
Configuring Chart Appearance ................................................ 203
Chart Options ..........................................................................................203
Menu Bar .................................................................................................218
Toolbar ....................................................................................................218
Chapter 6, Reports .................................................................... 219
Generating a Report ................................................................ 222
Book Report ............................................................................. 224
Family Group Sheet ................................................................. 228
Relationships Report................................................................ 231
Table of Contents
Family Tree Builder User's Guide
Ancestors Report ..................................................................... 233
Descendants Report ................................................................ 234
Timeline Report........................................................................ 235
Descendants Summary............................................................ 236
Address List ............................................................................. 237
Open Reports Folder ............................................................... 238
Chapter 7, Publishing Your Family Tree ................................. 239
What is Publishing? ................................................................. 241
How Do I Publish My Family Tree?.......................................... 242
Defining a Publishing Request................................................................ 243
Defining a Site ........................................................................................ 246
Publishing the Request........................................................................... 248
Publishing to the MyHeritage.com Site .................................... 249
Editing the Publishing Request ............................................................... 252
Managing Your Sites................................................................ 256
Chapter 8, Research.................................................................. 259
Introducing the Research Tool................................................. 261
Megadex™ and Soundex ......................................................... 262
Using MyHeritage Research .................................................... 263
The Research Menu ................................................................ 268
Chapter 9, Language and Translation .................................... 269
Supporting Multiple Languages ............................................... 271
User Interface ......................................................................................... 272
7
8
Table of Contents
Family Tree Builder User's Guide
Data .........................................................................................................273
The Virtual Keyboard ............................................................... 275
Changing the User Interface Language ................................... 276
Primary and Secondary Languages......................................... 278
Changing the Data Language .................................................. 280
Translating in Family Tree Builder ........................................... 282
Translating All Project Data .....................................................................284
Translating the Current Window’s Data...................................................286
Translating a Field ...................................................................................288
Chapter 10, Configuration Options.......................................... 289
Configuring Family Tree Builder .............................................. 291
Chapter 11, FAQ ........................................................................ 294
About This Guide
Family Tree Builder User's Guide
About This Guide
This user guide is intended for first-time and
experienced of users of MyHeritage Family Tree
Builder. It will familiarize you with its interface,
describe its workflow and can serve as a reference
for all the options that appear in its windows, menu
bar and toolbar.
This guide contains the following chapters:
Chapter 1, Introduction, page 15, introduces the features and benefits of
using Family Tree Builder to build your family tree, describes genealogy in
general and provides a guideline for doing your research.
Chapter 2, Quick Tour, page 27, provides a quick tour through the various
options in the Family Tree Builder interface.
Chapter 3, Getting Started, page 81, suggests a workflow for getting
started with Family Tree Builder and describes how to start adding people to
your family tree.
Chapter 4, Handling Photos and Other Media, page 145, describes how
to add, view, annotate and automatically mark faces in photos and how to
use documents and audio/video files to enrich your family tree.
Chapter 5, Charts, page 195, describes the types of charts that Family
Tree Builder provides and how to create and customize them.
Chapter 6, Reports, page 219, describes the variety of reports that Family
Tree Builder provides.
Chapter 7, Publishing Your Family Tree, page 239, describes how to
publish your family tree using Family Tree Builder to the MyHeritage site, so
that it is available for viewing through the Internet to anyone that you invite
using a standard web browser.
9
10
About This Guide
Family Tree Builder User's Guide
Chapter 8, Research, page 259, describes the rich functionality provided
by MyHeritage.com’s genealogy research feature. This tool enables you to
research families and/or specific people in a variety of genealogy research
databases.
Chapter 9, Language and Translation, page 269, describes the various
language and translation features that are provided by Family Tree Builder.
Chapter 10, Configuration Options, page 289, describes additional
options for configuring the behavior of your family tree.
Chapter 11, FAQ, page 294, describes how to handle a variety of special
situations in MyHeritage.
Finding Things in This User Guide
Family Tree Builder User's Guide
Finding Things in This User
Guide
This user guide provides a variety of options for finding information about
Family Tree Builder, these include the following:
Table of Contents, page x, this section provides a typical table of contents
listing the topics in this user guide, you can click on a topic to jump to the
relevant page.
Tree Browser – Table of Contents, provides a typical hierarchical
bookmark tree of topics in the guide. It appears in the left pane of the Adobe
Acrobat window. Simply click on a topic in the tree to access it.
Page References, in order to make the reading of this manual as easy as
possible, we have placed page references throughout the guide to enable
easy access to information that is relevant to or may clarify the topic that
you are reading. Any time you see something like: “as described on
page 44”, simply click on the page number to jump directly to that page.
Index, page x, this section provides an alphabetized list of the topics in this
guide. Simply click on a topic to display it.
11
12
Finding Things in This User Guide
Family Tree Builder User's Guide
Search, page x, the search feature of this user guide enables you to find a
word or phrase in this user guide. Click the Search button
Reader to display the following.
in Acrobat
Enter the word in which you are interested and click the Search button, as
shown above.
Quick Tour of the Interface, page x, provides a description of the Tree
View window and page x provides a description of the Photo View window.
These are the two man windows in which you will work.
Menu Bar Reference, page x, this section lists and describes the options
that appear in each menu and provides a reference to where more detail is
provided in this user guide. The Tree View and its menu is described on
page x. The Photo View has two additional menus and these are described
on page X.
Toolbar Reference, page x, this section lists and describes the options that
appear in the toolbar and provides a reference to where more detail is
provided in this user guide.
How To Chapter, page x, this chapter provides a variety of topics
describing how to perform various special tasks.
Glossary
Family Tree Builder User's Guide
Glossary
The following describes some of the terms used in
Family Tree Builder.
Term
Description
GEDCOM
An acronym for GEnealogical Data COMmunication.
GEDCOM is a specification for exchanging genealogical
data between different genealogy software. More
information is provided on page x.
Genealogy
The tracing of one’s roots. More information is provided
on page x.
Media or Photo
The term photo and media may be used interchangeably
in this guide. Media may refer to a photo, document file or
audio/video file.
PDF
PDF is a standard format provided by Adobe Acrobat for
viewing and printing files.
Personal Photo
Family Tree Builder enables you to assign a singe picture
to each person in order to represent them wherever
possible. For example, in a report, in a thumbnail that is
displayed when you hover over a person in a list or when
they are shown in Tree View. Typically, this photo should
be a portrait of their face. You can mark the face of a
person in a photo and use that marked area as the
personal photo. More information is provided on page x.
Home Person
Each family tree has one home person to whom quick
access is provided in order to display them in the center
of the Tree View. A variety of options are provided to see
the relationship of people in the family tree to this home
person. More information is provided on page x.
13
14
Contacting Us
Family Tree Builder User's Guide
Contacting Us
Technical Support
[email protected]
Sales
[email protected]
Marketing
[email protected]
Business Development
[email protected]
Public Relations
[email protected]
Affiliate Program
[email protected]
Introduction
Chapter 1
Introduction
16
Introduction
Family Tree Builder User's Guide
Chapter 1
Introduction
About This Chapter:
This chapter introduces the features and benefits of using Family
Tree Builder to build your family tree, describes genealogy in
general and provides a guideline for doing your research. It
contains the following sections:
Introducing Family Tree Builder, page 17, introduces the benefits of using
Family Tree Builder to build and publish your family tree.
What is Genealogy?, page 19, describes the definitions and origins of
genealogy.
Distributing Your Family Tree, page 21, describes how to use Family Tree
Builder and MyHeritage.com to build and publish your family tree.
Doing Your Research, page 23, provides a guideline for the process that
you will go through in order to gather information to fill your family tree.
Introduction
Family Tree Builder User's Guide
Introducing Family Tree Builder
A family site on MyHeritage.com provides an ideal location for showcasing your
family tree. Here are some of the benefits of having a family site:
Free: Family sites are free using MyHeritage. There are premium
subscription plans for huge family trees or photo collections, but these are
optional.
Sharing: Sharing your family tree with family members and friends in a
beautiful, interactive 3-D display will extend your personal connections and
bring you closer to all involved.
Functionality: Family Tree Builder provides your family tree website with a
rich variety of features and functions that were previously unavailable or that
had only been available using expensive genealogy applications.
Privacy: Your data is only visible to you and to the people that you invite to
view it. Information regarding deceased ancestors can optionally be made
available to guests, so that relatives can find you on the Internet.
Backup: Your data is automatically backed up online each time you publish
it and can later be restored. This protects your family tree and photos from
any catastrophe or computer failure.
What was once possible only using pen and paper and was very difficult to
maintain, can now be done easily and beautifully. In handwritten family trees, it
was a major task to add a newly discovered family branch. Using Family Tree
Builder, your computer helps you do the research and immediately produce a
variety of printouts, charts and reports. These can be easily distributed to
anyone and can be viewed on the Internet in a simple and intuitive interface.
Documenting your history for future generations is like writing a detective story,
where you are both the author and the hero. You are trying to unravel mysteries
of the past, sometimes starting with very little information. You put together a
puzzle and unravel the previously undiscovered history of your family.
17
18
Introduction
Family Tree Builder User's Guide
Gathering, designing and building your family tree is not just about collecting
names and dry facts. We recommend that you try to bring the family tree to life
by interviewing as many family members as possible and gathering all the
photos, documents and audio/video files that you can. Pulling a thread of
information opens up more information questions and typically encourages
relatives to share previously unknown facts. This is why genealogy is appealing
to tens of millions of people.
Family Tree Builder fulfills two major functions:
The ability to easily enter a variety of types of information.
The ability to enable your relatives and guests to browse through the family
tree that you publish on the Internet. Family Tree Builder provides a clear
separation between read-only pages and pages that can be added or
modified, thus ensuring the integrity of the information that is published in
your family tree.
Introduction
Family Tree Builder User's Guide
What is Genealogy?
Definition of Genealogy1
ge·ne·al·o·gy (jē-nē-ŏl’ə-jē)
noun. pl. ge·ne·al·o·gies
1
Lineage or pedigree.
2
The study or investigation of ancestry and family histories.
3
A record or table of the descent of a person, family, or group from an
ancestor or ancestors; a family tree.
The Rise of Genealogy
Genealogy, or the tracing of one's roots, has enjoyed a massive worldwide
surge in popularity over the past few years. In recognition of this, the United
States Congress has officially designated October as National Family History
Month by unanimously passing a Senate resolution in 2001.
"Experts say that in the United States, genealogy is now the second most
popular hobby next to gardening" 2 said US Senator Orrin Hatch who
co-sponsored the resolution, along with 83 others.
1
Source: The American Heritage® Dictionary of the English Language, Fourth Edition.
Copyright © 2000 by Houghton Mifflin Company
2
Source: United States Senate Committee on the Judiciary, June 26 2003,
http://judiciary.senate.gov/member_statement.cfm?id=834&wit_id=51
19
20
Introduction
Family Tree Builder User's Guide
"It is only natural that we want to find out more about our ancestors, and what a
better way to bring families closer together than by discovering more about the
story of your own family?"
This resolution celebrates the fact that millions of people are actively searching
for information about their ancestors and also encourages others to begin their
search.
In the eyes of many, genealogy is educational and bona fide. It brings people
closer to their roots and closer to each other; it strengthens bonds inside the
family as well as between families, and it bridges gaps between generations,
cultures and traditions.
Why is genealogy booming in recent years? This is to a great extent due to the
proliferation of the Internet that has proven to be an invaluable aid in
genealogy. The Internet allows one to search archives, libraries and databases
from one's home, to communicate easily with people across the globe and to
share information. As more and more people go online, and an increasing
number of databases become accessible online, genealogy is dramatically
gaining popularity. It's no wonder, therefore, that the Internet is home to
hundreds of thousands of personal genealogy Web sites and searching for
'genealogy' in Google yields over 33 Million hits 3.
3
Google, June 18 2007. There are also several million additional hits for translations of
genealogy into other languages, such as 'genealogie' (11,900,000 hits)
Introduction
Family Tree Builder User's Guide
Distributing Your Family Tree
Any member of MyHeritage can build a family tree. This family tree is built and
stored locally until you decide to publish it to the MyHeritage.com website. After
publishing, this site is available to all your family, friends and anyone else who
you invite to view it.
You have the option of defining multiple projects. Each project contains one
family tree. Each family tree describes numerous people. You can publish the
entire family tree to one or more sites, or you may decide to publish each
different part (branch) of your family tree to a different site.
You can create a family website that is private and secure, or make it public
and share it with the rest of the world. You are in complete control. Family
photos uploaded to your family site can use our face recognition technology for
genealogy. By sharing millions of facial templates among users, it helps you
find photos of your ancestors in other users' photo albums, identify mystery
people in your photos, and find relatives based on facial similarities.
Note A site can contain multiple family trees.
21
22
Introduction
Family Tree Builder User's Guide
The following shows the flow for building and publishing your site in order to
make it available for viewing by whomever you choose to invite:
Your Family and Friends
3
Family Tree Builder
(You)
Invite
View
4
MyHeritage Site
3
Invite
4
Serve
Publish
Publish
2
2
Build
1
1
Build your family tree on your computer using Family Tree Builder. This
process includes a variety of tasks described in this guide such as: entering
information about people, defining relationships, adding photos, marking
faces, designing the look and feel of reports and charts and so on.
2
Publish all or part of the family tree to the MyHeritage.com website.
3
Invite people to visit the website by sending them an email, through the
MyHeritage.com email interface.
4
People can now visit the website though a standard Internet browser and
can modify information only if you allow them.
Introduction
Family Tree Builder User's Guide
Doing Your Research
The following advice may help you through the process of tracing your ancestry
and family history:
Choosing Your Goal
Before you begin your family history research, it is a good idea to focus on what
you want to achieve. Do you wish to pursue the paternal (male) line with its
continuity of surname, or the maternal (female) line, or perhaps even verify a
family legend? You may find that the decision is made for you, if the research
proves difficult. If, however, you decide to pursue more than one line, be sure to
keep your research organized and file the results separately to avoid confusion.
Family History Begins at Home
The golden rule in family history research is to try to work backwards from what
you already know. As such, family history truly does begin at home and you
may be surprised at how much you already know or have access to within your
own extended family. It is not necessary to have a lot of detail to start, but it
makes sense to log whatever information is readily available and to seek out
further details from relatives.
Best Starting Point: You
Begin by recording your own details: date and place of birth, marriage, spouse,
children, and then the details of your parents, grandparents and so on, as you
recall them.
23
24
Introduction
Family Tree Builder User's Guide
Next Step: Your Relatives
Information from relatives can increase your knowledge of the family, but a
patient and tactful approach is required. Family anecdotes can become
distorted with the passage of time, but should still be noted for later verification.
Be sure to interview your relatives, especially the older ones, as they may have
information about your ancestors that you won't find in any database. Write
everything down for future reference. Getting in touch with your relatives may
often prove to be a rewarding and enriching experience.
Achieving Success
How successful you are in researching your family history is determined by a
number of factors, many of which are beyond your control. Your success can
depend on the survival of records, how common your surname was, your
family's social status and level of literacy, and the possibility of transcription
errors. However, success can also depend on your own tenacity, keeping an
open mind and not taking anything for granted, being methodical, approaching
a problem from more than one angle and corroborating any evidence you may
find. In spite of the occasional brick wall, you may find that the genealogy hunt
itself is almost as exciting as the thrill of discovery.
Introduction
Family Tree Builder User's Guide
Documents and Photographs
Most families possess old documents or photographs, which can be of use to
the family historian. Examples of documents you might find, which can
significantly aid your research, are: birth, marriage and death certificates,
obituaries, family bible, school certificates, university/school graduation
certificates and awards, military service records, business papers, immigration
papers, travel documents, diaries, address books, birthday books, letters,
postcards, newspaper cuttings and memoirs.
Go through old family photographs and see how many people you recognize.
Show the photos to older relatives to help jog their memory. Try to ask them to
identify as many faces as possible, so that this information is preserved.
Any information that can be gathered from within the family can help establish a
foundation on which to build your family history.
Read up on Family History: Join a Society
Libraries and bookshops stock a range of material on family history. You may
want to consider joining a family history society in your area. For a small annual
fee you will receive all the benefits of membership (magazine, research
facilities, well-stocked libraries, research services and ready advice) and meet
like-minded individuals. Consider also joining a society in the area in which you
are conducting research. You can also turn to the Internet for an active
genealogy community. You can find forums in which to post questions, read
answers, hear about others' successes and failures, and find additional
resources.
25
26
Introduction
Family Tree Builder User's Guide
Pick the Right Tools
The family tree is the nucleus of any family history research and putting it
together is often an exciting journey that can play out like a detective story.
Maintaining the family tree information that you accumulate on paper notes may
quickly get out of hand, so use genealogy software to help you keep track of the
various individuals in your family tree and the relationships between them.
Family Tree Builder is a good choice for this. It's free, supports multiple
languages, offers a very easy interface to enter and review data, and allows
you to organize your entire photo collection according to the relatives pictured.
The Internet offers a wealth of genealogy data, but this information is scattered
and difficult to find. To save time, use the dedicated genealogy search engine
at MyHeritage Research, as described on page X. It can help you get results
from the important genealogy databases on the Internet automatically, for the
surnames and individuals that you are researching.
Share and Enjoy
Once you have put together your family tree, collected some interesting old
photos of your family and gathered family legends, stories and anecdotes, don't
keep this treasure to yourself! Publish it on the Internet for your family and
friends to enjoy. They will be able to contribute more to your research and
perhaps help you fill in missing information. Distant relatives can also find you
this way so that long-lost cousins can reunite as a result of your efforts. Use
MyHeritage Family pages to create a family website and share your family tree
and family history gems, including photos, documents, stories and more. Invite
your relatives to become members in your site and open some areas in your
site for access to guests from the Internet. Share and enjoy!
Quick Tour
Chapter 2
Quick Tour
28
Quick Tour
Family Tree Builder User's Guide
Chapter 2
Quick Tour
About This Chapter:
This chapter provides a quick tour through the various options in
the Family Tree Builder interface.
Tree View, page 29, describes how to view and manage people in your
family tree in the graphical interface called the Tree View. This is the main
window of Family Tree Builder.
Menu Bar, page 49, describes the functions in the menu bar in Tree View.
Toolbar, page 64, describes the functions in the toolbar in Tree View.
Right Click Menu Options, page 68, describes the right-click menu options
available on a person’s card.
Quick Tour
Family Tree Builder User's Guide
29
Tree View
To view and manage people in your family tree:
1
The Tree View is displayed by default when you launch Family Tree Builder.
You can also display the Tree View by clicking on the
toolbar, as shown below:
button in the
Menu Bar
Toolbar
Generations
View Control
Person
Card
Tree
View
People
List
Status
Bar
This window contains the following areas:
Person Card, page 31, provides a graphical representation showing a
person’s photo and vital information in the family tree in Tree View and
enables access to all the information and functions provided by Family Tree
Builder for this person.
People List, page 35, lists all the people that you have already defined in
Family Tree Builder and enables easy access to their photos.
30
Quick Tour
Family Tree Builder User's Guide
Menu Bar, page 49, provides access to a variety of Family Tree Builder
functions.
Toolbar, page 64, provides quick access to the most frequently used
Family Tree Builder functions.
Generations View Control, page 49, is a slider at the top right of the
window, which enables you to control how many generations are displayed
in a Tree View. The default is three, and you have the option to select five
or seven.
Search Button, page X, enables you to specify information about a person
for whom you would like to search and display in the tree view.
Photo Button, page X, displays the Photo View, which shows all relevant
photos.
Styles Button, page X, displays the Options window in which you can
configure various aspects of the appearance and behavior of Family Tree
Builder.
Status Bar, indicates how many people and photos have been added to
this family tree.
Quick Tour
Family Tree Builder User's Guide
31
Person Card
Family trees are created and edited on Family Tree Builder using an intuitive
user interface that is surprisingly simple to use. Our philosophy is to keep things
highly visual and effortless, enabling you to create and branch-out a family tree
just as one would do using pen and paper.
A person’s card allows you quick, intuitive access to a person's genealogy
information. All the functions related to adding or changing information for a
person can be accessed from here. You can also see an individual's
information at a quick glance, such as birth date, place of birth, spouses,
siblings and so on.
In Tree View, each person on the tree is represented by a card.
Person
Card
32
Quick Tour
Family Tree Builder User's Guide
Family Tree Builder enables you to assign a single picture, or Personal Photo,
to each person in order to represent them wherever possible, such as in a
report, in a thumbnail that is displayed when you hover over a person in a list or
when they are shown in Tree View. Typically, this photo should be a portrait of
their face. You may refer to page x for instructions on defining a person's
Personal Photo, which will represent them in various places in Family Tree
Builder.
Note
The husband and wife displayed in the center of Tree View
have larger cards that display additional information, with
tabs that may be clicked to view this additional information.
Tabs that have information in them are denoted using a small green indicator,
for example:
The descendants and ancestors in this view have smaller cards showing less
information.
Main Tab
Info Tab
Notes Tab
Contact Tab
Quick Tour
Family Tree Builder User's Guide
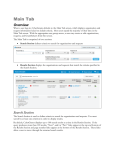
The Main tab
shows the following information:
Clicking the Info tab
shows the following information:
33
34
Quick Tour
Family Tree Builder User's Guide
Clicking the Contact tab
Clicking the Notes tab
shows the following information:
shows the following information:
To update information about this person click the Edit button in their card to
open a window showing their current information enabling you to update it or
modify it, as described on page x.
Quick Tour
Family Tree Builder User's Guide
To update the photos, documents or audio/video files about this person, click
the Photo button in their card to open a window showing the photos that are
currently defined for them, enabling you to edit or modify them, as described on
page x.
People List
The People List shown in Tree View lists all the people that you have defined in
Family Tree Builder.
35
36
Quick Tour
Family Tree Builder User's Guide
The People List enables quick access to any person and enables you to perform
almost all Family Tree Builder functions on a person in this list.
You can double-click any person in the People List to display that person’s card
in the Tree View, or right-click any person in the People List to display a menu
of options, as described on page 35. This list also enables you to perform quick
searches by typing in a first or last name and to sort the names, or see a photo
of a selected person. Hovering with the mouse over the name of a person in
this list displays a tooltip containing a photo. An example is shown below:
Quick Tour
Family Tree Builder User's Guide
People List Fields
Each row in the People List describes a single person.
Double-click on the person in the list to show their Tree View card on the right.
The Tree View is described on page 29.
37
38
Quick Tour
Family Tree Builder User's Guide
The following describes the columns in this list, which provides a different type
of information about each person.
Icon: The icon in each row indicates whether the person is a male or a
female, living or deceased (deceased individuals are grayed out), and
whether there are photos for that person or not.
Male
Female
Live People
(Colored Icon)
Deceased People
(Gray Icon)
With Personal Photo
(Picture Frame behind their
head)
Without Personal Photo
ID: A unique ID is automatically assigned to each person that you add to
Family Tree Builder in the order that you added them.
First Name/Last Name: When searching for a person, it is easiest to find
them by typing in all or part of their name in the Quick Find area at the top
of the People List.
Birth Date/Death Date: These dates only appear for the people for whom
they have been defined.
Relation: Specifies the distance of the relationship between this person and
the Home Person (you may refer to page x for a description of the Home
Person). The number 2 specifies that this person is immediate family, such
as: father, mother, spouse, son or daughter. The number 3 specifies a more
distant relationship, with two steps between this person and the Home
Person, such as: grandmother or grandchild. This number will go as high as
your family tree is large.
Last modified: Specifies the most recent date on which information was
added or modified for this person.
Quick Tour
Family Tree Builder User's Guide
Finding People in the People List
A number of options are provided for finding people in the people list, as
follows:
Quick Find, page 39.
Sorting the List, page 40.
Filtering the List, page 41.
Searching for People, page 42.
Quick Find
The Quick Find area appears above the People List and enables you to quickly
find a person in the list by entering his/her first or last name. As you type letters
into the First Name or the Last Name field, the people whose name starts with
this letter appear at the top of the list.
To display a person in the Tree View, simply double-click on their name in the
People List.
Double-click here to
display this person’s card
39
40
Quick Tour
Family Tree Builder User's Guide
Sorting the List
By default, the list is in the order that people were entered into Family Tree
Builder. To resort the list, simply click on the title of the column by which the list
should be sorted. For example, the following shows that clicking on the First
Name column title, sorts the People List by their first name:
Quick Tour
Family Tree Builder User's Guide
Filtering the List
A dropdown menu which appears above the People List enables you to specify
whether you would like to view all the people in the list, by selecting All People,
or a list of certain people, by implementing a Saved Search which filters lists
according to your definitions. The following shows a Saved Search that was
defined to show the award winners in the Japhet family:
You may refer to page x for a description of how to define a Saved Search.
41
42
Quick Tour
Family Tree Builder User's Guide
Searching for People
To define a new Saved Search for the People List:
1
Right-click on the Search icon
to display the following window:
2
Enter all or part of the First and/or Last Name of the people to be included
in the search results.
3
Select the Facts and/or Gender of the people to be included in the search
results.
4
Click the Save button to save the search for future use.
5
Click the Search button to filter the People List.
Quick Tour
Family Tree Builder User's Guide
Note
You may click the Manage Saved Searches button in the
window shown above to display a window in which you can
rename, delete or select a Saved Search.
Advanced Search
If you would like to add more specific details to search, click the Advanced tab,
as shown below, and fill out the information in the same manner as the Basic
tab:
43
44
Quick Tour
Family Tree Builder User's Guide
Right-Click Menu in the People List
When you right-click on a person in the People List, a menu of options is
displayed as shown below:
Display in Family Tree: Displays the selected family in Tree View, as
described on page X.
Manage Photos: Displays the Photo View showing all the photos defined
for this person, as described on page X.
Charts: Displays a chart of ancestors or descendants of the selected
person. You can select to display these charts horizontally or vertically. For
more detail, you may refer to page X.
Reports: Enables you to generate a variety of reports, as described on the
page X.
Quick Tour
Family Tree Builder User's Guide
Research: Provides you with full access to the rich functionality provided by
MyHeritage.com’s genealogy research feature. This database will enable
you to research families and/or specific people in a variety of genealogy
research databases, as described on page X.
Relation to Person’s Name: Displays a window which describes the
relationship between the selected person and the Home Person, as
described on page x.
Relation To: Displays a window in which you can select a person in order
to see the relationship between the selected person in the People List and
the person selected in the displayed window, as described on page x.
Family Tree List in the People List
Family Tree Builder contains a hierarchical tree of families, as shown below:
Double-click here to see
Family in Tree View
45
46
Quick Tour
Family Tree Builder User's Guide
As you can see, each family is listed in the top level branch of the tree and the
family of each of their children is listed as sub-branch.
You can double-click on any family in the list to display it in the family tree on
the right.
The icon representing the family in the tree may contain one or two people (a
husband and wife). If a person is deceased, the icon of one of them may be
grayed out.
Right-Click Menu in the Family List
When you right-click on a family in the family list, a menu of options is
displayed.
In addition, you can click on the name of the husband or the wife in this menu to
display a sub-menu of additional options:
Quick Tour
Family Tree Builder User's Guide
Display Family in Family Tree: Displays the selected family in Tree View,
as described on page X.
Manage Photos: Displays the Photos View showing all the photos defined
for this family as described on page X.
Expand this Family: Expands the hierarchical list of this family to show the
families of the children and the members of each family, an example is
shown below:
47
48
Quick Tour
Family Tree Builder User's Guide
The following options are available when you right-click the name of the
husband or the wife in the menu above:
Display Husband/Wife in the Family Tree: Displays this person in Tree
View, as described on page X.
Manage Photos: Displays the Photo View showing all photos, documents
and video/audio files relating to this person as described in page x
Charts: Displays a chart of ancestors or descendents of the selected
person. You can select to display this chart horizontally or vertically. For
more detail, you may refer to page X.
Reports: Enables you to generate a variety of reports, as described on
page X.
Research: Provides you with full access to the rich functionality provided by
MyHeritage.com’s genealogy research feature. This database will enable
you to research families and/or specific people in a variety of genealogy
research databases as described on page X.
Relation to Person’s Name: Displays a window which describes the
relationship between the selected person and the Home Person, as
described on page x.
Relation To: Displays a window in which you can select a person in order
to see the relationship between the selected person in the People List and
the person selected in the displayed window.
Quick Tour
Family Tree Builder User's Guide
Menu Bar
The following describes the options in the menu bar in Tree View:
Note
The menus that are shown and the options that are available
in each menu may change according to the view that you are
in (such as: Tree View, Photos View or Charts View). The
following is a comprehensive list.
File Menu, page 50.
Edit Menu, page 51.
View Menu, page 52.
Photos Menu, page X.
Query Menu, page X.
Person Menu, page 54.
Family Menu, page 57.
Charts Menu, page 58.
Reports Menu, page 59.
Favorites Menu, page 60.
Research Menu, page 60.
Tools Menu, page 62.
Help Menu, page 63.
49
50
Quick Tour
Family Tree Builder User's Guide
File Menu
The following describes each of the options in the File menu:
New Project: Enables you to create a new project, as described on page x.
Open Project: Displays a window from which you can select a project to be
opened. Only one project can be opened at a time. You are offered to save
your current project, if one is already open. Click the Finish button to load
the new project. A statistics window is then displayed summarizing how
many people, families, photos and so on are defined in the project that is
now opened.
Save Project: Saves the current project. If you have not yet created a
MyHeritage.com family website, you are offered to do so now, as described
on page x.
Save Project As: Saves the current project with the name that you specify
in the window that is displayed. Use this option when you would like to save
a copy of the current project.
Quick Tour
Family Tree Builder User's Guide
Close Project: Closes the current project.
Back up Project: Opens a wizard which will walk you through the process
of creating a backup of your entire project locally on your disk or on a family
tree site at MyHeritage.com.
Restore Project: Restores a backed up project (as described above) and
opens it in Family Tree Builder.
Manage Projects: Opens a window in which you can rename, describe,
delete, modify the folder, import or export a Family Tree Builder project.
Import/Export GEDCOM: Opens a wizard that will walk you through the
process of importing from or exporting to GEDCOM, as described on
page x.
Quick-Start Wizard: Opens a wizard that will walk you through the process
of creating a new genealogy project or importing an existing project, or
opening an existing project.
Print/Print Preview/Print Setup: These are standard Windows features.
Exit: Exits and closes the Family Tree Builder application.
Edit Menu
The following describes each of the options in the Edit menu:
Cut/Copy/Paste: These are standard Windows features.
Search: Displays a window in which you can enter information in order to
search for specific people, as described on page x.
51
52
Quick Tour
Family Tree Builder User's Guide
View Menu
The following describes each of the options in the View menu:
Toggle Toolbar: Shows or hides the toolbar in Family Tree Builder, which
is described on page x.
Toggle Status Bar: Shows or hides the status bar in Family Tree Builder,
which is described on page x.
Navigate Back: Returns to the previously displayed window in Family Tree
Builder.
Navigate Forward: Goes to the window that was displayed before you
clicked the Back button in Family Tree Builder.
Navigate Home: Displays the Home Person as the central individual in the
Tree View, meaning as the husband or wife in the center of the Tree View.
You may refer to page x for a description of how to define a Home Person.
Restore selection view: Redisplays the People List in its full size. The
People List is described on page x.
Quick Tour
Family Tree Builder User's Guide
Minimize selection view: Minimizes the People List on the display to give
more room for the display of Tree View, Media View or Charts. The People
List is described on page x. You can click on the > button to enlarge the
People List again.
Full-screen: Displays the Family Tree Builder window on the entire screen.
To exit this mode, click inside
or press the Esc key.
Family Tree: Displays Tree View, as described on page x.
Photos and other media: Displays Photos View, as described on page x.
Sources: Displays a window in which you can manage sources used in
citations, as described on page x.
Repositories: Displays a window in which you can manage the repositories
used in citations, as described on page x.
53
54
Quick Tour
Family Tree Builder User's Guide
Person Menu
The person menu enables you to access various MyHeritage options regarding
a person and their relationship to other family members, as shown below:
Edit Details: Opens the Edit Details window which enables you to modify
or add to the information already entered in Family Tree Builder about a
person, as described on page x.
Person: Enables you to display this person in the center of the Tree View,
add or remove them from the Favorites menu, define them as the Home
Person or delete them, as described on page x.
Parents: Shows the number of parents defined for this person, their names
and their type, such as Adopting. Simply select one of the parents in the
menu to show their card in the Tree View. The options in this menu enable
you to add, attach, detach, replace and manage parents, as described on
page x.
Siblings: Shows the number of siblings defined for this person and their
names. Simply select one of the siblings in the menu to show their card in
the Tree View. The options in this menu enable you to add or attach
siblings, as described on page x.
Quick Tour
Family Tree Builder User's Guide
Spouses: Shows the number of spouses defined for this person and their
names. Simply select one of the spouses in the menu to show their card in
the Tree View. The options in this menu enable you to add, attach, detach
or manage spouses as described on page x.
Photos: Provides the following photo handling options:
▪
Manage Photos: Provides a variety of options for handling the photos
of this person, as described on page x.
▪
Add Photos: Enables you to add a photo for this person, as described
on page x.
▪
Virtual Cemetery: Displays the virtual cemetery in Family Tree Builder
which shows photos, documents and audio/video files relating to the
death, funeral and/or tombstone, as described on page x.
▪
Load Personal Photo: Family Tree Builder enables you to assign a
single photo to each person in order to represent them wherever
possible, for example, in a report, in a thumbnail that is displayed when
you hover over a person in a list or when they are shown in Tree View.
Typically, this photo should be a portrait of their face. This option
enables you to select a photo to be used as this person’s Personal
Photo in Family Tree Builder.
▪
Clear Personal Photo: Clears the association of this person to the
defined Personal Photo. From now on, a silhouette will be displayed for
this person until you define another Personal Photo.
Research: Launches MyHeritage.com’s genealogy research feature and
automatically starts researching this person’s name, as described on
page X.
55
56
Quick Tour
Family Tree Builder User's Guide
Relation: Provides the following options:
▪
Define as Home Person: Defines the currently selected person as the
home person, as described on page x.
▪
Relation to Person’s Name: Displays a window which describes the
relationship between the selected person and the Home Person, as
described on page x.
▪
Relation To: Displays a window in which you can select a person in
order to see the relationship between the selected person in the People
List and the person selected in the window that is displayed.
Charts: Enables you to display a variety of charts about the selected
person, as described on page X.
Reports: Enables you to generate a variety of reports, as described on the
following page x.
Add Unrelated Person: Enables you to define another person. This person
is not yet defined as a relation to anyone in the family tree. Later you can
attach this person to a family, as described on page X.
Quick Tour
Family Tree Builder User's Guide
Family Menu
The Family menu enables you to access various MyHeritage options regarding
a family and the people that are members of this family, as shown below:
Family: Enables you to display or delete a family or to determine the marital
status of the husband and wife in the family, as described on page X.
Children: Enables you to add attach and manage the children of the
selected person and to navigate directly to a child’s name if they are listed
in this menu, as described on page X.
Photos: Enables you to manage and add photos, as described on page x.
Research: Launches MyHeritage.com’s genealogy research feature and
automatically starts researching the name of the person, as described on
page X.
Add Unrelated Family: Enables you to define another husband and wife
team. Later you can attach one of these people to another family.
57
58
Quick Tour
Family Tree Builder User's Guide
Charts Menu
The Chart menu provides a variety of attractive and detailed charts
representing your Family Tree. The following describes each of the options in
the Charts menu:
Ancestor Chart: Shows the selected person, his or her spouse(s) and the
parents, grandparents and so on, as described on page x.
Descendant Chart: Shows the selected person, his or her spouse(s), the
children, the grandchildren and so on, as described on page x.
Fan Charts: Shows the selected person and that person’s descendants or
ancestors in a chart that is shaped like a fan.
Close Family Charts: Shows the selected person and a few close
generations of that person’s family.
Chart Options: Enables you to determine the content and appearance of a
chart of your family tree, as described on page x.
Chart Styles: Enables you to define the general appearance of a chart and
the facts that will be included in it, as described on page x.
Quick Tour
Family Tree Builder User's Guide
Reports Menu
The following describes each of the options in the Reports menu:
Book Report, page X, displays a simple wizard that walks you through the
process of producing a report for a specific person, as described on page x.
Family Group Sheet, page X, generates a report showing the details of the
selected person and their immediate family.
Relationships, page X, generates a report showing all the relationships of
the selected person to all the other people in your project.
Ancestors Report, page x, describes how to generate a report showing all
the relationships of the selected person to all the other people in your
project.
Descendants Report, page x, describes how to generate a report showing
all the relationships of the selected person to all the other people in your
project.
Timeline Report, page x, describes how to generate a report showing all
the relationships of the selected person to all the other people in your
project.
59
60
Quick Tour
Family Tree Builder User's Guide
Descendants Summary Report, page x, describes how to generate a
report showing all the relationships of the selected person to all the other
people in your project.
Address Lists, page x, describes how to generate an alphabetical list (in
the order of each person’s name) of the addresses of all the people in the
family tree.
Open Reports Folder: Displays a list of folders into which reports have
been stored previously, as described on page x.
Favorites Menu
The following describes each of the options in the Favorites menu:
Remove person from Favorites: Enables you to remove a person from
this menu.
Organize Favorites: Enables you to determine the order in which people
appear in this menu.
People’s Names: Lists the favorite people that you have added so that
when you select a person’s name from this menu, that person is displayed
in the center of the Tree View.
Quick Tour
Family Tree Builder User's Guide
Research Menu
The following describes each of the options in the Research menu:
Open MyHeritage Research: Provides you with full access to the rich
functionality provided by MyHeritage.com’s genealogy research feature.
This database will enable you to research families and/or specific people in
a variety of genealogy research databases, as described on page X.
Research Person: Launches MyHeritage.com’s genealogy research
feature and automatically starts researching the person’s name that you
select in this menu, as described on page X.
61
62
Quick Tour
Family Tree Builder User's Guide
Tools Menu
The following describes each of the options in the Tools menu:
Publish to MyHeritage.com: Publishes your family tree to your
MyHeritage.com website so that anyone you invite can view it using a
standard web browser on the Internet.
Publishing Settings: Displays the list of publishing requests and enables
you to modify them, add new requests, visit the site or publish them, as
described on page x.
Check for Updates: Checks whether a newer version of Family Tree
Builder is available for downloading.
Languages: Enables you to select the language used in Family Tree
Builder, as described on page x.
Translation Wizard: Displays the Family Tree Builder Translation Wizard
that walks you through the process of translating all or some of the data in
your current project, as described on page x.
Author Information: Displays a window in which you can enter information
about the author of this family tree. This information will be used if you
export this family tree into GEDCOM format.
Quick Tour
Family Tree Builder User's Guide
Virtual Cemetery: Displays the virtual cemetery in Family Tree Builder
which shows photos, documents and audio/video files relating to a death,
funeral and/or tombstone of the entire family or of the specified person(s),
as described on page x.
Options: Describes additional options for configuring the behavior of your
family tree, as described on page x.
Help Menu
The following describes each of the options in the Help menu:
User’s Guide: Opens this document. This document is periodically updated
on MyHeritage.com site and it will be offered to you whenever a new
version becomes available..
Release History: Shows information about the new features in the latest
releases of Family Tree Builder.
About Family Tree Builder: Displays information about the current version
of Family Tree Builder.
63
64
Quick Tour
Family Tree Builder User's Guide
Toolbar
The following shows the toolbar that appears at the top of the Family Tree
Builder window and enables you quick access to a variety of options:
New: Enables you to create a new project, as described on page x.
Open: Displays a window from which you can select a project to be opened.
Only one project can be opened at a time, so it will offer to save your
current project, if one is open. Click the Finish button to load the new
project. A statistics window is then displayed summarizing how many
people, families, photos and so on, are in the project that is now opened.
Save: Saves the current project. If you have not yet created a site, it will
offer you to do so now, as described on page x.
Back: Returns to the previously displayed window in Family Tree Builder.
Forward: Goes to the window that was displayed before you clicked the
Back button in Family Tree Builder.
Home: Displays the home person as the focus of the Tree View, meaning
as the husband or wife in the center of the Tree View. You may refer to
page x for a description of how to define a Home Person.
Tree: Displays the Tree View window, as described on page x.
Photo: Displays the Photo View window, as described on page x.
Charts: Enables you to display a chart of ancestors or descendants either
vertically or horizontally, as described on page x.
Reports: Enables you to generate various reports describing your family
tree, as described on page x.
Publish: Publishes your family tree to the MyHeritage.com website so that
anyone you invite can view it using a standard web browser on the Internet,
as described on page x.
Quick Tour
Family Tree Builder User's Guide
About: Displays information about the current version of Family Tree
Builder.
Language: Enables you to select the language used in Family Tree Builder,
as described on page x.
65
66
Quick Tour
Family Tree Builder User's Guide
Generations View Control
By default, three generations are shown in the tree view example as shown
below:
In the window above Eliahu and Ester are the husband and wife in the Tree
View, the parents of each of them are shown above them and their children are
shown below them.
Note
Information about a marriage is shown immediately under
the husband-and-wife cards.
Quick Tour
Family Tree Builder User's Guide
The option to view three generations (the default and the most clutter-free
mode), five generations or seven generations is enabled by the generation
slider:
that appears at the top of the Tree View.
To navigate to any person and to make them the focus of the Tree View, click
on the person’s name.
For each person, a Personal Photo is displayed if one was defined. Defining a
Personal Photo for each person makes it much more intuitive to navigate in a
family tree when photos are displayed for each individual, especially if you are
familiar with people in the family.
67
68
Quick Tour
Family Tree Builder User's Guide
Right-Click Menu Options
The following describes the options that are available to you when you rightclick on a person’s card, as shown below:
At a glance this menu provides information about how many parents, children
spouses and photos have been defined for this person. For example: Chaim
has 1 spouse, no siblings and 59 photos, as shown above.
Edit Details
This option opens the Edit Details window which enables you to modify or add
to the information already in entered in MyHeritage about a person as
described on page x.
Quick Tour
Family Tree Builder User's Guide
Person
Go to Person
This option displays the current person as the focus of the Tree View, meaning
that this person’s card now appears in the center of the Tree View.
This option is inactive if the current person is already in focus.
Add to Favorites
This option adds the currently selected person to the Favorites menu. The
Favorites menu provides a quick means of bringing the person that you select
in that menu into focus. An example of the Favorites menu is shown below.
This one contains two favorite people:
69
70
Quick Tour
Family Tree Builder User's Guide
Set as Home Person
This option defines the currently selected person as the home person. Each
family tree has one home person around whom the family tree is centered. The
home person is influential for several reasons, as follows:
Clicking the Home
button brings this person into focus, meaning that it
displays this person in the center of the Tree View.
When you display information about a person, for example by hovering over
that person in the People List, the relationship between that person and the
home person is displayed as shown below:
Quick Tour
Family Tree Builder User's Guide
When you right-click on a person and select the Relation option, then this
person’s relationship to the home person is displayed.
You can change a home person at any time by selecting this option.
Delete Person
You can delete this person at any time. If this person has relationships a
warning is displayed.
Parents
When you right-click on a person’s card in Tree View, the menu shows the
number of parents defined for this person, their names and the category of
parents they are, such as biological or adopting. Simply select one of the
Parents in the menu to show their card in the Tree view.
The following options are available for defining parents:
71
72
Quick Tour
Family Tree Builder User's Guide
Add Parents
Additional parents can be added to a person at any time. For example, adoptive
parents or biological parents may be added in addition to the currently defined
parents.
The Family window is displayed in which you define these parents, as
described on page x.
Attach Parents
This option enables you to connect a person to a set of parents that have
already been defined in Family Tree Builder. A window is displayed in which
you can select parents. You can hover over a row to see photos of those
people.
Detach Parents
This option enables you to disconnect parents from a person. The definition of
these parents will still remain in Family Tree Builder, but they will no longer be
defined as the parents of this person.
Manage Parents
This option opens a window in which you can see a list of the currently defined
parents and in which you can add and define their type, such as Adopted, and
in which you can attach, replace and detach parents.
List of Parents
This option lists all the parents defined for this person and indicates their type,
such as Adopted.
Quick Tour
Family Tree Builder User's Guide
Siblings
When you right-click on a Person’s Card in Tree View, the menu shows the
number of siblings defined for this person and their names. Simply select one of
the siblings in the menu to show their card in the Tree View.
The following options are available for defining siblings:
Add Sibling
This option enables you to add additional siblings to the selected person. A
window is displayed in which you can define siblings in the same way that you
define any person in the Family Tree Builder. For more information refer to
page X.
Attach Existing Sibling
This option enables you to attach a person that has already been defined in
Family Tree Builder as the siblings of the selected person. A window is
displayed from which you can select a person as the sibling of this person.
73
74
Quick Tour
Family Tree Builder User's Guide
Spouses
When you right-click on a person’s card in Tree View, the menu shows the
number of spouses defined for this person and their names. Simply select one
of the spouses in the menu to show their card in the Tree View.
The following options are available for defining spouses:
Add Spouse
This option enables you to add additional spouses to the selected person. A
window is displayed in which you can define a spouse in the same way that you
define any person in the Family Tree Builder. For more information refer to
page X.
Tip
You can later use the Manage Spouses option as described on
page X, in order to specify the exact spousal relationship, such
as married, divorced, friends, separated and so on.
Attach Spouse
This option enables you to create a spousal relationship between two persons
already existing in your family tree.. A list of family tree members is displayed
from which you can select the spouse to attach..
Tip
You can later use the Manage Spouses option as described
on page X, in order to specify the exact spousal relationship,
such as married, divorced, friends, separated and so on.
Quick Tour
Family Tree Builder User's Guide
Detach From Spouse
This option enables you to disconnect a spouse from a person. The definition of
this spouse will still remain in Family Tree Builder but he or she will no longer
be defined as the spouse of this person.
Manage Spouses
Use this option when a person has more than one spouse. It enables you to
define more information about their relationship. Particularly interesting is the
marriage status, which specifies if a spouse is married, windowed, divorced,
separated and so on. The following window is displayed:
75
76
Quick Tour
Family Tree Builder User's Guide
The top of the window lists the spouse and a brief summary of their information.
The middle of the window provides all the details about the spouse whose row
is selected in the top of the window and enables you to edit it. The Marriage
Status field may be of particular interest in the case of multiple spouses.
The bottom of the window provides the following buttons:
: Displays a window in which you can define a new
person who will be a spouse.
: Displays a list of family tree members from which you
can select the spouse to attach.
: Detaches the selected spouse.
: Select the row of a spouse and click the up or down arrow button to
move the spouse up or down in the list.
: Click this button to sort the spouses in chronological order.
Quick Tour
Family Tree Builder User's Guide
Relation
This option enables you to define the selected person as a home person, you
may refer to page X for a definition of the home person. It also allows you to
see information about the relationship of this person to other people in the
family tree.
The following options are available in this menu:
77
78
Quick Tour
Family Tree Builder User's Guide
Set as Home Person
This option defines the currently selected person as the home person. Each
family tree has one home person who is given special treatment in Family Tree
Builder, as follows:
Clicking the Home
button brings this person into focus, meaning that it
displays this person in the center of the Tree View.
When you display information about a person, for example by hollering over
that person in the People List, the relationship between that person and the
home person is displayed as shown below:
Quick Tour
Family Tree Builder User's Guide
When you right-click on a person and select the Relation option, then this
person’s relationship to the home person is displayed.
You can change a home person at any time by selecting the option Set XXX as
Home Person.
Relation to Home Person
This option displays the relationship of the selected person to the home person.
You may refer to page x for a description of the home person.
Relation to
This option enables you to define the relationship of the selected person to
anyone in the family tree. A window is displayed listing all the people in the
family tree.
Charts
This option enables you to display a chart of ancestors or descendents of the
selected person. You can select to display this chart horizontally or vertically.
For more detail, you may refer to page X.
79
80
Quick Tour
Family Tree Builder User's Guide
Reports
This option enables you to generate a report by walking you through a simple
wizard in which you can specify the options that you would like generated in the
report. Each report is different, as described on the following pages:
Book Report, page X.
Family Group Sheet, page X.
Relationships, page X.
Ancestors, page X.
Descendants page X.
Timeline, page X.
Descendant Summary, page X.
Addresses, page X.
Getting Started
Chapter 3
Getting Started
82
Getting Started
Family Tree Builder User's Guide
Chapter 3
Getting Started
About This Chapter:
This chapter suggests a workflow for getting started with Family
Tree Builder and describes how to start adding people to your
family tree. It contains the following sections:
Using Family Tree Builder, page 84, describes a basic workflow for
building a tree using Family Tree Builder.
Creating Your First Project, page 89, describes how to create a project.
Adding a Family, page 94, describes how to define a family.
Describing a Person, page 98, describes how to define a person.
Expanding the Family, page 116, describes how to extend the family tree
by defining family members as they are related to the people that you have
already defined.
Editing Information, page 124, describes how to edit families and people
after they have been defined.
Getting Started
Family Tree Builder User's Guide
GEDCOM and Family Tree Builder, page 134, describes how to import
your data from a GEDCOM file.
Entering Dates, page 137, describes the variety of options available for
entering dates or ranges of dates in Family Tree Builder.
Citations, page 141, describes how to identify the sources and repositories
that you used for your research.
83
84
Getting Started
Family Tree Builder User's Guide
Using Family Tree Builder
The following is a simple workflow that you may use when building a tree using
Family Tree Builder:
Step 1
Downloading Family Tree
Builder
Step 2
Launching Family Tree
Builder
Step 3
Registering as a Member
of MyHeritage.com
Step 4
Creating Your First
Project
Step 5
Defining Your
First Family
Step 6
Defining People
Step 7
Generating Charts and
Reports
Step 8
Publishing and Inviting
Visitors
Getting Started
Family Tree Builder User's Guide
Step 1: Downloading Family Tree Builder
Family Tree Builder is available free of charge from MyHeritage.com, Simply
navigate to the website and follow the instructions that describe how to install it
on your computer.
After it is installed, the following icon appears on the desktop:
Step 2: Launching Family Tree Builder
You can launch MyHeritage Family Tree Builder by double-clicking on its
desktop icon, shown above or by starting it from the All Programs menu
available from the Start menu:
Step 3: Registering as a Member of
MyHeritage.com
If you have not yet registered as a member of MyHeritage.com, then do so now.
If you are already a registered member, login with your user member
information.
If you decide not to register with MyHeritage.com, you can build your family tree
using all the available features in Family Tree Builder. Even if you do not
register, you can still build and save your family tree, however, you will not be
able to publish it to MyHeritage.com until after you have registered.
85
86
Getting Started
Family Tree Builder User's Guide
Step 4: Creating Your First Project
Each project in Family Tree Builder represents a family tree. You can have as
many projects as you like. Typically, each project represents a family tree
comprised of many related families.
The process of creating a project will automatically offer you the option to
create a site on MyHeritage.com. You can create a site even if you have not yet
filled out your family tree. This will be the website to which you will later invite
people to visit through the Internet.
Getting Started
Family Tree Builder User's Guide
87
Step 5: Defining Your First Family
After you define a project, you are automatically offered the option to create
your first family, which means a husband, wife, children and two pairs of
parents (one for the husband and one for the wife). Simply click the Add
Family button that is displayed after you create your project to see Family Tree
Builder’s attractive and easy-to-use graphical interface for defining the people in
the family. This is called Tree View, as shown below and as described on page
x. Instructions for defining your first family are provided on page x.
Double-click
here to describe
this father
Double-click
here to describe
this person
Double-click
here to describe
this family
Double-click here to
describe this child
Step 6: Defining People
Double-click on the card of any person in this view to display the windows in
which you can describe them by adding basic details, photos, documents,
audio/video files, facts, notes and citations, as described on page x.
88
Getting Started
Family Tree Builder User's Guide
Step 7: Generating Charts and Reports
Family Tree Builder enables you to generate a rich variety of charts and reports
that show off your family tree, as described on page x.
Step 8: Publishing and Inviting Visitors
Publish your family tree to your website on MyHeritage.com and invite people to
come see it using their standard web browser, as described on page x.
Getting Started
Family Tree Builder User's Guide
Creating Your First Project
Each project in Family Tree Builder represents a family tree. You can have as
many projects as you like. Typically, each project describes a family tree that
contains numerous related families.
You may also decide to save different versions of a family tree in different
projects as a backup in case you would like to return to information that you
have already changed. In addition, all project information is backed-up on
MyHeritage.com servers after you publish it, as described on page X.
When you create a new project you are asked to specify its name and the
primary and secondary language to be used in the project, as described on
page X.
The initial project that is created is empty. You can fill the project with
information about your family tree as described throughout this guide or you
may import data that was stored in GEDCOM format. You may also import a
project that was created in Family Tree Builder or Family Tree Legends. The
Import function is described on page 134.
Note
Family Tree Legends is another genealogy application that
was integrated into Family Tree Builder and therefore the
projects created in it can be easily imported.
89
90
Getting Started
Family Tree Builder User's Guide
To create a new project:
1
From the File menu select New Project or click the
icon on the toolbar.
This window may also appear automatically to help you get started.
2
Enter the name of your project in the Project Name field. It must be entered
in English letters and it may also include spaces and basic characters. The
project name must be a legal file name in Windows.
Getting Started
Family Tree Builder User's Guide
3
Click the Next button to display the following window:
4
Select the Primary Language which will determine the language that is
shown in the Family Tree Builder user interface and the language of the
data that you will enter.
If you would like to enter data in an additional language, select this
language in the Secondary Language field.
Note Family Tree Builder provides a dual-language mode, which
enables you to enter and view data in two languages. You
may refer to page X for more information.
91
92
Getting Started
Family Tree Builder User's Guide
5
Click the Next button to display the following window:
You may change the folder in which the project is stored by typing the
location that you want in the field shown in this window.
This window indicates that your project has been created successfully.
Note Your project is not stored on MyHeritage.com and it is not
available to be viewed by anyone through the Internet until
you publish it, as described on page X.
Getting Started
Family Tree Builder User's Guide
6
Click the Finish button to display the following window:
You can now add your first family by clicking the
button. For a description of how to add a
family, proceed to page X.
93
94
Getting Started
Family Tree Builder User's Guide
Adding a Family
Family trees are created and edited in Family Tree Builder using an intuitive
graphical user interface that is surprisingly simple to use. It is highly visual
making the process almost effortless. This enables you to create and branch
out a family tree just as one would do using pen and paper.
Note Family Tree Builder is installed with a project describing the
Kennedy family to serve as an example for you.
Tip
You can also add a family by using the Add Unrelated Family
option in the Family menu, as described on page x.
For as long as your project is empty, Family Tree Builder will invite you to build
the first family from which descendants and ancestors can be defined
graphically, as shown below:
Getting Started
Family Tree Builder User's Guide
A variety of ways are available for you to get started in building your first family
and to fill out and enrich the information that describes members of that family.
The following describes one simple option for doing this.
Click the Add Family
The following window is displayed:
button to get started.
95
96
Getting Started
Family Tree Builder User's Guide
Defining the Husband and Wife
Fill out the details of the husband and the wife of this family.
Entering the maiden name of a woman (meaning her surname before her
marriage) enables Family Tree Builder enrich the connections in your family
tree.
To enter a date, either type it into the field or click on the Date icon
that
appears on the right of each date field. Family Tree Builder provides a rich
variety of options for entering dates or ranges of dates, as described on
page 137.
After filling this window and clicking OK you are prompted to add children to the
family, as shown below:
Getting Started
Family Tree Builder User's Guide
Click the Add Son or the Add Daughter button to display a window similar to
the following:
Fill in the details describing this child. You can then click the More details
button to define a variety of details about this child, as described on page x, or
you can click OK to return to the Add Children window, shown on the previous
page. You can then add more children in the same way as described above
until you click Done. After you click Done, the Tree View is then redisplayed
showing the husband and wife.
97
98
Getting Started
Family Tree Builder User's Guide
Describing a Person
A simple way to start describing a person in your family tree is to double-click
on their card or on an empty Add Father, Add Mother or Add Child box.
Double-click
here to describe
this father
Double-click
here to describe
this person
Double-click
here to describe
this family
Double-click here to define
a son or a daughter
Whether you are adding a mother, a father, a spouse or a child to an existing
person, or adding a person unrelated to all others, the Add Person wizard is
shown.
Getting Started
Family Tree Builder User's Guide
The easiest way to define a new person in Family Tree Builder is to double-click
on their card in the Family Tree View. The following window is in displayed
enabling you to enter a variety of information for this person:
99
100
Getting Started
Family Tree Builder User's Guide
This window contains the following tabs for describing this person:
Main Tab, page 100.
Info Tab, page 103.
Physical Tab, page 108.
Contact Tab, page 109.
Citations Tab, page 110.
Notes Tab, page 111.
Facts Tab, page 112.
Main Tab – Describing a Person
The Main tab enables you to define basic information about a person, such as
their name, gender and information about their birth and death. If the person is
deceased, check the deceased checkbox and they will automatically be added
to the virtual cemetery.
You can click the Photos button to associate photos in the family tree with this
person, as described on page X.
Getting Started
Family Tree Builder User's Guide
You may click the Names button to display a window in which you can add
additional names of this person and/or various suffixes and prefixes to their
name, as shown below:
The name that you entered in the Main tab appears in the window above. In
this case, you can add additional information about that name in this window. If
you would like to add another name then click the Add Additional Name
button.
101
102
Getting Started
Family Tree Builder User's Guide
The top of the window indicates how many names were assigned to this
person. You can click on the right or left arrow, shown below, to browse
between the various pages of name information.
To add citation information about this name, click the Citations button. You
may refer to page X for more information about citations.
To add a note about this name, click the name Notes button. You may refer to
page X for more information about notes.
Getting Started
Family Tree Builder User's Guide
Info Tab – Describing a Person
The Info tab enables you to enter information about the occupation, education
and identification of this person.
You can enter information in any of the areas in the window and then press the
button, to display a window in which you can add more detail about this
information, such as the date, place, fact citations, fact notes and fact photos,
as shown below:
Fact Citations: For a description of what a citation is and instructions on
how to enter a citation, you may refer to page 137.
Fact Notes: For a description of what a note is and instructions on how to
enter a note, you may refer to page X.
Fact Photos: For a description of what a fact photo is, you may refer to
page X.
103
104
Getting Started
Family Tree Builder User's Guide
Fact Photo
Click the Fact Photo button to display the following window:
This window enables you to view or add a photo that is associated with the fact
that you are entering about this person.
This window operates in two modes, which are determined by the radio button
that is selected in the top left corner in the Select area. These are:
Associated Photos, as described on page X.
Browse Associated Photos, as described on page X.
Getting Started
Family Tree Builder User's Guide
Associated Fact Photos
This window appears as shown above when the Associated Photos option is
selected in the top left corner in the Select area. It enables you to associate a
photo with a specific fact.
Note
If you would like to view the photos associated with this fact
select the Browse Associated Photos option, as described
on page X
To associate a photo with this fact:
1
Browse to the list of photos in the area on the right. In the field above the
photos you can select to show all photos or only those not yet associated
with this fact about this person.
2
Click on a photo in the area on the right.
3
Click the <<Associate button to move this photo into the area on the left
called Associated Photos. All the photos listed in this area are associated
with this fact. This means that they are displayed when you view this fact.
Viewing Options
This window provides a variety of options for viewing the photos that have not
yet been associated, making it easy for you to select from them and associate
them with this fact.
Format
You can select the Table radio button in the Format area to display the photos
in the form of a table or the Thumbnail radio button to display the photos only
as thumbnails.
You can adjust the size of the thumbnails using the slider on the top right of the
window. Moving it towards the XXL (Extra, Extra Large) on the right side makes
the thumbnails larger and moving it towards the S (Small) on the left side
makes the thumbnails smaller.
105
106
Getting Started
Family Tree Builder User's Guide
View
Under the View area, you can click in the Photos checkbox to specify that only
photos are displayed, or in the Documents checkbox to specify that only
documents are displayed or in the Video/Audio checkbox to specify that only
video or audio files are displayed.
New
You can add new photos, documents, video files and audio files to this fact and
to your family tree.
To add one or more media, click on the New button to add a photo or on the
arrow on the right of the New button to display a dropdown menu that enables
you to select which type of media you would like to add to this fact, as shown
below:
You may refer to page X for a description of how to add new media.
Getting Started
Family Tree Builder User's Guide
Browse Associated Photos
This window appears as shown below when the Associated photos option is
selected in the top left corner in the Select area.
This option enables you to easily browse through all the photos associated with
this fact.
You can double-click on a photo to display it in more detail in the MyHeritage
Image Viewer, as described on page X.
The viewing options provided here are the same as those described on page x.
107
108
Getting Started
Family Tree Builder User's Guide
Physical Tab – Describing a Person
The Physical tab enables you to enter information on the physical appearance
and medical status of this person, as shown below:
Getting Started
Family Tree Builder User's Guide
Contact Tab – Describing a Person
The Contact tab enables you to enter information about the various ways of
contacting this person, as shown below:
One or more additional addresses may be entered by clicking the Additional
Address button.
The number of addresses that have been added is indicated at the top of the
window as shown below:
Tip
Family Tree Builder provies a report listing all the addresses in
your family tree, as described on page x.
109
110
Getting Started
Family Tree Builder User's Guide
Citations Tab – Describing a Person
Citations enable you to track and identify the source of your research.
The Citations tab enables you to enter citations information, as shown below:
You may refer to page 137 for more information about citations and how to use
them.
Getting Started
Family Tree Builder User's Guide
Notes Tab – Describing a Person
The Notes tab enables you to type in any information that describes this person
in free text, as shown below:
You may refer to page X for more information about notes and how to use them.
Tip
Before entering a note, check if Family Tree Builder provides a
fact type that suits the kind of information that you want to
enter, as described on page x. The reason is that Family Tree
Builder automatically displays these facts in many of its
windows, charts and reports.
111
112
Getting Started
Family Tree Builder User's Guide
Facts Tab – Describing a Person
The Facts tab enables you to enter facts about this person. Each type of fact
provides a list of fields for you to enter. Family Tree Builder automatically
displays these facts in many of its windows, charts and reports.
The top of the window shows a list of various facts about this person. Each time
you click on a row, more detail about this fact is shown at the bottom of the
window. You can also double-click on it to show this information in a separate
window.
Getting Started
Family Tree Builder User's Guide
The middle of the window provides all the details about the fact whose row is
selected in the top of the window and enables you to edit it.
The bottom of the window provides the following buttons:
: Enables you to add a citation for this fact. More details
about citations are provided on page x.
: Enables you to add a note about this fact. More details
about notes are provided on page x.
: Enables you to add a photo for this fact. More details about
photos are provided on page x.
: Displays a window in which you can define a new fact
about this person, as described on page X.
: Displays a window in which you can edit the facts about
this person.
: Deletes the selected fact.
: Sorts the facts in chronological order.
113
114
Getting Started
Family Tree Builder User's Guide
To define a new fact:
1
Click the New Fact button to display the following window:
2
Select a category of facts from the list on the left to display a list of facts of
that type on the right.
Getting Started
Family Tree Builder User's Guide
3
Select a fact from the list on the right or type in the name of a new type of
fact in the field on the bottom of the window and click OK. The new row is
then created in the facts table ready for you to enter more information. An
example is shown below:
115
116
Getting Started
Family Tree Builder User's Guide
Expanding the Family
After you have defined information about this first family, as described on page
x, you can start defining information about each person in the family, as
described on page x.
You can also extend the family tree by adding people to the family group you
just created. You can branch out in any direction by adding parents,
grandparents, brothers, sisters, grandchildren and so on.
A variety of options are provided for adding members to you family tree,
including the following:
Double-Clicking on an Empty Family Card, page 116
Right-clicking on a Person’s Card, page 118
Using the Add Person Button, page 119
Defining New Children in the Family Tree, page 120
Adding an Existing Child to a Family, page 122
Adding Another Family, page 123
Double-Clicking on an Empty Family Card
When you define a new family, card is automatically created for a husband, wife
and a child. You can add a member to this family by double-clicking on an
empty card that represents the relevant relation to the people displayed, as
shown below:
Getting Started
Family Tree Builder User's Guide
117
Double-click
here to describe
the father of the
husband
Double-click
here to describe
this person
Double-click
here to describe
this family
Double-click here to
describe this child
box to display a
For example, you can click on the
window that walks you through the process of defining a child of these parents.
More details are provided regarding defining a child on page X.
The same goes for adding a mother or father for either the husband or the wife
displayed in this window.
118
Getting Started
Family Tree Builder User's Guide
Tip
To add a brother or sister to either the husband or the wife,
simply double-click on one of their parents. That husband or
wife then becomes a child of those parents and you can define
additional children for that parent, who are, of course, their
siblings.
Right-clicking on a Person’s Card
You can right-click on a person’s card to display numerous options that enable
you to add parents, siblings, spouses and other relations to this person.
Using one of the options that starts with the word Attach associates a person
that is already defined in Family Tree Builder as your relation. In this case, all
the other people to whom this person is related are your relations also.
Getting Started
Family Tree Builder User's Guide
Using the Add Person Button
Click the small arrow to the right of the Add Person button to display a drop
down list that enables you to add various relations to the people currently
displayed in the tree, as shown below:
119
120
Getting Started
Family Tree Builder User's Guide
Defining New Children in the Family Tree
The visual aspects of the main Family Tree Builder window make it easy to
define children and parents. This section describes how to define a child in a
family, and you can add parents in a similar manner.
Tip
To add a brother or sister, define them as the children of the
same parent.
Adding
a Child
Family details always appear under the husband and wife cards. It shows
details of their marriage and indicates the number of their children. It also
provides an Add Child option.
Tip
You can also add children in the Edit Family window, as
described on page x.
Getting Started
Family Tree Builder User's Guide
To add a child:
1
Click on the Add Child option or double-click in the white box at the bottom
of the tree that contains the text Add Children to display the following
window:
2
Fill in the fields of this window as you wish. You may click the More Details
button to open a window in which you can enter a rich variety of information
describing this person as described on page X.
121
122
Getting Started
Family Tree Builder User's Guide
Adding an Existing Child to a Family
If you have already defined a person in Family Tree Builder that is the child of
the parents, then it is quite easy to drag and drop that person from the People
List into the family tree of his or her parents. As shown below:
Select the
Child
Drag
the child
to here
To add an existing child:
1
Select the child's name in the People List on the left.
2
Drag the child into the white Add Children box at the bottom of the window.
Getting Started
Family Tree Builder User's Guide
Adding Another Family
You can define another husband and wife team by selecting the Add Unrelated
Family option from the Family menu. Later you can attach one of these people
to another family by right-clicking on a specific person and selecting any of the
many Attach options. The following shows an example of the Attach Parents
option.
Tip
The right-click options also provide a variety of ways to add
family members, such as the Add Spouse, Add Parent, Add
Child options, as described starting from page x.
123
124
Getting Started
Family Tree Builder User's Guide
Editing Information
Family Tree Builder is quite flexible and will enable you to edit any information
that you have entered at any time. The main components that you may wish to
edit are:
Editing a Person, page 125.
Editing a Family, page 126.
Editing a Photo, page X.
Getting Started
Family Tree Builder User's Guide
125
Editing a Person
You can reach the detailed information entry page of a specific person in
several ways:
Click the More Details button in the Add Person wizard.
Double-click the person’s card in Tree View.
Click the Edit button on a person card.
Right-click a person’s card and select Edit Details.
Double-click on a
Person’s Card to edit
their information
A window opens in
which you can enter
or modify information
and photos about
this person
126
Getting Started
Family Tree Builder User's Guide
Editing a Family
The simple-to-use interface provided by Family Tree Builder enables you to
double-click on the small box situated between the husband and wife of a family
, in order to edit any information about this family.
Double-click here to edit the
family’s information.
A window opens in
which you can enter
or modify information
and photos about
this family, as
described on page x.
Getting Started
Family Tree Builder User's Guide
The Edit Family window is comprised of various tabs, each which enables you
to enter different kinds of information about the family as a unit, as follows:
Main Tab, page x.
Children Tab, page x.
Citations Tab, page x.
Notes Tab, page x.
Facts Tab, page x.
Main Tab - Defining the Husband and Wife
The Main tab enables you to describe the husband and wife who represent the
center of this family and to enter details of their marriage. Entering the maiden
name of a woman (meaning her surname before her marriage) enables Family
Tree Builder enrich the connections in your family tree.
To enter a date, either type it into the field or click on the Date icon
that
appears on the right of each date field. Family Tree Builder provides a rich
variety of options for entering dates or ranges of dates, as described on
page 137.
127
128
Getting Started
Family Tree Builder User's Guide
Children Tab - Defining the Children
The Children tab enables you to define the children of this primary husband
and wife. The children that were already defined for this couple are listed at the
top of the window.
The top of the window lists the children that have already been defined and
provides a brief summary of their information.
The middle of the window provides all the details about the child whose row is
selected in the top of the window and enables you to edit it. The Relationship
field may be of particular interest in the case of adopted or step-children and
such.
Getting Started
Family Tree Builder User's Guide
The bottom of the window provides the following buttons:
: Displays a window in which you can define a new person who
will be a child of these parents.
: Displays a list of family tree members from which you can
select the child to attach.
: Detaches the selected child.
: Select the row of a child and click the up or down arrow button to
move the child up or down in the list.
: Click this button to sort the children in chronological order.
129
130
Getting Started
Family Tree Builder User's Guide
Citations Tab – Defining Citations
Citations enable you to track and identify the source and repositories that you
used in your research. The Citations tab enables you to enter citation
information, as shown below:
You may refer to page x for a description of citations and how to use them.
Getting Started
Family Tree Builder User's Guide
Notes Tab – Defining Notes
The Notes feature in Family Tree Builder enables you to enter free text that is
displayed about this family. You can type in the text or copy and paste it from
any source into the Notes window, which is shown below:
131
132
Getting Started
Family Tree Builder User's Guide
The top of the window indicates how many notes were assigned to this person.
You can click on the right or left arrow shown below, to browse between the
various pages of notes information.
To clear the note, simply display the Notes page, and click Clear Note button.
If you would like to add another note, then click the Add Additional Note
button.
If you would like to add a citation for this note, then click the Note Citation
button. Citations are described on page x.
Getting Started
Family Tree Builder User's Guide
Facts Tab – Defining Facts
The Facts tab enables you to enter various facts about this family. A variety of
categories of facts are provided and each fact has different fields, enabling you
to enter information that is relevant to this fact, as shown below:
The procedure for entering a fact about a family is similar to entering a fact
about a person, as described on page x.
133
134
Getting Started
Family Tree Builder User's Guide
GEDCOM and Family Tree
Builder
GEDCOM, an acronym for GEnealogical Data COMmunication, is a
specification for exchanging genealogical data between different genealogy
software.
MyHeritage provides a rich variety of visual interface features, media handling
features, information authoring and display options that represents a significant
improvement over the GEDCOM’s specification.
You can start your new genealogy project on Family Tree Builder in two ways:
Create a new project, or
Import a project from an existing GEDCOM file. Typically, this will be a
GEDCOM file that you have exported from other genealogy software.
Note
Tip
In Family Tree Builder, the main storage unit for your work is
a Project. A Project is equivalent to a single GEDCOM file,
plus all related photos, documents and files.
Alternatively, you can use the Quick-Start Wizard option in
the File menu to import, export or load a GEDCOM project.
To Import an Existing GEDCOM File
It is possible to start working on your genealogy project with Family Tree
Builder by importing your data. You can import a GEDCOM file exported by
another genealogy application to start a new project, or merge its contents
into the currently open project.
Getting Started
Family Tree Builder User's Guide
To import your data to Family Tree Builder:
1
Start by selecting Import GEDCOM from the File menu.
2
Browse and choose the GEDCOM file that you wish to import.
3
Choose a Primary Language for your project. This should be the language
that the GEDCOM was created in.
4
Fill out the GEDCOM configuration page, as shown below:
135
136
Getting Started
Family Tree Builder User's Guide
We have tested the GEDCOM Import feature on over 5,000 family trees
downloaded from the Internet. This was necessary because many genealogy
products do not adhere precisely to the GEDCOM format, or, suffer from
inconsistencies that exist within the format itself. We do our utmost to recover
your data as faithfully as possible and believe we have developed the most
accurate GEDCOM import functionality available. However, there are always
new issues found with this capability, so if you notice errors or deficiencies that
occurred in the import procedure, send us the details so that we may further
improve the import process.
Tip
Tip
Tip
Tip
We support the importing of media files and documents
referenced by a GEDCOM file, including photos. However,
some genealogy products reference them using proprietary
non-GEDCOM tags. If your photos are not imported
correctly, please send us your GEDCOM file for us to fix this.
Advanced users may view a report produced at the end of
the import, showing which unexpected tags were found in
your file and how they were handled.
We support a GEDCOM import from Dorotree, even of
bi-lingual family trees (for example English and Hebrew).
The ability to merge a GEDCOM file into a current project is
done only partially. Currently the import will not be done in
full. There is still no functionality to compare, side by side,
your existing family tree and the one in the imported
GEDCOM, where you are asked to pick which specific
records you wish to import and which ones to reject. This
functionality is planned for a future release.
Getting Started
Family Tree Builder User's Guide
Entering Dates
Family Tree Builder provides a rich variety of options for entering dates or
ranges of dates. Many of the features will provide automated benefits in Family
Tree Builder, such as the ability to see a list of people sorted by their birth date,
graduation date and so on. You are also able to see the events of a person’s
life listed chronologically.
To enter a date, either type it into the field using any format that you like (free
text) or click on the date icon
that appears on the right of each date field.
The following window is then displayed:
If you would like to enter an exact date, simply make your selections from the
Month and Day fields and type the year in the Year field.
You can also use the visual calendar in the top right of the window to click on
the date of your choice. The date you select will also be shown in the Month
Day Year fields.
137
138
Getting Started
Family Tree Builder User's Guide
Date Field
The date that you specify can be quite flexible. It can be the exact date as
described above, or an approximation. If you are not sure of the exact date
select Before, After, About, ? or Calculated options to indicate approximately
when the event took place.
The ? option is an indication that you are not sure when it happened.
The Calculated option is an indication that you calculated this date. For
example by saying that your grandmother was 70 years old when she died in
1985 and therefore may have been born in 1916.
The Period options are typically used to specify an event that took place over a
period of time such as university studies.
The options for entering a date in this window change according to the selection
that you type in the field as shown below:
Free Text
Single Date
Getting Started
Family Tree Builder User's Guide
Free Text
Date within Range
Period (Start to End)
Period Start
Period End
139
140
Getting Started
Family Tree Builder User's Guide
You may check the After Sunset check box to indicate that this is a when the
event occurred. This option is relevant when entering dates using the Hebrew
Calendar.
Hebrew and French Revolution Calendars
This window also enables you to click on the Hebrew Calendar button or the
French Revolution Calendar button at the bottom of the window in order to
display the required calendar. You can then make your selections in this
calendar in this the same way as in the Standard Calendar.
If you like, you can convert this date into the corresponding date in the standard
calendar by clicking the Convert button.
Getting Started
Family Tree Builder User's Guide
Citations
Citations enable you to identify the sources and repositories that you used for
your research.
Family trees are richest when they contain numerous citations, specifying the
reference of the information in the family tree to a specific source document
located in a repository such as a library. A source can be a variety of entities
such as a bible, newspaper clipping, tombstone photo, interview transcript or
letter. The citation is the reference to the specific place in that source that
verifies the relevant information in the family tree.
Family Tree Builder supports the full GEDCOM specification that pertains to
sources, notes and citations. These elements are supported recursively, so that
you can add a note to a person, associate that note with a citation that ties it to
a source, add another note on that specific citation, and so on. You can also
assign notes to specific events in the person’s life, or to one of his/her names,
instead of assigning them to the person as a whole.
141
142
Getting Started
Family Tree Builder User's Guide
To define a citation:
1
The Citation window is displayed when you click on the Citation button in
any of the Family Tree Builder windows, as shown below. It is also one of
the tabs available when defining a person or family. The name of this button
may differ between windows and may be called Citation Notes or Name
Citations and so on.
Getting Started
Family Tree Builder User's Guide
2
The first step when defining a new citation is to specify the source to which
this citation is referencing, such as the name of a book. If the source has
already been defined in this project, simply select it from the Source field.
Otherwise, click the New button to define it as shown below, or use the Edit
button to modify it.
143
144
Getting Started
Family Tree Builder User's Guide
3
Enter information describing the source in this window and define the
repository (such as the name of the library or database) in which the source
is located, if required. If the repository already exists, you can select it from
the Repository field. You can click the Add New Repository button to
display the following window in which you can define a new repository:
Notes can be allocated as a source or a repository by clicking on the
Source Notes or the Repository Notes buttons accordingly. Notes are
described on page x.
Handling Photos and
Other Media
Chapter 4
Handling Photos and
Other Media
146
Handling Photos and Other Media
Family Tree Builder User's Guide
Chapter 4
Handling
Photos and Other Media
About This Chapter:
This chapter describes how to add, annotate and automatically
mark faces in photos and how to use documents and audio/video
files to enrich your family tree. It contains the following sections:
Overview, page 148, describes Family Tree Builder’s powerful photo
handling tool.
Media Types, page 150, describes how to enter a variety of types of
information and to associate various types of media with this information.
Photos in Tree View, page 151, describes how to edit a photo in the Tree
View.
Photos View, page 152, describes a variety of options for viewing the
photos, associating photos with people and facts and adding information
about photos.
Handling Photos and Other Media
Family Tree Builder User's Guide
Photos People List, page 154, lists the people that you have defined in
Family Tree Builder.
Photos List, page 156, shows all or some of the photos defined in Family
Tree Builder according to your specification.
Adding New Photos, page 169, enables you to add photos, documents,
video files and audio files to your family tree.
Editing a Photo, page 173, enables you to benefit from the wonderful
photo features provided by Family Tree Builder.
Viewer Window, page 188, displays a large view of the photo, its name,
place and date and provides a list of the people that are marked in it.
Photos Menu Bar, page 190, describes the menu options that only appear
in Media View.
Virtual Cemetery, page 192, describes the virtual cemetery in Family Tree
Builder that enables you to view all the photos, documents and audio/video
files associated with a death, funeral or tombstone.
147
148
Handling Photos and Other Media
Family Tree Builder User's Guide
Overview
Powerful photo handling is one of the strongest and most helpful features of
Family Tree Builder. This special feature, created by MyHeritage, represents a
significant improvement of GEDCOM’s specification for photos. For more
information about Family Tree Builder and GEDCOM, you may refer to page x.
Photos are invaluable for genealogy research and help bring a family tree to
life. By scanning old photos, adding them to your project on Family Tree Builder
and properly annotating them, you will treasure your family’s history and enable
your family, relatives and friends to enjoy these photos in more ways than you
may have thought possible.
Adding old photos will most likely also benefit your research, because they can
often jog the memory of older relatives and lead to the discovery of information
that cannot be found elsewhere.
Note
The term photo and media may be used interchangeably in
this chapter. Media may refer to a photo, document file or
audio/video file.
Family Tree Builder photo handling features enable you to:
Add a photo just once and then associate it with a variety of relevant entities
in Family Tree Builder so that they are displayed together, such as:
elements in the family tree, a person, a family, personal facts, family facts
and more.
Navigate according to the photos of interest, including tooltips that show a
photo and a summary of relevant information. For each person, a Personal
Photo is displayed if one was specified. Otherwise, an anonymous
silhouette is shown. We found that it is much more intuitive to navigate
inside a family tree when photos are displayed for each individual,
especially if you are highly familiar with that family tree. This intuitive
navigation is one of the most useful capabilities of Family Tree Builder.
Handling Photos and Other Media
Family Tree Builder User's Guide
Mark where a person’s face appears in a photo in order to teach the system
to whom each face belongs. This is particularly useful for group photos,
which contain more than one person, in order to indicate exactly where
each person is. This is much better than a textural description, such as:
Grandma is the 14th person on the right, on the 6th row from the bottom.
Designate any marked face as a Personal Photo of a person, meaning that
it will become a face thumbnail representing that person that will appear in
the Tree View and in various reports. This saves having to use or create a
separate image for the thumbnail.
This is an improvement over other genealogy products that can only specify
a specific person’s photo as primary and show it in reduced size. In these
products, photos often include more than just the face, such as a full body
shot, which when reduced, becomes an unidentifiable miniature. This is not
the case in Family Tree Builder.
View both sides of a scanned photo as a single entity. Old photos often
have important inscriptions and dedications on their reverse side. Family
Tree Builder is the first to enable you to associate a scan of the reverse side
with the front side of each photo, instead of treating them as separate
photos.
Run powerful photo queries. For example to show all of the photos taken
where I am with my grandfather Jesse, or to show all the photos taken in
Bialystok (or a place that sounds like that using DM Soundex) in the 1930’s,
or to display all the photos showing my great-uncle Bob or any of his
descendents.
149
150
Handling Photos and Other Media
Family Tree Builder User's Guide
Media Types
Family Tree Builder enables you to enter a variety of types of information, as
described throughout this manual, and to associate various types of media with
this information: photos, documents (such as a Word file or a PDF of a scanned
birth certificate) and multimedia (audio/video). Some examples of how media
files may appear in Photos View are shown below:
Document
Photo
Audio/Video
Handling Photos and Other Media
Family Tree Builder User's Guide
151
Photos in Tree View
Double-clicking on a photo in the Tree View enables you to edit that photo, as
described on page x.
You can double-click
here to edit
information about
this photo.
Note
If no Personal Photo is defined, then this person appears as
a silhouette:
Double-clicking on a silhouette of a person in the Tree View or clicking on the
Add button under it opens a wizard in which you can add a new photo, as
described on page x.
Note
If no Personal Photo has yet been defined for a person, then
you are asked whether you want to define the current photo
as a Personal Photo, as described on page x.
152
Handling Photos and Other Media
Family Tree Builder User's Guide
Photos View
Photos View provides a variety of options for viewing the photos, associating
photos with people and facts and adding information about photos.
To view and manage photos:
Click on the
button in the toolbar. The Photos View window is
displayed, as shown below:
Query
Options
Quick
Find
Options
People
List
Photo
Display
Options
Photo
Handling
Options
Photos
List
Handling Photos and Other Media
Family Tree Builder User's Guide
This window contains the following areas:
People List, page x, lists all the people that you have already defined in
Family Tree Builder and enables easy access to their photos.
Photos List, page x, lists photos according to your request. It may show all
the photos defined in Family Tree Builder, all the photos that are associated
with a person or any other filtered list of photos that you specify by
indicating in what or in whom you are interested.
Quick Find Options, page x, enables quick access to a photo according to
a person’s name.
Photo Handling Options, page x, enables you to add photos, edit
information, mark faces and to view or delete photos.
Photo Display Options, page x, enables you to control how photos are
displayed in this window.
Query Options (Advanced Find), page x, provides advanced options for
finding photos in Family Tree Builder.
153
154
Handling Photos and Other Media
Family Tree Builder User's Guide
Photos People List
The People List in Photos View lists all the people that you have defined in
Family Tree Builder. It behaves in the same way as the People List that
appears in Tree View, which is described in Chapter 3, A Quick Tour on
page 81.
To display all the photos that are associated with a
specific person:
Double-click on a person’s name in the People List to display all the photos
that are associated with that person.
Note
Instructions for associating a photo with a person are
provided on page x.
Handling Photos and Other Media
Family Tree Builder User's Guide
The following shows the options available by right-clicking on a person the
People List:
Display in Family Tree: Displays this person in the center of the family tree
in Tree View, as described on page x.
Manage Photos: Displays Photos View, as described on page x.
Associate With Photo: Associates this person with the selected photos, as
described on page x.
Associate Fact With Photo: Opens the Select Fact window from which
you can select a fact that was associated with the selected person and
associate it with the selected photo, as described on page x.
Associate Virtual Cemetery with the Photo: Puts the selected photo into
the virtual cemetery of the selected person, as described on page x. For
more information about the virtual cemetery you may refer to page x.
Charts: Displays a chart of ancestors or descendants of the selected
person, as described on page X.
Reports: Generates a variety of reports, as described on page x.
Research Family Name/Research Full Name: Enables you to research
this name using MyHeritage’s research feature, as described on page x.
Relation to Person’s Name: Displays a window which describes the
relationship between the selected person and the Home person, as
described on page x.
Relation To: Displays a window in which you can select a person in order
to see the relationship between that person and a person that you select.
155
156
Handling Photos and Other Media
Family Tree Builder User's Guide
Photos List
The Photos list is displayed in Photos View when the Photos button is
selected. It shows all the photos defined in Family Tree Builder or
only the photos relevant to the current person or family, or
only the photos that match the options that you have specified, for example
in the View field.
Tip
Double-click on a person in the People List to display all their
photos.
Photos are initially listed in a table in chronological order, starting from the
oldest at the top.
Handling Photos and Other Media
Family Tree Builder User's Guide
To sort photos by column name:
You can click on any column name to sort the photos. For example if you
click the Title column, the photos will be sorted by their title, as shown
below:
157
158
Handling Photos and Other Media
Family Tree Builder User's Guide
Photos Display Options
The following describes a few of the options that enable you to control how and
which photos are displayed in Photos View:
Photos Views
The View field enables you to select from any of the values in its dropdown
menu, in order to specify which photos are displayed.
Viewing
Options
The following types of options may be available:
All: Shows all the photos in your family tree.
Virtual Cemetery: Shows all the photos that have been assigned to
MyHeritage’s virtual cemetery, as described on page x. These typically are
photos relating to death, funerals or tombstones.
Recently Added Items: Shows all the media items that were added in the
last session (since the last time you logged in).
Saved Search Results: Shows the searches that you have defined in the
Query tab and saved, as described on page x.
Handling Photos and Other Media
Family Tree Builder User's Guide
159
Photos Type Display
This section of the window enables you to define what types of media are listed
in the window.
To specify the media type display:
Under the View field, you can click in the Photos checkbox to specify that
only photos are displayed or in the Documents (Word, PDF and so on)
checkbox to specify that only documents are displayed or in the
Video/Audio checkbox to specify that only video or audio files are
displayed.
Check
Boxes
160
Handling Photos and Other Media
Family Tree Builder User's Guide
Photos Format Display
To specify the photos format display:
You can select the Table radio button in the Format area to display the
photos as a table, or the Thumbnail radio button to display the photos as
thumbnails, as shown below:
Table
Thumbnails
The table then displays the name of the media, associations, media type,
date, place and so on.
Handling Photos and Other Media
Family Tree Builder User's Guide
To adjust the size of the thumbnails:
You can adjust the size of the thumbnails using the slider on the top right of
the window. Moving it towards the XXL (Extra, Extra Large) on the right side
makes the thumbnails larger, and moving it towards the S (Small) on the left
side makes the thumbnails smaller.
To mark identified faces:
You can click the Show Marked Faces checkbox to mark the faces
identified in each photo, as shown above. Each person has one Personal
Photo that is shown to represent them in various situations in Family Tree
Builder, such as in the Tree View. By default, the photo that contains this
Personal Photo marks the face in a blue rectangle. Other occurrences of
that person’s face are marked by a red rectangle.
161
162
Handling Photos and Other Media
Family Tree Builder User's Guide
To display more information:
1
When thumbnails are displayed, you can hover over a photo to display a
larger photo image and more textual information, as shown below:
2
You can also double-click on the photo to display it in the MyHeritage Image
Viewer that provides various display options, as described on page x.
Handling Photos and Other Media
Family Tree Builder User's Guide
Sorting Photos
You can click on a column header to sort the photos accordingly.
Click here
to sort the
photos by
their Title
Quick Find Options
The Quick Find area above the People List enables quick access to a photo
according to a person’s name. You may refer to page x for a description of this
feature, which is the same as in the Tree View.
The People List also enables you to sort this list by first name, last name,
birthday date, death date, relation and more. Click on a person in the list to
show their photos.
163
164
Handling Photos and Other Media
Family Tree Builder User's Guide
Photos Handling Options
The following buttons enable you to add, edit, view or delete photos:
New: Opens a wizard in which you can add a new photo or any other media
to Family Tree Builder, as described on page x.
Edit: Opens the Edit Photos window in which you can define various
characteristics of the photo, as described on page x.
View: Opens the MyHeritage Image Viewer that provides various display
options, as described on page x.
Delete: Removes the selected photo from Family Tree Builder.
You can also right-click on a photo to display the following menu:
This menu provides the following additional option:
Associations: Displays the other people with which this photo was
associated. You may select a person from this list to display them at the
center of the Tree View, as described on page x. You may also refer to
page x for a description of how to define associations. You can then click
the Back button in the toolbar to redisplay the Photos List.
Handling Photos and Other Media
Family Tree Builder User's Guide
165
Query Options (Advanced Find)
Provides advanced options for finding photos in Family Tree Builder. Select the
Query tab at the top of the window to display the following window:
To find a photo or another type of media:
1
Specify the criteria of the media to be found.
2
One easy way is to drag one or more people from the People List into the
People/Families area in the center of the window.
Drag a person from
the People List
to here, to include
them in the query
Click Run Query to
display these
photos
166
Handling Photos and Other Media
Family Tree Builder User's Guide
3
Click the Run Query button. A list of images is then displayed that match
the criteria that you specified, as shown below:
Handling Photos and Other Media
Family Tree Builder User's Guide
Another way is to fill out this window as described below:
1
Click on the arrow to the right of the Select button to select whether you are
interested in photos associated with a person or a family.
2
Click the Select button to display a list of people or families according to
your selection in step 1 above. The list of the people or families that you
select then appears in the list.
3
Under the list of people or families specify whether all, any or the
descendants of the people or families that you select here should be found,
as follows:
4
▪
All: All the people or families listed in the People/Families field are in
the photo.
▪
Any: Any of the people or families listed in the People/Families field
are in the photo.
▪
Descendants: The descendants of the people or families listed in the
People/Families field will also be included.
In the Photo Information area, specify the photo information of interest.
Specify the Title, Date and/or Place of the photo. A variety of options are
provided to clarify which type of information you want, as shown below:
You may of course use the
on page x.
button to specify the date(s), as described
167
168
Handling Photos and Other Media
Family Tree Builder User's Guide
5
In the Fact Associated with Photo area, specify information about the
facts that were entered about the photo. Specify a fact that is associated
with this photo by selecting the arrow next to the Select button, select
Person or Family and then select the person or family from the displayed
window and click Select. The Fact field will then provide a list of the facts
available about this person or family for your selection, as shown below:
6
Optionally, you can save this definition for future use by clicking the Save
button. This saved query is then available for redisplay in the View area of
the Photos View, as shown below:
7
Click the Run Query button to display a list of photos that match the criteria
that you defined here.
Note The Manage Saved Queries button in the top right of the
window indicates how many queries where saved (for
means that two queries
example
were saved). Clicking it opens a window that enables you
to define the order in which queries appear in the View
field, to rename or to delete queries.
Note If you click the Clear button, then the current query
definitions in the window are erased.
Handling Photos and Other Media
Family Tree Builder User's Guide
Adding New Photos
Family Tree Builder enables you to add photos, documents, video files and
audio files to your family tree.
To add one or more photos:
1
Click the dropdown arrow on the right side of the
button, as
shown below, and select the relevant option to add the required media.
169
170
Handling Photos and Other Media
Family Tree Builder User's Guide
Clicking the
button assumes that you want to add a photo. The
following window is displayed:
Handling Photos and Other Media
Family Tree Builder User's Guide
2
Click the
the following:
button to display a File Selection window, such as
171
172
Handling Photos and Other Media
Family Tree Builder User's Guide
3
Select a file and click
. You also have the option to select
multiple files to be added using the Ctrl and Shift keys on your keyboard
button. The selected file(s) are then
and then click the
displayed in the wizard in a list, as shown below:
4
Click Next to display a success window and then click Finish. These photos
have now been added to your Family Tree Builder project. After you add a
photo, you can then enter more information about it, as described in the
section that follows on page x.
Note
The last window of the Add Photo wizard contains the Edit
the details of the photo now field which is automatically
selected to indicate that the Edit Photo window described in
this section opens by default.
Handling Photos and Other Media
Family Tree Builder User's Guide
173
Editing a Photo
Editing a photo in Family Tree Builder enables you to benefit from the wonderful
photo features provided by Family Tree Builder.
The Edit Photo window, shown below, is either displayed:
Automatically after you finish adding a single photo.
When you double-click on a photo in Photos View or Tree View.
When you select a photo and click the Edit button.
Photo
Information
People
List
Marked
Face
Status
Bar
Photo Zoom Tools
The Edit Photo window provides a number of tabs that enable you to handle
the photo and associate information with it.
174
Handling Photos and Other Media
Family Tree Builder User's Guide
This window contains the following areas:
People List, page x, lists all the people that you have already defined in
Family Tree Builder and enables easy access to their photos.
Photo Information, page x, provides a number of tabs in which you can
specify information about the photo.
Photo Zoom Tools: The following tools are provided for manipulating the
display of the photo in this window, as follows:
▪
Zoom In
▪
Zoom Out
▪
Fit to Window
: Resizes the display of the photo so that all of it is
displayed in the current window size. If you enlarge the window, the
photo will adjust its display size accordingly.
: Enlarges the view of this photo.
: Reduces the view of this photo.
Status Bar: Shows the file type of the photo, its size in pixels and the
percentage of its size at which it is displayed.
Handling Photos and Other Media
Family Tree Builder User's Guide
Photo Information
At the top of the Edit Photo window, above the photo, tabs are provided for
entering information about the photo, as shown below:
Info Tab
The Info tab, as shown above, enables you to enter the name of the photo that
will appear under it wherever it appears in Family Tree Builder, along with the
date it was taken and the place where it was taken.
Note
You may refer to page x for a description of the special date
entry features provided in Family Tree Builder.
175
176
Handling Photos and Other Media
Family Tree Builder User's Guide
Associations Tab
The Associations tab, as shown below, enables you to connect between
people in the People list and various types of media, so that you can easily
view all the media relating to a specific person or family.
The list in the center shows the people, families or facts that have already been
associated with the selected media. An icon to the left of each indicates to what
it is associated, as follows:
: Indicates a person.
: Indicates a fact.
: Indicates the virtual cemetery.
: Indicates a family.
Handling Photos and Other Media
Family Tree Builder User's Guide
To associate a person with this photo, do one of the
following:
Either:
▪
Right-click on the relevant person(s) in the People List and select
Associate with photo, as shown below:
▪
Select the relevant person(s) in the People List and click the Associate
button.
▪
Click on the arrow to the right of the Associate button and select
Person.
▪
Drag the person from the People List and drop it onto the photo. If a
face was identified, you can drop it into the relevant green rectangle.
Note
For more information about marking a face, you may refer to
page x.
177
178
Handling Photos and Other Media
Family Tree Builder User's Guide
Note
Once a person is associated with a marked face, a red
rectangle marks that person’s face.
Associating Media
You can associate a media with a variety of items by clicking the arrow to the
right of the Associate button, as shown below:
Person: Selecting this option opens a list of people with whom you can
associate this photo.
Fact of Person: Selecting this option first displays a list of people from
which you can select. After selecting a person, the window below is
displayed. In this window you can select a fact about that person to
associate with this media. You can also define a new fact for that person, if
required. You may refer to page x for a description of how to define facts.
Handling Photos and Other Media
Family Tree Builder User's Guide
Virtual Cemetery of person: Adds this media to the Virtual Cemetery
of this person which can be displayed, as described on page x.
Note
Adding a photo to the Virtual Cemetery of a person is
equivalent to associating the photo to the Burial fact of this
person.
Family: Selecting this option displays the following window in which you
can select a family with which to associate with this media.
179
180
Handling Photos and Other Media
Family Tree Builder User's Guide
Fact of Family: Selecting this option first displays a list of families for your
selection. After selecting a family the window below is displayed. In this
window you can select a fact of that family to associate with this media. You
can also define a new fact for that family, if required. You may refer to page
x for a description of how to define facts.
Handling Photos and Other Media
Family Tree Builder User's Guide
Face Recognition - Marking a Face
Family Tree Builder enables you to mark specific faces in a photo and to
associate this marking with a specific person. This is very useful, for example,
in group photos like the one shown below. After a person’s face has been
marked, when you hover over it, a tooltip is displayed with that person’s name.
Family Tree Builder also provides a wonderful feature that automatically
identifies faces in a photo. Faces that are automatically identified are marked by
a green rectangle. This option is turned on by default or it can be turned off/on
in the Options tab, as described on page x.
181
182
Handling Photos and Other Media
Family Tree Builder User's Guide
You may click the
button on the bottom right of the Edit Photos window to
display a legend reminding you that:
Automatically identified photos are highlighted by a green
rectangle, as described above.
Manually marked faces in photos are highlighted by a red
rectangle, as described on page x.
The face in a photo that you marked as the Personal Photo is
highlighted by a blue rectangle.
Photos: Family Tree Builder enables you to assign a
Note Personal
single picture to each person in order to represent them
wherever possible, such as in a report, in a thumbnail that is
displayed when you hover over a person, in a list or when they
are shown in Tree View. Typically, this photo should be a
portrait of their face. You may refer to page x for instructions on
defining a person's personal photo.
The Show Marked Faces button toggles the face markings on and off so that
they are visible or not, but they are still marked even when they are not visible.
Handling Photos and Other Media
Family Tree Builder User's Guide
To mark a face:
1
Select the name of the person in the Association list. If that person does
not exist in the list, then add him or her, as described on page x.
2
Click the
3
Drag and draw a box around the person’s face.
4
You can then resize or move the box as necessary.
Note
5
button. The cursor becomes a crosshair.
The little white boxes on the Mark Face rectangle are called
handles, and they indicate which box is selected. You can
click on them and drag them to resize the box.
Click the
button to specify that a specific photo is the
Personal Photo of that person, which will represent that person in various
places in Family Tree Builder, such as in Tree View. The box is then
displayed in blue. The dimension of a Personal Photo always retains the
height/width proportions of 4x3 and thus will force the shape of the
rectangle to these proportions.
183
184
Handling Photos and Other Media
Family Tree Builder User's Guide
Photos Notes Tab
The Notes tab, as shown below, enables you to enter notes describing the
photo.
Handling Photos and Other Media
Family Tree Builder User's Guide
Reverse Side Tab
Old photos often have important inscriptions and dedications on their reverse
side. An example of the tooltip that is displayed with a reverse side when you
hover over a photo is shown below:
185
186
Handling Photos and Other Media
Family Tree Builder User's Guide
Family Tree Builder is the first to enable you to associate a scan of the reverse
side with the front side of each photo, instead of treating them as separate
photos.
To define a reverse side:
1
Click the Select button. A file selection window is then displayed.
2
Select a file of the reverse side and click Select.
Once a reverse side is defined, you can click View to open the photo in the
MyHeritage Image Viewer, as described on page x, or click the Delete button to
delete the reverse side definition with this media.
Handling Photos and Other Media
Family Tree Builder User's Guide
Options Tab
The Options tab provides the following options:
This image is a scanned document: Check this option when the media
file is in a format that may be used for a photo (such as JPEG or TIF) even
though it is a scanned document.
Turn off automatic face detection for this photo: Check this option to
turn off automatic Family Tree Builder face detection, which is described on
page x.
187
188
Handling Photos and Other Media
Family Tree Builder User's Guide
Viewer Window
The Image Viewer window can be displayed by performing one of the following
actions:
Clicking the View button in Photos View.
Right-clicking on a photo and selecting View.
This displays a large view of the photo, its name, place and date and provides a
list of the people that are marked in it on the right, as shown below:
Handling Photos and Other Media
Family Tree Builder User's Guide
These tools enable you to browse though the images listed in Photos View and
provide various display options, as follows:
: Jumps to the first image listed in Photos View.
: Jumps to the previous image listed in Photos View.
: Jumps to the next image listed in Photos View.
: Jumps to the last image listed in Photos View.
: Zooms out the image making its display smaller. The relative size of the
image that is displayed in the window (for example 30%) is shown on the
bottom right of the window.
: Zooms in the image making its display larger. The relative size of the
image that is displayed in the window (for example 150%) is shown on the
bottom right of the window.
: Displays the image in its actual size, meaning 100%.
: Prints the image.
: Sets this image as the background for your desktop (also called
wallpaper).
: Toggles on and off the display of the Image Information panel that
shows the image’s name, place and date, and provides a list of the people
that are marked in it on the right. You can click the arrow on the right of this
tool to specify that the image information is displayed on the top, bottom,
right or left of the image or whether it is a floating (separate) window.
The menu options provided in the MyHeritage Image Viewer perform the same
functions as above with a few simple and clear additions.
189
190
Handling Photos and Other Media
Family Tree Builder User's Guide
Photos Menu Bar
The Photos mode in MyHeritage provides additional menus:
Photos Menu, as described on page 190.
Query Menu, as described on page 191.
Photos Menu
The following describes each of the options in the Photos menu:
Edit: Opens the Edit Photo window in which you can define various
characteristics of the media, as described on page x.
View: Opens the MyHeritage Image Viewer that provides various display
options, as described on page x.
Delete: Removes the selected image from Family Tree Builder.
New: Opens a wizard in which you can add a new photo or any other media
to Family Tree Builder, as described on page x.
Import Photos: Enables you to specify a folder, a device or your email and
to import all the photos in that folder into Family Tree Builder. A summary of
the number of photos imported is displayed at the end.
Create Thumbnails: Generates the thumbnails of the photos.
Produce Report: Produces a photo album.
Handling Photos and Other Media
Family Tree Builder User's Guide
Query Menu
The following describes each of the options in the Query menu:
Run Query: Displays a list of photos that match the criteria that you defined
in the Query tab, as described on page x.
Clear: Clears the current query definitions in the Query tab.
Save: Saves the current definitions in the Query tab for future use.
Note The Manage Saved Queries button in the top right of the
window indicates how many queries where saved (for
example
means that two queries
were saved). Clicking it enables you to define the order in
which queries appear in the View field, to rename or to
delete queries.
191
192
Handling Photos and Other Media
Family Tree Builder User's Guide
Virtual Cemetery
A virtual cemetery is available in Family Tree Builder to enable you to view all
the photos, documents and audio/video files associated with deaths, burials,
and/or funerals.
People that are deceased appear with a Tombstone icon in the title of their
family tree. If you hover over it, a tooltip is shown about the death, as shown
below:
A green picture frame appears on tombstone icons to which media was added.
Handling Photos and Other Media
Family Tree Builder User's Guide
To display the virtual cemetery:
Double-click on the Tombstone icon on a person’s card, as shown below:
193
194
Handling Photos and Other Media
Family Tree Builder User's Guide
to display the virtual cemetery, which shows all the media associated with
the death and funeral, as shown below:
Note
If you add a new photo while viewing a virtual cemetery,
then the last window of the wizard contains the following
check box. Check it to specify that this photo belongs to
that person’s virtual cemetery.
Charts
Chapter 5
Charts
196
Charts
Family Tree Builder User's Guide
Chapter 5
Charts
About This Chapter:
This chapter describes the types of charts that Family Tree Builder
provides and how to create and customize them.
Family Tree Builder provides the following types of charts:
Ancestor Charts, which shows the selected person, his or her spouse(s)
and the parents, grandparents and so on.
Descendant Charts, which shows the selected person, his or her
spouse(s), the children, the grandchildren and so on.
Fan Charts, which shows the selected person, and that person’s
descendants or ancestors in a chart that is shaped like a fan.
Close Family Charts, which shows the selected person and a few close
generations of that person’s family.
This chapter also contains the following sections:
Displaying a Chart, page 197, describes how to display a chart of
ancestors or descendants.
Configuring Chart Appearance, page 203, describes options for defining
the appearance of your charts.
Charts
Family Tree Builder User's Guide
Displaying a Chart
You can easily select from the menu options to display a chart of ancestors or
descendants either vertically or horizontally, as described below:
To display a chart:
1
Click the Charts
button to display the Charts menu, as shown below:
197
198
Charts
Family Tree Builder User's Guide
2
Select whether you want the chart to be displayed horizontally or vertically.
Examples of how each option appears are shown below:
Ancestor Horizontal
Charts
Family Tree Builder User's Guide
Ancestor Vertical
199
200
Charts
Family Tree Builder User's Guide
Descendants Horizontal
Descendants Vertical
Charts
Family Tree Builder User's Guide
An example of the window that is displayed is shown below:
3
You can manually click and drag any box in the chart to a new position as
required. The line connecting it to its family member adjusts accordingly.
4
The following describes the other options that are available in this window:
▪
Options: Enables you to configure the appearance of the chart and its
boxes, as described on page X.
▪
Styles: Provides a variety of attractive styles for your selection and
enables you to specify the type of facts that will appear in any box, as
described on page X.
▪
Save
Icon: Opens a wizard that enables you to save this chart as
a PDF or JPEG file to a location that you specify.
▪
Print
▪
Zoom: You can use the zoom slider to enlarge or reduce the display of
the report on the screen.
Icon: Prints the displayed report.
201
202
Charts
Family Tree Builder User's Guide
Note
5
PDF is a standard format provided by Adobe Acrobat. Its
reader can be downloaded for free from various sites on the
Internet. If you do not have Acrobat reader, simply download
it and install it. You can then view and print the PDF files
provided by Family Tree Builder or any other PDF file.
Once this chart appears to your liking, you can print it by clicking the Print
icon or selecting the Print option from the File menu.
Charts
Family Tree Builder User's Guide
Configuring Chart Appearance
Family Tree Builder provides a wide variety of options for defining the
appearance of your charts, as follows:
Chart Options, page 203
Chart Styles, page X
Chart Options
To configure Chart Options:
1
Display the chart of your choice, meaning Ancestor, Descendant, Horizontal
or Vertical, as described on page x.
2
Click the Charts
button to display the Charts menu, as shown below:
203
204
Charts
Family Tree Builder User's Guide
3
Select Chart Options to display the following window:
4
Fill in or modify the information in the various tabs of this window, as
described below, and click OK to display the chart. This new appearance
remains until you change it.
Note
You can also click the Apply button to save the changes
and still leave the window open for more changes.
Charts
Family Tree Builder User's Guide
The following tabs are provided to enable you to define the appearance of your
family chart as follows:
General Tab, page 206
Facts Tab, page 208
Boxes Tab, page 210
Fonts Tab, page 211
Background Tab, page 212
Lines Tab, page 213
Languages Tab, page 214
205
206
Charts
Family Tree Builder User's Guide
General Tab
The General tab enables you to define the general chart appearance, as
follows:
Charts
Family Tree Builder User's Guide
The following describes the fields in this window:
Title: Specify the name of the chart to appear in its title.
Generations: Specify whether to show all generations or specify the
number of generations to appear in the chart.
Personal Photos:
▪
Show personal photos: Specify how Personal Photos are shown in the
chart. You may refer to page x for a description of how to assign a
Personal Photo to a person.
▪
Only if Exists: Specifies that the Personal Photo is shown if it exists. If
it does not, then nothing is shown.
▪
Always (show placeholder, if any): You can specify that a silhouette
placeholder is displayed if no Personal Photo was defined for this
person.
▪
Never: Specifies that Personal Photos are not displayed.
▪
Personal photo size: Specify the size of the Personal Photos:
Normal is 60 x 80 pixels and Small is 30 x 40 pixels.
Arrangement:
▪
Orientation: Specifies whether the chart will be displayed vertically or
horizontally.
▪
Prevent boxes from crossing page boundaries: Specifies whether
Family Tree Builder will tile the printout of the chart so that it covers
multiple pages and so that no chart box exceeds the boundaries of a
single page.
Note
▪
To tile means to divide up the chart to cover multiple
sheets of paper as a single image, where a part of the
image appears on each sheet of paper.
Arrange boxes closely to save pages: Positions chart boxes close
together, thus reducing the space that they require on paper.
207
208
Charts
Family Tree Builder User's Guide
Facts Tab
The Facts tab enables you to define the facts that appear in each box of a
chart, as follows:
1
Select a
category of
facts
2
Select
facts
3
Click Add to
include these
facts
4
The included
facts are
listed here
Each chart box represents a person. An example of a box in a chart is shown
below:
Charts
Family Tree Builder User's Guide
To define the facts to be included:
1
The left side of this window lists the various facts that are available to be
shown in a chart box. The facts that are shown in this list are determined by
the selection in the category field that appears above it. Select a category of
facts from this dropdown field. These are the facts from which you can
choose to be included.
2
Click on the facts to be included in a chart box. A checkmark appears to the
left of the fields that have already been selected. You may use the Ctrl and
Shift keys on the keyboard to select more than one fact, in the same way as
in any Windows list.
3
Click the Add button to include these facts in the list on the right. This list
specifies the facts to be included in the box. The Remove button removes
them from this list.
4
Specify the order in which the facts will appear in the box. Selecting a fact
on the right and move it up in the list by clicking the Move Up button or
move it down in the list by clicking Move Down button.
5
You can specify whether Full Labels or Short Labels are shown in a box
by selecting the appropriate option and then checking off the Description,
Date, Place and/or Cause of death fields. Short labels enable a chart to
contain smaller boxes. In short labels the details that it contains, such as
date or place are abbreviated. For example: the letter D appears for Date
and the letter P appears for Place.
6
Click the Apply button or the OK button to save these changes.
209
210
Charts
Family Tree Builder User's Guide
Boxes Tab
The Boxes tab enables you to define the background color, border and shadow
of the boxes in the chart. You have the option to specify a different box color
according to whether the person in the box is male, female or of unknown
gender.
A variety of colors, line types, graphical borders and shadows are provided for
your selection.
Charts
Family Tree Builder User's Guide
Fonts Tab
The Fonts tab enables you to define the font properties of the various elements
in your chart, such as the font type, font size and font color. You can preview
your selection in the Preview box.
211
212
Charts
Family Tree Builder User's Guide
Background Tab
The Background tab enables you to define the background of the chart, such
as its color and/or image and the image’s transparency (meaning whether it
appears with a faded background or in vivid colors). You can also define
whether you want the background image to stretch to fit the chart or not or to
select a frame to appear around each chart box.
Charts
Family Tree Builder User's Guide
Lines Tab
The Lines tab enables you to define the line between the boxes in a chart. It
enables you to select the line type, width and color. You can also indicate a
non-natural parent/child relationship and/or whether non-married spouse
relationships are to be indicated by a dashed line.
213
214
Charts
Family Tree Builder User's Guide
Languages Tab
The Languages tab enables you to define the primary and secondary
language. More details about the primary and secondary language are provided
on page X.
Charts
Family Tree Builder User's Guide
Chart Styles
This option enables you to define the general appearance of a chart and the
facts that will be included in it. The Preview area of this window enables you to
see what your selection looks like before you apply it. A variety of attractive
styles are provided.
To configure Chart styles:
1
Click the Charts
button or select the Charts menu in the menu bar to
display the Charts menu, as shown below:
215
216
Charts
Family Tree Builder User's Guide
2
Select Chart Styles to display the following window:
3
Select any of the listed styles on the left.
Charts
Family Tree Builder User's Guide
4
Select one of the options in the Select Facts area to determine the type
and amount of detail to be included. An example of the type of information
to be shown can be seen in the Preview area each time you select an
option.
5
Click the Apply button or the OK button to save these changes.
217
218
Charts
Family Tree Builder User's Guide
Menu Bar
All the menus in Charts View perform the same functions as the same-named
menus in Tree View, as described on page x.
Toolbar
All the tools in Charts View perform the same functions as the same-named
tools in Tree View, as described on page x.
Reports
Chapter 6
Reports
220
Reports
Family Tree Builder User's Guide
Chapter 6
Reports
About This Chapter:
Family Tree Builder provides a variety of reports for your selection
as described in this chapter. It contains the following sections:
Generating a Report, page 222, describes how to generate the reports
provided by Family Tree Builder.
Book Report, page 224, describes a simple wizard that walks you through
the process of producing a Book Report for a specific person.
Family Group Sheet, page 228, describes how to generate a report
showing the details of the selected person and their immediate family.
Relationships Report, page 231, describes how to generate a report
showing all the relationships of the selected person to all the other people in
your project.
Ancestors Report, page 233, describes how to generate a report showing
facts and personal details about a selected person and about each
generation that precedes that person: parents, grandparents and so on.
Reports
Family Tree Builder User's Guide
Descendants Report, page 234, describes how to generate a report
showing facts and personal details about a selected person and about each
generation that follows that person: children, grandchildren and so on.
Timeline Report, page 235, describes how to generate a a list showing
major events of the family of the selected person in chronological order,
such as birth, marriage and death.
Descendants Summary, page 236, describes how to generate a a
hierarchical tree showing the descendants of the selected person.
Address Lists, page 237, describes how to generate an alphabetical list (in
the order of each person’s name) of the addresses of all the people in the
family tree.
Open Reports Folder, page 238, displays the list of files in the folder into
which reports are saved.
221
222
Reports
Family Tree Builder User's Guide
Generating a Report
You can easily select from the menu of options to generate one of the reports
provided by Family Tree Builder, as follows:
To generate a report:
1
Click the Reports
button to display the Reports menu, as shown below:
Reports
Family Tree Builder User's Guide
2
3
Select one of the reports displayed in this menu. This report will then either
be generated automatically, or Family Tree Builder will walk you through a
simple wizard in which you can specify the options that you would like to be
generated in the report. Each report is different, as described in the
subsequent sections:
▪
Book Report, page 224
▪
Family Group Sheet, page 228
▪
Relationships Report, page 231
▪
Ancestors Report, page 233
▪
Descendants Report, page 234
▪
Timeline Report, page 235
▪
Descendants Summary, page 236
▪
Address Lists, page 237
Once this report appears to your liking, you can save it or print it by
selecting the Save or the Print option from the File menu or by using one of
the icons described above.
223
224
Reports
Family Tree Builder User's Guide
Book Report
A Book Report displays a simple wizard that walks you through the process of
producing a report for a specific person, as follows:
To generate a book report:
1
Click the Reports
button to display the Reports menu and select Book
Report to display the following window:
This window enables you to select the primary person of this report.
Note
Family Tree Builder uses a third-party tool to generate this
report. If you would like to learn more about this third-party
tool click on the Learn More button.
Reports
Family Tree Builder User's Guide
2
Click the Next button to display the following window:
In this window, select the type of information to be included in the sections
of the report. You can select as many as you like.
225
226
Reports
Family Tree Builder User's Guide
3
Click the Next button to start generating a report. A window is displayed
showing the progress of this process. When this process is completed, the
following window is displayed, specifying the location in which a PDF file of
this report has been saved, as shown below:
Note
PDF is a standard format provided by Adobe Acrobat. Its
reader can be downloaded for free from various sites on the
Internet. If you do not have Acrobat reader, simply download
it and install it and you will then be able to view and print the
PDF files provided by Family Tree Builder or any other PDF
file.
Reports
Family Tree Builder User's Guide
The PDF file of this report is also displayed in the Family Tree Builder
window, as shown below:
227
228
Reports
Family Tree Builder User's Guide
Family Group Sheet
A Family Group Sheet generates a report showing the details of the selected
person and their immediate family.
To generate a Family Group Sheet:
Click the Reports
button to display the Reports menu and select
Family Group Sheet or select Family Group Sheet from the Reports
menu in the menubar. An example of the report that is automatically
generated is shown below:
Reports
Family Tree Builder User's Guide
The following describes the other options that are available in this window:
▪
Options: Displays a window in which you can define the font of various
aspects of this report.
▪
Save
Icon: Saves this file to the location that you specify. You are
offered the option to specify the format in which the file will be saved:
RTF, PDF or HTML. Each option is described in the window below.
▪
Print
▪
Zoom: You can use the zoom slider to enlarge or reduce the display of
the report on the screen.
Icon: Prints the displayed report.
229
230
Reports
Family Tree Builder User's Guide
By default this report is generated for the home person.
Note
You may refer to page x for a description of how to
define the home person.
After you have generated this report once, you can double-click on any
person in the People List to regenerate the report for that person.
Note
A description of how to find a specific person in the
People List is provided on page x.
Reports
Family Tree Builder User's Guide
Relationships Report
The Relationships report generates a report showing all the relationships of the
selected person to all the other people in your project. This report shows the
name of the relation, the relationship to the selected person in the report and
how many relationships steps are between the selected person and their
relation. Relationship steps indicate how close the relation is to the selected
person. For example, a mother or father, brother or sister is one step away
(indicated by a one) and their grandparent or grandchild is two steps away
(indicated by a two) and so on.
231
232
Reports
Family Tree Builder User's Guide
To generate a Relationships report:
Click the Reports
button to display the Reports menu and select
Relationships or select Relationships from the Reports menu in the
menubar. An example of the report that is automatically generated is shown
below:
The options that are available in this window are the same as in all the other
reports, as described on page x.
Reports
Family Tree Builder User's Guide
Ancestors Report
The Ancestors report generates a report showing facts and personal details
about a selected person and about each generation that precedes that person:
parents, grandparents and so on.
To generate an Ancestors report:
Click the Reports
button to display the Reports menu and select
Ancestors or select Ancestors from the Reports menu in the menubar. An
example of the report that is automatically generated is shown below:
The options that are available in this window are the same as in all the other
reports, as described on page x.
233
234
Reports
Family Tree Builder User's Guide
Descendants Report
The Descendants report generates a report showing facts and personal details
about a selected person and about each generation that follows that person:
children, grandchildren and so on.
To generate a Descendants report:
Click the Reports
button to display the Reports menu and select
Descendants or select Descendants from the Reports menu in the
menubar. An example of the report that is automatically generated is shown
below:
The options that are available in this window are the same as in all the other
reports, as described on page x.
Reports
Family Tree Builder User's Guide
Timeline Report
The Timeline report generates a list showing major events of the family of the
selected person in chronological order, such as birth, marriage and death.
To generate a Timeline report:
Click the Reports
button to display the Reports menu and select
Timeline or select Timeline from the Reports menu in the menubar. An
example of the report that is automatically generated is shown below:
The options that are available in this window are the same as in all the other
reports, as described on page x.
235
236
Reports
Family Tree Builder User's Guide
Descendants Summary
The Descendants Summary report generates a hierarchical tree showing the
descendants of the selected person.
To generate a Descendants Summary report:
Click the Reports
button to display the Reports menu and select
Descendants Summary or select Descendants Summary from the
Reports menu in the menubar. An example of the report that is
automatically generated is shown below:
The options that are available in this window are the same as in all the other
reports as described on page x.
Reports
Family Tree Builder User's Guide
Address List
The Address List generates an alphabetical list (in the order of each person’s
name) of the addresses of all the people in the family tree.
To generate an Address List:
Click the Reports
button to display the Reports menu and select List
and then Addresses or select the same from the Reports menu in the
menubar. An example of the report that is automatically generated is shown
below:
The options that are available in this window are the same as in all the other
reports, as described on page x.
237
238
Reports
Family Tree Builder User's Guide
Open Reports Folder
The Open Reports option displays a list of files in the folder into which reports
are saved.
Tip
If you have stored reports in a different folder than the default
Report folder, then these reports are not shown in the menus.
The Open Reports option enables you to access these
reports from the folder in which you stored it as a RTF, PDF
or HTML file.
To display Reports folders:
1
Click the Reports
button to display the Reports menu and select Open
Reports or select Open Reports from the Reports menu in the menubar. A
window similar to the following is displayed:
2
You can double-click on a file to view the report that was previously saved.
Publishing Your Family
Tree
Chapter 7
Publishing Your
Family Tree
240
Publishing Your Family Tree
Family Tree Builder User's Guide
Chapter 7
Publishing
Your Family Tree
About This Chapter:
This chapter describes how to publish your family tree using Family
Tree Builder to a MyHeritage family website, so that it is available
for viewing through the Internet to anyone that you invite using a
standard web browser. This chapter contains the following
sections:
What is Publishing?, page 241, describes the concept of publishing your
family tree in MyHeritage.
How Do I Publish My Family Tree?, page 242, describes how to publish
your family tree.
Publishing to the MyHeritage.com Site, page 249, describes...
Managing Your Sites, page 256, describes how to manage a MyHeritage
family website.
Publishing Your Family Tree
Family Tree Builder User's Guide
What is Publishing?
The word publishing refers to the process of posting your family tree project on
a MyHeritage family website so that it is available for viewing through the
MyHeritage.com website.
After installing Family Tree Builder, you can immediately start to create your
family tree. After you have prepared some of your family tree, you may want to
publish it so that other members of your family or friends can also see this tree.
To do so is very easy and only takes a few moments. All you need to do is to
register as a member of the MyHeritage.com site, as described on page x.
Periodically, when you save your project, Family Tree Builder suggests that you
create a personal family website to publish your project and provides an easy
link for doing so. You can also initiate the publishing of your family tree to the
MyHeritage.com site at any time.
You are ensured as much privacy as you would like because your data will only
be visible to you and to the people that you invite to see it.
Publishing your family tree copies either all or the relevant parts of your family
tree project to the MyHeritage.com website.
After your family tree has been published, you may make changes at any time.
You can then publish the entire tree again or parts of it so that this new
information that you enter into your project will also be available on the
MyHeritage.com website. You might say that you are synchronizing the project
from your local computer with the family tree that is published in the site.
Each MyHeritage member can create their own family website on the on the
MyHeritage.com site, which can contain one or more of the family trees that
they would like to publish. Thus, each member may have one site, and each
site may contain one or more family trees, and a family tree may be published
on one or more sites.
241
242
Publishing Your Family Tree
Family Tree Builder User's Guide
How Do I Publish My Family
Tree?
You may decide to publish your family tree anytime after you enter interesting
information in your project that you would like others to see.
To start the publishing process, select the Publish
button in the toolbar or
select the Publish to MyHeritage.com option from the Tools menu. The
following window is then displayed:
Family Tree Builder provides a simple-to-use publishing wizard, which guides
you through the process of publishing your family tree on the MyHeritage.com
site. It provides a series of windows, in which you can make selections and
progress by clicking the Next button, in order to publish your family tree. The
process of publish is comprised of creating a publishing request that is saved
and then executing the actual publishing.
You may refer to page X for a description of the publishing process. This
process will enable you to publish one or more of the publishing requests that
you have created.
To define a publishing request in the Publishing wizard, click the Add button, as
described below.
Publishing Your Family Tree
Family Tree Builder User's Guide
Defining a Publishing Request
The following shows the first window of the Publishing Wizard that is displayed
when you check the Add button in the window shown on the previous page.
Note
After you finish defining this publishing request, it appears
as a row in the window, shown on page 200, enabling you to
easily publish it.
Selecting Whether and Where to Publish
243
244
Publishing Your Family Tree
Family Tree Builder User's Guide
This window offers you three options, as follows:
I don't have a family site yet and I would like to create one: This option
walks you through the process of creating a site, as described on page X.
Note
You can click the link under the first bullet to display more
information about family sites.
I would like to publish the project to a family site that I already created
before: This option is displayed when you have already published one or
more projects. It enables you to select the site to which to publish this
project, as shown below:
Select a site and click Next to display a window in which you can publish
the request, as described on page 248.
Publishing Your Family Tree
Family Tree Builder User's Guide
I do not want to publish this project at this time: Select this option if you
do not yet want to publish any part of your project to a site at this time. You
can publish this project at any time later. Selecting this option exits the
Publishing Wizard.
Note
You may decide not to publish your project or you can use
MyHeritage’s Export option to transfer your project to other
people. The export feature is described on page x.
Note
If you have never published your project, you should select
the option I don't have a family site yet and I would like to
learn more about creating a site option. This option will
walk you through the steps required to set up your first site
on the MyHeritage site in order to publish your project.
245
246
Publishing Your Family Tree
Family Tree Builder User's Guide
Defining a Site
Each MyHeritage member can create their own site on the MyHeritage site,
which can contain one or more of the family trees that they would like to
publish.
The process of creating a site at MyHeritage.com only allocates a name
and a space for your family tree. The publishing process can be used later
to copy your family tree to the MyHeritage site.
Publishing Your Family Tree
Family Tree Builder User's Guide
Each member of MyHeritage is identified by their e-mail address which was
entered during the MyHeritage registration process as described on page X.
This e-mail address is used to verify whether you have already published a
project. You may click the sign-in as a different member option in order to
represent yourself as a different member.
To define a site:
1
Enter or select the name of the site to which your family tree will be
published.
If you have already defined people in your project, Family Tree Builder will
automatically recommend one or more names for the family tree. Typically,
these names consist of a last name of one or more major families in the
family tree. Click the arrow button on the right side of this field to see a
dropdown list of the various names that MyHeritage suggests. You may also
type in any name that you wish.
Note
2
The process of creating a site on MyHeritage.com only
allocates a name and a space for your family tree. The
publishing process can be used later to copy your family tree
to the MyHeritage site.
Enter an address for the site. The address that you enter here will become
part of the full URL address of the site. If you have already defined people in
your project, Family Tree Builder will automatically recommend the same
name that was recommended in the previous field.
For example, if you enter The Smith Family, then the URL address for
navigating to your family tree site on MyHeritage will be
thesmithfamily.MyHeritage.com
The address that you specify can only include letters, digits and dashes. It
must start with a letter.
3
Click Next to create your site at MyHeritage.com.
247
248
Publishing Your Family Tree
Family Tree Builder User's Guide
Publishing the Request
This window is the last stage of creating a publishing request. If you check the
Publish Project Now checkbox, then when you click the Finish button, this
project will be published immediately. If you do not, then this publishing request
will be added to the list of publishing requests that will be published when you
click the Publish Now button in that window, as described on page 242.
You can optionally click the Advanced Settings button to edit the default
publishing request for your project. The Edit Publishing Request window is then
displayed, as described on page x.
Note
You must be connected to the Internet in order to create a
Publishing Request.
Publishing Your Family Tree
Family Tree Builder User's Guide
Publishing to the
MyHeritage.com Site
Any time after you have made changes in your project that have not yet been
published to the MyHeritage.com site, the Publish button in the toolbar
appears with an exclamation mark:
process.
. Simply click it to start the publishing
You may be asked whether you want to save the current changes if you have
not done so already, as follows:
249
250
Publishing Your Family Tree
Family Tree Builder User's Guide
Click Yes to save your changes. The following window is then displayed:
The following options are available in this window:
Check the projects that you would like to publish and click the Publish Now
button to publish them. Each project will be published to the site that is
defined in the Target site column. This window shows the progress and
status of publishing your project to the MyHeritage site. After it is finished, a
success message is displayed.
Click the Add button to define another publishing request in this window, as
described on page 243. This makes it easy to publish the next time,
because all you will have to do is to click the Publish Now button, as
described above. If you have already published a site and nothing has
changed since then, then you can continue to use the same publishing
request in the future.
Click the Edit button to edit the publishing request whose row you selected
in this window, as described on page 248.
Publishing Your Family Tree
Family Tree Builder User's Guide
Click the Delete button to delete publishing request whose row you selected
in this window.
Click the Visit Site button in order to view the published family tree in an
Internet browser in order as others will see it.
Click the View Report button to see a report describing the publishing
process.
Note When you save your project, Family Tree Builder may
remind you to publish the changes that you made to your
project. When you save your project, the following window
may be displayed:
▪
Select Yes to publish the project now, as described in the
XYZ section on page 264.
or
▪
Select No to indicate that you do not want to publish the
project now, but would like to be reminded later.
251
252
Publishing Your Family Tree
Family Tree Builder User's Guide
Editing the Publishing Request
To edit a publishing request, select one in the window, shown on page 249, and
then click on the Edit button. The Edit Publishing Request window is then
displayed which enables you to define the details of a publishing request.
Publishing Your Family Tree
Family Tree Builder User's Guide
The following describes the fields in this window:
Pick project: Select the name of the project to be published. The default is
the currently open project.
Target site address and site administrator email fields: These are
described in the previous step. You may be asked to re-enter your
password.
People to publish: Select the people in the current project to be published
to your site, as follows. This option is particularly useful when you have a
big project that describes multiple families and you would like to create
different sites, each which describes a different family.
▪
All people in project: Select this option to specify that all the people in
your project will be published to the family tree on your site.
▪
Specific people selected below: Select this option to specify that only
the people that you select by clicking the select people button will be
published to the family tree on your site. When you click the Select
People button a window is displayed, enabling you to select any
combination of people in your project. Click the Add button to display a
list of people in your project from which to select.
253
254
Publishing Your Family Tree
Family Tree Builder User's Guide
Photos to Publish: Select the photos in the selected project to be
published to your site, as follows:
▪
All Photos: Select this option to specify that all the photos in your
project will be published to the family tree on your site.
▪
No Photos: Select this option to specify that no photos in your project
will be published to the family tree on your site.
▪
Specific Photos Selected Below: Select this option to specify that only
the photos that you select by clicking the Select Photos button will be
published to the family tree on your site. When you click the Select
Photos button the following window is displayed, enabling you to select
any combination of photos in your project.
Publishing Your Family Tree
Family Tree Builder User's Guide
Select
The Select area contains two options, as follows:
Select photos: This option displays photos for your selection. You can use
the dropdown menu above this box to display All photos, Photos not
selected for publishing request or the Home person's photos only.
Once you have displayed the requested photos in this list box, you can click
on them, and then press the Select button to move them to the selected
photos list box on the left. This list box indicates which photos will be
published to your site.
Browse selected photos: Select this option to enable you to browse
among the photos listed in the Selected Photos list box on the left. You can
use the arrow keys on your keyboard to browse up and down in this list.
Format and View
These areas of the window enable you to specify how photos appear when you
select the Browse selected photos option as described above. The options in
these areas are described in detail on page x.
Click OK after you have selected all the photos to be published to your site.
Creating a site does not mean that you have published your project to that site
yet.
Note
You can publish a project to your family site at any time by
clicking the Publish button in the toolbar
.
255
256
Publishing Your Family Tree
Family Tree Builder User's Guide
Managing Your Sites
As a member of MyHeritage you can create your own family site, which is
actually a sub-site of the MyHeritage.com website. This site can contain one or
more of the family trees that you would like to publish. You can also create
more than one site in case you have multiple family trees that are not related.
You can also publish the same tree, or different portions of the same tree to
multiple sites.
To see your sites:
Select the My Sites option in the Tools menu to show your list of sites, as
shown below:
When you select a site, its details are displayed at the bottom of the
window.
Publishing Your Family Tree
Family Tree Builder User's Guide
To visit a site:
You can visit a site by clicking the Visit Site option, which enables you to
view this site in a Web browser.
Anyone with an email address can be invited to be a member of your site.
Anyone that accepts your invitation automatically becomes a MyHeritage
member.
To invite people to visit your site:
You can invite people to visit your site by clicking the Invite Members
option, which displays the following window:
257
258
Publishing Your Family Tree
Family Tree Builder User's Guide
The list of current site members is shown at the bottom of the window. These
are all the people that are included in your family tree for whom an e-mail
address was defined. When you click the Send Invitations button, all these
people are invited to your site.
Your name is shown in bold.
People that you have invited previously, but who have never visited the site
appear with the Re-invite Member option next to their e-mail addresses. Click
this option to add these people to the list at the top of the window. This is the
list of people who will be invited when you click the Send Invitations button.
To add new people to be invited to see the site:
Simply type in their first name, last name and e-mail address.
Research
.
Chapter 8
Research
260
Research
Family Tree Builder User's Guide
Chapter 8
Research
About This Chapter:
The Family Tree Builder provides you with full access to the rich
functionality provided by MyHeritage.com’s genealogy research
feature. This tool enables you to research families and/or specific
people in a variety of genealogy research databases.
This chapter also contains the following sections:
Introducing the Research Tool, page 261.
Megadex™ and Soundex, page 262.
Using MyHeritage Research, page 263.
The Research Menu, page 268.
Research
Family Tree Builder User's Guide
Introducing the Research Tool
MyHeritage Research is the world's best search engine for ancestors and the
only tool that runs aggregate searches in hundreds of online databases.
MyHeritage Research is a search engine built specifically for genealogy,
capable of searching hundreds of major genealogy databases in a single query.
It is the most comprehensive genealogy research tool existing today and the
first of its kind. In simple terms, this search engine runs each query
simultaneously in hundreds of genealogy databases, aggregates the results
and displays them in one consolidated report. This gives you more genealogy
search power than has ever been available before, in a simple, friendly and
convenient interface.
To get started, simply go to the New Search page. Type in the name of an
ancestor, even just a last name and click the Search button, as described in
more detail on page x.
MyHeritage Research does the rest, combing the Internet for relevant
information in an unparalleled collection of the world's best genealogy
resources – over 1,150 of them to date. It queries websites, databases,
archives and message boards; covering all genealogy records including census
records, family trees, immigration records, military records, medical records,
cemetery records, court, land and probate documents, and other informational
sources, such as newspapers, telephone directories, and more.
Note
You must be connected to the Internet to be able to use
MyHeritage Research.
261
262
Research
Family Tree Builder User's Guide
Megadex™ and Soundex
Megadex™ helps you find richer information about your ancestors that may
have eluded you in the past.
If you are familiar with genealogy research you probably already know that
spelling variations present one of the top challenges. Suppose you are
researching your Williamson family heritage. In order to find information about
your ancestors, you may also need to search for Williemson, Williamsen and
Williamsohn, to mention but a few. This is because most last names evolve
over the centuries and they were written differently in different countries and
cultures, over different periods. Also, numerous errors may have crept in when
information about your ancestors was handwritten, transcribed, transliterated
and typed.
Existing solutions like Soundex run a query and return everything that sounds
like the entered name. But not all genealogy databases support Soundex, and
even those that do, are guaranteed to return masses of false positives,
meaning irrelevant results that waste your time. Many false positives may
cause you to overlook quality matches like Villiamson or Wilhelmson that are
perfect synonyms of your name but current technologies are incapable of
associating them correctly with your search.
Megadex™ was invented by MyHeritage to overcome the challenges posed by
spelling variations. Megadex™ first comes to your aid by pointing out the most
commonly used spelling variations of the last name you are researching.
It then enables you to search for a subset of these variations in a single,
powerful MyHeritage Research query. Your Megadex™ search covers all major
genealogy databases on the Web (even those that do not support any soundslike features). It does not return the typical Soundex false positives, and it does
not miss out as many good matches as Soundex.
Research
Family Tree Builder User's Guide
Using MyHeritage Research
You can easily select from the menu options to display a chart of ancestors or
descendants either vertically or horizontally, as described below:
To use MyHeritage Research:
1
From the Research menu, select Open MyHeritage Research, as shown
below:
The MyHeritage Research tool opens, as shown below:
2
Enter either a first and last name or only a last name.
263
264
Research
Family Tree Builder User's Guide
3
Optionally, you can change the way that MyHeritage searches for a match,
as follows:
▪
Exact: Research results only contain people whose name is spelled
exactly as you specified it.
▪
Soundex: Research results are presented for people whose names
sound-like the name that you specified.
▪
Megadex™: Research results are presented for several variants of a
last name in order to maximize hits and explore new avenues for
research based on alternative spellings of a name. More information is
on Megadex™ and Soundex is provided on page x.
Research
Family Tree Builder User's Guide
4
Optionally, you can click the Advanced search button to display a variety of
fields in which you can describe the person(s) in which you are interested
and the places in which to research more specifically, as shown below:
5
Click the Search button to start the search in over 1,150 of the world's best
genealogy databases.
265
266
Research
Family Tree Builder User's Guide
Megadex™ Results
The following describes how results appear when you have selected the
Megadex™ option.
As a preliminary step, Megadex™ displays a list of the best possible spelling
variants of the last name you entered. At the top of this list is the last name as
you typed it, already checked to be included in the search. Many spelling
variants are suggested for each name. A score is specified for each variant,
indicating its proximity to the last name you entered. Names that scored less
than 95% are not listed because they are deemed irrelevant to your search. At
this point you may want to print out the spelling suggestions as they could be
useful for future genealogy research on that name.
From the list of spelling variants, select up to ten names that best suit your
research. You can select any name individually, or automatically select the
most relevant ones by clicking Select the 10 best matching variants.
Then click Start this search. MyHeritage Research then queries all applicable
genealogy databases for each of the spelling variants that was selected. This
query is very powerful and may take a few minutes.
You can start accessing results the moment they appear without waiting for the
entire search to complete. If you also entered a first name, or other search
criteria, MyHeritage Research includes them in your Megadex™ query.
MyHeritage Research displays the results of your search in one long table.
Each row of the table shows a single database in which matches were found,
the Megadex™ spelling variant for which the matches were found, and the
number of matches.
You can view the actual matches by clicking the View action. Genealogy
databases that did not return any matches are not displayed.
Research
Family Tree Builder User's Guide
If you intend to review the results in detail, we recommend clicking Save
Search to save your search results. This enables you to revisit these results at
any time by clicking My searches in the menu without having to run the search
again, saving you time.
You can annotate your search results with research notes.
You can also schedule your search to recur automatically so that you are
notified when new results appear. This is extremely useful because new
genealogy databases are added to MyHeritage Research frequently.
Exact and Soundex Results
The following describes how results appear when you have selected the Exact
or the Soundex option.
All positive results are consolidated into one convenient report, built
dynamically for you. A results page starts filling up with matches almost
immediately. Each row specifies the name and description of a database that
returned matches.
Click on any View action to view the specific results from a database directly.
267
268
Research
Family Tree Builder User's Guide
The Research Menu
The Research menu offers a variety of information describing the functionality
that it provides:
New search: Enables you to start searching for a person, as described on
page x.
My searches: Enables quick access to previously saved searches without
having to run the search again, saving you time.
Overview: Describes the features and functionality of the MyHeritage
Research tool.
How it works: Describes how to use the MyHeritage Research tool.
Megadex™: Describes the features of the Megadex™ search algorithms.
Search tips: Provides a variety of tips for finding the information that you
want.
FAQ: Provides answers to the most Frequently Asked Questions about
MyHeritage Research.
Language and Translation
Chapter 9
Language
and Translation
270
Language and Translation
Family Tree Builder User's Guide
Chapter 9
Language
and Translation
About This Chapter:
This chapter describes the various language and translation
features that are provided by Family Tree Builder. It contains the
following sections:
Supporting Multiple Languages, page 271, describes the languages that
Family Tree Builder supports for both its user interface and the family tree
data that you can enter.
The Virtual Keyboard, page 275, enables you to enter data in any of the
numerous supported languages even when your computer and its keyboard
do not support or provide the letters of that language.
Changing the User Interface Language, page 276, describes how to
change the user interface language in Family Tree Builder.
Primary and Secondary Languages, page 278, describes Family Tree
Builder’s options for changing the data language.
Changing the Data Language, page 280, describes how to change the
data language in Family Tree Builder.
Translating in Family Tree Builder, page 282, describes the various
translation options in Family Tree Builder.
Language and Translation
Family Tree Builder User's Guide
Supporting Multiple Languages
Family Tree Builder supports numerous languages, which are listed below:
Family Tree Builder supports these languages for the following:
User Interface, as described on page 272
Data, as described on page 273
271
272
Language and Translation
Family Tree Builder User's Guide
User Interface
The user interface language refers to the text that appears in all the menus,
toolbars and windows in Family Tree Builder. You can select any one of the
languages for the user interface and swap this language at any time without
losing your data or closing the program. An example of the same window in
English and in French is shown below.
English
French
Language and Translation
Family Tree Builder User's Guide
Data
The data language refers to the language in which the genealogy data is
entered and displayed. Family Tree Builder allows you to create a family tree in
more than one data language. Specific facts must be entered in each language
separately, such as the names of people and places, while the relationships
between the individuals and the various dates need only be entered once and
are then shared between the languages unless you use the translation features,
which are described on page x.
Tip
The user interface language and the data language are
independent and can be combined in almost any way you
like. For example, you can view a family tree that was sent to
you by a relative that contains all French data (meaning
names and places), while the Family Tree Builder user
interface (meaning menu and filed names) is displayed in
English.
Note
The only limitation is when using Hebrew or Yiddish (right-toleft languages). The user interface language and the data
language must both be in the same direction (in this case,
right-to-left). This means that you cannot view Hebrew data
without also changing the user interface language to Hebrew
or Yiddish. This is mandatory to avoid text alignment issues.
Family Tree Builder is one of the only programs in the world
Tip that supports flipping from English to Hebrew and Hebrew to
English without restarting the program. This means that you
can switch the user interface language from English to
Hebrew or vice versa whenever you want, even while the
program is running.
273
274
Language and Translation
Family Tree Builder User's Guide
Tip
Tip
You can use any of the supported languages even without
installing them on your PC, including even more obscure
languages such as Greek. However, your Windows operating
system must support a feature called mirroring, which is
available as a default in most recent versions of Windows,
except the old Windows NT 4.0 and some old versions of
Windows 98.
Multi-lingual family trees are great for family reunions! You
can create and print multi-lingual reports that showcase the
same family tree in more than one language. The printing of
reports is described on page X.
Language and Translation
Family Tree Builder User's Guide
The Virtual Keyboard
Family Tree Builder provides a Virtual Keyboard that enables you to enter data
in any of the numerous supported languages even when your computer and its
keyboard do not support or provide the letters of that language.
To use the virtual keyboard:
1
Launch the virtual keyboard by clicking the Keyboard
icon at the top
of every page in Family Tree Builder. The virtual keyboard of the selected
language is displayed as a floating window, on top of the other Family Tree
Builder windows.
As an example, the keyboard that is displayed when the Russian language
is selected is shown below:
The virtual keyboard self-adjusts automatically, according to the current
language settings.
2
Click on a letter on the virtual keyboard with your mouse to enter that letter
in the most recently used/selected field in a Family Tree Builder window.
275
276
Language and Translation
Family Tree Builder User's Guide
Changing the User Interface
Language
This section describes how to change the user interface language of the text
that appears in all the menus, toolbars and windows in Family Tree Builder.
To change the language:
1
Click on the flag of the current language that appears in the top right of the
window to display a dropdown menu of all the available languages, as
shown below:
Language and Translation
Family Tree Builder User's Guide
2
Click the required language in the dropdown list and the user interface
automatically changes according to your selection. Some of the family tree
data, such as the relationships between people and dates is translated
automatically by Family Tree Builder. Other types of data, such as peoples’
names and the names of places, can be entered manually in the selected
language.
You also have the option to specify that all data fields that
Note do not already have a translation be automatically
translated by Family Tree Builder into the language of your
choice. This option is described on page X.
Note
Upon changing from a right-to-left language to a left-to-right
language, or vice versa, such as from English to Hebrew,
the following window is displayed:
This window provides you with the option to display both
languages. For example, both the English and the Hebrew
data side-by-side. This is called a dual-language interface.
It also provides you with the option to specify what to
display in place of data that has not been entered in both
the selected languages. For example, for a name entered
only in Hebrew, you can specify that Family Tree Builder
automatically translates it into English or that a string that
you specify is displayed instead (such as the words “not
translated into English” or a question mark).
277
278
Language and Translation
Family Tree Builder User's Guide
Primary and Secondary
Languages
When you create a new project, Family Tree Builder offers you to select one or
two languages: a primary language and a secondary language. The primary
language determines the default language of the user interface and will be the
dominant data-entry language. The secondary language is your alternative
data-entry language and is optional.
Note You may change these settings at any time.
Family Tree Builder enables you to specify the user interface language and the
primary and secondary data languages at any time. The primary data language
is the data language in which you want to enter data like names of people and
places, notes, and so on. If you define a secondary data language, then Family
Tree Builder works in dual-language mode and data entry pages are bi-lingual.
If you do not define a secondary data language, then the application works in
single-language mode and all data entry pages only accept data in the primary
language.
Language and Translation
Family Tree Builder User's Guide
The following shows an example in single-language mode and in dual-language
mode:
Single-Language Mode
Dual-Language Mode
By default, Family Tree Builder works in single-language mode. If you are not in
single-language mode and would like to be, then select Languages from the
Tools menu and set the Secondary Data Language field to No Secondary
Language.
Tip
By default, Family Tree Builder is configured so that the
primary data language is the same as the user interface
language. This means that upon changing the display
language you are also instructing the program to change the
data language to match it. While this keeps language control
simple, you can change this behavior if you want to, as
described in this chapter on page x.
Note This option is available, but is not recommended, as it may
be less convenient.
Tip
Although your project may be in two languages, such as
English and Hebrew, you can in fact create a family tree in
any subset of languages, such as Spanish and Portuguese.
You are not required to include English or any other language
in your project, although supporting English is generally a
good idea.
279
280
Language and Translation
Family Tree Builder User's Guide
Changing the Data Language
The following procedure describes how to change the data language and how
to modify the primary and secondary data languages.
To change the data language:
1
From the Family Tree Builder Tools menu, select Languages to display the
following window:
Language and Translation
Family Tree Builder User's Guide
2
From the Display Language dropdown list, select the language in which
you require the user interface to be displayed.
3
From the Primary Data Language dropdown list, select the default
language for entering data in your project.
4
From the Secondary Data Language dropdown list, select the
additional/alternative language for entering data in your project.
Tip
If you only require one data language, set the Secondary
Data Language field to No Secondary Language.
Tip
If you change the Primary Data Language of an existing
project, then the words Unknown or Empty may appear in
place of the data that you have already entered.
281
282
Language and Translation
Family Tree Builder User's Guide
Translating in Family Tree
Builder
If you are working in dual-language mode, as described on page X, you can
enter data directly in both languages in the easy-to-use dual-language
interface, which provides the fields in one language on the right and in the other
language on the left, as shown in the example below:
Language and Translation
Family Tree Builder User's Guide
Family Tree Builder is installed with a database of common translations of
names (for example, from Hebrew to English). This enables the Family Tree
Builder to automatically translate names of places and people in its various
entry windows. Family Tree Builder is also intuitive, gathering information as it
runs and adding all your manual translations into its database so that in the
future it can translate these same words automatically, as described below.
Family Tree Builder enables you to translate, as follows:
All project data, as described on page x
All the data in the current window, as described on page x
The data in the current field, as described on page x
283
284
Language and Translation
Family Tree Builder User's Guide
Translating All Project Data
By default, Family Tree Builder proposes to translate the data from the primary
language to the secondary language (described on page X).
To translate all project data:
1
From the Tools menu, select Translation Wizard. The following window is
displayed:
2
From the Translate from dropdown list, select the language to be
translated. In the above example, English is selected.
Language and Translation
Family Tree Builder User's Guide
3
From the Translate to dropdown list, select the language to which the
source language is to be translated. In the above example, Hebrew is
selected.
4
If you would like data that has already been entered in your Family Tree
Builder's database to be overwritten by this translation, select the Override
existing translations field.
5
Click the Next button to begin the translation. After translation is completed,
the following window is displayed:
This window specifies the number of first names, last names, and place
names that have been translated and the number of fields that remain untranslated. You may click the Report button to store these translation
results in a file for your review.
285
286
Language and Translation
Family Tree Builder User's Guide
6
Click the Next button to display a window which lists the names that have
not been translated and which enables you to manually translate them.
7
Click on any field to type in the translation.
8
Click the Next button to enable the Family Tree Builder to apply your
manual translations to your project.
Translating the Current Window’s Data
Family Tree Builder can attempt to translate all the data in the current window
from the primary language to the secondary language or vice versa.
To translate all the data in the current window:
In the Dual Interface window, click on the arrow button that is pointing to the
language into which it should be translated. It appears between the two
language headers, as shown below.
Click here to
translate the
entire window
from English to
Hebrew
Click here to
translate the
entire window
from Hebrew to
English
Language and Translation
Family Tree Builder User's Guide
The arrow buttons are only enabled when Family Tree Builder recognizes
some of the data that you entered in the language that you entered it,
meaning that it already has a translation of that term in its database. If
Family Tree Builder does not have a translation in its database, the arrow
is disabled, meaning that it will be gray and you cannot click it. After you
manually translate un-translated fields, Family Tree Builder remembers
your translation and is able to use it when performing automatic
translations in the future.
Note The direction of the arrow button that you click determines
the direction of the translation.
287
288
Language and Translation
Family Tree Builder User's Guide
Translating a Field
Family Tree Builder can attempt to translate a specific field in the window that is
currently displayed.
To translate a field that you have entered:
In the Dual Interface window, click on the arrow button that is pointing to the
language into which it should be translated. It appears between the two
fields, as shown below:
Note The direction of the arrow button that you click determines
the direction of the translation.
Click here to
translate the
entire window
from English to
Hebrew
Click here to
translate the
entire window
from Hebrew to
English
This example shows how the name Moshe has been translated into
Hebrew, and how the state of New York in Hebrew, was translated into
English.
Configuration Options
Chapter 10
Configuration Options
290
Configuration Options
Family Tree Builder User's Guide
Chapter 10
Configuration
Options
About This Chapter:
This chapter describes additional options for configuring the behavior of your
family tree.
Configuration Options
Family Tree Builder User's Guide
291
Configuring Family Tree Builder
Family Tree Builder provides a variety of configurable options. Each of these
options is described in the window shown below. This chapter describes how
to access this window and provides a general explanation of how to use it to
configure Family Tree Builder.
To configure Family Tree Builder:
1
Click Options in the Tools menu to display the following window in which
you can configure MyHeritage options:
1
Select a general
category of
configurable options
2
Look for the name
of the option that
you would like to
change
4
Click on a parameter to modify it
2
3
Click on a row to
see a description of
how this option
affects the behavior
of MyHeritage
Simply click on an option in the tree on the left, to display a list of
configurable options on the right.
292
Configuration Options
Family Tree Builder User's Guide
3
Each row on the right enables you to configure a different MyHeritage
option. The left column is the name of the option and the right column in this
window is the value of that option. Clicking on a row shows a description of
the aspect of MyHeritage that is affected in the bottom of the window. It also
may add a small icon to the right of the value in the right column of the
table, as shown in the examples below:
When you click on the row shown below, the following appears .
Click the up arrow to increment the value of that option or click the
down arrow to decrement that value. You can also simply type over
the value.
Browser button
When you click on the row shown below, the
appears. Click it to open a window from which you can select a folder.
Configuration Options
Family Tree Builder User's Guide
When you click on the row shown below, a dropdown menu appears
from which you can select an option.
293
FAQ
Chapter 11
FAQ
FAQ
Family Tree Builder User's Guide
Chapter 11
FAQ
About This Chapter:
This chapter describes how to handle a variety of situations in
MyHeritage. This chapter answers the following questions:
How Do I Indicate an Adoption?, page 296
How Do I Specify the Other Parents of an Adopted Child or a
Stepchild?, page 298
How Do I Add, Change or View Multiple Spouses?, page 299
How Do I Define Same-Sex Relationships?, page 300
How Do I Change the Parents of a Child?, page 301
295
296
FAQ
Family Tree Builder User's Guide
How Do I Indicate an Adoption?
1
From the Family menu, select Children and then Manage Children to
display the following window:
2
Select the Adopted option in the Relationship field.
FAQ
Family Tree Builder User's Guide
3
To indicate how adopted children are shown in the charts and reports, click
the Charts
4
button to display the Charts menu, as shown below:
Select Chart Options, as shown below:
The Lines tab enables you to define the line between the boxes in a chart.
It enables you to select the line type, width and color. You can indicate a
non-natural parent/child relationship by a dashed line.
297
298
FAQ
Family Tree Builder User's Guide
How Do I Specify the Other Parents of an Adopted Child
or a Stepchild?
Adding another set of parents may be relevant in a variety of situations, for
example, you may want to add the biological parents of an adopted child in your
family tree or the parents of a stepchild.
In the Tree View, right-click on a person’s card and select Parents Ä Add
Parents. A window is displayed offering you a variety of options to handle
different kinds of additional parents that a person may have.
When you right-click on a Person’s Card in Tree View, the following menu
appears indicating how many pairs of parents this person has and their names.
FAQ
Family Tree Builder User's Guide
How Do I Add, Change or View Multiple Spouses?
You can define multiple spouses for a single person. One of the spouses is
defined as the primary spouse. The primary spouse is the one displayed first in
the tree. You can change the primary spouse by changing the order of the
spouses in the Manage Spouses window, as described on page x.
When you right-click on a Person’s Card in Tree View, the menu shows the
number of spouses defined for this person and their names. Simply select one
of the spouses in the menu to show their card in the Tree View.
The following options are available for defining spouses:
299
300
FAQ
Family Tree Builder User's Guide
How Do I Define Same-Sex Relationships?
In a same-sex relationship, one partner is defined as the husband and the other
partner as the wife, even though their gender is the same. It is possible to
specify either male or female gender for anyone that is added to your family
tree. If John and Bob are added as a couple, John can be added as the male
and Bob as the female. To do so, the automatically set gender field can be
changed to Female or Male, as you wish. A warning is displayed, but clicking
OK allows the two same-sex partners to be defined as a couple.
FAQ
Family Tree Builder User's Guide
How Do I Change the Parents of a Child?
In the Tree View, right-click on a person’s card and select Parents Ä Detach
From Parents.
You can now replace the parents by right-clicking on this person’s card and
selecting Parents Ä Replace Parents. The following window is displayed,
enabling you to select different parents. You can hover over a row to display the
photos of these people.
301