1
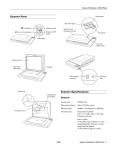
English Ref. No. 24-893G-2001-06/1232 XD-X2 Operating Instructions IRO AB Box 54 SE-523 22 Ulricehamn SWEDEN Tel: (+46) 321 297 00 Fax: (+46) 321 298 00 [email protected] www.iroab.com Contents XD-X2 Warning.........................................................................................................................2 Technical specifications.................................................................................................3 Mains connection..........................................................................................................4 Operating diagram.........................................................................................................5 Connections.............................................................................................................. 6-7 Installation.....................................................................................................................8 Jumper settings.............................................................................................................9 Main parts....................................................................................................................10 Speed settings.............................................................................................................11 Yarn control........................................................................................................... 12-13 S/Z adjustment............................................................................................................14 Threading.............................................................................................................. 15-16 Balloon/ E-Flex adjustment.........................................................................................17 CAT adjustment...........................................................................................................18 Sensor adjustment......................................................................................................19 Maintenance................................................................................................................20 Assembly instructions..................................................................................................21 Fault finding.................................................................................................................22 Declaration of conformity.............................................................................................23 This section contains important safety information. Read the manual carefully before installing, using or maintaining the feeder. CAUTION WARNING Indicates a possible dangerous situation which could result in serious injury or damage to the unit. Indicates a possible dangerous situation which could result in minor/moderate injury or damage to the unit. NOTE Ref. No. 24-893G-2001-06/1232 Used in order to draw attention to important information, which facilitates operation or handling. ORIGINAL LANGUAGE INSTRUCTION Iro ab reserve the right to change the contents of the user’s guide and technical specifications without prior notification. 1 Warning WARNING! • The power supply must be switched off at the mains before any work is carried out on the feeder, the transformer or any other electrical components. The feeder and the transformer cabinet must be fully assembled before the power supply is connected. • The weft feeder ON/OFF-switch does not cut off the main power supply. Turn off the main switch before any work is carried out on the electrical circuit. • The feeder and transformer contain electrical components that retain an electric current up to three minutes after disconnection XD-X2 2 CAUTION! • Caution must be taken in the close vicinity of the feeder as it contains moving parts that c an cause injuries and, in normal operation, starts without prior warning. • To comply with c.E. Regulations only replacement parts approved by IRO AB may be used. • The feeder is an industrial product and therefore not approved to use household environments /in residential areas. • All work on electrical components must be carried out by a qualified electrician. • This product is not intended for use in potentially explosive atmospheres or in zones classified according to the european directive 94/9/ec. Please contact iro ab if products for use in a potentially explosive atmosphere are required. • Always turn off the main switch or isolate the power supply and disconnect the air supply before connecting or disconnecting the feeder, the control board or any of the circuit boards • Routine checks for damaged or worn parts must be made before operating this equipment. Any part that is worn or damaged should be properly repaired or replaced by authorized personnel. To avoid risk of injury DO NOT operate this equipment if any component does not appear to be functioning correctly. Ref. No. 24-893G-2001-06/1232 NOTE • To ensure the selection of the most suitable feeder and associated accessories, it is recommended making weaving tests with the intended yarns. • Please dispose of obsolete or unwanted equipment responsibly, taking into consideration any local regulations regarding the disposal and / or recycling of materials that are applicable Technical specifications XD-X2 700 W / Optical Max 1800 m/min 11 kg Min 5° C-Max 40° C Max 85 % 83 dB Max 9 mm Input air pressure 5,5 - 7 bar Heavy Duty Power Supply Stand Alone 230-575V 1000VA Max T 10A Fuse 21 kg Heavy Duty Power Supply CAN 380-440V 1900VA Max ! Ref. No. 24-893G-2001-06/1232 35 kg Note Subject to technical modifications. 3 Mains connection XD-X2 warning Turn off the main switch before any work is carried out on the electrical circuit. NOTE Condensation can form on the weft feeder when it is moved from the cold environment of the warehouse to the warmer environment of the loom room. Make sure that the feeder is dry before switching it on. Take the Voltage Supply Box out of the packing. Open the cover and connect the three-phase power cord. (4-wires cable). Make sure that the earth connection is properly made The section of each wire cannot be less than 1,5 mm2. Min 4x1,5 mm2 warning Mains supply Power supply must be connected after the loom main switch and emergency stop. Main switch Emergency stop The power supply to the feeder must not be disrupted when the weaving machine stops. Ref. No. 24-893G-2001-06/1232 Variations in main voltage. Nominal Voltage Frequence 200V - 346V 180V - 380V 50/ 60 Hz 380V - 400V 342V - 440V 50/ 60 Hz 415V - 575V 374V - 632V 50/ 60 Hz 4 Operating diagram XD-X2 5 Motor control unit and fuse panel Motor Accessories Motor control unit Terminal board Power Supply/ Interface Ref. No. 24-893G-2001-06/1232 Feeder 1- 8 Power Loom communication cable Extension Interface Feeder 9-12 Accessories A-D Connections heavy duty power supply XD-X2 Mains connection • Hauptanschluss Heavy Duty Power Supply Stand Alone Min 4x1,5 mm2 STAND ALONE - POWER SUPPLY Fuses STAND ALONE - INTERFACE Fuses F1 F2 F3 Red= 6,3A slow Blue= 6,3 A slow F1 - F3 = 4 A / 500 V STAND ALONE - INTERFACE Stop relay jumpers Opto coupler/ stop relay connection Common Ref. No. 24-893G-2001-06/1232 NO - normally open NC - normally closed Without stop relay signal Stop relay 6 Connections heavy duty power supply CAN XD-X2 Mains connection • Hauptanschluss Min 4x1,5 mm2 Heavy Duty Power Supply CAN CAN - POWER SUPPLY Fuses CAN - INTERFACE Fuses F1 F2 F3 F4 F5 F6 F7 F8 F9 F10-F13 6,3 A Ref. No. 24-893G-2001-06/1232 F1 - F6 = 10 A / 500 V F7 - F9 = 4 A / 500 V F10 - F13 = 8 A / 500 V Blue= 6,3A slow 7 Installation CAUTION The unit should not be mounted directly on the weaving machine. Use a separate floor stand. Note Feeders’ stand and creel must be connected to the earth of the loom. Place the creel behind the feeder’s stand avoiding sharp angles to the yarn path from the creel output to the feeders. Ref. No. 24-893G-2001-06/1232 Ensure that the mount screws are correctly tightened. XD-X2 8 Jumper settings XD-X2 Motor circuit board jumpers The feeder is equipped with jumpers on the motor circuit board that adapt the feeders operation to the characteristics of the weaving process. (Weaving machine settings have priority over jumper settings). Opto sensors Ref. No. 24-893G-2001-06/1232 J1 Yarn store sensor sensitivity- LOW (Normal setting XD X2 700W) J1 Yarn store sensor sensitivity- AUTO J2 Integrated yarn break sensor- DISABLE J2 Integrated yarn break sensor- ENABLE J3 Winding disc positioningDISABLE (one way bearing) J3 Winding disc positioning- ENABLE J4 Sensor filtering- DISABLE (continuous take off) J4 Sensor filtering- ENABLE (weaving) 9 Main parts Winding disc XD-X2 Yarn break detector 10 Yarn store sensors Brushring holder adjustment Tension ring quick-release Spool body Indicator Max speed ON/OFF Switch Full threading CAT Adjustment Ref. No. 24-893G-2001-06/1232 Half threading S/Z Switch* *= Not on one-way bearing Speed settings XD-X2 11 Note Normally the switch should be left at posistion 1 since the feeder automatically calculates the speed according to yarn consumption. However, with very low speeds or wide looms, it could be helpful to reduce the maximum speed in order to avoid unnecessary acceleration To set the maximum speed rotate the disc to the appropriate position. Optical sensors with 700W Motor Ref. No. 24-893G-2001-06/1232 1 = 1600 m/min 2 = 1300 m/min 3 = 1100 m/min 4 = 900 m/min 1 2 3 4 Yarn control XD-X2 12 When weaving certain types of yarn and under special weaving conditions it may be necessary to use yarn control elements in positions 1 and 3. The tables below and on the following page describe suitable combinations. Yarn control element positions 2 3 1 Yarn control element – type and position ELEMENT TYPE Position A Ref. No. 24-893G-2001-06/1232 G 1 B 1 ELEMENT TYPE 3 H C 1 J D 1 K E Lamella 2 (E-flex) Brush (CAT) Position 2 2 3 3 Yarn control recommendations Yarn Rapier Spun cotton and covered elastic Stiff yarns, Jute and Flax (linen) Chenille Fancy yarns, Slub and Nub High Twist 2 3 Ne 74 - 35 A G/ I K Ne 15 - 4 A G/ III K Ne 59 - 9 Ne 6 - 0,5 Nm 100 - 14 Nm 25 - 7 A D A A A Nm 10 - 0,8 D Nm 120 - 30 A Nm 35 - 20 Nm 26 - 7 A A Nm 10 - 0,8 D Nm 120 - 20 A Nm 10 - 0,8 D Nm 120 - 50 B Nm 10 - 0,8 G/ II G/ IIII K K H/ I B+B+K G/ III K H/ II G/ IIII B+B+K K E/ II K G/ III K E/ III G/ IIII K K TENSIONERS 1 Ne > 35 Ne 59 - 16 Ne 20 - 4 Ne 6 - 0,5 Nm > 60 Nm 100 - 27 Nm 33 - 7 Nm 10 - 0,8 Nm 120 - 27 Nm 33 - 7 Nm 10 - 0,8 A A A D A A A D A D D 2 H/ I G/ II G/ III G/ IIII H/ I G/ II G/ III G/ IIII G/ II G/ III G/ IIII G/ II K G/ IIII K Nm 10 - 0,8 D H/ I B+B+K Nm 120 - 50 B B H/ III B+B+K Nm 10 - 0,8 B H/ III Tex 4 - 20 C E/ I K C H/ I Tex 40 - 100 C E/ III B+B+K Nm 25 - 7 Nm 67 - 7 Tex 15 - 50 Tex 4 - 20 Endless Filament YARN COUNT 1 Nm 120 - 60 Wool Projectile TENSIONERS YARN COUNT 13 XD-X2 A B C C Tex 15 - 40 C Tex 80 - 400 A Tex 30 - 100 A G/ III H/ II E/ II H/ I H/ II H/ II H/III K B+B+K K J/ I+K J/ II+K J/ III+K B+B+K Nm 120 - 50 Nm 67 - 7 Nm 67 - 7 Tex 4 - 20 Tex 15 - 100 Tex 80 - 400 Tex 4 - 20 Tex 15 - 100 Tex 80 - 400 A A B C C C C A H/ I H/ II H/ III H/ I H/ II H/ II H/ III H/ I H/ II H/ III Ref. No. 24-893G-2001-06/1232 Tension rating: I=soft, II=medium, III=stiff, IIII=extra stiff NOTE As tensioner performance can be affected by various factors connected to the specific yarns being used the above recommendations are intended purely as a guide. In case of any uncertainty it is recommended that a weft insertion test be carried out. S/Z adjustment XD-X2 With standard ball bearing Switch off the feeder. Grip the winding disc (1) and, whilst pressing the orange button on the front of the spool body (2), rotate the disc until the button is felt to locate. Aligning the mark on the winding disc with the line on the motor house gives the zero separation position. 1 To adjust, press in the button and revolve the winding disc in the appropriate direction. 2 Set the direction of rotation with the switch. (The feeder is deactivated in the standby position (0)) With one way ball bearing Insert the tool in to the hole (3) and, whilst pressing the tool gently, rotate the winding disc until the tool is felt to locate (4). Ref. No. 24-893G-2001-06/1232 To adjust, press with the tool and revolve the winding disc to the appropriate position between 0 and max Z. The separation must be distinct, but not excessive. 4 3 14 Pneumatic threading Switch on the feeder. The winding disc will automatically position itself (empty spool body). FULL THREADING Insert the yarn into the eyelet and press the upper button, whilst lightly holding the yarn. HALF THREADING Ref. No. 24-893G-2001-06/1232 Insert the yarn into the eyelet and press the lower button, whilst lightly holding the yarn. XD-X2 15 Manual threading 16 XD-X2 WITHOUT CAT • • • • Switch off the feeder. Align the winding disc eyelet (1). Open the brush holder (see page 20). Thread the needle all the way through the feeder and output eyelet. • Pull the yarn through. • Restart the feeder. 1 WITH CAT • Switch off the feeder. • Align the winding disc eyelet. • Thread the needle through the feeder and balloon control brush. • Start the feeder and fill the yarn store. • Insert the threading needle into the CAT (2) as far as possible. • Pulling the yarn (3) will cause it to wrap around the threading needle. • When the threading needle is pulled out (4) the yarn will follow. 2 3 Ref. No. 24-893G-2001-06/1232 4 WARNING When using a threading needle, care must be taken to avoid damaging the E-flex. Ensure that the flex holder is in the forward position before threading. Balloon/ E-Flex adjustment Adjust the balloon control/ E-flex tension. NOTE Excessive brush tension will cause abnormal wear. Ensure that the brush ring/ E-flex is correctly positioned. REPLACING THE BRUSH/ E- FLEX Ref. No. 24-893G-2001-06/1232 Rotating the slide shift lever will detach the brush/ E-flex from the spool body XD-X2 17 CAT adjustment Control input yarn tension to the CAT. NOTE The brush ring shall only be used for balloon control. Ref. No. 24-893G-2001-06/1232 Adjustment of the output tension. XD-X2 18 Sensor adjustment XD-X2 Opto sensor Certain yarn types may stick to, or leave deposits on, the sensor mirror. In such cases the clearance between the yarn and the mirror can be increased. Adjust the clearance by rotating the mirror 180 degrees. Normal Position Normalstellung Ref. No. 24-893G-2001-06/1232 Increased clearance Größerer Abstand 19 Maintenance XD-X2 Cleaning It is recommended to carry out a periodical cleaning of any lint or dust accumulation on the feeder or the control box. min 20 cm lubrication The unit requires no extra lubrication. Connections Main switch Warning Always turn off the main switch or isolate the power supply and disconnect the air supply before connecting or disconnecting the feeder, the control board or any of the circuit boards. IRO/ ROJ Tool kit Ref. No. 24-893G-2001-06/1232 It is recommended to use IRO tool kit, with specialised tools, to ensure easy and correct disassembly/ assembly of IRO feeders during maintenance work. Please contact your local IRO service station for further information. 20 Assembly instructions XD-X2 After disassembling, it is necessary to install the spool-body part by part to avoid damaging the parts. Secure the bellow properly with plastic straps (1). 1 1 Be sure that the carrier pin fits into the keygroove in the motor shaft (2). 2 Insert the two screws for the rubber belly (3) and be sure they are properly tightened with the correct key. (Torx T10) 3 3 Turn the winding disc (4) when holding the centre nut (5) to get the balance weight in position. When correct, the disc can easily be moved 180° only. 5 Ref. No. 24-893G-2001-06/1232 4 Install the centre screw, outer rubber belly, spoolbody and cover. Set the yarn separation in a suitable position to be sure it is correctly assembled. 4 21 Ref. No. 24-893G-2001-06/1232 Fault finding Fault Check in the following order Feeder will not start 1 - 2 - 3 - 4 - 6 - 7 - 8 - 24 - 25 - 26 Feeder will not stop 2 - 4 - 24 - 25 Low or empty yarn store 4 - 3 - 13 - 9 - 8 - 17 - 21 - 24 - 25 - 27 - 26 Input yarn breaks frequently 22 - 10 - 13 - 18 Output yarn breaks frequently 11 - 20 - 12 - 19 - 23 Fuses blow repeatedly 25 - 28 Feeder warning light flashes slowly 4 Feeder warning light flashes rapidly 3 - 9 - 8 - 27 Feeder warning light continously on 29 No Remedies Possible causes 22 XD-X2 See page 1. Incorrect S/Z switch position Set the S/Z switch in appropriate position 14 2. Incorrect spoolbody position Ensure the sensor unit is positioned upwards 19 3. Winding disc jammed Free and clean the winding disc 21 4. Contaminated sensor or mirror Clean the sensor and mirror using a mild cleaning agent 19 6. Faulty cable connections Check and rectify 4-7 7. Fuses blown Replace the relevant fuse 6-7 8. Mains supply / primary voltage fault Check the mains supply and connections 9. Insufficient input tension Increase the input tension 12-13 10. Excessive input tension Reduce the input tension 12-13 4-7 11. Insufficient balloon control Increase the balloon control 17 12. Excessive output tension Reduce the output tension 17 13. Excessive yarn separation Reduce the yarn separation 14 17. Insufficient max speed setting Increase the max speed setting 11 18. Excessive max speed setting Reduce the max speed setting 11 19. Insufficient yarn store See “low or empty yarn store” under “fault” 20. Damaged balloon control Repair/replace all defective parts 21. Stop signal fault between control box and weaving M/C Check all connections/cable 22. Misalignment between the bobbin and the feeder Realign the bobbin/feeder - 23. Misalignment between the feeder and the machine Realign the feeder/machine - 24. Defect yarn store sensor unit Replace the relevant sensor unit 25. Defective motor circuit board Replace the relevant circuit board 26. Defective fuse panel Replace the relevant fuse panel 6-7 27. Defective control box interface Replace the relevant interface 6-7 28. Defective feeder connection cable Replace the relevant connection cable 29. Yarn break Rethread the feeder 12-13 6-7 10 5 15-16 Declaration of conformity IRO AB Box 54 SE-523 22 Ulricehamn XD-X2 EC DECLARATION OF CONFORMITY EG-KONFORMITÄTSERKLÄRUNG DECLARATION CE DE CONFORMITE DICHIARAZIONE CE DI CONFORMITA’ DECLARACIÓN DE CONFORMIDAD CE DECLARAÇÃO CE DE CONFORMIDADE CE Guarantee that machine type:...................... Versichert dass der Maschinentyp:............. Guarantie pour machine type:..................... Garantische che il tipo di macchina:........... Garantia que é o tipo de màquina:............... Garantiza de que os tipos de màquinas:.... XD-X2 Is manufactured in comformity with the provisions of the following EC directives and applicable amendments: Ist gemäss der folgenden für Maschinen geltenden EG-Richtlinjen hergestellt worden (damit auch alle zusätzliche Änderungen) Est fabriqué en conformité aux dispositions des directives CE suivantes (y compris tous les amendements): E´costruito in conformità a quanto previsto dalle seguenti direttive UE e successive modifiche: Ref. No. 24-893G-2001-06/1232 Està fabricado conforme con las disposiciones de las debajo mencionadas directivas CE (y sucesivas Safety of machinery 98/ 37/ EEC EN ISO 111 11-1 Low voltage equipment 2006/ 95/ EC EN ISO 111 11-1 Electromagnetic compatility 2004/ 108/ EC EN ISO 111 11-1 Pär Josefsson, Manager Product and Development department, 2007-12-01 23