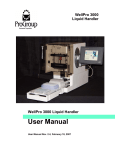
1
CESAR Swedish Energy Certificate System Account Holder Manual Date: 2015-01-05 CESAR ACCOUNT HOLDER USER MANUAL 2015-01-05 TABLE OF CONTENTS 1 2 CESAR – AN OVERVIEW ........................................................................................................................ 4 1.1 CESAR .................................................................................................................................................... 4 1.2 SUPPORTED BROWSERS AND VERSIONS ................................................................................................. 4 1.3 TERMS USED .......................................................................................................................................... 5 1.4 ABOUT THIS GUIDE ............................................................................................................................... 7 GETTING STARTED ................................................................................................................................. 9 2.1 3 4 5 ACCESSING CESAR ................................................................................................................................. 9 2.1.1 Login to Cesar................................................................................................................................... 9 2.1.2 Cesar Main Menu............................................................................................................................ 10 2.1.3 Report viewer functions .................................................................................................................. 11 2.1.4 Useful keyboard shortcuts ............................................................................................................... 12 2.1.5 Expandable bands ........................................................................................................................... 12 2.1.6 Log in to Box ................................................................................................................................... 13 MANAGING USERS ................................................................................................................................ 14 3.1 ROLES AND RESPONSIBILITIES ............................................................................................................. 14 3.2 VIEWING THE USERS LIST .................................................................................................................... 16 3.3 SEARCHING USERS ............................................................................................................................... 17 3.4 CREATING NEW USERS ........................................................................................................................ 18 3.5 EDITING USER DETAILS ....................................................................................................................... 20 MANAGING THE ORGANIZATION .................................................................................................... 22 4.1 MANAGE YOUR ORGANIZATION .......................................................................................................... 22 4.2 EDITING INVOICING ADDRESS.............................................................................................................. 24 RUNNING & MAINTAINING PLANTS................................................................................................ 25 5.1 MANAGE PRODUCTION DEVICES ......................................................................................................... 25 5.2 SEARCH FOR A PRODUCTION DEVICE ................................................................................................... 26 5.2.1 View Production Device Details ..................................................................................................... 29 Cesar Account Holder User Manual © 2014 Grexel Page 1 of 102 CESAR ACCOUNT HOLDER USER MANUAL 5.2.2 5.3 Change the issuing Account ............................................................................................................ 31 MR DECLARATION .............................................................................................................................. 32 5.3.1 Add MR Declaration ....................................................................................................................... 35 5.3.2 View and edit MR Declaration ........................................................................................................ 37 5.3.2.1 Fuel Declaration ..................................................................................................................................... 37 5.3.2.2 Unit Declaration ..................................................................................................................................... 39 5.4 6 2015-01-05 MONITOR METER READINGS ............................................................................................................... 39 MANAGING CERTIFICATES ............................................................................................................... 42 6.1 WORKFLOW DESCRIPTION ................................................................................................................... 42 6.2 ACCOUNTING AND TRANSACTIONS IN CERTIFICATES .......................................................................... 43 6.3 ACCESS TO CERTIFICATES MODULES ................................................................................................... 45 6.3.1 View Accounts ................................................................................................................................. 45 6.3.2 Modify Account ............................................................................................................................... 46 6.3.3 Move Account.................................................................................................................................. 47 6.3.4 Create Accounts .............................................................................................................................. 48 6.3.5 Create Sub Account ......................................................................................................................... 49 6.4 CERTIFICATE TRANSACTIONS .............................................................................................................. 49 6.4.1 6.4.1.1 Transfer SE-GO...................................................................................................................................... 50 6.4.1.2 Request EECS issuing (SE- GO) ............................................................................................................ 52 6.4.1.3 Cancel Certificates (SE-GO) .................................................................................................................. 54 6.4.2 Elcertificates transactions ............................................................................................................... 56 6.4.2.1 Transfer elcertificates ............................................................................................................................. 56 6.4.2.2 Import/Export to Norway (Elcertificates) ............................................................................................... 56 6.4.3 6.5 SE-GO transactions ........................................................................................................................ 50 Schedule Transaction ...................................................................................................................... 57 6.4.3.1 Create Schedule ...................................................................................................................................... 59 6.4.3.2 Edit Schedule.......................................................................................................................................... 61 6.4.3.3 Delete Schedule ...................................................................................................................................... 62 ACCOUNT STATEMENT......................................................................................................................... 62 Cesar Account Holder User Manual © 2014 Grexel Page 2 of 102 CESAR ACCOUNT HOLDER USER MANUAL 6.6 ACCOUNT BALANCE ............................................................................................................................ 64 6.7 SEARCH TRANSACTIONS ...................................................................................................................... 65 6.8 VIEW TRANSACTION DETAILS ............................................................................................................. 70 6.9 SEARCH CERTIFICATES ........................................................................................................................ 72 6.9.1 7 8 2015-01-05 Show as Report search .................................................................................................................... 74 6.10 OWN DEALS ......................................................................................................................................... 76 6.11 PREDEFINED PRICES (ELCERTIFICATES) ............................................................................................... 78 6.12 CERTIFICATE BUNDLES REPORT (SE-GO) ........................................................................................... 80 PRIVATE REPORTS ............................................................................................................................... 81 7.1 ACTIVITY LOG ..................................................................................................................................... 81 7.2 REVISION REPORT ................................................................................................................................ 82 7.3 STRUCTURAL REPORT .......................................................................................................................... 84 7.4 PRODUCTION REPORT .......................................................................................................................... 85 PUBLIC REPORTS .................................................................................................................................. 87 8.1 STATISTICS ELCERTIFICATES ............................................................................................................... 87 8.1.1 Average Price.................................................................................................................................. 88 8.1.2 Transfers List .................................................................................................................................. 89 8.1.3 Issuing ............................................................................................................................................. 91 8.1.4 Transfers ......................................................................................................................................... 93 8.1.5 Cancellations .................................................................................................................................. 94 8.2 STATISTICS GO .................................................................................................................................... 95 8.2.1 Members .......................................................................................................................................... 96 8.2.2 Plants .............................................................................................................................................. 98 8.2.3 Transactions .................................................................................................................................. 100 Cesar Account Holder User Manual © 2014 Grexel Page 3 of 102 CESAR ACCOUNT HOLDER USER MANUAL 2015-01-05 1 CESAR – AN OVERVIEW 1.1 Cesar Cesar is the system for green certificates (Elcertificates) and Guarantees of Origin in Sweden. On the Guarantees of Origin side, Cesar helps tracking the ownership of these certificates and facilitates issuing, trading, cancellation and expiration of guarantees of origin. On the Elcertificates side, Cesar assists the Swedish authorities to keep account of the certificates and register quota obliged actors. Elcertificates are cancelled to fulfil quota requirements in Sweden. Besides that, Cesar allows actors to transfer Elcertificates to Norwegian registry, NECS. Through Cesar, Account Holders can access elcertificates statistics as well. Cesar also gives the possibility to issue European Energy Certificate System (EECS). Certificates are used to track electricity production attributes from production to consumption. This manual describes the functionalities of the system from the Account Holders’ point of view. 1.2 Supported Browsers and Versions The recommended software to use Cesar is Internet Explorer Version 8 (or higher) 32 bit, Mozilla Firefox Version 4 (or higher) or Google Chrome. Note: When using Internet Explorer Version 10, the compatibility mode should be on to avoid issues. To enable the IE10 Compatibility mode: 1) Open the Internet Explorer Version 10 browser and access Cesar at https://cesar.energimyndigheten.se 2) Press F12 on the keyboard to see the developer window. 3) On the developer window click on Browser Mode. 4) Change the Browser mode from Internet Explorer 10 to Internet Explorer 10 Compatibility View. 5) Cesar page will be refreshed. Close the developer window and navigate normally. Note: When using Internet Explorer Version 9 users might have problems in signing as BankID is not updated to IE9 yet. Cesar Account Holder User Manual © 2014 Grexel Page 4 of 102 CESAR ACCOUNT HOLDER USER MANUAL 2015-01-05 1.3 Terms Used Table 1-1 – Terminology Used Term used Description Account The means by which an Account Holder can interact with this application. This is the source or destination for all transfer transactions. Account Holder A Production Device holder or trader or mixture of both. An Account Holder has an Account in the system to manage certificates. AH Short for Account Holder Association See License. Bundle A set of identical certificates with consecutive serial numbers. Cancel A type of transaction which leads to the cancellation of certificates by the Account Holder due to consumption or due to quota fulfilment. Certificate An official, tradable electronic document that is issued in lieu of energy produced by a Production Device. CMO Central Monitoring Offices CMO.grexel Hosted central registry for EECS Guarantees of Origin Declaration A specification submitted by Account Holders to the IB along with Meter Readings for a production device. The types of declarations include Fuel declarations and net/gross declarations. Domain A geographic area with a designated Issuing Body. For example, Sweden, Norway. Earmark This defines the nature of support associated with a Production Device. Examples include Production Support and Investment Support. EECS European Energy Certificate System. A trading and regulative international arrangement for guarantee of origin managed by the Association of Issuing Bodies (AIB). Ediel ID Code of agent engaged by the reporter Energimyndigheten Swedish Energy Agency Energy Source See Fuel. Expiration The Withdrawal of an EECS Certificate as a consequence of the passage of a given period of time since its issue. Cesar Account Holder User Manual © 2014 Grexel Page 5 of 102 CESAR ACCOUNT HOLDER USER MANUAL Term used 2015-01-05 Description Export A type of transaction in which an Account Holder transfers certificates to an External Account. External Account The Account of an Account Holder belonging to a different domain. Fuel This defines the source of energy associated with the Production Device. GS1 The unique identifier number assigned to the organization by the global GS1 organization (usually only for the issuing bodies) GSRN The Global Service Relation Number linked to a Production Device. Import A type of transaction in which an Account Holder receives certificates from an External Account. Issuing Body (IB) An organization which issues certificates and also registers and approves production devices and Accounts. Pre-defined list of schemes with which a domain (hence an organization) is associated for a specific period of time. They are categorized as : License Non-Trading Scheme — Certificates linked to such Licenses cannot be transferred. Trading Scheme — Certificates linked to such Licenses can be transferred. Member Code The Account Holder specific identifier code formatted according to AIB (Association of Issuing Body) standards. Member Code is used if a certificate is transferred from an Account belonging to an external Registry. Organization A body which is associated with this system as an AH or IB. Member code, Business Id and Address are some of the identifying parameters linked to this body. The organization is also linked to some Licenses which are determined by the domain they belong to. Plant See Production Device. Production Device A separately metered device or group of devices that generates electricity. Parameters like Licenses, Fuels, Owners, etc., are defined for each device. Certificates are issued for energy produced by such devices. PD Short for Production Device. Registrant The party that requests a Production Device to be registered for certificate issuing. Often an Account Holder that owns a Production Device. Registrar The auditing authority to verify registered Plant information. Registry A database operated by a Member or by a CMO for the purposes of EECS. Certificates are held in the Registry, where Account Holders can perform Transactions with them. Cesar Account Holder User Manual © 2014 Grexel Page 6 of 102 CESAR ACCOUNT HOLDER USER MANUAL Term used 2015-01-05 Description Swedish Energy Agency Main body to hold information and registration on Actors, Production Devices, Quota obligation and Certificate redemption in Sweden Technology The type of the Production Device, i.e. the processes and technology through which the Production Device generates electricity. User User of the system. User – Locked or Unlocked The status of the user’s account on Cesar Withdrawal Corrective action that the IB can take to remove an erroneously issued or transferred certificate. 1.4 About This Guide Note: This user guide is addressed to Account Holder users. This guide describes how to use the Cesar application effectively to manage its functions. This user guide explores the application from the perspective of Account Holder users and it is divided into the following chapters: Table 1-2 – Organization of chapters Chapters Description Chapter 1 – Cesar– An Overview This chapter introduces the Cesar application, describes the workflow briefly and lists its requirements. Chapter 2 – Getting Started This chapter describes the steps to access and log in to the Cesar application. Chapter 3 – Managing Users This chapter enumerates the different roles and rights of the users and the options under the Users module to create and manage different users for the application. Chapter 4 – Managing the Organization This chapter describes the option provided under the My Page module to maintain the details of your Organization. Chapter 5 – Running & Maintaining Plants This chapter describes the process of managing Production Devices (Plants module). Cesar Account Holder User Manual © 2014 Grexel Page 7 of 102 CESAR ACCOUNT HOLDER USER MANUAL Chapters 2015-01-05 Description Chapter 6 – Managing Certificates This chapter describes the actions to manage the Accounts of the Account Holder and to handle certificates. (SE-GO and Elcertificates modules). Chapter 7 – Generating Private Reports This chapter describes the system of private reporting of the Transactions provided under the Reports module. Chapter 8 – Public Reports This chapter describes the system of public reporting and statistics. Table 1-3 – Typographical conventions used Convention Bold Purpose Example Statements describing the execution of a function. Click Cancel to ignore the data entered and return to the main menu page. Navigation paths in the Cesar application. Navigate to Certificates>Account Statement. Capitalized Indicating that the word is defined in the Terminologies Used section. […] an Account Holder can make a Declaration […] Blue & Bold A note to draw the attention of the reader. Note: Important points that have to be taken care of while using the options. Hyperlink Link to specific locations inside the document. Click the PD Registration Form to view the PD registration form details. Cesar Account Holder User Manual © 2014 Grexel Page 8 of 102 CESAR ACCOUNT HOLDER USER MANUAL 2015-01-05 2 GETTING STARTED This chapter describes the steps to access and log in to the Cesar application. Cesar’s system takes different types of users into consideration while defining access provisions to functionalities (Chapter 3 describes users’ types and roles). 2.1 Accessing Cesar Cesar is accessible via an Internet browser and requires login. The system can be accessed at https://cesar.energimyndigheten.se. Users are given access to the functions of the system according to the roles assigned to them, and therefore if some activity described in this document is not accessible for you, you might not have permission to it. Note: The AH Root user can create other AH users and assign roles (For more information, see Chapter 2.1.5). Internet Explorer Version 8.0 (or higher), Mozilla Firefox Version 4.0 (or higher) and Google Chrome are the recommended browsers. 2.1.1 Login to Cesar To be able to access Cesar, you need to obtain a client certificate. A client certificate is like a digital identification card, which proves who you are. You can get a client certificate for free from your bank. For information on how to proceed, please navigate to Info/FAQ under the public pages of the Cesar application. 1. To access the Cesar web application, start your Internet browser and navigate to www.cesar.energimyndigheten.se (or straight at https://cesar.energimyndigheten.se). 2. The Cesar public site is displayed (Figure 2.1). Navigate to the private site and use the certificate to log in. 3. Select the appropriate login option for you: BankId or Nexus Personel Token. 4. After login, the start-up screen of the Cesar application is launched. The welcome screen should show news and information about the user. Cesar Account Holder User Manual © 2014 Grexel Page 9 of 102 CESAR ACCOUNT HOLDER USER MANUAL 2015-01-05 Figure 2.1 – Cesar login screen 2.1.2 Cesar Main Menu The main menu displays the list of modules that are accessible to the user. Table 2-1 gives a brief description of each module listed in the main menu. Figure 2.2 display the start-up screen. Notes: This manual covers all the functionalities provided for the AH Root users. However, the options available to the users are based on the roles assigned to them. Refer to Chapter 3 for information about the access permissions defined for different roles. Table 2-1 – Modules in the Main Menu Main Menu / Modules Functions Home The start-up page of the application that is displayed when you log in to the application. SEGO/Elcertificates The sections to manage the Accounts of the Account Holder and to Transfer and Cancel certificates to other Accounts of the same Domain or to other Domains. Provides also options to create different Transaction reports and to see details of Certificate Bundles on the Accounts. Cesar Account Holder User Manual © 2014 Grexel Page 10 of 102 CESAR ACCOUNT HOLDER USER MANUAL Main Menu / Modules 2015-01-05 Functions Plants Covers the process of registering Production Devices to the system and aggregating Meter Readings. Users Covers the options to create and manage the Users of the Account. Reports Covers the options of generating private reports of the Activity Log of Transactions and modifications, Revision Report and Structural Report My Page Covers the options to maintain the organization details and settings. Public Site Brings you back to the public site Figure 2.2 – Cesar start-up screen 2.1.3 Report viewer functions Figure 2.3 shows the report viewer toolbar that provides navigation, search and export functions to help you work with reports in Cesar. The different icons and their functions are presented in Table 2-2. Figure 2.3 – Report viewer Cesar Account Holder User Manual © 2014 Grexel Page 11 of 102 CESAR ACCOUNT HOLDER USER MANUAL 2015-01-05 Table 2-2 – Report viewer functions Icon Description First Page: Navigate to the first page of the report. Previous Page: Navigate to the previous page. Next Page: Navigate to the next page. Last Page: Navigate to the last page of the report. Go back to the parent report: Navigate to the parent report. Find Text: Search text from the entire report. (Note: not available on Firefox.) Export: Select from the dropdown list to export the report in Excel or PDF format. 2.1.4 Useful keyboard shortcuts Table 2-3 lists some useful key combinations that may facilitate the use of the Cesar application. Table 2-3 - Keyboard shortcuts Key combination Description Enter Activate focused button, menu item, e.g. search request. Ctrl - Click Select multiple choices in list boxes. Alt Gr - Click Unselect choices in list boxes. Tab Navigate to the following field. Shift - Tab Navigate to the previous field. 2.1.5 Expandable bands When navigating through Cesar, your navigation sections are organized in bands (header for sections) which can be expandable or hidden depending on the user’s preferences. Figure 2.4 displays a band example. To expand a band, click on Open and to hide a band select Close. Cesar Account Holder User Manual © 2014 Grexel Page 12 of 102 CESAR ACCOUNT HOLDER USER MANUAL 2015-01-05 Figure 2.4 – Band example 2.1.6 Log in to Box If a user has credentials to more than one organization, this user is able to login to the second organization using the Log in to box in home screen (Figure 2.2). To login to the different organization, select the organization in the login box and click Login. To go back to the previous organization, click Go Home. Figure 2.5 – Log in to box Cesar Account Holder User Manual © 2014 Grexel Page 13 of 102 CESAR ACCOUNT HOLDER USER MANUAL 2015-01-05 3 MANAGING USERS This chapter describes the roles and the responsibilities assigned to the users of the Account. In addition, this chapter introduces the options provided under the Users module for creating and managing users for the Account. 3.1 Roles and Responsibilities Cesar has various user authorization levels for Account Holders. Specific responsibilities related to the use of Cesar are identified and assigned to the predefined role(s). The appropriate roles are assigned to the users. Figure 3.1 lists the different roles and the access rights assigned to them. The Root User has the highest access, but only Producers type actors have access to Plants module and can perform actions related to production devices. Note: Some of the functions are Domain/actor dependent and might not be available for you even if they are listed in Figure 3.1. These functions are denoted by an asterisk (*). The person who is assigned as Business Contact of a new organization receives from the start AH Root rights. Cesar Account Holder User Manual © 2014 Grexel Page 14 of 102 CESAR ACCOUNT HOLDER USER MANUAL 2015-01-05 Figure 3.1 - Roles and Access provisions for the modules Cesar Account Holder User Manual © 2014 Grexel Page 15 of 102 CESAR ACCOUNT HOLDER USER MANUAL 2015-01-05 3.2 Viewing the Users List Note: This feature is available only for the role AH Root and AH User Administrator To view the list of users in your Organization, 1. Navigate to the Users module on the Main Menu. By default, the user list in your organization is shown. (Figure 3.2). The descriptions of the fields are listed in Table 3-1. 2. To Export the details of all the pages to an Excel sheet or a PDF file, select the respective option and click the Export button. 3. You can use the Edit to perform the respective actions. 4. You can execute a specific search by expanding the search criteria band (see chapter 3.3) Figure 3.2 – Viewing the Users list Cesar Account Holder User Manual © 2014 Grexel Page 16 of 102 CESAR ACCOUNT HOLDER USER MANUAL 2015-01-05 Table 3-1 – Details displayed in the Users List Name Description First Name First name of the User Last Name Last name of the user Roles Role(s) assigned to the user Locked Information about the Locked status of the user Action links Edit (link) Click this link to Edit the user details 3.3 Searching Users Note: This feature is available only for the role AH Root and AH User Administrator The Search option is provided to filter the user list by using one or more conditions: 1. Navigate to Users>Search User. 2. Expand the Search criteria band (Figure 3.3). Select Open to expand a band. 3. Define a single condition or multiple conditions by filling in the necessary field(s) (Table 3-2). By default, status Unlocked is selected. 4. Click the Search button to display the filtered users list below the Search Criteria band. Figure 3.3 – Search Users: search criteria Cesar Account Holder User Manual © 2014 Grexel Page 17 of 102 CESAR ACCOUNT HOLDER USER MANUAL 2015-01-05 Table 3-2 – Search Users: search criteria Name Description First Name Enter the First Name or a string (wild string) to filter the users list and locate the users whose First name contains the string Last Name Enter the Last Name or a string (wild string) to filter the users list and locate the users whose Last name contains the string User Status Search and filter the list based on the status of the user, Locked users or Unlocked users, by selecting one of the options. Roles Select one or more Role(s) from the drop down list to view the list of users who have the selected Role(s) (see Figure 3.1 for the different access rights). Action links Search Click to invoke the search and display the filtered user list. Reset Click to reset the screen to enter new search conditions. 3.4 Creating New Users Note: This feature is available only for the role AH Root Account Holder users assigned with role AH Root can create new users to the Account with different roles. Refer to Figure 3.1 for possible user roles. 1. Navigate to Users>Create User (Figure 3.4). 2. Enter the details of the user to be created (Table 3-3). 3. Click Create to save the details. Cesar Account Holder User Manual © 2014 Grexel Page 18 of 102 CESAR ACCOUNT HOLDER USER MANUAL 2015-01-05 Figure 3.4 – Creating a New User Cesar Account Holder User Manual © 2014 Grexel Page 19 of 102 CESAR ACCOUNT HOLDER USER MANUAL 2015-01-05 Table 3-3 – New user details (mandatory fields marked with *) Field Name Description First Name* Enter the First Name of the user. Last Name* Enter the Last Name of the user. Organization* Select your Organization from the drop-down list. The Organization cannot be changed. Groups * Select one or more Role(s) from the drop down list to be assigned to the user (use the Ctrl-key to select several roles). Email * Enter the email address. The client certificate will be delivered to this address. Mobile Phone Number* Enter the phone number. The SMS containing the PIN code will be delivered to this number. SSN Organization Personal Number Company, Street, PO Box, City, Zip code, Country Enter the relevant address details (Organization address is given as default). Action links Create Click this to save the details and create a new user. If the entries are valid, the new user is created and a suitable message is displayed. If the mandatory fields are not entered, the system displays an error message and the new user is not created. Reset Click this to reset the screen to enter new user details. 3.5 Editing User Details Note: This feature is available only for the role AH Root and AH User Administrator If the user has Edit rights to the Users module, the users list is displayed with the Edit link (Figure 3.2). 1. Click the Users module link on the Main menu. Define one or multiple search conditions and click Search to display the filtered user list. 2. Click the Edit link of the user whose details need to be edited. The Edit user details screen is displayed (Figure 3.5). 3. Carry out the changes. To lock the user, enable the Locked checkbox. Cesar Account Holder User Manual © 2014 Grexel Page 20 of 102 CESAR ACCOUNT HOLDER USER MANUAL 2015-01-05 The locked user will not be able to access the application. Upper level users will not be able to use the ‘Log in as’ functionality for locked users. To unlock the user, uncheck the Locked checkbox. 4. Click Update to save the changes or click Cancel go back to the users list. Figure 3.5 – Editing user details Cesar Account Holder User Manual © 2014 Grexel Page 21 of 102 CESAR ACCOUNT HOLDER USER MANUAL 2015-01-05 4 MANAGING THE ORGANIZATION Note: This module is available only for the AH Root role. Refer to Figure 3.1 for the access rights of different Account Holder users. This chapter will explain the option to manage your Organization information. This function is provided under the My Page module. 4.1 Manage Your Organization To manage your Organization details: 1. Click the My Page module link on the Main menu. By default, Manage My Organization is selected and details of your Organization are displayed (Figure 4.1 and Table 4-1). 2. You can Export the details to an Excel sheet or a PDF file by selecting the respective option and clicking the Export button. Cesar Account Holder User Manual © 2014 Grexel Page 22 of 102 CESAR ACCOUNT HOLDER USER MANUAL 2015-01-05 Figure 4.1 – Organization and its License details Cesar Account Holder User Manual © 2014 Grexel Page 23 of 102 CESAR ACCOUNT HOLDER USER MANUAL 2015-01-05 Table 4-1 – Viewing Organization details Field Name Description General details of the Organization Figure 4.1 displays the general details of the Organization including its License details. Business Contact and Invoice Contact details The Business Contact and Invoice Contact details of your Organization Action links Edit Invoicing Address Click this to edit the details of the invoicing Address (Chapter 4.2). 4.2 Editing Invoicing Address Note: Only an AH Root user can modify the Organization details. 1. Click the My Page module link on the Main menu. 2. By default, the Manage My Organization option is selected and details of your Organization are displayed (Figure 4.1). 3. Click the Edit Invoicing Address to edit the details of the selected Organization. 4. The Invoicing Address screen (Figure 4.2) is displayed. Carry out you changes. 5. Click Update on the bottom of the screen to save the details. Figure 4.2 – Editing Billing Address Cesar Account Holder User Manual © 2014 Grexel Page 24 of 102 CESAR ACCOUNT HOLDER USER MANUAL 2015-01-05 5 RUNNING & MAINTAINING PLANTS This section describes the process of registering, managing and reporting Production Devices. First, the general workflow of registering and managing PDs is described, after which detailed explanations are given on how these actions are performed in the Cesar application. Notes: This section is only available for Producers actors Only an AH Root, AH PD Administrator and AH PD Viewer users can view PD’s details Refer to Figure 3.1 for the permissions assigned to the roles for executing the functionalities available under the Plants module. An Account Holder with sufficient rights can view and search Production Devices to the Cesar system in order to receive certificates for the produced electricity of the device. Certificates of the Production Device are issued to the owner(s) of the device. 5.1 Manage Production Devices When you navigate to the Plants module, the search criteria band expands and existing Production Devices of the Account Holder are listed. (Figure 5.1 and Table 5-1). Figure 5.1 – Manage PD: Production Devices list Cesar Account Holder User Manual © 2014 Grexel Page 25 of 102 CESAR ACCOUNT HOLDER USER MANUAL 2015-01-05 Table 5-1 – Production Devices: Field Description Name Description Production Device Name Name of the PD. Click the link to see the details of the PD. STEM ID ID given by Energimyndigheten (Swedish Energy Agency) assigned to this device Grid area, Device ID Serial ID of the PD. Ediel-ID The PD’s Ediel-ID Installed Capacity (kW) Maximum capacity of the PD Status Indicates the status of the Production Device (e.g. Active or Deregistered). Fuel Specifies the Fuel(s) used by the PD. Technology Specifies the Technology of the PD Locked Indicates whether or not the PD is locked (yes/no). 5.2 Search for a Production Device Navigate to Plants>Manage PD. Expand the Search criteria band and fill the required criteria (Figure 5.2). Table 5-2 gives the search criteria descriptions in detail. Cesar Account Holder User Manual © 2014 Grexel Page 26 of 102 CESAR ACCOUNT HOLDER USER MANUAL 2015-01-05 Figure 5.2 – PD Search Criteria Cesar Account Holder User Manual © 2014 Grexel Page 27 of 102 CESAR ACCOUNT HOLDER USER MANUAL 2015-01-05 Table 5-2 – PD Search Criteria: Field Description Name Description Production Device Enter the PD name, Device ID, Stem ID, GSRN or Ediel-ID Grid Area Select a Grid Area to list PDs in this Area. Locked Select All from the dropdown list to list the PDs irrespective of the Lock status. Select Locked/Unlocked to view the PDs with the specific status. PD Status Select the Status from the list box to list the PDs with the specified status. Installed Capacity Enter the range of installed capacity using From and To fields to list PDs with this range of capacity. Date Of Commissioning Enter the range of dates using From and To fields to list the PDs, which were commissioned during this period. Start Date Enter the range of dates using From and To fields to list the PDs with a Start Date during this period. Stop Date Enter the range of dates using From and To fields to list the PDs with a Stop Date during this period. License Expiry Date Enter the expiry dates of the PD’s License Fuel and Technology Select the Fuel(s) and technology from the list box to list the PDs that use the specified source(s) of energy. License Select License(s) from the list box to list the PDs which have been associated with the specific scheme(s). Combusting Select Yes or No from the list to list combusting or non-combusting PDs. Earmark Select Earmark(s) from the list box to list the PDs which have been associated with the Earmark(s). Grid Reference Search by Grid Reference. Action links Search Click this to invoke the search and display the filtered device list. Reset Click this to reset the screen to enter new search conditions. Cesar Account Holder User Manual © 2014 Grexel Page 28 of 102 CESAR ACCOUNT HOLDER USER MANUAL 2015-01-05 5.2.1 View Production Device Details Navigate to Plants>Manage PD. 1. To view the details of a Production Device (PD), click the PD Name link on the PD list (Figure 5.1). The details of the current version of the PD are shown (Figure 5.3). 2. If the Production Device has several versions, the links to previous versions are shown on the top of the details view. Table 5-3 explains the hyperlinks and the action keys available in this view. Cesar Account Holder User Manual © 2014 Grexel Page 29 of 102 CESAR ACCOUNT HOLDER USER MANUAL 2015-01-05 Figure 5.3 – Production Device Details Cesar Account Holder User Manual © 2014 Grexel Page 30 of 102 CESAR ACCOUNT HOLDER USER MANUAL 2015-01-05 Table 5-3 – Production Device Details Hyperlinks Name Description Version Click to view information on the previous versions of the same PD (all versions have different production times). Owner Name Click to view the details of the owner Organization(s). Action Keys Change issuing account Click to make changes in the issuing account details. Back Click to go back to the previous section. 5.2.2 Change the issuing Account Note: Users with the role AH Root and AH PD Administrator user who are owners of a PD and whose ownership is not aggregated. Navigate to Plants>Manage PD>Click PD name>Change issuing Account. 1. To change the issuing Account for a specific Production Device, click the Change issuing Account button on the PD Details page. 2. Choose the issuing Account from the dropdown list. The current issuing Account is selected by default (Figure 5.4) 3. Click Save to confirm the change or click Back to go back to the PD Details page without effecting any changes. Note: Changing the issuing Account depends on the Account Holder’s relation to the Production Device. If your ownership share is aggregated to another Account Holder (in case of SE-GO), you cannot change the issuing Account. If you are an Owner of a multi-owned Production Device but have not aggregated your ownership share, the issuing Account can be changed. However, the change only applies to the certificates determined by your ownership share. The change can be seen in the Production Devices list under ‘Issuing Account’. In the case of aggregation, the field shows the text “Aggregated to [Account Holder the share is aggregated to] Aggregation is only available for SE-GO Cesar Account Holder User Manual © 2014 Grexel Page 31 of 102 CESAR ACCOUNT HOLDER USER MANUAL 2015-01-05 Figure 5.4 – Change the issuing account 5.3 MR Declaration Note: This functionality is only available for AH Root and AH PD Administrator Declarations are pieces of information that are needed along with the meter reading for the issue of certificates when e.g. more than one fuel is associated with a Production Device. Some examples of declarations are: Fuel declaration where the producer declares what fuels and how much was used during a time period. Gross/net declaration where meter reading reports gross production but the producer needs to declare self-consumption during the period. This leads to calculation of net production. This is required only if “Net Meter” is selected. The declarations are made by AH Root or AH PD Administrators and can hold valid for one or more meter reading periods, but not for a fraction of a period. 1. Navigate to Plants>MR Declaration to manage data related to Declarations. Fill the search Criteria (Figure 5.5 and Table 5-4) 2. A list of the PDs is shown (Figure 5.6 and Table 5-5) 3. You can Export the details to an Excel sheet or a PDF file by selecting the respective option and clicking the Export button. Cesar Account Holder User Manual © 2014 Grexel Page 32 of 102 CESAR ACCOUNT HOLDER USER MANUAL 2015-01-05 Figure 5.5 – MR Declaration: Search Criteria Table 5-4 – MR Declaration Search Criteria: Field Description Name Description Production Device Enter the PD name or Serial ID or Stem ID or GSRN Grid Area Select a Grid Area to list PDs in this Area. Installed Capacity Enter the range of installed capacity using From and To fields to list PDs with this range of capacity. Date Of Commissioning Enter the range of dates using From and To fields to list the PDs which were commissioned during this period. Start Date Enter the range of dates using From and To fields to list the PDs with a Start Date during this period. Cesar Account Holder User Manual © 2014 Grexel Page 33 of 102 CESAR ACCOUNT HOLDER USER MANUAL 2015-01-05 Stop Date Enter the range of dates using From and To fields to list the PDs with a Stop Date during this period. License Expiry Date Enter the expiry dates of the PD’s License Fuel and Technology Select the Fuel(s) and Technology from the list box to list the PDs that use the specified source(s) of energy. Declaration Type Select a Declaration type from the list box. Declaration Status Select the status of the declaration Declarations Period Enter the range of dates using From and To fields to list the PDs with declarations during this period. Declaration Reviewed Select Yes or No License Select License(s) from the list box to list the PDs which have been associated with the specific scheme(s). Combusting Select Yes or No from the list to list combusting or non-combusting PDs. Earmark Select Earmark(s) from the list box to list the PDs which have been associated with the Earmark(s). Grid Reference Search by Grid Reference. Action Links Search Click this to invoke the search and display the filtered device list. Reset Click this to reset the screen to enter new search conditions. Figure 5.6 –MR Declaration Cesar Account Holder User Manual © 2014 Grexel Page 34 of 102 CESAR ACCOUNT HOLDER USER MANUAL 2015-01-05 Table 5-5 – MR Declaration Management Name Description Production Device Name PD Name Version Start date of the PD version STEM ID ID given by Energimyndigheten assigned to this device Ediel-ID Ediel-ID of the device Grid Area, Device ID Serial ID of the PD. GSRN GSRN of the PD Action Links Add MR Declaration Click this link to Add MR Declaration View Declarations Click this link to View MR Declaration 5.3.1 Add MR Declaration Note: This function is only available for AH Root and AH PD Administrator. This page enables you to provide Declarations for a specific metering period. This option is available only if the PD requires a declaration. However, note that during the issuing day (usually 15th of each month or next working day, the exact date is shown on the public site) this functionality is locked and it is not possible to add or edit any kind of declaration. Notes: Some PD owners are required to provide both Unit declaration and Fuel declarations. In these case the unit declarations must be done first, and the fuel declaration second. If one of the declarations is still missing, the link “Add Declaration” will be visible for the given period. Unit type declaration must be signed using your client certificate During the issuing day (usually 15th of each month or next working day, the exact date is shown on the public site) there this functionality is looked and it is not possible to add or edit any kind of declaration. Some PD owners are required to provide both unit declaration and Fuel declarations. In these case the unit declarations must be done first, and the fuel declaration second. If one of the declarations is still missing, the link “Add Declaration” will be visible for the given period. Cesar Account Holder User Manual © 2014 Grexel Page 35 of 102 CESAR ACCOUNT HOLDER USER MANUAL 2015-01-05 Navigate to Plants>MR Declaration>Add MR Declaration. The view depends on the type of the declaration (Figure 5.7). Table 5-6 explain the declaration fields. Figure 5.7 – Create Declaration (unit declaration view) Table 5-6 – MR Declaration Creation Name Description Declaration Type Select a Declaration type from the list box (Fuel/Unit). The rest of the page is populated based on this selection. Metering Periods Select a Metering period from the list. Declaration Name Enter the name of the Declaration (of the type selected above). Declaration Percentage Enter the required percentage. Fuel This field displays the associated Fuels to be declared. Cesar Account Holder User Manual © 2014 Grexel Page 36 of 102 CESAR ACCOUNT HOLDER USER MANUAL Description Enter a description of the associated Fuel. Total Percentage Shows the sum of Declaration Percentages. 2015-01-05 Action Links Continue Click to create this record. To confirm the data entered, click Confirm in the page that is displayed. Back Click to return to Manage MR page Reset Click to clear the values entered. 5.3.2 View and edit MR Declaration Note: This function is only available for AH Root and AH PD Administrator Under MR declaration AH with sufficient rights can view and edit their MR Declarations. Declaration can be fuel or unit type. A declaration status can be Locked, Reviewed or Issued. If a declaration is locked by Swedish Energy Agency for investigation, the message “Declaration is locked” is shown. Locked declarations are restricted for issuing. 5.3.2.1 Fuel Declaration AHs can view and edit their Fuel Declarations. Fuel declaration refers to energy sources of the Production devices. The steps to view, edit and add fuel declaration are as follows: 1. Navigate to Plants > MR Declarations 2. Fill the search criteria and click Search 3. A list of declarations is displayed. Select View Declaration hyperlink 4. This page displays the details of the Declarations associated with this Production Device (Figure 5.8). The user with sufficient rights can view PDs declarations and edit them. 5. Click on Edit to update the declaration information. The edit window is displayed. Once done, select Save. Cesar Account Holder User Manual © 2014 Grexel Page 37 of 102 CESAR ACCOUNT HOLDER USER MANUAL 2015-01-05 Figure 5.8 – View Fuel Declaration Cesar Account Holder User Manual © 2014 Grexel Page 38 of 102 CESAR ACCOUNT HOLDER USER MANUAL 2015-01-05 5.3.2.2 Unit Declaration AHs can view and edit their Unit Declarations. Unit Declaration refers to the percentage of the production that each device has produced or how much each power source have produced if a plant has more power sources, such as production of both wind and solar as reported through the same meter. The steps to view, edit and add unit declaration are similar to the ones described in Fuel Declaration area: 1. Navigate to Plants > MR Declarations 2. Fill the search criteria and click Search 3. A list of declarations is displayed. Select View Declaration hyperlink 4. This page displays the details of the Declarations associated with this Production Device (Figure 5.9). The user with sufficient rights can view PDs declarations and edit them. 5. Click on Edit to update the declaration information. The edit window is displayed. Once done, select Save. Figure 5.9 – View Unit Declaration 5.4 Monitor Meter Readings Note: This functionality is only available for Producers actors with the roles AH Root, AH PD Administrator and AH PD Viewer Cesar Account Holder User Manual © 2014 Grexel Page 39 of 102 CESAR ACCOUNT HOLDER USER MANUAL 2015-01-05 This page displays the details of the Meter Readings associated with this Production Device. Similar to a report, the user with sufficient rights can see unissued MR periods, missing meter readings for each PD. The PD information as installed capacity, version, annual production, energy sources is also displayed. 1. Navigate to Plants > Monitor Meter Readings 2. By default, the search criteria window is shown (Figure 5.10 and Table 5-7). Fill the search criteria and click Search 3. The meter reading list is displayed. (Figure 5.11) 4. Click on the hyperlink on the PD’s name to see the device details. See View Production Device Details for more information. 5. You can Export the details to an Excel sheet or a PDF file by selecting the respective option and clicking the Export button. Figure 5.10 – Monitor Meter Readings: Search Criteria Table 5-7 –Search Criteria Monitor Meter Readings: Field Description Name Description Production Period Search by Production Period Production Device Search by PD name, Device ID, Stem ID, GSRN or Ediel-ID PDs Select the PDs from the list Grid Area Search by Grid Area Action Links Cesar Account Holder User Manual © 2014 Grexel Page 40 of 102 CESAR ACCOUNT HOLDER USER MANUAL 2015-01-05 Search Click this to invoke the search and display the filtered meter reading report. Reset Click this to reset the screen to enter new search conditions. Figure 5.11 – View Meter Readings Cesar Account Holder User Manual © 2014 Grexel Page 41 of 102 CESAR ACCOUNT HOLDER USER MANUAL 2015-01-05 6 MANAGING CERTIFICATES Cesar enables the handling of two kinds of electricity certificates: Guarantees of Origin (GO) and Elcertificates. Information about guarantees of origin can be found on the www.cesar.energimyndigheten.se site, at About GO>Information. Information about Elcertificates can be found at About Elcertificates>Information. This chapter describes how both types of certificates are handled in the system. For the most part, the certificates are managed similarly, but there are some essential differences. The screenshots are mainly from the SE-GO menu: however, the same functions and menu structures can be found under the Elcertificates menu. The chapter is formed in the following way: (SE-GO) suffix depicts a function related solely to the handling of Guarantees of Origin. (Elcertificates) suffix depicts a function related solely to the handling of Elcertificates. No suffixes indicate that the section refers to the handling of both certificates. In Certificates Transaction section, besides the suffixes, the section is also divided in SE-GO transactions and Elcertificates transaction to facilitate understanding of transactions available for each certificate. 6.1 Workflow Description The Issuing Body issues certificates for electricity units produced by a Production Device. These certificates are credited to the issuing Account of an Account Holder. The user with sufficient rights can make the following Certificate Transactions: Transfer — Transfer the certificates to another Account held by this AH itself or held by another AH in the same Domain. Cancel* — Cancel the certificates to compensate electricity consumed. Import — Transfer certificates from another AH outside the Domain. Export — Transfer certificates to another AH outside the Domain. These Transactions can be scheduled to occur under specific conditions or on the request of the Account Holder. *Note: The normal cancellation procedure is disabled for Elcertificates. Cesar Account Holder User Manual © 2014 Grexel Page 42 of 102 CESAR ACCOUNT HOLDER USER MANUAL 2015-01-05 6.2 Accounting and Transactions in Certificates All Account Holders hold a Default Account. Users with permission rights can create Accounts and Sub Accounts. By default, the newly created Account will be active. Certificates that have been issued for the electricity produced by a Production Device are credited to the default Account of the Account Holder, if the issuing account hasn’t been changed. These certificates can be Transferred or Cancelled. All Accounts* can be: Active/Inactive: Accounts can be set as inactive, if it is not needed anymore and if it does not hold certificates or Sub Accounts. By default, the inactive Accounts are not listed in the Account list view. No certificates can be transferred to this Account. The default Account cannot be set as inactive. Locked/Unlocked: in certain cases, the Issuing Body can lock an Account. Locked Accounts can be seen by the Account Holder in the Account list, but no operations can be performed (shown with a grey colour). However, from an activate Account is possible to transfer certificates internally (within the same AH) and externally (from another AH) to a locked Account; but no transactions can be performed from a locked Account. Public: Accounts that are public are visible to other Account Holders. Hence inter Account Holder Transfers are possible only with Accounts that have been declared Public. The Public status of the default Account cannot be changed. *Note: Except Default and Cancellation Accounts. Accounts can also have one or more Sub Accounts that have the same characteristics as the parent Account. The maximum number of Sub Account levels is three. Each of the Sub Accounts can hold their own certificates. A parent-child relationship is displayed in the list of Accounts. The default Account cannot be moved to the Sub Account of another Account. As discussed earlier, certificates linked to a specific PD are credited to the Account Holder’s issuing Account for the Production Device. The Account Holder can Transfer some or all the certificates to different Accounts. Some transaction types require you to sign the transaction using signature certificate. This can be done by keying in you pin code in the signature window that pops when committing the transaction. Transactions are classified depending on the nature of the Account, as described below: Transfer: the receiving Account belongs to another Account Holder of the same Domain. Cesar Account Holder User Manual © 2014 Grexel Page 43 of 102 CESAR ACCOUNT HOLDER USER MANUAL 2015-01-05 Note: Transfer requires signing of the transaction Internal Transfer: the receiving Account belongs to the same Account Holder. Export: the receiving Account belongs to another Account Holder in another Domain (e.g. Norway). o In the case of Export outside this Registry, the Transaction is deemed as successful only if the system receives an acknowledgement message from the receiving system. Such certificates are no longer held by the current Account Holder. However, if a negative acknowledgement message is received, i.e. the receiving Registry or counterparty has rejected the Export, a new Transaction type called “Correction” is created and the respective certificates are returned to the Account. Import: certificates are transferred into the Account from another Domain. Cancel: the certificates are taken out of circulation to prove electricity consumption with certain attributes (for example consumption of renewable electricity). These certificates are then no longer available for the current Account Holder. Note: Cancellation requires signing of the transaction Issue: the Issuing Body issues certificates against the electricity produced by a Production Device. Request EECS Issuing – When Account Holder wishes to transfer certain certificates to external EECS account and hence have EECS certificates issued based on Swedish Guarantees of Origin. Notes: EECS issuing request requires signing of the transaction. EECS issuing request is visible for Account Holders that are registered for EECS. EECS issuing can only be requested for certificates that are eligible for EECS (Trading Scheme: EECS-eligible. EECS eligible certificates are issued to production devices that are registered for EECS and which have all the time been hold by Account Holders that are EECS members. If EECS eligible certificates are transferred to an Account Holder, which is not EECS member, the EECS eligibility of the certificates is lost for good. When requesting EECS issuing the selected certificates are permanently moved to the Default account of the sender in CMO.grexel where those are issued as EECS GO certificates and are not anymore available as SE-GO certificates in Cesar System. . Cesar Account Holder User Manual © 2014 Grexel Page 44 of 102 CESAR ACCOUNT HOLDER USER MANUAL 2015-01-05 6.3 Access to Certificates Modules Refer to Figure 3.1 for the permissions assigned to the roles for executing the functionalities available under the SE-GO/Elcertificates modules. 6.3.1 View Accounts Navigate to SE-GO/Elcertificates. The Manage Accounts option is displayed by default when entering the certificate module. It enables you to view the Accounts held by an Account Holder and execute operations and Transactions on them. The ID displayed alongside the heading is the Business ID of the Account Holder (Figure 6.1 and Table 6-1). Some accounts exhibit in the start of the line. This indicates that the Account has one or more Sub Accounts under it. Click the icon to expand the hierarchy. Figure 6.1 – Manage Accounts: View Account List Table 6-1 – View Account List: Field Description Name Description Include inactive Accounts Click to display details of inactive Accounts also. By default this is not selected. Account Number Click this link to view the complete Transaction details of this Account for a default period of one year. Refer to Account Statement for more details. Account Name Name of the Account. Not visible to other Account Holders. Status Indicates whether the Account is active or not. Cesar Account Holder User Manual © 2014 Grexel Page 45 of 102 CESAR ACCOUNT HOLDER USER MANUAL Name 2015-01-05 Description Yes — the Account will be visible to other Account Holders Public No — the Account will not be visible to other Account Holders Volume of Certificates Number of certificates held currently in this Account. Click on this hyperlink to be transferred to Transfer/Cancel certificates section. Expiring Certificates Number of certificates that will expire soon. 30 days prior expiration this warning is set. Action Links Click Operations to Modify Account Click to Move Account Click to Create Sub Account Click to Schedule Transaction 6.3.2 Modify Account This option is used to change the Active and Public status of an Account. This also permits a change in the Account Name. 1. Navigate to SE-GO/Elcertificates>Manage Accounts. 2. Click icon available under Operations for the required Account (Figure 6.1). Note: The default and the cancellation accounts are not modifiable. 3. Enter new Account Name, if required (Figure 6.2). 4. Change the status of Active, if required. An Account can be set as inactive if it does not hold any certificates and is not required any more. 5. Change the status of Public, if required. Note: Only Public Accounts are visible to other Account Holders. 6. Click Update to save the changes or click Back to return to the Manage Accounts page without saving the changes. Cesar Account Holder User Manual © 2014 Grexel Page 46 of 102 CESAR ACCOUNT HOLDER USER MANUAL 2015-01-05 Figure 6.2 – Certificates: Modify Account 6.3.3 Move Account This option enables you to move an entire Account to render it as a Sub Account of another one. The details of this Account will now be visible as a child Account under the Destination Account. Note: The default Account cannot be moved. 1. Navigate to SE-GO/Elcertificates>Manage Accounts. 2. Click icon available under Operations for the required Account. 3. Enter or select the Account from the Destination Account box (Figure 6.3). 4. Click Move to execute the movement. Click Back to return to Manage Account page without moving the Account. Cesar Account Holder User Manual © 2014 Grexel Page 47 of 102 CESAR ACCOUNT HOLDER USER MANUAL 2015-01-05 Figure 6.3 – Certificates: Move Account 6.3.4 Create Accounts A default Account is created automatically for every Account Holder, when an Account Holder is created. In addition to this, the user can subsequently create new Accounts. The newly created Account is active by default. 1. Navigate to Certificates>Manage Accounts. 2. Click Create Account (Figure 6.4). 3. Enter the Account Name. The system automatically generates an Account Number. 4. Set status as public if the Account should be visible for other Account Holders for transfer. 5. Click Create to complete the process. 6. Click Back to return to Manage Accounts page, without effecting any changes. 7. Click Reset to enter a new set of specifications. Note: The newly created Account is Active by default. Figure 6.4 – Manage Account: Create Account Cesar Account Holder User Manual © 2014 Grexel Page 48 of 102 CESAR ACCOUNT HOLDER USER MANUAL 2015-01-05 6.3.5 Create Sub Account This option allows you to create a Sub Account under an existing Account. 1. Navigate to SE-GO/Elcertificates>Manage Accounts. 2. Click icon available under Operations for the required Account. 3. Enter the Account name for the new Sub Account (Figure 6.5). 4. By default, the Sub Account inherits the Active Status and the Public Status from the parent Account. 5. Click Create to create the Account. Click Back to return to the Manage Accounts page without creating a Sub Account. Figure 6.5 – Certificates: Create Sub Account 6.4 Certificate Transactions Under the SE-GO/Elcerticates module AHs with sufficient rights can perform certificate transactions. This chapter is divided in two sections: Elcerticates and for SE-GOs. It is possible to transfer, cancel and request EECS issuing for SE-GOs. In the case of Elcerticates, AHs can transfer elcertificates within Swedish domain and import/export elcertificates form/to Norway. Besides that it is also possible to schedule SE-Go and Elcertificates transactions. Cesar Account Holder User Manual © 2014 Grexel Page 49 of 102 CESAR ACCOUNT HOLDER USER MANUAL 2015-01-05 6.4.1 SE-GO transactions 6.4.1.1Transfer SE-GO This option enables you to Transfer all or some of the certificates from one Account to another in the same domain. Transfers can be made between accounts of the same account holder (internal transfer) or between different account holders (transfer). 1. Navigate to SE-GO/ >Manage Accounts. 2. Click the number under the Volume of Certificate column for the required Account. 3. You can select all certificates or select them by bundle, Production Device or account (Figure 6.6). Note: If nothing is chosen, the system takes the latest certificates based on production date to be transferred. 4. To select the exact bundles, click the Select certificates by bundle option. The list of Certificate Bundles held by this Account is displayed (Figure 6.7). Select the required bundles by checking the corresponding checkboxes. 5. Click to execute a Transfer. The Certificate Transfer page is displayed in Figure 6.8. 6. Enter the number of certificates to be Transferred (Figure 6.8). 7. You can choose to either enter a specific Account number or select one (Figure 6.8). To select an Account number, select Domain, Account Holder and Account from the drop-down box. To enter an Account number, click Enter Account number. Enter the Account number in the text box. Click Validate Account Number to get the Account number validated. 8. Click Transfer to complete the Transaction or click Back to return to the list of Certificates (Figure 6.8). Note: All receiving Accounts must have an existing account in the system. In case the Account cannot be found, please contact technical support to have the Account added to the system. Cesar Account Holder User Manual © 2014 Grexel Page 50 of 102 CESAR ACCOUNT HOLDER USER MANUAL 2015-01-05 Figure 6.6 – Transfer Certificates: Select all Figure 6.7 – Transfer Certificates: Select by bundle Cesar Account Holder User Manual © 2014 Grexel Page 51 of 102 CESAR ACCOUNT HOLDER USER MANUAL 2015-01-05 Figure 6.8 – Certificate Transfer 6.4.1.2 Request EECS issuing (SE- GO) Notes: EECS issuing request is visible of for Account Holders that are registered for EECS. EECS issuing request requires signing of the transaction. EECS issuing can only be requested for certificates that are eligible for EECS (Trading Scheme: EECS-eligible. EECS eligible certificates are issued to production devices that are registered for EECS). When requesting EECS issuing the selected certificates are permanently moved to the Default account of the sender in CMO.grexel where those are issued as EECS GO certificates and are not available anymore as SE-GO certificates in Cesar System AHs need a separate EECS issuing sub account. SE-GO certificates can be Exported to CMO.grexel registry from Cesar system as follows. 1. Navigate to SE-GO>Manage Accounts. 2. Select the certificates to be exported. The selection is similar to what was described in Transfer Certificates. You can select certificates by bundle, by PD or by account. See Transfer Certificates for more information. Cesar Account Holder User Manual © 2014 Grexel Page 52 of 102 CESAR ACCOUNT HOLDER USER MANUAL 2015-01-05 Note: If nothing is chosen, the system takes the latest certificates based on production date to be transferred. 3. Click to Export the certificates. The Certificate Transfer page is displayed (Figure 6.9). Description of input data is presented in Table 6-2. 4. Enter the data in the screen and select Export to EECS. 5. After clicking Export to EECS –button, you are asked to confirm the transaction. 6. Upon confirmation a Nexus Personal window pops up and asks you to sign the transaction using your signature certificate and personal pin code. Figure 6.9 – Export to EECS Table 6-2 Certificate Export to EECS (mandatory fields marked with an asterisk) Name Description Total certificate volume available Number of certificates in the current selection. Can be modified only by making a new selection Give certificate amount * Number of certificates to be cancelled from the current selection. Receiver of the transaction, the Account Holder in CMO.grexel. You should select the member code, which corresponds to the member code of the sender Receiver Note: the sender and the receiver have the same code in Cesar and in CMO, because they are the same organization. The code can be found under My Page menu. Optional message Message to Receiver Note: This information is only visible for the sender. Cesar Account Holder User Manual © 2014 Grexel Page 53 of 102 CESAR ACCOUNT HOLDER USER MANUAL 2015-01-05 6.4.1.3Cancel Certificates (SE-GO) SE-GO certificates can be Cancelled from the system as follows. 1. Navigate to SE-GO>Manage Accounts. 2. Click the number under the Volume of Certificate column for the required Account. The actions involved in Cancelling are similar to those in Transferring. Thus, same figures will be used for reference. 3. You can cancel all the certificates or cancel them by bundle, PD or account (Figure 6.6). 4. To cancel a part of the certificates, click Select certificates by bundle, Select certificates by PD or Select certificates by account. If e.g. Select certificates by bundle is selected, the list of Certificate Bundles held by this Account is displayed (Figure 6.7). (For more information on this view, refer to the description given in Search Certificates.) Select the required certificates. Note: If nothing is chosen, the system take the latest certificates based on production date to be cancelled. 5. Click to cancel the certificates. The Certificate Cancellation page is displayed (Figure 6.10). Description of input data presented in Table 6-3. 6. Enter the Cancellation data in the Cancellation screen. Cesar Account Holder User Manual © 2014 Grexel Page 54 of 102 CESAR ACCOUNT HOLDER USER MANUAL 2015-01-05 Figure 6.10 – Certificate Cancellation (SE-GO) Table 6-3 Certificate Cancelling (mandatory fields marked with an asterisk) Name Description Selected Certificates amount Number of certificates in the current selection. Can be modified only by making a new selection Amount of certificates to Cancel * Number of certificates to be Cancelled of the current selection. Country of Consumption * The country where this electricity has been consumed. Certificates may only be Cancelled for domestic consumption. Name of Beneficiary * The company to which this electricity was sold to or by whom it was sold. Location of Beneficiary More detailed information of the Beneficiary like department unit, division, or geographical branch. Cesar Account Holder User Manual © 2014 Grexel Page 55 of 102 CESAR ACCOUNT HOLDER USER MANUAL Name 2015-01-05 Description Select the usage category of electricity origin Certificate Cancellation purpose from dropdown list: Usage Category* Support: Cancelled to receive financial support Disclosure: Cancelled under a green labelling scheme or as proof of supply to consumers or for own use. Has not been used to receive financial support. By default only Disclosure I available in Cesar Consumption Period * Select the Start and End day of the time period of electricity consumption for which the certificates are Cancelled for. Type of Beneficiary * Select from dropdown list. Cancellation Purpose * Enter text to indicate the reason for Cancellation. Action Links Cancel Certificates Click to complete the cancellation Back Click to return to the previous screen 6.4.2 Elcertificates transactions 6.4.2.1Transfer elcertificates This option enables you to Transfer all or some of the certificates from one Account to another in the same domain. The procedure for Elcertificates transfers is similar to SE-GO transfer. See chapter 6.4.1.1 for more information. 6.4.2.2Import/Export to Norway (Elcertificates) Note: This section refers only to elcertificates and transactions to Norway. Account Holder with sufficient rights can transfer Elcertificates to Norway through Cesar since the application was designed to handle both support certificates. The transfer is similar to the certificate transfer described above, but refers only to elcertificates. Note: To be able to export the certificates to Norway, on the Certificate transfer page you should select Domain = Norway 1. Navigate to Elcertificates>Manage Accounts. 2. Click the number under the Certificate Count column for the required Account. Cesar Account Holder User Manual © 2014 Grexel Page 56 of 102 CESAR ACCOUNT HOLDER USER MANUAL 2015-01-05 3. You can select all certificates or select them by bundle, Production Device or account (Figure 6.6). Note: If nothing is chosen, the system takes the latest certificates based on production date to be transferred. 4. To select the exact bundles, click the Select certificates by bundle option. The list of Certificate Bundles held by this Account is displayed (Figure 6.7) Select the required bundles by checking the corresponding checkboxes. 5. Click to execute a Transfer. The Certificate Transfer page is displayed in Figure 6.8. 6. Enter the number of certificates to be Transferred (Figure 6.8). 7. Select Norway domain. 8. You can either choose to enter a specific Account number or select one (Figure 6.8). To select an Account number, select Account Holder and Account from the dropdown box. To enter an Account number, click Enter Account number. Enter the Account number in the text box. Click Validate Account Number to get the Account number validated. 9. Click Transfer to complete the Transaction or click Back to return to the list of Certificates (Figure 6.8). 6.4.3 Schedule Transaction The system enables an Account Holder to program Transactions based on some pre-specified events. This schedule can be repeated periodically. 1. Navigate to SE-GO/Elcertificates>Manage Accounts. 2. Click icon available under Operations, for the required Account. The existing schedule, for this Account is displayed (Figure 6.11). Field description presented in Table 6-4. If no transactions are scheduled, a corresponding message is shown. Cesar Account Holder User Manual © 2014 Grexel Page 57 of 102 CESAR ACCOUNT HOLDER USER MANUAL 2015-01-05 Figure 6.11 – Manage Accounts: Schedule Transactions Table 6-4 – Existing Schedules: Field Description Name Description Created Date Date on which the schedule was created Next Execution Date The next execution date of the transaction Last Execution Date The last execution date of the transaction Last Run Date The most recent execution date of the transaction Transaction Type The type of the transaction ( only Transfer type is available in Cesar) Occurrence The occurrence of the transaction (on issue / specific day / incoming transaction / per month) Destination Account Name Destination Account Name Certificate Count Number of certificates to be transacted Action Links Create Schedule Click to Create Schedule Edit Click to Edit Schedule Delete Click to Delete Schedule Cesar Account Holder User Manual © 2014 Grexel Page 58 of 102 CESAR ACCOUNT HOLDER USER MANUAL 2015-01-05 6.4.3.1Create Schedule 1. Navigate to SE-GO/Elcertificates>Manage Accounts> 2. Click for the required Account. to schedule a new activity (Figure 6.11). 3. Create Schedule frame is displayed. The fields displayed vary with the selection made for the fields. 4. Figure 6.12 shows the frame displayed if the Transaction type Transfer is selected to occur monthly. Refer to Table 6-5 for the description of fields. 5. Click Create Schedule to complete the process. 6. Click Back to return to the Manage Accounts page without effecting any changes. 7. Click Reset to enter a new set of specifications. Figure 6.12 – Certificates: Create Schedule Cesar Account Holder User Manual © 2014 Grexel Page 59 of 102 CESAR ACCOUNT HOLDER USER MANUAL 2015-01-05 Table 6-5 – Create Schedule: Field Description (mandatory fields marked with an asterisk) Name Transaction Type * Description Transfer Select : Specific day — Selected event occurs only on a specific date. Occurrence * Specific day of each month—Selected event occurs on the specified day of the month till the stop date. On Issue — Selected event occurs on issue of certificates to this Account. On Incoming Transaction — Selected event occurs when certificates are transacted to this Account. Specified amount / % of all certificates in Account / % of incoming Certificates The amount of certificates to be transacted. The option “Incoming Certificates” is available only if Occurrence is selected as On Transfer or On Issue. Percentage (0%100%)* The required percentage of certificates to be transacted. Available if the choice is either “% of all certificates in Account” or “% of all incoming certificates”. Amount * The required number of certificates to be transacted. Available if the choice is Specified Amount. Execution Date * The execution date of the Transaction. Available if the Occurrence is set as Specific day. Stop Date * The date up to which the scheduled Transaction will be executed. Available if the Occurrence is set as other than Specific day. Day of Month * The day on which the Transaction will be executed every month. Available if the Occurrence is set as Specific day of each month. To Domain* The Domain to which the certificates will be Transferred. Account Holder* The Account Holder to which the certificates will be Transferred. Account* The Account of the AH to which the certificates will be Transferred Message to Receiver A free-form message to the receiver about the Certificate Transfer. Price Group (only Elcertificates) Select price group Price( only Elcertificates) If a price group is selected above the price is displayed automatically. If no price group is selected, add a price. Cesar Account Holder User Manual © 2014 Grexel Page 60 of 102 CESAR ACCOUNT HOLDER USER MANUAL Name 2015-01-05 Description Currency (only Elcertificates) Currency of the transaction scheduled. SEK,NOK or EUR Contract Date (only Elcertificates) Contract date of the transaction 6.4.3.2 Edit Schedule 1. Navigate to SE-GO/Elcertificates>Manage Accounts> 2. Click for the required Account. icon to make changes in an existing schedule (Figure 6.11). 3. The edit schedule window is displayed (Figure 6.13). Refer to Schedule Transaction for field description details. 4. Click Update to complete the process. 5. Click Cancel to return to Manage Accounts page, without effecting any changes. 6. Click Reset to enter a new set of specifications. Figure 6.13 – Certificates: Edit Schedule Cesar Account Holder User Manual © 2014 Grexel Page 61 of 102 CESAR ACCOUNT HOLDER USER MANUAL 2015-01-05 6.4.3.3Delete Schedule 1. Navigate to SE-GO/Elcertificates>Manage Accounts> for the required Account. 2. To delete an existing schedule, click the Delete icon of the schedule to be deleted. 6.5 Account Statement This option gives complete details of the Transactions in an Account. The Account, whose name is positioned first (alphabetically), is displayed by default. To view the details of an Account, within the purview of your rights: 1. Navigate to SE-GO/Elcertificates>Account Statement (Figure 6.14). 2. By default the details for one month, dating back from today are selected in the search criteria. Fill the search criteria according to your preferences and click Search. 3. The details of the Account include the basic information of the Account and the Transaction details (Figure 6.15 and Table 6-6). You can choose to view all transactions or only completed transactions. 4. You can Export the details to an Excel sheet or a PDF file by selecting the respective option and clicking the Export button. Figure 6.14 – Account Statement – search criteria Cesar Account Holder User Manual © 2014 Grexel Page 62 of 102 CESAR ACCOUNT HOLDER USER MANUAL 2015-01-05 Figure 6.15 – Account Statement Table 6-6 – Account Statement: Field Description Name Description Name of Account Holder Account Holder Name Address of Account Holder Account Holder Address Issuing Body Comment Comment on the transaction Account Status If the Account is Active or Not Opening Balance No. of certificates on hand, on the start of the period. Closing Balance No. of certificates on hand, at the end of the period. Difference Certificate inflow / outflow during the period. Transaction Date Date and time of Transaction. Click to View Transaction details. Cesar Account Holder User Manual © 2014 Grexel Page 63 of 102 CESAR ACCOUNT HOLDER USER MANUAL Name 2015-01-05 Description Transaction Type The nature of the Transaction Transaction number The number of a specific transaction Account number from which the Transfer has been executed. If the source Account is your Account, then Account name and number will be displayed. Account From If the Account is that of an AH in the same Domain, then the name and Account number of the AH will be displayed. If the Account belongs to an AH of other Domain, the Domain name, AH name & Account number will be displayed. Account To Account number to which the Transfer has been executed. The details displayed follow the rule explained above. Volume Number of certificates included in the Transaction. The volume can be negative or positive. Select Certificates Click to Select Certificates. This option is available only for Transactions that have resulted in Transfer of certificates to this Account. Using this option, you can select the certificates which were involved in this Transaction (even if they are currently located in another own Account). However, if these have since then been Transferred to an Account belonging to another Account Holder, i.e. they no longer belong to this Account Holder, then this link will still be shown but the certificates can no longer be found. 6.6 Account Balance This option enables users to view the account balance of all accounts that they hold for a specific date. 1. Navigate to SE-GO/Elcertificates>Account Balance (Figure 6.16) 2. Determine the date and select the accounts at the search criteria 3. Executing the search will list the account balance in a specific date for all the accounts selected in the search criteria. The balance is shown given the technology reported in each certificate (water, wind, biomass, other) (Figure 6.17). 4. You can Export the details to an Excel sheet or a PDF file by selecting the respective option and clicking the Export button. Cesar Account Holder User Manual © 2014 Grexel Page 64 of 102 CESAR ACCOUNT HOLDER USER MANUAL 2015-01-05 Figure 6.16 – Account Balance Search Criteria Figure 6.17 – Account Balance 6.7 Search Transactions This option enables you to locate and view the details of a specific Transaction. For an Account in your purview, you can drill down to the details of the certificates involved in the Transaction. 1. Navigate to SE-GO/Elcertificates>Search Transactions (Figure 6.19) 2. Determine the search criteria and click Search. Note: If you have filtered the search by Production Device, the result set includes those whole transactions, which incorporate certificates from selected Production Device(s). The total volumes of the transactions are shown even though the transaction might include certificates from other Production Device(s) than selected. 3. The resulting view will be similar to Account Statement and are displayed on Figure 6.19. 4. The results can be filtered according to Table 6.7. Figures 6.19 to 6.21 present the different display options for each type of filter. 5. You can Export the details to an Excel sheet or a PDF file by selecting the respective option and clicking the Export button. Cesar Account Holder User Manual © 2014 Grexel Page 65 of 102 CESAR ACCOUNT HOLDER USER MANUAL 2015-01-05 Figure 6.18 – Search Transactions Table 6-7 – Search Transactions: Field description Name Description Period The period (Start and End Date) of the transactions. Account The Account associated with the transactions. Transaction Number The number of a specific transaction. Cesar Account Holder User Manual © 2014 Grexel Page 66 of 102 CESAR ACCOUNT HOLDER USER MANUAL 2015-01-05 Name Description Currency (only Elcertificates) Currency of Transaction - Original, NOK, SEK or EUR. Transaction Number The number of the transaction Transaction Type The character of the transactions Production Device The Production Device(s) associated with the transactions. License The Licenses linked with the transactions. Transaction Status The Transaction Status of the transactions. Fuel The Fuel(s) associated with the transactions. Technology The Technology associated with the transactions. Counter Party Counter Party Domain Domain of the receiver Counter Party External Receiver/Sender of the transaction Cancel Transactions search criteria Consumption Period The Start and End Dates of the period of electricity consumption for which the certificates have been Cancelled. The country where the electricity has been consumed. Country of Consumption Certificates may only be Cancelled for domestic consumption or for consumption in countries where the EECS is not implemented. Beneficiary Name The actor to which this electricity was sold to or by whom it was sold. Location of Beneficiary More detailed information of the Beneficiary such as department unit, division, or geographical branch. Type of Beneficiary The type of the cancellation beneficiary Cesar Account Holder User Manual © 2014 Grexel Page 67 of 102 CESAR ACCOUNT HOLDER USER MANUAL Name 2015-01-05 Description Select the usage category of electricity origin Certificate Cancellation purpose from the dropdown list: Support: Cancelled to receive financial support Disclosure: Cancelled under a green labelling scheme or as proof of supply to consumers or for own use. Has not been used to receive financial support. Other: other usage Category Usage Category Cancellation Purpose Enter text to indicate the reason for Cancellation. Table 6-8 – Search Transaction Results Options: Field Description Name Description Transaction All the transactions of account and based on search criteria Transactions overview (only completed transactions) All the completed transactions of account and based on search criteria. It groups the transaction by Account holder, transaction type and displays the result. Transactions overview by account (includes internal transactions) It contains the same data as in “Transactions” view. However, it groups the transactions by account holder, account and transaction type. Cesar Account Holder User Manual © 2014 Grexel Page 68 of 102 CESAR ACCOUNT HOLDER USER MANUAL 2015-01-05 Figure 6.19 – Search Transactions Results (option 1 – Transactions) Figure 6.20 – Transaction Search results (option 2 – Transactions overview) Cesar Account Holder User Manual © 2014 Grexel Page 69 of 102 CESAR ACCOUNT HOLDER USER MANUAL 2015-01-05 Figure 6.21 – Transaction Search results (option 3 – Transactions overview by account) 6.8 View Transaction Details To view the details of a specific Transaction you can, Navigate from Search Transactions and click on Transaction Date Navigate from Account Statement and click on Transaction Date (Figure 6.14). or Figure 6.22 displays the details of the Transaction displayed. Field description is presented in Table 6-9). Note: The details displayed in the Account Statement vary with the Transaction type. Cesar Account Holder User Manual © 2014 Grexel Page 70 of 102 CESAR ACCOUNT HOLDER USER MANUAL 2015-01-05 Figure 6.22 – Transaction Details Table 6-9 – Transaction Details: Field Description Frame Description Transaction Type Gives information on type, date, id and status of the Transaction. Transaction Source (From and To) Gives information on the Account Holder(s) involved in the Transaction. Certificate volumes Gives the number of certificates and corresponding units of electricity involved in the Transaction. Also states the volumes by License. Cesar Account Holder User Manual © 2014 Grexel Page 71 of 102 CESAR ACCOUNT HOLDER USER MANUAL Frame Certificate Details 2015-01-05 Description Gives details on Certificate Numbers, Volume, Domain, Fuel, Issuing Date, Production Period, Support Schemes and PD details like, PD GSRN, Capacity, Name and License. 6.9 Search Certificates This option enables you to locate a set of certificates and execute Transfer/Cancel operations on them, or simply view their details. 1. Navigate to SE-GO/Elcertificates>Search SE-GO/Elcertificates 2. Determine the criteria (the fields are described in Table 6-10 and Figure 6.23). 3. The search results can also be shown as a report by checking the Show As Report checkbox. After that, you can choose the appropriate Report Type. 4. Executing the search has different results if Show as Report has been selected or not. If Show as report is NOT selected, executing the Search will display a similar view as in Chapter 6.4.1 when Transferring or Cancelling Certificates. See Chapter 6.9.1 for details on Show As report Type. Table 6-10 – Search Certificates: field description Field Description Certificate Info Production Period The production period (Start and End Date) of the electricity associated with the certificates. Earmark Type The support type(s) of the certificates. Fuel The Fuel(s) for which the certificates have been issued. License License(s) linked with the certificates. Only Selected Scheme(s) Exclusive search according to License, i.e., search certificates that are GO-only or ICS:RECS-only. Issuing Body The Issuing Body/Bodies that issued the certificates. Cesar Account Holder User Manual © 2014 Grexel Page 72 of 102 CESAR ACCOUNT HOLDER USER MANUAL 2015-01-05 Field Description Issuing Date The period during which the certificates have been issued. Certificate Number The Start and End numbers of the certificates. Account Holder Info Account Name Name of the Account possessing the certificates. Account Number Number of the Account possessing the certificates. Account The Account(s) possessing the certificates. Search only locked accounts Exclusive search in locked accounts Production Device Info PD Name Name of the Production Device associated with the certificates. GSRN GSRN of the Production Device. PDs Production Device(s) associated with the certificates. Technology The type of Production Device, i.e. the processes and technology through which the Production Device generates electricity. Commission Date Commission Date of the Production Device(s). Installed Capacity Installed Capacity of the Production Device(s) Show As Report If you check this box you will get the following options of Report Types, Transferrable/Active and Issued. See Show as report for more information Cesar Account Holder User Manual © 2014 Grexel Page 73 of 102 CESAR ACCOUNT HOLDER USER MANUAL 2015-01-05 Figure 6.23 – Certificate Search Criteria 6.9.1 Show as Report search The search results of Search Certificates can also be shown as a report by checking the Show As Report checkbox. After that, you can choose the appropriate Report Type: Cesar Account Holder User Manual © 2014 Grexel Page 74 of 102 CESAR ACCOUNT HOLDER USER MANUAL 2015-01-05 Transferable/active certificates refer to the certificates active on the AH’s account (not cancelled or transferred certificates) Issued certificates refer to certificates issued for that specific AH. This includes certificates that were already cancelled and transferred. The report view can be seen by bundle, by PD or by account. Depending on the option selected, the search results have a different view: View by bundle - shows all the information about the different certificates bundles: Certificate Number, Volume, Account Name, Account number, Issuing Body, Fuel, Technology, Earmarks, Issuing Date, Production Period, PD’s name, PD’s GSRN, PD’s installed capacity and PD’s license. See Figure 6.24 View by PD – shows the details on the PD related to the certificates: PD’s name, Volume, Production period, PD’s GSRN, PD’s Installed capacity, Commissioning date and Technology. See Figure 6.25 View by account – shows the certificate present in each account or issued to each account. The details are: Account name, Account Number, Certificate Volume and Production period. See Figure 6.26 Figure 6.24 – Certificate Search Results (Show as report selected) – View by bundle Cesar Account Holder User Manual © 2014 Grexel Page 75 of 102 CESAR ACCOUNT HOLDER USER MANUAL 2015-01-05 Figure 6.25 – Certificate Search Results (Show as report selected) – View by PD Figure 6.26 – Certificate Search Results (Show as report selected) – View by Account 6.10 Own Deals Note: Own Deals report refer only to Elcertificates. Roles AH Elcert Account Administrator, AH Elcert Account Viewer and AH Root Own deals report shows organization’s completed elcertificates transfers for specified time period, providing the balance on the accounts after each transfer. To retrieve the report as it was on old Cesar and use it in 3rd party systems, the users can download it to HTML format. Cesar Account Holder User Manual © 2014 Grexel Page 76 of 102 CESAR ACCOUNT HOLDER USER MANUAL 2015-01-05 1. Navigate to SE-GO/Elcertificates>Own Deals 2. Fill the Search Criteria (Currency field is available if the search refers to Elcertificates). Figure 6.27Error! Reference source not found.. Select Search 3. The results will be shown according to Figure 6.28 and Error! Reference source not found. 4. You can Export the details to HTML by selecting Download to HTML report or you can export the results to Excel/PDF. Notes: It is only possible to extract the report for 12 months or less. If specific currency is selected the newest exchange rate will be used for conversions Retrieve the report might take some minutes due to the large amount of data Figure 6.27 – Own Deals Search criteria Figure 6.28 – Own Deals Cesar Account Holder User Manual © 2014 Grexel Page 77 of 102 CESAR ACCOUNT HOLDER USER MANUAL 2015-01-05 Table 6-11 – Own Deals – Field Description Name Description Time of the transfer. the format is given by Initiation Date YYMMDD and hh:mm Account To and From The account to which the transaction refers to Organization number or Account number of the Org.nr/Account nr receiving AH/Account Volume of certificates in the transaction (+/- Amount indicates the amount that entered/left the account) Currency (only Elcertificates) Price (only Elcertificates) Currency of the Transaction (Original, NOK, SEK or EUR) Price of the transaction Type Type of the transaction: Domestic or International Total balance left in the account after the given transaction. Total Balance 6.11 Note: Internal transfers (to the AH itself) don’t cause any change to the total balance. Predefined Prices (Elcertificates) Note: Predefined prices refer only to Elcertificates. Roles AH Elcert Account Administrator and AH Root Navigate to Elcertificates>Predefined Prices. This section allows users to manage price groups. Cesar Account Holder User Manual © 2014 Grexel Page 78 of 102 CESAR ACCOUNT HOLDER USER MANUAL 2015-01-05 Price groups are used by other users who transfer certificates to this user. When transferring the certificates, other users can, instead of selecting a certificate price, select price group. To manage price groups, navigate to Elcertificates>Predefined Prices. If no price group has been created, a default message “Price Group is missing (Figure 6.29) is shown. Insert the price group details and Select Create to add a new price group. See Table 6-12 for the field description. If the user already has created price groups, a list of all price groups is displayed (Figure 6.30). Select Edit to alter an existing price group or Delete to erase it. Figure 6.29 – Predefined prices Table 6-12 – Predefined Prices – Field Description Name Description Name Name of the price group Price Currency Cesar Account Holder User Manual Price of the group (It shouldn’t be lower than the minimum level for price per certificate) Currency of the price group. SEK, NOK or EUR. © 2014 Grexel Page 79 of 102 CESAR ACCOUNT HOLDER USER MANUAL 2015-01-05 Figure 6.30 – Predefined prices 6.12 Certificate Bundles Report (SE-GO) Certificates bundles report provide shows completed elcertificates transfers for a specified period. The report provides the account balance after each transfer. 1. Navigate to SE-GO> Certificates bundles report 2. By default, the period of the search criteria shows is the last month. Please change if needed and click Download to get the report in excel format. Cesar Account Holder User Manual © 2014 Grexel Page 80 of 102 CESAR ACCOUNT HOLDER USER MANUAL 2015-01-05 7 PRIVATE REPORTS 7.1 Activity Log The Activity Log keeps track of User Activities, e.g. Transactions and modifications made. Details of Activities performed include Date, User, Category and Description. 1. Navigate to Reports > Activity Log 2. Define the search criteria and click Search (Figure 7.1). 3. The activities will be listed. (Figure 7.2) 4. To view details of a specific activity click on Details link 5. You can Export the details to an Excel sheet or a PDF file by selecting the respective option and clicking the Export button. The Activity Log also lists information of changed fields: these changes can be viewed under the View History column or Link column. All relevant changes of data are logged to the Activity Log with their previous and new values. Figure 7.1 – Activity Search Cesar Account Holder User Manual © 2014 Grexel Page 81 of 102 CESAR ACCOUNT HOLDER USER MANUAL 2015-01-05 Figure 7.2 – Activity Log 7.2 Revision Report Note: This is only available to AH Root, AH PD Administrator and AH PD Viewer. This option shows the produced energy and issued certificates of the Production Device. 1. Navigate to Reports>Revision Reports 2. Fill the search criteria selecting the period, the PD or one of the options on “production device approved for” box and click Search. (Figure 7.3) 3. The list of the PDs according to the search criteria is displayed (Figure 7.4). For each PD, hyperlinks are provided to view the Revision Report (Figure 7.5). 4. You can Export the details to an Excel sheet or a PDF file by selecting the respective option and clicking the Export button. Cesar Account Holder User Manual © 2014 Grexel Page 82 of 102 CESAR ACCOUNT HOLDER USER MANUAL 2015-01-05 Figure 7.3 – Revision Report – Search Criteria Figure 7.4 – Revision Report- Search Results Cesar Account Holder User Manual © 2014 Grexel Page 83 of 102 CESAR ACCOUNT HOLDER USER MANUAL 2015-01-05 Figure 7.5 – Revision Report 7.3 Structural Report This module allows Producer type actors to have an overview of all the quota reporters (EdielID) on and how they connect to production devices. If the production device is owned by several organizations then there is an asterisk (*) beside the plant name. If there are errors in meter readings then this will be flagged Note: Structural Report is also available in the Public Site and without logging in into the private site Figure 7.6 – Structural Report – Search Criteria Cesar Account Holder User Manual © 2014 Grexel Page 84 of 102 CESAR ACCOUNT HOLDER USER MANUAL 2015-01-05 7.4 Production Report Note: This is available for all user rights except for AH Elcert Account Viewer. Under Reports>Production Report, users can have an overview of their production devices’ production and certificates issued. For a given production period, users can see the number of certificates issued for each PD they own. The amount issued of Elcertificates, GO with EECS (GO EECS eligible) and GO without EECS (SEGO) are calculated based on the AH’s percentage ownership over the PD and on the license allocation factors of the PD. 1. Navigate to Reports>Production Report 2. Fill the search criteria selecting the period of your search and click Search. (Figure 7.7) 3. The list of the PDs according to the search criteria is displayed (Figure 7.8). For each PD, the type, production MWh, Issued Elcertificates, Go without EECS and GO with EECS is displayed. 4. You can Export the details to an Excel sheet or a PDF file by selecting the respective option and clicking the Export button. Figure 7.7 – Production Report: Search Criteria Cesar Account Holder User Manual © 2014 Grexel Page 85 of 102 CESAR ACCOUNT HOLDER USER MANUAL 2015-01-05 Figure 7.8 – Production Report Cesar Account Holder User Manual © 2014 Grexel Page 86 of 102 CESAR ACCOUNT HOLDER USER MANUAL 2015-01-05 8 PUBLIC REPORTS The public reports are available at the public site of the Cesar application. Both Elcertificates and SEGOs have available reports. In order to access it, you need to navigate to the public site and select Statistics Elcertificates or Statistics GO from the main menu. Figure 8.1 – Public Site 8.1 Statistics Elcertificates Under Statistics Elcertificates module you find: Summary: This first page report gives a daily overview of the common elcertificates market between Sweden and Norway. It contains information on the volume and price of Elcertificates in the current day for transaction within Sweden and Norway. Average Price: This report contains the average prices of Elcertificates transactions by month Transfer List: This report contains a list of the transactions that occurred inside Norway and Sweden and between the two domains for the chosen period. Issuing: This report contains information on the number of elcertificates Issued in Sweden and Norway per month, by fuel or by country. Transfers: This report contains the volume of transferred elcertificates inside Norway and Sweden and between the two domains by months of a chose period. Cancellations: This report contains information on the number of elcertificates cancelled in Sweden and Norway per year in order to cover quota obligation the preceding year. Cesar Account Holder User Manual © 2014 Grexel Page 87 of 102 CESAR ACCOUNT HOLDER USER MANUAL 2015-01-05 8.1.1 Average Price This report gives brief details about price of elcertificates transactions. It is a break-up of Price Transactions for each month of the selected period. Note: Average Price is calculated with current exchange rate and from transfers initiated during a month. 1. On the Public Site navigate to Statistics Elcertificates> Average Price. 2. Fill in the search criteria (Figure 8.2). By default, the system shows the last month period in relation to the present date. Besides that, it is possible to select the most appropriate currency for the report (NOK, SEK or EUR). Currencies are calculated based on the exchange rates of the European Central Bank for the day that the report was calculated 3. Click Search. 4. A bar graph and a table of the price of all Transactions matching your criteria are displayed. On the right side of the table, you can find details about the currency used in the report (Figure 8.3). 5. You can Export the details to an Excel sheet or a PDF file by selecting the respective option and clicking the Export button. Figure 8.2 – Price report Search Criteria Cesar Account Holder User Manual © 2014 Grexel Page 88 of 102 CESAR ACCOUNT HOLDER USER MANUAL 2015-01-05 Figure 8.3 – Average Price report 8.1.2 Transfers List This report contains a list of the transactions that occurred for the chosen period. It gives an overview of the transactions of elcertificates presenting its: Date, Volume transferred, Price, Currency, Contract Date and Type (International or Domestic). 1. On the Public Site navigate to Statistics Elcertificates>Transfer List. 2. Fill in the search criteria (Figure 8.4). By default, the system selects as period the last week in relation to the present date. Cesar Account Holder User Manual © 2014 Grexel Page 89 of 102 CESAR ACCOUNT HOLDER USER MANUAL 2015-01-05 3. Click Search 4. A table with details of the Transactions matching or search criteria is displayed. 5. You can Export the details to an Excel sheet or a PDF file, by selecting the respective option and clicking the Export button. Note: It is possible to select the most appropriate currency for the report (NOK, SEK or EUR). When original is selected, the original currency with which the transaction was done will be listed. On selecting any of the currency from the drop down, the report will convert the original currency to whatever selected in the drop down. Once the currency is changed, the price column and the currency column will alone be changed. Currencies are calculated based on the exchange rates of the European Central Bank for the day that the report was calculated. Figure 8.4 –Transaction List report – Search Criteria Cesar Account Holder User Manual © 2014 Grexel Page 90 of 102 CESAR ACCOUNT HOLDER USER MANUAL 2015-01-05 Figure 8.5 –Transaction List report 8.1.3 Issuing On Issuing report, you can find data about the issuing volume of Sweden and /or Norway, for the latest 12 months for different fuels. The data is presented on tabular form and on a line graph. It is possible to group the results by country or by energy source. 1. On the Public Site navigate to Statistics Elcertificates>Issuing. 2. Fill in the search criteria (Figure 8.6). By default, the system shows the last month period in relation to the present date. 3. Click Search 4. A table and a graph with details of the Issuing matching or search criteria are displayed. Figure 8.7 5. You can Export the details to an Excel sheet or a PDF file, by selecting the respective option and clicking the Export button. Cesar Account Holder User Manual © 2014 Grexel Page 91 of 102 CESAR ACCOUNT HOLDER USER MANUAL 2015-01-05 Figure 8.6–Issuing Report – Search Criteria Figure 8.7–Issuing Report Cesar Account Holder User Manual © 2014 Grexel Page 92 of 102 CESAR ACCOUNT HOLDER USER MANUAL 2015-01-05 8.1.4 Transfers This report contains the volume of transferred elcertificates inside Norway and Sweden and between the two domains by months of a chosen period. 1. On the Public Site navigate to Statistics Elcertificates>Transfers. 2. Fill the search criteria (similar to Figure 8.4) and select Search. 3. A graph and a table are displayed (Figure 8.8) 4. You can Export the details to an Excel sheet or a PDF file, by selecting the respective option and clicking the Export button. Figure 8.8 – Transfers Cesar Account Holder User Manual © 2014 Grexel Page 93 of 102 CESAR ACCOUNT HOLDER USER MANUAL 2015-01-05 8.1.5 Cancellations This report contains information on the number of elcertificates cancelled in Sweden and in Norway per year. 1. On the Public Site navigate to Statistics Elcertificates>Cancellation. 2. Fill the search criteria and select Search (Figure 8.9). 3. A graph and a table are displayed. By default, the system shows the last 10 years data. Figure 8.10. 4. You can Export the details to an Excel sheet or a PDF file, by selecting the respective option and clicking the Export button. Figure 8.9–Cancellation Report – Search Criteria Cesar Account Holder User Manual © 2014 Grexel Page 94 of 102 CESAR ACCOUNT HOLDER USER MANUAL 2015-01-05 Figure 8.10–Cancellation Report 8.2 Statistics GO Three different reports exist under Statistics Elcertificates module: Members: This report gives the details of Account Holders that exist in the Cesar application. Details include Name, Domain, Default Account Number and Website. Plants: This report gives the details of Production Devices (PD) that exist in the Cesar application. You can search Production Devices and view public information related to them: public Cesar Account Holder User Manual © 2014 Grexel Page 95 of 102 CESAR ACCOUNT HOLDER USER MANUAL 2015-01-05 details include the Plant’s name, Domain, GSRN number, Installed Capacity, Date of Commissioning, Address, Operator, Energy Source, Public Support schemes and PD Earmarks. Transactions: This report contains the volumes of Certificate Transactions from different Energy Sources. The report provides a breakdown of Transactions based on the types of electricity Certificate Transactions that include Export External, Issue, Cancel, Import External, Export and Transfer. 8.2.1 Members This report gives the brief details associated with Account Holders who exist in Cesar application. The Account Holder (Organization) name, Domain to which the AH belongs, the default Account Number and website information (if available) are the details provided in the report. 1. On the Public Site navigate to Statistics GO>Members. 2. Fill in the search criteria (Figure 8.11). You can search based on Account Holder Name or Account Number (Table 8-1). You can define single or multiple criteria. 3. Details of all Organizations matching the criteria are displayed (Figure 8.12). Details are described in Table 8-2. 4. You can Export the details to an Excel sheet or a PDF file, by selecting the respective option and clicking the Export button. Figure 8.11– Search Criteria for Account Holder Search Table 8-1– Account Holder Search conditions Name Account Holder Name Description Enter the Account Holder name or a string (wild string) to filter and display the Account Holders list whose name contains the string you have entered. Cesar Account Holder User Manual © 2014 Grexel Page 96 of 102 CESAR ACCOUNT HOLDER USER MANUAL 2015-01-05 You can choose to search either on the basis of the Account Holder name or Account Holder number. When you select either one of the options, the other option is disabled. Enter Account Number (Enable / Disable) Instead of entering the Account Holder name, you can enter the Account Number of the Account Holder, to search the list. Click this box to enter the Account Number. Enter Account Number Enter the Account Number of the Account Holder. Validate Account Number (link) Click this link to validate the Account Number entered. Action Links Search Click this to invoke the search and display the filtered Account Holders list. Reset Click this to reset the screen to enter new search conditions. Figure 8.12 – Account Holders report Table 8-2 – Details of the Account Holders Details of the Account Holders Account Holder Name Name of the Account Holder Organization Domain The Domain to which the Organization belongs Cesar Account Holder User Manual © 2014 Grexel Page 97 of 102 CESAR ACCOUNT HOLDER USER MANUAL 2015-01-05 Details of the Account Holders Default Account Number The default Account number generated for this Organization Website Website address of the Organization (if provided) 8.2.2 Plants This report gives details of the Production Devices that exist in Cesar application. Details include the Plant name, Domain, its GSRN number, Fuel and Technology. 1. On the Public Site navigate to Statistics GO>Plants. Fill in the search criteria (Figure 8.13). You can search based on PD Name, GSRN, Fuel and Technology and commission date (Table 8-3). You can define one or multiple criteria. 2. List of all Production Devices matching the Search Criteria is displayed. You can select and click the PD name link to display the complete public information associated with that Plant (Figure 8.14). The public information includes the Production Device Name, PD GSRN Number, Domain, Installed Capacity (MW), Date of Commissioning, Location, Name of the Operator, Address, Technology, Fuels, Public Support Schemes (Table 8-4). 3. If you click on the Production Device Name link you are able to see the production device details. 4. You can Export the details to an Excel sheet or a PDF file, by selecting the respective option and clicking the Export button Figure 8.13– Search Criteria for Plants Search Cesar Account Holder User Manual © 2014 Grexel Page 98 of 102 CESAR ACCOUNT HOLDER USER MANUAL 2015-01-05 Table 8-3 – Production Devices Search Criteria Name Description Production Device Name Enter the Production Device name or a string (wild string) to filter and display the Production Devices list whose name contains the string you have entered. Enter PD GSRN Number Enter the (complete) GSRN of the PD to search for a specific Production Device by its Global Service Relation Number. Fuels Select the Fuels from the drop down list, to filter and display the Production Devices belonging to the selected Fuel. By default, all the Fuels are selected and searching with default criteria will display the details of all the Production Devices under Cesar. Select the Technology from the drop down list, to filter and display the Production Devices belonging to the selected Technology. Technology By default, all the Technologies are selected and searching with default criteria will display the details of all the Production Devices under Cesar. Date of Commissioning (From) Earliest date the Production Device has become operational. Date of Commissioning (To) Latest date the Production Device has become operational. Action Links Search Click this to invoke the search and display the filtered Production Devices list. Reset Click this to reset the screen to enter new search conditions. Cesar Account Holder User Manual © 2014 Grexel Page 99 of 102 CESAR ACCOUNT HOLDER USER MANUAL 2015-01-05 Figure 8.14 – Production Device Public Information Table 8-4 – Details of all the Production Devices Details of the Production Devices Production Device Name (link) Name of the Production Device. Click this link to view the details of the Production Device. PD GSRN Number The GSRN (Global Service Relation Number) assigned to the Organization. Domain of Production Device The Domain to which the Organization belongs. Installed Capacity, MW The installed capacity of the PD. Date of Commissioning Date of Commissioning of the PD Location, Name, Address Location, name and Address information of the PD Fuels All the Fuels the Production Device is able to convert to electricity. Technology The Technology of the Production Device Support Schemes The name of Support Scheme that the PD belongs to. 8.2.3 Transactions This report gives the details of the GO Transfers from different fuels for specified periods of transaction or production. Transfers that include Issue, Transfer, Cancel, Export, Import, Certificate expiration. This Cesar Account Holder User Manual © 2014 Grexel Page 100 of 102 CESAR ACCOUNT HOLDER USER MANUAL 2015-01-05 is useful for analysing the electricity production from the different Fuels and to define a trend of electricity Transfers. 1. On the Public Site navigate to Statistics GO>Transactions. 2. Fill in the search criteria (Figure 8.15). You can search based on Transaction Date, Production Date (Table 8-5). 3. A bar graph and a table of the quantity of all Transactions matching your criteria is displayed (Figure 8.16). a) Bar Graph: The different Fuels are listed in the y axis and the electricity in MWh is represented in X axis. The different types of fuel Certificate Transfers that have taken place (Issue, Transfer, Cancel, Export, Import and Certificate expiration) from each of the listed Fuel are represented in different colour bar graphs. b) Table: The same details are represented in numbers in a tabular form, below the bar graphs. 4. You can Export the details to an Excel sheet or a PDF file, by selecting the respective option and clicking the Export button. Figure 8.15– Transaction Report search criteria Table 8-5 – Transaction Report search criteria Name Transaction Date Description Select this if you want the report to be generated on the basis of the Transaction date (period) Cesar Account Holder User Manual © 2014 Grexel Page 101 of 102 CESAR ACCOUNT HOLDER USER MANUAL Production Date 2015-01-05 Select this if you want the report to be generated on the basis of the production date (period). Production in this case refers to the end date of the production period. Action Links Search Click this to invoke the search and display the details of the filtered Transactions. Reset Click this to reset the screen to enter new search conditions. Figure 8.16– Transaction Report: Bar graph representation Cesar Account Holder User Manual © 2014 Grexel Page 102 of 102