1
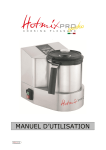
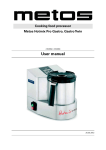
THERMO CUTTER Metos Hotmix GASTRO XL Installation and User Manual 15.12.2014 MG4163993, MG4163995 IMPORTANTNOTICE “WAIT‐TEMPERATURE” FUNCTION When you get informed that a recipe (or a step of it) has been completed after reaching a set temperature, and you wish to keep the ingredients at this steady temperature for a while, you need to use the “WAIT‐ TEMPERATURE” function. HOTMIX PRO is capable to find and keep the wished temperature for the programmed time. With this function, the initial temperature of the ingredients is NOT RELEVANT, therefore you get the same results any time. HOTMIX PRO starts the time countdown when the PROGRAMMED temperature has been reached. ACCESS TO THE FUNCTION • Press the temperature icon for 3 seconds, till you hear a beep • The display will show: WAIT‐TEMP, together with the Temperature icon • Set the wished temperature • Press the time icon • The display will show: WAIT‐TEMP, together with the Time icon • Set the wished time 2 CONTENTS IMPORTANT NOTICE .......................................................................................................................................... 2 GENERAL INFORMATION ................................................................................................................................... 4 WARNINGS BEFORE USE .................................................................................................................................... 5 FREIGHT, PACKAGE AND STORAGE ................................................................................................................... 6 INSTRUCTIONS FOR USE .................................................................................................................................... 6 PRODUCT DESCRIPTION .................................................................................................................................... 7 MACHINE DEVICES ............................................................................................................................................. 8 ACCESSORIES ................................................................................................................................................... 10 CLEANING ........................................................................................................................................................ 12 HOW TO OPERATE ........................................................................................................................................... 13 HOW TO USE THE PRODUCT PROPERLY .......................................................................................................... 21 RECYCLING AND WASTE DISPOSAL ................................................................................................................. 22 TECHNICAL SPECIFICATIONS ............................................................................................................................ 22 Please read carefully this manual prior to the first use of the appliance. It is fundamental to get the best results out of the product and the highest level of safety. 3 GENERAL INFORMATION About the manual This manual contains information on installation, operation and maintenance of the equipment and must be consulted as a reference guide. Reading this book provides a safe and proper use of the appliance. In addition to the information provided with this manual, you must comply with local regulations. The instruction manual is an integral part of the product, and should be kept near the equipment and easily accessible to anyone who makes the installation, care and cleaning. Symbols In this manual, symbols are used to highlight important safety instructions and any warning. The instructions must be followed very carefully to avoid any risk of accidents, personal injury and / or damage to things and people. WARNING! This symbol highlights the dangers that might cause injury and / or damage. WARNING Electricity Danger! This symbol points out potential electricity hazard. CAUTION! This symbol highlights instructions that must be followed to avoid risks, damage, malfunction, and/or breaking of the appliance. This symbol highlights tips and information that must be followed for the efficient operation of the appliance. NOTE! Read the instruction manual carefully before using the appliance. The manufacturer disclaims any liability resulting from non‐compliance with these instructions for use. The instruction manual must always be kept near the equipment and easily accessible for anyone wishing to consult it. We reserve the right to make unannounced changes to improve the technical specifications and / or the development of the product. Compliance Statement The appliance has been built in accordance with the current standards and the international safety directives. 4 WARNINGSBEFOREUSE • Before using the appliance, please check that the voltage of the electricity grid corresponds to the one indicated on the label of the device. Only connect the machine to an outlet that has a minimum capacity of 10 A and an effective earthing system. • The electrical safety of this equipment is guaranteed only if it is connected directly to an AC grounded socket as required by the applicable electrical safety standards. The manufacturer cannot be held responsible for any damage caused by a lack of connection to ground the appliance. In case of doubt, contact a professionally qualified technician. • After you’ve unwrapped the equipment, ensure the integrity of the unit. In case of doubt, do not use the appliance and contact qualified personnel only. • We do not recommend the use of adapters, multiple plugs and / or extension cords. If is absolutely necessary use one of these devices, you must only use single or multiple adapters conform to current safety standards, being careful not to exceed the power limit specified in the adapter. • The elements of the packaging (plastic bags, etc..) should be kept out of reach of children, because they are a potential source of danger. • This equipment must be used solely for the use described in this manual. Any other use is considered inappropriate and therefore dangerous. • The manufacturer cannot be held responsible for any damage caused by the equipment when used inappropriately, erroneous and irrational, and / or repaired by unqualified personnel. • Do not touch the appliance with hands and / or feet if wet or damp. • Do not remove the plug from pulling the power cord. • Do not leave the unit exposed to the weather (rain, sun, frost, etc.). • This appliance is not intended for use by people (including children) with reduced physical or mental ability, or lack of experience and knowledge, unless they have been instructed on the use of the equipment by personnel responsible for their security. • Ensure that children do not play with the appliance. • Before carrying out any cleaning or maintenance, disconnect the appliance from the mains supply by removing the plug. • Never immerse the appliance in the water to clean it. • Never mount the blades in the bowl without sealing. • Use only the supplied spatula to stir the preparations. • Do not ever cook with the empty bowl. • Never place the entire unit under the tap to introduce water into the bowl. • Never lift the appliance by holding the handle of the bowl. • Do not cover the inlet and ventilation openings on the rear of the unit. • In case of breakdown or malfunctioning, turn it off and do not open it. For repairs, contact only a service facility authorized by the manufacturer and ask the use of original spare parts. Failure to comply with this rule may jeopardize the safety of the appliance. • When you decide to permanently delete the device, after removing the plug from the socket, it is recommended the cutting of the power cord. • If the power cord is damaged, it must be replaced only at a service centre authorized by the manufacturer, so as to prevent any risk. • When not using the unit, disconnect the plug from the mains and turn off the switch. Do not leave the device connected to the mains if it is not necessary. • The unit cannot be used after a fall or in case of imperfections or losses. Before returning to use it will need to be brought to an authorized service centre. • Keep this instruction manual, because it may be necessary to consult it in the future. • This device complies with European Community rules in relation to electromagnetic compatibility. 5 FREIGHT,PACKAGEANDSTORAGE Shipping control Check shipping claims regarding damage caused by transport immediately after receipt. In case of apparent damage, accept the shipment only under reserve. Please note the extent of the damage on the transport document. Packaging Do not throw away the packaging of your appliance, because it could be useful for storage, when transported or in case of damage for the return to centre. The inner and outer envelope must be completely removed from the equipment before installing it PLEASE NOTE! In case you should bring the machine back to your dealer, please use exclusively the original package, as any break or fault caused by transport damages due to lack of the original package could be charged to you. If you want to throw away the package, please consider the recycling regulations in your country. Check the equipment and the presence of all components. In case of missing parts, please contact our customer service immediately. Storage Keep the packaging closed till it will be installed, taking into account the marking on the packaging. The packaging must be stored, taking into consideration the following: ‐ Do not store it outdoor. ‐ Keep in a dry place away from dust. ‐ Do not expose to corrosive elements. ‐ Do not expose to direct sunlight. ‐ Avoid mechanical shock and vibrations. ‐ In case of prolonged storage (> 3 months) make sure that the state of the package and all its parts are in good condition. If necessary, renew the packaging. INSTRUCTIONSFORUSE • Before using the appliance for the first time, thoroughly clean all the accessories such as bowl, lid, measuring cap, blades and spatula, following the procedures described later. • Place the unit on a horizontal work surface, away from edges and heat sources and out of reach of children. • The maximum capacity of the bowl must never be exceeded. Introducing excessive quantity could mean spilling liquids and, consequently, also irreparable damage the unit. These failures are not covered by the warranty agreement. • Do not introduce hands (or fingers) into the hole of the lid, it could be a potential risk of cutting. 6 PRODUCTDESCRIPTION 1. Liquid Crystal Display 2. Control Panel 3. SD card compartment 4. SD card 5. Measuring cap 6. Lid 7. Magnet 8. Flaps for lid opening and closing 9. Lid gasket 10. Lid hole 11. Flaps for lid opening and closing 12. Power cable 13. Switching ON / OFF 14. Stabilizing feet 15. Stainless steel bowl 16. Mixing paddle 17. NTC probe 18. Heating element 19. Liquid leaking hole 20. Blades 21. Blades locking ring 22. Spatula Optional accessories 23. Stainless steel basket for steam cooking 7 MACHINEDEVICES CONTROL PANEL (2) Menu: to access to the recipe menu. + ‐: to increase or decrease Speed, Time and Temperature parameters. When “+” and “‐” are used as pulse buttons, the parameters increase or decrease by one digit. If you keep pressing the buttons, the parameters will quickly increase or decrease, just depending on how long the buttons will stay pressed. Turbo: By keeping the switch pressed, it is possible to go from speed 6 as a minimum to the maximum speed (“Turbo” speed), till the switch is being released. Pulse: to get a “Pulse” functioning at any speed, from 1 to 10 (with the exception of speeds 1E and 1F). Clock: to set the operating time up to a maximum of 12 hours. Start/stop: it is the on/off switch for any function. Thermometer: to set the operating temperature as from 25° C (77°F) up to 190° C (374°F). Speed: To set the operating speed, with 12 different options. HEATING ELEMENT (18) Electrical device for heating the bowl while cooking. WARNING: do not heat the bowl when empty! WARNING: do not touch it, it could cause burns! NTC PROBE (17) It is the element enabled to control the temperature set. 8 LIQUID LEAKING HOLE (19) Whenever some liquids should come out of the bowl, they will go out from the appliance base, throughout this hole! WARNING: check that the hole is not blocked periodically! WARNING: the even partial blockage of this hole could cause serious damage in case of liquid leakage out of the bowl. STABILIZING FEET (14) The four elastic feet at the base of the appliance work as shock absorbers and stabilizing elements of any oscillation when the appliance is operating. WARNING: it may happen that, depending on the food preparation, the appliance could make visible oscillations: this is absolutely normal, and the stabilizers will absorb any oscillation LCD DISPLAY (1) Once the appliance has been switched on, the Hotmix PRO logo will appear on the display. If the lid of the bowl is open, the icon of the lid will switch on and the indication “LID OPEN” will appear. After closing the lid safely, the icon and the written indication will disappear, while the speed icon will appear with “00” digits, together with the indication “SET SPEED”: at this point, the appliance is ready to be programmed. When temperature is being set, the thermometer icon will switch on, together with the indication “SET TEMPERATURE” When pressing the “CLOCK” switch to set time, the clock icon will switch on with “00:00” digits, and the “SET TIME” indication will appear. The display will show the remaining time slipping by. In case of severe fault, the spanner will switch on while anything else will switch off. The appliance must then be brought to a service center. MOTOR CONTROL THERMOSTATS Your appliance is equipped with two thermostats for motor protection: one dynamic and one static. The dynamic thermostat always intervenes before the static, which stops the machine pointing Er: 01. The dynamic thermostat, in fact, make an “intelligent” control of the motor temperature, stopping for a moment, if necessary, to cool the motor down and finish the recipe, before involving the static thermostat. When the dynamic thermostat is in operation, the word “PULSE” will be displayed, and you can easily finish the preparation. If, however, an excessive amount of ingredients or a too thick preparation takes place (which can cause a strain upon the appliance, with consequent overheating of the motor), the static thermostat comes into operation, stopping the motor immediately. The display shows “Er: 01”. Wait a few minutes before the appliance cools down, and when the motor has reached an acceptable temperature, the machine is automatically ready for use again. To do this you have a forced air cooling fan that also works when the machine is off. SD card (4) The machine is equipped with an Sd card, placed inside of a comportment on the back of the machine. To access it, unscrew the screws. Inside the SD card there are: Folder “DEFAULT”: it contains programs, recipes and specially stored functions; Folder “USER”: it is suited to store personal recipes; Folder “CreatorPRO”: it contains the software to be installed on the PC for storing, modifying and deleting the recipes and instructions to do it; Folder “Recipebook_Gastro XL” with the complete recipe book of pre‐stored recipes. 9 ACCESSORIES COVER (6) • Mount the cover by pressing the two side flaps (8) and exerting a little pressure. It will be very easy. The lid has a gasket (9), which must always be mounted correctly to avoid the risk of leaking fluids. WARNING: The incorrect position of the gasket (9) could enable the spill of liquids, or prevent the start of the appliance. • If the lid is not closed properly, the electromagnetic safety device (7) prevents the appliance to start working, and the display shows the icon of the bowl with an opening lid. • To open the lid, press with two fingers on the side flaps (8) and lift them up. WARNING: If there are some liquids in the bowl and the speed is high, wait before opening the lid a few seconds so the liquid will come back to their ordinary level, to avoid over spilling. CAUTION: Before you start the appliance, please always check that the two side flaps are closed. CAUTION: Remove the gasket periodically and clean the dirt between the seal itself and the cover. CAUTION: Take care to correctly reassemble the gasket at its head, so that the lid closes well. CAUTION: Never put the lid in the dishwasher! MEASURING CAP (5) The cap has a dual function: when fit on the cover it prevents liquid leaking from the lid itself, and can be used as a handy measuring cup as well. CAUTION: If boiling liquids are present inside the bowl, please wait a while before removing the cap: it will prevent any puffs of steam. Equivalence capacity of measuring cap: Water ............................................................................................................ g. 85 Extra‐virgin oil ............................................................................................... g. 85 Seed oil ......................................................................................................... g. 75 Wine ............................................................................................................. g. 85 Milk ............................................................................................................... g. 85 Flour ............................................................................................................. g. 55 Semolina ....................................................................................................... g. 70 Sugar ............................................................................................................ g. 85 Cocoa ........................................................................................................... g. 50 Rice .............................................................................................................. g. 85 Breadcrumbs ................................................................................................ g. 50 Grated cheese .............................................................................................. g. 50 CLEANING: The measuring cap can be washed in the dishwasher. Bowl (15) The bowl shows three lines to indicate the content level: 3rd line= 3 litres 10 CAUTION: when the contents of the bowl arrives to the 3rd line (3lt max) the speed 3 is the maximum speed setting. When, on the contrary, the content of the bowl doesn’t exceed the 2nd line (1,5 lt). The maximum speed setting is 10. CAUTION: The maximum capacity must never be exceeded, and it is vital that you take it into account for some foods such as leavened dough (bread, pizza, etc..) During some preparations volume increases, furthermore the higher speeds tend to increase the liquid level because of the centrifugal force. BOWL’S EXTRACTION Ensure that the unit is stopped, then press the buttons to open the lid. CAUTION: To stop the engine never open the lid. Use only the “START / STOP” switch. CAUTION: To remove the bowl, please use only the handle. CAUTION: The bowl may be very hot, do not touch it and do not place it on delicate surfaces as they could even be irreparably damaged. BOWL’S OPENING AND INSERTION Make sure that the appliance is stopped, then press the buttons to open the lid. Opening the lid automatically sets operational safety that stops the engine and, consequently, the blades stop turning. Insert the bowl making sure that sounds perfectly in their seats, otherwise the safety device will prevent the motor starting. CAUTION: before to insert the bowl check that the blades are securely locked. CAUTION: Before cleaning the glass, always make sure that the blades are dismantled in order to avoid the risk of cutting. CLEANING: The bowl can be washed in the dishwasher. Consider, however, that the detergents used in dishwashers are very aggressive and that, after some time, the grip of the bowl’s handle could become a little discoloured. BLADES (20) MOUNTING THE BLADES: Hold the blades with one hand, insert it into the hole on the bottom of the bowl with the other hand and carefully tighten the locker on the bottom of the bowl, turning it clockwise. To take out the blades, please turn the locker anti‐clockwise and make the opposite operation to re‐mount the blades. WARNING: The blades have sharp surfaces, be careful while handling. CAUTION: After you have crushed harsh elements (ice, nuts, carrots etc.) ALWAYS tighten the locker. Always check that the blades are equipped with the gasket and that the gasket is in good condition, otherwise it will be possible that liquids come out through the discharge pipe on the basis of the appliance. 11 SPATULA (22) The spatula allows to stir the ingredients contained in the bowl even with the blades in motion in total security, because its special shape makes it impossible to get in contact with the blades themselves. It also enables, when necessary, to remove ingredients from the walls of the bowl in one processing step and the next. WARNING: DO NOT use other tools (spoons or wooden spoons, etc.) with the blades in motion. CLEANING: The spatula can be washed safely in the dishwasher. MIXING PADDLE (16) The mixing paddle helps foods and liquids to get properly blended. To insert the mixing paddle, please match the hole at the bottom of the device with the upper pin linked to the blades, then push down till you hear a “click”. To remove the mixing paddle, pull it upward to remove it from the blades’ pin. The time of usage of the mixing paddle is linked to the duration of the food preparation. WARNING: DO NOT use the mixing paddle at speeds higher than 4 or at speed TURBO. WARNING: DO NOT remove the mixing paddle when the glass is still hot. Wait till the mixing paddle cools down before removing it from the bowl. CLEANING Clean the appliance with a damp cloth and neutral detergent, avoid cleaners that result in being too aggressive or that make too much foam. CAUTION: Disconnect the plug from the outlet before starting the cleaning operations. CAUTION: Do not completely submerge the unit in water for cleaning. CAUTION: Do not clean the appliance with a jet of water. WARNING: periodically disassemble the lid’s gasket and remove the dirt that there might be between it and the lid. WARNING: take care to correctly reassemble the gasket at its head, so that the lid closes correctly. Clean the inside of the bowl with a slightly dampened, non‐abrasive sponge. Do this only and exclusively when the machine is off and cold. Before cleaning the bowl, always make sure that the blades are dismantled, in order not to run the risk of cutting. 12 HOWTOOPERATE • Place the appliance on a flat surface, so that it will be in a stable position. • Connect the equipment to the mains voltage. • Switch on the appliance by keeping the main switch pressed, the display will then switch on automatically and showing the HotmixPRO logo. To ensure safety and respect of energy saving, if you do not set any parameters, after about 5 minutes the unit will shut down, setting in “standby” position and displaying the HotmixPRO logo. Just press any key to put the device back into operation. SETTING THE FUNCTIONS • Select the icon of the function. • Use the “+” and “‐” buttons to set the digits. • Set the functions necessary to make food preparations, always use this recommended sequence: 1. Temperature 2. Speed 3. Time 4. Start / Stop WARNING: at the first use, it is possible that the device emit a low noise, due to the internal stabilization of the joints. That is normal, and it will disappear in a short time. CORRECTION OF DATA SET When working you can change the parameters of speed, time and temperature and, with the “+” and “‐” symbols, define the new digits. Proceed as follows: • Press the START / STOP button to stop the appliance • Press the button corresponding to the parameter that you want to change for the setting • Press the “+” and “‐” buttons to set the new digit • Press the START / STOP button to restart the unit. The unit will not start without any given set of parameters. SPEED CONTROL Selection of the blades’ speed as follows: • Press the SPEED button • Use “+” and “‐” buttons to select the required speed. The speed set will appears on the display. The appliance is equipped with 23 different types of speed: • Speed from 0 to 10 • Speed from 1 to 10 PULSE • Speed 1E for cooking meat with mixing paddle • Speed 1F for cooking delicate foods with mixing paddle • Turbo The speed “0” can be displayed and selected only by setting a temperature first as follows: • Press the button with the icon of the thermometer • Select a temperature • Use the “‐” button to select speed “0”, that will appears on the display • Set the other parameters and proceed. 13 TIME Selection of time duration: • Press the TIME button. • Use “+” and “‐” to select the working time. The value of time set will be displayed. • The range of time varies from 5 seconds to 12 hours. • After 60 minutes, and up to 12 hours, the steps will be 10 minutes at a time, unless you use the “+” and “‐ ” with small shots: in this case we can proceed from minute to minute. Steps of the clock: <1min 1‐5min. 5‐10min. 10‐30min. 30 ‐ 60min. > 60min.fino to 12 hours. Every 5 sec. Every 15 sec. Every 30 sec. Every 1 min. Every 5 min. Every 10 min. Every 10 min. with option of min. in min. The display shows the remaining time of food preparation. The unit stops automatically when it reaches the selected time and emits a beep. TEMPERATURE Temperature selection: • Press the TEMPERATURE button • Use “+” and “‐” buttons to select the required temperature. The display will show the set temperature. • If you do not set any temperature as the machine has to work “cold”, the display will show two horizontal lines to indicate that there is no heating. The temperature range varies from 25 °C (77°F) to 190°C (374°F). Prepare first all those preparations that do not require the temperature setting, so you do not have to wait for the unit to cool down for subsequent food processing. EXAMPLES OF WORK NORMAL WORK: • After introducing the ingredients into the bowl, close the lid properly. • Press the SPEED button, then use the buttons “+” and” “‐” to select the required speed. • Press the TIME button and then use the buttons “+” and “‐” to select the required time. • Press the temperature button (if necessary), then with the “+” and “‐” buttons please select the required temperature. • Finally, press the Start / Stop button (to operate the appliance). PULSE WORK (work stopped): When the unit is operating with the trend of the regular program: • Press the PULSE button briefly‐ so the job will go from NORMAL to the DISCONTINUED. The appearance of the appropriate icon on the display will indicate that the function PULSE is on‐going. TURBO WORK: When the unit is operating with the trend of the regular program: • Press the button to activate TURBO function. TURBO function remains operational until the button is pressed. The TURBO is active from the speed 6 through speed 10. The display indicates the function with the flashing icon TURBO SPEED. 14 MENU a. RECIPE GUIDE b. RECIPE MANAGEMENT (modifying, deleting, memorizing) In order to access the RECIPE GUIDE, please insert the SD card in the appropriate compartment, placed on the back side of the appliance (3). a. Keeping the MENU switch pressed, the pre‐stored recipes/programs will be accessed. b. Keeping the MENU switch pressed for at least 3 seconds, the following functions can be accessed: modifying, deleting, storing of one’s own recipes (only for setting functions). The programs and the pre‐stored recipes have been created by our chefs according to their personal taste, using ingredients available in our country. It is possible that different ingredients and a different personal taste will sort out a different outcome from what expected. To this purpose, the appliance offers the opportunity to modify the stored recipes and/or programs, by saving a copy in one’s own file (User), or to store own recipes, according to the personal taste and the ingredients available in one’s own country. a. Keep the MENU button pressed and, by using the + and – buttons, select the file you want to access to: DEFAULT (pre‐stored recipes and programs) or USER (personal recipes). Confirm by pressing the Start button. Regardless of the selected file, please proceed as follows to create a prestored recipe/program: • By using the “+” and “‐“ buttons, select the number of the chosen program. For seeing the complete list, please go to: www.hotmixpro.com , at the “RECIPES AND SPECIAL PROGRAMS” section. The consultation of this section will enable you: a) to print the full text of recipes, including any final stages of processing; b) to always find the updated list, in real time, of any recipe and program available and possibly their updated version, which will be possible to download on your SD card. • Then press the START/STOP button: the number of the program/recipe will appear on top, with the title flowing “INGREDIENT_ OF _” (where 000 is the first ingredient, and the number after the bar show the total quantity of ingredients of a specific recipe), and the name and the quantity of the first ingredient. Within some programs, neither the ingredients not the quantities are being specified. • By using the “+” button, all the ingredients needed for a recipe can be displayed one by one. • At the end, press again the START/STOP switch to show the first ingredient of the first step to be introduced into the bowl. The display shows the total number of the steps for each recipe as well (e.g. 1/3). • Once the ingredients of the first step have been introduced into the bowl, press START and the machine will operate. • At the end, follow the same procedure with the second step, till the recipe will be completed. The display shows the remaining time, speed, temperature and the accessory used. • At any stage of each operations, the icons will appear on the display, thus indicating which function is working, like when the machine is being operated manually. At the end of the last operating step. The machine will emit a continuous “beep”, like at the end of any manual preparation. When a stored recipe is being created, it is fundamental that the ingredients are being introduced exactly in the same order as per the indications given on the display or the recipe guide. ATTENTION: Never let the machine unattended while working. 15 b. Press the MENU button for at least 3 seconds. By using the “+” and “‐” buttons, select the file as follows: DEFAULT (pre‐stored recipes and programs) or USER (personal recipes). Confirm by pressing the Start button. This menu includes the following activities: Storage of a recipe Modification of a pre‐stored recipe Delete of a pre‐stored recipe STORAGE OF A RECIPE There are two ways to store one’s own recipe: A. Directly from the machine, into the USER file, it is possible to store number and name of a recipe, number of the steps required to complete it, and the operating parameters (speed, time and temperature). It is not possible to write the ingredients and the quantities, if you wish to include these infos please proceed to point B. B. From the PC, after inserting the SD card into the appropriate card reader, through the program into the CreatorPRO file it is possible to store number and name of the recipe, number of the steps required to complete it, and the operating parameters (SPEED, TIME and TEMPERATURE), besides writing ingredients and related quantities. A. To store a recipe directly from the machine: Keep the MENU button pressed for at least 3 seconds. Use the “+” e “‐” buttons to let the Menu words flowing till selecting “STORE”, and press the “START” button. It is necessary to select the number of the recipe to be stored, by letting the numbers flowing with the “+” and “‐” buttons. Confirm the selected number with the START button: in case the selected number is already assigned, the indication “ATTENTION RECIPE EXISTING” will appear, and it will fade away after 3 seconds; a “beep” will be then heard, and the display will go back to the previous screen, in order to enable the selection of another number. In case the selected number will be available, please confirm with the START switch, then go ahead to the subsequent line. The storage of a recipe should be made by dividing it into steps, starting from 1 upwards, using the “+” and “‐” buttons. Then confirm with the START button, and then go ahead to the subsequent screen of setting modes. If when storing each step an already assigned number will be chosen, a “beep” will be heard after 3 seconds and the display will go back automatically to the previous screen, to enable the insertion of the correct number. Once on the screen of the setting modes, select the SPEED digit with the “+” and “‐” buttons, and the PULSE switch as well if required, then press START to confirm. Now we go to the TIME setting mode. Please select the digits with the “+” and “‐” buttons, confirm with the START button, and then go to the next setting mode. So we get to the TEMPERATURE setting: please select the digit with the “+” and “‐” buttons, confirm with the START button, and then go to the next setting mode, that is the selection of the accessory to be used. Selection of the ACCESSORY: please go the requested accessory by the “+” and “–“ buttons, then confirm with the START/STOP button. All the set data are to be confirmed (or not) with the subsequent screen by using the “+” and “‐” buttons, to get positioned over YES, or NO and then pressing the START/STOP button. If the data are confirmed, then the subsequent screen will appear, otherwise it will go back to the initial screen. In both cases the name of the accessory will flow on the display. On the next screen the indication “OPERATION COMPLETED” will appear. It will mean that all the necessary operations have been set. The indication will stay on for about 3 seconds, then a “beep” will announce the change to the next screen. 16 In case a recipe needs to be prepared through various steps, press the START button to get back to the screen where the number of the step to be stored will be selected. Conversely, if the recipe has been completed, please select the indication END by using the “+” and “‐” buttons, and then press START. To get out from the STORE RECIPE menu and go back to the initial screen RECIPE MANAGEMENT, press START if the storage procedure has been completed, or MENU if you decide to exit earlier, therefore deleting the storage procedure. MODIFICATION OF A PRE‐STORED RECIPE To modify a pre‐stored recipe: Press the MENU button for at least 3 seconds. By using the “+” and “‐” buttons, let the menu words flowing, till selecting “CHANGE”, and press the START button. Choose the number of the recipe to be modified, by using the “+” and “‐” buttons, then once selected press START to confirm, and pass on to the line below. Selection of the step to be modified: by using the “+” and “‐” buttons, once the step has been selected please press START to confirm, and then pass on to the setting mode screen. To set the new operating speed: select the digit with the “+” and “‐” buttons, and possibly the PULSE function (by pressing the PULSE button). Once the word SPEED has been selected, choose the new digit with the “+” and “‐” buttons, then confirm by pressing the START button, and pass on to the subsequent screen. To set the new operating time: select the digit with the “+” and “‐” switches. Once selected the word TIME, choose the new digit with the “+” and “‐” switches and confirm by pressing the START switch, then pass on to the subsequent screen. To set the new operating temperature: choose the digit with the “+” and “‐” buttons. Once selected the new the word TEMPERATURE, choose the new digit with the “+” and “‐” buttons, and confirm by pressing the START button, then pass on to the next screen. To set a new accessory, position on the word referred to the accessory to be selected with the “+” and “‐” buttons, and confirm by pressing the START button. To confirm the new set data, select YES with the “+” and “‐” buttons, and confirm by pressing the START button, then pass on to the next screen. Conversely, if you do not want to confirm the new set data, select NO with the “+” and “‐” buttons, and confirm by pressing the START button to go back to the screen that enables to repeat any operation required to change the parameters. DELETE OF A PRE‐STORED RECIPE To delete a pre‐stored recipe, please proceed as follows: Enter the RECIPE MANAGEMENT menu by keeping the MENU button pressed for 3 seconds. Use the “+” and “‐” buttons to let the menu words flow, then position on DELETE and confirm by pressing the START button. Select the number of the recipe to be deleted by using the “+” and “‐” buttons, then press START to confirm and pass on to the line below. Position on YES with the “+” and “‐” buttons and confirm by pressing the START button. The display will show the indication SURE DELETE, then get positioned on YES with the “+” and “‐” buttons and give confirmation by pressing the START button. Then the subsequent screen OPERATION COMPLETED will appear. Conversely, by selecting NO the program will be exited. B. To store a recipe through the PC, writing even ingredients and quantities, or to modify or delete a recipe from the SD card through the PC, download from the SD card the software located in the folder “CreatorPRO” and install it following the instructions. 17 SPECIAL FUNCTIONS “WAIT TEMPERATURE” FUNCTION This function, particularly useful for pastry preparations, allows the machine to reach a temperature that has been pre‐determined by the user. Once reached this temperature, the recipe has been completed (e.g. Custard), but the WAIT TEMPERATURE function enables to keep mixing the just completed preparation, requiring that a TIME digit below 04:00 hours is being set into the machine. When one wants to use the preparation, the machine must be stopped MANUALLY, by pressing the START/STOP button. PERSONAL TOUCH: To facilitate the perfect success of the stored recipes, you can repeat the last sequence of processing as follows: • Press the “clock” • You will hear a beep • Set a time of your choice • Press the “Start” In this way the unit will repeat the last sequence with the same speed and the same temperature, for the time you set. It is very useful, for example, to give a final touch to food preparations that are not to your liking, without the need to reset all the digits again. DELAYED DEPARTURE There are 3 ways to operate the machine with the late departure. MANUAL PROGRAMMING When the machine is turned on, to set the current time, press and hold the button “clock” for 5 seconds till you will hear 3 beeps. Now the display shows “‐ ‐: ‐ ‐” with the first two lines that are flashing, they indicate the hour, with the “+” and “‐” buttons you could just set the time format 0‐24. Once you have chosen the time, you have to store your data by pressing the “start / stop” button: after flashing, the second two lines are to indicate the minutes: with the same procedure you store the minutes. Then, you must set the time you want the appliance get started, and with the same system you set the hour . Once you confirm the information with the START / STOP button, the display will show the clock icon, which means that we must set (again with the “+” and “‐” buttons) the time we want the machine starts working; it must be confirmed by pressing “start / stop” as well. Next, the display shows the icon of the thermometer, if you want to set a temperature, always with the “+” and “‐” buttons, and pressing the “start / stop” button to confirm. If you do not want any temperature, press the “start stop” button and skip this step. Now the blades’ icon appears on the display, and as above, adjust the speed with the “+” and “‐” buttons, and store the data. If you want a speed pulse, press the “pulse” button before storing the data. Once you set the last digit of speed, you will hear 4 beeps, the machine is put on standby, the display shows the current time and the clock icon is flashing. In this condition the machine waits for the set time to perform the set functions. Speeds will be set only up to 3, the temperature will be up to 95 ° and the time up to 4 hours. COMPLETE RECIPE IN MEMORY: Once selected a recipe that you want to perform with the delayed start, press and hold for 5 seconds the “clock” button and you will then hear 3 beeps. Now the display shows “‐ ‐: ‐ ‐” with the first two lines that are flashing, they indicate the hour, with the “” and “‐” you could just set the time format 0‐24. Once you have chosen the time, you have to store your data by pressing the button “start / stop”: after flashing the second two lines indicate the minutes to the same procedure time you store the minutes. 18 Then, you must set the time when you want the appliance will get started, with the same system with which he had set the hour earlier. Once you set the last value, you will hear 4 beeps, the machine is put on standby, the display shows the current time and the clock icon is flashing. In this condition the machine waits for the set time to perform the set function. In this case, the first step of the recipe selection starts, then once finished the machine stops and waits for the start for the next step. CAUTION: Always check that the ingredients are introduced in the recommended amount from the display. WARNING: Failure to maintain the quantity of food could cause serious damage to things and people. CAUTION: Never leave your appliance unattended during the operations. SINGLE STEP OF A RECIPE When you pick a recipe of which you want to make a single step with the delayed start, first you need to do the above steps in the ordinary way, then once the last step is over, and before you give the start to the next step, press and hold for 5 seconds the “clock” button and you will hear 3 beeps. Now the display shows “‐ ‐: ‐ ‐” with the first two lines that are flashing, they indicate the hour, with the “+” and “‐” buttons you could just set the time format 0‐24. Once you have chosen the time, you have to store your data by pressing the button “start / stop”: after flashing the second two lines indicate the minutes: with the same procedure for storing the hours, you now store the minutes. Then, you must set the time at which you want the appliance getting started, with the same system by which you had set the hour earlier. In this case, the step being part of the chosen recipe starts. At the end of it, the machine stops and waits for the start of the next step, or it beeps while the recipe has been completed. WARNING: Always check that the ingredients are being introduced in the recommended amount as per the display indication. WARNING: Failure to maintain the quantity of food could cause serious damage to things and people. CAUTION: Never leave your appliance unattended during the operations. It is possible to check if set data are correct when the machine is in standby, with the clock flashing, by pressing the start / stop button: set digits appear in sequence with the appropriate icon. When making this operation, if you realize that you have set wrong data, please press the recipe icon for 5 seconds, then you hear 4 beeps, and all data settings will be deleted with the exception of the current time. FOOD REHEATING For this function, there is the program P00 in the recipe memory. After pressing the START / STOP button, you’ll need to set the temperature (ranging from 25° to 65 °) with the “+” and “‐” buttons, then once the selected temperature is confirmed by pressing “Start / Stop” button. You should then confirm the time (0 ‐ 4 hours), then after pressing “start / stop”, the robot will start reheating the food at speed 0 at the set temperature and time. 19 20 HOWTOUSETHEPRODUCTPROPERLY To chop, grate, pulverize and mount, the bowl should be perfectly clean and dry. To chop, grate, pulverize and mix, the volume of ingredients should never exceed half of the bowl. When you need to chop, you should remind that speed is proportional to the hardness of the ingredients, while time is proportional to the quantity of the ingredients by chopping. When you are chopping small amounts of food (cloves of garlic, a sprig of parsley, etc..) you should program speed and introduce the ingredients all of a sudden through the hole in the lid. When you wash the blades, dry them very well and, if necessary, mount the unit to work for a few seconds at maximum speed, so that drops of water will step down the inside of the bowl. If you must chop harsh ingredients such as almonds, hazelnuts, chocolate, etc.., set the required speed and the machine, second after second, will increase its speed automatically. After chopping very hard ingredients such as ice, nuts, chocolate, etc.., ALWAYS check that blades are still screwed perfectly. When cooking, never exceed the liter and half of ingredients (including liquids and solids) otherwise you run the risk that the contents of the bowl could overspill. • While the unit is in operation, only use the supplied spatula to loosen the ingredients from the sides of the bowl or mix them. To make preparations with boiling milk, always remove the cap from the cover while cooking. After cooking, do not open the lid immediately, but let the blades turning without any temperature set, until the milk has gone off the boil before opening. Do not place the unit near heat sources (stove, oven, etc..). When you want to move the equipment you need to lift it, and never drag it while working: you may run the risk of damaging the functionality of the machine. Before carrying out any recipe, please read all the ingredients to prepare it properly and have them at hand, and strictly follow the sequence of implementation. When a recipe calls for ingredients that are a “cube” or “diced”, it is necessary to prepare them this way, otherwise they do not mix well with other ingredients in the recipe. The cubes should have the side of about 1 ‐ 1.5 cm, while the diced should have the side smaller than 1 cm. In all preparations of fruit (juices, sherbets, jams, etc..) add a peeled lemon “in vivo”, ie without white skins, seeded and cut into small pieces. The lemon will act as an antioxidant and will enhance the colour and flavour of the preparation. For the preparation of ice creams and sorbets, and to assemble the cream, it is necessary that the machine is cold and that the bowl is first cooled for a couple of hours in the refrigerator. If the machine is off, but it was not thought to cool the bowl, you can do it by grinding ice, then take it out from the bowl and proceed with the preparation. In preparations that require long cooking times you may need to add extra liquids. Similarly, for preparations that require the use of eg. tomato sauce, please remind that not any soups are the same, but they can vary in consistency and, therefore, in the amount of liquid they contain. For the preparation of dishes with vegetables, if you are not satisfied with the amount of cooking achieved by the recipe, you can use the “personal touch” and prolong the cooking for the desired time. If you use canned beans instead of dry ones, consider that cooking times should be reduced considerably. For the preparation of meat dishes, one should consider the importance of the type of meat and the cut used. Cooking times of the recipes refer exclusively to the type and cut of meat indicated in the recipes themselves. If for any reason, you decide to use a different type of meat, remember that it will change its cooking times. Obviously, if you must lengthen the cooking time, you must increase the amount of liquid in the bowl while cooking. When you program the delayed start of a recipe with rice and liquids (broth, water, milk, etc.), you must keep in mind that over time the rice absorbs the liquid and therefore the cooking time should be reduced. After cooking, wait a moment before opening the lid and take care of possible “puffs” of steam. You could burn yourself. 21 If the unit is used improperly, eg. by putting bigger amounts of an ingredient than those provided by the recipe, or more than the appliance can accept, the motor tends to overheat and thus, in order to protect it, the intervention of a thermal protection will block the motor until it will cool down. Once cold, the unit will work again. If, after preparing a “hot” recipe, you want to switch to a “cold” recipe, in order to speed up the cooling times it is recommended to let the appliance work at speed 10 for about 2 minutes. Do not lift or move the unit by grasping the handle. RECYCLINGANDWASTEDISPOSAL When the device stops working and must be scrapped, you must ensure that its disposal will cause the least environmental damage possible, in accordance with the following European legislation 2002/96/EC: 1 ‐ When a product is given the symbol of a garbage crossed out, it means that the product is covered by the European Directive 2002/96/CE. 2 ‐ All electrical and electronic products should be disposed separately from the municipal waste collection, and being collected within specific plants designated by the government or local authorities. 3 ‐ The proper disposal of obsolete equipment helps to prevent possible negative consequences on human health and the environment. 4 ‐ For more detailed information on the disposal of obsolete equipment, please contact the municipality, the waste disposal service or the shop where you purchased the product. TECHNICALSPECIFICATIONS Power supply: 110÷240 V. 50/60Hz Motor power: 1800 W Heater power: 1500 W Total power: 3300 W Bowl: Stainless Steel Max Capacity: 3 litres Overall dimensions: (H x W. X D) : 396 mm x 320mm x 420mm Weight: Kg. 18 22