1
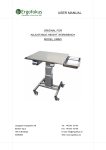
USER MANUAL IN ORIGINAL
ADJUSTABLE-HEIGHT
WORKBENCH “L&D”
Ljunggren & daughters AB
Tel: +46 243 153 50
Backes väg 3
Fax: +46 243 153 59
784 54 Borlänge
E-mail: [email protected]
SWEDEN
Web: www.ergofokus.se
CONTENTS
1
2
3
4
GENERAL INFORMATION .....................................................................................................3
1.1
FUNCTION OF THE SYSTEM...................................................................................................3
1.2
PRODUCT WARRANTY ..........................................................................................................3
PROHIBITIONS – WARNINGS - REQUIREMENTS .........................................................5
2.1
GENERAL INFORMATION .......................................................................................................5
2.2
HAZARD NOTICES.................................................................................................................5
2.3
USE OF THE MACHINE ..........................................................................................................6
2.4
MAINTENANCE AND REPAIR ..................................................................................................6
OPERATOR’S MANUAL ..........................................................................................................7
3.1
FUNCTION OF THE SYSTEM...................................................................................................7
3.2
OPERATION ..........................................................................................................................7
3.3
SAFETY ................................................................................................................................7
3.4
STARTING AND STOPPING ....................................................................................................7
3.5
PROBLEMS DURING STARTING, OPERATION OR STOPPING ...................................................8
3.6
CONSUMABLE SUPPLIES.......................................................................................................8
3.7
MAINTENANCE ......................................................................................................................8
3.8
HANDLING OF USER MANUAL ...............................................................................................8
ASSEMBLY - DISASSEMBLY - REPARATION ...................................................................9
4.1
DISASSEMBLY OR SCRAPPING OF THE SYSTEM.....................................................................9
4.2
REPARATION AND SPARE PARTS ..........................................................................................9
4.3
CYLINDER-PUMP COUPLING ............................................................................................... 10
4.4
REFILLING OF INDIVIDUAL CYLINDERS ................................................................................. 11
4.5
TROUBLESHOOTING CHART HYDRAULIC SYSTEM ............................................................... 13
5
PRODUCT SPECIFICATION ................................................................................................ 15
6
EC DECLARATION …………………………………………………………………………18
2
1 General Information
You have in your possession a hydraulic adjustable-height workbench used mainly to adjust
work surfaces to ergonomically suitable heights.
1.1 Function of the System
Ljunggren & daughters’ hydraulic workbench works on the principle of two communicating
vessels. One of the vessels is in the pump (4) under the bench, while the other (cylinder) is in
one of the bench legs (6); the vessels are connected by a plastic hose (5).
When the bench is to be raised, the necessary amount of oil is quite simply pumped out of the
vessel in the pump (4), through the hose (5) to the cylinder in the bench leg (6) and the bench is
thereby pushed upward.
When the bench is to be lowered, an underpressure is generated in the pump (4) by means of
its piston (3) being pulled back. The oil in the cylinder is then forced back through the hose into
the pump by means of the overpressure generated by the weight of the bench.
The vessels inside the pump are mechanically connected to each other by a plastic nut (2) so
that all bench legs are at the same height and that they remain at the same height regardless of
whether one bench leg bears a greater load than the others do.
The motion in the system is created when the screw (1) that goes through the plastic nut is
turned, either by means of a manual crank or with the help of an electric motor device.
By varying the pump and cylinder diameters, different lift forces and speeds are obtained. See
Product Specification, page 14.
1.2 Product Warranty
Ljunggren & daughters’ workbench is covered by a warranty against manufacturing defects for
a period of 24 months following the date of manufacture.
Ljunggren & daughters’ warranties will only be honoured provided that the workbench has been
used in the manner intended and as long as it has not be disassembled or subjected to any kind
of tampering.
3
The bench is raised by the oil
being forced out from the
pump through the hose and
into the cylinder.
The bench is lowered, but this time
this cylinder is compressed and
thus the oil is returned to the pump
by the weight on the bench and
thereby on the cylinder.
4
2 Prohibitions – Warnings - Requirements
2.1 General Information
-
The workbench must not be continuously raised and lowered, i.e., a maximum of 2 minutes
of operation should be followed by at least 8 minutes of idle time.
This operating manual must always be available for reference at the workbench.
The transformer must only be connected to outlets of the same voltage as indicated on its
rating plate.
The workbench may only be moved when it is not bearing a load. In the meantime, any
wheels must be in locked mode.
Make sure that the control unit is always kept in its holder so that no accidental motion
occurs as a result of someone touching the panel.
When the workbench is to be attached to a wall using a wall bracket, the wall must be
reinforced with a batten measuring 100 x 50 mm to which the retaining screws can be
anchored. Hexagon-head wood screws measuring at least L = 100 diam = 10 mm must be
used as retaining screws.
2.2 Hazard Notices
-
-
-
-
The hose must not be against sharp edges, non-chamfered holes, moving parts or the like.
Electrical cables / connecting cables that are not correctly laid in upon installation may be
pinched and conduct electricity to the bench. There is also a risk that electrical cables /
connecting cables may contact sources of heat in the kitchen.
The workplace must be arranged so that no risk of tipping or falling occurs.
Nearby counters, benches or the like shall have smooth walls that minimise the risk of
crush injuries when raising the bench. The bench must stand on a flat horizontal surface.
Keep hands and other body parts away from the bench when it is being raised or lowered.
There is a risk of being crushed between the benchtop and other nearby edges.
The maximum load on the workbench must not be exceeded, statically or dynamically.
The workbench must not be subjected to the effects of any mechanical, thermal, chemical,
electromagnetic or electrical fields (for example, high-power cables), beyond the limits
indicated in this user manual.
If the workbench is used in a location where there is a risk of damage to property or injury
to persons by a movement caused by the system, it is then incumbent upon the occupant
to ensure that the appropriate safety devices are used in order to prevent such damages
and injuries from occurring.
In the event of an oil leak or spill, wipe up the spilled oil immediately and clean with an oilsolubilising cleaning agent (e.g., dish detergent or washer fluid) to prevent the risk of
slipping.
5
2.3 Use of the Machine
This system is intended to be used in adjusting the height of work locations.
The workbench must not be used as:
- A means of transport, either for goods or for persons.
- A jack or for lifting things or persons.
- A safety device
- A clamping device
- A counterstay
- A pressing machine
It is expressly forbidden to use the system in environments that exceed the limits indicated in
this operating manual.
2.4 Maintenance and Repair
-
-
The workbench shall be placed in such a manner that cleaning is facilitated, that bacteria
do not accumulate and that dirt traps are not formed.
The motor unit and control panel must not be subjected to water flushing. They can be
wiped off with wet rags, as needed.
The hydraulic system must always be free of any load and the motor unit must be without
electrical current when any work is being done on them.
Residual oil resulting from assembly or repair of the hydraulic system shall be treated as
environmentally hazardous waste, even if it has been deemed not to entail a risk of injury or
damage during normal handling.
Ljunggren & daughters’ product liability only extends to products that were defective coming
from the factory. Ljunggren & daughters’ product liability will be disclaimed in part or in
whole if the user does not follow the care instructions or uses spare parts that are not
original.
For each repair, there is a written set of instructions available in order to minimise the risk of
error; request such instructions when you order the spare parts and read them thoroughly
before you begin effecting repairs.
In order for a product warranty to be valid following a repair, the following conditions apply:
- Only original parts may be used when making any repairs.
- No modifications may be made to products such as the pump, cylinder, motor, transformer
or circuit board.
- Any repairs shall be made according to the enclosed instructions.
- The workbench must continue to be used only in accordance with the specified data.
6
3 Operator’s Manual
3.1 Function of the System
Ljunggren & daughters’ hydraulic workbench works on the principle of two communicating
vessels. One of the vessels is in the pump (4) under the bench, while the other (cylinder) is in
one of the bench legs (6); the vessels are connected by a plastic hose (5).
When the bench is to be raised, the necessary amount of oil is quite simply pumped out of the
vessel in the pump (4), through the hose (5) to the cylinder in the bench leg (6) and the bench is
thereby pushed upward.
When the bench is to be lowered, an underpressure is generated in the pump (4) by means of
its piston (3) being pulled back. The oil in the cylinder is then pushed back through the hose into
the pump by means of the overpressure generated by the weight of the bench.
The vessels inside the pump are mechanically connected to each other by a plastic nut (2) so
that all bench legs are at the same height and that they remain at the same height regardless of
whether one bench leg bears a greater load than the others do.
The motion in the system is created when the screw (1) that goes through the plastic nut is
turned, either by means of a manual crank or with the help of an electric motor device.
The system is not intended for continuous operation!
3.2 Operation
The height is adjusted either by using a manual crank or with the aid of an electric motor.
The crank is tiltable can be readily folded in and hidden under the benchtop when not in use.
The electric motor device is operated by means of a control unit consisting of two buttons.
One for upward adjustment and one for downward adjustment of the bench.
One of the buttons must be kept depressed in order to the system to move. Thus, the system
does not feature any automatic operation.
3.3 Safety
The transformer must only be connected to outlets of the same voltage as indicated on its
rating plate.
The workbench and hydraulic system must never be uncoupled or repaired while under
hydraulic pressure or when connected to the electrical mains.
3.4 Starting and Stopping
The workbench and the hydraulic system have no particular starting and stopping instructions,
as operation is merely a matter of an on-off function.
7
3.5 Problems during Starting, Operation or Stopping
If a problem occurs during any of the phases, immediately release the button on the control
unit; then pull the plug out of the wall or pull the transformer cable out from the motor unit. Then
refer to the “Troubleshooting” section further on in this user manual.
3.6 Consumable Supplies
In the event of an oil leak or spill, wipe up the spilled oil immediately and clean with an oilsolubilising cleaning agent (e.g., dish detergent or car washer fluid) to prevent the risk of
slipping.
Discard spilled oil and other contaminated objects at a suitable collection point or similar facility
for proper handling. The oil must NOT be discharged into the sewer or be disposed with other
refuse.
First Aid Procedure Concerning Oil:
Eyes:
Skin:
Inhalation:
Ingestion:
Rinse immediately with large amounts of water for several minutes.
Wash thoroughly with soap and water or with some other suitable skin cleanser
as quickly as possible.
Move away from the exposure to fumes.
Seek medical aid and indicate the name of the product. Do NOT induce
vomiting.
3.7 Maintenance
The hydraulic system is maintenance-free given ordinary use and thus needs no servicing.
Normal cleaning of the hydraulic system shall be done using a mild oil-solubilising cleaning
agent (e.g., dish detergent or car washer fluid).
The motor unit and control panel must not be subjected to water flushing. They can be wiped
off with wet rags, as needed.
Powerful cleaning agents containing, for example, acids, ammonia or lye must not be used.
3.8 Handling of User Manual
It is important that all those assembling and using the workbench read through and have
access to this user manual. It must be kept in close proximity to the workbench (the system).
8
4 Assembly - Disassembly - Reparation
All work done to the hydraulic system, be it assembly, disassembly, repairs or any other work
must be done while the bench is not under pressure (not loaded) and is disconnected from any
electrical power source. Other points that pertain to all the work on the system include the
following:
- The hose must not be against sharp edges, non-chamfered holes, moving parts or the like.
- The minimum curvature radius is 30 mm.
- Wherever there is a risk of the hose in anyway being at risk of damage, it must be built-in or
shielded.
- The workplace must be arranged so that no risk of tipping or falling occurs.
4.1 Disassembly or Scrapping of the System
Hydraulic oil must be disposed of at a suitable destruction or processing facility in the event of
leakage or when the workbench is scrapped. The rest of the workbench consists of fully
recyclable and thereby environmentally friendly parts.
4.2 Reparation and Spare Parts
The hydraulic system must always be free of any load and the motor unit must be without
electric current when any work is being done on them.
The following parts on the motor device can be replaced:
·
Electric motor
·
Circuit board
·
Fuse circuit board
·
Transformer
·
Control unit
·
Limit switch
The only repair measure available for the cylinder or pump is simply to replace the entire unit;
they must not be taken apart. This is to prevent the risk of malfunction. All these parts are
supplied as spare parts from Ljunggren & daughters AB or its representative.
For each repair, there is a written set of instructions available in order to minimise the risk of
error; request such instructions when you order the spare parts and read them thoroughly
before you begin effecting repairs.
Kindly state the designation from the product’s rating plate when ordering.
In order for a product warranty to be valid following a repair, the following conditions apply:
·
Only original parts may be used when making any repairs.
·
No modifications may be made to products such as the pump, cylinder, motor, transformer
or circuit board.
·
Any repairs shall be made according to the enclosed instructions.
9
·
The workbench must continue to be used only in accordance with the specified data.
Residual oil resulting from assembly and repairs to the hydraulic system shall be treated as
environmentally hazardous waste, even if it has been deemed not to entail a risk of injury or
damage during normal handling.
Ljunggren & daughters’ product liability is extends only to products that were defective coming
from the factory. Ljunggren & daughters’ product liability will be disclaimed in part or in whole if
the user does not follow the care instructions or uses spare parts that are not original.
4.3 Cylinder-Pump Coupling
1. Cut the hoses to the desired lengths; use a utility knife to obtain a clean and square cut.
2. Unscrew the pressure nut on the first cylinder and remove the sealing ball with the help of a magnet.
3. Thread on the pressure nut and then the compression ring on the hose (if you have a C01 cylinder,
thread on the black plastic cap first.)
4. Push the hose down into the connection hole on the cylinder, bring the compression ring down and
tighten the pressure nut to 10 Nm. Be careful to keep the hose in “place” while you tighten the pressure
nut.
N.B.! The cylinder must not be fastened in the tube or piston during tightening.
5. If you have a C01 cylinder, push the black plastic cap down on the cylinder.
6. Hold the cylinder vertically with the connection upward, keep the end of the hose down in an oil bottle
and push the cylinder piston in all the way. On the C01-cylinder, the piston runs evenly with the
housing; however, on the C02 – C04 cylinders, the piston sticks out 12 mm when the cylinder is fully
compressed.
7. Do not allow the end of the hose to hang down or lie against anything for an extended amount of
time. If you do, you run the risk of introducing air into the system.
8. Repeat steps 2-7 with the rest of the cylinders.
9. Place the pump vertically with the hose connections upright.
10. Unscrew the pressure nuts in the pump and use a magnet to remove the sealing balls located in the
connection holes.
11. Crank/run the system ½ turn or until you see that there is oil in the open connection holes on the
pump.
12. First thread on the pressure nut and then the compression ring onto the hose from the cylinder,
connect it the same way to the pump as to the cylinder, and tighten to 10 Nm.
13. Repeat step 12 with the remaining cylinders.
14. Crank/run the system halfway and check to see that the cylinders start to move simultaneously and
that they extend equally as much outward and with a smooth motion. Also, make sure that the
cylinders do not seem to be “spongy” when under pressure.
If one or more of the cylinders seems “spongy”, follow ”Refilling of Individual Cylinders” and try again
according to the above instructions.
15. Put the cylinder and pump in place. Secure any loosely hanging hoses.
The system is now ready for use.
N.B.!
10
- Make sure that the cylinder is completely emptied of oil before being
connected to the pump, or else the hydraulic system will be destroyed.
- Make sure that the connections are tightened to 10 Nm, or else there is a
risk of oil leaking.
4.4 Refilling of Individual Cylinders
Start by removing the load from the system (workbench) by jacking it up or placing the
workbench to the side.
11
1. Crank/run the system (WITHOUT A LOAD) until the defective cylinder has moved 30-40 mm
outward.
2. If possible, remove the pump from the bench and place it vertically with the hose connections
upward; if this is not possible, make sure that the end of the pump with the hose is placed
higher than the oppose end. N.B.! Be careful not to damage the hoses, min. curvature radius:
30 mm.
3. Unscrew the affected cylinder’s hose connection on the pump.
4. Keep the end of the hose below the level of the oil in the oil bottle we sent to you and slowly
extract the piston. The oil is sucked in by means of the vacuum created. Keep the piston in the
extracted position for 1-1½ min.
5. Hold the cylinder vertically with the hose collection upward (if necessary, unscrew the
cylinder from the bench) and push the piston in until air-free oil comes out of the hose.
Tip! This is best seen if the end of the hose is kept below the level of the oil in the bottle.
6. Repeat steps 4 and 5 until the piston in this cylinder sticks out approximately 50 mm farther
than those in the “working” cylinders.
7. Crank/run the system approximately ½ turn or until oil comes out of the open connection hole
on the pump.
8. Connect the hose to the pump.
9. Crank/run the pump back to the bottom position while at the same time you push the piston
in on the refilled cylinder. Then push the pistons in on the other cylinders.
10. With the pump at the bottom position, the piston in the refilled cylinder will stick out farther
than the pistons in the other cylinders.
11. Unscrew the hose connection from the pump again and press out the excess oil into the oil
bottle by pushing the piston in to the bottom for a crank-operated system, and by pressing the
piston in until the protruding section is as long as those in the other cylinders for a motoroperated system. Tip! For a motor-operated system, set the piston as shown in the diagram
when you press the oil out. Reconnect the hose in the pump and tighten it to 10 Nm.
12. Crank/run the system halfway and check to see that the cylinders start to move
simultaneously and that they extend equally as much outward and with a smooth motion. Also,
make sure that the refilled cylinder does not seem “spongy” when under pressure. Repeat the
above steps as needed until the hydraulic system is working properly again.
13. Put the cylinder and pump back in place.
The workbench with the hydraulic system is now ready to be used again.
12
4.5 Troubleshooting Chart Hydraulic System
· The motor can be heard and the coupling rotates, but the workbench is not moving.
Cause
Measure
The shearing pin has broken.
Order instructions on “Replacement of Shearing
Pin on the Motor Unit:”
Pump broken
Order instructions on “Replacement of Pump:”
· The motor can be heard and the coupling does not rotate.
The worm-gear motor is broken
Order instructions on “Replacement of Electric
Motor”
· The motor cannot be heard (no current to the circuit board)
Cause
Measure
Transformer overloaded
Unplug the transformer cord from the wall outlet
and plug it back in; the fuse is thereby reset.
Replace transformer.
Transformer broken
· The motor cannot be heard, but the relay can be heard clicking (no current to the
motor)
Cause
Measure
The circuit board is broken
Order instructions on ”Replacement of Circuit
Board”
· The motor cannot be heard, but the relay can be heard clicking (current to the motor)
·
Cause
Measure
The motor is broken
Order instructions on “Replacement of Electric
Motor”
Limit switch broken
Order instructions for “Replacement of Limit
Switch”
The motor cannot be heard and no relay can be heard clicking (no current to the
motor)
Cause
Measure
The circuit board is broken
Order instructions on “Replacement of Circuit
Board”
13
Short circuit in the circuit board.
Order instructions on “Replacement Circuit Board
Fuse”
· The workbench can only be run in one direction.
Cause
Measure
The circuit board is broken
Order instructions on “Replacement of Circuit
Board”
Limit switch broken
Order instructions for “Replacement of Limit
Switch”
· The workbench moves downward too which (the motor speeds)
Cause
Measure
Electrical resistor broken
Replace electrical resistor.
· Cylinder leakage
Cause
Measure
Hose connection loose
Order instructions for “Description of Refilling
Individual Cylinders” and replace the parts in the
coupling.
The cylinder is broken
Order instructions on “Replacement of Cylinder”
· Pump leakage
Cause
Measure
Hose connection loose
Order instructions for “Description of Refilling
Individual Cylinders” and replace the parts in the
coupling.
Pump broken
Order instructions on “Replacement of Pump”
· Hose breakage
Cause
Measure
Hose damaged
Order instructions on “Replacement of Hose”
N.B.! When making repairs, the hydraulic system (workbench)
must always be unloaded and the motor unit not powered.
14
5 Product Specification
Product:
Ljunggren & daughter’s hydraulic adjustable-height workbench.
Model:
L&D Bench with MF44150 pump, AB2300 cylinder, MOMF motor, MDS230 ECU, MBOX9
control unit and TUBM hose
Functional Principle of the System:
Single-acting hydraulic system with manual crank operation or electric motor operation.
Operating Conditions:
The workbench is not made to be continuously raised and lowered, i.e., a maximum of 2
minutes operation should be followed by at least 8 minutes of idle time.
The hydraulic system can be sensitive to corrosive environments. Prior to using it in such
environments, kindly contact Ljunggren & daughters AB.
Maximum Load on Various System Combinations:
These loads must not be exceeded.
Pump with 18 mm diameter in the pressure element
Cylinder diameter
1-leg System
2-leg System
3-6-leg Systems
14 mm
115 kg
230 kg
350 kg
16 mm
150 kg
300 kg
450 kg
18 mm
200 kg
400 kg
600 kg
1-leg System
2-leg System
3-6-leg Systems
14 mm
115 kg
230 kg
285 kg
16 mm
150 kg
300 kg
350 kg
Pump with 20 mm diameter in the pressure element
Cylinder diameter
18 mm
200 kg
400 kg
450 kg
These values only apply when one cylinder is used in each leg of the bench. When other
solutions are used, e.g., two cylinders per bench leg, other maximum loads apply.
Contact Ljunggren & daughters AB or their representatives for more information.
Physical Dimensions:
See the enclosed technical drawings of the hydraulic system and the workbench.
Temperature Ranges:
Operation: 0 to +45 degrees C
Transport: – 20 to + 60 degrees C
After being transported at temperatures below 0 degrees C, the workbench must rest within the
premises at operating temperature for at least three hours prior to being used.
15
Electrical Supply:
Frequency: 50 – 60 Hz
Primary voltage: 230 V AC (also available in 110 – 115 V AC)
Secondary voltage: 29 V AC
Secondary current (at maximum load): 12 A
Maximum power consumption: 350 W
Fuse 1 in transformer: Thermal fuse 152 degrees C. (Destructive, not replaceable)
Fuse 2 in transformer: PTC thermal fuse. (Reset when plug is pulled)
EMC Requirements:
Sources of interference with emissions of electromagnetic or electrical fields (for example, highcurrent cables) that are stronger than what is allowed according to the applicable EMC
directives must not be located in the vicinity motor-pump unit.
Hydraulic System:
Hose, exterior diameter: 4.5 mm
Hose, material: PA12 (Nylon)
Hose, min curvature radius: 30 mm
Hose, other:
The hose must be shielded from mechanical, thermal, chemical and other damage. If
necessary, the entire hose must be built into a protective casing.
Hydraulic oil: Castrol Hyspin AWS 15
Oil volume 4-leg system – stroke 300 mm: 0.25 litre
Oil volume 6-leg system – stroke 300 mm: 0.35 litre
Oil flashpoint (closed): Above 140 degrees C
In case of oil leakage:
Wipe up the spilled oil immediately and clean with an oil-solubilising cleaning agent (e.g., dish
detergent or car washer fluid) to prevent the risk of slipping.
Discard spilled oil and other contaminated objects at a suitable collection point or similar facility
for proper handling. Oil must NOT be poured down the drain.
First Aid Procedure Concerning Oil:
Eyes:
Rinse immediately with large amounts of water for several minutes.
Skin:
Wash thoroughly with soap and water or with some other suitable skin cleanser
as quickly as possible.
Inhalation:
Move away from the exposure to fumes.
Ingestion:
Seek medical aid and indicate the product code. Do NOT induce vomiting.
Suitable Fire Fighting:
Carbon dioxide extinguishers, powder, foam extinguishers or water mist. Do not use water
streams.
16
Cleaning:
Only mild cleaning agents may be used, for example, car washer fluid.
The motor unit and control panel must not be subjected to water flushing.
They can be wiped off with wet rags, as needed.
Powerful cleaning agents containing, for example, acids, ammonia or lye must not be used.
Environmental Considerations:
As mentioned above, hydraulic oil must be disposed of at a suitable destruction or processing
location in the event of leakage or when the workbench is scrapped. The rest of the workbench
consists of fully recyclable and thereby environmentally friendly parts.
Warranty:
Ljunggren & daughters’ workbench is covered by a warranty against manufacturing defects for
a period of 12 months following the date of manufacture.
Ljunggren & daughters’ warranties will only be honoured provided that the workbench has been
used in the manner intended and as long as it has not be disassembled or subjected to any kind
of tampering.
17
EC Declaration of Conformity for Machinery
Ljunggren and Daughters AB
Backes väg 3
784 54 Borlänge
Sweden
Declares under its sole liability that the workbench designated as:
L&D Workbench
Serial number_____________________
Satisfies the “Essential Health and Safety Requirements on the
Design and Manufacture of Machinery and Safety Components”
according to the European Parliament’s and Council’s Directive
2006/42/EC
Borlänge, on _____________________
Sara Ljunggren
18
L&D WORKBENCH
In various designs:
Ljunggren & daughters AB
Tel: +46 243 153 50
Backes väg 3
Fax: +46 243 153 59
784 54 Borlänge
E-Mail: [email protected]
SWEDEN
Web: www.ergofokus.se
19