1
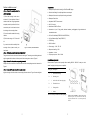
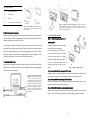
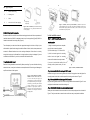
Contents 8. Loudspeaker Installation Manual Introduction ………………………………………………………………………………….………………………………….1 Read the following installation manual carefully before proceeding. If you are unfamiliar with wiring Applications ……………………………………………………………………………………….……………………………1 electronic devices, consult your local dealer or contract professionals. False wiring could damage the Safety precaution …………………………………………………………………………………………….………………..1 amplifier and the rest of audio system. Specification ………………………………………………………………………………………….………………………...2 Parts list …………………………………………………………………………………………………………….…………..2 Jet-engine speaker installation manual Select the best location for mounting …………………………………………………………………………….………….3 1) Mount the plastic bracket on the chosen flat Amplifier installation manual ……………………………………..……….……………………………………………..……3 Loudspeaker installation manual ……………………………………..………………..………………………………….…6 surface with the screws provided in the package 2) Hold the jet-engine speaker in position and 1. Introduction secure the mounting with a screw and a nut The SM-200 and SM-300 are designed to provide the maximum waterproof protection to your 3) Adjust the projecting angle of the speaker and audio/MP-3 player. The housings are compatible with most of the audio devices with a 3.5mm plug tighten the screw and they are intended for use in a marine environment. There is a built-in microphone which would If you are in doubt with the stability of the mounting allow you to have a voice conversation while still the front cover is down. The housings are designed surface, please consult your local dealer. to be waterproof with IP 65 rating. However, direct submersion of the housing under water may induce damage to the unit and your audio/MP-3 player. Flush-mount speaker installation manual 1) Select a mounting location which will allow the speaker to lay flat and has adequate space. Keep the front cover down to provide the maximum protection. After any user operation, close the front cover and ensure the seal is complete. The unit will provide protection against splashes of water, dust, sand and other substances. 2) Use the supplied template to mark the mounting holes. See Figure1. 3) Drill a starter hole in the center of the mounting hole and use a hacksaw blade or a similar tool, cut the mount hole. 2. Applications 4) Drill the four 1/8" mounting holes. SM-200 and SM-300 are built to withstand tough challenges in different outdoor / marine 5) Connect the speaker wire to the speaker terminals and route to stereo. Be sure stripe wire is environments. They can be installed at locations with high humidity and high chance of water connected to the positive (+) terminal of speaker. See Figure2. splashes (SPA room, sauna, swimming pool, etc). Vehicles suitable for SM-200/SM-300 installation 6) Slide the four U-Clips over the mounting holes and press to hold in place. See Figure3. 7) Place a bead of RTV sealant (or equivalent) around the back rim of speaker basket. include: Motorbike Utility task vehicle (UTV) Personal watercraft (PWC) Golf car All terrain vehicle (ATV) Recreational vehicle (RV) Snowmobile Watercraft / boat 8) Secure the unit with provided screws for integrated speakers. Or for flush-mount speakers, tighten the screws to secure the unit first before fitting the cover grille onto the speaker. If you are in doubt with the stability of the mounting surface, please consult your local dealer. 3. Safety Precaution Read the manual before installation. It contains important information for all users. Turn off the electricity supply before beginning the installation For electric drill, ensure it is connected to the ground properly and the area is free of any liquid. If any problem occurs during the installation, please contact your local dealer for advice before proceeding. Contract professionals if necessary. 1 6