Download 3"_porttable_printer_PP
Transcript
PP-38T5_sz(Fine Abridged ver.)
Bluetooth Portable 3'' thermal printer
User Manual
1 Content Chapter 1 Introduction ................................................................................................... 3 1‐1. All Parts ............................................................................................................... 3 1.2 Printer outlook and figure quick view .................................................................. 4 1.3 Specification ......................................................................................................... 4 Chapter 2 Quick installation............................................................................................... 5 2.1 put into the paper roll and battery ...................................................................... 5 2.2.Power on .............................................................................................................. 5 2.3. Recharging ........................................................................................................... 5 2.4. Operation of Printer ............................................................................................ 5 2.5 Warning indicator ................................................................................................. 6 Chapter 3 Set up ................................................................................................................ 7 3.1 Dip Switch ............................................................................................................ 7 3.2 RS232 Pin definition ....................................................................................... 7 3.3 Remark: ................................................................................................................ 7 3.4 Trouble Shooting .................................................................................................. 8 2 Chapter 1 Introduction 1‐1. ALL PARTS Basic Parts
1. Printer
2. Battery
3. Charger
(Default Pack)
Accessories Parts
3. Charger
4. Belt
5. Holster
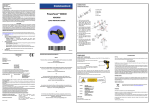
3 1.2 PRINTER OUTLOOK AND FIGURE QUICK VIEW 1.
2.
3.
4.
5.
Fig1
Fig2
Fig3
Fig4
Fig5
Front View and Control Panel
Left Side View
Back View
Inside of Paper Case Cover
Battery Case
1.3 SPECIFICATION Dot structure
Dot pitch
Effective printing area
Paper width
Number of columns
Printing speed
Interface
Operating temperature
Operating humidity
Storage temperature
Storage humidity
battery voltage
voltage
Channel number
Spacing) Frequency Rang
MHz
Max. Output Power
Modulation Type
Data Rate
576 dots/line
0.125 mm (8 dots/mm) dot density
72mm
80mm
ANK 48 columns/line (maximum
12x24 dot font)
Maximum 80mm/sec
bluetooth, rs232
0˚ C to 50˚ C
20 to 85% RH (no condensation)
-10 to + 70˚C
5 to 95% RH
7.4VDC/2600mAh charge
9 - 15VDC
79 Ch(1MHz
2402 ~ 2480
4 dBm
FHSS
1Mbps (GFSK), 2Mbps (π/ 4DQPSK),
3Mbps
(8DPSK)
Ceramic Chip Antenna
Alphanumeric characters, extended
graphics,
international characters,12x24 font
1D Barcode:EAN13,Code 39,CODE128
2D Barcode:PDF417(By WINDOWS-XP DLL)
IP53
1.2M Drop Pass
116.5mm(L)x112mm(W)x59.5mm(H)
Antenna Type
Character:
Bar-code
Certificate
Drop Test
Dimension
4 Chapter 2 Quick installation 2.1 PUT INTO THE PAPER ROLL AND BATTERY 1.
2.
3.
4.
5.
6.
Pull the pull rod backward ,release the paper cover to open the
cover
Put paper into printer following the figure ,target on the paper exit
of printer
After stretching out a little paper on the cutter,close the paper
cover
Put battery into the correct location with correct direction as figure
show
Push the battery to the bottom of battery location
C lose the battery cover and screw tightly
2.2.POWER ON 1.
2.
3.
4.
5.
Press the Power key until PWR/CHR green indicator light,release
the power button
Bluetooth indicator flashing,means Bluetooth not yet connect
Press the paper feed button ,Printer will feed the paper forward
automatically
Check the L.BATT and ERROR indicator ,one of both flashing
that means error happen.Please trouble shooting as following
steps
While power off,you have to press the power button until
PWR/CHR indicator light off,then release the button
2.3. RECHARGING 1.
2.
3.
4.
5.
*With Battery outside charger
Put the AC power adapter into outside charger,the LED indicator
will light on the green
Put the battery with correct direction into the outside charger,the
red light on
After power full,indicator will light on the green color
*With Car charger cable
Plug the Car charger cable into the socket of car,another end of
cable plug into the charger
While recharging , PWR/CHR red light on,while full,the red
light off
2.4. OPERATION OF PRINTER 5 1. Power on the printer
2. active hand-held device Bluetooth tp pair with thermal printer
and build the connection
3. the Password of Bluetooh of printer,need to key in ''0000''
4. After bluetooh successful connect,the BT indicator will not flash
but light on
5. Transmit the data from Hand-Held device to thermal printer
6. BT LED indicator flashing ,means bluetooh already
disconnected,please reconnect again then enable to printing
7. Also can with RS232 cable,plugging into the port of printer,but
need to adjust the dip-swith setting of printer(refer to Chapter III),
This way do not need bluetooth connection
2.5 WARNING INDICATOR 1.
2.
3.
4.
While the shortage of paper or paper cover been opened,the
ERROR indicator red light light on
Battery the voltage is too low(about 7.2V),L.BATT organge light
on,and buzzle buzzling
Press the “Power” button to stop the buzzling,but L.BATT
indicator still light on
BT LED Flashing means Bluetooth disconnect,BT LED
keeping light on means the Bluetooth connect
6 Chapter 3 Set up 3.1 DIP SWITCH 1. Pin definition
No.
ON
OFF
1
reserve
Reserve
2
reserve
Reserve
3
Firmware Upgrade
Normal
4
RS232 connection
Bluetooh connection
2. Dip Switch for service member,end user do not touch
3.2 RS232 PIN DEFINITION 9P D type
pin d e f i n e m i n i - USB type
RX 1
2
3
CTS 4
GND 5
GND
6
Fig 5 RS232 cable p i n d e f i n e
3.3 REMARK: 1.
2.
3.
4.
5.
6.
forbid shower or sink into water
forbid throwing or kick printer
If any issue ,please waiting for after service not fix by yourself
Notice the lifecycle of battery is 1 years
While fist time use of the battery,please fully charge the battery
Low Power RF not affect the use of electrical safety and
interference to flight communications; been found to have
interference, should be immediately disabled, were improved
to the time of non-interference may continue to use.
7 3.4 TROUBLE SHOOTING 1.C a n n o t p o w e r
Battery wrong direction putting
Battery low power
2.C a n n o t p o w e r
Printer btoon fail,reload the battery
3.Can not printing
Bluetooth yet connection/connection failure
PDA did not send data to printer
8 Fig 1 front view and control panel
9 Fig2 left side view
10 Fig 3 Back view
11 Fig 4 Inside of Paper case
12 Fig 5 Battery Case Inside
13


