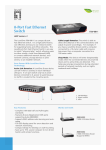
1
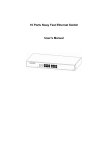
16 Port Nway Fast Ethernet Switch
User's Manual
16
2
RESET
LINK / ACT
4
6
8
10
10 / 100M
POWER
FDX
1
2
3
4
5
6
7
8
9
10
11
12
13
14
15
12
14
16
16
1
3
5
7
9
11
13
15
UP-LINK
FCC Warning
This device has been tested and found to comply with limits for
a Class B digital device, pursuant to Part 2 and Part 15 of the
FCC Rules. These limits are designed to provide reasonable
protection against harmful interference when the equipment is
operated in a commercial environment. This equipment
generates, uses and radiates radio frequency energy and, if
not installed and used in accordance with the user's manual,
may cause interference in which case user will be required to
correct the interference at his own expense.
CE Mark Warning
This is a Class B product. In a domestic environment, this
product may cause radio interference in which case the user
may be required to take adequate measures.
Table Of Contents
Chapter 1 -------------------------------------------------------------------1
Introduction ---------------------------------------------------------------------1
Key Features -------------------------------------------------------------------2
Chapter 2 -------------------------------------------------------------------3
Package Contents ------------------------------------------------------------3
Chapter 3 -------------------------------------------------------------------4
Front Panel Layout -----------------------------------------------------------4
I. 16 RJ-45 10/100Mbps Switch Ports --------------------------------4
II. Uplink port----------------------------------------------------------------4
III. LED Indicators of 16 Port 10/100Mbps Switch--------------5
IV. Reset----------------------------------------------------------------5
V. LED Definitions ----------------------------------------------------------6
Power LED --------------------------------------------------------------6
FDX LED -----------------------------------------------------------------6
10/100M LED -----------------------------------------------------------6
LINK/ACT LED ---------------------------------------------------------6
Chapter 4 -------------------------------------------------------------------7
Rear Panel Layout ----------------------------------------------------------7
I. AC input-------------------------------------------------------------------7
II. Optional Module----------------------------------------------------------7
Hardware Setting------------------------------------------------------8
Software Setting-------------------------------------------------------8
Chapter 5 -------------------------------------------------------------------9
Rack Mounting -----------------------------------------------------------------9
Chapter 6 ------------------------------------------------------------------10
Installation ---------------------------------------------------------------------10
I. To connect the Switch to PCs, servers, and other
network devices. -------------------------------------------------------10
To
II. connect the Switch to a Switch or a Hub --------------------10
Chapter 7 -----------------------------------------------------------------11
Technical Specifications ---------------------------------------------------11
Chapter 1
16 Port Nway Fast Ethernet Switch
Introduction
The Switch provides 16 10/100Mbps ports. The Switch was designed
for easy installation and high performance in an environment where
traffic on the network and the number of user increase continuously.
With the Rack-mount size was specifically designed for ROBO
(Remote Office & Branch Office) and medium to large workgroups.
The Switch can be installed where space is limited; moreover it
provides smooth network migration and easy upgrades to network
capacity.
16
2
RESET
LINK / ACT
4
6
8
10
10 / 100M
POWER
FDX
1
2
3
4
5
6
7
8
9
10
11
12
13
14
15
12
14
16
16
1
-1-
3
5
7
9
11
13
15
UP-LINK
Key Features
16 Port 10/100Base T/TX Nway (Auto-negotiation)
Switch with RJ-45 connectors. Plus 1 fiber
(100Base-FX) module port
19-inch standard Rack- mount size
Auto-detect of Full/Half-duplex modes in all ports
Dedicated full-duplex 200Mbps bandwidth on each
port
Broadcast storm control
Store & Forward switching methods
IEEE 802.3x flow control for Full-duplex
Zero-Packet Loss Back-pressure flow control for
Half-duplex
Non-blocking & Non-head-of-line blocking full wire
speed forwarding
Auto-learning of networking configurations
Provided front panel reset button
Status LEDs: Power, Speed, Link/Activity And
Full/Half-duplex
Smart plug & play
Chapter 2
Package Contents
Before you start to install the Switch, please verify your package that
contains the following items:
One Fast Ethernet Switch
Rack-mount Kit For Rack Installation
One Power Cord
One User's Manual
16
RESET
2
4
1
3
LINK / ACT
6
8
10
10 / 100M
POWER
FDX
1
2
3
4
5
6
7
8
9
10
11
12
13
14
15
12
14
16
16
5
7
9
11
13
15
UP-LINK
16 Port Switch
User's Manual
16 Port Nway Fast Ethernet Switch
Power Cord
User's Manual
16
RESET
2
4
6
8
1
3
5
7
LINK / ACT
10
10 / 100M
POWER
FDX
1
2
3
4
5
6
7
8
9
10
11
12
13
14
15
12
14
16
16
9
11
13
15
UP-LINK
Rack-mount Kit
Note: If any of these items is found missing or damaged, please
contact your local supplier for replacement.
-3-
Chapter 3
Front Panel Layout
I. 16 RJ-45 10/100Mbps Switch Ports
There are 1~16 RJ-45 connectors on the front panel for connecting
to servers, workstation or other devices. The Switch provides 16
10/100Mbps switching ports that could sense the 10/100M speed
and negotiate Full/Half-duplex mode automatically. These switching
ports allow users to connect the Switch to 10BASE-T and 10ASE-TX
devices.
II. Uplink Port
Uplink port shared with the port #15 for expanding to another Hub or
Switch. The Uplink port and port 15 share the same port & function.
Do not use both of the Uplink port and port 15 at the same time.
RJ-45 Port
LED Display
Uplink Port
16
2
4
6
8
10
12
14
16
1
3
5
7
9
11
13
15
LINK / ACT
RESET
POWER
10 / 100M
FDX
1
3
5
7
1
3
5
7
9
11
13
15
17
19
21
23
UP-LINK
10
12
14
16
9
11
21
15
10
12
14
16
9
11
13
15
Reset
-4-
UP-LINK
UP-LINK
III. LED Indicators of 16 Port 10/100Mps Switch
LED
Color
Status
Description
No. Of LED
Power
FDX
Yellow
Green
On
On
Off
Flashing
1
16(1~16)
16(1~16)
16(1~16)
10/100M
Green
On
Power on
Full-duplex
Half-duplex
Partial collision
occurs
Port is on the
100M status
Port is on the
10M status
10/100Mbps port
for connection
10/100Mbps for
data activating
Off
LINK/ACT Yellow
On
Flashing
16(1~16)
16(1~16)
16(1~16)
16(1~16)
IV. Reset
Allows the users refresh Automatic-learning of network configuration.
RESET
POWER
Yellow
LINK / ACT
10 / 100M
FDX
1
3
5
7
9
11
13
15
17
Green
Green
Yellow
-5-
19
21
23
V. LED Definitions
Power LED
On
Off
FDX
On
Off
Flashing
10/100M LED
On
Off
LINK/ACT LED
On
Flashing
: The unit is powered on and ready for use.
: The unit is powered off.
: The port is operating at Full-duplex.
: The port is operating at Half-duplex
without any data being transmitted or
received.
: Collisions occurred and the port is
operating at Half-duplex mode.
: The port is on the 100Mbps status.
: The port is on the 10Mbps status.
: The port is ready for 10/100Mbps
connection.
: The data is transmitted or received on
the port.
-6-
Chapter 4
Rear Panel Layout
I. AC input
AC input (90~260V/AC, 50~60Hz) UL Safety.
ON
90~260VAC
OFF
50~60Hz
II. Optional Module
This 100BASE-FX Module is for use with Fiber Optics cable with one
SC or ST type connector.
100BASETX
LE
E
FX MODUL
FX MODU
100BASE-
RX
TX
SC mode
RX
ST mode
The fiber module supports non-console switch with hardware setting.
For console switch, the fiber module supports software setting.
Please refer to the following procedures at page 8:
-7-
Hardware Setting
To setup duplex mode of fiber port.
Step 1: To inset HW1 PIN. (Hardware configuration)
RX
TX
HW1
HW1
HALF1
Step 2: To set up the fiber port to Half-duplex mode, please inset the
HALF1 pin. In addition, to change the fiber port to Full-duplex,
please pull out the HALF1 pin.
RX
TX
HALF1
HW1
Half Duplex
or
HALF1
Full Duplex
HALF1
Software Setting
If your Switch supports console port, please use the software setting.
For detail information, please to see the console port user's manual.
Note: The power must be turned off before inserting or removing
modules.
-8-
Chapter 5
Rack Mounting
Optional Rack-mounting brackets are available to mount Switch in
standard EIA 19-inch rack. 16 port 10/100Mbps Switch is supplied
with two mounting brackets, eight screws.
First, put the Switch on the flat surface. Locate the mounting bracket
on the sides of the Switch with the mounting holes on each. Next,
insert the screw through the bracket and into the bracket mounting
holes in the Switch. Then, place the Switch in to 19-inch rack.
-9-
Chapter 6
Installation
I. To connect the Switch to PCs, servers, and other network
devices.
Use straight-through twisted-pair cable (Cat. 5) to connect the Switch
to PCs, servers and other network devices. Networks can be built as
figure shown.
16
RESET
2
4
6
8
1
3
5
7
LINK / ACT
10
10 / 100M
POWER
FDX
1
2
PC
3
4
5
6
7
8
9
10
11
12
13
14
15
12
14
16
16
MAC
9
Server
11
13
15
UP-LINK
Workstation
II. To connect the Switch to a Switch or a Hub
Use straight-through twisted pair cable to connect the Switch to
another Switch or Hub on uplink port. If you connect the Switches on
port 1 to port 16, the cable should be changed to crossover cable.
16
RESET
2
4
6
8
1
3
5
7
LINK / ACT
10
10 / 100M
POWER
FDX
1
2
3
4
5
6
7
8
9
10
11
12
13
14
15
12
14
16
16
9
11
13
15
UP-LINK
Uplink
Dual Speed Hub
Fast Ethernet Switc
h
Fast Ethernet Switc
h
1
2
3
4
Uplink
Uplink
Server
MAC
PC
Server
Workstation
PC
PC
-10-
PC
PC
Chapter 7
Technical Specifications
1. Standards Compliance
- IEEE 802.3 10BASE-T; IEEE 802.3u 100BASE-TX
2. Number Of Ports
- 16 integrated ports: 10/100Mbps Nway port
3. Expansion Interface
- 1 uplink port
4. Fully Flow Control Supported
- Half-duplex mode: Backpressure
- Full-duplex mode: IEEE 802.3x
5. Network Transmission Media
- 10BASE-T Cat. 3, 4, 5 UTP/STP
- 100BASE-TX Cat. 5 UTP/STP
6. Network Status Monitoring LEDs
- Per port: LINK/ACT, 10/100M, FDX
- System: POWER
7. Buffer Memory
- RAM: 4Mbits per device
- RAM buffer dynamically allocated for each port
8. Filter/Forward Rate
- Packet Filtering/ Forwarding Rates
100Mbps port - 148,800pps
10Mbps port - 14,880pps
9. MAC Address
- Up to 8K per device
10. Power
- AC input (90~260V/AC, 50~60Hz) UL Safety
11. Power Consumption
- 9.2 Watts (Max)
-11-
12. Operating Temperature
- 0 C ~ 60 C
13. Store Temperature
- -20 C ~ 90 C
14. Humidity
- 10% ~90% RH (Non-condensing)
15. Dimension (L x W x H)
- 440mm x 220mm x 44mm
16. Weight
- 2.57 Kg
17. Safety & EMI Certificates
- CE & FCC-B
WAN
Router
Proxy Server
Firewall
Fast Ethernet Switch
24
2
4
6
8
10
12
14
16
18
20
22
24
5
7
9
11
13
15
17
19
21
23
LINK / ACT
10 / 100M
2
4
6
8
1
3
5
7
FDX
10
12
LINK / ACT
RESET
14
16
18
20
22
24
17
19
21
23
10 / 100M
POWER
FDX
1
3
9
11
13
15
UP-LINK
Fast Ethernet Switch
Web Server
Fast Ethernet Switch
FTP Server
Laptop
Print Server
PC
PC
PC
Print
-12-
DOC-UMWR160T001
Console Port
(16 Port Nway Switch)
User's Manual
Table Of Contents
Chapter 1 -------------------------------------------------------------------1
Console port features overview--------------------------------------------1
Chapter 2 -------------------------------------------------------------------2
Hardware installation ---------------------------------------------------------2
Accessories--------------------------------------------------------------2
Chapter 3 -------------------------------------------------------------------3
Software Setting ---------------------------------------------------------------3
Open Hyper Terminal --------------------------------------------------3
Chapter 4 -------------------------------------------------------------------6
The Function of Smart Switch ---------------------------------------------6
I. Port Setup --------------------------------------------------------------6
II. Optional Module (Port 18) -----------------------------------------7
III. VLAN Setup ------------------------------------------------------------8
IV. Trunk Setup ------------------------------------------------------------8
V. Restore Default Setup -----------------------------------------------9
IV. View Setup -----------------------------------------------------------10
Chapter 1
Console port features overview
Supports real time status read/write operation.
Provided on line Link status.
Supports port setting for N-Way or force mode operation.
Supports Link Fault Tolerance on Trunking port.
Supports 18 groups port based V-LAN.
Two MAC-based Trunking groups from 2 to 6 ports of each.
Supports Load Balancing on Trunking port.
16 Port Nway Smart Switch
16
9600 , 8 , N , 1
2
RESET
LINK / ACT
4
6
8
10
12
14
16
9
11
13
15
10 / 100M
CONSOLE
POWER
FDX
1
2
3
4
5
6
7
8
9
10
11
12
13
14
15
16
1
-1-
3
5
7
UP-LINK
Chapter 2
Hardware installation
Accessories:
One Null modem cable
One D-SUB 9 pin female connector on front panel
Turn off your PC & Smart Switch powers, and then connect the cable
from PC Serial port to Smart Switch D-sub connector.
Smart Switch
16
9600 , 8 , N , 1
2
RESET
4
LINK / ACT
6
8
10
12
14
16
9
11
13
15
10 / 100M
CONSOLE
POWER
FDX
1
2
3
4
5
6
7
8
9
10
11
12
13
14
15
16
1
3
5
7
UP-LINK
PC
Note: When you connect the cable from PC Serial port, please
remember which serial port you connected. (Please refer to the step
3 of page 4)
-2-
Chapter 3
Software Setting
Open Hyper Terminal
Following the steps to open the program.
Step 1:
Start
Programs
Accessories
Communications
-3-
HyperTerminal
Step 2:
Enter any name for new connection, and then press OK.
Step 3:
Choose serial port that you connect.
-4-
Step 4:
Configuration COM port properties.
Bits per second: 9600
Data bits: 8
Parity: None
Stop bits: 1
Flow control: None
Step 5:
Press enter key at keyboard when you see the cursor blinking.
You will see
The configuration on PC is successful.
-5-
Chapter 4
The Functions of Smart Switch
I. Port Setup
II. Optional Module (Port 18)
III. VLAN Setup
IV. Trunk Setup
V. Restore Default Setup
VI. View Setup
I. Port Setup
16 Ports Smart Switch has functions to setup on each port. You can
disable Auto-negotiation to select Half/Full duplex mode, and the
speed of 10/100Mbps. Besides each port has Link status indication.
Factory default of each port is on N-Way enable status. When you
enable the Auto-Negotiation (N-Way), the Speed & Duplex mode will
follow N-Way status.
-6-
II. Optional Module (Port 18)
This 100BASE-FX Module is for use with Fiber Optics cable with one
SC or ST type connector.
LE
TX
E
FX MODUL
FX MODU
100BASE-
100BASE-
RX
TX
SC mode
RX
ST mode
The fiber module supports non-console switch with hardware setting.
For console switch, the fiber module supports software setting at port
18 of port setup.
Note:
1. Before fiber module is plugged, please make sure the pin header
of module board (HW1 & HALF1) is open.
RX
TX
HW1 and
HALF1
HW1
HALF1
2. The power must be turned off before inserting or removing
modules.
-7-
III. VLAN Setup
The 16 ports smart switch can support up to 18 port-based security
V-LANs. Each port can be assigned to up eighteen V-LAN. Every port
is assigned to group 1 as the factory default. The V-LAN Frames
from the source port will only be forwarded to destination ports within
the same V-LAN domain. A broadcast/multicast frame will be
forwarded to all ports that belong to V-LAN(s) of the source port. An
unicast frame will be forwarded to the destination port only if the
destination port is in the same V-LAN as the source port. Otherwise,
the frame will be treated as a frame with unknown DA. (Frame with
unknown DA will be forwarded to all ports).
Show below:
IV. Trunk Setup
Port trunking is basically a method to treat multiple physical links as
a single logical link. The benefit of trunking is to be able to group
multiple lower speed links into one higher speed link.
For example, four full duplex 100 Mbit/s links can be used as one
single 800-Mbps link.
This is very useful for Switch to Switch, Switch to server, and Switch
to router application.
-8-
Factory default is no Trunk setting.
We divide the 16 ports of smart switch into 2 segments for users to
set up the Trunk port easily.
Trunk 1: you can select 2 ports Trunk; 4 ports Trunk, or 6 ports
Trunk.
Trunk 2: you can select 4 ports Trunk at most.
V. Restore Default Setup
Execute the commands to restore default setup.
Factory default of each port is on N-Way enable status, flow control
enable and assigned to same V-LAN group at no any trunk port be
assigned.
-9-
VI. View Setup
Execute the command to be aware of the status of Smart Switch,
such as port link status, port operation mode, V-LAN groups or Trunk
port status...etc.
-10-
DOC-UMWR160TC01