1
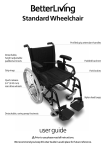
Self Propelled Wheelchair
Profiled grip attendant handles
Padded seat and backrest
Lift up,
padded armrests
Height adjustable frame
Grip rings
Park brakes
Quick release
24” (610 mm)
rear drive wheels
Nylon heel loops
Detachable, swing away footrests
user guide
Prior to use please read all instructions.
We recommend you keep this User Guide in a safe place for future reference.
Self Propelled Wheelchair
Product Overview
Box Contents and Inspection
A premium self propelled wheelchair with
lightweight aluminium frame and compact
folding design. Available in two different seat
widths, the height adjustable frame is equipped
with comfortable profiled grip handles for safe
attendant propulsion and padded armrests that
lift up for easy lateral transfer. The wheelchair
includes anti-tip wheels for enhanced stability
and safety, adjustable to suit the needs of the
individual user.
Carefully remove all components from the box
and check items against the list below. Any
damaged or missing components should be
reported to your authorised dealer or Novis
Healthcare.
Prior to use, remove all packaging and plastic
wrapping and check the wheelchair for any
damage that may have occurred in transit,
paying particular attention to:
›› Any cracks or damage to the wheels,
tyres or chassis.
The detachable, height adjustable footrests
are equipped with heel loops, offering greater
security and comfort during transport. Both
footrests fold away to increase accessibility and
ease of transfer.
›› Damage to the seat and backrest.
›› Any missing or loose screws, wheelnuts or
fasteners.
Featuring nylon padded seat and backrest for
user comfort, the wheelchair is simple to fold
for easy travel and storage. Rear drive wheels
and footrests can also be removed for ease of
storage and transportation.
Intended Use
›› This wheelchair is designed for indoor and
outdoor use, and is intended for either self
propulsion or propulsion by an attendant.
›› The maximum occupant weight is 110 kilograms,
as stated on the manufacturer’s label.
›› The wheelchair should only be used and
maintained in accordance with the
instructions in this User Guide.
Wheelchair
User Guide (this document)
Seat cushion
Left hand footrest
Tool kit
Right hand footrest
Backrest cover
2
Set Up
Unfold the wheelchair
To unfold the wheelchair, place on a stable
surface and stand behind the wheelchair.
Use both hands to press down on the outer
edges of the seat frame to unfold. It may help
to gently tilt the wheelchair back to lift the
front wheels off the floor. Once open, press
firmly to make sure cross brace is locked.
Secure the backrest
Place the backrest over the back straps of the
wheelchair with the padded foam cushion facing
forwards. Push firmly to ensure the hook and loop
fastener is securely attached both back and front.
Pull the bottom flap under the back of the
seat and push firmly to secure the hook and
loop fastener attachment. This closes any gap
between the seat and the backrest.
Secure the seat cushion
Place the seat cushion onto the wheelchair, with
the zip towards the back of the seat and the
angled edge facing forwards.
Make sure the attachment strips are aligned and
push firmly to ensure the hook and loop fastener
is securely attached.
Attach the footrests
With the footrest at a 90° angle to the chassis
(ie swung outwards), attach the footrest by
aligning the two holes at the top of each footrest
with the corresponding hinge pins on the chassis
frame, and push down firmly to insert.
Now swivel the footrest inward to lock into
position, and fold down the footplates.
3
Adjustments
Adjusting the handle height
To move the attendant handles up or down, turn the lock
lever (located on the back of the seat directly beneath
each handle) anti-clockwise until loose.
Adjust the handles to the required height (level with the
attendant’s wrist height when standing), then tighten by
turning the lock lever clockwise.
Ensure the handles are at the same height.
If the lever is protruding from the side of the wheelchair
it can be repositioned. Holding your thumb against the
red centre point of the handle, pull the handle outwards
and rotate.
Adjusting the seat height
By adjusting the wheels, the height of the seat can be set
at one of two heights (470 or 500 mm). Both front and
rear wheel height must be adjusted to the same height.
Adjust front wheel height
The front wheel assembly includes two bolt holes, 30 mm
apart (upper and lower). From the factory, the wheelchair
is set to the lower bolt hole. To lower the seat to 470 mm,
remove the bolt from the centre of the front wheel to
release the wheel.
Move the wheel to align the centre against the upper hole,
reinsert and firmly tighten the bolt.
Adjust rear wheel height
Remove the rear wheels (see page 8
v“Removing rear wheels”).
Undo the two bolts holding the wheel bracket,
adjust the bracket to the desired height and
retighten the bolts.
Always make sure all four wheels are set to the
same height so that the seat remains level and
parallel to the ground.
Changing the seat height requires a
readjustment of the park brakes – please
refer to “Adjusting the brakes”.
4
Adjustments
Adjusting the brakes
When fully released, the maximum distance
between the brake latch and the tyre should be
no more than 40 mm.
To adjust the brakes, loosen the bolt at the top
of the brake (refer to picture) and slide the metal
bracket left or right to set the correct distance.
Securely tighten the bolt and check the
adjustment has not affected proper brake
function – when the brakes are engaged the rear
wheels should not move.
Adjusting the footrest height
Correct leg position is achieved when the occupant’s
feet can be placed flat on the footplates when his /
her thighs are resting horizontally on the seat.
To adjust the height of the footrests, use the Allen
Key (provided in the toolkit) to loosen the bolt on
the leg support (do not remove).
Adjust each footrest by sliding up or down until the
desired position and height are reached, ensuring
both footplates are at the same height.
Tighten the bolt firmly to lock into place.
Adjusting the anti-tip wheels
This wheelchair includes adjustable anti-tip wheels
for enhanced stability and safety. They can be
adjusted in length to suit the individual occupant.
To adjust the length of the anti-tip wheels, use
thumb and forefinger to pull the spring loaded
silver disc back and release the locking pin.
Use the other hand to slide the shaft up or down to
adjust the height of the wheels to the desired length.
Release the disc to lock the pin against one of the
holes on the shaft. Ensure the pin is firm.
5
40mm
Operation
Transferring in and out the wheelchair
When transferring in or out of the wheelchair, place
the wheelchair as close as possible to the transfer
destination. Ensure that the front wheels are in the
forward position and both footplates are folded up.
Always secure the wheelchair by engaging both left
and right brake levers.
The Self Propelled Wheelchair also features folding
and removable footrests and lift up armrests to
increase access options for easy transfer.
Lift up the armrests
For increased access during lateral or sliding transfers,
the armrests can be lifted up. To release the
armrests, press the lever located at the
front of the armrest to release the lock.
Swing the armrest upwards until vertical
(the armrest will sit safely out of the way
in an upright position).
To return the armrest, hold the lever while
lowering the armrest and locking into place.
Ensure the lock is engaged before use.
Fold out the footrests
Ensure the footplates are folded up.
On the back of the leg support, pull the lever to the
rear and swing the footrests outwards.
From this position, footrests can also be removed
(simply lift up on the footrest assembly to remove).
Positioning the occupant
One the occupant is seated, swing the footrests inwards until they lock
into place. Fold the footplates down and ensure the occupant’s feet are
placed flat on each footplate. This wheelchair features heel loops for
occupant safety and comfort. Always ensure the heel loops are securely
attached to the footrests and that the occupant’s feet are firmly located
against the straps.
The user should be seated as far back as possible in the seat at all times.
6
Operation
Propelling the wheelchair
The wheelchair should be self-propelled forward and
backward using the grip rings located on the side of
the wheels only. Do not manoeuvre the wheelchair
by pushing directly on the wheels as this may result in
personal injury.
The wheelchair can be propelled by an attendant using
the profiled grip handles.
Make sure the attendant has sufficient strength to stop
the wheelchair on a slope, or to negotiate up curbs or
over obstacles.
Activating the brakes
The brakes should always be applied whenever the
wheelchair is stationary, or when getting in and out of
the wheelchair. Apply brakes to both wheels to ensure
the wheelchair can not move or swing sideways.
To apply the brakes, make sure the wheelchair has
come to a complete stop. Push the brake lever all the
way forwards until the brakes come to rest firmly
against each wheel. Always check both brakes are
properly applied before getting in or out of the
wheelchair.
To release the brakes simply pull the brake lever back.
Using the tilt-assist pedal
Before attempting to tilt the wheelchair,
ensure the anti-tip wheels are positioned high
enough to allow tilting.
The tilt-assist pedal helps the attendant to tilt the
wheelchair backwards when negotiating obstacles.
The pedal is positioned on the rear of the chassis.
To tilt the wheelchair, attendant places one foot on
the tilt-assist pedal, and presses down while pulling
back on the attendant handles.
Ensure balance is maintained while the front wheels
are lifted.
7
Transportation & Storage
Folding the wheelchair
To fold the wheelchair, firstly fold up the
footplates.
If needed, the footrests can be removed for easy
storage; to remove the footrests, pull the lever
on the back of the leg support and swing the
footrests outwards, then simply lift up on the
footrest assembly to remove.
Detach the padded seat cushion by pulling firmly.
Detach the backrest by removing the hook and
loop fastener attachment from underneath the
seat and remove.
Pull up on the centre of the seat by gripping the
front and rear edges with both hands – the sides
of wheelchair then fold inwards.
To protect the seat during transportation or
storage, push the folded seat back down so it
is positioned between the wheels for added
protection.
Removing the rear wheels
To remove the rear drive wheels for
maintenance, transport or storage, tilt the
wheelchair so the wheel to be removed is lifted
off the ground.
Using your thumb, press the button in the
centre of the wheel hub to release the lock, and
gently pull the drive wheel out of the bracket.
Repeat for the other wheel.
To re-attach the drive wheels, press the button
in the centre of the wheel hub and insert the
wheel axle into the bracket until it clicks into
place. Ensure the wheel is firmly secured into
place before using the wheelchair.
8
Safety & Maintenance
General Safety Precautions
Do not use the wheelchair as a seat in a
handicap vehicle.
›› A risk assessment should always be carried
out to ensure the product is suitable for a new
occupant.
›› Do not tip the wheelchair back beyond its point
of balance or the wheelchair may overbalance.
›› Never suddenly apply the brakes while the
wheelchair is moving. First stop the wheelchair
and then apply the brakes firmly.
›› Before use, both the occupant and the
attendant should read these instructions and
familiarise themselves with the wheelchair.
Ensure all components are properly and
securely installed.
›› Do not touch the tyre when propelling the
wheelchair. Be aware of the risk of friction
injury or entrapment between the tyres and
the side armrest.
›› Do not use the wheelchair without the
designated backrest or seat cushion attached.
›› Never stand on the footrests or the seat.
›› The occupant and attendant should make sure
they have sufficient strength to safely operate
and control the wheelchair with the occupant
seated in the wheelchair – especially when
negotiating a step, curb or slope.
›› Do not exceed the maximum recommend
working load.
›› Do not attach any weights to the wheelchair.
›› Do not use the wheelchair to transport more
than one person at a time.
›› To ensure safe clearance when negotiating
ramps or inclines, the clearance between the
ground and the footrests should never be less
than 50 – 60 mm.
›› Keep the wheelchair out of the direct sunlight
or keep the wheelchair covered; cushions or
parts exposed to sunlight will heat up and may
cause injury to the skin.
›› Before sitting down in the wheelchair
ensure the brakes are firmly applied. It is
recommended the footrests are folded out of
the way to assist the occupant when getting
into the wheelchair.
›› When using the wheelchair outside, ensure
the rear wheel reflectors are visible to road
users and not obscured or defective.
›› When travelling in the wheelchair the
occupant must not lean forward; it is
recommended the occupant’s feet are located
in the heel loops for extra safety and comfort.
9
Care & Cleaning
Cleaning
Regular Maintenance
Professional inspection of the wheelchair is
recommended at least once a year.
Any service or repairs, especially to the brakes,
must be performed by a trained professional.
Any unauthorised repairs or service may void
your warranty.
›› Regularly check the wheelchair for damage and wear,
paying special attention to the workings of the brakes and
the condition of the wheels and tyres. If the wheelchair is
damaged in any way, stop using the wheelchair immediately
and contact your authorised dealer or the manufacturer.
›› Check the efficiency of the braking system to ensure the
rear drive wheels cannot rotate when the park brakes are
engaged. With brakes released, there should be no drag
on the rear wheels and the wheelchair should be wheeled
easily. If you notice an unfamiliar braking sensation or any
abnormalities, stop using the wheelchair immediately and
contact your authorised dealer or the manufacturer.
›› Check all screws and wheelnuts are firmly secured.
Use the toolkit provided to tighten any loose fixtures.
›› Ensure tyres are inflated to the specified pressure (optimal
pressure 420kPa or 60 PSI) and have sufficient tread depth
(> 1 mm). Defective tyres must be replaced before use.
›› In the event of a puncture or constant loss of pressure to one
or other of the rear drive wheels, stop using the wheelchair
immediately and contact your authorised dealer or the
manufacturer.
10
Do not use high pressure
cleaners or harsh, caustic
chemicals for cleaning.
Frame
Wipe the wheelchair frame
with a damp cloth.
For more stubborn dirt, use a
mild detergent solution up to 40
°C. Dry thoroughly before use to
avoid corrosion.
Clean the wheels using a damp
brush with plastic bristles (do
not use a wire brush or you may
damage the rubber).
Upholstery
Regularly clean the upholstery
materials using a mild detergent
solution up to 40 °C, or washed
with alcohol-based disinfectants
if necessary.
Dry thoroughly before use.
Warranty
This warranty is provided by
Novis Healthcare (ABN 45 102 735 491)
of Unit 12, 12 Mars Road Lane Cove
2066 New South Wales Australia.
Australian Consumer Law
Our goods come with guarantees that cannot be
excluded under the Australian Consumer Law. You
are entitled to a replacement or may be entitled to
a refund for a major failure and compensation for
any other reasonable foreseeable loss or damage.
You are also entitled to have the goods repaired or
replaced if the goods fail to be acceptable quality
and the failure does not amount to a major failure.
Where a failure does not amount to a major failure
Novis Healthcare is entitled to choose between
providing you with a repair, replacement or refund.
To obtain compensation, you would need to provide
documentary evidence of the loss or damage
suffered and documentary evidence that such loss or
damage was a reasonable foreseeable consequence
of a failure by Novis Healthcare to comply with
a consumer guarantee under the Australian
Consumer Law.
At our option:
›› goods repaired may be replaced by refurbished
goods of the same type rather than being repaired
›› refurbished parts may be used to repair goods
In addition to all rights and remedies which you may
be entitled to under the Competition and Consumer
Act 2010 (Commonwealth) and any other relevant
legislation, Novis Healthcare warrants each of
its products to be free of defects in materials and
workmanship for a period of 12 months (unless
otherwise stated), commencing from the date the
product is received by the purchaser.
Product Warranty
In addition to all rights and remedies which you may
be entitled to under the Competition and Consumer
Act 2010 (Cth) and any other relevant legislation,
Novis Healthcare warrants each of its products will,
with normal use and service to be free from faulty
parts, manufacture or workmanship for a period of
12 months (unless otherwise stated), commencing
from the date of purchase.
Subject to the provisions of the Australian Consumer
Law, Novis Healthcare excludes, to the fullest extent
permitted by law, all liability in respect of loss of
profit or other economic loss, direct or indirect or
consequential, special, general or other damages
or other expenses or costs which may include
negligence.
Warranty Claims
To claim under this warranty, please contact Novis
Healthcare and have your receipt or proof of
purchase available. Novis Healthcare may need to
assess the defect before determining any claim, and
additional information may be requested to process
your claim.
Any expenses incurred relating to the return of the
defective product to Novis Healthcare will be borne
by us. We will then, at our discretion, either repair or
replace the product, or refund your money and take
back the product. Warranty repairs do not extend
the length of the warranty period.
Limited Liabilities
Our liability under this manufacturer’s warranty is
subject to us being satisfied that a defect was caused
by faulty parts, manufacture or workmanship, and
was not caused or substantially contributed to by
other factors or circumstances beyond our control,
including (but not limited to) defective installation,
maintenance or repair, product modification
or alteration, any neglect, misuse, or excessive
use, normal wear and tear or failure to follow
manufacturer’s instructions.
The benefits conferred by this manufacturer’s
warranty are in addition to all rights and remedies
conveyed by the Competition and Consumer Act
2010 (Cth), and any other statutory rights to which
you may already been entitled, and this warrant
does not exclude, restrict or modify such rights or
remedies that are implied by law.
Mail To
Novis Service Centre:
Unit 12, 12 Mars Road Lane Cove NSW 2066
For more information please contact us on
1300 738 885, email [email protected]
or visit www.novis.com.au
11
Specifications
Code
BL1508
Seat width
405 mm
Chassis
Aluminium, height adjustable
Safe working load
110 kg
Complies to
ARTG 176832
Product weight
16 kg
Seat height
470 mm or 500 mm
Seat depth
410 mm
Seat back height
410 mm
Front wheels
180 mm (solid)
Rear drive wheels
610 mm (pneumatic)
Manufacturer
Novis Healthcare
bringing you the world in health
ABN 45 102 735 491
Novis Healthcare
12/12 Mars Road Lane Cove 2066
New South Wales Australia
T 1300 738 885
www.novis.com.au