1
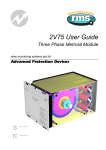
2P49 User Guide Phase Failure Relay relay monitoring systems pty ltd Advanced Protection Devices User Guide Test Manual 2P49 User Guide About This Manual This User Guide covers all 2P49 relays manufactured from August 2006. Earlier relays do not necessarily incorporate all the features described. Our policy of continuous may means that extra features & functionality may have been added. The 2P49 User Guide is designed as a generic document to describe the common operating parameters for all relays built on this platform. Some relay applications are described but for specific model information the individual “K” number Product / Test manuals should be consulted. The copyright and other intellectual property rights in this document and in any model or article produced from it (and including any Registered or unregistered design rights) are the property of Relay Monitoring Systems Pty Ltd. No part of this document shall be reproduced or modified or stored in another form, in any data retrieval system, without the permission of Relay Monitoring Systems Pty Ltd, nor shall any model or article be reproduced from this document without consent from Relay Monitoring Systems Pty Ltd. While the information and guidance given in this document is believed to be correct, no liability shall be accepted for any loss or damage caused by any error or omission, whether such error or omission is the result of negligence or any other cause. Any and all such liability is disclaimed. Contact Us © Relay Monitoring Systems Pty Ltd 2001-2006 6 Anzed Court • Mulgrave 3170 • AUSTRALIA Phone 61 3 9561 0266 • Fax 61 3 9561 0277 Email [email protected] • Web www.rmspl.com.au To download a PDF version of this guide: http://www.rmspl.com.au/userguide/2P49_user_guide.pdf To download the model specific Test Manual: http://www.rmspl.com.au/search.asp How this guide is organised This guide is divided into five parts: Part 1 Overview About this Manual Contents Test Manual Part 2 Mechanical Configuration Part 3 Technical Bulletin Part 4 Installation Handling of Electronic Equipment Safety Unpacking Accessories Storage & Handling Recommended Mounting Position Relay Dimensions & Other Mounting Accessories Equipment Connections Part 5 Maintenance Mechanical Inspection Test Intervals Defect Report Form Visit www.rmspl.com.au for the latest product information. Due to RMS continuous product improvement policy this information is subject to change without notice. 2P49_Guide/Iss C/08/08/06 Part 1 Test Manual This User Guide covers all 2P49 relay versions & describes the generic features & attributes common across all versions. Different relay versions are required to cater for varying customer requirements such as auxiliary voltage range, I/O configuration, case style, relay functionality etc. The product ordering code described in the Technical Bulletin is used to generate a unique version of the relay specification & is called a type number. The type number takes the form 2P49Kxx where the Kxx is the “K” or version number. www.rmspl.com.au/handbook/PARTA3.pdf Refer to: for a complete description of the RMS “K” number system. Each 2P49 version has a specific Test Manual which provides details on the unique attributes of the relay. Each Test Manual includes the following information: • Test Certificate • Specific technical variations from the standard model if applicable • Test & calibration record • Wiring diagram A Test Manual is provided with each relay shipped. If you require a copy of the Test Manual for an RMS product the following options are available: • Check the RMS web site at: www.rmspl.com.au/search.asp • RMS CD catalogue select: List all Product/Test Manuals under Technical Library • Contact RMS or a representative & request a hard copy or PDF by email. Visit www.rmspl.com.au for the latest product information. Due to RMS continuous product improvement policy this information is subject to change without notice. 2P49_Guide/Iss C/08/08/06 Part 2 Mechanical Configuration Great care has been taken to design a rugged, cost effective & flexible mechanical solution for the MATRIX range of RMS protection relays. The MATRIX range provides a compact draw out case solution with M4 screw terminals: • • • 2M28 4M28 4M56 Size 2 with 28 terminals Size 4 with 28 terminals Size 4 with 56 terminals Complete details & attributes for the M (MATRIX) cases & accessories may be found at: http://www.rmspl.com.au/mseries.htm The 2P49 is configured in a 2M28 case & the following photographs depict the general mechanical configuration. It should be noted that re-usable screw rivets are used to bind the draw out relay module. A 1/16” hex key is required for disassembly. Visit www.rmspl.com.au for the latest product information. Due to RMS continuous product improvement policy this information is subject to change without notice. 2P49_Guide/Iss C/08/08/06 Part 3 Technical Bulletin The detailed technical attributes, functional description & performance specifications for the 2P49 are described in the attached Technical Bulletin. For the most up to date version go to: www.rmspl.com.au/handbook/2P49.htm For any specific attributes of a particular version refer to the Test Manual for that type (K) number. The order of precedence for technical information is as follows: • • • Test Manual Technical Bulletin User Guide Visit www.rmspl.com.au for the latest product information. Due to RMS continuous product improvement policy this information is subject to change without notice. 2P49_Guide/Iss C/08/08/06 2P49 Technical Bulletin Three Phase Voltage Monitoring Relay Features Detects phase angle imbalance Detects negative phase sequence Detects supply undervoltage Unaffected by frequency variations of + 5Hz Adjustable 5-15% out of balance setting Range of detection voltages & frequencies available No auxiliary voltage required Fail safe operation (Contacts normally picked up) Filter rejects harmonics & control tones Size 2M28 draw out case Optional heavy duty contacts Optional mechanical flag indication Suitable for 3 phase voltage selection schemes Optional time delay on drop off 2P49 depicted in a 2M28 case Description Made in Australia The 2P49 relay is a 3 phase voltage monitoring relay suitable for the detection of excessive negative sequence voltage resulting from phase failure, phase unbalance and reversed phase sequence. The 2P49 output relay provides fail safe operation in that its output contacts are normally energised & drop out when: ♦ Phase angle unbalance is greater than the front panel pre-set; ♦ 3 phase voltage falls below the factory pre-set of 80%; ♦ Reverse phase sequence. www.rmspl.com.au Visit for the latest product information. Due to RMS continuous product improvement policy this information is subject to change without notice. 2P49/Iss. J/15/05/09 - 1/4 Application PRINCIPLE OF OPERATION The unit consists of a simple RC circuit across the R-Y phase such that point x will only be at the same potential as point p for a balanced supply of correct phase sequence. The solid state relay circuit is designed to release the relay at either a set out of balance voltage (X-P voltage), or a set undervoltage of the B-W phase (relay supply). Special filtering circuitry is used to prevent high frequency or ripple control signals from affecting the operation of the relay. VOLTAGE SELECTION SCHEMES The 2P49 relay can be applied in automatic voltage selection schemes to change over from a primary 3 phase supply to a secondary 3 phase supply if any phase of the primary supplies has faulted. A number of 2P49 relays may be cascaded to allow selection between 2, 3 or 4 independent 3 phase supplies. For this application 4 C/O heavy duty contacts are required & the 2s time delay is recommended. A single phase representation for automatic selection between multiple 3 phase supplies is depicted below: VT 1 Supply 1 in Selected supply output VT VT Supply 3 in Supply 4 in or add further 2P49 relays for additional supply selection Setting (%) Ph-Ph (V) Ph-N (V) 5 6 7 8 9 10 11 12 13 14 15 104.5 103.4 102.3 101.2 100.1 99.0 97.9 96.8 95.7 94.6 93.5 57.10 55.80 54.50 53.19 51.88 50.56 49.23 47.90 46.56 45.21 43.86 Negative Phase Sequence 3.48% 4.21% 4.96% 5.72% 6.50% 7.29% 8.10% 8.92% 9.76% 10.62% 11.50% Negative phase sequence chart – 110V AC PHASE REVERSAL PROTECTION The 2P49 relay can be used for transportable cranes, refrigerated transporters, etc., which on being connected from one supply to another require phase reversal protection. The advantage of the 2P49 for this application is the added protection of phase failure and undervoltage. 2P49 2 Supply 2 in NEGATIVE PHASE SEQUENCE The relay will drop out when the negative phase sequence value corresponding to the relay setting shown below for the 110V AC is reached. 2P49 2P49 3 All circuits shown de-energised MOTOR PROTECTION The 2P49 phase failure relay has the sensitivity to detect the voltage unbalance caused by a motor single phasing. In most instances even a motor with no load and no other loads connected to the open phase will be detected when single phasing. The 2P49 relay is ideal for detecting phase failure and unbalance of HT lines and for this purpose 110V relays are also available. As the 2P49 detects the presence of negative sequence voltage a relay connected on the load side of a three phase transformer will detect a blown fuse or high impedance in one phase of the supply to the transformer, regardless of the transformer winding connections. Pump motors on the end of a HT line with fuse protection and therefore high probability of single line outages are an obvious application for the 2P49 relay. 3 PHASE UNDERVOLTAGE It is a useful undervoltage relay in that phase angles are also monitored. As an example three single phase undervoltage relays may not detect an open phase which is connected to a healthy phase through a low impedance load. The 2P49 relay however will detect this condition due to the change in phase angles. In using the 2P49 relay as an undervoltage relay it must be remembered that only the B-W voltage is monitored directly. The other two ∅ to ∅ voltages are monitored for correct phase angle and voltage balance with respect to the B-W voltage. The difference in percentage undervoltage expressed as phase to phase and phase to neutral must also be appreciated. As a guide, when two ∅ to ∅ voltages are equally reduced as shown - the relationship is as follows: 95% ∅ to ∅ = 90% ∅ to N 90% ∅ to ∅ = 80% ∅ to N 85% ∅ to ∅ = 69% ∅ to N www.rmspl.com.au Visit for the latest product information. Due to RMS continuous product improvement policy this information is subject to change without notice. 2P49/Iss. J/15/05/09 - 2/4 Technical Data IMBALANCE SETTING Adjustable 5-15% expressed as phase to phase voltage difference as a % of nominal voltage when two phase to phase voltages are reduced equally with the third at nominal voltage. The imbalance dial is calibrated for drop off at each end of the scale; the user should set the control as fine as possible (5% end), to the point where the voltage dips on the system caused by varying loads do not cause the relay to drop out. OPTIONAL HEAVY DUTY OUTPUT CONTACTS 4 C/O for voltage selection schemes 6R RELAY CONTACT RATINGS Make & Carry Continuously 3,000 VA AC resistive with maximums of 660V & 12A 3,000 W DC resistive with maximums of 660V & 12A Make & Carry for 3 Seconds 7,500 VA AC resistive with maximums of 660V & 30A 7,500 W DC resistive with maximums of 660V & 30A UNDERVOLTAGE SETTING 80% fixed - expressed as phase to phase voltage % of nominal voltage. (Other settings are available to order) AC Break Capacity 3,000 VA AC resistive with maximums of 660V & 12A ACCURACY Front dial setting +3. DC Break Capacity (Amps) TIME DELAY Refer to the Order Code section to select instantaneous operation or 2s approx. time delay for operation on drop off. L/R=40ms 110 10 7.5 AC 220 7 5 250 6.6 4.4 Make & Carry for 200ms 30A at 250V DC resistive 48V 125V 250V 12 12 1.5 12 0.5 10 0.25 5 a b 12 30 1 15 0.25 5.5 0.15 3.5 1K operations (N3 Rating) b 12 12 5 2.5 Resistive rating STANDARD OUTPUT CONTACTS 2 C/O standard (Idec RH type) Maximum Contact Capacity (Amps) DC Voltage 30 125 250 Resistive 10 2.4 1.2 Inductive L/R 7ms 7.5 1.8 0.9 24V a b Voltage Maximum break a = Without magnetic blowouts b = With magnetic blowouts CASE 2M28-S draw out case INSULATION WITHSTAND In accordance with IEC 255-5: 2KV RMS between input and frame, output and frame, and output and input. 1.2/50 5KV impulse between each terminal and earth, between circuits not normally connected together and between terminals of the same circuit. Maximum Break Capacity 0.34A at 250V DC inductive (40ms) NOISE IMMUNITY Withstands the high frequency interference test detailed in IEC 255-22-1. AMBIENT OPERATING TEMPERATURE RANGE -5 to 55 degrees Celsius . Size 2M28-S draw out case Drawing units: mm Indicative position 1 2 27 28 14 Suits flush panel mounting & 4U high 19 inch rack frame Front view 15 2 holes of 3.7 Side view www.rmspl.com.au Terminal layout Panel cut out Visit for the latest product information. Due to RMS continuous product improvement policy this information is subject to change without notice. 2P49/Iss. J/15/05/09 - 3/4 Ordering Information Generate the required ordering code as follows: e.g. 2P49-ABAB 1 2 3 4 2P49 1 R 3 5 B PHASE ROTATION 1 SENSING SUPPLY - 3 Phase 3 or 4 wire (3 wire connection) A B C 110V 50Hz 415V 50Hz 440V 50Hz D E F 110V 60Hz 415V 60Hz 440V 60Hz 2 TIME DELAY (2s approx. time delay on drop off) A Required Recommended for voltage selection schemes. B Not required G 380V 50Hz 3 OUTPUT CONTACTS A B Idec RH type output relay 2 C/O contacts Heavy duty 6R output relay 4 C/O contacts Required for voltage selection schemes. C 6R output relay with magnetic blowouts 4 FLAG A B C Required – hand reset Not required Required – self reset 4 C/O contacts – Only available with 6R output relay Phase R input Phase R preferred Phase W input Phase W preferred Phase B input Phase B preferred W 17 19 Output 1 21 Phase R standby 23 25 Metering Equipment Output 2 27 6R relay output option Phase W standby 18 20 Output 3 22 Phase B standby 24 26 Output 4 Alarm 28 Potential Selector Circuit Example 2P49 wiring diagram www.rmspl.com.au Visit for the latest product information. Due to RMS continuous product improvement policy this information is subject to change without notice. 2P49/Iss. J/15/05/09 - 4/4 Part 4 Installation Handling of Electronic Equipment A person’s normal movements can easily generate electrostatic potentials of several thousand volts. Discharge of these voltages into semiconductor devices when handling electronic circuits can cause serious damage, which often may not be immediately apparent but the reliability of the circuit will have been reduced. The electronic circuits of Relay Monitoring Systems Pty Ltd products are immune to the relevant levels of electrostatic discharge when housed in the case. Do not expose them to the risk of damage by withdrawing modules unnecessarily. Each module incorporates the highest practicable protection for its semiconductor devices. However, if it becomes necessary to withdraw a module, the following precautions should be taken to preserve the high reliability and long life for which the equipment has been designed and manufactured. 1. Before removing a module, ensure that you are at the same electrostatic potential as the equipment by touching the case. 2. Handle the module by its front-plate, frame, or edges of the printed circuit board. 3. Avoid touching the electronic components, printed circuit track or connectors. 4. Do not pass the module to any person without first ensuring that you are both at the same electrostatic potential. Shaking hands achieves equipotential. 5. Place the module on an antistatic surface, or on a conducting surface which is at the same potential as yourself. 6. Store or transport the module in a conductive bag. If you are making measurements on the internal electronic circuitry of an equipment in service, it is preferable that you are earthed to the case with a conductive wrist strap. Wrist straps should have a resistance to ground between 500k – 10M ohms. If a wrist strap is not available, you should maintain regular contact with the case to prevent the build up of static. Instrumentation which may be used for making measurements should be earthed to the case whenever possible. Visit www.rmspl.com.au for the latest product information. Due to RMS continuous product improvement policy this information is subject to change without notice. User_Guide-5/IssE/25/08/08 Safety Section This Safety Section should be read before commencing any work on the equipment. The information in the Safety Section of the product documentation is intended to ensure that products are properly installed and handled in order to maintain them in a safe condition. It is assumed that everyone who will be associated with the equipment will be familiar with the contents of the Safety Section. Explanation of Symbols & Labels The meaning of symbols and labels which may be used on the equipment or in the product documentation, is given below. Caution: refer to product information Caution: risk of electric shock ! Functional earth terminal Note: this symbol may also be used for a protective/safety earth terminal if that terminal is part of a terminal block or sub-assembly eg. power supply. Visit www.rmspl.com.au for the latest product information. Due to RMS continuous product improvement policy this information is subject to change without notice. User_Guide-4/Iss E/25/08/08 Unpacking Upon receipt inspect the outer shipping carton or pallet for obvious damage. Remove the individually packaged relays and inspect the cartons for obvious damage. To prevent the possible ingress of dirt the carton should not be opened until the relay is to be used. Refer to the following images for unpacking the relay: Outer packing carton showing shipping documentation pouch. Address label on top of carton. Inner packing carton showing front label detailing the customer name, order number, relay part number & description, the relay job number & packing date. (Size 2 inner packing carton depicted) Visit www.rmspl.com.au for the latest product information. Due to RMS continuous product improvement policy this information is subject to change without notice. User_Guide-4/Iss E/25/08/08 Unpacking (Continued) Inner packing carton with lid open showing protective foam insert. CD depicted supplied with digital relay models or upon request at time of order. Inner packing carton with protective foam insert removed showing relay location. Where mechanical flags are fitted the yellow transit wedge must be removed before operation using a gentle twisting action. The wedge should be stored with the original packaging material. Visit www.rmspl.com.au for the latest product information. Due to RMS continuous product improvement policy this information is subject to change without notice. User_Guide-4/Iss E/25/08/08 Relay Module Side Label Depicting Product Details Relay Module Side Label Depicting Wiring Diagram Visit www.rmspl.com.au (6R MATRIX relays only) for the latest product information. Due to RMS continuous product improvement policy this information is subject to change without notice. User_Guide-4/Iss E/25/08/08 Accessories Supplied With Each Relay Self threading M4 mounting screws M4 terminal screws with captured lock washers Storage & Handling If damage has been sustained a claim should immediately be made against the carrier, also inform Relay Monitoring Systems Pty Ltd and the nearest RMS agent When not required for immediate use, the relay should be returned to its original carton and stored in a clean, dry place. Relays which have been removed from their cases should not be left in situations where they are exposed to dust or damp. This particularly applies to installations which are being carried out at the same time as constructional work. If relays are not installed immediately upon receipt they should be stored in a place free from dust and moisture in their original cartons. Dust which collects on a carton may, on subsequent unpacking, find its ay into the relay; in damp conditions the carton and packing may become impregnated with moisture and the dehumidifying agent will lose is efficiency. Visit www.rmspl.com.au for the latest product information. Due to RMS continuous product improvement policy this information is subject to change without notice. User_Guide-4/Iss E/25/08/08 Equipment Operating Conditions The equipment should be operated within the specified electrical and environmental limits. Protective relays, although generally of robust construction, require careful treatment prior to installation and a wise selection of site. By observing a few simple rules the possibility of premature failure is eliminated and a high degree of performance can be expected. Care must be taken when unpacking and installing the relays so that none of the parts are damaged or their settings altered and must al all times be handled by skilled persons only. Relays should be examined for any wedges, clamps, or rubber bands necessary to secure moving parts to prevent damage during transit and these should be removed after installation and before commissioning. The relay should be mounted on the circuit breaker or panel to allow the operator the best access to the relay functions. Relay Dimensions & Other Mounting Accessories Refer drawing in Technical Bulletin. Relevant Auto Cad files & details on other accessories such as 19 inch sub rack frames, semi projection mount kits & stud terminal kits may be down loaded from: http://www.rmspl.com.au/mseries.htm Visit www.rmspl.com.au for the latest product information. Due to RMS continuous product improvement policy this information is subject to change without notice. User_Guide-4/Iss E/25/08/08 Equipment Connections Personnel undertaking installation, commissioning or servicing work on this equipment should be aware of the correct working procedures to ensure safety. The product documentation should be consulted before installing, commissioning or servicing the equipment. Terminals exposed during installation, commissioning and maintenance may present hazardous voltage unless the equipment is electrically isolated. If there is unlocked access to the rear of the equipment, care should be taken by all personnel to avoid electric shock or energy hazards. Voltage and current connections should be made using insulated crimp terminations to ensure that terminal block insulation requirements are maintained for safety. To ensure that wires are correctly terminated, the correct crimp terminal and tool for the wire size should be used. Before energising the equipment it must be earthed using the protective earth terminal, or the appropriate termination of the supply plug in the case of plug connected equipment. Omitting or disconnecting the equipment earth may cause a safety hazard. The recommended minimum earth wire size is 2.5mm2, unless otherwise stated in the technical data section of the product documentation. Before energising the equipment, the following should be checked: 1. Voltage rating and polarity; 2. CT circuit rating and integrity of connections; 3. Protective fuse rating; 4. Integrity of earth connection (where applicable) Visit www.rmspl.com.au for the latest product information. Due to RMS continuous product improvement policy this information is subject to change without notice. User_Guide-4/Iss E/25/08/08 Current Transformer Circuits Do not open the secondary circuit of a live CT since the high voltage produced may be lethal to personnel and could damage insulation. External Resistors Where external resistors are fitted to relays, these may present a risk of electric shock or burns, if touched. Insulation & Dielectric Strength Testing Insulation testing may leave capacitors charged up to a hazardous voltage. At the end of each part of the test, the voltage should be gradually reduced to zero, to discharge capacitors, before the test leads are disconnected. Insertion of Modules These must not be inserted into or withdrawn from equipment whilst it is energised, since this may result in damage. Electrical Adjustments Pieces of equipment which require direct physical adjustments to their operating mechanism to change current or voltage settings, should have the electrical power removed before making the change, to avoid any risk of electric shock. Mechanical Adjustments The electrical power to the relay contacts should be removed before checking any mechanical settings, to avoid any risk of electric shock. Draw Out Case Relays Removal of the cover on equipment incorporating electromechanical operating elements, may expose hazardous live parts such as relay contacts. Insertion & Withdrawal of Heavy Current Test Plugs When using a heavy current test plug, CT shorting links must be in place before insertion or removal, to avoid potentially lethal voltages. Visit www.rmspl.com.au for the latest product information. Due to RMS continuous product improvement policy this information is subject to change without notice. User_Guide-4/Iss E/25/08/08 Commissioning Preliminaries Carefully examine the module and case to ser that no damage has occurred during transit. Check that the relay serial number on the module, case and cover are identical, and that the model number and rating information are correct. Carefully remove any elastic bands/packing fitting for transportation purposes. Check that the external wiring is correct to the relevant relay diagram or scheme diagram. The relay diagram number appears inside the case. Particular attention should be paid to the correct wiring and value of any external resistors indicated on the wiring diagram/relay rating information. Note that shorting switches shown on the relay diagram are fitted internally across the relevant case terminals and close when the module is withdrawn. It is essential that such switches are fitted across all CT circuits. If a test block system is to be employed, the connections should be checked to the scheme diagram, particularly that the supply connections are to the ‘live’ side of the test block. Earthing Ensure that the case earthing connection above the rear terminal block, is used to connect the relay to a local earth bar. Insulation The relay, and its associated wiring, may be insulation tested between: - all electrically isolated circuits - all circuits and earth An electronic or brushless insulation tester should be used, having a dc voltage not exceeding 1000V. Accessible terminals of the same circuit should first be strapped together. Deliberate circuit earthing links, removed for the tests, subsequently must be replaced. Visit www.rmspl.com.au for the latest product information. Due to RMS continuous product improvement policy this information is subject to change without notice. User_Guide-4/Iss E/25/08/08 Commissioning Tests If the relay is wired through a test block it is recommended that all secondary injection tests should be carried out using this block. Ensure that the main system current transformers are shorted before isolating the relay from the current transformers in preparation for secondary injection tests. DANGER DO NOT OPEN CIRCUIT THE SECONDAY CIRCUIT OF A CURRENT TRANSFORMER SINCE THE HIGH VOLTAGE PRODUCED MAY BE LETHAL AND COULD DAMAGE INSULATION. It is assumed that the initial preliminary checks have been carried out. Relay CT shorting switches With the relay removed from its case, check electrically that the CT shorting switch is closed. Primary injection testings It is essential that primary injection testing is carried out to prove the correct polarity of current transformers. Before commencing any primary injection testing it is essential to ensure that the circuit is dead, isolated from the remainder of the system and that only those earth connections associated with the primary test equipment are in position. Decommissioning & Disposal Decommissioning: The auxiliary supply circuit in the relay may include capacitors across the supply or to earth. To avoid electric shock or energy hazards, after completely isolating the supplies to the relay (both poles of any dc supply), the capacitors should be safely discharged via the external terminals prior to decommissioning. Disposal: It is recommended that incineration and disposal to water courses is avoided. The product should be disposed of in a safe manner. Visit www.rmspl.com.au for the latest product information. Due to RMS continuous product improvement policy this information is subject to change without notice. User_Guide-4/Iss E/25/08/08 Part 5 Maintenance Mechanical Inspection Relay Assembly Inspect the relay for obvious signs of damage or ingress of moisture or other contamination. Relay Module Isolate the relay, remove the front cover & carefully withdraw the relay module from the case. Care must be taken to avoid subjecting the relay element to static discharge which may damage or degrade sensitive electronic components. Inspect the relay module for signs of any overheating or burn marks which may have been caused by overvoltage surge or transient conditions on the power supply or digital status inputs. Inspect the VT & CT stages for degradation of insulation on the terminal wiring & transformer windings. Remove cover by unscrewing black thumb screws & withdraw the relay module from the case. Visit www.rmspl.com.au for the latest product information. Due to RMS continuous product improvement policy this information is subject to change without notice. User_Guide-5/Iss D/10/07/08 Relay Case Inspect the outer terminals checking insulation integrity & tightness. Inspect inside the case and use a blower to remove dust. Inspect the inner terminals for worn, distorted or tarnished contacts and if necessary clean the contacts using a brush dipped in a suitable substance. Case outer terminals Case inner terminals Module plug in terminals Test Intervals The maintenance tests required will largely depend upon experience and site conditions, but as a general rule it is recommended that the following inspection and tests are performed every twelve months. ♦ Mechanical Inspection ♦ Check of Connections ♦ Insulation Resistance Test ♦ Fault Setting Tests by Secondary Injection ♦ Tests using Load Current ♦ Check the continuity of the neutral CT loop with a bell test set or an ohmmeter Visit www.rmspl.com.au for the latest product information. Due to RMS continuous product improvement policy this information is subject to change without notice. User_Guide-5/Iss D/10/07/08 Defect Report Form Please copy this sheet and use it to report any defect which may occur. Customers Name & Address: Contact Name: Telephone No: Fax No: Supplied by: Date when installed: Site: Circuit: When Defect Found Date: Commissioning? Maintenance? Systems Fault? Product Part No: Other, Please State: Serial Number: Copy any message displayed by the relay: Describe Defect: Describe any other action taken: Signature: Please Print Name: Date: For RMS use only Date Received: Contact Name: Visit Reference No: www.rmspl.com.au Date Acknowledged: Date of Reply: Date Cleared: for the latest product information. Due to RMS continuous product improvement policy this information is subject to change without notice. User_Guide-5/Iss D/10/07/08 Australian Content Design References Unless otherwise stated the product(s) quoted are manufactured by RMS at our production facility in Melbourne Australia. Approximately 60% of our sales volume is derived from equipment manufactured in house with a local content close to 90%. Imported components such as semi-conductors are sourced from local suppliers & preference is given for reasonable stock holding to support our build requirements. The products & components produced by RMS are based on many years of field experience since Relays Pty Ltd was formed in 1955. A large population of equipment is in service throughout Australia, New Zealand, South Africa & South East Asia attesting to this fact. Specific product & customer reference sites may be provided on application. Quality Assurance Product Warranty RMS holds NCSI (NATA Certification Services International), registration number 6869 for the certification of a quality assurance system to AS/NZS ISO9001-2000. Quality plans for all products involve 100% inspection and testing carried out before despatch. Further details on specific test plans, quality policy & procedures may be found in section A4 of the RMS product catalogue. All utility grade protection & auxiliary relay products, unless otherwise stated, are warranted for a period of 24 months from shipment for materials & labour on a return to factory basis. Repair of products damaged through poor application or circumstances outside the product ratings will be carried out at the customer’s expense. Product Packaging Standard Conditions of Sale Protection relays are supplied in secure individual packing cardboard boxes with moulded styrene inserts suitable for recycling. Each product & packing box is labeled with the product part number, customer name & order details. Unless otherwise agreed RMS Standard Terms & Conditions (QF 907) shall apply to all sales. These are available on request or from our web site. Relay Monitoring Systems Pty Ltd 6 Anzed Court, Mulgrave, Victoria 3170, AUSTRALIA Tel: 61 3 9561 0266 Fax: 61 3 9561 0277 Email: [email protected] Web: www.rmspl.com.au © 2 0 0 9 R e l a y M o n i t o r i n g S y s t e m s P t y L t d Due to RMS continuous product improvement policy this information is subject to change without notice.