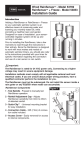
1
Connecting the Control Wire
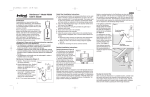
Caution: Do not connect the RainSensor directly to
120/240 V ac power as this may result in irreversible
damage. If you are in doubt, contact a qualified installer
or electrician.
1. Disconnect power to the controller.
2. Review the following connection diagrams in Figures 6, 7 and 8.
Follow the applicable instructions provided in steps A or B or C.
A. Controllers with sensor terminals:
Refer to Figure 6. Find the controller sensor terminals (generally
marked “Sensor”, “SEN” or “S”) and directly connect the control
wires to these terminals in any order. There may be a jumper tab
or wire between the sensor terminals that must be removed and/or
a sensor control or bypass switch that must be activated.
Figure 6
C. Controllers with pump start/master valve and no sensor
terminals:
Refer to Figure 8. Disconnect all common wires from the common
terminal(s) and join them to either control wire using the supplied
wire nut. Be sure to include the common wire from the pump start
relay or master valve in this connection. Connect the remaining
control wire to the valve common terminal.
Figure 8
Irrigation System Controller
Specifications
Mounting: Quick-Clip rain gutter bracket or screws (2 provided)
Control Wire: 7,5m outdoor-rated 2-wire cable
Sensor Type: Industry-standard hygroscopic disc stack with
adjustable rainfall sensitivity
Rating: 3 amp, 24 V ac, NO/NC
Operating Temperature Range: -29°C to 60°C
Hardware: Stainless steel
Housing: UV-resistant engineered polymer
To Valves
Irrigation System Controller
Pump Start
Relay
To Valves
Common From Valves
B. Controllers with no pump start/master valve and no sensor
terminals:
Refer to Figure 6. Disconnect the valve common wire(s) and join to
either control wire using the supplied wire nut. Connect the remaining control wire to the valve common terminal.
Figure 7
Irrigation System Controller
To Valves
Common From Valves
The Toro Promise — Limited Two-Year Warranty
Wire Nut
Operation
Common From Valves
Wire Nut
Bypassing the RainSensor
The RainSensor can be temporarily bypassed or deactivated using
a number of methods:
• Use the controller’s sensor bypass switch.
• Install an optional bypass switch.
• Temporarily disconnect the RainSensor from the controller’s wiring.
Note: Always disconnect power to the controller before performing
any wiring tasks.
Testing the Installation
In order to test the installation of the RainSensor, turn on a watering
zone which is visible from the installation location.
Note: The manual activation cycle of some controllers bypasses
the sensor inputs. You will need to run an automatic/timed watering
program for these types of controllers.
With the sprinklers on, manually activate the RainSensor by pressing and holding the spindle at the top of the unit. The sprinklers
should shut off within a short time. If they do not shut off, recheck
the wiring connections at the controller. If the controller has a
sensor control or bypass switch, make sure the switch is set to
the position that will enable the sensor circuit to be active.
Normal Operation
When the RainSensor activates due to sufficient rainfall, the sprinkler system will remain inactive until the hygroscopic discs inside
the sensor have dried out. This dry-out rate will be about the same
as your soil’s drying rate and allow for sprinkler activation once the
soil is dry enough to be watered again. After the RainSensor
“dries out”, the controller will resume its normal watering schedule.
The Toro Company and its affiliate, Toro Warranty Company, pursuant to an agreement between them, jointly
warrants, to the owner, each new piece of equipment (featured in the current catalog at date of installation)
against defects in material and workmanship for the period described below, provided they are used for irrigation
purposes under manufacturer's recommended specifications. Product failures due to acts of God (i.e., lightning,
flooding, etc.) are not covered by this warranty.
Neither Toro nor Toro Warranty Company is liable for failure of products not manufactured by them even though
such products may be sold or used in conjunction with Toro products.
During such warranty period, we will repair or replace, at our option, any part found to be defective. Your remedy
is limited solely to the replacement or repair of defective parts.
Return the defective part to your local Toro distributor, who may be listed in your telephone directory Yellow
Pages under "Irrigation Supplies" or "Sprinkler Systems," or contact The Toro Warranty Company, P.O. Box 489,
Riverside, California, 92502.
Phone (800) 664-4740 for the location of your nearest Toro distributor or outside the U.S., call (909) 688-9221.
This warranty does not apply where equipment is used, or installation is performed, in any manner contrary to
Toro’s specifications and instructions, nor where equipment is altered or modified.
Neither Toro nor Toro Warranty Company is liable for indirect, incidental or consequential damages in connection with the use of equipment, including but not limited to: vegetation loss, the cost of substitute equipment or services required during periods of malfunction or resulting non-use, property damage or personal
injury resulting from installer’s actions, whether negligent or otherwise.
Some states do not allow the exclusion or limitation of incidental or consequential damages, so the
above limitation or exclusion may not apply to you.
All implied warranties, including those of merchantability and fitness for use, are limited to the duration of
this express warranty.
Some states do not allow limitations of how long an implied warranty lasts, so the above limitation
may not apply to you.
This warranty gives you specific legal rights and you may have other rights which vary from state
to state.
The TRS is covered by this warranty for a period of two years from the date of installation.
For Technical Assistance:
U.S.A.
Australia
(800) 664-4740 or
(08) 8300 3633
(951) 688-9221
© 2004 The Toro Company, Irrigation Division
373-0353 Rev. A