1
Trouble Shooting
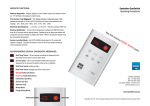
Trouble Shooting: SunSwitch Controller
Controller is on, but
ER message in display
Controller not turning
pump is not & solar
(SunSwitch)
on - no power
Check wire connections to controller
Plug controller into a
conditions are good
Check solar pump is
different power point
plugged into the base of
and test. If no response
the controller & check
ER flashing =
ER not flashing =
controller is not in ESM
Faulty Roof Sensor
Faulty Cold Sensor
Set controller to Manual &
Check for breaks in wires and/or
verify that the pump runs
damage to the sensor ends
please call
Sunbather Head Office
Repair or replace sensor wire &
Test pump by plugging
sensor
into a different power
point & turn on. If it
doesn’t turn on then the
If ER still displayed, call Sunbather
pump is the problem
Head Office with a description of
the fault
Check computer output
by plugging in a power
tool or small appliance
into the bottom of the
controller to see if it runs
Contact Sunbather - [email protected]
Refer to our website for additional SunSwitch information
www.sunbather.com.au
Other Tips:
•
If you have an ER message displayed on an SCM model controller, (blue box with diving girl), the ER message will
not be flashing, but the LED light next to the button ‘Roof Temp, Set Temp, Pool Temp’ will be red or green. Red =
Roof/Hot Sensor fault. Green = Pool/Cold Sensor fault. Please call Sunbather Head Office for repair information.
•
For SCM controller with a serial number prior to 411583 (found on the back or base), brass ended 2kΩ sensors are
required - plastic ended 47kΩ sensors are not compatible.
•
For SCM Controllers with a serial number 411583 and onwards, use plastic ended sensors (47kΩ) which are interchangeable with SunSwitch sensors.
•
•
SunSwitch version 6 (serial numbers 1500 - 4999).
SunSwitch version 8 (serial numbers 5000 - 7499).
1.
Flashing dot in LED display means the controller is awaiting user instruction, eg. Set temperature. Pulsating
circle means the controller is in Auto.
2.
Energy Saving Mode (ESM) has a 2.5 hour lock-out period after the set temperature has been reached. A
non-flashing dot in the display indicates that the unit is in ESM.
ESM last 2.5 hours. At the end of this period the unit will run a 5 minute test before resuming normal
operation.
Ideas””
“A Collection of Great Ideas
Trouble Shooting
Trouble Shooting: Leaks
Leaking from main
Leaking from manifold
Leaking from Vacuum
solar strips
connections
Break Valve
Leaking from pipe work
Water is spraying
Degrading rubber &
Dripping or
Glue any fittings you
into the air or
grommet connections
pouring water from over
may have forgotten
running down roof
may be the cause
flow hose or leaking
to glue or not glued
from threaded
enough
connection to pipe work
Use repair kit to fix
If a Sunbather system,
leaks
fix with insert & header
plug in tool
If pipe is cracked,
Check for debris under
replace the leaking
valve seat. The valve
section
may be unscrewed and
cleaned out.
Replace valve
Contact Sunbather - [email protected]
Trouble Shooting: Solar Pipe Work
Air bubbles continually
Pipes vibrating &
returning to pool
causing noise
Bubbles may take up
Check that air is not
to 10 minutes to
being sucked in
clear when starting
vacuum break valve
Check for air bubbles
in solar pump
up for the first time
Check that solar pump
If a simultaneous system,
Check for holes or
is not partially blocked
check the filter pump is not
a crack in the
or drawing air
suction line
sucking air or partially
blocked. If yes, notify owner.
Check that the
If pumps & filters are OK, adjust opti valve until
pump lid & barrel
bubbles cease. DO NOT close by more than 2/3
union connections
are sealed
Larger pump maybe required
Contact Sunbather - [email protected]
Ideas””
“A Collection of Great Ideas
Trouble Shooting
Trouble Shooting: Pressure Gauge
Pressure Gauge is in the red area
No pressure reading can be seen on
the gauge
Ensure all valves are open and in the flow & return pipe work.
This includes flip hose valves which should NEVER be fully
If no air bubbles are returning to the
closed. This creates back pressure if closed.
pool and all appears reasonable, then
no pressure reading is OK
Remove any eyeballs in the pool return outlets. These are the
returns in the actual pool.
Install opti valve on the discharge side of the solar booster
pump. Slowly restrict the valve until the pressure drops into the
green.
Solar pump may be too powerful & need to be down-sized.
Contact Sunbather - [email protected]
Trouble Shooting: Solar Pump
Solar pump not
Pump motor is running,
operating
but no water circulating
Check that any opti
Check solar computer for
valves are not closed
correct settings and/or
Pump will not prime
Check lid seal is airtight
Stones may have jammed
impellor. Open casing
faults
and check. Only do so if
Fill pump filter pot with
you are competent.
water, reseal, and try to
Try pump in another
power outlet that you
Pump makes loud
whining or grating noise
Visually inspect pump for
run pump again.
blockages
Priming may take 5 Min
know works.
Possible bearing,
impellor, or seal failure.
Check the impellor to see if
Check for a broken or
it is clogged or broken
blocked pipe in the
shaft. Only dismantle a
suction line. This will be
pump if you are competent.
sucking air.
Install a check valve in
the suction line.
Contact Sunbather - [email protected]
Ideas””
“A Collection of Great Ideas
Sunbather Solar Pool Heating
Solar FAQ’s
Ideal Roof Type:
All except slate
Ideal Orientation:
North, North-West & West
Ideal Roof Angle:
Any walkable roof
Ideal Exposure:
In sun for at least 2/3 of the day
Ideal Height:
Up to 4 storeys
Ideal direction:
Running horizontally across roof. May be ran vertically on tile roofs
Ideal Fixation:
Glued to roof surface with a high grade silicone
Ideal Size:
100% of pool surface area
Ideal Maintenance:
Annual inspection by qualified Sunbather Technician
Weight On Roof:
4kg per m² (When full of water)
Troubleshooting FAQ’s
Pool is not heating to required temperature
•
•
•
•
•
Is there enough collector?
Is the controller set correctly?
Is it a brand new system? It takes around 4-5 days of good sun to heat
Is it an old system that has previously worked well? Check for blockages in pipe work
If it is leading into Autumn, the sun isn’t as high in the sky or as hot
Refer to pages 2626-28 or our website for more troubleshooting & detailed SunSwitch information or
contact your nearest Sunbather office.
Required Components of a Sunbather Solar System
The above picture is of an ideal Sunbather Solar System & a list of its components.
All these items and more can be found on pages 7-11 of this price list.
Ideas””
“A Collection of Great Ideas