1
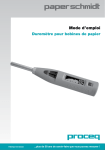
Operating Instructions
Paper Roll Hardness Tester
Made in Switzerland
... more than 50 years of know-how you can measure!
Operating Instructions
1.
Getting Started
3
2.
2.1
2.2
2.3
2.4
Safety and Liability
General Information
Liability
Safety Instructions
Correct Usage
4
4
4
4
4
3.
3.1
3.2
3.3
3.4
3.5
3.6
3.7
Real Tests Preparation
Define a Roll ID for the Test Series
Measure the Roll Hardness Profile
Terminate the Series and review
Entering a Roll ID manually
Accept or modify limits
Review list
5
6
6
7
7
8
8
9
4.
Technical Specifications
9
5
5.1
5.2
Part Numbers and Accessories
Units
Parts and Accessories
10
10
10
6.
6.1
6.2
6.3
6.4
Maintenance and Support
Self test function
Checking the calibration on the anvil
Support Concept
Standard Warranty and Extended Warranty
10
10
10
10
10
7
7.1
7.2
7.3
7.4
7.5
7.6
7.7
7.8
7.9
Paperlink Software
Starting Paperlink
Viewing the data Adjusting the max/min settings Adjusting the date and time Exporting data
Deleting and restoring data
Further Functions
Pre-define Roll IDs
Technical Information Paperlink software
11
11
11
13
13
13
14
14
15
15
1. Getting Started
Note: First time user: Complete the tutorial OR see a demo by a qualified Proceq
representative. If you only need to do simple measurements, please go to chapter
3.3.
Charging the PaperSchmidt
The PaperSchmidt uses a built-in Lithium Polymer accumulator. In case of a low battery alert, you
can still record approximately 100 to 200 impacts. When the display indicates a low battery, connect
the PaperSchmidt to the charger or to a PC. Approximately 90 minutes of charging will bring your
PaperSchmidt to its full capacity. The PaperSchmidt can be recharged at any time.
Power ON
Press the SELECT button to power on.
Plunger
USB port
LC Display
SELECT button
Check the calibration of the hammer
Perform a calibration check on your hammer as described in chapter 6.
Congratulations! Your new PaperSchmidt is fully operational and you can now continue with your
measurements.
Performing a reset
In case a reset is required, this can be done by performing an impact with the select button
pressed.
Note: This will remove any lower and upper limits that may have been set.
Note: Should your instrument be fully discharged, start with a reset after recharging.
Power OFF
The PaperSchmidt will shut down automatically after 5 minutes of inactivity.
Standards and Regulations Applied
The following standard has been applied in the PaperSchmidt.
TAPPI T 834 om-07 (Determination of containerboard roll hardness)
The following recommendation has been taken into consideration in the PaperSchmidt.
TAPPI TIP 1004-01 (TAPPI Roll Number for inventory/tracking systems and bar codes)
This standard recommends a 12 digit roll number. The PaperSchmidt is able to accept roll identifier
names (Roll IDs) in this format.
3
© 2009 by Proceq SA
2. Safety and Liability
2.1
General Information
This manual contains important information on the safety, use and maintenance of the PaperSchmidt.
Read through the manual carefully before the first use of the instrument. Keep the manual in a safe
place for future reference.
2.2
Liability
Our “General Terms and Conditions of Sales and Delivery” apply in all cases. Warranty and liability
claims arising from personal injury and damage to property cannot be upheld if they are due to one
or more of the following causes:
•
•
•
•
•
Failure to use the instrument in accordance with its designated use as described in this manual.
Incorrect performance check for operation and maintenance of the instrument and its components.
Failure to adhere to the sections of the manual dealing with the performance check, operation
and maintenance of the instrument and its components.
Unauthorised modifications to the instrument and its components.
Serious damage resulting from the effects of foreign bodies, accidents, vandalism and force
majeure.
All information contained in this documentation is presented in good faith and believed to be correct.
Proceq SA makes no warranties and excludes all liability as to the completeness and/or accuracy of
the information.
2.3
Safety Instructions
The equipment is not allowed to be operated by children or anyone under the influence of alcohol,
drugs or pharmaceutical preparations. Anyone who is not familiar with this manual must be supervised when using the equipment.
•
•
Carry out the stipulated maintenance properly and at the correct time.
Following completion of the maintenance tasks, perform a functional check.
2.4
Correct Usage
•
•
•
The instrument is only to be used to determine the roll hardness profile of paper and film rolls.
Replace faulty components only with original replacement parts from Proceq.
Accessories should only be installed or connected to the instrument if they are expressly authorized by Proceq. If other accessories are installed or connected to the instrument then Proceq will
accept no liability and the product guarantee is forfeit.
4
© 2009 by Proceq SA
3. Real Tests
3.1 P reparation
C omplete G etting S tarted
7.8 P re-define R oll IDs in
P aperlink and download to
hammer
3.2 Define a R oll ID for the T es t S eries
Method 1: P erform an
impact (R oll ID = C ounter)
Method 2: Manually
enter R oll ID
Method 3: S elect a predefined R oll ID
3.6 Ac c ept or modify limits
3.3 Meas ure the R oll Hardnes s P rofile
3.4 T erminate the S eries and review
5
© 2009 by Proceq SA
3.1
Preparation
If desired, define Roll IDs for the paper rolls under test using Paperlink and download these onto the
PaperSchmidt (See 7.8)
3.2
Define a Roll ID for the Test Series
The data list is the starting point for a new test series. Navigate within the data list by rolling the PaperSchmidt either away from you or towards you.
The upper section contains empty series with
pre-defined Roll IDs.
The lower section contains completed series
which can be reviewed.
There are 3 methods to define a Roll ID for a new test series.
Method 1 – Perform an impact
It is not necessary to define a specific Roll ID. Simply begin a measurement series by performing an
impact directly from the data list. Whatever upper/lower limits were previously set will be adopted
automatically for this series. In this case the actual 4-digit value of the internal impact counter is used
as a Roll ID and will appear in the review list once the series has been terminated.
Roll ID = Counter
Method 2 – Manual entry of the Roll ID
Scroll to “NEW” and press the SELECT button.
Enter the Roll ID on the PaperSchmidt (see 3.5)
Accept or modify the upper/lower limits (see 3.6)
and begin measuring the roll hardness profile.
Method 3 – Select a pre-defined Roll ID
Scroll to the desired pre-defined Roll ID in the upper section of the data list and press the SELECT
button.
Accept or modify the upper/lower limits (see 3.6)
and begin measuring the roll hardness profile.
Note: A single pre-defined name can be used for a whole batch of rolls. In this case,
each time you move on to the next roll, select the same name again from the review
list and the device will increase an index which is used to identify that particular roll
in the list.
6
© 2009 by Proceq SA
3.3
Measure the Roll Hardness Profile
Each factory has its own recommendations for measuring the roll hardness. However, the method
is very similar in all cases and some general principles can be applied. Begin at one end of the roll,
not too close to the edge. To carry out an impact, place the hammer perpendicular to the paper roll.
Push the hammer against the surface of the roll at a moderate speed until the impact is triggered. (For
best results, impact at the same angle and apply the same pressure for each reading.) Repeat this
procedure at a regular spacing to obtain a profile across the entire roll.
The rebound value is displayed on the screen after each
impact along with the number of impacts in the current
series. (A series may contain up to 99 impacts.)
“TIP” the plunger to display the running profile. The minimum and maximum measured values are displayed on
the right. (TIP = Slightly depress the plunger, but not far
enough to impact.)
Pressing the SELECT button gives you the option of terminating a series (SUM icon) or deleting the last impact
if it was an obvious outlier (Dustbin icon). Scroll to the
desired icon and press the SELECT button again.
A confirmation screen prevents terminating a series prematurely. Use cancel (X-symbol) or confirm (tick-symbol).
If an outlier is deleted, the display returns to the previous
value and the series counter is reduced by one.
3.4
Terminate the Series and review
At the end of the roll, terminate the series by pressing the SELECT button. Then press on the “Sum”
icon as shown above and confirm the action. This will take you to the statistics screen where you can
review all of the significant data for the test series.
Mean R value
Standard deviation
Range (Max-Min)
No. of impacts
Tilt the PaperSchmidt to show the roll hardness profile. The screen can show a roll hardness profile
of up to 50 impacts. However, a single series may contain up to 99 impacts for very large rolls. To see
beyond the 50 impacts simply TILT the PaperSchmidt to show the impacts to the right. A marker on
the scale at the bottom of the profile shows the “50th” impact position on both screens.
50th impact
50th impact
Exit the summary display mode by pressing the SELECT button if you want to enter or select a new
roll ID. Simply proceed to a next measurement series if you don’t use specific roll IDs.
7
© 2009 by Proceq SA
3.5
Entering a Roll ID manually
Having selected “NEW” from the data list, the user may define a Roll ID for the test series manually.
The Roll ID can be up to 12 characters long. The screen begins with the last Roll ID that was entered,
or with the impact counter value following a reset.
•
The cursor position is shown inverted.
The screen can show up to 10 characters.
Arrows at the bottom indicate if there is more to the left or
right.
TILT to scroll to the character you wish to change and press the SELECT button to access the
character select screen.
The character select screen is arranged in 3 rows to
allow the user to locate the desired characters quickly.
•
•
•
ROLL and TILT to the desired character and press the SELECT button to set it.
Repeat this procedure to enter the complete Roll ID.
Scroll to the “ENTER” symbol at the far right of the Roll ID and press the SELECT button.
Deleting a character
•
•
•
TILT to scroll to the character you wish to delete and press the SELECT button to access the
character select screen.
TILT to the delete symbol and press the SELECT button. (See below)
The character is deleted. Any characters to the right of the character deleted will shift left.
The character select screen has a special symbol (highlighted), that allows the user to delete the selected character from the Roll ID
3.6
Accept or modify limits
This function is a rapid way to check if the roll hardness profile is within a pre-defined tolerance.
After selecting a pre-defined Roll ID or after entering a Roll ID manually, the actual upper and lower
limit values are displayed, e.g. 28R is the lower limit, 56R is the upper limit.
TILT to adjust the value and press SELECT.
(It may also be blank if you were previously working with no limits. To work without limits, adjust them
to 0R resp. 100R.) To accept the limits displayed press the SELECT button. To modify the limit values,
scroll the cursor to the limit you wish to change and press SELECT.
Note: If the lower limit is higher than the upper limit, they will be reversed automatically
8
© 2009 by Proceq SA
Display warnings
When carrying out a measurement (See 3.3) the display
will give a warning if any of the limits are exceeded. In
this example, the limit sign next to the R indicates that the
lower limit has been exceeded. If the upper limit has been
exceeded, the arrow points upwards.
In the roll profile view (after TIP function and in the summary view), impacts which exceed the limits will blink.
3.7
Review list
A previous series can be reviewed directly from the data list. The lower portion of the data list shows
the last 20 completed measurement series identified by name.
This symbol identifies a file which contains data.
Scroll to the series you wish to review and press the select button. You are given the option to look at
the summary data or to delete the series. If you choose to delete the series, the confirmation window
will be displayed.
If you wish to look at the summary data, you will be taken
directly to the statistics screen. (See 3.4)
Note: Only the last 20 completed measurement series can be reviewed in the data
list. The PaperSchmidt stores many more. The remaining series can only be seen
once the data has been put into Paperlink.
4. Technical Specifications
Mechanical Data
Impact energy
Hammer mass
Spring constant
Spring extension
Dimensions of housing
Dimensions (plunger visible part)
Weight
Memory Data
No. of impacts in a series
No. of series names
Memory capacity
Electrical Data
Display
Power consumption
Accumulator duty
Charger connection
Accumulator capacity
Environmental conditions
Operating temperature
Storage temperature
9
0.735 Nm
115 g
0.262 N/mm
75 mm
55 x 55 x 250 mm (340 mm to tip of plunger)
105 x ø15 mm (radius of spherical tip 25mm)
570 g
Maximum 99
50 series names. Each name can be up to 12 characters long.
Dependent on length of test series, Example 1: 401 series with 10
values per series, Example 2: 246 series with 20 values per series
17 x 71 pixel, graphic
~13 mA measuring, ~4 mA set-up and review, ~0.02 mA idle
> 5000 impacts between charges
USB type B (5V, 100 mA)
~150 mAh
0 to 50°C
-10 to 70°C
© 2009 by Proceq SA
5
Part Numbers and Accessories
5.1
Units
Part No.
342 10 000
5.2
Description
PaperSchmidt consisting of battery charger with USB-cable, CD with Paperlink
software, carrying strap, documentation, carrying bag
Parts and Accessories
341 10 113
342 10 310
342 10 400
341 80 105
351 90 018
341 80 112
341 80 203
Cover for USB port
Plunger complete with plunger spring
Testing Anvil PaperSchmidt
Carrying bag
USB cable 1.8m
USB charger, global
Carrying strap (loop)
Please contact your Proceq business unit or authorized service centre for pricing and availability.
6. Maintenance and Support
6.1 Self test function
The PaperSchmidt performs a number of self checks and gives an alert when there is a problem.
These three alerts show the
battery status:
Low battery, Battery full,
Battery charging
6.2
Low impact energy: The impact
spring is out of tolerance and should
be replaced. It is recommended to
return the PaperSchmidt to an authorized service centre.
Checking the calibration on the anvil
The PaperSchmidt checks for correct impact energy with each and every impact. Nevertheless, it is
recommended to check the calibration on a regular basis.
• Perform a series of 10 impacts on the anvil (Proceq Part Nr. 342 10 400)
• Check that the average R-value lies within the tolerance shown on the label.
• If it is out of tolerance, it should be returned to an authorized service centre for recalibration.
The EURO anvil p/n 310 09 040 can also be used.
6.3
Support Concept
Proceq is committed to providing a complete support service for this instrument by means of our
global service and support facilities. It is recommended that the user register the product on www.
proceq.com to obtain the latest on available updates and other valuable information.
6.4
Standard Warranty and Extended Warranty
The standard warranty covers the electronic portion of the instrument for 24 months and the mechanical portion of the instrument for 6 months. An extended warranty for one, two or three years for
the electronic portion of the instrument may be purchased up to 90 days of date of purchase.
10
© 2009 by Proceq SA
7
7.1
Paperlink Software
Starting Paperlink
Locate the file “Paperlink_Setup” on your computer or on the CD and click on it. Follow the instructions you see on the screen.
Application settings
The menu item “File – Application settings” allows the user to select the language and the date and
time format to be used.
Connecting to the PaperSchmidt
Connect the PaperSchmidt to a USB port, then click on the icon to bring up below window:
Leave the settings as default or if
you know the COM port you can enter it manually.
Click on “Next >”
The USB driver installs a virtual COM port which is used to communicate with the PaperSchmidt.
When a PaperSchmidt has been found, you will see another window. Click on the “Finish” button to
establish the connection.
7.2
Viewing the data
The data stored on your PaperSchmidt will be displayed on the screen:
11
© 2009 by Proceq SA
The test series is identified by the “Impact counter” value and by a “Roll ID” if assigned.
• The user may alter the Roll ID directly in the “Roll ID” column.
• The “Date & Time” when the measurement series was made.
• The “Mean value”.
• The “Total” number of impacts in this series.
• The “Lower limit” and “Upper limit” set for that series.
• The “Range” of the values in this series.
• The “Std dev.” Standard deviation of the measurement series.
Click on the double arrow icon in the impact counter column to see the profile.
If limits have been set, they are displayed as above with a blue band. It is also possible to adjust the
limits directly in this window by clicking on the blue limit values.
Note: The user may also add a comment to the measurement series. To do so, click
on “Add”.
Note: The user may alter the order in which the measurements are shown. Click on
“measurement order” to switch to “ordered by value”.
Summary window
In addition to the above “Series” view, Paperlink also offers a “Summary” window. This is useful when
comparing a batch of rolls of the same type. Click on the respective tab to switch between views.
Note: To include or exclude a series from the summary, click on the summary symbol
in the impact counter column. This symbol is either “black” or “greyed out”, which
shows whether or not the particular series is included in the summary. The summary
view can be adjusted in a similar way to the detailed view of a series.”.
12
© 2009 by Proceq SA
7.3
Adjusting the max/min settings
Maximum and Minimum settings that were used in the PaperSchmidt at the time of the measurement
series can be adjusted subsequently in Paperlink. This can be done either by right clicking directly
on the item in the appropriate column, or by clicking on the blue setting item in the detailed view of a
measurement series. In each case a selection box will appear with the choice of setting.
7.4
Adjusting the date and time
Right click in the date and time
column.
The time will be adjusted for the
selected series only.
7.5
Exporting data
Paperlink allows you to export selected series or the entire project for use in third party programs.
To export selected series, click in the table of the measurement series you wish to export. It will be
highlighted as shown.
Click on the “Copy as text” icon. The data for this measurement series is copied to the
clipboard and can be pasted into another program such as Excel. If you wish to export
the individual impact values of the series, you have to display them by clicking on the
double arrow icon as described above before you “Copy as text”.
Click on the “Copy as picture” icon – For exporting the selected items only into another
document or report. This performs the same action as above, but the data is exported in
the form of a picture and not as text data.
“Export as text” icon – Allows you to export the entire project data as a text file that can
then be imported into another program such as Excel. Click on the “Export as text” icon.
This will open the “Save As” window where you can define the location in which you wish
to store the *.txt file.
Note: Paperlink has two “tabs” with two display formats. “Series” and “Summary”.
When performing this operation, the project data will be exported in the format defined by the active “Tab”, i.e. either in “series” or “summary” format.
To open the file in Excel, locate the file and right click on it and “Open with” – “Microsoft Excel”. The
data will be opened in an Excel document for further processing. Or drag and drop the file into an
open Excel window.
13
© 2009 by Proceq SA
7.6
Deleting and restoring data
The menu item “Edit – Delete” allows you to delete one or more selected series from the downloaded
data.
Note: This does not delete data from the PaperSchmidt, only data in the current
project.
The menu item “Edit – Select all”, allows the user to select all series in the project for exporting etc.
Restoring original downloaded data
Select the menu item: “File – Restore all original data” to restore the data to the original format as
it was downloaded. This is a useful feature if you have been manipulating the data, but wish to go
back to the raw data once again. A warning will be given to say that the original data is about to be
restored. Confirm to restore.
Note: Any names or comments that have been added to series will be lost.
Deleting data stored on the PaperSchmidt
Select the menu item “Device – Delete all Data on Device” to delete all data stored on the PaperSchmidt. A warning will be given to say that the data is about to be deleted on the device. Confirm
to delete.
Note: Please note, this will delete every measurement series and cannot be undone.
It is not possible to delete individual series.
7.7
Further Functions
The following menu items are available via the icons at the top of the screen:
“Upgrade” icon - Allows you to upgrade your firmware via the Internet or from local files.
“Open project” icon – Allows you to open a previously saved project. It is also possible to
drop a *.pqr file onto Paperlink to open it.
“Save project” icon – Allows you to save the current project. (Note this icon is greyed out if
you have opened a previously saved project.
“Print” icon – Allows you to print out the project. You may select in the printer dialog, if you
want to print out all of the data or selected readings only.
14
© 2009 by Proceq SA
7.8
Pre-define Roll IDs
Select the menu item “Device - Series names…” to create pre-defined roll names which can be
downloaded onto the PaperSchmidt before testing a batch of rolls.
This will bring up the following window.
Simply type in the names for the series and they are transferred automatically onto the PaperSchmidt.
Up to 50 series names can be defined in this way. Each name can be up to 12 characters long.
Note: Please note, that also “copy and paste” works with data from Excel.
7.9
Technical Information Paperlink software
System requirements: Windows XP, Windows Vista, USB-Connector. An Internet connection is necessary for automatic updates, if available. An Internet connection is necessary for firmware updates
(using PqUpgrade), if available. PDF Reader is required to show the “Help Manual”.
15
© 2009 by Proceq SA
Proceq Europe
Proceq Rus LLC
Ringstrasse 2, Postfach 336
CH - 8603 Schwerzenbach
Switzerland
Tel.: +41 ( 0 )43 355 38 00
Fax: +41 ( 0 )43 355 38 12
[email protected]
Ul. Kompozitorov, 10
lit.A, pom.345-N
194356 St. Petersburg, Russia
Phone: + 7 812 335 92 34
Fax: + 7 812 335 92 34
[email protected]
Proceq USA, Inc.
Proceq Middle East
117 Corporation Drive
Aliquippa, PA 15001, USA
Phone +1 724 512 0330
Fax +1 724 512 0331
[email protected]
P.O. Box: 262419
Jebel Ali Free Zone
Dubai, United Arab Emirates
Phone: +971 4 8865877
[email protected]
Proceq Asia Pte Ltd
Proceq SAO Ltd.
12 New Industrial Road
#02 - 02A Morningstar Centre
Singapore 536202
Phone +65 - 6382 – 3966
Fax +65 - 6382 - 3307
[email protected]
South American Operations
Rua Haddock Lobo, 746 - 5 andar
Cerqueira Cesar, São Paulo - SP, Brasil
Cep. 01414-000
Phone: +55 11 3083 38 89
[email protected]
Proceq Asia Pte Ltd Shanghai Rep Office
Unit G, 10th Floor, Huamin Empire Plaza
No. 728, Yan An Road(W)
Shanghai 200050
Tel: +86 21-63177479 / 62122680 / 62122698
Fax: +86 21 63175015
[email protected]
www.proceq.com
Subject to change without notice.
Copyright © 2009 by Proceq SA, Schwerzenbach
820 342 01 E ver 10 2009
... more than 50 years of know-how you can measure!