1
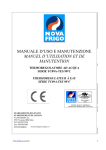
GB - ENGLISH
Operating Instructions
Dear Customer,
Many thanks for the confidence you have shown in us with the purchase of your new JET-machine. This manual has been
prepared for the owner and operators of a JET JTS-315 table saw to promote safety during installation, operation and
maintenance procedures. Please read and understand the information contained in these operating instructions and the
accompanying documents. To obtain maximum life and efficiency from your machine, and to use the machine safely, read this
manual thoroughly and follow instructions carefully.
…Table of Contents
1. Declaration of conformity
2. JET Warranty
3. Safety
Authorized use
General safety notes
Remaining hazards
4. Machine specifications
Technical data
Noise emission
Contents of delivery
Description of machine
5. Transport and start up
Transport and installation
Assembly
Dust connection
Mains connection
Starting operation
6. Machine operation
7. Setup and adjustments
Changing saw blade
Mounting the raving knife
Mounting the saw guard
Rising and tilting sawblade
Rip fence setup
Adjusting 90°stop
Adjusting sawblade parallel
8. Maintenance and inspection
9. Troubleshooting
10. Available accessories
11. „Safe operation” ........ appendix A
1. Declaration of conformity
On our own responsibility we hereby
declare that this product complies
with the regulations* listed on page 2.
Designed in consideration with the
standards**. CE type examination***
conducted by****.
The JET Group makes every effort to
assure that its products meet high
quality and durability standards and
warrants to the original retail
consumer/purchaser of our products
that each product be free from
defects in materials and
workmanship as follows:
2 YEARS ON ALL MECHANICAL
PARTS
1 YEAR ON ALL ELECTRICAL
PARTS:
This Warranty does not apply to
defects due to directly or indirectly
misuse, abuse, negligence or
accidents, normal wear-and-tear,
repair or alterations outside our
facilities, or to a lack of maintenance.
The Jet group limits all implied
warranties to the period specified
above, from the date the product was
purchased at retail.
To take advantage of this warranty,
the product or part must be returned
for examination, postage prepaid, to
an authorized repair station
designated by our office.
Proof of purchase date and an
explanation of the complaint must
accompany the merchandise.
If our inspection discloses a defect,
we will either repair or replace the
product, or refund the purchase price
if we cannot readily and quickly
provide a repair or replacement, if
you are willing to accept a refund.
We will return repaired product or
replacement at JET’S expense, but if
it is determined there is no defect, or
that the defect resulted from causes
not within the scope of JET’S
warranty, then the user must bear the
cost of storing and returning the
product.
The JET Group reserves the right to
make alterations to parts, fittings, and
accessory equipment which they may
deem necessary for any reason
whatsoever.
3. Safety
2. JET Group Warranty
3.1 Authorized use
This machine is designed for sawing
wood, wood derived materials as well
as similar to be machined hard
plastics only.
Machining of other materials is not
permitted and may be carried out in
specific cases only after consulting
with the manufacturer.
No metal workpieces may be
machined.
Do not cut round stock without
suitable jigs or fixtures. The rotating
saw blade could turn the work-piece.
The proper use also includes
compliance with the operating and
maintenance instructions given in this
manual.
The machine must be operated only
by persons familiar with its operation,
maintenance and repair and who are
familiar with its hazards.
The required minimum age must be
observed
The machine must only be used in a
technically perfect condition
When working on the machine, all
safety mechanisms and covers must
be mounted.
In addition to the safety requirements
contained in this operating
instructions and your country’s
applicable regulations, you should
observe the generally recognized
technical rules concerning the
operation of woodworking machines.
Any other use exceeds authorization.
In the event of unauthorized use of
the machine, the manufacturer
renounces all liability and the
responsibility is transferred
exclusively to the operator.
3.2 General safety notes
Woodworking machines can be
dangerous if not used properly.
Therefore the appropriate general
technical rules as well as the
following notes must be observed.
Read and understand the entire
instruction manual before attempting
assembly or operation.
Keep this operating instruction close
by the machine, protected from dirt
and humidity, and pass it over to the
new owner if you part with the tool.
No changes to the machine may be
made.
Daily inspect the function and
existence of the safety appliances
before you start the machine.
Do not attempt operation in this case,
protect the machine by unplugging
the mains cord.
Remove all loose clothing and
confine long hair.
Before operating the machine,
remove tie, rings, watches, other
jewellery, and roll up sleeves above
the elbows.
Wear safety shoes; never wear
leisure shoes or sandals.
Always wear the approved working
outfit
Always wear ear protection when
operating a table saw.
Do not wear gloves while operating
this machine.
For the safe handling of sawblades
wear work gloves.
(smaller than 120mm) use as pushstick or push-wood.
Never reach into the machine while it
is operating or running down.
Push stick or push wood must stay
with the machine when tool is stored
and not in use.
Never leave a running machine
unattended. Before you leave the
workplace switch off the machine.
Always use the mitre gauge for
cutting off.
Do not operate the electric tool near
inflammable liquids or gases.
Observe the fire fighting and fire alert
options, for example the fire
extinguisher operation and place.
The use of dado-blades and groove
cutters is not permissible.
Make sure that small cut off
workpieces will not be caught and
thrown away by the rising saw blade
teeth.
Remove cut and jammed workpieces
only when motor is turned off and the
machine is at a complete standstill.
Install the machine so that there is
sufficient space for safe operation
and work piece handling.
Keep the inside of the cabinet clear
of sawdust and wood chips. Make
sure the motor fan and fan cover are
kept clear of sawdust.
Keep work area well lighted.
Observe the chapter “save operation”
in this manual.
The machine is designed to operate
in closed rooms and must be placed
stable on firm and levelled ground.
Check the correct rotation of the
sawblade before operating the
machine.
Make sure that the power cord does
not impede work and cause people to
trip.
Do not start cutting operation until
sawblade is at full speed.
Never use the power cord to carry the
tool.
Do not expose the power cord to
heat, oil or any sharp corners.
Do not pull the cord to unplug.
Control the stopping time of the
machine, it may not be longer than
10 seconds.
Do not use side pressure to stop
rotating blade.
Insure that the work piece does not
roll when cutting round pieces.
Use suitable table extensions and
supporting aids for difficult to handle
workpieces.
Always hold and guide the
workpieces safely during machining.
Pay particular attention to instructions
on reducing the risk of kickback.
The supplied raving knife must
always be used. Adjust the space to
the sawblade to be max 5mm.
Do not perform any operation for
which the tool has not been designed
for, e.g. do not use this table saw to
cut logs or firewood.
Do not perform any operation
freehand.
Never reach around or over the saw
blade.
When ripping narrow workpieces
If the tool is used outdoor, make sure
that the extension cord is rated for
outdoor use.
Keep the floor around the machine
clean and free of scrap material, oil
and grease.
Stay alert!
Give your work undivided attention.
Use common sense.
Pull the mains plug if the tool is not in
use.
Pull the mains plug prior to any
maintenance or change of accessory
(e.g. sawblade).
Do not use the machine in a dump
environment and do not expose it to
rain.
Wood dust is explosive and can also
represent a risk to health.
Dust form some tropical woods in
particular, and from hardwoods like
beach and oak, is classified as a
carcinogenic substance.
Always use a suitable dust extraction
device
Before machining, remove any nails
and other foreign bodies from the
work piece.
Specifications regarding the
maximum or minimum size of the
work piece must be observed.
Cut thin or thin-walled work-piece
only with fine-toothed saw blades.
Never cut several work-pieces at the
same time – and also no bundles
containing several individual pieces.
Risk of personal injury if individual
pieces are caught by the saw blade
uncontrolled.
When cutting round stock, use a
suitable jig to prevent the work-piece
from turning.
Never cut work-pieces containing the
following materials:
-Ropes, strings, cords, cables and
wires.
Do not force the power tool. It will do
a better and safer job and give you
much better service if it is used at the
rate for which it was designed.
Do not remove chips and work piece
parts until the machine is at a
complete standstill.
Never operate with the guards not in
place – serious risk of injury!
Before starting the machine make
sure that operating and measuring
tools are removed from the machine.
Connection and repair work on the
electrical installation may be carried
out by a qualified electrician only.
Do not operate the machine when
you are tired.
Do not operate the machine under
the influence of drugs, alcohol or any
medication. Be aware that medication
can change your behaviour.
Always unwind any extension cords
fully.
Keep children and visitors a safe
distance from the work area.
Have a damaged or worn cord
replaced immediately.
Do not use the machine when the
ON-OFF switch does not operate
correctly.
The use of accessories other than
those recommended in this manual
can create a safety hazard.
Make all machine adjustments or
maintenance with the machine
unplugged from the power source.
When installing a new sawblade
make sure that it matches the raving
knife.
The raving knife thickness must be in
between sawblade body thickness
and width of cut.
Make sure that the sawblade is
suitable for the work piece material to
be cut.
Use only sawblades according to
EN 847-1
Never use sawblades made from
High Speed Steel (HSS).
Remove defective sawblades
immediately.
A worn table insert must be replaced.
3.3 Remaining hazards
When using the machine according
to regulations some remaining
hazards may still exist
The moving sawblade in the work
area can cause injury.
Broken saw blades can cause
injuries.
Thrown workpieces can lead to injury
Wood chips and sawdust can be
health hazards. Be sure to wear
personal protection gear such as
safety goggles ear- and dust
protection.
Use a suitable dust exhaust system.
The use of incorrect mains supply or
a damaged power cord can lead to
injuries caused by electricity.
4. Machine specifications
4.1 Technical data
Machine Table
550x800 mm
Rear table extensions
550x800 mm
Sawblade diameter
315 mm
Blade bore diameter
30 mm
Blade body thickness
1,8-2,2 mm
Raving knife thickness
2,3 mm
Blade speed
2800 rpm
Cutting height & 90°/45° max90/60mm
Tilting range of blade
90°- 47 °
Dust port diameter
100 mm
Working height
800 mm
Weight
50 kg
Mains
230V ~1/N/PE 50Hz
Motor input power
1600W S1-100%
Reference current
7,0 A
Extension cord (H07RN-F) 3x1,5mm²
Installation fuse protection
16A
Isolation class
I
Mains
400V ~3L/PE 50Hz
Motor input power
2000W S1-100%
Reference current
3,5 A
Extension cord (H07RN-F) 4x1,5mm²
Installation fuse protection
16A
Isolation class
I
4.2 Noise emission
Determined according to EN
1807:1999 (Inspection tolerance 4
dB)
Work piece plywood 16mm:
Fig 1
A…...Saw guard
Acoustic power level (acc. EN 3746):
Idling
99,6 dB (A)
Operating
104,8 dB (A)
B…..Table insert
Acoustic pressure level (EN 11202):
Idling
86,7 dB (A)
Operating
95,5 dB (A)
D…..Carry handle
The specified values are emission
levels and are not necessarily to be
seen as safe operating levels
This information is intended to allow
the user to make a better estimation
of the hazards and risks involved.
4.3 Content of delivery
Machine stand
Rear table extension
Rip fence
Sawblade dia 315 mm
Raving knife
Saw guard
Dust connection hose and Y-adapter
2 Wheels
2 Carry handles
Push stick
Operating tools
Operating manual
Spare parts list
4.4 Description of machine
C….On/Off switch
E….. Dust connection hose
F….. Raving knife
G….. Rip fence
H…. Tilting handle
I…. Blade rising handle
J…...Foldable leg stand
5. Transport and start up
5.1 Transport and installation
Never lift the tool on it’s guards.
The sawblade must be covered by
the saw guard during transport.
The machine is designed to operate
in dry rooms and must be placed
stable on firm and levelled ground.
The machine can be bolted down if
required.
For packing reasons the machine is
not completely assembled.
WARNING:
To avoid injury, if any parts are
missing, do not attempt to assemble
the machine, do not plug in the power
cord, do not turn the switch on until
the missing parts are obtained and
installed correctly.
5.2 Assembly
Assemble tool in strict accordance
with these instructions. Only if you
follow the instructions exactly does
the machine conform to the safety
regulations and can be safely
operated.
to attach the aluminium profile
(G) to the rip fence body
If you notice any transport damage
while unpacking, notify your supplier
immediately. Do not operate the
machine!
Dispose of the packing in an
environmentally friendly manner.
Clean all rust protected surfaces with
a mild solvent.
Requirements for machine
assembly:
-Philips screwdriver
-22mm wrench
-17mm wrench
-10mm wrench
-8mm wrench
-pair of work gloves
Fig 4
Install dust port:
Attach the dust port with 3 taping
screws (M, Fig 5).
Fig 7
Install rear extension table:
Fit the rear table extension (X, Fig 8).
Stand assembly:
The four legs have been folded
before shipment.
To assemble the stand:
- unfold the four legs ( J, Fig 2) and
tighten the nuts securely.
- insert the short crossbeams and
tighten the nuts.
Fig 5
Install switch:
Fit the switch (C, Fig 6) on the left
front leg, using two M4 self-locking
nuts and two M4X60 screws.
Fig 8
Fig 2
- insert the short crossbeams (Fig 3)
and tighten the nuts
Fig 6
Install saw blade:
See chapter 7.1
Fig 9
Install raving knife:
See chapter 7.2
Install table insert:
Position the table insert into the
Table top, and lock with 6 screws.
Install blade guard:
See chapter 7.3
Fig 3
NOTE: The carriage bolts (L, Fig 4)
must be positioned in the groove to
fasten through wing nut.
Install rip fence carrier:
Attach the rip fence carrier to the
machine table front with
-2 Carriage bolts M6X20
- 2 Nuts M6
Install rip fence:
Use 2 bots and wing nuts (W, Fig 7)
Attach two support arms (Y, Fig 10).
Adjust the table to be level and
tighten the nuts.
electrical equipment may only be
carried out by qualified electricians.
5.5 Starting operation
You can start the machine with the
green ON button. The red OFFbutton on the main switch (C, Fig 1)
stops the machine.
Fig 10
Install wheels:
Attach the wheels (X, Fig 11) with 4
bolts and nuts.
Correct working position:
In front of the machine standing out
of the line of cutting (danger zone).
Feed the work piece towards the saw
blade in the direction of the saw line.
Push the work piece steadily forward;
complete the cut as a single
movement.
Support long and wide workpieces
with helping roller stands.
Install carry handles:
Attach the carry handles (D, Fig 11)
with 2 bolts to the front legs.
Operating hints:
5.3 Dust connection
Ensure that the saw blade protective
cover is in the correct position before
you start sawing.
Attach the connecting hose to the
saw guard and the Y-piece
A 100mm dust collection hose can be
connected.
5.4 Mains connection
Mains connection and any extension
cords used must comply with
applicable regulations.
The mains voltage must comply with
the information on the machine
licence plate.
When ripping narrow workpieces
(width less than 120mm) use a pushstick (Fig 12) or push-wood.
6. Machine operation
Hands placed flat on the work piece
outside the cutting area.
Before initial operation, the machine
must be connected to a dust
extractor. The suction should switch
on automatically when the saw is
switched on.
Do not perform any grooving,
tenoning or splitting operations on
this machine.
In case of machine overload the
motor overload cut-off will react.
After appr.10 min of cooling the
machine can be started again.
Work piece handling:
Fig 11
freehand.
Always observe the safety
instructions and adhere to the
current regulations.
The cutting blade must first reach the
maximum rpm before cutting may
begin.
Fig 12
Make sure that small cut off
workpieces will not be caught and
thrown away by the rising saw blade
teeth.
Remove cut and jammed workpieces
only when motor is turned off and the
machine is at a complete standstill.
Pay particular attention on reducing
the risk of kickback.
The supplied raving knife must
always be used.
Inspect for correct adjustments.
For the authorized use of the
machine observe the appendix A
“safe operation“
(on the last pages of this operating
manual)
(on the last pages of this operating
manual)
A.1.: Ripping
A.2.: Ripping of narrow stock
A.3.: Crosscutting on rip fence
Attention:
A.4.: Mitre cutting
The condition of the blade should be
checked before each machining
process.
Work only with a sharp and flawless
sawblade.
A.5.: Ripping of big board
Never use a sawblade rated with a
blade speed lower than the machine.
Use a suitable wedge to prevent
round timber from turning under the
pressure of the cut
The mains connection must have a
16A surge-proof fuse.
Use suitable table extensions and
supporting aids for difficult to handle
workpieces.
Only use connection cables marked
H07RN-F
Always hold and guide the
workpieces safely during machining.
Connections and repairs to the
Do not perform any operation
7. Setup and adjustments
General note:
Setup and adjustment work may
only be carried out after the
machine is protected against
accidental starting by pulling the
mains plug.
-centring flange (O)
7.1 Changing sawblade
-saw blade (P)
The sawblade has to meet the
technical specification.
Use only sawblades according to
EN 847-1
Check sawblade for flaws (cracks,
broken teeth, bending) before
installation. Do not use faulty
sawblades.
-tightening flange (Q)
The sawblade teeth must point in
cutting direction (down)
The supplied raving knife must
always be used.
Always wear suitable gloves when
handling sawblades.
Disconnect saw from power source,
unplug!
WARNING:
When installing or changing saw
blade, always disconnect saw from
power source, unplug!
The raving knife (F, Fig 15) is
clamped with 1 nut (U).
-left handed nut (R)
Reinstall the table insert and the saw
guard.
Use the front handle (I, Fig 1)to raise
the sawblade.
Use the tilting handle (H, Fig 1) to tilt
the sawblade. Tighten knob to lock in
place.
Start the machine with care.
7.5 Rip fence setup
7.2 Mounting the raving knife
Rip fence setup shall never be
performed when the machine is
running.
Use 2 bots and wing nuts (W, Fig 1 7)
to attach the aluminium profile (G) to
the rip fence body
Remove the saw guard (A, Fig 1))
and table insert (B).
Raise sawblade fully.
Loosen the arbor nut while stopping
the arbor against rotation with the
supplied tools (S, T, Fig 13)
Fig 15
Adjust the space between sawblade
teeth and raving knife to be 2 to
5mm.
Well tighten the locking nut (U).
7.3 Mounting the saw guard
Fig 13
Attention: left hand thread.
Remove the arbor nut (R, Fig 14 and
flange (Q).
The saw guard must always be used.
Attach the saw guard (A, Fig 16) to
the raving knife (F) with 1 carriage
bolt, washer and wing nut
Fig 17
Note:
The rip fence profile can be placed
flat and adjusted in length.
-Use in upright position (Fig 17) for
cutting wide stock:
-The cutting of small workpieces
(width less than 120mm) and tilted
cuts shall only be performed with the
rip fence profile placed flat (Fig 18).
Fig 16
Fig 14
Place saw blade(P) on arbor shaft
making sure teeth point down at the
front of the saw.
Reinstall flange and arbor nut and
securely tighten.
Order for installation:
-adjusting washer (N)
Fig 18
The saw guard must be lowered to
the work piece to minimise the
amount of exposed teeth.
Start the machine with care.
7.4 Rising and tilting of sawblade
7.6 Adjusting 90°stop
Setup adjustments of the sawblade
shall never be performed when the
machine is running.
The positive stop is adjusted at the
factory.
If out of alignment:
Disconnect saw from the power
source, unplug.
Readjust the positive 90° stop.
only be performed by a trained
person.
Defective safety devices must be
replaced immediately.
7.7 Adjusting sawblade parallel
Check saw blades regularly for faults.
Replace a defective sawblades
immediately.
The sawblade is adjusted parallel to
the machine table at the factory.
9. Trouble shooting
If out of alignment:
Disconnect saw from the power
source, unplug.
Motor doesn’t start
*No electricitycheck mains and fuse.
Loosen the screws on the tabletop
(V, Fig 19) and readjust saw unit.
*Defective switch, motor or cordconsult an electrician.
*Overload has reactedWait and start again.
Fig 19
8. Maintenance and inspection
General notes:
Maintenance, cleaning and repair
work may only be carried out after
the machine is protected against
accidental starting by pulling the
mains plug.
Repair and maintenance work on the
electrical system may only be carried
out by a qualified electrician.
Consult a qualified repair shop if a
malfunction or damage occurs to this
tool, including sawblades and guards.
Cleaning:
Clean the machine regularly.
Inspect the proper function of the
dust extraction daily.
Keep the inside of the cabinet clear
of sawdust and wood chips.
All protective and safety devices
must be re-attached immediately
after completed cleaning, repair and
maintenance work.
Defective safety devices must be
replaced immediately.
Saw blades:
The servicing of saw blades should
mitre gauge.
Fig 20
Refer to the JET-Pricelist
for various saw blades.
11. Safe operation
Machine vibrates excessively
*Stand on uneven flooradjust stand for even support.
See appendix A (on the last pages of
this operating manual)
*dust on saw flangesclean saw arbor and flanges.
A.1.: Ripping
*defective sawblade replace sawblade immediately
A.2.: Ripping of narrow stock
Cut is not accurately square
*90° stop not adjusted correctlycheck with square and adjust stop.
A.4.: Mitre cutting
Material binds blade when
ripping
*Rip fence not parallel to sawbladecheck and adjust rip fence.
*Wrapped woodselect another piece of wood.
*Excessive feedratereduce feedrate.
Material kicked back from
blade
*Fence not aligned with sawbladecheck and adjust rip fence.
*Raving knife not in placehigh danger, mount immediately with
guard.
Cutting surfaces is bad
*Wrong sawblade used
*Blade mounted backwards
*resin collection on sawblade
*sawblade is dull
*work piece inhomogeneous
*Feed pressure too highDo not force the work piece.
10. Available accessories
(A, Fig 20) Stock No.: 10000811
Right table extension 550 x 800mm
including rip fence base extension.
(B, Fig 20) Stock No.: 10000812
Sliding table 230 x 230mm including
A.3.: Crosscutting on rip fence
A.5.: Ripping of big board