Transcript
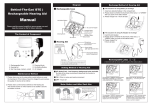
E.A.R. MINICANAL OPERATING INSTRUCTIONS
Patented Tip
with built-in
Wax Guard
Battery Holder
Tone Control
Volume Control
Microphone
1. Remove the protective seal from the battery.
2. Open the battery holder.
3. Load a #10 battery into the battery holder.
Battery can be placed into battery compartment with either side up.
Battery Life (#10) Approximately 170 hours.
Battery life will vary depending on operating
conditions. Remove battery when not in use.
E.A.R. MiniCanal™ tips come in small, medium and large sizes and
in vented and unvented styles. If you experience a “stuffed up”
feeling or if your voice sounds as if it is in a barrel, you may want
to try a vented tip. Use an unvented tip in loud situations such as
hunting or shooting. Change the tip if sound quality declines or
when sharing with another user.
2.
3.
How to use your E.A.R. MiniCanal™ Electronic Hearing Enhancer
The E.A.R. MiniCanal™ does not have a power switch. The battery holder
functions as a power switch. Each E.A.R. MiniCanal™ is identified with
red for right and blue for left and is marked Top Right or Top Left.
Open the battery holder.
Close the battery holder.
1. Turn volume control to the minimum position.
2. Open the battery holder completely so that Minimum Minimum
for left ear for right ear
the battery is disconnected.
3. Grasp the battery holder with thumb
Rotate in
and forefinger (as shown,
arrow
left). Insert the E.A.R.
direction.
MiniCanal™ straight into
the ear canal. If insertion
is difficult, rotate the E.A.R. MiniCanal™
Volume
control
toward the back of the ear (as shown,
must be
right.)
on top.
4. Close the battery holder to turn the
E.A.R. MiniCanal™ on.
Low
Low
5. Adjust the volume control to a suitable
level. Turning the control in the arrow
High
High
direction raises the volume.
6. To remove the E.A.R. MiniCanal™ from the
ear canal, open the battery holder, grasp
Left Ear
Right Ear
the battery holder and carefully pull the
E.A.R. MiniCanal™ out. Do not remove with the power turned
on (battery door closed) as this will cause acoustic feedback.
7. Open the battery holder and remove the battery.
Control Adjustment
Tone control should be set at the position
of comfortable sound by the screwdriver
on the end of the brush included in your
E.A.R. MiniCanal™ package.
Tone Control
We recommend you clean your E.A.R.
MiniCanal™ twice a week (more or less as needed) to remove any earwax that may build up as
a result of regular use.) Excessive earwax buildup can prevent your
MiniCanal™ from working. Hold as shown and brush off any earwax.
(Tips can be replaced if they can no longer be easily cleaned.)
Switching the Tip
Battery Placement
Power OFF
Power ON
Cleaning Your E.A.R. MiniCanal™
Left Ear
To replace the
tip, turn the
wide section
of the MiniCanal™ over
and remove
the old tip as
shown in the illustration, below. Fit the new tip snugly over the tip
of the main unit, return the wide section to the original position and
rotate several times so that the tip is securely fastened.
CAUTION: to prevent dislodging of the tip in the ear canal, be sure it is
correctly and tightly attached to the main unit of the E.A.R. MiniCanal™.
Factory Default Setting for Volume Control
The default setting for minimum volume
control is shown at right.
Left Ear
Right Ear
Care and Maintenance of your E.A.R. MiniCanal™
• Always keep the E.A.R. MiniCanal™ clean. Clean with dry cloth
periodically. remove any earwax with the supplied brush.
• Do not expose the MiniCanal™ to heat sources such as stoves, etc.
• Do not leave in excessively humid places.
• Operate controls with care. Do not force them.
• Do not pick the microphone with pins or pointed instruments as
damage may occur.
• There are no user-serviceable parts. See your provider for repairs.
Basic Technical Data for E.A.R. MiniCanal
Maximum Output . . . . . . . . . . . . . . . . . . . . . . . . . . . . . . .108 dB
Reference Gain . . . . . . . . . . . . . . . . . . . . . . . . . . . . . . . . .28 dB
Frequency Range . . . . . . . . . . . . . . . . . . . . . . . . . .200 - 5500 Hz
Battery Size . . . . . . . . . . . . . . . . . . . . . . . . . . . . . . . . . . . . . . .10
Estimated Battery Life . . . . . . . . . . . . . . . . . . . . . . . . .170 Hours
Color: . . . . . . . . . . . . . . . . . . . . . . . . . . . . . . . . . . . .Hunter Tan
The E.A.R. MiniCanal™ is not intended for use as a hearing aid.
Right Ear
In the factory default
position, the tone control is set to the “N”
Rotate clockwise to set
Rotate clockwise to set
position. Turning the
to “H”. Rotate counterto “H”. Rotate counterclockwise to set to “N”.
clockwise to set to “N”.
control fully clockwise
corresponds to the “H” position (Low frequencies lessened, high frequencies emphasized.) The control can only be set in the “N” or “H”
position. Do not attempt to set in an intermediate position.
E.A.R./Insta-Mold, Inc • P.O.Box 18888
Boulder, CO. 80308 U.S.A. • (800) 525-2690
(303) 447-2619 • E-mail: [email protected]
www.earinc.com • www.freehearingtest.com


