1
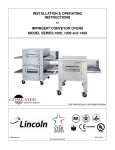
INSTALLATION & OPERATING
INSTRUCTIONS
for
IMPINGER® LOW PROFILE CONVEYOR OVENS
MODEL SERIES 1600 & 1600-000-A
TO BE SERVICED ONLY BY AUTHORIZED PERSONS
P/N: 2810081
REV: 8/9/07
IMPORTANT WARNING AND SAFETY INFORMATION
FOR YOUR SAFETY, DO NOT STORE OR USE GASOLINE OR OTHER FLAMMABLE VAPORS OR LIQUIDS
IN THE VICINITY OT THIS OR ANY OTHER APPLIANCE.
DO NOT SPRAY AEROSOLS IN THE VICINITY OF THIS APPLIANCE WHILE IT IS IN OPERATION.
WARNING: IMPROPER INSTALLATION, ADJUSTMENT, ALTERATION, SERVICE OR MAINTENANCE CAN
CAUSE PROPERTY DAMAGE, INJURY OR DEATH. READ THE INSTALLATION, OPERATING, AND
MAINTENANCE INSTRUCTIONS THOROUGHLY BEFORE INSTALLING OR SERVICING THIS EQUIPMENT.
· Obtain from your local gas provider and post in a prominent location instructions to be followed in the event gas
odors are detected.
· It is required that the oven be placed under a ventilation hood to provide for adequate air supply and ventilation.
· Minimum clearances must be maintained from all walls and combustible materials. See “spacing instructions” for
additional information.
· Keep the oven free and clear of combustible material.
· Adequate clearance for air openings to the combustion control chamber on both sides of the oven is required.
· Do not obstruct the ventilation holes in the control panels, as these provide the combustion air for the burner and
cooling air for the controls.
· The oven is to be operated only on the type of gas and/or electricity as shown on the specification plate.
· The power burner will not operate and gas will not flow through the burner without electrical power.
· This manual should be retained for future reference.
· The electrical wiring diagram is located under the control box covers.
2
Low Profile - 1600 Series Operations Manual - Dom & Int’l
PURCHASER’S RESPONSIBILITY
It is the responsibility of the purchaser:
1. To see that the gas and electric services for the oven are installed on site in accordance with the manufacturers
specification.
2. To unload, uncrate, and install the oven in its proper location; in accordance with this installation / operation
manual.
3. To see that the gas and electric services are connected properly by a qualified installer of your choice. For
installation in the State of Massachusetts: Installation of this oven must be performed by a licensed plumber or
gas fitter. All such connections must be in accordance with applicable code requirements. Refer to Page 8 for
specific code references.
4. To arrange for inspection and operation check-out by an Authorized Service Technician as described below:
Do not attempt to operate the oven until connection of utility service has been fully inspected by an Authorized
Service Technician or a Lincoln Foodservice Products, LLC Service Representative. This service is required
by Lincoln Foodservice Products, LLC in order to assist the purchaser in proper start-up of the oven on site. Please
note the specific details on the Warranty and make certain connections are made to proper utility services.
The warranty shall not apply if the oven(s) are started up and operated prior to the utilities and oven being
inspected and check out made by an Authorized Service Technician or a Lincoln Foodservice Products,
LLC Service Representative.
TABLE OF CONTENTS
WARNING AND SAFETY INFORMATION……………………………………………………………………...… 2
PURCHASER’S RESPONSIBILITY……………………………………………………………………………...… 3
UTILITY SPECIFICATIONS – MODEL SERIES 1600 & 1600-000-A – GAS & ELECTRIC……...……....… 4
MODEL NUMBER KEY……………………………………………………………………………………………… 5
SPACING REQUIREMENTS……………………………………………………………………………………...… 5
AMBIENT TEMPERATURE REQUIREMENTS…………………….…………………………………………….. 5
VENTILATION GUIDELINES…………………………………………………………………...…………………... 6
CANOPY VENTILATION RECOMMENDATIONS………………………………………………………………...6
SMOKE CANDLE TEST…………………………………………………………………………………………..… 7
RESTRAINT REQUIREMENT…………………………………………………………………………………….....7
GENERAL INFORMATION………………………………………………….…………………………………….…7
UNLOADING AND UNCRATING …………..…………………………………………………………………….... 8
CODE REFERENCE……………………….……………………………………………………………………….... 8
EXTERIOR DIMENSIONS – 1600 SERIES…………...…………….…………………………………………..… 10
EXTERIOR DIMENSIONS – 1600-000-A ……………………………………………………………………….… 11
ASSEMBLY INSTRUCTIONS………………………………………………………………………………………. 12-14
FINGER COLUMNATING PLATE IDENTIFICATION……………………………………………………………. 13
IMPINGER® CONCEPTS……..………..………………………………………………………………………….... 15
INFORMATION ON USE OF OVEN……….…………………………………………………………………...….. 15
PROGRAMMING DIGITAL ADVANTAGE 1600-000-A CONTROL PANEL…..…………………………..…. 16
DIAGNOSTIC MESSAGES – DIGITAL ADVANATGE 1600-000-A CONTROL PANEL …….…………….. 17
CONVEYOR INFORMATION – DIGITAL ADVANTAGE 1600-000-A……………………………………….... 17
FUNCTIONS – THERMAL CUT-OUT SWITCH………………………………………………………………….. 17
OVEN OPERATIONS: Start-Up and Shut Down……………………………………………………...………… 18
OPERATOR MAINTENANCE………………………………………………………………………………………. 18
PREVENTIVE MAINTENANCE……………………………………………………………………………..……… 19
CLEANING INSTRUCTIONS………………………………………………………………………………….……. 19
FINGER REMOVAL & DISASSEMBLY FOR CLEANING…………………………………………………..….. 19
IMPINGER CONVEYOR DISASSEMBLY FOR CLEANING…………………………………………………..... 20-21
HOW TO OBTAIN SERVICE…………………………………………………………………………………….…. 21
APPENDIX A: LABEL DEFINITIONS………………………………………………………………………….….. 22-23
WARRANTY………………………………………………………………………………………………………...… 24
Low Profile – 1600 Series Operations Manual – Dom & Int’l
3
IMPINGER® CONVEYOR OVENS – MODEL SERIES 1600
UTILITY SPECIFICATIONS REQUIRED – ELECTRIC
Model
Energy
Power
Voltage
Current
Phase
Hz
***1621-xxx-E
Electric
29 kW
400/230 VAC
42 Amps
3
50 Hz
1622
Electric
29 kW
120/208 VAC
81 Amps
3
60 Hz
1623
Electric
29 kW
120/240 VAC
70 Amps
3
60 Hz
1628-000-A
Electric
29 kW
380/220 VAC
44 Amps
3
50 Hz
1629-000-A
Electric
29 kW
415/240 VAC
40 Amps
3
50 Hz
Recommended Electrical
Specifications
5 Wires, 3 Poles
1N-1G
5 Wires, 3 Poles
1N-1G
5 Wires, 3 Poles
1N-1G
5 Wires, 3 Poles
1N-1G
5 Wires, 3 Poles
1N-1G
Agency
Listing
F-G
A-B-D-F
A-B-D-F
F
F
UTILITY SPECIFICATIONS REQUIRED – GAS
Model
Energy
Power
Voltage
Current
Phase
Hz
1600
Nat. Gas
110,000 BTU
120 VAC
14 Amps
1
60 Hz
1601
L.P. Gas
110,000 BTU
120 VAC
14 Amps
1
60 Hz
***1633-xxx-E
Nat. Gas
32 kW
230 VAC
4 Amps
1
50 Hz
***1634-xxx-E
L.P. Gas
32 kW
230 VAC
4 Amps
1
50 Hz
4 Amps
1
50 Hz
4 Amps
1
50 Hz
220/240
VAC
220/240
VAC
1646
Nat. Gas
110,000 BTU
1647
L.P. Gas
110,000 BTU
1650
Hong
Kong TG
33 kW
240 VAC
5 Amps
1
50 Hz
1651
Shangi TG
33 kW
240 VAC
5 Amps
1
50 Hz
1652
Brazil TG
32 kW
120 VAC
14 Amps
1
60 Hz
1600-000-A
Nat. Gas
110,000 BTU
120 VAC
14 Amps
1
60 Hz
1601-000-A
L.P. Gas
110,000 BTU
120 VAC
14 Amps
1
60 Hz
***1633-xxx-EA
Nat. Gas
110,000 BTU
230 VAC
4 Amps
1
50 Hz
***1634-xxx-EA
L.P. Gas
110,000 BTU
230 VAC
4 Amps
1
50 Hz
Agency Listing
A
B
CSA
UL
C
Recommended
Electrical
Specification
Gas
3 Wires, 1 Pole
1N-1G
3 Wires, 1 Pole
1N–1G
3 Wires, 1 Pole
1N-1G
3 Wires, 1 Pole
1N-1G
**3 Wires, 1 Pole
1N-1G
**3 Wires, 1 Pole
1N-1G
3 Wires, 1 Pole
1N-1G
3 Wires, 1 Pole
1N-1G
3 Wires, 1 Pole
1N-1G
3 Wires, 1 Pole
1N-1G
3 Wires, 1 Pole
1N-1G
3 Wires, 1 Pole
1N-1G
3 Wires, 1 Pole
1N-1G
****110,000 BTU at
7 in. H2O column
****110,000 BTU at
11 in. H2O column
32 kW/hr at 17.4
mB H2O column
32 kW/hr at 27.4
mB H2O column
****110,000 BTU at
7in. H2O column
****110,000 BTU at
7 in. H2O column
33 kW/hr at
10 mB H2O column
33 kW/hr at
10 mB H2O column
32 kW/hr at
9 mB H2O column
****110,000 BTU at
7 in. H2O column
****110,000 BTU at
11 in. H2O column
32 kW/hr at
17.4 mB H2O column
32 kW/hr at
27.4 mB H2O column
D
E
F
MEA
AGA*
NSF
G
Agency
Listing
A-D-F
A-F
F-G
F-G
E-F
E-F
F
F
F
A-D-F
A-F
F-G
F-G
H
CE
Electrical Supply for Australia:
Single Phase: 240VAC, 50Hz / 20 Amp: one neutral & one earth/ground.
Three Phase: 240/415 VAC / 20 Amp; three active, one neutral & one earth/ground.
* AGA Australian Gas Association
*** Reference Model Key
** In Australia, use a 10 Amp General Purpose Outlet
All ovens require separate service and dedicated neutral.
GAS PRESSURE CONVERSION CHART
4
Inches of
Water Column
Kpa
m-Bar
Millimeters of
Water Column
3.5
4.5
7
10
10.5
11
14
14.5
0.87
1.12
1.74
2.48
2.61
2.73
3.48
3.61
8.70
11.2
17.40
24.87
26.11
27.36
34.81
36.05
88.9
114.3
177.8
254.0
266.7
279.4
355.6
368.3
****NOTE: For proper operation, the gas valve requires a nominal
inlet pressure of 7 inches H2O column for natural gas and 11
inches of H2O column for L.P. gas. A minimum inlet pressure of
1.0 inch of H2O above the manifold setting (NAT. manifold 3.5”
H2O, L.P. manifold 10” H2O) must be maintained with no pressure
drop from the no load to full load condition. The maximum inlet
pressure must be maintained at or below ½ PSIG (14.5 inches
H2O column). Refer to the chart on the left for pressure
conversions
Low Profile - 1600 Series Operations Manual - Dom & Int’l
MODEL NUMBER KEY
COUNTRY
LANGUAGE
CODE
1.
2.
3.
4.
5.
6.
7.
8.
9.
10.
11.
12.
13.
14.
15.
16.
French
German
Italian
Spanish
English
French
Portuguese
Danish
Dutch / French
Dutch
English
Greek
German
Finnish
Norwegian
Swedish
B
C
D
E
F
B
H
J
K
L
F
M
C
N
P
R
France
Germany
Italy
Spain
United Kingdom
Luxembourg
Portugal
Denmark
Belgium
Netherlands
Ireland
Greece
Austria
Finland
Norway
Sweden
EXAMPLE:
1633-
NOT USED
A
I
O
Q
1633-B00-EA
B
00- E
A
A = Advantage Style
E = EC Marked Units
00 = Special Unit Designation
(02 = All Stainless Unit)
B = Language
1633 = Main Model Number
NOTE: Date of manufacture is stamped on the
rating plate of each oven at the end of the serial
number.
Example: XXX…01-96
SPACING
The right and left side of the oven must have a minimum 3-inch (75mm) clearance from all surfaces. The oven
rear, WITH COOLING DUCTS ATTACHED, requires no clearance. The front of the oven requires a minimum 36inch (914.4mm) clearance from all surfaces. An 18-inch (457mm) clearance on both sides of the oven may be
required for service accessibility. In case other cooking equipment is located on both sides of oven, a minimum 24inch (609mm) clearance is required for that equipment.
NOTE: Do not install ovens in any area with an ambient temperature in excess of 95°F / 35°C. Doing so will cause
damage to the unit(s).
! CAUTION:
Oven(s) must be operated on approved bases only.
Low Profile – 1600 Series Operations Manual – Dom & Int’l
5
VENTILATION
A VENT IS REQUIRED: Local codes prevail. These are the “authority having jurisdiction” as stated by the
NATIONAL FIRE PROTECTION ASSOCIATION, INC. in NFPA 96 latest edition. In addition, to be in compliance
with the NFPA 54 Section 10.3.5.2, this unit must be installed with a ventilation hood interlock that prevents the unit
from operating when the ventilation hood is off. For further ventilation information, see below.
VENTILATION GUIDELINES
A ventilation hood is required to remove heat and cooking odors. For gas ovens, a ventilation hood is also required
to remove the products of combustion. The hood and HVAC installation must meet local codes to gain approval by
the authority having jurisdiction. Requirements may vary throughout the country depending on the location by city,
county, and state. Obtain information from the authority having jurisdiction to determine the requirements for your
installation. Obtain information and review copies of codes or documents that will be used to inspect and approve
your installation. Your ventilation hood supplier and HVAC contractor should be contacted to provide guidance. A
properly engineered and installed ventilation hood and HVAC system will expedite approval and reduce oven
maintenance costs. Proper ventilation is the oven owner’s responsibility.
The ventilation hood must operate in harmony with the building HVAC system. It typically requires between 2500
and 6000 CFM exhaust. (The “Efficiency” of various hood designs makes it necessary to specify such a wide range
of ventilator CFM.) Make up air must be supplied by either a hood design or the HVAC system. This will vary with
hoods from various manufacturers.
!
CAUTION: Prevent airflow through the cooking tunnel. Air must NOT be directed onto the oven
front or at side of cooking area or rear of oven.
Performance will be evaluated during Start-up Checkout by conducting a smoke candle test. The hood must
capture all smoke from the oven. This is required to assure proper performance of the oven and to eliminate
additional service calls that occur when ambient temperatures are too high. In all cases, the ambient temperature
around the oven must be less than 95° F / 35° C when the oven is operating. In certain localities, other chemical or
gaseous methods of detecting adequate capture will be the requirement to meet the local code authority.
The drawing shown below is a typical installation and is intended to be a guideline. It is not a rigid specification.
Hood dimensions and the positioning of the hood over the oven will vary with hood manufacturers.
NOTE: Lincoln can provide oven spec sheets that show the dimensions of the oven, KW or BTU ratings and other
information that will be useful to both the ventilation hood supplier and the HVAC contractor.
CANOPY VENTILATION RECOMMENDATIONS
(Hood shown as dimensional for island mount-size reductions may be possible for wall mount units.)
6
Low Profile - 1600 Series Operations Manual - Dom & Int’l
SMOKE CANDLE TEST – VENTILATION SYSTEM VERIFICATION
OVEN SET-UP FOR THIS TEST:
1. This test is to be done on the bottom oven of a multiple oven system, or a single oven.
2. The conveyor must be off.
3. The oven temperature must be set and operating at 550°F/288°C.
TEST PROCEDURE:
Note: Use Lincoln Smoke Candle #369361 (in Australia, an alternate method of coloring the air may be used).
1. Wear heat resistant gloves to prevent burns to your hands.
2. Put the smoke candle in a cake pan approximately 8 inches (200 mm) x 8 inches (200 mm) x 2 inches (50 mm)
deep or equivalent.
3. Open the optional access window in the oven door, or insert candle through conveyor opening.
4. Light the fuse of the smoke candle and immediately put the pan and candle into the center of the oven cavity,
on the conveyor belt. (Close the access window or door.)
5. Observe the smoke pattern coming out of the oven openings and the collection of this smoke by the ventilation
system.
The ventilation system must capture all the smoke from the oven.
RESTRAINT REQUIREMENT – GAS OVEN(S) ON CASTERS, U.S. AND AUSTRALIA
1. The installation shall be made with a gas connector that complies with the Standard for Connectors for Movable
Gas Appliances, ANSI Z21.69 latest version, and a quick disconnect device that complies with the Standard for
Quick Disconnect Devices for Use With Gas Fuel, ANSI Z21.42 latest version.
IN CANADA: The installation shall be made with gas connectors that comply with Canadian Code CSA 6.16
latest version and quick disconnects complying to Canadian Code CSA 6.9 latest version.
IN AUSTRALIA: To be installed in accordance with AS 5601-2004 and 4563-2004 Gas Installation Code.
2. The installation of the restraint must limit the movement of the oven(s) without depending on the connector, the
quick disconnect device or its associated piping to limit the oven movement.
3. If the restraint must be disconnected during maintenance or cleaning, it must be reconnected after the oven has
been returned to its originally installed position.
OPERATIONS
1. Screw lifting eye “B” of cable assembly to hole “A”.
2. Screw eye bolt “C” of cable assembly to stud in wall “D” or floor anchor “E”.
NOTE: Installation point is the same for single, double or triple stack oven(s).
GENERAL INFORMATION
The instructions that follow are intended as a guide for preparing for the installation of the Impinger® Conveyor
Ovens, Series 1600.
First and foremost, each crate should be examined before signing the Bill of Lading to report any visible damage
caused by the trucker in transit, and to account for the proper number of crates.
Low Profile – 1600 Series Operations Manual – Dom & Int’l
7
UNLOADING
When the oven arrives it should consist of:
1. A crate containing oven body, conveyor, fingers, crumb pans, and pan stop. (Some models may have
the conveyor packed separately.)
2. A package containing the stand and top.
It is recommended that you have a material-handling device available to unload.
DO NOT LIFT EXCESSIVE WEIGHT!
IF THERE IS APPARENT DAMAGE:
UNITED STATES AND CANADA: Arrangements should be made to file a claim against the carrier, as Interstate
Commerce Regulations require that the consignee initiate a claim.
ALL SHIPMENTS TO OTHER COUTRIES: Freight terms will be developed and extended on an individual basis.
Proper and secure storage facilities should be arranged for the oven(s). If necessary, protect it from outdoor or
damp conditions at all times before installation.
UNCRATING
When you have all the crates unloaded, open the crates and remove the plastic covers. Inspect at once for
concealed damage. If anything appears to be damaged, contact the appropriate persons immediately to file a
damage claim. After completing this inspection, finish unpacking the oven and all other components. Be sure to
remove the cardboard from the plenum shroud. Move all components inside near the area where they will be
assembled in the order in which they will be assembled.
THE OVEN WILL CLEAR THROUGH A 30” (762 mm) DOORWAY BY USING THE FOLLOWING PROCEDURE:
1. Model 1600 Series
A. Remove conveyor; see page 19 for instructions. (Some units may have conveyor packed separately.)
B. Remove front doors by lifting the doors from the hinge plates.
C. Place oven front on a four-wheel moving dolly and it will clear a 30” (762 mm) doorway.
NOTE: Use care not to damage hinge plates on oven front.
!
CAUTION: DO NOT LIFT BY EITHER OF THE CONTROL BOXES.
CODE REFERENCE
!
WARNING
INT’L (CE):
This appliance must be properly grounded at time of installation. Failure to ensure
that this equipment is properly grounded can result in electrocution, dismemberment
or fatal injury.
GAS CODE REFERENCE
Safe and satisfactory operation of this oven depends to a great extent upon its proper installation, and it should be
installed, as applicable in accordance with the National Fuel Gas Codes, ANSI Z223.1/NFPA 54, latest version,
Manufacturers’ installation Instructions and local municipal building codes.
1. The oven and its individual shut off valve must be disconnected from the gas supply piping system
during any pressure testing of that system at test pressures in excess of ½ psig (3.45kPa).
2. The oven must be isolated from the gas supply piping system by closing its individual manual shut off
valve during any pressure testing of the gas supply system at test pressures equal to or less than
½ psig (3.45kPa).
IN MASSACHUSETTS: The minimum length of a flexible gas supply hose is thirty-six (36”) inches.
IN CANADA: The installation of these appliances is to be in accordance with CSA B149.1 latest version – Natural
Gas and Propane Installation Code – and/or local codes.
IN AUSTRALIA: To be installed in accordance with AS 5601-2004 and 4563-2004 Gas Installation Code.
8
Low Profile - 1600 Series Operations Manual - Dom & Int’l
CODE REFERENCE (CONTINUED)
ELECTRICAL CODE REFERENCE
When installed, this appliance must be electrically grounded and its installation must comply with the National
Electric Code, ANSI-NFPA 70, latest edition, the Manufacturers’ Installation Instructions, and applicable local
municipal building codes.
IN CANADA: All electrical connections are to be made in accordance with CSA C22.1 – Canadian Electrical Code
and/or local codes.
ALL OTHER COUNTRIES: Local gas and/or electrical codes will prevail.
1. Strain Relief is provided with each oven. International Dealer/Distributors provide applicable power
cord/plug for each customer.
2. All pole disconnection switch 3mm open contact distance.
3. To prevent electrical shock, an equal potential bonding ground lug is provided in the back. This allows
the oven to be connected to an external bonding system.
4. If used as double or triple stack and each oven has its own disconnection switch, all switches should be
close together.
Low Profile – 1600 Series Operations Manual – Dom & Int’l
9
EXTERIOR DIMENSIONS
SPECIFICATIONS
BODY: Stainless Steel
POWER: Gas and/or Electric
DB LEVEL: ≤ 77dba
OPERATING TEMPERATURE RANGE: 300°-600°F
(149°-316°C)
10
Low Profile - 1600 Series Operations Manual - Dom & Int’l
EXTERIOR DIMENSIONS - 1600-000-A
SPECIFICATIONS
BODY: Stainless Steel
POWER: Gas and/or Electric
DB LEVEL: ≤ 77dba
OPERATING TEMPERATURE RANGE: 300°-600°F
(149°-316°C)
Low Profile – 1600 Series Operations Manual – Dom & Int’l
11
ASSEMBLY INSTRUCTIONS
2.
Oven stand has a small notch (see figure above) to
locate front of stand. Notch should be located under
oven door when oven is placed on stand. Using a
carpenter’s level, level all four (4) sides of the stand.
Also, bolt holes should be located at rear of stand.
1.
If you purchased a multiple oven, place the second and
third ovens on top of the first. Be sure that they set on
squarely and are fully seated.
NOTE: The oven top is packed with the oven stand.
Remove top from stand before assembly.
3.
NOTE: When stacking ovens, remove the cover
mounting screws to provide a flush fit.
Remove the oven from the dolly and set it on the stand.
Be sure that the oven sets squarely on the stand and is
fully seated.
4.
Install duct cover top cap (A), and right and left baffles
(B) as shown. Use #8 screws provided.
Install oven top with #8-32 screws provided.
5.
Before installing the finger supports in the
oven(s), be sure all of the packing materials
are removed from the plenum shroud.
Install air return baffles (1), two top and two
bottom, as shown.
Install the finger supports by hooking the
Rear Retaining Pin (2) and swinging the
finger support into position (3) as shown to
the right.
12
Low Profile - 1600 Series Operations Manual - Dom & Int’l
6.
Assemble Fingers as shown to the right.
Insert columnating plate so the step goes under the lip of the
finger housing and the plate lies flush with the housing side
edge.
Install cover by sliding it on the small end of the finger
housing.
IMPINGER FINGER COLUMNATING PLATES
7.
To install close-off plates, use close-off plate as a template
and drill three (3) mounting holes. Use #29 drill. Use
three (3) screws supplied to mount close-off plate.
NOTE: The customer MUST tell you what position to
place the assembled fingers in, for their application.
There are two styles of finger housings. Four (4) rights
and four (4) lefts. The plenum has openings which dictate
which style is used. Check each finger housing “Style” to
determine which plenum opening will accept it.
Install assembled finger through door opening starting with
lower left.
Install fingers in the oven by sliding it over the plenum
flange and setting the front of the finger on the retaining
bracket. Be sure that the finger sets squarely over the
plenum flanges and the holes point in the proper direction.
Top fingers point down, bottom fingers point up. Repeat
until all eight (8) fingers are installed.
Low Profile – 1600 Series Operations Manual – Dom & Int’l
13
8.
Install Conveyor Drive Sprocket on Conveyor Drive
Shaft as shown. NOTE: Edge of Drive Sprocket
should be flush with end of Drive Shaft.
9.
Insert the conveyor through the opening in the right
side. Sprocket should be to the right side of the
conveyor.
Slide conveyor through the oven chamber until the
locking bar on driving end of the conveyor is
approximately 2”-3” (50.8 – 76.2 mm) into the oven
chamber. Install drive chain by placing it over the
drive sprocket and placing it over the conveyor
sprocket.
Lift conveyor just enough to allow you to pull the
conveyor to you until the locking bar is outside of
the oven cavity. At the same time, push the
conveyor downward so that the bar locks on the
outside of the oven wall.
10. Install Chain Guard Cover by sliding guard onto
retaining clips.
11. Slide the conveyor crumb pans into the rails on the
under side of the conveyor.
12. Electric Models 1622, 1623, 1628 and 1629 use
control box standoffs that must be mounted to the
left and right side of the control box as shown
above.
You are now ready for services to be connected.
This should be done by licensed electricians and
plumbers. See “Specifications” on page 4 and
“Code References” on Page 8.
13. The gas piping manifold kit should be installed
as shown to the left.
14
Low Profile - 1600 Series Operations Manual - Dom & Int’l
DO NOT ATTEMPT TO OPERATE THE OVEN until connection of utility service and installation has been
fully inspected (START-UP CHECKOUT) by an Authorized Service Technician or a Lincoln Foodservice Products,
LLC Service Representative. This service is required by Lincoln Foodservice Products, LLC to insure the oven(s)
is/are properly installed and in proper working order. The warranty becomes effective upon verification of proper
installation.
The warranty shall not apply if the oven(s) are started up and operated prior to the “START-UP CHECKOUT” being
performed by an Authorized Service Technician or a Lincoln Foodservice Products, LLC Service Representative.
! WARNING:
ELECTRICAL GROUNDING INSTRUCTIONS
MODEL 1600 AND 1601 ONLY
This appliance is equipped with a three-prong (grounding) plug for your protection against shock hazard and should
be plugged directly into a properly grounded three-prong receptacle. Do not cut or remove the grounding prong
from this plug.
! WARNING:
IF THE SUPPLY CORD APPEARS TO BE DAMAGED, DO NOT ATTEMPT TO
OPERATE UNIT. CONTACT A SERVICE AGENT OR QUALIFIED ELECTRICIAN
TO REPAIR.
IMPINGER CONVEYOR OVEN CONCEPTS
The Impinger Conveyor Oven produced by Lincoln Foodservice Products, LLC utilizes a revolutionary cooking
concept called “AIR IMPINGEMENT.” It provides exceptional baked food product quality in far less time than
conventional devices on the market. The “AIR IMPINGEMENT” system directs a high velocity stream of heated air
at the food product being baked. This blast effect penetrates the boundary layer of air encircling the product and
heats the food more efficiently because the air concentrates heat on the product. Greater heat transfer rates, which
result in products baking two to four times faster than conventional means, are possible with “AIR IMPINGEMENT.”
The “AIR IMPINGEMENT” process develops the high velocity air stream with a specially designed fan that draws
super-heated air from a heat source (either gas or electric). This air is directed through a plenum chamber to
patented “JET FINGERS” which have hundreds of focused jet ports that “IMPINGE” the heated air onto the product
surface. The heated air is recycled to the heat source after striking the product, thus reducing energy consumption.
A variable speed conveyor system moves food products through the oven one after another to improve product flow
during the cooking process. The “AIR IMPINGEMENT” process is tolerant enough for sensitive food products and
effects proper crisping and even browning of such products as they pass through the oven, because air is the
medium that heats the food product.
INFORMATION ON USE OF OVEN
As explained in “Concepts,” the Impinger Conveyor Oven functions by directing high velocity streams of heated air
directly upon the food products. Because air is the heat source it is effective even on sensitive foods. Compared to
conventional ovens and even convection ovens the cook time of products in the Impinger Conveyor Ovens can be
as much as two (2) to four (4) times faster. Several factors may affect the cooking time of any special product such
as: 1) oven temperature setting, 2) conveyor speed, 3) position of columnating plates in the oven, and 4)
adjustments of the two baffles on the conveyor openings.
We encourage you to experiment with the oven by trying different temperature settings and belt speeds. Also try to
control the cooking of the product by rearranging the optional columnating plates.
Low Profile – 1600 Series Operations Manual – Dom & Int’l
15
PROGRAMMING DIGITAL ADVANTAGE 1600-000-A SERIES TOUCH PAD
TPL = Left Oven Temperature
TPR = Right Oven Temperature
HEAT = Will turn on and off to indicate
when heat mode is cycling.
INTRODUCTION: START-UP AND SHUTDOWN
For the operator, the panel has power-up, run, and program menu modes. To start the oven, turn the power switch
“ON.” To shut down the oven, turn the power switch “OFF.”
FRONT PANEL LAYOUT
The front panel contains four (4) momentary pushbuttons: TEMP, TIME, UP, and DOWN. There is a 2-line x 16character VFD display.
PROGRAM MODE
The program mode allows the operator to change the setpoint(s) of the oven temperature and the conveyor speed.
To enter the PROGRAM MODE: Depress and hold the TEMP and TIME pushbuttons together for 5 seconds. The
Run Mode display will clear and the word SETPOINT will appear. If no changes are made within 5 seconds the
display will revert back to the previous settings.
There are two types of setpoints: TEMP and TIME. Press the TEMP or TIME key to choose the desired setpoint to
change and then press the UP or DOWN keys to the desired setting. After 5 seconds these settings will remain in
memory.
TEMPERATURE SETPOINTS
For Low Profile Advantage ovens, there are two setpoints: LEFT OVEN and RIGHT OVEN. Press the TEMP
button once to set the left oven temperature and press the TEMP button again to set the right oven temperature.
Pressing the TEMP pushbutton, the display will show the current setting. Pressing the UP or DOWN pushbuttons
will raise or lower the setpoint. In Fahrenheit, F mode, the temperature is adjusted in 5-degree increments. When
in Centigrade, C mode, the temperature adjustment will be in 1-degree increments. Pressing and holding the UP or
DOWN keys will allow the settings to “roll” at a much faster rate. When the desired temperature is indicated,
release all keys. After 5 seconds the selected setpoints will be stored and remain in memory.
TIME SETPOINT
There is one setpoint for the conveyor speed. The speed can be set as follows:
1:00 to 9:55 in 5 second increments
10:00 to 12:45 in 15 second increments
13:00 to 19:30 in 30 second increments
20:00 to 30:00 in 1 minute increments
The accuracy specification is +/- 3%.
JUMPING BETWEEN MENUS
Pressing the TIME pushbutton while in the TEMP setting mode (and vice versa) will cause the menu selection to
jump over to that mode.
16
Low Profile - 1600 Series Operations Manual - Dom & Int’l
DIAGNOSTIC MESSAGES
The Digital Advantage Low Profile ovens have diagnostic messages within the control. Upon the unexpected event
that there is a failure in the oven operation the following messages will appear in the control.
OPEN PROBE
This occurs when there is no temperature signal being sent to the controller from the baking chamber.
SHORTED PROBE
This occurs when a constant temperature signal (as opposed to the normal cyclical cavity temperature) is being
sent to the controller from the baking chamber.
CAUTION: This message can also occur when there is no gas supply to the oven. If the oven does not detect a
temperature fluctuation in 5 minutes the error message will appear. Be sure to check the gas vlave and gas hose
for proper connections.
BELT JAM
This occurs when the conveyor motor fails.
CONVEYOR
The conveyor for Digital Advantage Low Profile ovens has a different drive cog than the Full Featured Low Profile
ovens. The drive cog on the conveyor for the Digital Advantage Low profile oven has a 15-tooth cog where all
other Low Profile ovens have a 10-tooth cog.
CAUTION: On installations where a Digital Advantage Low Profile oven is stacked with a Full Featured Low Profile
oven, THE CONVEYORS CANNOT BE INTERCHANGED. INTERCHANGING CONVEYORS WILL AFFECT
COOKING TIMES.
The conveyor for the Digital Advantage Low Profile ovens will have a label to identify proper use.
ADVANTAGE OVENS
ONLY
REVERSING SWITCH
The Digital Advantage Low Profile oven has a belt direction reversing switch on the back of the oven.
FUNCTIONS
THERMAL CUT-OUT SWITCH
The Impinger Low Profile unit includes a “safety thermal cut-out switch” for your protection. This safety related
device is designed to insure that the Impinger Low Profile unit will not overheat and damage the unit. In the unlikely
event that the Impinger Low Profile unit would exceed the specified operating temperature range, the “safety
thermal cut-out switch” will activate, thus blocking power to the Impinger Low Profile unit and causing it to turn off.
!
CAUTION:
In order to avoid a hazard due to inadvertent resetting of the thermal cutout, this
appliance must not be supplied through an external switching device, such as a
timer or connected to a circuit that is regularly switched on and off by the utility.
Low Profile – 1600 Series Operations Manual – Dom & Int’l
17
OVEN START-UP FOR 1600 SERIES OVENS
1. Push switches for the oven and conveyor to “ON.” Light indicates heat sources are operating. If light or lights
do not illuminate, turn switch off, wait 5 minutes and turn switch to “ON.”
NOTE: Models 1646 and 1647 have a “Burner Off” alarm and a Burner Reset Switch for each burner. The
Push Button Switches are located on the outside rear of each burner compartment. If the alarm sounds or
oven does not light, push the Reset Switch.
2. To set belt speed, slowly adjust knob to achieve desired belt speed. Allow 4 seconds for display to respond.
3. After preheat 20 to 30 minutes, adjust left or right oven temperatures to desired settings. Allow 10 minutes
after adjustment for the oven to respond.
OVEN SHUTDOWN
1. Push switches for conveyor and oven to the “OFF” position. The fan will continue to operate for approximately
20 minutes.
! CAUTION:
DO NOT WORKAROUND CONVEYOR BELT WITH LONG HAIR,
LOOSE CLOTHING OR DANGLING JEWELRY. GETTING CAUGHT IN
THE BELT COULD RESULT IN DISMEMBERMENT OR FATAL INJURY.
OPERATOR MAINTENANCE
!
WARNING - DANGER:
DISCONNECT POWER SUPPLY BEFORE SERVICING OR CLEANING THIS OVEN. SAFEGUARD
POWER SO IT CAN BE ACCIDENTALLY RESTORED. FAILURE TO DO SO COULD RESULT IN
DISMEMBERMENT, ELECTROCUTION, OR FATAL INJURY. THERE IS MORE THAN ONE POWER
SUPPLY CONNECTION POINT WHEN OVENS ARE STACKED, SO MAKE SURE THAT ALL SWITCHES
ARE IN “OFF” POSITION BEFORE CLEANING OR MAINTENANCE.
To maintain maximum efficiency of the oven, it is necessary to keep it clean and all louvers on the oven must be
cleaned regularly. Oven use and type of product will actually determine the frequency of cleaning. The conveyor
drive chain should be checked during the weekly cleaning cycle to see if it has become loose. Loose chain
operation will DAMAGE the conveyor drive motor.
If the oven fails to operate, check the circuit breaker to be sure it is turned on. Also, check the fuses on the control
panel to be sure that they are good before you call the Authorized Service Agency. The name and phone number
of the Authorized Service Agency should be located at the bottom of the data plate.
18
Low Profile - 1600 Series Operations Manual - Dom & Int’l
PREVENTIVE MAINTENANCE
Although this oven has been designed to be as trouble free as possible, periodic preventive maintenance is
essential to maintain peak performance. It is necessary to keep the motors, fans, and electronic controls free of
dirt, dust, and debris to insure proper cooling. Overheating is detrimental to the life of all components mentioned.
The periodic intervals for preventive cleaning may vary greatly depending on the environment in which the oven is
operating.
You must discuss the need for preventive maintenance with your Authorized Service Agent to establish a proper
program. If there are any questions that the service agency cannot answer, please contact the Lincoln Foodservice
Technical Service Department.
CLEANING INSTRUCTIONS
! CAUTION:
OVEN MUST BE COOL. DO NOT USE POWER CLEANING
EQUIPMENT, STEEL WOOL OR WIRE BRUSHES ON
STAINLESS STEEL SURFACES.
DAILY
1. Clean exterior surfaces of the oven by wiping down with a mild detergent and clean water or a commercial
stainless cleaner.
2. Clean crumb pans and guards by washing with a mild detergent solution and rinsing with clean water.
3. Clean the interior by sweeping up all loose particles, then wash with a mild detergent solution and rinse with
clean water.
4. Clean the conveyor belt by wiping with a cleaning cloth or brushing with a soft wire brush. Lincoln catalog
#369217.
NOTE: DO NOT USE A CUASTIC OR AN ALKALINE BASE CLEANER ON INTERIOR OF THE OVEN. THIS
WILL RUIN THE ALUMINIZED FINISH OF THE OVEN INTERIOR.
On the exterior of oven, deposits of baked-on splatter, oil, grease, or light discolorations may be removed with any
of several commercial cleaners. Consult with your local supplier.
! CAUTION:
WHEN USING CLEANING SOLUTIONS, BE SURE THEY
MEET LOCAL AND NATIONAL HEALTH STANDARDS.
WEEKLY
1. Remove fingers, disassemble and clean. See instructions below.
2. Remove conveyor, disassemble and clean. See instructions on page 19.
NOTE: Be sure to clean and inspect the ventilation hood, in accordance with the ventilation hood manufacturer’s
specifications.
FINGER REMOVAL AND DISASSEMBLY FOR CLEANING
1. Open door and remove upper fingers. Note any particular placement of fingers that you may have, such as
fully closed, half-closed or fully open columnating plates.
2. Remove conveyor and then remove bottom fingers.
3. For finger disassembly, see page 13.
4. Reassemble fingers in reverse order with the step of the columnating plate facing downward so it fits under the
lip of the finger housing.
5. Reinstall fingers in oven. Be sure that they are fully seated over the plenum flanges and the holes are pointing
toward the conveyor.
Low Profile – 1600 Series Operations Manual – Dom & Int’l
19
CONVEYOR DISASSEMBLY FOR CLEANING
1.
Remove chain guard cover and conveyor crumb
pans.
2.
Lift right end of conveyor and push in
approximately 3” (76 mm). Remove drive chain.
Pull conveyor out the right end. Place on table or
work surface.
3.
Locate connecting links on the conveyor belt, turn
belt to place the links on the top left end of the
conveyor approximately 8” (203 mm) from the
shaft.
4.
You can easily remove the connecting links by
grasping them with a pair of pliers and slipping
the eye of the connecting link over the wire of the
other links. Also notice the direction of the
opening on the other links. The belt will have to
be reinstalled with the opening facing the same
way.
Loosen jam nuts and unscrew the tension
adjustment screws. Push the idler shaft against
the conveyor support bars.
Carefully pull out the belt, rolling it up as you go.
After you have it removed, it may be placed in a
pan of detergent solution to soak. Rinse with
clean water.
REASSEMBLY
5.
Put conveyor belt back on by setting the rolled belt to
the left of the conveyor and thread approximately 2/3
of the belt over the bottom slider bed.
Put the loose end of the belt around the idler shaft
and back on the conveyor. The belt must lay on top
of the upper conveyor slider bed. NOTE: The belt
should curl around the conveyor sprockets and lay
flat on top of the sprockets.
If the belting does not curl around the sprockets and
lay flat, remove the belting and turn the belting over.
Reinstall.
20
Low Profile - 1600 Series Operations Manual - Dom & Int’l
6.
Pull all the slack belt through conveyor until both
ends are on top of the conveyor on the left end.
7.
Re-connect conveyor belt by slipping the
connecting links back in place.
Pull idler shaft toward the end of the conveyor
and screw tension adjustment knobs back in. DO
NOT OVER TIGHTEN THE BELT! Tighten the
jam nuts against the adjustment plate.
REINSTALL CONVEYOR IN OVEN: Slide
conveyor through the oven chamber until the
locking belt on drive end of the conveyor is
approximately 2”-3” (50.8 – 76.2 mm) into the
oven chamber.
Install drive chain by placing it over the driving
sprocket and placing it over the conveyor
sprocket.
Lift conveyor just enough to allow you to pull the
conveyor to you until the locking bar is outside of
the oven cavity, at the same time push the
conveyor downward so that the bar locks on the
outside of the oven wall.
8.
Reinstall conveyor crumb pans and chain guard
cover.
!
9.
Set tension on the conveyor belt. The belt should
be able to be lifted enough to allow it to be ¼” (6
mm) from the top of the conveyor opening on the
oven. DO NOT OVER TIGHTEN THE BELT!
CAUTION: BELT MAY BE HOT!
HOW TO OBTAIN SERVICE
If the oven fails to operate, check the circuit breaker to be sure it is turned on (on a gas oven check the
manual gas valve to insure it is in the ON position), and check the fuses on the back of the oven to be
sure that they are good before you call the Authorized Service Agency. The name and phone number
of the Authorized Service Agency should be located on the oven or contact the factory at (260) 4329511 for the name of the nearest Authorized Service Agency.
Low Profile – 1600 Series Operations Manual – Dom & Int’l
21
APPENDIX A – LABEL DEFINITIONS
22
Low Profile - 1600 Series Operations Manual - Dom & Int’l
APPENDIX A – LABEL DEFINITIONS (CONT’D)
Low Profile – 1600 Series Operations Manual – Dom & Int’l
23
LIMITED WARRANTY FOR COMMERCIAL PRODUCTS
LIMITED WARRANTY
Lincoln Foodservice Products, LLC (“Lincoln”) warrants this product to be free from defects in material and workmanship for a period of one (1) year
from the date of purchase.
During the warranty period, Lincoln shall, at Lincoln’s option, repair, or replace parts determined by Lincoln to be defective in material or
workmanship, and with respect to services, shall re-perform any defective portion of said services. The foregoing shall be the sole obligation of
Lincoln under this Limited Warranty with respect to the equipment, products, and services. With respect to equipment, materials, parts and
accessories manufactured by others, Lincoln’s sole obligation shall be to use reasonable efforts to obtain the full benefit of the manufacturer’s
warranties. Lincoln shall have no liability, whether in contract, tort, negligence, or otherwise, with respect to non-Lincoln manufactured products.
WHO IS COVERED
This Limited Warranty is available only to the original purchaser of the product and is not transferable.
EXCLUSIONS FROM COVERAGE
•
Repair or replacement of parts required because of misuse, improper care or storage, negligence, alteration, accident, use of incompatible
supplies or lack of specified maintenance shall be excluded
•
Normal maintenance items, including but not limited to, light bulbs, fuses, gaskets, O-rings, interior and exterior finishes,
lubrication, conveyor belt, motor bushes, broken glass, etc. adjustments and calibrations for temperatures, speed and air flows
•
Failures caused by improper or erratic voltages
•
Improper or unauthorized repair
•
Changes in adjustment and calibration after ninety (90) days from equipment installation date
•
This Limited Warranty will not apply to any parts subject to damage beyond the control of Lincoln, or to equipment which has been subject
to alteration, misuse or improper installation, accidents, damage in shipment, fire, floods, power changes, other hazards or acts of God that
are beyond the control of Lincoln
•
This Limited Warranty does not apply, and shall not cover any products or equipment manufactured or sold by Lincoln when such products
or commercial equipment is installed or used in a residential or non-commercial application. Installations not within the applicable building or
fire codes render this Limited Warranty and any responsibility or obligations associated therein null and void. This includes any damage,
costs, or legal actions resulting from the installation of any Lincoln commercial cooking equipment in a non-commercial application or
installation, where the equipment is being used for applications other than those approved for by Lincoln.
LIMITATIONS OF LIABILITY
The preceding paragraphs set forth the exclusive remedy for all claims based on failure of, or defect in, products or services sold hereunder,
whether the failure or defect arises before or during the warranty period, and whether a claim, however instituted, is based on contract, indemnity,
warranty, tort (including negligence), strict liability, implied by statute, common-law or otherwise , and Lincoln its servants and agents shall not
be liable for any claims for personal injuries, incidental or consequential damages or loss, howsoever caused. Upon the expiration of the
warranty period, all such liability shall terminate. THE FOREGOING WARRANTIES ARE EXCLUSIVE AND IN LIEU OF ALL OTHER
WARRANTIES, WHETHER WRITTEN, ORAL, IMPLIED OR STATUTORY NO IMPLIED WARRANTY OF MERCHANTABILITY OR FITNESS
FOR PARTICULAR PURPOSE SHALL APPLY. LINCOLN DOES NOT WARRANT ANY PRODUCTS OR SERVICES OF OTHERS.
REMEDIES
The liability of Lincoln for breach of any warranty obligation hereunder is limited to: (i ) the repair or replacement of the equipment on which the
liability is based, or with respect to services, re-performance of the services; or (ii) at Lincoln’s option, the refund of the amount paid for said
equipment or services.
Any breach by Lincoln with respect to any item or unit of equipment or services shall be deemed a breach with respect to that item or unit or
service only
WARRANTY CLAIM PROCEDURE
Customer shall be responsible to:
•
Immediately advise the Dealer or Lincoln’s Authorized Service Agent of the equipment serial number and the nature of the problem.
•
Verify the problem is a factory responsibility. Improper installation or misuse of equipment, are not covered under this Limited
Warranty.
•
Cooperate with the Service Agency so that warranty service may be completed during normal working hours.
•
Travel Time not to exceed two hours and mileage not to exceed one hundred (100) miles.
GOVERNING LAW
Limited Warranty shall be governed by the laws of the state of Delaware, USA, excluding their conflicts of law principles. The United Nations
Convention on Contracts for the International Sale of Goods is hereby excluded in its entirety from application to this Limited Warranty
Lincoln Foodservice Products, LLC
1111 North Hadley Road
Fort Wayne, Indiana 46804
USA
www.lincolnfp.com
24
Low Profile - 1600 Series Operations Manual - Dom & Int’l
This page intentionally left blank.
Low Profile – 1600 Series Operations Manual – Dom & Int’l
25
This page intentionally left blank.
26
Low Profile - 1600 Series Operations Manual - Dom & Int’l
This page intentionally left blank.
Low Profile – 1600 Series Operations Manual – Dom & Int’l
27
Lincoln Foodservice Products, LLC
1111 North Hadley Road
Fort Wayne, Indiana 46804
United States of America
Phone : (800) 374-3004
U.S. Fax: (888) 790-8193
Int’l Fax: (260) 436-0735
Technical Support Hotline: (800) 678-9511
www.lincolnfp.com
28
Low Profile - 1600 Series Operations Manual - Dom & Int’l