1
Boiler L. P. Gas and 230 / 240 V Electric Storage Water Heater Model B 10 / B 14 from 08/2008
Operating instructions
Installation instructions
To be kept in the vehicle!
Comfort on the move
Page 2
Page 6
Boiler L. P. Gas and 230/240 V Electric Storage Water Heater Model B 10 / B 14 from 08/2008
Installation example
1
2
3
4
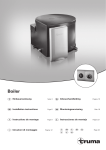
Truma-Boiler
Control panel
Safety/drain valve
Cowl for combustion air intake and exhaust gas discharge
General safety notes
The use of upright gas cylinders from which gas is taken in
the gas phase is mandatory for the operation of gas regulators, gas equipment and gas systems. Gas cylinders from
which gas is taken in the liquid phase (e. g. for fork lifts) must
not be used, since they would result in damage to the gas
system.
In event of leaks in the gas system or if there is a smell of gas:
–
–
–
–
–
–
–
extinguish all naked flames
do not smoke
switch off all appliances
shut off the gas cylinder
open the windows and doors
do not actuate any electrical switches
have the entire system checked by an expert!
Repairs may only be carried out by an expert.
Danger
Failure to operate the relief valve easing gear at least once
every six months may result in the water heater splitting. Continuous leakage of water from the valve may indicate a problem with the water heater!
– Water may drip from the discharge pipe of the pressure relief device and this pipe must be left open to the
atmosphere.
– The pressure relief device is to be operated regularly to
remove lime deposits and to verify that it is not blocked.
– Any discharge pipe connected to the safety (pressure relief)
valve is to be installed in a continuously downward direction
and in a frost free ambient.
– This unit is not to be used by children or infirm persons
without proper supervision at all times. Not to be used as a
toy.
2
– Before gaining access to any and all terminals, please ensure all supply circuits are disconnected (i.e. 230 – 240 V
and 12 V) and gas supply is securely turned off.
– Any work involving connection or interconnecting wiring
must be conducted by a licensed electrician.
– Any modifications to the unit, including accessories and
cowl, or the use of spare parts and accessories that are important to the operation of the system that are not original
Truma parts and failure to follow the installation and operating instructions will cancel the warranty and indemnify
Truma from any liability claims. It also becomes illegal to
use the appliance, and in some countries this even makes it
illegal to use the vehicle.
– The operating pressure for the gas supply is 2.75 kPa
(AUS – Propane, NZ – LPG) and must correspond to the operating pressure of the appliance (see data plate).
– LPG Systems and pressure regulators must comply with
the technical and administrative regulations of the country
in which the appliance is used. For your own safety it is
absolutely necessary to have the complete gas installation
regularly checked by an expert (at least every 2 years).
The vehicle owner is always responsible for arranging
the gas inspection.
– Do not operate when travelling.
– Do not operate the water heater when refuelling the vehicle
and when in the garage.
– Items sensitive to heat (e. g. spray cans) must not be stored
in the installation area, since excess temperatures may under circumstances be incurred there.
– During the initial operation of a brand new appliance (or
after it has not been used for some time), a slight amount of
fumes and a slight smell may be noticed for a short while.
Operating instructions
2. Open hot water taps in bathroom and kitchen.
3. Open Safety/drain valve: Lever in vertical position, position (f).
Always observe the operating instructions prior to
starting! The vehicle owner is responsible for the correct
operation of the appliance.
The installer or vehicle owner must apply the yellow sticker
with the warning information, which is enclosed with the appliance, to a place in the vehicle where it is clearly visible to
all users (e. g. on the wardrobe door)! Ask Truma to send you
stickers, if necessary.
Before using the first time, it is essential to flush the
entire water supply through with clean warm water.
Always mount the cowl cap when the water heater is not being operated! Drain the water heater if there is a risk of frost!
There shall be no claims under guarantee for damage
caused by frost!
Always remove the cowl cover prior to operating the
water heater!
If connecting to a central water supply (rural or city connection) or when using more powerful pumps, a pressure reducer
must be used which prevents pressures of greater than
400 kPa occurring in the Boiler.
Filling the Truma Boiler with water
4. The water heater is now drained directly to the outside via
the drain valve. Check that the water contents have been
completely drained (10 litres or 14 litres).
Switching on gas operation
Boiler
60°
a
70°
b
c
b
a = Red indicator lamp “Failure”
b = Water heater “On” 60 °C or 70 °C
c = Water heater “Off”
Never operate the water heater without water in it!
If the wall cowl is positioned close to an opening window (or
hatch) – in particular directly under it – it must remain closed
when the water heater is in use (see warning plate).
1. Remove cowl cover.
1. Check that the drain valve in the cold water intake is closed:
Lever should be in horizontal position, position (e).
f
e
e
2. Open gas cylinder and open stop cock valve in the gas
supply line.
3. Switch on water heater at the switch on the control panel (b).
When using the vehicle switches
Refer to operating instructions of the vehicle manufacturer or
see switch labels.
4. If there is air in the gas supply line, it may take up to a
minute before the gas is available for combustion. If the
appliance switches to “Failure” during this period, switch off
the appliance – wait 5 minutes – and switch on again!
e = Lever position “Closed”
f = Lever position “Drain”
Switching off (gas operation)
Switch off the water heater to position (c).
2. Open hot tap in bathroom or kitchen, with pre-selecting
mixing taps or single-lever fittings set to “hot”.
3. Switch on power for water pump (main switch or pump
switch).
Leave the tap open to let air escape while the water heater is
filling. The heater is filled when water flows out of the tap.
Residues of frozen water can prevent filling if there is a frost.
The water heater can be defrosted by switching on the heater
for a short period (max. 2 minutes). Frozen pipes can be defrosted by heating the room.
If just the cold water system is being used, without water heater, the heater tank is also filled up with water. In
order to avoid damage through frost, the water contents must
be drained by actuating the drain valve, also when the heater
has not been used. As an alternative, two shut-off valves, resistant to hot water, can be fitted in front of the cold and hot
water connection.
Draining the water heater
If the mobile home is not used during periods of frost,
it is essential that the Boiler be emptied.
If the water heater is not to be used for a longer period, mount
cowl cover (non-observance of this point can lead to the function of the appliance being impaired through water, dirt or
insects), close stop cock valve in the gas supply line and close
the gas cylinder.
Before setting off on any journey, fit cowl cap with the
boiler switched off. Please ensure that it is secure and
has locked into place (risk of accident). Defective cowl caps
must not be used.
Drain the water heater if there is a risk of frost! There
shall be no claim under guarantee if this point is not
observed.
1. Disconnect power for water pump (main switch or pump
switch).
3
Red indicator lamp “failure“
The red indictor lamp (a) lights up if there is a failure. For possible causes please refer to page 4. To unlock, switch off the
appliance, wait 5 minutes, and switch on again.
Electrical operation – option –
230 / 240 V, 850 W (3.7 A)
To operate the electric heating element, please insert the plug
into the socket and then turn it on with the switch.
The electric heating element is operational when you can see
the mark on the switch (g).
Never operate the water heater without water in it!
The water temperature cannot be selected, automatic
temperature limitation at approx. 70 °C! For a faster heating up period the appliance can be simultaneously operated
with gas and electrical power.
Maintenance
Materials in the device which come into contact with
water are suitable for use with drinking water
(see manufacturer declaration:
www.truma.com – Downloads – Manufacturer Declaration).
Use wine vinegar for de-scaling the water heater, this being
introduced into the appliance via the water supply. Allow the
product to react and then thoroughly flush out the appliance
with plenty of fresh water. To sterilise the water we recommend “Certisil-Argento”. Other products, particularly those
containing chlorine are unsuitable.
In order to avoid the colonization of micro-organisms, heat up
the Boiler to 70 °C at regular intervals.
Technical data
Manufacturer
Truma Gerätetechnik GmbH & Co. KG
P.O. Box 1252
85637 Putzbrunn / Munich
Germany
Water contents
10 or 14 litres
Water pressure
up to max. 400 kPa
Type of gas
Liquid gas (AUS – Propane, NZ – LPG)
Test point pressure
2.75 kPa
Nominal input
5.0 MJ/h
Heat output
1.5 kW
Gas consumption
120 g/h
Injector size
0.70 mm
Heating up time from approx. 15 °C up to approx. 70 °C
(10 litres / 14 litres)
Gas operation: approx. 34 min. / approx. 50 min.
Electrical operation: approx. 45 min. / approx. 72 min.
Gas and electrical operation: approx. 25 min. / approx. 38 min.
Power consumption 12 V
Ignition: 0.17 A
Heating up: 0.08 A
Standby: 0.04 A
Power consumption 230 / 240 V
Heating up: (3.7 A) 850 W
Weight (empty) 10 litres / 14 litres
approx. 6.4 kg / 6.7 kg
Declaration of conformity
The Truma-Boiler model has been tested and approved
through the DVGW and fulfils the EC gas appliance guidelines
(90/396/EEC) as well as the associated EC guidelines.
The CE product number is available for EU countries:
CE-0085AP0038
AGA Approval-No
5801
Electrical Approval-No
Q00083
C-tick Mark
ACN 004947488
Compliance with NZS 5262 section 5
The right to effect technical modifications is reserved!
Fuses
The water heater 12 V fuse is on the electronic control unit on
the water heater.
Important note
Only replace the miniature
Fuse on the p.c.b. with a fuse
of the same type: 1.6 A (slow
action).
If there is a defect in the electronics, return the control p.c.b.
well padded. If you fail to pack it correctly the guarantee shall
no longer be valid.
Only use original Truma Boiler control p.c.b.'s as spare parts!
4
Dimensions
Fault finding
Manufacturer’s terms of warranty
Gas operation
The manufacturer grants a warranty for malfunctions in the
appliance which are based on material or production faults.
In addition to this, the statutory warranty claims against the
seller remain valid.
Symptom
Cause
When switching on, the
heater does not operate.
– No 12 V supply voltage.
The warranty claim is not valid for damage to the appliance
Check the power supply (operation voltage min. 10.5 V).
Check the Boiler fuse (refer to maintenance “Fuses”).
When switching on, the
heater does not operate
and the red lamp lights up
after approx. 30 secs.
– Cowl cover fitted.
– Air in the gas supply.
– No gas supply.
– Incorrect gas pressure.
– as a result of not original Truma parts being used in the appliance and as a result of unsuitable gas pressure regulators
being used,
– as a result of non–compliance with the installation
instructions and instructions for use,
– as a result of incorrect handling,
Remove cowl cover and / or clear any obstruction.
Check gas valves and gas bottle.
To unlock (and purge air), switch off the appliance, wait
5 minutes, and switch on again.
Heater operates for a
prolonged time and then
the red lamp lights up.
– Over temperature
thermostat operated.
Check water content, refill if required (close drain valve).
To unlock, switch off the appliance, wait 5 minutes, and
switch on again.
Electrical operation
Symptom
Cause
When switching on, the
heater does not operate.
– No 240 V supply voltage.
– Over temperature
thermostat operated.
Connect the caravan to the site supply and / or check residual
current circuit breaker.
Check water content, refill if required (close drain valve).
The electrical heating element is fitted with an excess temperature cut-out. In event of a fault, switch off at the control
panel, wait 5 minutes, then switch on again.
– as a result of incorrect packaging for transportation.
The warranty is valid for malfunctions as stated above, which
occur within 12 months after conclusion of the purchase
agreement between the seller and the final consumer. The
manufacturer shall rectify such malfunctions by way of repair,
however, the manufacturer also reserves the right to supply a
replacement instead of repairing said malfunctions. Claims for
indirect damage or consequential damage shall be rejected.
This does not affect the rules of the product liability law.
The manufacturer shall bear the cost of employing the Truma
customer service for the removal of a malfunction under warranty – in particular transportation costs, travelling expenses,
job and material costs, as long as the service is carried out in
Germany. Customer service carried out abroad is not covered
by the warranty.
Additional costs based on complicated removal and installation conditions of the appliance (e. g. removal of furniture or
parts of the vehicle body) do not come under warranty.
In Germany, the Truma Service Center in Putzbrunn / Munich
must always be contacted in event of a malfunction; Abroad,
respective service partners are available (refer to address list).
Complaints must be specified. In addition, the correctly completed warranty certificate must be presented or the Serial
number of the appliance and the date of purchase specified.
Proof of purchase must be supplied.
Water supply
Symptom
Cause
Water drips from the
safety valve.
– Water pressure to high.
Check water pressure (max. 400 kPa), use a pressure reducer
when connected to central water supply.
When opening the cold
water tap, hot water
comes out.
– Hot water flows back
through the cold water
supply.
Fit a no-return valve in the cold water supply (refer to installation instructions “Water connection”).
If fault persists please contact the nearest
Dometic Service.
5
Installation instructions
This outside surface must be exposed to wind from all directions and, if possible, there should be no trim strips or
covers in this area, mount heater on an appropriate base, if
necessary.
This appliance must be installed by an authorised person.
This appliance shall be installed in accordance with the manufacturer’s installation instructions, local gas fitting regulations, municipal building codes, electrical wiring regulations,
AS5601 “Gas Installations”, any other statutory regulations
and water supply regulations.
Data label
The data label is located on the top of the water heater.
This appliance is suitable for propane gas only, ensure that the
available gas supply is suitable.
The cowl must be placed in such a way that the exhaust gas
cannot find its way into the vehicle interior. For this reason,
choose a location where there are no opening windows, skylights or ventilation openings directly above the cowl or for
50 cm on either side. If this is not possible, a warning plate
must be placed on the inside of the window (or skylight) stating that it must be kept closed while the heater is operating.
In this case refrigerator ventilations must be tight-sealed from
the interior of the vehicle.
AUS:
Refer to AS5601 – Gas Installations, for location requirements
of the flue terminal.
NZ:
Refer to NZS 5428 – LPG installations
Intended use
Installation of the water heater
This appliance has been designed for the installation in caravans, mobile homes and other vehicles. It is not approved for
installation in boats. Other forms of use are also possible
following consultation with Truma.
1. Position template for cowl opening on the inside of the wall.
Regulations
Any modifications to the unit, including accessories and cowl,
or the use of spare parts and accessories that are important to
the operation of the system that are not original Truma parts
and failure to follow the installation and operating instructions
will cancel the warranty and indemnify Truma from any liability
claims. It also becomes illegal to use the appliance, and in
some countries this even makes it illegal to use the vehicle.
The operating pressure for the gas supply is 2.75 kPa
(AUS – Propane, NZ – LPG) and must correspond to the operating pressure of the appliance (see data plate).
When installing the appliance always observe the technical
and administrative rules and regulations of the country in
which the vehicle is to be registered, for the first time!
Water heater kit
A = Bottom edge of heater
B = Lateral edge of heater
Drill 4 holes (C) with 10 mm dia. through the wall. Drill hole (E)
with 15 mm dia. for condensation tube (also possible from the
outside = F).
2. Position template on the outside of the wall. The markings
(C) must be above the through-holes. Saw cut-out section for
cowl (D) 92 x 168 mm.
If the distance between outside wall and heater is more than
35 mm you must use the cowl extension VBO 2 (please refer
to the last page) with an additional length of 50 mm. Saw out
100 x 176 mm along the dashed line.
If there are any cavities in the
area of the cowl, pack these
with pieces of wood so as to
be able to tighten the screws.
The finished hole should be
168 mm high and 92 mm
wide.
The water heater kit contains:
1 Assembled water heater
1 Cowl assembly with screws
1 Hot water connector (12 mm rigid piping)
1 Cold water connector (12 mm rigid piping)
1 Safety (pressure relief) drain valve (12 mm rigid piping)
1 Pressure reducer (12 mm rigid piping)
1 Wall switch (gas operation) with 2.5 m cable
1 Electric heating element (230 / 240 V) with 1,1 m mains
cable and pre-fitted plug – option –
1 Gas inlet connection, 14 mm / UNF 1/2" -20
(SAE 45° Male AN Flare)
1 Installation template
1 Set literature
1 Label with warning information
In order to guarantee complete emptying of the water content, ongoing sealing tightness of the water connections and
safety function all enclosed parts must be used!
Choice of location
1. Always install the appliance in such a way that it is easily
accessible for service work at all times and can be easily
removed and installed.
2. Locate the heater in such a way that the cowl can be
mounted on the outside on a surface which is as straight
and smooth as possible.
6
Cut out trim strips or such on the vehicle or place supports
beneath them so as to make the cowl lie flat.
Place a support beneath the heater if the walls are sloping. An
angle of inclination of 10 degrees is not to be exceeded.
3. Insert heater with cowl body (1) through the wall cut-out (2),
allow approx. 5 mm to project out of the wall. Mount sealing
frame (3 – the anti-twisting device ensures correct fitting!).
Pre-drill holes for the 6 fastening bolts (4).
4. Remove sealing frame (3) and coat with non hardening
mastic on the side facing the vehicle – do not use silicone!
The sealing frame must be well sealed with respect to
the front sides and the cross bars of the cowl body (1)
as well as towards the outside wall!
5. Fasten sealing frame (3) to the cowl body using 4 self-cutting screws (4).
The supplied water connectors (12 + 13) and Safety/
drain valve (14) have a 12 mm rigid piping connection
(e. g. John Guest System). For connecting to rigid pipes with
other diameters appropiate adapters (not included in scope of
delivery) must be used.
As special accessories Truma supplies the water connectors
(12 + 13) and Safety/drain valve (14) with a 10 mm / 3/8" diameter hose nipple (please refer to the last page).
Route water pipes so that they are as short and free of
kinks as possible (hose connections must be secured
using hose clamps – also for cold water! – pressures of up
to 400 kPa can occur in the Safety/drain valve – also with
submergible pumps – because of the heat of the water and
the resulting expansion).
3
4
Screw the sealing frame
(3) in contact together
with the cowl body (1) so the
anti-twist device projects out!
6. Seal the gap between the hole (6) and the condensation
tube (7) with non hardening mastic – do not use silicone!
All hot water pipes should be routed in a descending
manner to the Safety/drain valve! Otherwise no guarantee of protection from frost!
Installation of the elbow water connectors
Screw elbow with integrated
breather valve (12) to hot
water connection pipe (upper
pipe) and elbow without
breather valve (13) to cold
water connecting pipe (lower
pipe).
Slide on nut (17), tension ring
(18) and O-ring (19). Assemble
screw connector and connecting pipe and fasten together
using nut (17).
7. Mount the grille (8). Press the entire cowl assembly onto
the vehicle wall and fasten with 6 screws (5).
8. Screw the boiler securely to the floor of the vehicle with
at least two shackle plates (9) with the screws provided,
B 5.5 x 25, on suitable base (plywood panel, laminated wood
strips or metal base).
Water connection
All pressure and submergible waterpumps can be used for
operating the water heater.
In order to guarantee complete emptying of the
water content and to prevent pressures of greater
than 400 kPa occurring in the boiler, the enclosed pressure reducer (10), the enclosed water connectors (12 + 13)
and the enclosed safety (pressure relief) drain valve (14)
must be used!
When using pressure pumps with high switching hysteresis,
hot water may flow back through the cold water tap. To prevent the backflow, we recommend that a non-return valve
(nrv – not included in the scope of supply) be fitted between
the outlet to the cold water tap and the drain valve.
12
Slide ventilation hose with
11 mm outer diameter (20)
onto the breather valve hose
nozzle (21) and route towards
the outside. Do not allow the
radius of the arc to be less
than 40 mm.
Cut off the ventilation hose
approx. 20 mm below the floor
of the vehicle at an angle of
45° to the direction of travel.
In industrial bulk packs the water connections are preinstalled
and have to be tightened after the water pipes have been connected. Please check for leaks before starting up for the first
time.
Installation of the safety (pressure relief)
drain valve
Install the Safety/drain valve
(14) at a place which is easily accessible, near the water
heater. Drill a hole with 18 mm
diameter and pass through
the discharge tube. Fasten
Safety/drain valve with two
screws. The draining is to be
directly to the outside at a position protected against splash
water (apply splash guard, if
necessary).
14
Ø 18 mm
nrv
14
10
13
7
Installation of the pressure reducer
Installation of the control panel
The pressure reducer (10)
must be fitted between the
Safety/drain valve and water
pump in accordance to the
direction of flow. Fasten the
pressure reducer to the floor.
When using control panels which are specific to the
vehicle or the manufacturer, the electrical connection
must be established in accordance with the Truma interface
descriptions (refer to Electrical connection 230 / 240 V). Any
modification made to the Truma components pertaining to
this will lead to the invalidation of the guarantee, as well as to
the exclusion of any claims for liability. The installer (manufacturer) is responsible for providing instructions for use for the
user as well as for identification printing on the control panels.
10
When selecting the location, bear in mind that the control
panels must not be subjected to direct radiant heat. Length of
connection cable 2.5 m. If required, a cable extension of 5 m
can be supplied (refer to last page).
Water pipe routing
Connect the cold water supply (15) via the pressure reducer
(10) to the Safety/drain valve (14).
m
12
22
Ø
55
m
28
25
29
28
31
26
13
16 14
15
10
Produce connection (16) for cold water supply between
Safety/drain valve (14) and elbow (13 – lower pipe) on water
heater.
Route the hot water pipe (22) from the elbow with integrated
breather valve (12 – upper pipe) to the hot water consumers.
Drill a hole with diameter 55 mm.
Plug the control panel cable (28) to the control panel for gas
operation (26) and then fit on the rear cover cap (29) as a
stress-relieving device.
Gas connection
The gas inlet connection
on the Boiler is a 14 mm
metric connection.
2"
1/
14
Lay the connection cable with the orange multipole connector
(28) to the 12 V control electronics unit (for connection refer
to Electrical connection 12 V).
Secure control panel with 4 screws (31) and fit the cover
frame (32) on it.
8
m
m
For connection to 8 mm steel
piping Truma povides an
adapter UNF 1/2" x RVS 8,
part no. 70020-02700.
F
N
m
m
Push the cable through to the rear and lay the connection
cable (28) to the boiler.
U
To connect, the UNF 1/2" - 20
(SAE Male AN Flare) gas inlet
connection provided with the
appliance must be used.
32
If a flush installation of the control panel it is not possible, use the surface-mounting frame (25) as supplied.
In industrial bulk packs the test connection is preinstalled and
has to be tightened after the gas line has been connected.
Please check for leaks before starting up for the first time.
Check for gas leaks (do not check for gas leaks with a naked
flame), then check that the gas pressure is as follows:
Electrical connection 12 V
AUS: Propane gas – 2.75 kPa
NZ: LPG – 2.75 kPa
The appliance must be disconnected from the vehicle main
power supply when carrying out any electric welding work on
the vehicle body.
Before connecting to the water heater make sure that the gas
lines are free from dirt, chips and such!
Route the pipes in such a way that the appliance can be
removed again for servicing.
AUS:
Refer to AS5601 – Gas Installations, for gas pipe sizing.
NZ:
Refer to NZS 5428 – LPG installations
8
Always disconnect the appliance from the power supply prior
to working on electrical components. It is not sufficient to just
switch off at the control panel!
If the connections are transposed there is a risk of cable
burning. This also rules out any guarantee or liability
claims.
Unscrew cover (34) from the electronic control unit. Slide cable connector of control panel (28) onto the p.c.b.. The electrical connection is made at terminal (35).
To connect press with a small screwdriver from above and
push in cable from the front.
Function check
After installation, check gas supply line for leaks in accordance with the pressure drop method. Following this, check the
function of the appliance as specified in the operating instructions, check the function of the draining of the water contents,
in particular. There shall be no claims under guarantee for
damage caused by frost!
Never operate the water heater without water contents.
It is, however, possible to briefly check the electrical function
without water contents. Always observe the operating instructions prior to operation!
The operating instructions and completed guarantee card are
to be given to the owner of the vehicle.
Orange =
Blue
=
Positive 12 V
Negative
Connect to fused vehicle mains (central electrical equipment
5 – 10 A) using a 2 x 1.5 mm² cable.
Negative cable to central earth. With lengths of over 6 m use
a cable 2 x 2.5 mm². If connecting directly to the battery, the
positive and negative cable must be fused. Screw cover (34)
back on.
Warning information
The installer or vehicle owner must apply the yellow sticker
with the warning information, which is enclosed with the appliance, to a place in the vehicle where it is clearly visible to all
users (e. g. on the wardrobe door)! Ask Dometic to send you
stickers, if necessary.
There are to be no other 12 V consuming appliances connected to the supply line!
The water heater fuse (36), 1.6 A, (slow-acting) is on the
p.c.b..
When power supplies are being used, it must be noted that
the output voltage is between 11 V and 15 V and the alternating current ripple is < 1.2 Vpp.
Electrical connection 230 / 240 V – option –
The electrical connection is only to be carried out by a
licensed electrician. The information given here is not
intended as information for the layman, rather it is to for assisting the assigned electrician, as additional information,
when connecting the appliance!
The electric heating element in the water heater is supplied
with a mains cable and fitted 3-pole, earthed plug (in compliance with the norm AS/NZS 3112/2000)
In order to operate the element the manufacturer of the vehicle has to supply and install a socket with switch (2-pole separation) which is approved in Australia and earthed.
All cables must be secured with cable clips.
Cables must be in accordance with the technical rules and
regulations of the country in which the vehicle is to be
registered, for the first time.
9
Boiler L. P. Gas and 230 / 240 V Electric Storage Water Heater Model B 10 / B 14 from 08/2008
When ordering spare-parts, please always specify the fabrication number and year of make
10
Accessories
Control panel extension cable
70000-53500
Control extension cable 5 m
Safety/drain valve and water connectors for flexible
water hoses
34150-01
70150-01
70141-02
Hot water connector, 10 mm / 3/8"
Cold water connector, 10 mm / 3/8"
Safety/drain valve (400 kPa), 10 mm / 3/8"
Cowl extension for wall thicknesses over 35 mm
70131-00
Cowl extension VBO 2
✂
Boiler L. P. Gas and 230 / 240 V Electric Storage Water Heater Model B 10 / B 14 from 08/2008
70010-29100 · 01 · 11/2009 · Om · ©
In Germany, always notify the Truma Service Centre
if problems are encountered; in other countries the
relevant service partners should be contacted (see
Truma Service Booklet or www.truma.com). Having
the equipment model and the serial number ready
(see type plate) will speed up processing.
Dometic Pty Ltd
6 Treforest Drive,
Clayton, Victoria 3168
Australia
Service (Australia)
Telephone: (03) 95 45 56 55
Facsimile: (03) 95 45 59 66
Leisure Appliances NZ Ltd
26 Cashew Street, Grenada
North, Wellington
New Zealand
Service (New Zealand)
Telephone: (04) 232 38 98
Facsimile: (04) 232 38 78
✂
Boiler L. P. Gas and 230/240 V Electric Storage Water Heater Model B 10/B 14 from 08/2008
Garantiekarte
Guarantee Card
Bon de Garantie
Certificato di Garanzia
Garantiebon
Garantikort
Tarjeta de garantía
Händler-Adresse
Dealer’s address
Adresse du commerçant
Timbro del rivenditore
Dealeradres
Forhandleradresse
Dirección del comerciante
Verkaufsdatum
Date of sale
Date de vente
Data di vendita
Verkoopdatum
Salgsdato
Fecha de venta
Fabrik-Nummer
Serial number
No. de fabrication
No. di matricola
Serie-nummer
Seriennummer
Número de fábrica
10 l
14 l