1
Recommended Location of Alarms
• Locate the first alarm in the immediate areas of the bedrooms. Try to protect the exit path as the bedrooms are usually furthest from an exit. If more than one sleeping area exists, locate
additional alarms in each sleeping area.
• Locate additional alarms to protect any stairway as stairways act like chimneys for smoke and heat.
• Locate at least one alarm on every floor level.
• Locate an alarm in any area where a smoker sleeps or where electrical appliances are operated in sleeping areas.
• Smoke, heat and other combustion products rise to the ceiling and spread horizontally. Mounting the detector on the ceiling in the centre of the room places it closest to all points in the room.
Ceiling mounting is preferred in ordinary residential construction. However, in mobile homes, wall mounting on an inside partition is required to avoid the thermal barrier that may form at
the ceiling.
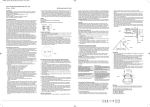
• When mounting alarm in the ceiling, locate it a minimum of 30cm from a side wall and 30cm from any corner (see Diagram A).
• When mounting alarm on a wall, use an inside wall with the alarm a maximum of 30cm below the ceiling and at least 10cm from any corner (see Diagram A).
Avoid These Locations
• Do not install a Smoke Alarm within 1 metre of heating and cooling supply vents or within 1 metre of return air or fresh air vents. Smoke may be blown away from the Smoke Alarm by the
supply vents, or could be diffused or reduced by being diverted into the return air vent.
• Do not install your Smoke Alarm in an area where the temperature may fall below 5°C or rise above 45°C. Smoke Alarms are designed to work safely only within these temperature ranges and
failure to alarm, improper alarms or nuisance alarms may result from operation outside these temperature limits.
• Do not install a Smoke Alarm in a damp or very humid area such as bathrooms with showers, where the normal humidity may rise above 90%. Above this level, moisture may condense inside
the smoke chamber and cause wrong or false alarms. The Smoke Alarm may also become unstable below 10% Relative Humidity.
• Do not install a Smoke Alarm in an area where particles of combustion are normally present, such as garages or kitchens etc. as this can cause false alarms.
• Do not install a Smoke Alarm in dusty or dirty areas – such an installation cannot be relied on. An accumulation of dust and dirt in the sensing chamber may block the openings and prevent an
alarm, or may get inside the alarm and cause false alarms. If a Smoke Alarm is required in such an area, vacuum it frequently and test it according to the ‘Operation and Testing’ section.
• Do not install a Smoke Alarm in the dead air space in the corner where the wall meets the ceiling. If in doubt as to the exact location of mounting, for your safety, contact your local Fire
Department for help choosing a location.
• Do not install a Smoke Alarm where bugs or insects are present before eliminating or minimising the problem. Although all smoke Alarms built since 1985 are made to prevent bugs from
entering the detection chamber, bugs may build up on chamber openings and prevent smoke from entering. If bugs are present, vacuum the unit frequently as described in the
maintenance section.
• Do not install a Smoke Alarm within 1 metre of a fluorescent light. Electrical ‘noise’ may cause nuisance alarms.
Installation
CAUTION: The Smoke Alarm will function correctly either as a stand-alone alarm or interconnected. All interconnected Smoke Alarms must be supplied from a single power circuit. A
common neutral must be used for the interconnect to function. Do not connect the Interconnect wire to
Active or Neutral.
WIRING: All 220-240V wiring must comply with AS/NZS3000 wiring rules.
1. Strip the Active / Neutral and Interconnect (if used) wires back to the strip length shown.
2. Connect the wires to the correct terminals on the base as indicated and ensure the screws are fully tightened.
3. Clip the flap closed preventing accidental contact with the live terminals.
4. Screw the mounting base on the ceiling or wall using the screws provided.
5. Clip the Smoke Alarm on to the base and install the 9V battery. The Smoke Alarm base will only close with
a battery installed.
Note: Do not close unless a battery is installed.
6. Turn on the Mains Power and check the Green and Red LED’s function. Green LED should glow to
show Mains Power present. Red LED will pulse every 40-60 seconds to indicate correct operation and the
9V battery is OK.
7. Press the Test / Hush Button to check the alarm works.
DO NOT LEAVE THE INSTALLATION UNTIL THE RED AND GREEN LEDS AND THE ALARM HAVE BEEN CHECKED FOR CORRECT OPERATION.
Hush or Silence Feature
• This Smoke Alarm has a built in Hush or Silence feature incorporated into the Test button.
• If cooking or other non-hazardous sources cause the alarm to sound it can be temporarily silenced by pressing the test / hush button for
3 seconds.
• The alarm then enters a dormant period for 10 minutes.
• If the smoke density increases during this period (i.e. from a fire) the unit will go into alarm mode.
• After the 10 minute dormant period the Smoke Alarm resumes normal operation and two beeps will sound to indicate this.
2
Press to silence
after checking
source of smoke