1
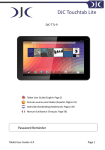
Model: AMI-TT4 EN USER MANUAL Introduction This manual contains detailed instructions and notes on the operation and use of this device. For your safety and bene it, read this manual carefully before using the device. Keep this manual in a handy place for quick reference. DO NOT place this device in a hot, wet or dusty environment Avoid leaving this device in a hot car or vehicle for prolonged periods of time. Dropping, high impacts and shaking the device violently may cause damage or malfunctions. DO NOT drive or operate machinery whilst using this device. To protect your device against online treats, it is highly recommended to use anti-virus software. Only use the charger supplied in the package and ensure compatibility of 3rd party accessories before itting. Be sure to charge the device when the following situations occur. - The battery icon shows the device is low on power or empty. - The system automatically shuts down or turns OFF soon after a restart. - Operation keys are slow to respond. - The device shows an empty battery icon in the bottom right corner. ǣǡ ̶̶Ǥ Page 1 ϔ Hardware Software Rockchip Dual Core A9 1.ͷGhz Processor 1GB System RAM 9.7” Multi-Touch Capacitive Screen 1024 x 768 Resolution ͺGB onboard memory MicroSD Card slot - Max 32GB Micro USB port Micro USB OTG port External 3G support 802.11 b/g/n WiFi Accelerometer Dual Camera (Rear 2MP, Front 0.3MP) Built-in Speaker & Microphone Rechargable Lithium-ion, Battery ͺ000mAh ͵ǤVǡͻȀʹ Android 4.1.1 - Jelly Bean Video - MPEG1,2,4 (DAT, MPG, VOB, TS, AVI, MKV, MP4, MOV, 3GP), Real Video 8/9 (RM, RMVB), H.264/AVC(AVI, MKV, MP4, MOV, 3GP), Sorenson Spark (FLV), H.263 (3GP, MOV, MP4), Google VP8 (WEBM), H.264 /AVC (MOV, 3GP) Audio - MP3, WMA,WAV, OGG, OGA, APE, FLAC, AAC, M4A Image - JPG, GIF, BMP, PNG eBook Format - PDF, EPUB, TXT, FB2, PDB, RTF Software Support - MSN, Skype, YouTube, Twitter, Media player, etc. Page 2 Qucik Guide 1 2 3 4 14 5 6 7 8 9 10 11 12 13 1. Volume Up 2. Volume Down 3. Return to the Home Screen 4. Front Camera 5. Speaker 6. Microphone Page 3 15 7. Headphone Jack 11. HDMI Output 8. USB interface for PC connection 9. Micro SD card slot 10. OTG Interface for connection to External Flash drive, Keyboard etc. 12. 2.5mm DC 9V, 2A Charging Port 13. Power Button 14. Reset button 15. Rear camera 1. Power ON/OFF To turn ON the device, press and hold the Power button for ͷ seconds/ The device may take a minute to boot. To place the device in ‘Standy Mode”, press the Power button for 1 second. To Turn OFF (Shut down) the device, press the Power button for 5 seconds. 2. Lock Screen & Desktop/Home Screen After turning ON the device, the Lock screen will appear. Touch and slide the “Lock” icon in order to unlock the screen. In standby mode, press the power button once to activate the screen, then slide the ‘Lock” icon to go into the “Home Screen” Lock Screen Page 4 Slide the ‘Lock icon” to the right to unlock Desktop/Home Screen 3. System Settings Apps Drawer button/icon 1. On the desktop, press the Apps (Applications) Drawer button to enter the Apps & Widgets Drawer Page 5 System Settings icon 2. In the “Apps Drawer” Press the ‘Settings” icon to enter system settings System Settings 1. Wi-Fi 2. Bluetooth Press “WiFi” to turn ON/OFF The device will automatically scan for available networks; select the network you want to connect to. To connect a Bluetooth device, turn ON the Bluetooth settings by toggling the ON/OFF switch. Page 6 System Settings 3. Ethernet 4. Data Usage With a USB to Ethernet adapter (not included) you are able to connect the TouchTAB IV to a LAN port. ou can view Ǥ Page 7 System Settings 5. More 6. Sound You can enter network settings such as: - VPNȋȌ - Portable Hotspot - Mobile Network Press “Sound” to access: - Volumes Ǧϔ Ǧ Ǧ Page 8 System Settings 7. Display 8. HDMI Press “Display” to access: - Brightness - Wallpaper - Sleep - Font Size Press “HDMI” to turn ON/OFF - Adjust HDMI output resolution - Adjust Screen Zoom Page 9 System Settings 9. Storage ϔig.1 Press “Storage” to access the devices memory and MicroSD status. To safely remove external storage such as MicroSD cards and external Flash drivesǡ “Unmount shared storage”̺̺Ǥ To enable “Mass Storage” mode connection to a PC, press the “USB computer connection” button (ϔig.1) and click on “Mass Storage” Page 10 10. Battery Press “Battery” to check the battery usage status. System Settings 11. Apps 11a. Apps To View and manage installed applications, press ‘Apps” to access: - Downloaded - On SD card - Running - All Select an application to manage. - Select the “Force stop” button to stop the application running in the background. - Select the ‘Uninstall” button to removeunwanted applications. Page 11 System Settings 11b. Apps 12. Location services You can controll applications currently using system resources by selecting “Running services” from the Apps menu. To view “Running Services” simply swipe to the left from the “Apps” menu. Enable Apps to use data from sources such as Wi-Fi and mobile networks to determine your approximate location. Page 12 System Settings 13. Security Screen Lock - Protect your device from unauthorised access by creating a personal screen unlock option. Make passwords visible - Show the password onscreen as you type. Device Administration - You can allow installation of non-Google Plays Store applications. Select “unknown sources” and press “ok”. Credential Storage - Display trusted CA certificates. - Install certificates from the SD card. Page 13 System Settings 14. Language & Input Language - Choose your prefered onscreen language. Spell Checker - Enable onboard spelling correction. - You can enter “Personal dictionary” words to the onboard dictionary. Keyboard & Input Methods - Change keyboard & keyboard settings. - Turn ‘Google voice typing” ON/OFF. Speech - Enable & manage “Voice Search” & “Text-to-speech output”. Mouse /Trackpad - Adjust the “Pointer Speed” when using with a mouse or trackpad. Page 14 System Settings 15. Backup & Reset 16. Email You can backup your data or completely erase the device by selecting reset. You can view and manage your POP, IMAP or Exchange mail box. Page 15 System Settings 17. Google 18. Add Account You can view and manage your Google email Account. Add your Exchange, POP, IMAP or Google email account. Once your account setup is complete, the emailing system synchronizes your accounts with the device. Emails are automatically downloaded to the device. Page 16 System Settings 16. Date & Time 17. Accessibilty Adjust the date and time according to your time zone. Select the Accessibility options to suit your needs. Page 17 System Settings 18. Developer Options Set options for application development. Page 18 19. About Tablet Identify model, software version and general information about your device How to enable USB Storage mode with a PC When connected to your PC, on the Desktop, touch the bottom right handside of the status barǤ A USB symbol will appear. Press on the bottom right hand side noti ation area to access the connection options. To enable USB Storage mode, press the “USB Connected” option. *Mass Storage mode must be enabled to connect to a PC. See page 10 for more info. Page 19 Press “Turn on USB Storage” to connect the device. The device will appear on your PC as a Removable Disk. You can now use it as an external storage drive. To disconnect the device, press the “Turn Off USB Storage” button and remove. How to install an Application (App) Apps Drawer button/icon 1. On the Desktop, press the Apps Drawer icon Google Play store 2. Select either the “Shop” button or the “Play store” icon. 4. Follow the on-screen instructions to download and install Apps. 5. To uninstall Apps, see section (11a. Apps) on page 11. * To view the Play store, you must be connected to the internet. Page 20 3. The Google Play store will launch where you can view, purchase and download Apps, Magazines, Books, Movies and more. How to create Desktop icons/shortcuts 1. On the Desktop, press the “Apps Drawer” icon Page 21 2. In the “Apps Drawer” press and hold an App icon and the Home Page (Desktop) will appear. You can then move the App to your desired location on the desktop. 3. In the “Apps Drawer” swipe across till the “Widget Apps” appear. Press and hold a Widget icon and the Home Page (Desktop) will appear. You can then move the Widget to your desired location on the desktop. How to change your Home Screen (Desktop) background 1. Go to the “Settings Menu” Page 22 2. In the Settings Menu, press on “Display” to view the wallpaper options. 3. Select from Live Wallpaper, Photo or Wallpapers and follow the onscreen instructions. ϔ Operating System CPU SDRAM Display Screen Resolution Storage I/O Port - Audio - USB - DC (Power) - Micro SD - HDMI Wi-Fi Camera Accelerometer Speaker & Microphone Battery Charge Time Dimension Warranty Page 23 Android 4.1.1 Jelly Bean Rockchip Dual Core A9 1.ͷGhz Processor 1GB System RAM 9.7” Multi-Touch 5 Point Capacitive Screen 1024 x 768 ͺGB onboard memory 3.5mm Stereo socket 1 x Micro USB port, 1 x Micro USB OTG port 9V, C-Tick Approved power adapter supplied) MicroSD Card slot - Max 32GB Micro HDMI port 802.11 b/g/n WiFi Dual Camera (Rear 2MP, Front 0.3MP) 4 Point rotation Built in Rechargable Lithium-ion, Battery ͺ000mAh ͵ǤV ǤͶǦͷ ȗȗǣʹͶͲȗͳͺͷȗͳͳǤͷ 12 Months Replacement Warranty Warranty Our goods come with guarantees that cannot be excluded under the Australian Consumer Law. You are entitled to a replacement or refund for a major failure and for compensation for any other reasonably foreseeable loss or damage. You are also entitled to have the goods repaired or replaced if the goods fail to be of acceptable quality and the failure does not amount to a major failure. The warranty starts from the date of purchase. Proof of purchase that includes the original purchase date is required for warranty service. If our goods are defective, not caused by accident or improper usage, please properly package and return them at your expense to the place of purchase, or kindly contact us. Amicroe Australia 13 Cleg St. Artarmon, NSW 2064 Australia TEL: (+61 2) 9966 8896 Web: www.amicroe.com.au Amicroe TM and the Amicroe logos are internationally registered trade marks. Page 24