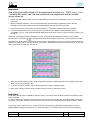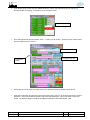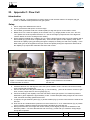
1
Fri Apr 9 00:13:53 2004 ./data/he1716_eu100b_295_1.dat 46,000 44,000 42,000 40,000 38,000 36,000 34,000 32,000 30,000 28,000 Counts 26,000 24,000 22,000 20,000 18,000 16,000 14,000 12,000 10,000 8,000 6,000 4,000 2,000 0 -2,000 4 5 6 7 8 9 10 11 12 13 14 15 16 17 2 Theta 1. SUMMARY OF MANUAL ................................................................................ 4 2. INTRODUCTION ......................................................................................... 5 3. SAFETY ................................................................................................... 5 CONTACTS .................................................................................................................5 GENERAL GUIDELINES ......................................................................................................5 SEARCHING AND SECURING THE HUTCHES ..................................................................................6 OPENING HUTCHES ........................................................................................................6 EMERGENCY STOP..........................................................................................................6 4. GENERAL INFORMATION .............................................................................. 7 VIEWING THE FACILITY STATUS ............................................................................................7 ACCESSING WIFI ...........................................................................................................7 5. END STATION SETUP NOTES – TIPS FOR SETTING UP EXPERIMENTS .......................... 7 6. END STATION COMPUTERS............................................................................ 8 LOGGING ON...............................................................................................................8 7. VIDEO CAMERAS AND VIDEO CONFERENCING FACILITIES........................................ 8 SURVEILLANCE CAMERAS ...................................................................................................8 HUTCH B CAMERAS ........................................................................................................8 CONFERENCE CALLING .....................................................................................................8 8. POWDER DIFFRACTION END STATION GUI - BEAMLINE CONTROL ............................. 9 PSS - OPENING AND CLOSING THE SHUTTERS ............................................................................ 10 FILTERS .................................................................................................................. 10 SLITS .................................................................................................................... 11 TABLE ................................................................................................................... 11 SAMPLE STAGE ........................................................................................................... 12 DIFFRACTOMETER TWO-THETA AND OMEGA AXES ........................................................................ 12 COUNTER ................................................................................................................ 13 9. MULTI-DIMENSION DATA ACQUISITION CONTROL............................................... 13 COLLECTING DATA USING A MULTI-DIMENSION SCAN ..................................................................... 13 1-D LINEAR SCAN ........................................................................................................ 14 2-D LINEAR SCAN ........................................................................................................ 14 1-D TABLE SCAN......................................................................................................... 15 1-D, 2-POSITIONERS TABLE SCAN ....................................................................................... 17 COMBINED EPICS AND ‘ROCKER’ SCANS ................................................................................. 19 10. SAMPLE ENVIRONMENT ANCILLARIES CONTROL ................................................ 21 OPERATING THE CRYOSTREAM 700 ...................................................................................... 21 CRYOSTREAM MANUAL SET ............................................................................................... 21 CRYOSTREAM TEMPERATURE STEP SCAN ................................................................................. 21 CRYOSTREAM TEMPERATURE PROFILE .................................................................................... 22 OPERATING THE HOT-AIR BLOWER 1000 ................................................................................ 24 EUROTHERM (HOT AIR BLOWER CONTROL) MANUAL SET ................................................................. 24 EUROTHERM TEMPERATURE STEP SCAN .................................................................................. 24 Document: Version no: 7864 Powder Diffraction Beamline - User Manual 5.1 Date: 7/3/2012 Page: 1 of 76 Fri Apr 9 00:13:53 2004 ./data/he1716_eu100b_295_1.dat 46,000 44,000 42,000 40,000 38,000 36,000 34,000 32,000 30,000 28,000 Counts 26,000 24,000 22,000 20,000 18,000 16,000 14,000 12,000 10,000 8,000 6,000 4,000 2,000 0 -2,000 4 5 6 7 8 9 10 11 12 13 14 15 16 17 2 Theta EUROTHERM TEMPERATURE PROFILE ..................................................................................... 25 OPERATING THE SERPENTINE HOT-AIR BLOWER .......................................................................... 26 OPERATING THE HIGH-THROUGHPUT STAGE ............................................................................. 27 THE AUTO-CAPILLARY-SPINNER.......................................................................................... 33 11. OTHER ANCILLARIES – NO CONTROL SOFTWARE ............................................... 35 PHILIPS FLAT PLATE SAMPLE SPINNER.................................................................................... 35 12. MYTHEN DETECTOR .................................................................................. 36 MYTHEN CLIENT INTERFACE .............................................................................................. 36 DETECTOR SETUP ........................................................................................................ 37 DATA PROCESSING SETUP ................................................................................................ 37 DATA ACQUISITION SETUP ............................................................................................... 38 13. DATA OUTPUT ........................................................................................ 41 PARAB FILE ............................................................................................................. 41 RAW FILES .............................................................................................................. 42 RAW.FF FILES .......................................................................................................... 42 XY FILES ................................................................................................................. 42 XYE FILES ............................................................................................................... 42 14. DATA PROCESSING - DATAPRO ..................................................................... 43 GENERAL HINTS AND TIPS ................................................................................................ 43 DATAPRO OPERATING INSTRUCTIONS .................................................................................... 43 15. VIEWING DATA ........................................................................................ 43 16. TRANSFERRING DATA ................................................................................ 45 USING USB DRIVE ....................................................................................................... 45 ON-LINE VBL TRANSFER ................................................................................................. 45 ACCESSING THE FTP SHARE .............................................................................................. 45 17. 18. LINUX COMMANDS .................................................................................... 45 X-RAY VHR AND GEMSTAR CCD DETECTOR ...................................................... 45 VHR ..................................................................................................................... 45 GEMSTAR ................................................................................................................ 48 19. SEALING QUARTZ CAPILLARIES WITH THE MICROTORCH...................................... 50 20. TROUBLESHOOTING.................................................................................. 51 NO INTENSITY OBSERVED IN DATA ....................................................................................... 51 MYTHEN CLIENT SHUTDOWN UNEXPECTEDLY ............................................................................. 51 CONTROL INTERFACE INPUT BOXES ARE “WHITED OUT” ................................................................. 51 EUROTHERM TEMPERATURE 1D SCAN DOES NOT START ................................................................... 51 GENERAL PROBLEMS ..................................................................................................... 51 21. APPENDIX A: ANTON PAAR FURNACE ............................................................. 52 INTRODUCTION ........................................................................................................... 52 HEATING STRIPS.......................................................................................................... 52 HEATING STRIP DETAILS AND OPERATING CONDITIONS .................................................................... 52 RAMP RATE PROFILES..................................................................................................... 52 FURNACE PREPARATION AND SET-UP ..................................................................................... 52 Document: Version no: 7864 Powder Diffraction Beamline - User Manual 5.1 Date: 7/3/2012 Page: 2 of 76 Fri Apr 9 00:13:53 2004 ./data/he1716_eu100b_295_1.dat 46,000 44,000 42,000 40,000 38,000 36,000 34,000 32,000 30,000 28,000 Counts 26,000 24,000 22,000 20,000 18,000 16,000 14,000 12,000 10,000 8,000 6,000 4,000 2,000 0 -2,000 4 5 6 7 8 9 10 11 12 13 14 15 16 17 2 Theta REMOVING AND INSTALLING THE PT HEATING STRIPS ..................................................................... 54 FURNACE RAMP RATE, MAXIMUM TEMPERATURE AND ATMOSPHERE ........................................................ 56 REMOVING AND INSTALLING THE W HEATING STRIPS ...................................................................... 56 APPLYING SAMPLES TO THE HEATING STRIP ............................................................................... 56 CONTROLLING THE FURNACE TEMPERATURE .............................................................................. 57 PLATINUM REACTIVITY ................................................................................................... 60 RESISTANCE AND HANDLING .............................................................................................. 60 ERRORS AND TROUBLESHOOTING ......................................................................................... 63 SOURCES OF ERROR ...................................................................................................... 64 22. APPENDIX B: VHR CCD DETECTOR WITH EPICS CONTROL ..................................... 68 SET-UP .................................................................................................................. 68 ON MAIN VHR CAMERA CONTROL DIALOGUE .............................................................................. 68 ON THE VHR CAMERA FILE SUB- DIALOGUE ............................................................................... 69 HOW TO VIEW THE IMAGE ................................................................................................ 69 USE SCAN RECORD TO CONTROL PB SHUTTER ........................................................................... 70 23. APPENDIX C: FLOW CELL ........................................................................... 71 INTRODUCTION ........................................................................................................... 71 SETUP ................................................................................................................... 71 24. APPENDIX D: DATA PROCESSING - ROOT ......................................................... 73 IMPORTANT .............................................................................................................. 73 START ROOT ............................................................................................................ 73 QUIT ..................................................................................................................... 73 SPLIT DATA AT ZERO..................................................................................................... 74 MERGE ................................................................................................................... 74 25. APPENDIX E: DATA PROCESSING - DATAPRO .................................................... 75 PROGRAM OVERVIEW..................................................................................................... 75 INSTALL DATAPRO ....................................................................................................... 75 HOW TO USE DATAPRO .................................................................................................. 75 Document: Version no: 7864 Powder Diffraction Beamline - User Manual 5.1 Date: 7/3/2012 Page: 3 of 76 Fri Apr 9 00:13:53 2004 ./data/he1716_eu100b_295_1.dat 46,000 44,000 42,000 40,000 38,000 36,000 34,000 32,000 30,000 28,000 Counts 26,000 24,000 22,000 20,000 18,000 16,000 14,000 12,000 10,000 8,000 6,000 4,000 2,000 0 -2,000 4 5 6 7 8 9 10 11 12 13 14 15 16 17 2 Theta 1. Summary of Manual Contacts Telephone numbers for the Control Room, Security, and Beamline Staff can be found on page 5 Safety Procedures EATING IS NOT ALLOWED AT THE BEAMLINE SAMPLE PREPARATION IS NOT ALLOWED AT THE BEAMLINE, use the chemical lab Listen to announcements. If beam SCRAPING is announced please VACATE the beamline, to the red floor area, until scraping is complete Search hutches thoroughly, looking behind obstructions Ensure equipment protection system (EPS), on Hutch-A roof is ready – indicated by all green LEDs Ensure that the ‘Storage Ring’ and ‘Beamline’ shutters are enabled, indicated by red dots on PSS Panel During an injection into the storage ring the Front End shutter will be closed. To re-open see page 10 Shutters may be actuated via the PSS interface on the End Station Overview GUI If Beamline shutter is not enabled but storage ring is AND EPS is green, call Control Room (x123) to request that they enable 10-BM1 (the powder diffraction beamline) Beamline and Storage Ring Status Monitor Can be viewed at: http://vbl.synchrotron.org.au/fsm/ Green squares indicate storage ring shutters are enabled and whether beamline shutter is open End Station Setup Ensure BEAM STOP is in the IN position (approx. -350 mm position on Table Horizontal), before opening the monochromatic shutter Ensure attenuation foils are out of beam path before collecting data; except where Pb foil is being used as a shutter Sample can be aligned with the aid of the camera and TV monitor in the experiment hutch (note: view of capillary on TV screen won’t be exactly horizontal! See markings on screen) TV monitor no. 2 in beamline control area shows the view of the experiment hutch, from the surveillance camera – USE IT to verify positions, conditions, and equipment settings in the hutch Surveillance camera can also be viewed and controlled at http://10.130.2.132/home/homeJ.html Diffractometer axes move CLOCKWISE when moving to NEGATIVE (lower) angles 2-theta axis (“Circle B”) position refers to position of leading edge of first detector module Beamline Control Centre Computers Computer LOGON to end station control, if required is - Username: 10bm1user1 Password: 10bm1user1 Data Processing The procedure for processing data off-line is described in sections Appendix D: Data Processing - ROOT and Appendix E: Data Processing - DataPro. Document: Version no: 7864 Powder Diffraction Beamline - User Manual 5.1 Date: 7/3/2012 Page: 4 of 76 Fri Apr 9 00:13:53 2004 ./data/he1716_eu100b_295_1.dat 46,000 44,000 42,000 40,000 38,000 36,000 34,000 32,000 30,000 28,000 Counts 26,000 24,000 22,000 20,000 18,000 16,000 14,000 12,000 10,000 8,000 6,000 4,000 2,000 0 -2,000 4 5 6 7 8 9 10 11 12 13 14 15 16 17 2 Theta 2. Introduction Welcome to the Powder Diffraction Beamline at the Australian Synchrotron. The purpose of this manual is to provide users with instructions for operating the beamline, including associated equipment, safely and efficiently. The beamline comprises 3 hutches and the end station control centre, where: Hutch A (enclosure closest to the storage ring) is where the optics reside. Hutch B (middle enclosure) contains the diffractometer and other equipment for performing powder diffraction experiments. Hutch C (down-stream enclosure) is currently in limited use. The Beamline Control Centre is where the computer terminals reside. This is the area used for controlling and monitoring the experiment, in addition to performing analysis of experiment data. 3. Safety Contacts Name Extension Phone Number Control Room 123 8540 4123 Security 120 8540 4120 Justin Kimpton 145 0428 584 304 Qinfen Gu 219 0488 312 422 Helen Brand 255 0477 315 128 Helen Maynard-Casely 266 General Guidelines By the time you arrive at the beamline, it is expected that you have already completed the radiation and site safety inductions. If this is not the case, then you must notify one of the staff associated with the beamline so that they can organise appropriate training. Some specific guidelines relating to the powder diffraction beamline are listed below and throughout this section. Eating is not allowed at the beamline - Please go to the user lounge. Sample preparation is not allowed at the beamline - Please use the chemistry lab for all sample preparation. Listen to announcements over the PA. If “Beam Scraping” is announced, please move to the red floor area until scraping is complete. Wear appropriate eye protection, especially during experiments involving dangerous chemicals and/or where heating/cooling. There are several pairs of safety glasses located near the left-hand side of the rear doors in the Beamline Control Cabin. Document: Version no: 7864 Powder Diffraction Beamline - User Manual 5.1 Date: 7/3/2012 Page: 5 of 76 Fri Apr 9 00:13:53 2004 ./data/he1716_eu100b_295_1.dat 46,000 44,000 42,000 40,000 38,000 36,000 34,000 32,000 30,000 28,000 Counts 26,000 24,000 22,000 20,000 18,000 16,000 14,000 12,000 10,000 8,000 6,000 4,000 2,000 0 -2,000 4 5 6 7 8 9 10 11 12 13 14 15 16 17 2 Theta Searching and Securing the Hutches Before the front end shutter can be opened Hutch A must be searched; this is normally done by beamline staff only. Before the monochromatic beam shutter can be opened, Hutch B must be searched thoroughly to ensure that there are no people occupying the enclosure. Notes on conducting a search: One person, at any one time, should be designated as the Searcher to perform all search activities. To begin the search, the flashing blue button labelled “SEARCH POINT” should be depressed, and then the flashing blue button at the next SEARCH POINT within the hutch should be depressed. There are two such search points in each hutch. Upon pressing the SEARCH POINT an alert will sound at approximately 1 second intervals informing occupants that a search is in progress. If you hear this sound and are not the Searcher, leave the enclosure immediately. The Searcher must, during the search, methodically look around the hutch including behind obstructions to ensure that there are no people present. When the Searcher is satisfied that no one remains in the hutch, the Searcher should leave the hutch and press the SEARCH POINT outside the hutch (located to the left of the door on the outside of the hutch). Close the door to the hutch gently as the magnets will draw the door closed when it approaches the door frame. Then press the SEARCH POINT button outside the hutch again. A different alert tone will be heard and the PSS stack lamp will light orange (from green) to indicate that the hutch is locked. The PSS panel will also indicate that the door is locked. Opening Hutches Once hutches have been secured, they can only be opened if the corresponding shutter is closed. Notes on opening hutches: Check on the status indicated by the PSS stack lamp corresponding to the hutch to be opened. If the lights are red and orange, then a shutter is open; if the light is orange, the shutters are closed and the door is locked. If the shutters are open, then close them. Press the DOOR UNLOCK button on the panel to the left hand side of the door. The stack lamp should now be green, indicating that the door is unlocked and there are no X-rays entering the enclosure Before entering an experimental enclosure, look through the window to ensure that everything is in order; particularly when performing experiments with hazardous conditions. Emergency Stop If an emergency situation arises involving synchrotron radiation within a hutch, press a red EMERGENCY STOP button, these are located at the hutch search points and adjacent to the PSS panel. Document: Version no: 7864 Powder Diffraction Beamline - User Manual 5.1 Date: 7/3/2012 Page: 6 of 76 Fri Apr 9 00:13:53 2004 ./data/he1716_eu100b_295_1.dat 46,000 44,000 42,000 40,000 38,000 36,000 34,000 32,000 30,000 28,000 Counts 26,000 24,000 22,000 20,000 18,000 16,000 14,000 12,000 10,000 8,000 6,000 4,000 2,000 0 -2,000 4 5 6 7 8 9 10 11 12 13 14 15 16 17 2 Theta 4. General Information Viewing the Facility Status The Australian Synchrotron has a webpage at http://114.30.64.13/fsm/ or http://vbl.synchrotron.org.au/fsm/ , which displays a summary of the machine and beamline run status information. Important Leave the Facility Status page open on the Data Analysis computer. The first step at troubleshooting a problem with the data collection should be a visit to the Facility Status page and ensure there is beam available. Information of particular interest on the Facility Status page includes: The Beam Current text displays the current in the synchrotron storage ring. After a routine injection, the current should be near 200 mA and will slowly decay over the following hours. If the beam has been lost the current is 0.0 mA; you will need to await reinjection before you can resume data acquisition. The “PSS Master Shutter Enable” light on the display must be green before the beamline Front End Shutter can be opened. If the “Powder Diffraction” status light is green the beamline Front End shutter is open. The text at the bottom of the display should state when the next injection will occur. This information is generally up-to-date and can be a useful source of information. Accessing WiFi Many users bring in their own laptops for data analysis etc. The synchrotron provides access to a wifi network, which can be used for internet or email access etc. Information on obtaining access to this service is available in the user office. 5. End Station Setup Notes – tips for setting up experiments Capillary Alignment Capillaries can be aligned manually or via the auto-alignment spinner. The notes below relate to the manual alignment of capillaries. Instruction on the operation of the auto-alignment spinner can be found in a later section. Use the monitor mounted on the down-stream wall of Hutch B, in combination with the camera mounted on the BCS frame, for aligning capillaries. The lines marked on the TV monitor are a guide to the eye only, some judgement as to the true alignment of the capillary will be needed. There is a monocular microscope situated at the beamline to assist with capillary alignment, prior to mounting on the diffractometer. Beam Stop After setting up your experiments, ensure that the beam-stop is blocking the direct beam and that the detector will not collide with anything during its travels. Injection The Control Room Operators perform an injection into the storage ring twice per day; unless there has been a beam loss and reinjection shortly before this time. While reinjection occurs, the shutters will be closed for around 10 minutes and no data can be collected. Document: Version no: 7864 Powder Diffraction Beamline - User Manual 5.1 Date: 7/3/2012 Page: 7 of 76 Fri Apr 9 00:13:53 2004 ./data/he1716_eu100b_295_1.dat 46,000 44,000 42,000 40,000 38,000 36,000 34,000 32,000 30,000 28,000 Counts 26,000 24,000 22,000 20,000 18,000 16,000 14,000 12,000 10,000 8,000 6,000 4,000 2,000 0 -2,000 4 5 6 7 8 9 10 11 12 13 14 15 16 17 2 Theta Important After the injection is complete, it is advised that you remain at the beamline for a further 30 minutes or so, to restart data acquisition and also to ensure that the beam remains stable before leaving the beamline. 6. End Station Computers There are three computers located at the end station labelled “Optics Control” (on the left), “End Station Control” (in the centre) and “Data Analysis” (on the right). These computers contain all of the control systems and data processing tools available at the beamline. This section describes available software for powder diffraction experiments and login procedures. In addition to the control and data analysis computers, there is an additional keyboard and mouse for controlling the video conferencing and camera equipment, and a computer that allows access to the ICDD powder diffraction database. Logging On The “End Station Control” computer is used for control systems and the processing of raw data, while the “Data Analysis” windows-based computer is used for data analysis and transfer of data files. The “End Station Control” can be accessed with: UserName: 10bm1user1 Password: 10bm1user1 The “Data Analysis” computer does not require a password; click on ‘pduser’. The “Optics Control” computer is not available to users. 7. Video Cameras and Video Conferencing Facilities There are a number of cameras in use at the beamline to aid visualisation of samples, equipment, and overall surveillance, in addition to provision of video conferencing facilities. Surveillance Cameras Three cameras are positioned outside the beamline hutches in order to provide a view of the Beamline Control Centre and a general view outside the beamline. Hutch B Cameras A camera, positioned above the door of Hutch B, can be used to monitor what is happening in the hutch and is controlled remotely using the following procedures: Open the Firefox web browser In the bookmarks menu, select the “Sony Network Camera” or similarly named menu option Click on the “Control” link in the top right hand corner Use the cursor arrows to move the frame position. It is also possible to zoom in on a particular area by drawing a box around it (zoom out again by clicking on the button in the middle of the cursor arrow group Conference Calling Users may make use of the conference call facilities, following prior arrangement with beamline staff. Document: Version no: 7864 Powder Diffraction Beamline - User Manual 5.1 Date: 7/3/2012 Page: 8 of 76 Fri Apr 9 00:13:53 2004 ./data/he1716_eu100b_295_1.dat 46,000 44,000 42,000 40,000 38,000 36,000 34,000 32,000 30,000 28,000 Counts 26,000 24,000 22,000 20,000 18,000 16,000 14,000 12,000 10,000 8,000 6,000 4,000 2,000 0 -2,000 4 5 6 7 8 9 10 11 12 13 14 15 16 17 2 Theta 8. Powder Diffraction End Station GUI - Beamline Control Software for monitoring and control of equipment in Hutch B (such as detectors, motors, ancillary equipment, etc) is located on the “End Station Control” computer. The main application is the Powder Diffraction End Station control graphical user interface (GUI) for monitoring and manipulating experiment equipment. To open the beamline controls, double click on the “PD End Station” icon. A window will be displayed, similar to that shown above. Important When entering text into a GUI textbox, you must have the mouse pointer located in that box and you must also press the carriage return for the value to be accepted. If motors do not move to position requested, put cursor in textbox and press carriage return again. Document: Version no: 7864 Powder Diffraction Beamline - User Manual 5.1 Date: 7/3/2012 Page: 9 of 76 Fri Apr 9 00:13:53 2004 ./data/he1716_eu100b_295_1.dat 46,000 44,000 42,000 40,000 38,000 36,000 34,000 32,000 30,000 28,000 Counts 26,000 24,000 22,000 20,000 18,000 16,000 14,000 12,000 10,000 8,000 6,000 4,000 2,000 0 -2,000 4 5 6 7 8 9 10 11 12 13 14 15 16 17 2 Theta PSS - Opening and Closing the Shutters There are two photon beam shutters in the beamline; one is situated up-stream of the optical components and the other is down-stream of the optics – both are located in Hutch A. The first is called the “Front End Shutter” and the second is the “Mono Shutter”. During user experiments the Front End Shutter must be open. Prior to injection the Front End Shutter will be closed remotely by the Control Room and must be reopened by the user after the injection is complete. The Front End Shutter can only be opened when the PSS Master Shutter has been enabled (indicated by red colour in “Master Shutter Enable” field above). Both shutters can be actuated via the Powder Diffraction End station GUI. Click on the Open or Close buttons for each of the shutters. This display will also provide feedback on whether the shutters are opened (in red) or closed (in green). When the shutters are open, the orange stack lights displayed above the hutches will go red. Filters There are a series of 9 filter foils that can be placed, in combination, in the beam path to provide different levels of attenuation of the photon beam - 4 tin filters (shown in shades of blue), 4 aluminium filters (shown in shades of purple) and one Pb filter (shown in a shade of orange). The Sn and Al filters are arranged with the thinnest filter (denoted by the lightest colour) on the right-hand side. To place a filter into the beam path, click on “In”. The filter square in the display will be blocked out in a solid colour to indicate that the filter is in position. Click the “Out” button to bring the filter out of the beam path. For most experiments, users should make sure that the filters are out of the path before data acquisition; except when using the Pb foil as a shutter, in this case the Mythen detector will trigger the removal of that attenuator. Document: Version no: 7864 Powder Diffraction Beamline - User Manual 5.1 Date: 7/3/2012 Page: 10 of 76 Fri Apr 9 00:13:53 2004 ./data/he1716_eu100b_295_1.dat 46,000 44,000 42,000 40,000 38,000 36,000 34,000 32,000 30,000 28,000 Counts 26,000 24,000 22,000 20,000 18,000 16,000 14,000 12,000 10,000 8,000 6,000 4,000 2,000 0 -2,000 4 5 6 7 8 9 10 11 12 13 14 15 16 17 2 Theta Slits The final beam-defining slits in the beamline can be set to provide a specific horizontal and vertical aperture, centred at a particular position. The slits are located between the filter foil units and the ion chamber. Care should be taken in positioning the slits prior to data acquisition. Table The experiment table can be used to support a variety of ancillary equipment and importantly supports the beam stop. The table is moved up and down to position the beam-stop and other equipment that are mounted on the table. Important The table must be positioned at approximately -310 mm, in the horizontal direction, in order for the beam stop to be in place – vertical height must be set according to the experiment. When moving the table in the positive direction (into the diffractometer), ensure that the beam-stop and any other equipment does not collide with the detector. The operating range for the table in the horizontal (direction is approximately -900 mm (out) to -300 mm (in). The operating range for the table in the vertical direction is approximately 50mm (top) to 0 mm (bottom). To move the table, horizontally or vertically, type the absolute position into the blue text box. Document: Version no: 7864 Powder Diffraction Beamline - User Manual 5.1 Date: 7/3/2012 Page: 11 of 76 Fri Apr 9 00:13:53 2004 ./data/he1716_eu100b_295_1.dat 46,000 44,000 42,000 40,000 38,000 36,000 34,000 32,000 30,000 28,000 Counts 26,000 24,000 22,000 20,000 18,000 16,000 14,000 12,000 10,000 8,000 6,000 4,000 2,000 0 -2,000 4 5 6 7 8 9 10 11 12 13 14 15 16 17 2 Theta Sample Stage A Huber XY stage may be used to provide two axes of linear, perpendicular motion. The X-Y stage is typically employed for position alignment of user-supplied sample stages, on the omega axis. The X-Y axes each have a travel range of ±15 mm. An additional linear stage labelled Z, can be mounted perpendicularly from the X-Y stage and can provide motion ±50 mm across the beam path. Diffractometer Two-Theta and Omega Axes The Mythen detector itself covers a range of 80 in 2-theta – this can be extended by moving the position of the detector. Note, this detector gives rise to data with gaps of approximately 0.2 every 5. To move the Mythen detector position, type the absolute position into the two-Theta text box and press enter. The travel range for the 2-theta axis is 0 to -40 2-theta; this is equivalent to detection coverage over the angular range of 0 to 120 in the lower 2-theta region. The omega axis is usually only adjusted for flat plate samples, or to accommodate user-supplied ancillaries. Important CAUTION: Driving 2-theta to angles between 0-80 places at least part of the detector in the direct beam. When using capillary sample mounting it is not necessary to alter the position of the omega axis. Document: Version no: 7864 Powder Diffraction Beamline - User Manual 5.1 Date: 7/3/2012 Page: 12 of 76 Fri Apr 9 00:13:53 2004 ./data/he1716_eu100b_295_1.dat 46,000 44,000 42,000 40,000 38,000 36,000 34,000 32,000 30,000 28,000 Counts 26,000 24,000 22,000 20,000 18,000 16,000 14,000 12,000 10,000 8,000 6,000 4,000 2,000 0 -2,000 4 5 6 7 8 9 10 11 12 13 14 15 16 17 2 Theta Counter An indication of the elapsed acquisition time and the accumulated ion chamber counts is given by the “Counter” status, as shown below. This information during data collection is logged in the .parab file for beam normalisation. 9. Multi-Dimension Data Acquisition Control Collecting Data Using a Multi-dimension Scan In order to automate the collection of data over a series of parameter changes, such as multiple detector positions at different environment temperatures, it is necessary to use a “Scan”. There are two ways to achieve this, depending on the complexity required of the scan. 1. 1-D SCAN: If ≤4 detector positions are required (in 2-theta), then use the Mythen Client to set the detector positions; and set additional positioners, such as temperature, using the PD End Station GUI st 1 dimension. 2. 2-D SCAN: If >4 detector positions are required in addition to a temperature scan, use the “MultiDimensional Scan” interface within the PD End Station GUI; where the 2-theta position of the detector is st set as the 1 dimension. Options for these scans include: a. LINEAR SCAN: where uniform step sizes are used to position the relevant ‘positioner’ b. TABLE SCAN: user inputs required positions via a table of values, allowing non-uniform steps. All multi-dimensional scans must be activated within the Mythen Client GUI (this procedure is described in the next section, from page 36), AND a number of settings must be updated within the “PD End Station” GUI. Important Detector positions must be entered as NEGATIVE values, when operating in the lower 2-theta region. If temperature ramp rate is required, set ramp rate via the ancillaries interface. Document: Version no: 7864 Powder Diffraction Beamline - User Manual 5.1 Date: 7/3/2012 Page: 13 of 76 Fri Apr 9 00:13:53 2004 ./data/he1716_eu100b_295_1.dat 46,000 44,000 42,000 40,000 38,000 36,000 34,000 32,000 30,000 28,000 Counts 26,000 24,000 22,000 20,000 18,000 16,000 14,000 12,000 10,000 8,000 6,000 4,000 2,000 0 -2,000 4 5 6 7 8 9 10 11 12 13 14 15 16 17 2 Theta 1-D Linear Scan Select “EPICS scan” function within Mythen Client and set required detector positions using “Detector Positions” dialogue. Using “Scan setup ” within PD End Station, select script for 1 dimension, available options include: 1-D Cryostream, 1-D Eurotherm, etc. st Set the Start, Finish, and Step size required. st Notes on completing the fields for 1 dimension values, for temperature ancillaries: o Set the ancillaries ramp rate elsewhere, prior to starting data acquisition. o The Eurotherm and Cryostream don’t require a settling time, although one may be set. Using “Scan setup ”, select script, 2-D Clear. Begin data acquisition by pressing “Start” in the Mythen Client, then “Start 1-D” in PD End Station GUI. To abort scan press “ABORT” within PD End Station and “Stop” in Mythen Client. When scan is finished, press “Stop” in Mythen Client to return to interactive control. Important To abort a scan when using the 1-D Eurotherm or 1-D Furnace scan setups, the “Abort Seq” button should also be clicked. This button is located in each of the Eurotherm or Furnace temperature sub-panels. 2-D Linear Scan Document: Version no: 7864 Powder Diffraction Beamline - User Manual 5.1 Date: 7/3/2012 Page: 14 of 76 Fri Apr 9 00:13:53 2004 ./data/he1716_eu100b_295_1.dat 46,000 44,000 42,000 40,000 38,000 36,000 34,000 32,000 30,000 28,000 Counts 26,000 24,000 22,000 20,000 18,000 16,000 14,000 12,000 10,000 8,000 6,000 4,000 2,000 0 -2,000 4 5 6 7 8 9 10 11 12 13 14 15 16 17 2 Theta Select “EPICS scan” function within Mythen Client and ensure number of “Detector Positions” is set to 0. Using “Scan setup ” within PD End Station, select script, 1-D Two-Theta, to enable moving the 2-theta position of the Mythen detector. Set the Start, Finish, and Step size required. In a new terminal window (or a previously open one that is not the Mythen terminal window) type in “./endstation_gui.sh”. This opens the EPICS dialogue (shown below). Click on “Scan” and select “Scan 2 (for nd 2D and higher scans)”. Enter the 2 Dimension positioner drive and readback PVs for the axis to be controlled. Note that the “Drive” and “Read” PVs should have “.VAL” and “.RBK” extensions (see below). Set the Start, Finish, and Step size required. Begin data acquisition by pressing “Start” in the Mythen Client, then “Start 2-D” in PD End Station GUI. To abort scan press “ABORT” within PD End Station and “Stop” in Mythen Client. When scan is finished, press “Stop” in Mythen Client to return to interactive control. Important To abort a scan when using the 1-D Eurotherm or 1-D Furnace scan setups, the “Abort Seq” button should also be clicked. This button is located in each of the Eurotherm or Furnace temperature sub-panels. 1-D Table Scan A ‘Table’ scan utilises a table of values to position an axis, where the step size is not uniform. In MYTHEN client select “EPICS scan” Using “Scan setup ” within PD End Station, select script for 1 dimension, available options include: 1-D Revolver; 1-D Cryostream, 1-D Eurotherm, etc. st st Notes on completing the fields for 1 dimension values, for temperature ancillaries: o Set the ancillaries ramp rate elsewhere, prior to starting data acquisition. o The Eurotherm and Cryostream don’t require a settling time, although one may be set. Using “Scan setup Document: Version no: ”, select script, 2-D Clear. 7864 Powder Diffraction Beamline - User Manual 5.1 Date: 7/3/2012 Page: 15 of 76 Fri Apr 9 00:13:53 2004 ./data/he1716_eu100b_295_1.dat 46,000 44,000 42,000 40,000 38,000 36,000 34,000 32,000 30,000 28,000 Counts 26,000 24,000 22,000 20,000 18,000 16,000 14,000 12,000 10,000 8,000 6,000 4,000 2,000 0 -2,000 4 5 6 7 8 9 10 11 12 13 14 15 16 17 2 Theta Launch Open Office by double clicking on the icon labelled “Scan Setup Template” on the desktop; click ‘OK’, then ‘save as’ to save and edit the template as your own file. Enter the desired positioner values in the first column and save the file. Important Use a filename which relates to the experiment number e.g. ‘ 2009-1-xxx_1.csv ‘ as table files which can’t be associated with an experiment will be deleted during clean-up. Launch ‘Position Table’ window via the “PD End Station” GUI and enter the filename of the *.csv that was just saved. Select ‘Load Scan Positions’, this will load and plot the requested table of positions; as indicated in the plot above. Begin data acquisition by pressing “Start” in the Mythen Client, then “Start 1-D” in PD End Station GUI. To abort scan press “ABORT” within PD End Station and “Stop” in Mythen Client. When scan is finished, press “Stop” in Mythen Client to return to interactive control. Important To abort a scan when using the 1-D Eurotherm or 1-D Furnace scan setups, the “Abort Seq” button should also be clicked. This button is located in each of the Eurotherm or Furnace temperature sub-panels. Document: Version no: 7864 Powder Diffraction Beamline - User Manual 5.1 Date: 7/3/2012 Page: 16 of 76 Fri Apr 9 00:13:53 2004 ./data/he1716_eu100b_295_1.dat 46,000 44,000 42,000 40,000 38,000 36,000 34,000 32,000 30,000 28,000 Counts 26,000 24,000 22,000 20,000 18,000 16,000 14,000 12,000 10,000 8,000 6,000 4,000 2,000 0 -2,000 4 5 6 7 8 9 10 11 12 13 14 15 16 17 2 Theta 1-D, 2-Positioners Table Scan A ‘Table’ scan can be implemented where 2 positioners are required to move prior to data acquisition; for example, varying slit aperture with omega angle. In the MYTHEN client select “EPICS scan” Using “Scan setup omega axis). ” within PD End Station, select script, (e.g. “1-D Omega”, to enable moving the Launch Open Office by double clicking on the icon labelled “Scan Setup Template” on the desktop; click ‘OK’, then ‘save as’ to save and edit the template as your own file. Enter the desired positioner values in adjacent columns (e.g. omega angle and slit vertical aperture) and save the file. See below for a screen shot of the Open Office spreadsheet. Document: Version no: 7864 Powder Diffraction Beamline - User Manual 5.1 Date: 7/3/2012 Page: 17 of 76 Fri Apr 9 00:13:53 2004 ./data/he1716_eu100b_295_1.dat 46,000 44,000 42,000 40,000 38,000 36,000 34,000 32,000 30,000 28,000 Counts 26,000 24,000 22,000 20,000 18,000 16,000 14,000 12,000 10,000 8,000 6,000 4,000 2,000 0 -2,000 4 5 6 7 8 9 10 11 12 13 14 15 16 17 2 Theta Important Use a filename which relates to the experiment number e.g. ‘ 2009-1-xxx_1.csv ‘ as table files which can’t be associated with an experiment will be deleted during clean-up. Launch ‘Position Table’ window via the “PD End Station” GUI and enter the filename of the *.csv that was just saved. Select ‘Load Scan Positions’, this will load and plot the requested table of positions. Ensure that the message in the window reads “Successfully loaded points” and do not close the window. Check that the ‘Scan mode’ field in the PD End Station 1 dimension window should read “TABLE”. st In a new terminal window (or a previously open one that is not the Mythen terminal window) type in “./endstation_gui.sh”. This opens the EPICS dialogue (shown below). Click on “Scan” and select “Scan 1 (for all scans)”. Within the scan dialogue select “Positioners” to open a window where additional positioners can be listed (shown below). Note that four pairs of Read and Drive positioner fields can be seen. The first positioner is that selected using “Scan setup ” and the second must be completed by the user; the example below shows the positioners: omega and vertical slits aperture size (Ysize). Remember to keep the mouse in the box as you type and to press enter to retain the new values. When the Mythen client has been setup, begin data acquisition by pressing “Start” in the Mythen Client, then “Start 1-D” in PD End Station GUI. To abort scan press “ABORT” within PD End Station and “Stop” in Mythen Client. When scan is finished, press “Stop” in Mythen Client to return to interactive control. Important It may take several clicks on ABORT to stop the scan (i.e. to return status to IDLE), and then the Mythen Client may be stopped. To abort a scan when using the 1-D Eurotherm or 1-D Furnace scan setups, the “Abort Seq” button should also be clicked. This button is located in each of the Eurotherm or Furnace temperature sub-panels.‘Rocker’ scans This type of scan is used to move or rock an axis (such as omega) for particular sample stages to improve particle statistics during data collection (e.g. High-throughput). To enable rocking of an axis do the following: Document: Version no: 7864 Powder Diffraction Beamline - User Manual 5.1 Date: 7/3/2012 Page: 18 of 76 Fri Apr 9 00:13:53 2004 ./data/he1716_eu100b_295_1.dat 46,000 44,000 42,000 40,000 38,000 36,000 34,000 32,000 30,000 28,000 Counts 26,000 24,000 22,000 20,000 18,000 16,000 14,000 12,000 10,000 8,000 6,000 4,000 2,000 0 -2,000 4 5 6 7 8 9 10 11 12 13 14 15 16 17 2 Theta Open the Engineering GUI (if not already open) in a new terminal window (or a previously open one that is not the Mythen terminal window) type in “./endstation_gui.sh”. Click on “Scan” and select “Scan 3 (for 3D and higher scans)” and then select “Scan 4 (for 4D scans)”. Open the windows fully by clicking the more button twice on both scan windows. Select “Rocker” on the Mythen client. This will change the “Script before each frame” and the “Script after each frame” fields to “../detector and rocker_before.sh” and “../detector and rocker_after.sh” Within Scan3, set the start and end values for the travel range of the axis as circled below, e.g. C-circle Within Scan4, set the number of cycles, via #pts as circled below Set the speed of the axis to ensure that the full motion is finished before the data acquisition for each position is complete. The motion range (Scan 3), “#pts” (Scan 4) and the axis speed can all be manipulated to ensure that this condition is met. Start the data acquisition by selecting “START” on the Mythen client. Important To enable the rock to complete within the acquisition time, manually move the rocking axis to the start position before starting the data acquisition.. Combined EPICS and ‘Rocker’ scans The rocker scan be combined with a standard EPICS scan (e.g. Temperature scan). Please ensure the following steps are followed: Set-up the EPICS scan as required and follow the above procedure for setting up the rocking scan, but DO NOT select “Rocker” scan type in the Mythen client. Document: Version no: 7864 Powder Diffraction Beamline - User Manual 5.1 Date: 7/3/2012 Page: 19 of 76 Fri Apr 9 00:13:53 2004 ./data/he1716_eu100b_295_1.dat 46,000 44,000 42,000 40,000 38,000 36,000 34,000 32,000 30,000 28,000 Counts 26,000 24,000 22,000 20,000 18,000 16,000 14,000 12,000 10,000 8,000 6,000 4,000 2,000 0 -2,000 4 5 6 7 8 9 10 11 12 13 14 15 16 17 2 Theta Manually set the “Script before each frame” and the “Script after each frame” fields to “../detector and rocker_before.sh” and “../detector and rocker_after.sh. DO NOT click “EPICS Scan“ in the Mythen client again as it will reset these fields. Start the data acquisition by selecting “START” on the Mythen client. Document: Version no: 7864 Powder Diffraction Beamline - User Manual 5.1 Date: 7/3/2012 Page: 20 of 76 Fri Apr 9 00:13:53 2004 ./data/he1716_eu100b_295_1.dat 46,000 44,000 42,000 40,000 38,000 36,000 34,000 32,000 30,000 28,000 Counts 26,000 24,000 22,000 20,000 18,000 16,000 14,000 12,000 10,000 8,000 6,000 4,000 2,000 0 -2,000 4 5 6 7 8 9 10 11 12 13 14 15 16 17 2 Theta 10. Sample Environment Ancillaries Control Operating the Cryostream 700 The Cryostream is used for controlling the temperature of capillary mounted samples in the 80 – 500 K range. There are several options for operating the cryostream, these include: 1. Set temperature and ramp rate manually for each new temperature. 2. Set temperature programme via a LINEAR or TABLE SCAN 3. Set temperature programme via a PROFILE (otherwise known as an on-the-fly scan) Notes The ramp rate can be set to any value between 1 to 360 K/hr. A plot of the progress of the temperature programme and the current temperature status can be obtained by selecting ‘Plot’. Note that this is a real-time plot and will not display values achieved before the plot is launched. Cryostream Manual Set Set new target temperature by typing in “Ramp target” and the speed with which this should be achieved in “Ramp rate”. Select “Start ramp” to action change to new temperature. Select “Pause” to temporarily hold current temperature during ramp. Select “Resume” to return to rampingto-target temperature. Select “Stop ramp” to halt ramp-to-target and hold temperature at current temperature. Cryostream Temperature Step Scan A temperature step scan programme should be used where data collection should occur only when the temperature has reached, and is held at, a target temperature. Type in desired “Ramp rate” for scan, within Cryostream dialogue. Refer to, and follow, notes on setting up a 1-D linear or table scan described from page 13. Note The Cryostream should not require a settling time for the temperature to be achieved prior to data acquisition, however, the user may choose to input one. Document: Version no: 7864 Powder Diffraction Beamline - User Manual 5.1 Date: 7/3/2012 Page: 21 of 76 Fri Apr 9 00:13:53 2004 ./data/he1716_eu100b_295_1.dat 46,000 44,000 42,000 40,000 38,000 36,000 34,000 32,000 30,000 28,000 Counts 26,000 24,000 22,000 20,000 18,000 16,000 14,000 12,000 10,000 8,000 6,000 4,000 2,000 0 -2,000 4 5 6 7 8 9 10 11 12 13 14 15 16 17 2 Theta Begin data acquisition by pressing “Start” in the Mythen Client, then “Start 1-D” in 1 Dimension. st To abort scan press “ABORT” within PD End Station and “Stop” in Mythen Client. When scan is finished, press “Stop” in Mythen Client to return to interactive control. Cryostream Temperature Profile A temperature profile programme should be used where data collection will occur ‘on-the-fly’, (i.e. there is no requirement for the temperature to plateau for data acquisition). Within the Mythen Client interface, select “Fast Repetition” which loads the following scripts: o “Script before each frame” => scripts/detector_before_fast_rep.sh o “Script after each frame” => scripts/detector_after_fast_rep.sh o “Trigger script” => scripts/trigger_scan.awk Set “Number of repetitions” to a number greater than which can be collected in the time it will take to complete the temperature profile. Within the Cryostream dialogue in the PD End Station interface, type in the desired “Ramp rate” to be used for the profile. Document: Version no: 7864 Powder Diffraction Beamline - User Manual 5.1 Date: 7/3/2012 Page: 22 of 76 Fri Apr 9 00:13:53 2004 ./data/he1716_eu100b_295_1.dat 46,000 44,000 42,000 40,000 38,000 36,000 34,000 32,000 30,000 28,000 Counts 26,000 24,000 22,000 20,000 18,000 16,000 14,000 12,000 10,000 8,000 6,000 4,000 2,000 0 -2,000 4 5 6 7 8 9 10 11 12 13 14 15 16 17 2 Theta Select “Profile” within Cryostream dialogue and, in the pop-up window, enter the desired target temperatures for the profile and hold time, if required. Select “Store profile”. Begin data acquisition by pressing “Start” in the Mythen Client, then “Start profile” within the Temperature Profile dialogue. To abort scan press “Skip phase” within Profile dialogue; it is necessary to press “Skip phase” as many times as required to move to the end of the profile. Then press “Stop” in Mythen Client. When the profile is finished, await completion of the number of repetitions or, press “Stop” in Mythen Client to return to interactive control. Important Leave blank the temperature boxes that aren’t required; do not enter 0 K. Hold time will still apply, even when ‘Skip phase’ has been pressed. In “Fast repetition” mode, the fast shutter will not be used, thus users must ensure all filters are out of the beam before starting data acquisition. Document: Version no: 7864 Powder Diffraction Beamline - User Manual 5.1 Date: 7/3/2012 Page: 23 of 76 Fri Apr 9 00:13:53 2004 ./data/he1716_eu100b_295_1.dat 46,000 44,000 42,000 40,000 38,000 36,000 34,000 32,000 30,000 28,000 Counts 26,000 24,000 22,000 20,000 18,000 16,000 14,000 12,000 10,000 8,000 6,000 4,000 2,000 0 -2,000 4 5 6 7 8 9 10 11 12 13 14 15 16 17 2 Theta Operating the Hot-air Blower 1000 The Hot-air Blower 1000 is used for controlling the temperature of capillary mounted samples in the 50 – 1000 °C range. There are several options for operating the Hot-air 1000, these include: 1. Set temperature and ramp rate manually, for each new temperature. 2. Set temperature programme via a LINEAR or TABLE SCAN 3. Set temperature programme via a PROFILE NOTE: The maximum temperature that can be set is 999.9°C. Do not enter 1000°C. The ramp rate can be set to any value up to a maximum of 5 °C /min. The maximum cooling rate is 15°C /min. A plot of the progress of the temperature programme and the current temperature status can be obtained by selecting ‘Plot’. Note that this is a real-time plot and will not display values achieved before the plot is launched. Eurotherm (Hot air Blower control) Manual Set Set new target temperature by typing in “Ramp target” and the speed with which this should be achieved in “Ramp rate”. Eurotherm Temperature Step Scan A temperature step scan programme should be used where data collection will occur only when the temperature has reached, and is held at, a target temperature. Type in desired “Ramp rate” for scan, within Eurotherm dialogue. Refer to, and follow, notes on setting up a 1-D linear or table scan described from page 13. Document: Version no: 7864 Powder Diffraction Beamline - User Manual 5.1 Date: 7/3/2012 Page: 24 of 76 Fri Apr 9 00:13:53 2004 ./data/he1716_eu100b_295_1.dat 46,000 44,000 42,000 40,000 38,000 36,000 34,000 32,000 30,000 28,000 Counts 26,000 24,000 22,000 20,000 18,000 16,000 14,000 12,000 10,000 8,000 6,000 4,000 2,000 0 -2,000 4 5 6 7 8 9 10 11 12 13 14 15 16 17 2 Theta Note The Eurotherm should not require a settling time for the temperature to be achieved prior to data acquisition however, the user may choose to input one. Begin data acquisition by pressing “Start” in the Mythen Client, then “Start 1-D” in 1 Dimension. st To abort scan press “ABORT” and “Abort Seq” within PD End Station and “Stop” in Mythen Client. When the scan is finished, press “Stop” in Mythen Client to return to interactive control. Eurotherm Temperature Profile A temperature profile programme should be used where data collection will occur ‘on-the-fly’, (i.e. there is no requirement for the temperature to plateau for data acquisition). Within the Mythen Client interface, select “Fast Repetition” which loads the following scripts: o “Script before each frame” => scripts/detector_before_fast_rep.sh o “Script after each frame” => scripts/detector_after_fast_rep.sh o “Trigger script” => scripts/trigger_scan.awk Set “Number of repetitions” to a number greater than which can be collected in the time it will take to complete the temperature profile. Within the Eurotherm dialogue in the PD End Station interface, type in the desired “Ramp rate” to be used for the profile. Select “Profile” within Eurotherm dialogue and, in the pop-up window, enter the desired target temperatures for the profile and hold time, if required. Select “Store profile”. Begin data acquisition by pressing “Start” in the Mythen Client, then “Start profile” within the Eurotherm Profile dialogue. To abort scan press “Skip phase” within Eurotherm Profile dialogue; it is necessary to press “Skip phase” as many times as required to move to the end of the profile. Then press “Abort seq” in the furnace sub panel and then “Stop” in Mythen Client. When the profile is finished, await completion of the number of repetitions or, press “Stop” in Mythen Client to return to interactive control. Important Leave blank the temperature boxes that aren’t required; do not enter 0.0 C. In “Fast repetition” mode, the fast shutter will not be used, thus users must ensure all filters are out of the beam before starting data acquisition. Document: Version no: 7864 Powder Diffraction Beamline - User Manual 5.1 Date: 7/3/2012 Page: 25 of 76 Fri Apr 9 00:13:53 2004 ./data/he1716_eu100b_295_1.dat 46,000 44,000 42,000 40,000 38,000 36,000 34,000 32,000 30,000 28,000 Counts 26,000 24,000 22,000 20,000 18,000 16,000 14,000 12,000 10,000 8,000 6,000 4,000 2,000 0 -2,000 4 5 6 7 8 9 10 11 12 13 14 15 16 17 2 Theta Operating the Serpentine Hot-air Blower The Serpentine Hot-air Blower may be used for controlling the temperature of capillary mounted samples in the 50 – 750 °C range; the control of this ancillary is also through the Eurotherm interface. The advantage of this blower is that the air stream is somewhat larger, thereby allowing the use of a larger beam size (i.e. more intensity). The operation of the Serpentine hot-air blower is similar to the Hot-air Blower 1000, thus refer to the instructions given above, from page 24. Note that the maximum ramp rate is 1000°C/hr for heating and cooling. The heater should not be switched off to facilitate faster cooling. Document: Version no: 7864 Powder Diffraction Beamline - User Manual 5.1 Date: 7/3/2012 Page: 26 of 76 Fri Apr 9 00:13:53 2004 ./data/he1716_eu100b_295_1.dat 46,000 44,000 42,000 40,000 38,000 36,000 34,000 32,000 30,000 28,000 Counts 26,000 24,000 22,000 20,000 18,000 16,000 14,000 12,000 10,000 8,000 6,000 4,000 2,000 0 -2,000 4 5 6 7 8 9 10 11 12 13 14 15 16 17 2 Theta Operating the High-throughput Stage Once the high-throughput stage has been set-up and aligned by beamline staff, the following instructions detail the operation of the stage: Select “EPICS Scan” on the Mythen client. Change the “before each frame” and “after each frame” scripts to “detector_and_rocker_before_frame.sh” and “detector_and_rocker_after_frame.sh” respectively. Important Remember that if you select EPICS scan on the Mythen anytime afterwards, these scripts need to be selected again. Select ‘1-D Sample X’ and then ‘2-D Clear’ in the scan setup menu on the PD Overview GUI as shown. Document: Version no: 7864 Powder Diffraction Beamline - User Manual 5.1 Date: 7/3/2012 Page: 27 of 76 Fri Apr 9 00:13:53 2004 ./data/he1716_eu100b_295_1.dat 46,000 44,000 42,000 40,000 38,000 36,000 34,000 32,000 30,000 28,000 Counts 26,000 24,000 22,000 20,000 18,000 16,000 14,000 12,000 10,000 8,000 6,000 4,000 2,000 0 -2,000 4 5 6 7 8 9 10 11 12 13 14 15 16 17 2 Theta If not already open (check the open MEDM windows), launch the Engineering GUI by opening a terminal window and typing: ./endstation_gui.sh and press enter. Engineering GUI Go to the Engineering GUI and select ‘Scan’ --> ‘Scan1 (for all scans)’. Press the green ‘More’ button twice to expand the scan record. Scan1 scan record Positioners button X-Y stage x axis PV Check that the x-axis of the X-Y stage (VAL PV) is located in the drive field as shown above. Open the ‘Positioners’ GUI and put in the linear stage motor (VAL) PV in the drive field for the second positioner. Close the positioners window and check that positioners 1 and 2 are active in the scan record. The detector trigger should be SR10BM01HU02IOC01:MYTHEN_BUSY_STS. Document: Version no: 7864 Powder Diffraction Beamline - User Manual 5.1 Date: 7/3/2012 Page: 28 of 76 Fri Apr 9 00:13:53 2004 ./data/he1716_eu100b_295_1.dat 46,000 44,000 42,000 40,000 38,000 36,000 34,000 32,000 30,000 28,000 Counts 26,000 24,000 22,000 20,000 18,000 16,000 14,000 12,000 10,000 8,000 6,000 4,000 2,000 0 -2,000 4 5 6 7 8 9 10 11 12 13 14 15 16 17 2 Theta X-Y stage x axis motor PV Linear stage motor PV (Z axis) 2 active positioners Launch OpenOffice by double clicking on the icon labelled “Scan Setup Template” on the desktop. Click ‘OK’, then ‘load‘ the generic full scan file (high_thr_put.csv). This has the coordinates for all 40 cassette positions. If you do not have a full cassette or only want to collect data for selected samples, save this file using another name and edit this new file to remove the sample positions not required. Document: Version no: 7864 Powder Diffraction Beamline - User Manual 5.1 Date: 7/3/2012 Page: 29 of 76 Fri Apr 9 00:13:53 2004 ./data/he1716_eu100b_295_1.dat 46,000 44,000 42,000 40,000 38,000 36,000 34,000 32,000 30,000 28,000 Counts 26,000 24,000 22,000 20,000 18,000 16,000 14,000 12,000 10,000 8,000 6,000 4,000 2,000 0 -2,000 4 5 6 7 8 9 10 11 12 13 14 15 16 17 2 Theta NOTE: A two column format is required for the csv files. The vertical and horizontal stage coordinates are located in the first and second columns respectively. The first column of coordinates will be the x axis positions for the X-Y stage (vertical) and the second column is the position for the linear stage. The vertical and horizontal distances between the cassette positions are 8 mm and 10 mm respectively. Load position table via the PD Overview GUI and enter the csv file name (See the 1-D Table Scan section for details). Check that the correct number of points and their positions are OK. Check that the scan1 record is in “Table” mode with no settling time and that the after scan mode is set to “STAY”. If rocking the stage during data acquisition is required, then follow the instructions in the next section otherwise click “Start” in the Mythen client and “Start 1-D” in the PD Overview GUI. The stage should begin to move the sample into the beam path. You can do a few dummy runs to make sure that the cycles and times fit OK. To abort the scan, click “Stop” in the Mythen client and “Abort” in the PD Overview GUI. Data acquisition with rocking To rock the stage during data acquisition a number of variables must be considered. Re-check that the rocking scripts are still loaded in the Mythen Client. From the Engineering GUI, open scan records 3 and 4, and expand their views by clicking ‘More’ twice in both scan records. Document: Version no: 7864 Powder Diffraction Beamline - User Manual 5.1 Date: 7/3/2012 Page: 30 of 76 Fri Apr 9 00:13:53 2004 ./data/he1716_eu100b_295_1.dat 46,000 44,000 42,000 40,000 38,000 36,000 34,000 32,000 30,000 28,000 Counts 26,000 24,000 22,000 20,000 18,000 16,000 14,000 12,000 10,000 8,000 6,000 4,000 2,000 0 -2,000 4 5 6 7 8 9 10 11 12 13 14 15 16 17 2 Theta Settings for Scan 3 record NOTE: These are standard settings that are used in the scan 3 and scan 4 records (as shown above) and are to be used as a guide. 1. No positioner settling time required. Detector trigger is the scan PV from scan 3: SR10BM01HU02IOC01:scan3.EXSC. If long acquisition times are required, the #PTS value can be increased from 1 to 2 (or more) to enable more cycles to be completed. 2. Drive: SR10BM01HU02IOC01:DIF01_C_MTR.VAL 3. Start: -2 degrees 4. End: 2 degrees (Centre should change to 0 degrees) 5. Step size: 4; Width: 4; #PTS: 2. 6. Linear scan mode should be active and ‘AFTER SCAN’ mode should be: START POS. No positioner settling time is required. Settings for Scan 4 record NOTE: No read or drive PVs required Start = 0 End = 1 (Centre should change to 0.5) Step size = 1; Width = 1; #PTS: 2 1. No positioner settling time required. Detector trigger is the scan PV from scan 3: SR10BM01HU02IOC01:scan3.EXSC. 2. If long acquisition times are required, the #PTS value can be increased from 1 to 2 (or more) to enable more cycles to be completed. Document: Version no: 7864 Powder Diffraction Beamline - User Manual 5.1 Date: 7/3/2012 Page: 31 of 76 Fri Apr 9 00:13:53 2004 ./data/he1716_eu100b_295_1.dat 46,000 44,000 42,000 40,000 38,000 36,000 34,000 32,000 30,000 28,000 Counts 26,000 24,000 22,000 20,000 18,000 16,000 14,000 12,000 10,000 8,000 6,000 4,000 2,000 0 -2,000 4 5 6 7 8 9 10 11 12 13 14 15 16 17 2 Theta NOTE ON SETTINGS FOR OPTIMISATION OF THE ROCKING CYCLES AND OMEGA AXIS SPEED As the rocking scan records are not fully integrated into the data acquisition, it is critical to ensure that the rocking is completed by the end of each data collection period (i.e. after each detector position). The number of cycles can be adjusted by changing the “#PTS” field in the scan4 record. The omega axis speed can also be manipulated. Settings used so far: Data collection time (s) 60 No. cycles (#PTS in scan record 4) 1 Omega axis speed (mm/s) 0.18 150 4 0.34 Comments Started at +2 degrees and was able to get 1.5 cycles per acquisition. Prior to starting acquisition, move the omega axis to the start angle position (e.g. usually -2 degrees). JJ slits set to 1.1 mm vertically and 2.5 mm horizontally. Enter sample name details in Mythen Client and press ‘Start’ and the ‘Start 1-D’ in the PD Overview. The stage should begin to move the sample into the beam path. You can do a few dummy runs to make sure that the cycles and times fit Document: Version no: 7864 Powder Diffraction Beamline - User Manual 5.1 Date: 7/3/2012 Page: 32 of 76 Fri Apr 9 00:13:53 2004 ./data/he1716_eu100b_295_1.dat 46,000 44,000 42,000 40,000 38,000 36,000 34,000 32,000 30,000 28,000 Counts 26,000 24,000 22,000 20,000 18,000 16,000 14,000 12,000 10,000 8,000 6,000 4,000 2,000 0 -2,000 4 5 6 7 8 9 10 11 12 13 14 15 16 17 2 Theta The Auto-Capillary-Spinner The auto capillary spinner is designed to aid capillary alignment for users. It uses image recognition technology to align the capillary to the centre of diffractometer axis. The auto capillary spinner control computer located on the roof of the PD hutches and is connected to two monitors: one on the wall of hutch B, the other on the cabin wall. The mouse and keyboard used to control the auto capillary spinner are shared with Data Analysis computer. The mouse can be moved to the monitor above the Data Analysis PC by moving it through the top of the monitor (on the desk). A ripple effect is observed when the mouse moves between the two monitors. Start up If you restart the computer, login as “10bm1user1”. The password is the same as the login name. Double click the “ Start_all” shortcut located on the wall monitor. It should start EPICS and an IDL window. Click the IDL window when requested and wait for the start up procedure to complete. An image as shown below should be observed. After 30s click “Check all” and “image1” should turn green. Click “Done” and an “areaVision” window will open. Click button “START VIDEO”. Check (tick) the box from the menu “Plugins” => “Auto align” => “Show GUI”. Check (tick) the box “Activate” as shown in “Capillary autoalignment” window. “Show Processing” also should be ticked. Mounting capillaries Fix the capillary in a brass pin and insert the pin into a magnetic base and carefully clamp (not too tight). Attach the magnetic base to the post of spinner. Make sure there is enough contrast between the capillary and the background in the image. Important 1. The capillary needs to be mounted as straight as possible in the brass pin. 2. If there is insufficient contrast between the capillary and the background, flip the black & white board located in the hutch to alter the background. Running the software Move mouse UP from the “Data Analysis computer” into the monitor on the cabin wall to access control of the “capillary spinner computer”. The “areaVision” and “Capillary autoalignment” windows should be open on the desktop. The beam position on the sample can be marked on screen by Ctrl+left click or Ctrl+right click mouse to move the green or red cross, respectively. In the “Capillary autoalignment” window, check “AUTOMAGIC” to start sample alignment. The progress of the alignment can be followed by monitoring the red progress bar. When the alignment is finished, the progress bar will turn green,”Idle” will appear at the end of the progress bar and the selection option should also move to “Idle”. Check “Spin FWD” or “Spin REV” to spin the sample; there are 3 spin speed options to choose from (360°/s, 180°/s and 90°/s). Document: Version no: 7864 Powder Diffraction Beamline - User Manual 5.1 Date: 7/3/2012 Page: 33 of 76 Fri Apr 9 00:13:53 2004 ./data/he1716_eu100b_295_1.dat 46,000 44,000 42,000 40,000 38,000 36,000 34,000 32,000 30,000 28,000 Counts 26,000 24,000 22,000 20,000 18,000 16,000 14,000 12,000 10,000 8,000 6,000 4,000 2,000 0 -2,000 4 5 6 7 8 9 10 11 12 13 14 15 16 17 2 Theta For use with the flow and Norby cells an oscillation of the sample is possible. A value can be input into the “SPIN” area to set the angular range for rotation, then the “Oscillate” check box can be ticked to begin oscillating the capillary. Commence data collection. To stop the spinner at the end of a measurement, check “stop”. The capillary can be removed from the spinner and a new sample mounted. NOTE: DO NOT attempt to remove the sample from the spinner while it is rotating. Spin speed control Automagic, stop and spin control Rotation angle control Troubleshooting Cannot see the capillary in the monitor: the software cannot align the capillary! Straighten the capillary in the brass stub before re-trying. Software crashes: close all windows on the desktop of the “capillary spinner computer” then begin the “Start up” process again. Cannot align capillary satisfactorily after a couple of attempts: check if the capillary is loose or if there are any disturbing artifacts in the background of the image (e.g. such as the bottom of the brass stub) before trying again. If the capillary still won’t align, then go into the hutch and manually move the two translation and tilt axes to zero. The capillary image should be observable on the monitor now. Press the “Home Tilt1”, “Home Trans1”, “Home Tilt2” and “Home Trans2” buttons on the “Capillary alignment” panel. Begin the alignment procedure again. If there are still problems call beamline staff or operators (after hours). More troubleshooting details can found in the ELOG. Document: Version no: 7864 Powder Diffraction Beamline - User Manual 5.1 Date: 7/3/2012 Page: 34 of 76 Fri Apr 9 00:13:53 2004 ./data/he1716_eu100b_295_1.dat 46,000 44,000 42,000 40,000 38,000 36,000 34,000 32,000 30,000 28,000 Counts 26,000 24,000 22,000 20,000 18,000 16,000 14,000 12,000 10,000 8,000 6,000 4,000 2,000 0 -2,000 4 5 6 7 8 9 10 11 12 13 14 15 16 17 2 Theta 11. Other Ancillaries – No Control Software Philips Flat Plate Sample Spinner Below are the instructions for the operation of the flat plate sample stage. WARNING: Sample must not be removed while spinner is spinning or ‘engaged’ To Load Sample: 1. Insert sample holder disk - push disk to back of spinner and position approximately in the centre, left-toright by eye. 2. Push ‘Enable’ button (in control rack), to raise sample height 3. Push ‘Start Spin’ button to spin sample To Remove Sample: 1. Push ‘Stop Spin’ button to stop sample 2. Push ‘Disable’ button (in control rack), to lower sample height 3. Remove sample disk from spinner Document: Version no: 7864 Powder Diffraction Beamline - User Manual 5.1 Date: 7/3/2012 Page: 35 of 76 Fri Apr 9 00:13:53 2004 ./data/he1716_eu100b_295_1.dat 46,000 44,000 42,000 40,000 38,000 36,000 34,000 32,000 30,000 28,000 Counts 26,000 24,000 22,000 20,000 18,000 16,000 14,000 12,000 10,000 8,000 6,000 4,000 2,000 0 -2,000 4 5 6 7 8 9 10 11 12 13 14 15 16 17 2 Theta 12. Mythen Detector The Mythen detector uses software developed at the Paul Scherrer Institut and Swiss Light Source, and which has been modified for use at the Australian Synchrotron. Mythen Client Interface The application used for acquiring data is the “Mythen Client”. Double click on the desktop icon labelled Mythen Client – this launches the “NewMythenII” GUI and a “terminal” session which provides feedback on the status of the detector. If this is the first time the Mythen Client has been used since reboot, the Mythen Client will download trim files from the detector; this may take a minute and is complete after which a plot of the trimbits is displayed. The main window, shown above, has 4 tabs of which users will use only the first 3. Document: Version no: 7864 Powder Diffraction Beamline - User Manual 5.1 Date: 7/3/2012 Page: 36 of 76 Fri Apr 9 00:13:53 2004 ./data/he1716_eu100b_295_1.dat 46,000 44,000 42,000 40,000 38,000 36,000 34,000 32,000 30,000 28,000 Counts 26,000 24,000 22,000 20,000 18,000 16,000 14,000 12,000 10,000 8,000 6,000 4,000 2,000 0 -2,000 4 5 6 7 8 9 10 11 12 13 14 15 16 17 2 Theta Detector Setup INITIALIZATION TAB – Global Settings: Threshold energy (eV) – Set the threshold energy to half the value of the X-ray energy of the experiment. This is an important step and you should remember to change this value whenever you change energies. Settings – use the “Standard” setting for all experiments using X-rays of ≥ 10,000 eV (threshold <5,000). The “High Gain” setting should be selected for experiments performed at photon energies lower than this. Advanced – “Advanced” radio button is selected when triggering the detector to collect data via an EPICS scan. Data Processing Setup It is crucial to check the settings within this tab to ensure data are processed on-line, in real-time. DATA TAB – Output Format Settings: Ensure the ‘Angle’ and ‘Value’ boxes are checked. DATA TAB – Corrections Settings: Ensure the ‘Flat Field’ box is checked, and the flat field file that is selected corresponds to the current experiment. Note, flat field file should be *.raw. DATA TAB – Data Display Settings: Ensure the ‘Raw Data’, ‘Flat Field Corrected’ and ‘Flat Field Data’ boxes are checked. Document: Version no: 7864 Powder Diffraction Beamline - User Manual 5.1 Date: 7/3/2012 Page: 37 of 76 Fri Apr 9 00:13:53 2004 ./data/he1716_eu100b_295_1.dat 46,000 44,000 42,000 40,000 38,000 36,000 34,000 32,000 30,000 28,000 Counts 26,000 24,000 22,000 20,000 18,000 16,000 14,000 12,000 10,000 8,000 6,000 4,000 2,000 0 -2,000 4 5 6 7 8 9 10 11 12 13 14 15 16 17 2 Theta Data Acquisition Setup ACQUISITION TAB – Output File: Output Directory - the “Output Directory” will initially be set to the user directory. It is generally a good idea save data in subdirectories of the user directory - a new subdirectory for each sample or run sequence. To create a subdirectory, click on the Browse button and create a directory with a descriptive name in the usual way. Important When naming files and folders do not use spaces, hyphens, backslashes or any kind of punctuation. If the temptation to decorate names becomes unbearable, use underscores. File name root - change the name of “File name root” to a word or phrase that describes the sample. DO NOT start name with number!!! Start index - the “Start index” is the current number in the sequence of histograms and will be appended to the filename. When the “File name root” is changed the “start index” will reset to 0. The Mythen Client will then save each data file with the file root name and a number incrementing up from the start index. Header - the before frame and after frame boxes should be checked by default; ensure these are selected. This will enable the collection of meta information which will be saved alongside the diffraction data. ACQUISITION TAB – Runs: Acquisition Time – set the time required per exposure, as required. The maximum time unit is seconds (to collect for minutes set the time to > 60s); time may be set in smaller units using the drop-down box to select ms, etc. Repetitions – data can be collected in a continuous manner by setting the number of repetitions to >1. Delay between frames – when collecting data for a number of repetitions but is not required continuously, set a delay between frames. Delay after trigger, Gating and Trigger – not used. Document: Version no: 7864 Powder Diffraction Beamline - User Manual 5.1 Date: 7/3/2012 Page: 38 of 76 Fri Apr 9 00:13:53 2004 ./data/he1716_eu100b_295_1.dat 46,000 44,000 42,000 40,000 38,000 36,000 34,000 32,000 30,000 28,000 Counts 26,000 24,000 22,000 20,000 18,000 16,000 14,000 12,000 10,000 8,000 6,000 4,000 2,000 0 -2,000 4 5 6 7 8 9 10 11 12 13 14 15 16 17 2 Theta ACQUISITION TAB – Detector Positions: Number of positions – should be 0, for data collection at current position of detector (see Two-Theta position, page 12). Number of positions – data can be collected at multiple detector positions by setting this to 1, 2, 3, or 4. Type the required 2-theta positions in the dialogue boxes. Important It is essential that these positions are typed in as negative numbers, when using the detector in the lower 2-theta region, and positive in upper 2theta region. ACQUISITION TAB – Setup, Scripts, Scans: Setup mode 1 – to turn off scanning capability click on “No scan”. Setup mode 2 – click on “EPICS Scan” to select the option to collect data using a multi parameter scan. A number of actions will occur : 1. The “advanced” radio button in the Initialisation tab will be checked. 2. The “Scan Type” and “External” radio buttons will be checked. 3. The “Stop script”, “Script before each frame”, “Script after each frame”, and “Trigger script” will be checked. Scripts mode 2 – when collecting data via a scan routine, ensure the following scripts are in use: 1. “Stop script” => scripts/epics_busy_reset.awk 2. “Script before each frame” => scripts/detector_before.sh 3. “Script after each frame” => scripts/detector_after.sh 4. “Trigger script” => scripts/trigger_scan.awk Scans mode 2 – Scan Type “External” should be selected when triggering the Mythen detector from a multidimensional scan routine. Document: Version no: 7864 Powder Diffraction Beamline - User Manual 5.1 Date: 7/3/2012 Page: 39 of 76 Fri Apr 9 00:13:53 2004 ./data/he1716_eu100b_295_1.dat 46,000 44,000 42,000 40,000 38,000 36,000 34,000 32,000 30,000 28,000 Counts 26,000 24,000 22,000 20,000 18,000 16,000 14,000 12,000 10,000 8,000 6,000 4,000 2,000 0 -2,000 4 5 6 7 8 9 10 11 12 13 14 15 16 17 2 Theta Setup mode 3 – to utilise fast data collection (on-the-fly) through repetitious acquisition, click on “Fast repetition”. Scripts mode 3 – when collecting data on-the-fly, ensure the following scripts are in use: 1. “Stop script” => scripts/epics_busy_reset.awk 2. “Script before each frame” => scripts/detector_before_fast_rep.sh 3. “Script after each frame” => scripts/detector_after_fast_rep.sh ACQUISITION TAB – Start, Stop, Progress: To start data acquisition, press the Start button and to stop the acquisition, press the Stop button. Ensure that the beam stop is in line with beam and that the monochromatic beam shutter is open before acquiring data. The progress bar displays the percentage completion of the data collection, when acquiring in ‘No scan’ and ‘Fast repetition’ mode. For an indication of the progress of an EPICS scan, see the Progress ratios in PD End Station GUI. Document: Version no: 7864 Powder Diffraction Beamline - User Manual 5.1 Date: 7/3/2012 Page: 40 of 76 Fri Apr 9 00:13:53 2004 ./data/he1716_eu100b_295_1.dat 46,000 44,000 42,000 40,000 38,000 36,000 34,000 32,000 30,000 28,000 Counts 26,000 24,000 22,000 20,000 18,000 16,000 14,000 12,000 10,000 8,000 6,000 4,000 2,000 0 -2,000 4 5 6 7 8 9 10 11 12 13 14 15 16 17 2 Theta 13. Data Output Five data files are generated for each data acquisition. Files with the extensions “raw” and “raw.ff” are comprised of the raw channel and flatfield-corrected channel data. The files with the “parab” extension contain the meta-data. Processed data files include the files with the “xye” and “dat” extensions. All files will be located in the same directory, and should be COPIED by the user to their own storage media. A number of files are produced during data collection and after processing, below is a description of these. PARAB File These files contain meta-data, additional information relating to the experiment. These data include: a time stamp, the data acquisition time, the integrated ion chamber counts, and the 2-theta axis position. Thu Nov 26 18:46:30 EST 2009 file name root = quartz_ht run = 11 acquisition time = 60.000 second(s) mythen gain mode = standard threshold energy = 7000 eV SR10BM01ICH01:I_RAW_MON SR10BM01ICH01:RANGE_SP SR11BCM01:CURRENT_MONITOR SR10BM01DCM01:KEV_MON SR10BM01DCM01:UBRAGG_MON SR10BM01DCM01:BRAGG_MTR_OFFSET_MON SR10BM01MIR01:RADIUS_MON SR10BM01MIR02:RADIUS_MON SR10BM01HU02IOC01:DIF01_B_MTR.RBV SR10BM01HU02IOC01:DIF01_B_MTR.OFF SR10BM01HU02IOC01:DIF01_Y_MTR.RBV SR10BM01HU02IOC01:DIF01_C_MTR.RBV SR10BM01HU02IOC01:SLM01_Yt2.C SR10BM01HU02IOC01:SLM01_Yt2.D SR10BM01HU02IOC01:SLM01_Xt2.C SR10BM01HU02IOC01:SLM01_Xt2.D SR10BM01HU02IOC01:CS700:GAS_TEMP SR10BM01HU02IOC01:ET:RBV_pvTemp SR10BM01HU02IOC01:FRNC:RBV_pvTemp SR10BM01HU02IOC01:FRNC_MTR.RBV SR10BM01HU02IOC01:SPN01_INDEX_MTR.VAL SR10BM01HU02IOC01:scaler1.S8 SR10BM01HU02IOC01:scaler1.S16 SR10BM01HU02IOC01:scaler1.S10 Document: Version no: 39935 10pA-0.1uA 185.162 10.0081 11.3935 0.038 20.834 5.5 84.9997 -44.1254 0.17498 7.3104 0.2 4.55 2 6.10623e-16 0 0 610 -0.15 -5.275 4.40399e+06 6.0574e+07 0 7864 Powder Diffraction Beamline - User Manual 5.1 Ion_Chamber_Raw_Counts Ion_Chamber_Gain Beam_Current_(mA) Photon_Energy_(keV) Bragg_Axis_Calculated_(deg) Bragg_Axis_Offset_(deg) Collimating_Mirror_Radius_(steps) Focussing_Mirror_Radius_(km) 2theta_Mythen_(deg) 2theta_Offset_Mythen_(deg) Diffractometer_Height_(mm) omega_(deg) JJ-slit_Vertical_Size_(mm) JJ-slit_Vertical_Centre_(mm) JJ-slit_Horizontal_Size_(mm) JJ-slit_Horizontal_Centre_(mm) Cryo_Temperature_(K) Eurotherm_Temperature_(C) Furnace_Temperature_(C) Furnace_Stage_Position_(mm) Multisample_Spinner_Position Integrated_Ion_Chamber_Count(counts) Integration_Time(microseconds) Integrated_Misc_Counts(counts) Date: 7/3/2012 Page: 41 of 76 Fri Apr 9 00:13:53 2004 ./data/he1716_eu100b_295_1.dat 46,000 44,000 42,000 40,000 38,000 36,000 34,000 32,000 30,000 28,000 Counts 26,000 24,000 22,000 20,000 18,000 16,000 14,000 12,000 10,000 8,000 6,000 4,000 2,000 0 -2,000 4 5 6 7 8 9 10 11 12 13 14 15 16 17 2 Theta RAW Files Contain the raw data in ‘xy’ format, where x = detector channel number and y = counts. 0 47.000000 1 43.000000 2 34.000000 3 31.000000 4 41.000000 5 33.000000 etc… RAW.FF Files Contain the flat field corrected raw data in ‘xy’ format, where x = detector channel number and y = corrected counts. 0 37.995037 1 36.822037 2 30.309925 3 28.574492 4 38.199272 5 31.159782 etc… XY Files These are your data files, after processing, containing xy data, where x = 2-theta angle and y = corrected counts. 82.818459 37.995037 82.814705 36.822037 82.810951 30.309925 82.807198 28.574492 82.803444 38.199272 82.799683 31.159782 etc… XYE Files These are your data files, after processing, containing xye data, where x = 2-theta angle, y = corrected counts, and e = error. 82.818459 37.995037 6.164011 82.814705 36.822037 6.068116 82.810951 30.309925 5.505445 82.807198 28.574492 5.345511 82.803444 38.199272 6.180555 82.799683 31.159782 5.582094 etc… Document: Version no: 7864 Powder Diffraction Beamline - User Manual 5.1 Date: 7/3/2012 Page: 42 of 76 Fri Apr 9 00:13:53 2004 ./data/he1716_eu100b_295_1.dat 46,000 44,000 42,000 40,000 38,000 36,000 34,000 32,000 30,000 28,000 Counts 26,000 24,000 22,000 20,000 18,000 16,000 14,000 12,000 10,000 8,000 6,000 4,000 2,000 0 -2,000 4 5 6 7 8 9 10 11 12 13 14 15 16 17 2 Theta 14. Data Processing - DataPro General Hints and Tips Mythen Detector Overview The Mythen detector consists of 16 modules allowing 80° of data to be simultaneously acquired. There are small gaps between each module (ca. 0.2°) resulting in missing data every ca. 4.9°. Data must be collected in pairs (e.g. p1&p2 or p3&p4) with a small angular difference between the histograms of each pair (e.g. 2θ p1 = 1.0° and 2θ p2 = 1.5°). As the detector modules are flat, automatic processing is required to convert the data from channel v. intensity data into 2theta angular geometry. This is performed for all data sets, resulting in variable step sizes between points. Hints on getting the most out of your data Acquire data from a diffraction standard, such as LaB6, at the same 2theta angles at which experimental data are acquired in order to apply relevant zero shifts, should they be required. Note regarding output of grid data: In order to output data of constant step size it is necessary to interpolate between data point of one or more data files. This causes neighbouring data points in the subsequent output to be correlated (because neighbouring points in the output probably arose from interpolating between 2 points in the input, at least one of which is common to both of the output points). This correlation destroys the assumption in least squares refinement that the observations are independent, so strictly speaking it is no longer justifiable to quote the numbers coming out of your refinement (particularly esds). It is therefore preferable to conduct a multihistogram refinement. DataPro Operating Instructions Refer to the appendices. 15. Viewing Data Most users will have a favourite method of displaying histograms. One convenient application for displaying diffraction patterns is CMPR, the use of which is briefly described here. CMPR is available on the linux and windows computers. Double click on the CMPR desktop icon or select from the Start Menu (in Windows). Two windows will appear: CMPR and plot. On the read tab of the CMPR window, scroll down to the bottom of the “File format” list and select” XY data (ascii)” In the “Filter” input on the right-hand panel, change the extension to *.xye and press the carriage return Select the directory that contains the files that you wish to view, Select the files that you wish to view Press ‘Read” The file(s) just read will be drawn in the plot window. To select which plots are displayed, click on the plot tab, select the names of the plots that you wish to display and click on Update Plot CMPR has many options for exporting and fitting data which you are free to explore Document: Version no: 7864 Powder Diffraction Beamline - User Manual 5.1 Date: 7/3/2012 Page: 43 of 76 Fri Apr 9 00:13:53 2004 ./data/he1716_eu100b_295_1.dat 46,000 44,000 42,000 40,000 38,000 36,000 34,000 32,000 30,000 28,000 Counts 26,000 24,000 22,000 20,000 18,000 16,000 14,000 12,000 10,000 8,000 6,000 4,000 2,000 0 -2,000 4 5 6 7 8 9 10 11 12 13 14 15 16 17 2 Theta Document: Version no: 7864 Powder Diffraction Beamline - User Manual 5.1 Date: 7/3/2012 Page: 44 of 76 Fri Apr 9 00:13:53 2004 ./data/he1716_eu100b_295_1.dat 46,000 44,000 42,000 40,000 38,000 36,000 34,000 32,000 30,000 28,000 Counts 26,000 24,000 22,000 20,000 18,000 16,000 14,000 12,000 10,000 8,000 6,000 4,000 2,000 0 -2,000 4 5 6 7 8 9 10 11 12 13 14 15 16 17 2 Theta 16. Transferring Data Data can be transferred to the users system either via a USB drive or over the internet. Using USB Drive To transfer to a usb drive, plug device into the “Data Analysis” computer. Navigate to the Z:-drive, then to the folder where data are stored; usually called ‘data’. On-line VBL Transfer Before attempting to transfer the data in this way ensure that you have access to the experiment data – ask the beamline staff or the Principal Investigator on the proposal. To transfer data via VBL website, go to http://vbl.synchrotron.org.au Login and navigate to ‘Storage Gateway’, select experiment number. Select file or files to transfer – you will be asked for a location to save the data upon selecting Download XXX. Accessing the FTP share The powder diffraction beamline has an ftp site that selected data can be accessed by prior arrangement with beamline staff. Read only access is permitted. Please arrange with beamline staff for your data to be put on the ftp share. Data is accessible for five days only and will be automatically deleted after this period. To access the share type the following in your web browser: ftp://pdread:[email protected] 17. LINUX Commands For help and a list of commands for navigating around the LINUX environment go to the following website: http://www.computerhope.com/unix.htm#05 Important Avoid using “rm” which risks deleting all data! 18. X-ray VHR and GEMSTAR CCD detector The instructions given here are a brief overview and provide suggested settings, however, users should take care to ensure the settings and the data are appropriate. For a detailed manual please refer to the Manufacturer’s Instructions. The VHR operates in 12 bit/pixel (standard) or enhanced 16 bit/pixel (fusion) mode. In 16 bit mode dynamic range is up to 20000:1, 0.6 second for readout time. Max resolution is 4008 x 2670 for 1x1 bin mode. Pixel size is 26 micron square. The Gemstar is an intensified 1392 x 1040 format interline CCD detector. Pixel size is 120 micron square. It has high-speed read-out 10 or 20 MHz. Saturation is approximately 13000 electrons. VHR How to operate Mount the detector properly. (Caution: heavy mass of detector, fragile Al foil in front of the detector). The CCD detector can be mounted on the table in hutch B or C, also can be mounted on diffractometer circle A. Mount the beamstop in front of the detector. Use computer (Linux or windows) at operation area to connect the computer through VNC. Name: SR10BM01HU03CCD02 IP address: 10.130.2.52 Password: 10bm1user1 Document: Version no: 7864 Powder Diffraction Beamline - User Manual 5.1 Date: 7/3/2012 Page: 45 of 76 Fri Apr 9 00:13:53 2004 ./data/he1716_eu100b_295_1.dat 46,000 44,000 42,000 40,000 38,000 36,000 34,000 32,000 30,000 28,000 Counts 26,000 24,000 22,000 20,000 18,000 16,000 14,000 12,000 10,000 8,000 6,000 4,000 2,000 0 -2,000 4 5 6 7 8 9 10 11 12 13 14 15 16 17 2 Theta Double click the Image Pro 6.0 icon on desktop. Click in the menu Acquire > Video/digital capture… to open the main dialog box. In the Current Driver box ensure that VHR/Grablink is selected. Click on the ‘Camera Options’ button in the main dialog box to open Custom setup menu. Document: Version no: 7864 Powder Diffraction Beamline - User Manual 5.1 Date: 7/3/2012 Page: 46 of 76 Fri Apr 9 00:13:53 2004 ./data/he1716_eu100b_295_1.dat 46,000 44,000 42,000 40,000 38,000 36,000 34,000 32,000 30,000 28,000 Counts 26,000 24,000 22,000 20,000 18,000 16,000 14,000 12,000 10,000 8,000 6,000 4,000 2,000 0 -2,000 4 5 6 7 8 9 10 11 12 13 14 15 16 17 2 Theta On custom setup menu Do NOT enable Fusion acquisition. The camera is put into a 16 bit imaging mode, if this enabled. (the default is 12 bit). Noise reduction value of between 1 and 16 can be selected. A setting of 16 offers the least noise at higher grey levels but at the expense of increased overall acquisition time. A setting of 1 minimises acquisition time but has higher noise at the higher grey levels. Ticking the ‘low noise’ check box will result in less noise at lower grey levels. Enable “offset” to automatically carry out a “dark subtraction” as part of the acquisition process. To do this the driver loads a stored dark image of the appropriate binning setting and subtracts it from the acquired image before returning the image to Image Pro. Enable “bright pixel” to reduce the number of bright pixels (individual high dark current pixels). Enable “flat field” to compensate for variations in sensitivity across the sensor and remove shading variations due to non-uniformity of the incident X-ray beam. Enable “Image remapping” to remove the effect of fibre-optic distortion by automatically re-sampling the raw image. Enable “Use interpolation” to use sub-pixel interpolation of the original image, which eliminates any aliasing effects introduced by the re-sampling. Enable “Clip margins” to exclude edge irregularities caused by the remapping process, and to present a cleaner remapped image, particularly when sub-area operation is employed. Clicking on the “Select trigger mode” button allows the user to specify alternative trigger modes (the default is software triggered) Document: Version no: 7864 Powder Diffraction Beamline - User Manual 5.1 Date: 7/3/2012 Page: 47 of 76 Fri Apr 9 00:13:53 2004 ./data/he1716_eu100b_295_1.dat 46,000 44,000 42,000 40,000 38,000 36,000 34,000 32,000 30,000 28,000 Counts 26,000 24,000 22,000 20,000 18,000 16,000 14,000 12,000 10,000 8,000 6,000 4,000 2,000 0 -2,000 4 5 6 7 8 9 10 11 12 13 14 15 16 17 2 Theta On the main dialog box Click Signal tab: Video gain can be set in the range 1 to 100. It is recommended that the video gain is set to a min of 30 if operating with no binning. Select file name in the image tab. Set the acquisition time in (Exp Acq). Click the snap button to start data collection. Use the standard samples (LaB6, Si) to calibrate the detector. To change the colour scale: In main ‘Image Pro’ window, click Enhance>Display Range menu to adjust upper & lower value. Gemstar Caution: For Gemstar detector select small value (e.g. 1) for intensify gain to start, in order to avoid overexposure on detector. Mount the detector properly. (Caution: heavy mass of detector, fragile Al foil in front of the detector). The CCD detector can be mounted on the table in hutch B or C, also can be mounted on diffractometer circle A. Mount the beamstop in front of the detector. Use computer (Linux or windows) at operation area to connect the computer through VNC. Name: SR10BM01HU03CCD01 IP address: 10.130.2.51 Password: 10bm1user1 Double click the Image Pro 6.0 icon on desktop. Click in the menu Acquire > Video/digital capture… to open the main dialog box. In the Current Driver box ensure that FDI/Grablink… is selected. Click on the ‘Camera Options’ button in the main dialog box to open Custom setup menu. Document: Version no: 7864 Powder Diffraction Beamline - User Manual 5.1 Date: 7/3/2012 Page: 48 of 76 Fri Apr 9 00:13:53 2004 ./data/he1716_eu100b_295_1.dat 46,000 44,000 42,000 40,000 38,000 36,000 34,000 32,000 30,000 28,000 Counts 26,000 24,000 22,000 20,000 18,000 16,000 14,000 12,000 10,000 8,000 6,000 4,000 2,000 0 -2,000 4 5 6 7 8 9 10 11 12 13 14 15 16 17 2 Theta On custom setup menu Select Speed 10Mhz or 20Mhz. DO NOT enable Fusion acquisition. The camera is put into a 16 bit imaging mode, if this enabled. (the default is 12 bit). Noise reduction value of between 1 and 16 can be selected. A setting of 16 offers the least noise at higher grey levels but at the expense of increased overall acquisition time. A setting of 1 minimises acquisition time but has higher noise at the higher grey levels. Ticking the ‘low noise’ check box will result in less noise at lower grey levels. Select small value (e.g. 1) for intensify gain to start, in order to avoid over-exposure on detector. Enable “offset” to automatically carry out a “dark subtraction” as part of the acquisition process. To do this the driver loads a stored dark image of the appropriate binning setting and subtracts it from the acquired image before returning the image to Image Pro. Enable “bright pixel” to reduce the number of bright pixels (individual high dark current pixels). Enable “flat field” to compensate for variations in sensitivity across the sensor and remove shading variations due to non-uniformity of the incident X-ray beam. Enable "corner” to compensate the corner pixel. Enable “reduce scintillations”. Enable “Image remapping” to remove the effect of fibre-optic distortion by automatically re-sampling the raw image. Enable “Use interpolation” to use sub-pixel interpolation of the original image, which eliminates any aliasing effects introduced by the re-sampling. Document: Version no: 7864 Powder Diffraction Beamline - User Manual 5.1 Date: 7/3/2012 Page: 49 of 76 Fri Apr 9 00:13:53 2004 ./data/he1716_eu100b_295_1.dat 46,000 44,000 42,000 40,000 38,000 36,000 34,000 32,000 30,000 28,000 Counts 26,000 24,000 22,000 20,000 18,000 16,000 14,000 12,000 10,000 8,000 6,000 4,000 2,000 0 -2,000 4 5 6 7 8 9 10 11 12 13 14 15 16 17 2 Theta Enable “Clip margins” to exclude edge irregularities caused by the remapping process, and to present a cleaner remapped image, particularly when sub-area operation is employed. Clicking on the “Select trigger mode” button allows the user to specify alternative trigger modes (the default is software triggered) On the main dialog box Click Signal tab: Video gain can be set in the range 1 to 100. It is recommended that the video gain is set to a min of 30 if operating with no binning. Select file name in the image tab. Set the acquisition time in (Exp Acq). Click the snap button to start data collection. Use the standard samples (LaB6, Si) to calibrate the detector. To change the color scale: In main ‘Image Pro’ window, click Enhance>Display Range menu to adjust upper & lower value. 19. Sealing quartz capillaries with the Microtorch Caution: High temperature of up to 2800 °C can be obtained, so caution should be exercised when using. Safety glasses should be worn. The Microtorch should be used to seal quartz capillaries. Use of the Microtorch is restricted to the Chemistry Laboratory only and not to be used at the beamline. Operating the Microtorch may be hazardous due to the extremely high temperatures obtainable therefore care must be taken when operating. Safety glasses should be worn and the SOP should be followed. Start Up Procedure For capillary sizes less than 1 mm diameter fit the 8/10 needle into the front end of the Microtorch handpiece and give it a twist clockwise to lock it in place. Finger tight only. The 10/10 needle size is required for capillaries larger than 1 mm. Carefully turn the red gas valve anti-clockwise and ignite. Gently turn the blue oxygen valve anti-clockwise until the desired flame is obtained. The valve should be rotated slowly. The needle tip must not be allowed to become red hot. If this happens incorrect adjustment of gases has occurred and the Microtorch should be turned off and allowed to cool. Shutdown Procedure To shutdown, first rotate the blue oxygen valve clockwise. Do not overtighten. Turn the red gas valve clockwise. To minimise gas wastage, turn both the oxygen and the gas off during long delays. Always ensure that the taps have been turned off properly after use. Overtightening of the taps can cause damage to the gas distributor and may result in a leak. Allow the needle to cool to ambient temperature if a changeover is required. Please report any problems or safety concerns with the Microtorch to beamline staff immediately. When finished with the Microtorch please return it to the beamline. Document: Version no: 7864 Powder Diffraction Beamline - User Manual 5.1 Date: 7/3/2012 Page: 50 of 76 Fri Apr 9 00:13:53 2004 ./data/he1716_eu100b_295_1.dat 46,000 44,000 42,000 40,000 38,000 36,000 34,000 32,000 30,000 28,000 Counts 26,000 24,000 22,000 20,000 18,000 16,000 14,000 12,000 10,000 8,000 6,000 4,000 2,000 0 -2,000 4 5 6 7 8 9 10 11 12 13 14 15 16 17 2 Theta 20. Troubleshooting This section describes some of the more commonly observed issues. No Intensity Observed in Data Check the Facility Status to see whether there is any beam current. If stored beam has been lost, await reinjection. Check that the Front End and Monochromatic beam shutters are open. Use the webcam and monitors to check that the sample is intact and aligned. Verify that there is nothing obstructing the detector. Verify that the ion chamber is recording counts (i.e. note the difference between the reading with shutters open, and with the monochromatic beam shutter closed). If no/few counts are observed, call beamline staff to check settings of optics. Mythen Client Shutdown Unexpectedly Check the terminal associated with the Mythen Client software for errors – take note of these and take note of what the operator was doing at the time. Close the Mythen terminal and try to relaunch Mythen Client by clicking on the desktop icon. If the application does not restart call the beamline staff or, if after hours, call the control room and request reboot of the Mythen server. Control Interface Input Boxes are “Whited Out” Call the beamline staff or, if after hours, call the control room and request assistance. Eurotherm Temperature 1D Scan does not start Ensure that the last scan has ended by pressing ‘ABORT’ and ‘Abort Seq.’. Re-select ‘1-D Eurothern’ under “Scan setup ”, re-load Table, or Step scan information. Select ‘Start 1-D’ General Problems If issues arise overnight, please call the Control Room on x123. Document: Version no: 7864 Powder Diffraction Beamline - User Manual 5.1 Date: 7/3/2012 Page: 51 of 76 Fri Apr 9 00:13:53 2004 ./data/he1716_eu100b_295_1.dat 46,000 44,000 42,000 40,000 38,000 36,000 34,000 32,000 30,000 28,000 Counts 26,000 24,000 22,000 20,000 18,000 16,000 14,000 12,000 10,000 8,000 6,000 4,000 2,000 0 -2,000 4 5 6 7 8 9 10 11 12 13 14 15 16 17 2 Theta 21. Appendix A: Anton Paar Furnace Introduction The Anton Paar HTK 2000 furnace is comprised of the furnace body, a temperature control unit, a motorised alignment stage and the X-Y stage. Additional equipment includes a control cabinet (that contains the temperature control unit) and the chilled water supply. Heating strips Three types of heating strips are available at the beamline: Pt, W and inconel. Other types can be purchased from Anton Paar, but their performance cannot be guaranteed and is at the user’s risk. Heating strip details and operating conditions The dimensions and operating conditions of the different types of heating strips are summarised in the tables below. Heating Strip Note: Tmax (°C) Strip dimensions L x W x D (mm) Cavity dimensions L x W x D (mm) Vacuum required ? Pt 1450 1 102 x 10 x 1 N/A N Pt (cavity) 1450 1 102 x 10 x 1 20 x 8 x 0.2 N N Inconel 900 102 x 10 x 1 N/A W 2300 102 x 9 x 0.5 N/A Y Gasses Air, He, Ne, Ar, Xe or N2 2 Vacuum only 1 Pt heating strips are capable of continuous operation at 1450°C. Temperatures up to 1600°C are possible for a maximum duration of 3 hours although Pt becomes very soft and samples may become embedded within the strip. 2 W filaments require vacuum of at least 1x10 mbar (roughing and turbo molecular pumps typically required). -4 Ramp rate profiles The maximum ramp rate for the furnace is 400°C/min. The maximum ramp rate can only be used up to Tfinal200°C where Tfinal is the requested maximum temperature. Typical ramp rates for most user experiments do not exceed 100°C/min. Furnace preparation and set-up This section contains information on the connectivity between the different components of the system. 1. Check that the thermocouple (orange cable with blue plug) is connected to the blue socket in the furnace (Fig. 1). 2. Check that the red thermoswitch plug is connected into the red socket in the base of the furnace (Fig. 1). 3. Check that the black cooling water tubing is connected to the furnace and that chilled water is flowing. Document: Version no: 7864 Powder Diffraction Beamline - User Manual 5.1 Date: 7/3/2012 Page: 52 of 76 Fri Apr 9 00:13:53 2004 ./data/he1716_eu100b_295_1.dat 46,000 44,000 42,000 40,000 38,000 36,000 34,000 32,000 30,000 28,000 Counts 26,000 24,000 22,000 20,000 18,000 16,000 14,000 12,000 10,000 8,000 6,000 4,000 2,000 0 -2,000 4 5 6 7 8 9 10 11 12 13 14 15 16 17 2 Theta 4. The chilled water supply unit is located in hutch C. Ensure that the ball valve at the rear of the chilled water supply on the right hand side is open (Fig. 2). Fig. 1 Fig. 2 5. The water pressure gauge located on the wall above the chilled water supply unit should read ~2 bar. 6. Check that the water flow controller and the serial communication cables are plugged into the rear of the temperature control unit (Fig. 3) and that the other end of the serial cable is connected to the serial-toethernet MOXA unit. The MOXA is connected to the network via a blue CAT5 cable. Fig. 3 7. Prior to removing the cover and mounting the sample in the furnace, please ENSURE THAT THE TEMPERATURE CONTROLLER (Fig. 3) IS NOT TURNED ON AND THE FURNACE TEMPERATURE IS LESS THAN 30°C. 8. The front cover must be removed in order to access the heating strip to enable sample mounting. The front cover can be removed by carefully rotating the bayonet clamp anti-clockwise and drawing the cover away from the furnace body and placing it on the translation table (Fig. 4). Fig. 4 Bayonet clamp Document: Version no: 7864 Powder Diffraction Beamline - User Manual 5.1 Date: 7/3/2012 Page: 53 of 76 Fri Apr 9 00:13:53 2004 ./data/he1716_eu100b_295_1.dat 46,000 44,000 42,000 40,000 38,000 36,000 34,000 32,000 30,000 28,000 Counts 26,000 24,000 22,000 20,000 18,000 16,000 14,000 12,000 10,000 8,000 6,000 4,000 2,000 0 -2,000 4 5 6 7 8 9 10 11 12 13 14 15 16 17 2 Theta 9. Samples should not be applied to the heating strip while the heating strip is mounted in the furnace. This is to ensure that samples are not accidentally spilled over the furnace interior or on to the hutch floor. 10. The instructions for the removal and installation of the heating strips can be found in the following sections: Removing and installing the Pt heating strips and Removing and installing the W heating strips. 11. Fit the cover on the furnace and fix by rotating the bayonet clamp clockwise. 12. Inert gases can be passed through the furnace via the inlet port located on the front cover (Fig. 4) and the exit port located at the rear of the furnace body. THE FURNACE IS NOT DESIGNED FOR HIGHPRESSURE OPERATION, therefore flowing gas must be able to continuously flow through the furnace. 13. If vacuum is required then a different fitting on the front cover is required to connect to the vacuum system -4 (see beamline staff). If W heating strips are being used then the maximum air pressure is 1x10 torr. Ensure that the vacuum system is operating correctly and that the desired pressure is reached before applying power to the furnace. 14. Turn on the temperature control unit via the switch on the front panel. If the cooling water is above the critical flow rate, then a green WATER FLOW light will be illuminated on the front panel otherwise it will flash amber (Fig. 3). The Eurotherm 2604 temperature controller will start and indicate the current temperature. 15. On the temperature controller front panel, the HEATER light will flash amber indicating that no current is being applied to the furnace. Pushing the HEATER button will allow power to be applied to the furnace and the LED should emit a green colour. Wait until the temperature controller has started up completely before pressing the HEATER button. 16. The Eurotherm 2406 should not be controlled via the front panel. All furnace temperature control is managed at the beamline control station. Removing and installing the Pt heating strips 17. Prior to installing a Pt heating strip please ensure that the temperature controller is switched off and the internal temperature of the furnace <30°C. 18. Before removing the front cover, turn off gas flow or vent the evacuated furnace and disconnect the fittings from the front cover. Fig. 5 Ceramic guides Pt thermocouple terminals W thermocouple terminals 19. Loosen the thermocouple screws at the thermocouple terminals and carefully extract the thermocouple wires from the ceramic terminals (Fig. 5). 20. Loosen the pre-tension screw until the sample tension gauge reads zero and the screw head is exposed. Loosen and remove the top clamping screws holding the heating strips in place using the tools provided (Fig. 6). Document: Version no: 7864 Powder Diffraction Beamline - User Manual 5.1 Date: 7/3/2012 Page: 54 of 76 Fri Apr 9 00:13:53 2004 ./data/he1716_eu100b_295_1.dat 46,000 44,000 42,000 40,000 38,000 36,000 34,000 32,000 30,000 28,000 Counts 26,000 24,000 22,000 20,000 18,000 16,000 14,000 12,000 10,000 8,000 6,000 4,000 2,000 0 -2,000 4 5 6 7 8 9 10 11 12 13 14 15 16 17 2 Theta Fig. 6 Heating strip clamping screws Pre-tension screw 21. While lifting the old heating strip off the furnace, carefully straighten and feed the thermocouple wires through the ceramic guides until the heating strip is free (Fig. 5). 22. Do not excessively bend the thermocouple wires as they are fragile. Ensure that there is no undue force on the join between the thermocouple and the heating strip and take care to ensure that the positive wire can be clearly identified by marking it red with the marker provided. 23. To install the new strip after the sample has been applied, feed the thermocouple wires through the ceramic guides and ensure that the red coated (Pt/10%Rh) wire is connected to the positive (+) terminal (LHS). 24. Use tweezers to position the wires in the small holes at the bottom of the terminal cavities and then clamp gently with the ceramic pins provided. Do not over-tighten the thermocouple clamping screws or else the ceramic terminals may break. 25. Check the continuity of the heating strip thermocouple wires on either side of the terminal with the digital multimeter provided. There should be very little resistance (<0.1Ω). Repeat 29 if high resistance through the terminal is observed. Check that there is no incidental contact between the wires prior to the join on the heating strip. 26. Put the heating strip in the groove and while the strip is flush with the RHS tighten the 1 mm clamp on the right. 27. Push the LHS of the support toward the right until this clamp is flush with the LHS of the strip, secure the clamping screws. The thermocouple should be located in the middle. 28. Adjust the strip pre-tension screw until a value of 4 for Pt strips (3 for W strips) is shown on the gauge (Fig. 7). Fig. 7 Sample tension gauge Heating strip Gas outlet port 29. If a previously unused heating strip is installed in the furnace then it must be annealed prior to use. Annealing is accomplished by heating the new strip (with no sample) up to 800°C and then cooling back to ambient temperature. The heating and cooling rate should be 50°C/min. Document: Version no: 7864 Powder Diffraction Beamline - User Manual 5.1 Date: 7/3/2012 Page: 55 of 76 Fri Apr 9 00:13:53 2004 ./data/he1716_eu100b_295_1.dat 46,000 44,000 42,000 40,000 38,000 36,000 34,000 32,000 30,000 28,000 Counts 26,000 24,000 22,000 20,000 18,000 16,000 14,000 12,000 10,000 8,000 6,000 4,000 2,000 0 -2,000 4 5 6 7 8 9 10 11 12 13 14 15 16 17 2 Theta Furnace ramp rate, maximum temperature and atmosphere 30. The maximum sustained temperature for the furnace fitted with Pt heating strips is 1450°C, but temperatures up to 1500°C can be sustained for a total duration of 3 hours. 31. The maximum ramp rate for the furnace is 400°C/min. The maximum ramp rate can only be used up to Tfinal-200°C where Tfinal is the requested maximum temperature. For most experiments a maximum ramp rate of 100°C/min is sufficient. 32. The Pt heating strips can be operated in a number of different atmospheres (air, vacuum, nitrogen, argon etc), however corrosive environments are prohibited. A 6 mm quickfit fitting on the front of the furnace cover enables gas flow into the furnace. The outlet is located near the rear of the furnace. Removing and installing the W heating strips 33. The installation process for a W heating strip is almost identical to the Pt heating strip installation with the following exceptions: i. Change the clamping pieces from the 1 mm thick type used for Pt strips to the 0.5 mm type. ii. The thermocouple wires on the heating strips should be connected to terminals located on the outer edge of the RHS fixed support block (Fig. 9). The negative terminal is rearmost terminal. The red marked thermocouple lead should be connected to the positive terminal. iii. The W thermocouples use the silver extension cable (with blue plug) from the temperature control unit and should be connected to the blue plug at the bottom of the furnace (Fig. 3). Do not use the type-S thermocouple (orange cable with blue plug) as it is used for the Pt heating strips only. iv. The pre-stress tension of the W heating strips is 3 notches. v. A change to W heating strips will require a considerable setup change for the Eurotherm temperature controller. A beamline scientist will be required to perform this changeover. Applying samples to the heating strip 34. Samples must not be applied to the strips while the strips are mounted in the furnace. 35. Apply powder samples as a slurry (mixed with a solvent such as ethanol) and disperse uniformly over the heating strip. Repeated applications with adequate drying time between will allow the sample thickness to increase. 36. It is the responsibility of Users to ensure that their samples do not react over the temperature range used. The heating strips are very expensive and Users will be charged for their replacement if they are damaged. 37. A barrier substance such as corundum (Al2O3) may be applied between the sample and the heating strip for protection. This is done at the Users own risk. 38. Anton Paar have prepared a section in their manual describing some of the more reactive elements and compounds with Pt over the temperature range of the furnace. This can be found in the Errors and Troubleshooting section and on the Powder Diffraction website: http://www.synchrotron.org.au/images/stories/beamline/powder/furnace_pt-filament_reactivity.pdf Document: Version no: 7864 Powder Diffraction Beamline - User Manual 5.1 Date: 7/3/2012 Page: 56 of 76 Fri Apr 9 00:13:53 2004 ./data/he1716_eu100b_295_1.dat 46,000 44,000 42,000 40,000 38,000 36,000 34,000 32,000 30,000 28,000 Counts 26,000 24,000 22,000 20,000 18,000 16,000 14,000 12,000 10,000 8,000 6,000 4,000 2,000 0 -2,000 4 5 6 7 8 9 10 11 12 13 14 15 16 17 2 Theta Controlling the furnace temperature Controlling the furnace temperature is done via the Furnace sub panel in the Powder Diffraction Endstation GUI (Fig. 8). The furnace has several operating modes, these include: 1. Manually set temperature and ramp rate, for each new temperature. 2. Set temperature programme via a LINEAR or TABLE SCAN 3. Set programme via a TABLE SCAN with variable temperature and ramp rate 4. Set temperature programme via a PROFILE Notes The ramp rate can be set to any value between 1 to 400 °C /min The temperature is entered in units of celcius (°C). A plot of the progress of the temperature programme and the current temperature status can be obtained by selecting ‘Plot’. Note that this is a real-time plot and will not display values achieved before the plot is launched. Fig. 8a Fig. 8b Manual temperature set Set new a target temperature by typing a value in “Setpoint temp” field. Type a value in “Ramp ramp” to set the speed with which the set point is obtained (Fig.8). Temperature step scan A temperature step scan programme should be used where data collection will occur only when the temperature has reached, and is held at a target temperature. Type in desired “Ramp rate” for scan, within the furnace dialogue. Refer to, and follow, notes on setting up a 1-D linear or table scan, but select “1-D furnace” in the scan setup.. NOTE: The furnace temperature controller should not require a settling time for the temperature to be achieved prior to data acquisition, however, the user may choose to input one. Document: Version no: 7864 Powder Diffraction Beamline - User Manual 5.1 Date: 7/3/2012 Page: 57 of 76 Fri Apr 9 00:13:53 2004 ./data/he1716_eu100b_295_1.dat 46,000 44,000 42,000 40,000 38,000 36,000 34,000 32,000 30,000 28,000 Counts 26,000 24,000 22,000 20,000 18,000 16,000 14,000 12,000 10,000 8,000 6,000 4,000 2,000 0 -2,000 4 5 6 7 8 9 10 11 12 13 14 15 16 17 2 Theta Begin data acquisition by pressing “Start” in the Mythen Client, then “Start 1-D” in 1 Dimension. st To abort scan press “ABORT” within the 1 dimension panel, “Abort Seq” within the Furnace panel and “Stop” in Mythen Client. st When the scan is finished, press “Stop” in Mythen Client to return to interactive control. Fig.9 Document: Version no: 7864 Powder Diffraction Beamline - User Manual 5.1 Date: 7/3/2012 Page: 58 of 76 Fri Apr 9 00:13:53 2004 ./data/he1716_eu100b_295_1.dat 46,000 44,000 42,000 40,000 38,000 36,000 34,000 32,000 30,000 28,000 Counts 26,000 24,000 22,000 20,000 18,000 16,000 14,000 12,000 10,000 8,000 6,000 4,000 2,000 0 -2,000 4 5 6 7 8 9 10 11 12 13 14 15 16 17 2 Theta Variable temperature and ramp rate scan A variable temperature and ramp rate profile scan can be performed using a 1-D table scan with 2 positioners. Follow the notes in the 1-D, 2-positioners table scan to use this scan mode. Note the following differences: Select “1-D Furnace” in the “Scan setup”. In the Open Office file put the required temperatures in the first column and the ramp rates for each temperature in the second. The name of the second positioner to be entered into the ”Drive” field within scan dialogue is: SR10BM01HU02IOC01:FRNC:RampRate.VAL st To abort scan press ”ABORT” in the Furnace sub panel and “Abort Seq” within the “1 dimension” of the PD End Station Overview, and then “STOP” in the Mythen Client. Furnace temperature profile A temperature profile programme should be used where data collection will occur ‘on-the-fly’, (i.e. there is no requirement for the temperature to plateau for data acquisition). Within the Mythen Client interface, select “Fast Repetition” which loads the following scripts: o “Script before each frame” => scripts/detector_before_fast_rep.sh o “Script after each frame” => scripts/detector_after_fast_rep.sh o “Trigger script” => scripts/trigger_scan.awk Set “Number of repetitions” to a number greater than which can be collected in the time it will take to complete the temperature profile. Within the furnace dialogue in the PD End Station interface type in the desired “Ramp rate” to be used for the profile. Select “Profile” within Furnace dialogue and in the pop-up window (Fig. 10) enter the desired target temperatures for the profile and hold time, if required. Select “Store profile”. Begin data acquisition by pressing “Start” in the Mythen Client, then “Start profile” within the Furnace Profile dialogue. To abort scan press “Skip phase” within Furnace Profile dialogue; it is necessary to press “Skip phase” as many times as required to move to the end of the profile. Press “Abort Seq” in the furnace dialogue in the PD End Station interface and then press “Stop” in Mythen Client. When the profile is finished, await completion of the number of repetitions or press “Stop” in Mythen Client to return to interactive control. Important Leave blank the temperature boxes that aren’t required; do not enter 0.0 C. In “Fast repetition” mode, the fast shutter will not be used, thus users must ensure all filters are out of the beam before starting data acquisition. Document: Version no: 7864 Powder Diffraction Beamline - User Manual 5.1 Date: 7/3/2012 Page: 59 of 76 Fri Apr 9 00:13:53 2004 ./data/he1716_eu100b_295_1.dat 46,000 44,000 42,000 40,000 38,000 36,000 34,000 32,000 30,000 28,000 Counts 26,000 24,000 22,000 20,000 18,000 16,000 14,000 12,000 10,000 8,000 6,000 4,000 2,000 0 -2,000 4 5 6 7 8 9 10 11 12 13 14 15 16 17 2 Theta Fig.10 Platinum reactivity This is an excerpt from the Anton Paar manual with a summary of Pt reactivity at high-temperature. Resistance and handling (Abstract from DEGUSSA Specifications in German language) How to handle Pt heating strips Platinum is one of the most resistant metals. Due to its high chemical resistance, its high melting point (1768°C) and its low vapour pressure it is better suited for heating strips than any other material. No other material can compete with its resistance to acids, especially its perfect resistance to hydrofluoric acid - even in a mixture with sulphuric acid and/or nitric acid. Finally it is of great value that platinum can be machined reliably so that forming and shaping hardly faces any restrictions. A special benefit is that it can be homogeneously welded without troubles, thus completely avoiding soldering points which generally have reduced chemical and thermal resistance. Naturally, the described properties of the Pt heating strips can only be perfectly achieved with a platinum that is faultless in every respect. The purity of the primary material, the homogeneity as well as appropriate processing of the material are preconditions for the production of reliable heating strips. Pure platinum is very soft and solidification occurs during the manufacturing and shaping processes. However, its original softness is regained during annealing at 700 to 1000 °C. Despite the numerous benefits of the material, the extremely resistant platinum can be very reactive in particular cases. It can be strongly attacked or even be completely destroyed by a few samples. The detrimental substances for Pt heating strips are listed more or less completely in most of the handbooks of inorganic and especially analytical chemistry. The mainly mentioned substances are chlorine, chlorine of hydrochloric acid - nitric acid mixtures (nitrohydrochloric acid), hydrochloric acid with other oxidants such as chromic acid, manganates or ferric salts as well as certain molten salts from which platinum is separated Document: 7864 Powder Diffraction Beamline - User Manual Date: 7/3/2012 Version no: 5.1 Page: 60 of 76 Fri Apr 9 00:13:53 2004 ./data/he1716_eu100b_295_1.dat 46,000 44,000 42,000 40,000 38,000 36,000 34,000 32,000 30,000 28,000 Counts 26,000 24,000 22,000 20,000 18,000 16,000 14,000 12,000 10,000 8,000 6,000 4,000 2,000 0 -2,000 4 5 6 7 8 9 10 11 12 13 14 15 16 17 2 Theta chemically; furthermore the low-melting metals such as lead, tin, zinc, silver, aluminium, mercury, alkali metals, antimony, bismuth - already present or formed secondarily by reduction of compounds - elementary phosphorus, arsenic, boron and silicon which form an alloy with platinum, reducing considerably its melting point. The extent to which these different substances are detrimental is greatly varying. In some cases a few hundredth of a milligram can make a Pt heating strip completely unusable, whereas other detrimental substances can be in touch with the heating strip for a long time without considerably limiting its usability. Just on this matter you can hardly find any detailed information, although the use of Pt heating strips often offers big advantages when operating with some substances which are in general detrimental. In the following we give a survey of the most important substances having a detrimental effect on platinum and consider the extent of the influence on platinum. With our experiences we hope to contribute to the knowledge of platinum used for heating strips, thus not only sparing the users of the heating strips a lot of troubles but also providing the heating strips with a longer life and possibly extending their fields of application. Substances with destroying effect Apart from the chemically dissolving action of atomic chlorine in liquids - e. g. in hydrochloric acid-nitric acid mixtures - and of some molten salts, each definite destruction of Pt heating strips is caused by the fact that platinum forms alloys with other metals or non-metals. In most cases the melting point of these alloys, which is exceeded at the usual working temperatures, is much lower than that of platinum. Then local melting causes holes or cracks in the heating strips. Forming of alloys with metals The low-melting point metals such as lead, tin, antimony or bismuth reduce the melting point of platinum even in little concentrations thus causing holes in the heating strips. There is no need to put the metals as such on the heating strips. It occurs only very rarely that these metals are heated with Pt heating strips, but occasionally one ignores that a part of their compounds - mainly their oxides - can very easily be reduced to metal, e. g. by filtering charcoal. Sometimes it occurs that traces of fusible metal - mainly minute soft solder particles - reach the Pt heating strips, adhere to them and cause holes when heated next time. The explanations about the fusible metals (including mercury) and their compounds in principle apply to the higher melting-point metals, too, in the case of the heating approaching their melting point. Therefore contact between these and a Pt heating strip should be avoided. Even if the forming of an alloy with a higher melting-point metal such as iron does not decrease the melting point so much that the heating strip is immediately destroyed, the forming of these alloys reduces considerably the heating strip's general corrosion resistance and the material embrittles. As a result secondary influences can cause the complete destruction. A platinum-iron alloy is formed e. g. if a Pt heating strip is heated up to temperatures higher than 1200 °C in the presence of iron oxide. In addition to free carbon and filtering charcoal, all organic compounds, e. g. inorganic salts of organic acids, can be used as reducing agent for metal oxides - just like in all the cases that will be mentioned later. Reducing flame gases from heating sources act similarly. Please note that hydrogen is occluded at a temperature of approx. 400 °C and diffuses at higher temperatures into the Appendix F: Platinum Heating Strip 66 B41IB03-A heating strip. Contrary to wrong indications in literature, hydrogen as such cannot be considered as a detrimental substance. Nevertheless, its action on reducible compounds in the annealing material has to be taken into account. Forming of alloys with non-metals Like metals, non-metals also form low-melting alloys with platinum, a fact to which there has not been paid sufficient attention yet. In particular silicon, phosphorus and arsenic have to be mentioned on whose effect as detrimental substances there are indications in recent publications and to which special care must be taken because of their topochemically specific attack. Whereas the formation of a platinum-tin alloy expands on the whole surface, the formation of a phosphorus-arsenic alloy occurs along the grain boundaries where alloying progresses fast and causes very quickly cracks. Silicon, considerably reducing the platinum melting point, forms the silicide Pt3Si which in turn forms a eutectic melting with platinum at 830 °C. The forming of alloys in the presence of free silicon, resulting eventually from the reduction of primarily present silicon dioxide by carbon or hydrogen (in small quantities), causes the perforation of the heating strip due to the low-melting eutectic Pt-Pt3Si. Document: Version no: 7864 Powder Diffraction Beamline - User Manual 5.1 Date: 7/3/2012 Page: 61 of 76 Fri Apr 9 00:13:53 2004 ./data/he1716_eu100b_295_1.dat 46,000 44,000 42,000 40,000 38,000 36,000 34,000 32,000 30,000 28,000 Counts 26,000 24,000 22,000 20,000 18,000 16,000 14,000 12,000 10,000 8,000 6,000 4,000 2,000 0 -2,000 4 5 6 7 8 9 10 11 12 13 14 15 16 17 2 Theta Phosphorus reacts similarly. Already in fractions of a milligram, it forms with platinum the platinum phosphide Pt20P7, which yields with platinum a particularly low-melting (588 °C) eutectic Pt-Pt20P7. The melting temperature of the platinum contaminated by phosphorus is immediately locally reduced to app. 600 °C (eutectic melting), thus making cracks and holes inevitable. Arsenic and platinum also form a low-melting eutectic (at 597 °C) which has been known for a long time and even made possible the first method for the production of machinable platinum (Achard, 1779); through arsenide, Berzelius won rhodium metal in 1836. Similar to phosphorus, platinum arsenides can be created by annealing arsenic compounds, e. g. Mg2As2O7, if reducing substances (flame gases or filtering charcoal) are present. Detrimental substances Whereas the detrimental effect of the above mentioned substances is generally underestimated, the damages of the Pt heating strips caused by the following substances are very often less important than assumed. In nitrohydrochloric acid, platinum is dissolved very slowly in the cold and even at temperatures of a water bath it takes many hours until the heating strip is dissolved. Caustic alkali, carbonates, sulphides, cyanides and thiocyanates attack platinum at higher temperatures, but very often the use of Pt heating strips provides so many advantages that a certain loss of substance must be accepted.9 Maintenance B41IB03-A 67 In case of glasses and ceramic materials it has to be examined, whether metallic constituents (e. g. lead, antimony, arsenic, iron etc.) do occur by secondary reduction processes of heavy metal oxides. In oxidising atmosphere up to 1400 °C, platinum will not be attacked by magnesium silicates (asbestos). In atmosphere with little reduction, however, melting to a slag of unknown composition will occur already at red heat. If carbon or reducing flame gases (from luminous gas flames or from the inner cone of a gas flame) act upon Pt heating strips, their surface is getting roughened. This surface roughening can only be partly undone by strong annealing of the heating strip in oxidising atmosphere, so that the original smoothness of the surface cannot be regained completely. The detrimental effect of carbon and the reducing flame gases on platinum is only insignificant and can be neglected as long as there are not any reducible compounds of the mentioned toxins for platinum such as metal oxides. Otherwise platinum forms alloys with the elements set free by reduction. Pt heating strips are likely to be damaged by sulphur and sulphurous gases only from 1550 °C upwards. Heating Unnecessarily long heating of Pt heating strips up to high temperatures has to be avoided, since this would cause coarsening of their crystalline structure, brittleness and even cracking. Cleaning and Maintenance After the use of Pt heating strips, a careful maintenance and cleaning is necessary. After boiling out using suitable solvents, it is to be recommended to occasionally clean the heating strips with fine sea sand, which essentially improves their look and their life span. Scrubbing with the round grains of sand does not only remove surface alloys, but also smoothens the surface thus making it more resistant to corrosions. Careful cleaning can also be obtained by melting out the heating strips with potassium hydrogensulphate or potassium metabisulphate. Avoid to burn impurities out of the platinum by annealing. This method is only successful in particular cases, but it is recommended to remove impurities in a mechanical or chemical way before annealing a Pt heating strip. Life span of the Pt heating strips Although a premature destruction of the Pt heating strips can be avoided by taking into account the instructions mentioned above, it is not possible to guarantee unlimited durability. Document: Version no: 7864 Powder Diffraction Beamline - User Manual 5.1 Date: 7/3/2012 Page: 62 of 76 Fri Apr 9 00:13:53 2004 ./data/he1716_eu100b_295_1.dat 46,000 44,000 42,000 40,000 38,000 36,000 34,000 32,000 30,000 28,000 Counts 26,000 24,000 22,000 20,000 18,000 16,000 14,000 12,000 10,000 8,000 6,000 4,000 2,000 0 -2,000 4 5 6 7 8 9 10 11 12 13 14 15 16 17 2 Theta Errors and troubleshooting This is an excerpt from the Anton Paar manual detailing some of the errors that may appear on the temperature control unit. Document: Version no: 7864 Powder Diffraction Beamline - User Manual 5.1 Date: 7/3/2012 Page: 63 of 76 Fri Apr 9 00:13:53 2004 ./data/he1716_eu100b_295_1.dat 46,000 44,000 42,000 40,000 38,000 36,000 34,000 32,000 30,000 28,000 Counts 26,000 24,000 22,000 20,000 18,000 16,000 14,000 12,000 10,000 8,000 6,000 4,000 2,000 0 -2,000 4 5 6 7 8 9 10 11 12 13 14 15 16 17 2 Theta Sources of error NOTE: If there is a loss of communication with the furnace temperature controller at the beamline, check to see whether the controller is in Stand-by (SBY) mode. If the error is not cleared after turning the HEATER button off and then on, then turn off the temperature control unit and call for a beamline scientist. Document: Version no: 7864 Powder Diffraction Beamline - User Manual 5.1 Date: 7/3/2012 Page: 64 of 76 Fri Apr 9 00:13:53 2004 ./data/he1716_eu100b_295_1.dat 46,000 44,000 42,000 40,000 38,000 36,000 34,000 32,000 30,000 28,000 Counts 26,000 24,000 22,000 20,000 18,000 16,000 14,000 12,000 10,000 8,000 6,000 4,000 2,000 0 -2,000 4 5 6 7 8 9 10 11 12 13 14 15 16 17 2 Theta Document: Version no: 7864 Powder Diffraction Beamline - User Manual 5.1 Date: 7/3/2012 Page: 65 of 76 Fri Apr 9 00:13:53 2004 ./data/he1716_eu100b_295_1.dat 46,000 44,000 42,000 40,000 38,000 36,000 34,000 32,000 30,000 28,000 Counts 26,000 24,000 22,000 20,000 18,000 16,000 14,000 12,000 10,000 8,000 6,000 4,000 2,000 0 -2,000 4 5 6 7 8 9 10 11 12 13 14 15 16 17 2 Theta Document: Version no: 7864 Powder Diffraction Beamline - User Manual 5.1 Date: 7/3/2012 Page: 66 of 76 Fri Apr 9 00:13:53 2004 ./data/he1716_eu100b_295_1.dat 46,000 44,000 42,000 40,000 38,000 36,000 34,000 32,000 30,000 28,000 Counts 26,000 24,000 22,000 20,000 18,000 16,000 14,000 12,000 10,000 8,000 6,000 4,000 2,000 0 -2,000 4 5 6 7 8 9 10 11 12 13 14 15 16 17 2 Theta Document: Version no: 7864 Powder Diffraction Beamline - User Manual 5.1 Date: 7/3/2012 Page: 67 of 76 Fri Apr 9 00:13:53 2004 ./data/he1716_eu100b_295_1.dat 46,000 44,000 42,000 40,000 38,000 36,000 34,000 32,000 30,000 28,000 Counts 26,000 24,000 22,000 20,000 18,000 16,000 14,000 12,000 10,000 8,000 6,000 4,000 2,000 0 -2,000 4 5 6 7 8 9 10 11 12 13 14 15 16 17 2 Theta 22. Appendix B: VHR CCD detector with EPICS control Set-up Mount the detector properly. (Caution: heavy mass of detector, fragile Al foil in front of the detector). The CCD detector can be mounted on the table in hutch B or on MARdtb base in hutch C, also can be mounted on diffractometer circle A. Mount the beamstop in front of the detector. Connect the CCD detector to camera control box and VHR camera computer. Connect the VHR computer to Ethernet. Name: SR10BM01HU03CCD01 IP address: 10.130.2.52 Password: 10bm1user1 Start the WinXP on VHR computer, the EPICS window should open automatically. Otherwise click the ‘Start EPICS’ icon on the desktop. (If you want to use Image Pro 6.0 as camera control software, then close the EPICS window.) In the Linux system on control area computer open the MEDM engineer gui. Click on the ‘Detector>VHR Camera’ button to open main VHR detector dialogue. On main VHR camera control dialogue Make sure in ‘Camera Connection’, the status of camera is ‘Connected’. Select ‘Region size’ and ‘Binning’. The default is using 4008X2671 and 1X1. Gain can be set in the range 1 to 100. It is recommended that the video gain is set to a min of 30 if operating with no binning. Set ‘Exposure time’ and ‘Acquire period’ in second. If you are measure single image, input ‘Images’ number as 1 and ‘image mode’ as single. Otherwise select ‘image mode’ as multiple and input the number of images you want to collect. Select ‘Trigger mode’ as ‘Software’. Set ‘offset’ and ‘Dark field’ to ‘enable’ carry out a “dark subtraction” as part of the acquisition process. Enable ‘flat field’ to compensate for variations in sensitivity across the sensor and remove shading variations due to non-uniformity of the incident X-ray beam. Document: Version no: 7864 Powder Diffraction Beamline - User Manual 5.1 Date: 7/3/2012 Page: 68 of 76 Fri Apr 9 00:13:53 2004 ./data/he1716_eu100b_295_1.dat 46,000 44,000 42,000 40,000 38,000 36,000 34,000 32,000 30,000 28,000 Counts 26,000 24,000 22,000 20,000 18,000 16,000 14,000 12,000 10,000 8,000 6,000 4,000 2,000 0 -2,000 4 5 6 7 8 9 10 11 12 13 14 15 16 17 2 Theta Enable ‘Distortion Subtraction’ to remove the effect of fibre-optic distortion by automatically resampling the raw image. Enable ‘Distortion Smoothing’ to use sub-pixel interpolation of the original image, which eliminates any aliasing effects introduced by the resampling. Enable ‘Distortion Cliping’ to exclude edge irregularities caused by the remapping process, and to present a cleaner remapped image, particularly when sub-area operation is employed. Noise reduction value of between 1 and 16 can be selected. A setting of 16 offers the least noise at higher grey levels but at the expense of increased overall acquisition time. A setting of 1 minimises acquisition time but has higher noise at the higher grey levels. Ticking the ‘low noise’ check box will result in less noise at lower grey levels. Usually do NOT enable Fusion acquisition. The camera is put into a 16 bit imaging mode if enable Fusion mode. Click ‘Driver file I/O’ to open a VHR file sub-dialogue. Click the ‘Start’ in ‘VHR camera main control’ dialogue to collect data. On the VHR camera file sub- dialogue Input ‘File path’ and ‘File name’. ‘next file’ number. Leave the ‘Auto increment’ as ‘yes’, ‘Filename format ’ as default. The data files are saved in the local harddisk of VHR camera computer. How to view the image Double click ‘ImageJ’ icon on the desktop in linux system In ImageJ menu, click ‘Plugins>Epics areaDetector>Epics AD Viewer’ Click the ‘Start’ in the new opened window. The ImageJ will automatic load the latest image measured from the VHR camera. For more info of ImageJ programme, please check ImageJ help menu. Use the standard samples (LaB6, Si) to calibrate the detector. Document: Version no: 7864 Powder Diffraction Beamline - User Manual 5.1 Date: 7/3/2012 Page: 69 of 76 Fri Apr 9 00:13:53 2004 ./data/he1716_eu100b_295_1.dat 46,000 44,000 42,000 40,000 38,000 36,000 34,000 32,000 30,000 28,000 Counts 26,000 24,000 22,000 20,000 18,000 16,000 14,000 12,000 10,000 8,000 6,000 4,000 2,000 0 -2,000 4 5 6 7 8 9 10 11 12 13 14 15 16 17 2 Theta Use SCAN record to control Pb shutter In the MEDM engineering gui, click ‘scan’ to open ‘scan record 2’ and ‘scan record 4’. In ‘scan record 4’ dialogue, drag PV of ‘Acquire start’ from main VHR camera dialogue to ‘DetTriggers 1’. Drag PV of Pb shutter from ‘PD beamline overview’ dialogue to ‘BeforeScan’ and ‘AfterScan’; set the value as 0.0 and 1.0. In ‘scan record 2’ dialogue, drag PV of ‘SCAN’ in ‘scan record 4’ dialogue to ‘DetTriggers 1’. Set ‘Settling TIME’ to 0.5 s. Click the ‘SCAN’ in ‘scan record 2’ dialogue to collect data. Document: Version no: 7864 Powder Diffraction Beamline - User Manual 5.1 Date: 7/3/2012 Page: 70 of 76 Fri Apr 9 00:13:53 2004 ./data/he1716_eu100b_295_1.dat 46,000 44,000 42,000 40,000 38,000 36,000 34,000 32,000 30,000 28,000 Counts 26,000 24,000 22,000 20,000 18,000 16,000 14,000 12,000 10,000 8,000 6,000 4,000 2,000 0 -2,000 4 5 6 7 8 9 10 11 12 13 14 15 16 17 2 Theta 23. Appendix C: Flow Cell Introduction The flow cell (Fig. 1) is designed to be used to study in-situ chemical reaction of samples with gas phase, or materials under protective inert gas system. Setup 1. 2. 3. 4. Put XY stage onto diffractometer circle C. Fix the goniometer head spinner to the XY stage. Use a Huber goniometer head with a small capillary to align the spinner to the rotation center. Rotate circle C to centre the capillary in the camera view. e.g. omega position at -20°,160 ° and 70°,110 ° (Make sure at each position that the X or Y axis of the stage is perpendicular to the alignment camera. Watch out for the XY stage motor cables.) 5. Fill the studying material into a capillary (0.5 or 0.7mm is best).Pack the open end of the capillary with a filter material (e.g. quartz wool or cigarette filter). There are two options for the capillary setup: leave both ends of capillary open (gas flowing through the sample) or sealing one end of the capillary. In the latter mode, gas can be supplied to the open end of the capillary during the experiment. Both ends of the capillary may require filter material if the first mode is used. To flow cell Gas inlet Figure 1. Overview of flow cell setup on diffractometer in hutch B Gas inlet Figure 2. Gas manifold is connected to the flow cell 6. Assemble the flow cell, and align the cell to the spinner rotation centre. The flow cell can be manually spun to assist with the alignment. 7. Connect the flow cell to the gas manifold (Fig. 2). The remaining ports can be used to connect to gas lines, vacuum pumps and/or a vacuum gauge (Fig. 3). 8. Check the sealing of the capillary to the flow cell and the entire gas system. The maximum pressure attainable in glass capillaries is approximately 10 bar. To allow adequate safety margins do not exceed 4 bar, and wear the safety glasses all the time. 9. If required, the gas exhaust system (Fig. 4) and/or bubbler (Fig. 5) can be connected to the outlet of the flow cell. 10. Flow cell can be combined with cryostream or hot air blower for LT or HT measurement (Fig. 6). Watch out for potential collisions between the temperature ancillaries and the flow cell. 11. During measurement, the omega axis can be rocked (ca. 20 degree) to improve the statistics of the diffraction pattern. Use a two dimensional scan record (e.g. scan2 and 3) to rotate the omega angle during data acquisition. Document: 7864 Powder Diffraction Beamline - User Manual Date: 7/3/2012 Version no: 5.1 Page: 71 of 76 Fri Apr 9 00:13:53 2004 ./data/he1716_eu100b_295_1.dat 46,000 44,000 42,000 40,000 38,000 36,000 34,000 32,000 30,000 28,000 Counts 26,000 24,000 22,000 20,000 18,000 16,000 14,000 12,000 10,000 8,000 6,000 4,000 2,000 0 -2,000 4 5 6 7 8 9 10 11 12 13 14 15 16 17 2 Theta Figure 3. Vacuum gauge for the flow cell system Figure 4. gas exhaust system for the waste gas. Figure 5. Bubbler for flow cell connection Figure 6. Flow cell is combined with cryostream or hot air blower for LT or HT measurement Document: Version no: 7864 Powder Diffraction Beamline - User Manual 5.1 Date: 7/3/2012 Page: 72 of 76 Fri Apr 9 00:13:53 2004 ./data/he1716_eu100b_295_1.dat 46,000 44,000 42,000 40,000 38,000 36,000 34,000 32,000 30,000 28,000 Counts 26,000 24,000 22,000 20,000 18,000 16,000 14,000 12,000 10,000 8,000 6,000 4,000 2,000 0 -2,000 4 5 6 7 8 9 10 11 12 13 14 15 16 17 2 Theta 24. Appendix D: Data Processing - ROOT Data processing may be conducted on-line, as data are collected by the Mythen Client, or off-line using routines within ROOT. Also data process may be conducted with DataPro program. The following notes describe how data processing may be done off-line in order to convert channel / counts data to the angle / counts data format. Important Once root has been launched, the UP ARROW can be used to cycle through different commands, a command similar to that required can be selected and edited to suit; if the required command does not appear it will need to be typed in full. Leave a terminal open with an active root session in order to avoid repeatedly loading the libraries and reading the flat field files. Start ROOT The steps for data processing are as follows: Launch ‘root’ in a terminal window after first moving to data directory, for example: $ cd /beamline/data/user/2008-1-000/ $ root root [0] .L /beamline/apps/SR10BM01OPI/root/convertMythenIInew.C+ root [1] readflatfile(“beamline/data/mythen/FlatField/ff_20000”,”dat”) Notes on [1] Readflatfile should launch a plot of the flat field correction to be applied. This step is only required when the root session is first opened, or when the X-ray energy is changed. Change the filename above, to suit the photon energy in use, e.g. 09000, 12400, 15000, 17700, 20000. root [2] processrun(“Standards/Al2O3_20keV_px_”, ”raw”, y, m, 0, 80, ”afsp”) Notes on [2] – file and folder names Standards is a sub-directory in “user/2008-1-000” Al2O3_20keV is the “file name root”, as described in the section on the Mythen client. _px will have been added to the filename if the number of POSITIONS is >0, thus x = 1, 2, 3, or 4 _y will have been added to the end of all file names to indicate the RUN number, thus y = 0,1,…, 9999 File names will therefore become either Al2O3_20keV_px_000y or Al2O3_20keV_000y Notes on [2] – processing >1 data set and angular range To process 1..m datasets with the same filename but different run number at once, change m to value ≥1 Set angular range of data required to be processed (can make larger or smaller than the range covered by the detector), e.g. 0 to 80 degrees is used when the detector is in the lower region -80 to 0 degrees is used when the detector is in the upper region Notes on [2] – ensuring the file is written Use asf to ensure data are saved to file; to plot and save the processed data use afsp. Do not plot data if processing >>1 data file as this option requires the user to close one plot before another file can be processed. Quit To quit the ROOT session, type: root [n] .q Document: Version no: 7864 Powder Diffraction Beamline - User Manual 5.1 Date: 7/3/2012 Page: 73 of 76 Fri Apr 9 00:13:53 2004 ./data/he1716_eu100b_295_1.dat 46,000 44,000 42,000 40,000 38,000 36,000 34,000 32,000 30,000 28,000 Counts 26,000 24,000 22,000 20,000 18,000 16,000 14,000 12,000 10,000 8,000 6,000 4,000 2,000 0 -2,000 4 5 6 7 8 9 10 11 12 13 14 15 16 17 2 Theta Split Data at Zero If data have been collected with the detector centred on, or near, 0° 2-theta, then the output data may be split into 2 files using: root [y] splitDataAtZero(“Standards/Al2O3_20keV_px_”, “xy”, y, m) The files produced retain the same base name as the parent file. For example: Parent file Al2O3_20keV_p1_0001.xy produces Al2O3_20keV_p1_split_0002.xy and Al2O3_20keV_p1_split_0003.xy Merge Data files from multiple positions may be combined, via merging, which sorts the data points from each file by angle, thereby producing a file containing all data points from each file, without manipulation. The steps for data processing are as follows: Launch ‘root’ in a terminal window after first moving to data directory, for example: $ cd /beamline/data/user/2008-1-000/ $ root root [0] .L /beamline/apps/SR10BM01OPI/root/convertMythenIInew.C+ root [x] mergePositions(2, “Standards/Al2O3_20keV_p%d_0000”, “xy”, “Standards/Al2O3_20keV_merged_0000.xy”) Document: Version no: 7864 Powder Diffraction Beamline - User Manual 5.1 Date: 7/3/2012 Page: 74 of 76 Fri Apr 9 00:13:53 2004 ./data/he1716_eu100b_295_1.dat 46,000 44,000 42,000 40,000 38,000 36,000 34,000 32,000 30,000 28,000 Counts 26,000 24,000 22,000 20,000 18,000 16,000 14,000 12,000 10,000 8,000 6,000 4,000 2,000 0 -2,000 4 5 6 7 8 9 10 11 12 13 14 15 16 17 2 Theta 25. Appendix E: Data Processing - DataPro Program Overview The program, ‘DataPro’, is written in IDL (Interactive Data Language) routines to process data collected using the Mythen detector at the PD beamline. To run the program you must have IDL or IDLVM (virtual machine) installed. The program can be run on Windows, Linux and Mac systems. Full testing can not be guaranteed for all platforms, however, bugs can be reported to Dr Qinfen Gu ([email protected]). IDLVM is part of the main IDL package and can be downloaded (after registering) from the site: http://www.ittvis.com/ProductServices/IDL.aspx You will require a license to run the full version of IDL, but IDLVM is a freely distributed runtime utility. The purpose of this program is to provide a convenient means of normalising and combining powder diffraction data. Available options include: Merge data (mm) – combine by sorting according to angle, 2 data sets. Splice data (ss) – combine 2 data sets by incorporating points from second histogram into the gaps of the first histogram. Grid data (gg) – output constant step size data through applying a cubic spline after splicing two histograms to generate a single data set with step size 0.00375°. Normalise (nn) the intensity between multiple data files, using the integrated ion chamber counts. Apply a zero offset, if required, when combining adjacent histograms. Split histogram into two files (sp or sn), where data have been collected about 2θ = 0°. Install DataPro 1. Download 2. Extract 3. Place shortcut on desktop 4. Run by double clicking on *.sav file, or desktop shortcut. How to use DataPro Ensure diffraction data are located in a folder and path that is free of spaces in the name; e.g. C:\2009-1-0000 Ensure data file names are of the format shown below, AND that ‘parab’ files are also located with the data. e.g. xxx_p1_ scan0.000000_adv0_n.xy or xxx_p1_n.xy NOTE: ‘p1’ files must exist in this folder when normalising data. Double click the shortcut ‘DataPro’ on the desktop. Use input browse button to select the first file in a sequence to be processed e.g. C:\ 2009-1-0000\lab6_15000_p1_0000.xy or C:\ 2009-1-0000\lab6_15000_p3_0000.xy Use output browse button to generate folder and filename to be written; DO NOT include index number or suffix. WARNING: files which already exist will be overwritten. e.g. C:\ 2009-1-0000\ processed \lab6_15000_p1-2 Set the index number range of your data into start and end field. Select input data type .xye (2theta, intensity, error) or .xy (2theta, intensity). Select apply function None AND No position if data are to be normalized without combining histograms. NOTE: each different position of a run must be processed separately in this case (i.e. change ‘p1’ to ‘p2’, then ‘p3’ etc.) Document: Version no: 7864 Powder Diffraction Beamline - User Manual 5.1 Date: 7/3/2012 Page: 75 of 76 Fri Apr 9 00:13:53 2004 ./data/he1716_eu100b_295_1.dat 46,000 44,000 42,000 40,000 38,000 36,000 34,000 32,000 30,000 28,000 Counts 26,000 24,000 22,000 20,000 18,000 16,000 14,000 12,000 10,000 8,000 6,000 4,000 2,000 0 -2,000 4 5 6 7 8 9 10 11 12 13 14 15 16 17 2 Theta If histograms are to be combined, select (sequential) detector positions up to a maximum of 2. e.g. ‘p1 & p2’ or ‘p3 & p4’ to merge or splice. Select the processing method (Merge or Splice or Grid). Merging uses all data points from the two data files and sorts them based on two theta angle. Splice uses the first histogram as the reference and fills in the gaps from the second histogram. Grid splices the data then applies a spline to generate data with a uniform step size. Select Normalise if data intensity normalistation is required; data intensity is normalised based on the integrated ion chamber counts found in the ‘parab’ files and ‘p1’ data are used as the reference. If data files contain a header, select Header to skip in input to skip the header line(s) in the input xy file. If a zero correction is required to be applied to the second histogram, relative to the first, type this value, e.g. 0.0003°, in Zero correction applied to hist 2 field. Or leave zero correction to 0, and tick auto correction option, and input the 2theta range of a single peak with strong intensity to fit. Select output data format. Normal is for .xye/.xy data format, GSAS is for .fxye format. Finally, click the Go!!!. Document: Version no: 7864 Powder Diffraction Beamline - User Manual 5.1 Date: 7/3/2012 Page: 76 of 76