1
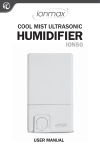
ION70
ionmax.com.au
1300 800 200
USER MANUAL
Updated: 18-04-2013. Version 2.0.
DEAR CUSTOMER
Thank you for purchasing the Ionmax Ion70 Ionic Cool Mist Humidifier with Humidistat. The Ion70
reintroduces moisture into the air to help you maintain a comfortable humidity level in your home. It can
help to efficiently relieve respiratory ailments such as colds, flus or hay fever caused by dry air.
Please read this manual carefully to ensure proper usage and save these instructions for future
reference.
FEATURES
•
•
•
•
•
•
•
•
Built-in ioniser to help revitalise and clean the air
Adjustable humidistat to maintain desired humidity
12-hour timer settings for added convenience
3 moisture control settings - low, medium, high
Easily adjustable moisture and timer via LCD display
7-colour night light makes it suitable for use at night or in the bedroom
Optional ion resin filter system to reduce limes in water
Auto switch off and water tank is empty light indicator
CORD AND PLUG INSTALLATION SAFETY INSTRUCTIONS:
The length of the cord on the unit was selected to reduce the hazards of becoming tangled in, or
tripping over a longer cord. If a longer cord is necessary, an approved extension cord may be used.
The electrical rating of the extension cord must be equal to or greater than that of the humidifier.
Please take extra care to arrange the extension cord so that it will not drape over the countertop or
tabletop where it can be pulled on by children or accidentally tripped over.
PRE-OPERATING INSTRUCTIONS
1. Please ensure the unit is switched off and disconnected from the electrical outlet.
2. Place the unit on a flat surface, about 60 cm above the floor and 10 cm away from the wall. Do not
place the unit on or near moisture-sensitive surfaces or furniture.
3. Fill up the water tank:
a.Remove the water tank by lifting it straight upward. (fig. 1).
b.Twist off the tank cap located on the bottom of the tank by turning it counter clockwise. Fill the
water tank with cool, fresh water.
Do not fill tank with warm water as this may cause leakage.
Do not use essential oils as this may damage the unit.
c.After filling the tank, replace the tank cap by firmly turning it clockwise and then replace the water
tank onto the base. The tank will immediately begin to empty into the base.
4. Plug in the unit’s power cord into a 220V AC electrical outlet.
SAFETY INSTRUCTIONS:
When using electrical appliances, basic safety precautions should always be followed to reduce the risk
of fire, electric shock, and injury to persons, including the following:
Check the household voltage to ensure that it matches the unit’s rated specification before operating.
Children should be supervised to ensure that they do not play with the appliance.
Do not add water directly to the moisture outlet as this will damage the unit.
Do not allow children to play with any product packaging, such as plastic bags.
To avoid fire hazard, never put the cord under rugs or near heat registers, radiators, stoves, or
heaters.
6. Do not place the unit near heat sources such as stoves, radiators, and heaters. Do locate your unit
on an inside wall near an electrical outlet. The unit should be at least 10cm away from the wall for
best results.
7. Do not attempt to refill the unit without first unplugging the unit from its electrical outlet.
8. Do not operate any appliance with a damaged cord or plug, after the appliance malfunctions, or
if it has been dropped or damaged in any manner. Return the appliance to the manufacturer for
examination, electrical or mechanical adjustment, or repair.
9. Always place the unit on a firm, flat, level surface at least 60cm above the floor.
10.Do not allow the moisture outlet to directly face the wall.
11.Never tilt, move, or attempt to empty the unit while it is operating.
12.Shut off and unplug the unit before removing the water tank and moving the unit.
13.Do not attempt to repair or adjust any electrical or mechanical functions on this unit. Doing so will
void your warranty. The inside of the unit contains no user serviceable parts. All servicing should be
performed by qualified personnel only.
14.Do not plug in the cord with wet hands: this could result in electrical shock.
15.Never use detergents, gasoline, glass cleaner, furniture polish, paint thinner or other household
solvents to clean any part of the unit.
16.Do not pour water into any openings other than the water tank.
17.Excessive humidity in a room can cause water condensation on windows and some furniture. If this
happens, turn the unit off.
18.Never place the housing under water flow or immerse it in liquid.
1.
2.
3.
4.
5.
Moisture outlet
Handle
Water tank
Filter cartridge
Water tank cap
Transducer
Water level sensor
Control panel
Main body
FIGURE 1.
1
2
CONTROL PANEL AND OPERATION
A) On/off switch
Press button A to turn the unit on and off.
A) Daily maintenance
1.Before cleaning, turn the power off and unplug the unit from its electrical outlet.
2.Remove the water tank from the base of the unit.
3.Carry the water tank to a sink, then drain and rinse the water tank thoroughly to remove any
sediment or dirt. Wipe clean and dry it with a clean soft cloth or paper towel.
4.Refill the water tank with cool tap water as instructed in the Pre-Operating Instructions.
B) Ioniser/night light
The ioniser is set to automatically start running once the unit is switched on. Press button B once to
turn the night light on; press it a second time to turn the ioniser off, and; press it a third time to turn
both the ioniser and the night light off.
C)Auto
Press Button C to activate the automatic humidity function, then the ideal humidity of 55% is
maintained. When the humidity level in the room is less than the auto humidity level (55%), the
humidifier will continue to produce moisture automatically. Once the room humidity level is met, the
humidifier will turn itself off.
D)Timer setting
Press Button D to determine the operating time. It can be regulated to operate between 1 and 12
hours or continuously.
E) Humidity setting
Set the desired humidity in % by pressing Button E. We recommend a relative humidity of between
40% and 60%. The appliance can be regulated from 40% to 75%. If the humidity exceeds the
desired setting, the appliance will turn itself off. The appliance will not turn itself off if it has been
set for continuous operation (“Co”). The desired value is shown while you are making the selection.
After a few seconds, the display automatically switches to the current value.
F) Mist emission setting
Press Button F to adjust between low, medium and high mist emission. We recommend setting it to
low mist emission for night use.
B) Weekly maintenance
1.Repeat steps 1-3 above.
2.Pour one cup of white vinegar (about 200ml) into the base in the main body and leave for about
15 minutes. Then, wipe off the scale (especially in the transducer) with the soft brush.
3.Wipe off the scale and white vinegar solution using a clean soft cloth.
C)Maintenance caution
1.Never submerge the main body in water.
2.Do not use any solvents or aggressive cleaning agents to clean the unit.
3.Clean the internal parts with a soft cloth.
4.Use only the brush provided to clean the transducer. This should be done once a week.
5.Use only the soft bristle portion of the brush when cleaning.
6.Change the water in the water tank at least once a week to ensure that water is not left standing
more than one week.
D)Storing the humidifier
1.Clean the unit as described above and dry thoroughly.
2.Preferably, store the unit in its original box.
3.Avoid exposing the unit to high temperatures.
E) Replacement of the filter cartridge (Optional)
Replace the filter cartridge every 6 months as follows:
1.Unplug the unit before removing the water tank. Do not touch the water in the main body during
operation.
2.Turn the water tank upside down and unscrew the water tank cap. The filter cartridge is attached
to the inside of the cap.
3.Remove the old filter cartridge and insert the new filter cartridge.
4.Screw the tank cap tightly onto the water tank and replace the water tank onto the main body.
Additional note: The main material of the filter cartridge is grain resin.
G)Water level display
The appliance will show on the display (G) with flash warning when the water tank needs to be
refilled.
Attention: A humidity level below 20% can be unhealthy and uncomfortable. The optimal humidity
level is between 40-60%. If condensation forms on your windows or walls or the humidity % on the
display reads above 70%, turn the unit off.
CLEANING AND MAINTENANCE
In winter, the lack of humidity can dry out your skin and cause nasal irritation, frequent colds, sore
throats and other respiratory conditions. Humidifiers provide relative humidity to protect our health.
To get the most benefit from the humidifier and avoid product failure, please follow all maintenance
instructions carefully. These steps are essential to prevent microorganisms from growing in the water
within the humidifier.
3
4
TROUBLESHOOTING INSTRUCTIONS
If your humidifier is not working correctly please check the following causes:
Problem
Probably cause
Solution
Unit not operating
Power cable not plugged in
Plug in power cable
The power light is on, but the
humidifier doesn’t work
Too much water in the tank
Pour away some water from the
tank
No water in water tank
Fill tank with water
New machine
Open the water tank, empty it and
leave it in a shady and cool place
for 12 hours
Dirty water or the water has been
left in the water tank for too long
Clean the water tank and refill with
fresh, cool water
The transducer is dirty
Clean transducer using vinegar and
a soft brush
Dirty water or the water has been
left in the water tank for too long
Clean the water tank and refill with
fresh, cool water
Resonance in water tank when
water is insufficient
Fill tank with water
Unit is on an unstable or uneven
surface
Move the unit to a stable, flat
surface
Can’t open tank cap / very tight
tank cap
Over tightened
Add liquid soup to cap gasket to
ease it open
Water is leaking from the unit
Tank cap too loose
Tighten tank cap
Base not emptied during refill
Remove tank. Empty base and refill.
Water mist produces an unpleasant
smell.
Mist output volume is low
Abnormal noise
PRODUCT SPECIFICATION
Model: Ionmax Ion70
Input voltage: AC 220-240V 50 Hz
Power consumption: 30W
Moisture capacity: 300ml/h
Tank capacity: 4.5L
Room coverage: 30-40 sqm
Weight: 1.5 kgs
Dimension: 246 x 182 x 329 mm
WARRANTY DETAILS
Congratulations on your purchase! It is our aim to provide you with quality products that you can
trust. Our products come with guarantees that cannot be excluded under the Australian Consumer Law.
You are entitled to a replacement or a refund for a major failure and for compensation for any other
reasonably foreseeable loss or damage.
You are also entitled to have the goods repaired or replaced if the goods fail to be of acceptable quality
and the failure does not amount to a major failure.
The Guarantee
The product is guaranteed to be free from defects in workmanship and parts for a period of 12 months
from date of purchase for domestic use and 3 months for commercial use. Defects that occur within this
warranty period, under normal use and care, will be repaired, replaced or refunded at our discretion,
solely at our option with no charge for parts and labour. The benefits conferred by this warranty are
in addition to all rights and remedies in respect of the product that the consumer has under the Trade
Practises Act and similar state laws.
Proof of Purchase
This warranty is valid for the original purchase and is not transferable. Please keep your purchase
docket or receipt as proof of purchase and as proof of date on which the purchase was made. The
purchase docket (or a copy) or receipt must be presented with the warranty when making a claim under
this warranty.
Service during the Warranty Period
To claim for warranty, contact us on 1300 800 200 or [email protected] to get an RA# (Return
Authorization Number). Ensure that the RA# is clearly stated on the outside of the packaging and that
the product is properly packaged so that no damage occurs to the product during transit. Shipping of
the product back to us for warranty will be at your cost. A product return without the RA# or proof of
purchase will not be accepted.
Extent of Warranty
This warranty is limited to defects in workmanship or parts. All defective products or parts will be
repaired or replaced. This warranty does not cover manuals and packaging.
Normal Wear and Tear
This warranty does not cover normal wear and tear to the product or parts.
Exclusions
This warranty does not cover:
•Any defect caused by an accident, misuse, abuse, improper operation, lack of reasonable care,
unauthorised modification, loss of parts, tampering or attempted repair by a person not authorised by
the distributor.
•Any product that has been damaged by a lightning strike either directly or indirectly or a main power
surge or liquid ingress.
•The product if it is located outside of Australia.
•Any damage caused by improper power input or improper cable connection.
Andatech Corporation Pty. Ltd.
PO Box 3038, Nunawading VIC 3131, Australia.
Phone: 1300 800 200 Fax: 1300 883 802 Email: [email protected]
5