Download Sopix2
Transcript
USER MANUAL
E N G L I S H
Contents
1
FOREWORD . . . . . . . . . . . . . . . . . . . . . . . . . . . . . . . . . . . . .2
2
X-RAY SYSTEM INTRODUCTION . . . . . . . . . . . . . . . . . . . . . . . .2
3
PRECAUTIONS FOR USE . . . . . . . . . . . . . . . . . . . . . . . . . . . . .4
4
STANDARDS AND REGULATIONS . . . . . . . . . . . . . . . . . . . . . . . .7
5
SYSTEM CONFIGURATION . . . . . . . . . . . . . . . . . . . . . . . . . . .13
6
INSTALLATION AND CONNECTION . . . . . . . . . . . . . . . . . . . . . .14
7
USE . . . . . . . . . . . . . . . . . . . . . . . . . . . . . . . . . . . . . . . . .17
8
MAINTENANCE . . . . . . . . . . . . . . . . . . . . . . . . . . . . . . . . . .19
9
AFTER-SALES SERVICE . . . . . . . . . . . . . . . . . . . . . . . . . . . . .21
10
TECHNICAL FEATURES . . . . . . . . . . . . . . . . . . . . . . . . . . . . .23
Sopix
²
• User manual
1
E N G L I S H
1
FOREWORD
Before using the Sopix² digital x-ray system, it is recommended to carefully read and follow the instruction
manual in order to use this device at its best.
Always be aware of the messages CAUTION, WARNING and NOTE when using the system.
CAUTION: the term CAUTION describes potential incidents likely to jeopardize safety.
WARNING: the term WARNING refers to the incidents likely to disturb the smooth running of the imaging
system.
NOTE: the term NOTE highlights particular points in order to facilitate the system maintenance or to
clarify important information.
2
X-RAY SYSTEM INTRODUCTION
2.1. FUNCTIONS AND PERFORMANCE
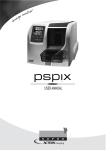
The Sopix² medical device is a digital dental x-ray imaging system. The sensor (located in the patient’s mouth
just like a silver film) captures, thanks to the CMOS sensor, the X-rays produced by the generator. Then, it will
transmit this data to the control box to which it is connected and, in turn, transmits the information to the
computer to display the x-ray onto the screen.
All the images captured with the Sopix² system can be recalled onto the screen with the Sopro Imaging software
provided with the system. This software displays, processes, and stores the images captured with the Sopix²
system.
Exclusive technology A.C.E™ (Automatic Control Exposure), developed by SOPRO, provides the system with
prominent functionalities. Thus, Sopix² analyzes radiation in real time upon every acquisition, thus avoiding any
risk of overexposure.
2
Sopix
²
• User manual
E N G L I S H
2.2. PARTS LIST
The Sopix² dental digital x-ray system is composed of the following elements:
• A sensor, size 1, integrating the controller and a cable of 3.70 meter total length.
• A sensor holder.
• 10 sensor protectors.
• An active extension USB2.0 (booster), 5 meters long.
• A CD of Imaging SOPRO software.
• Multilingual operating instructions incorporated in the Sopro-Imaging software CD-ROM.
• A quick startup guide.
• Optional: the angulation set.
NOTE:
“The device was designed and developed for use with SOPRO accessories only, In order to guarantee patient
safety and maximum performance. The use of any other manufactures accessories can result in risk or harm
to a patient, and a malfunction to your device.”
Sopix
²
• User manual
3
E N G L I S H
3
PRECAUTIONS FOR USE
3.1. SAFETY INSTRUCTIONS
• Comply with the operating and storage requirements, and avoid exposing the Sopix² system to excessive dust.
• Do not open the device and do not try to take it apart or to modify it.
• Never insert any metallic object into the device in order to avoid any electric shock, fire, short-circuit or
hazardous discharge risk.
• Do not put the device in a humid environment or where it could be water sprayed.
• Always unplug from the outlet the computer on which Sopix² system is connected in case of storm or when it
will not be used for a certain period.
• Only use the connecting cable(s) supplied with the Sopix² system.
3.2. SYSTEM OPERATING ENVIRONMENT
Refer to chapter 10 « Technical features ».
3.3. TRANSPORT AND/OR STORAGE ENVIRONMENT OF THE SYSTEM
Refer to chapter 10 « Technical features ».
4
Sopix
²
• User manual
E N G L I S H
3.4. PRECAUTIONS TO TAKE FOR THE SENSOR(S)
It is imperative to take some precautions for use of the sensors, particularly:
• YOU MUST handle the sensor with much care.
• YOU MUST use a SOPRO sensor protector for each patient.
• YOU MUST use a positioning kit to correctly place the sensor.
• YOU MUST use a disinfecting wipe to clean the sensor.
• YOU MUST put the sensor on its support.
• DO NOT put the sensor in an autoclave.
• DO NOT drop the sensor.
• DO NOT hold the sensor with clamp forceps.
• DO NOT hold the sensor with the connecting cable.
• DO NOT roll over or walk on the connecting cable.
• DO NOT ask the patient to bite the sensor or the connecting cable.
• DO NOT immerse the sensor.
• DO NOT open the sensor or controller in case of failure.
• DO NOT use protections other than the SOPRO sensor protectors.
• DO NOT use abrasive product to clean the sensor.
3.5. PRECAUTIONS TO TAKE FOR THE USB PORT
Most of current motherboards are equipped with two USB channels. Each channel has two USB ports to connect
various peripherals.
WARNING:
It is recommended to dedicate a USB channel for the imaging system. This will ensure the performance and
the transmission speed of Sopix² system data will not be affected by the fact that another peripheral is on
the same channel.
Sopix
²
• User manual
5
E N G L I S H
3.6. ELECTROMAGNETIC INTERFERENCE AND ELECTROSTATIC DISCHARGES
Electromagnetic compatibility (CEM) is the ability of electronic device elements to correctly interact in an
electronic environment. Although this digital X ray system was designed according to this compatibility and complies
with the electromagnetic interference thresholds established by the regulatory agency, there is no guarantee about
the interference likely to occur on a particular installation.
If the device generates interference with radio communication services (which can be determined by switching
it off and on), the user is recommended to try to correct this phenomenon by taking whole or part of the
following measures:
• Change the receiving antenna orientation.
• Reposition the product according to the receiver.
• Take away the computer from the receiver.
The Sopix² digital x-ray system is designed and tested to be used in a home environment, class B Group 1,
according to CISPR11 standard.
3.7. ELECTROSTATIC INTERFERENCE
A strong electrostatic discharge may logically disconnect the Sopix² system from the computer USB (Universal
Serial Bus) port.
In most cases, the Sopix² system recovers itself.
Thereafter, it will be judicious to:
• implement the sensor cap before setting the Sopix² system to hold an image acquisition, and/or
• dissipate your static charge by touching, for example, a metallic part of the dental chair before taking a digital
x-ray.
6
Sopix
²
• User manual
E N G L I S H
4
STANDARDS AND REGULATIONS
4.1. COMPLIANCE WITH STANDARDS AND REGULATIONS
Compliance with European Community directives
The Sopix² system design, manufacturing and distribution comply with the European directive 93/42/EEC
requirements, relative to medical devices.
SOPRO certifies this device went through audit tests and was declared complying with the restrictions imposed
by the safety standards of electromedical devices (IEC 60601-1) and of electromagnetic compatibility (IEC
60601-1-2).
Medical device vigilance
As any medical device, this device is subjected to the medical device vigilance dispositions; any serious
dysfunction should then be the subject of a description to the competent authorities and to the manufacturer
as soon as possible and as precisely as possible.
Scrapping the system
This device bears the recycling symbol according to the European directive 2002/96/EC about electric and
electronic equipment waste (DEEE or WEEE).
By correctly disposing of this device, you will avoid damaging the environment and human health.
The symbol
present on the device or on the accompanying documentation indicates that this product cannot
be in any case treated as household waste. Therefore, it should be given to a waste collection centre that
handles electric and electronic equipment recycling.
Standards in force in the installation country must be respected relative to waste disposal. To have more details
about this device treatment, recuperation and recycling, please contact your dental device distributor (or
failing that, the group ACTEON site) regarding the indicated procedure.
NOTE:
To avoid any environment contamination risk likely to cause mild or serious injuries, be sure to dispose of
the device and its accessories as special waste.
Sopix
²
• User manual
7
E N G L I S H
Electromagnetic compatibility
Guide and declaration of the manufacturer - electromagnetic emissions
The standard device « Sopix² dental digital x-ray system » is intended to be used in the electromagnetic
environment specified below. The user should make sure it is used in this environment
Compliance
Emission trial
Electromagnetic environment - Guide
RF emissions
CISPR 11
Group 1
The standard device « Sopix² dental digital x-ray
system » only uses radio energy for its internal
functions. therefore, its RF emissions are very low
and are not likely to cause interference with near
electronic devices.
RF emissions
CISPR 11
Class B
The standard device« Sopix² dental digital x-ray
system » may be used in every domestic premises,
including the ones directly connected to the public
low voltage power distribution network used to
supply household buildings.
Harmonic emissions
EN 61000-3-2
Class D
The standard device « Sopix² dental digital x-ray
system » may be used in every premises other than
household premises and the ones directly
connected to the public low voltage power
distribution network used to supply household
buildings.
Voltage fluctuations /
Flicker
EN 61000-3-3
Applicable
8
Sopix
²
• User manual
E N G L I S H
Guide and declaration of the manufacturer - electromagnetic immunity
The standard device « Sopix² dental digital x-ray system » is intended to be used in the electromagnetic
environment specified below. The user should make sure it is used in this environment
Immunity trial
CEI 60601 Compliance
Severity level
level
Electromagnetic environment
Guide
± 6 kV when
in Contact
± 8 kV in the
air
± 6 kV
± 2 kV for the
feed cables
± 1 kV for the
input/output
cables
± 2 kV
Differential
mode ± 1 kV
Common
mode ± 2 kV
± 1 kV
Dips, brief outages and
power voltage variation
EN 61000-4-11
• <5% UT - for
10 ms
• 40% UT - for
100 ms
• 70% UT - for
500 ms
• <5% UT - for
5s
<5% UT
10 ms
<40% UT
100 ms
<70% UT
500 ms
<5% UT
5s
The main power supply quality should be one of a
traditional commercial or hospital environment.
If the user of the standard device « Sopix² dental
digital x-ray system » requires it to continue to
operate during main power supply outages, it is
recommended the standard device « Sopix² dental
digital x-ray system » is fed by an inverter or a
battery.
Magnetic field with the
network frequency
(50/60 Hz)
3 A/m
3 A/m
The magnetic field with the network frequency
should be at a characteristic level of a location in
a traditional commercial or hospital environment.
Electrostatic discharges
EN 61000-4-2
Far transient bursts
EN 61000-4-4
Voltage shocks
EN 61000-4-5
± 8 kV
± 1 kV
The floor should be wooden, concrete or tile. If
the floor is covered with a synthetic material, the
relative humidity should be at least 30%.
The main power supply quality should be the one
of a traditional commercial or hospital
environment.
The main power supply quality should be one of a
traditional commercial or hospital environment.
N.A.
Note: UT is the power voltage nominal value applied during the trial.
Sopix
²
• User manual
9
E N G L I S H
Guide and declaration of the manufacturer - electromagnetic immunity
The standard device « Sopix² dental digital x-ray system » is intended to be used in the electromagnetic
environment specified below. The user should make sure it is used in this environment
CEI 60601
Severity level
Immunity trial
Compliance
level
Electromagnetic environment
Guide
Portable and mobile RF communication devices
should not be used at a distance from the standard
device « Sopix² dental digital x-ray system »,
including the cables, lower than the recommended
separation distance, calculated with the
applicable formulas depending on the emitter
frequency.
Recommended separation distance
Conducted RF
EN 61000-4-6
3 Vrms
150 kHz
to 80 MHz
3 V/m
Radiated RF
3V
d = 1.16 √ P
d = 1.16 √ P 80 MHz to 800 MHz
3V/m
d = 2.33 √ P 800 MHz to 2.5 GHz
80 MHz to 2.5
GHz
EN 61000-4-3
where
is the maximum rated output of the
transmitter in watts (W) by the transmitter
manufacturer and d the recommended separation
distance in metres (m).
The field levels emitted by the fixed RF
transmitters, determined by an electromagnetic
measurement of the sitea, should be lower than
the compliance level in each frequency band.
Interference may occur in the vicinity of the
devices bearing the following symbol:
Note 1: At 80 MHz and 800 MHz, the higher frequency band applies.
Note 2: These recommendations may not apply in every situation. Electromagnetic wave propagation is
modified by the absorption and reflection due to the structures, objects and persons.
10
Sopix
²
• User manual
E N G L I S H
a The fixed transmitter field levels, such as the base stations of the radio telephones (cellular/wireless) and
the terrestrial mobile radios, amateur radio, AM, FM, and TV radio communication cannot be theoretically
assessed precisely. To obtain the electromagnetic environment due to the fixed RF transmitters, a site
measurement should be performed. If a field level measured in the use environment of the standard device
« Sopix² dental digital x-ray system» exceeds the compliance levels above applicable, the good operation
of the standard device « Sopix² dental digital x-ray system» should be checked. If abnormal operations are
proved, some further measures should be taken, such as reorientation or relocation of the standard device.
b Above the 150 kHz to 80 MHz frequency band, the field level should be lower than 3 V/m.
Recommended separation distances between the portable and mobile RF communication devices and
the standard device « Sopix² dental digital x-ray system»
The standard device « Sopix² dental digital x-ray system » is intended to be used in an electromagnetic
environment in which the irradiated RF disturbances are checked. The user of the standard device « Sopix²
dental digital x-ray system » can help to avoid electromagnetic interference by maintaining a minimal distance
between the portable and mobile RF communication devices (transmitters) and the recommended device «
Sopix² dental digital x-ray system» such as recommended below, depending on the maximal output power of
the communication device.
Rated maximal output
power of the
transmitter
W
Separation distance depending on the transmitter frequency
m
150 kHz to 80 MHz
80 MHz to 800 MHz
800 MHz to 2.5 GHz
d = 1.16 √ P
d = 1.16 √ P
d = 2.33 √ P
0.01
0.116
0.116
0.233
0.1
0.366
0.366
0.736
1
1.16
1.16
2.33
10
3.66
3.66
7.36
100
11.6
11.6
23.3
For the transmitters whose maximal output is not listed above, the recommended separation distance d in
metres (m) can be determined by using the equation applicable to the transmitter frequency, where P is the
maximal output of the transmitter in watts (W) rated by the transmitter manufacturer.
Note 1: At 80 MHz and at 800 MHz, the separation distance given in the higher frequency band applies.
Note 2: These recommendations may not apply in every situation. The electromagnetic wave propagation is
modified by absorption and reflection due to the structures, objects and persons.
Sopix
²
• User manual
11
E N G L I S H
4.2. SIGNIFICATION OF THE STANDARDISED SYMBOLS
Indications born on the controller identifying the Sopix² digital x-ray system according to the international
standards.
This symbol indicates the device protection degree against indirect and direct electric contacts is BF
type.
Read the use instructions.
Electric and electronic equipment marketed after 01/August/2005.
Manufacture date.
Manufacturer.
0459
12
Complying with the European directive 93/42/EEC relative to medical devices.
Sopix
²
• User manual
E N G L I S H
5
SYSTEM CONFIGURATION
5.1. REQUIRED CONFIGURATION FOR THE COMPUTER
To use the Sopix² system, you must make sure the computer and its peripherals do not have any use limitation
that could concern life safety. It should also meet the following requirements:
Minimal system configuration
Recommended configuration
Operating system
Windows XP Pro SP2
Windows XP SP2 – VISTA SP1
Processor
Intel® Pentium IV – 1.3 GHz
Intel® Core 2
Memory
512 MB
2 GB
Hard disk
80 GB
320 GB
USB ports
2 x USB2.0 Hi-Speed ports
4 x UB 2.0 Hi-Speed ports
Video board
Graphic board 32 MB RAM
Graphic board with Nvidia chipset
or exclusive video ATI / 256 MB
RAM
USB Chipset
Intel or NEC
Intel or NEC
Screen resolution
1024 x 768
1024 x 768 or higher
Standard
IEC 60950
IEC 60601-1
5.2. IMAGING SOFTWARE
The Sopix² system is provided with the dental imaging software Sopro Imaging, running in Windows. It is a
versatile software that captures, processes, and files the x-rays taken with the Sopix² system, but also to share
your data in network.
Sopro Imaging may also link together with the imaging software of the management software of the practice.
For more information, please contact your distributor.
5.3. COMPATIBILITY WITH X-RAY GENERATORS
The Sopix² digital x-ray system is potentially compatible with all intraoral x-ray generators. Nevertheless, we
recommend X-Mind AC/DC generators which are perfectly adapted to Sopix² system and provide very good
performance to the system.
Sopix
²
• User manual
13
E N G L I S H
6
INSTALLATION AND CONNECTION
6.1. IMAGING SOPRO SOFTWARE INSTALLATION
• Insert the Sopro Imaging CD-ROM in the drive (it will run automatically).
WARNING:
If the CD-ROM does not execute automatically or if the operating system is prior to Windows XP SP1, follow
the following instructions:
- Go to the Start menu > Execute.
- Type D:\setup.exe (replace D by the letter of the CD-ROM driver).
- And then, click on OK. The file instantly executes. Then follow the steps from the below point.
NOTE:
Clicking on the key « Browse this CD-ROM » accesses a Windows browse window from which it is possible to
consult the whole content of the CD-ROM.
At the CD-ROM root, there are files to automatically and/or manually launch the setup:
- In the directory « Document » and its subdirectories, there are all the documents about the Imaging SOPRO
software and the Sopix² system; these documents are in PDF format. Make sure to correctly install
Acrobat Reader in case of reading difficulties.
- The Drivers directories contain the drivers necessary to the use of the hardware accepted by Sopro Imaging
(Sopix² system, SOPRO cameras in USB 1 and USB 2, Hasp protection key).
- The directory Sopro Imaging contains the Sopro Imaging installation program.
- The directory « Tools » contains the Microsoft Direct X 9.0 c and ADOBE Acrobat Reader installation
programs.
To obtain the best performance possible when using the Imaging SOPRO software, it is recommended to
install DirectX 9.0c. In order to do this, click on the key « Install DirectX 9.0c » and then follow the displayed
instructions. DirectX 9.0c is a Microsoft® product. In case of difficulties when installing this product, consult
the information provided by this editor.
In order to ensure maximal compatibility with all the installed systems (computers, Windows, and word
processing version) it was decided to provide the documents available on the CD-ROM in PDF format.
This format developed by ADOBE® Company can be read thanks to Acrobat Reader service program.
If Acrobat Reader is not installed on the computer or the version is not recent enough, click on the key «
Install Acrobat Reader », and then follow the instructions. Acrobat Reader is an ADOBE® product. In case of
difficulties when installing this product, consult the information provided by this editor.
14
Sopix
²
• User manual
E N G L I S H
• A dialog box opens - it is the main menu window for installing a certain number of programs related to Sopro
Imaging application.
• Click on « Install Sopro Imaging ». A window displays; select the desired language during the installation
process.
• A dialog box opens. It displays the software license to be entirely read to continue the installation. Once the
terms are read, click on « Next ».
• By default, the Imaging SOPRO software will automatically install in the directory « C:\Program Files\Sopro
Imaging ». To start installing the software, click on « Next ».
• Once the installation is completed, a dialog box displays. Click on « Finish ».
Once the software installation is completed, you just have to connect the Sopix² system to the computer.
6.2. SOPIX² SYSTEM INSTALLATION
Before installing the Sopix² system, make sure the computer is connected to an outlet correctly grounded.
Now, follow the below indications:
• Connect the Sopix² system USB connector to the computer.
WARNING:
Never connect the USB cable to the port found on the computer front plate.
Indeed, the connectors present on the computer front plate are much more sensitive to the various USB
signal interference and this may cause a dysfunction of our x-ray system.
For electrical safety reasons, the computer on which the imaging system will be connected, as well as the
printer, should comply with IEC 60950 standard. Be sure their respective manual indicates the compliance
with this standard and that it supplies a cleaning and/or disinfecting procedure.
These elements should be placed more than 1.50m from the chair so that they are not part of the patient’s
environment. No peripherals (other than the ones specified) should be connected to the system.
No mobile stand with multiple plugs; and no additional or extension cord (other than that supplied by
SOPRO) should be connected to the system.
Check the electric installation compliance with the standards in force in the country where the system is.
Sopix
²
• User manual
15
E N G L I S H
• Once the box is connected to the PC, Windows detects the Sopix² system and indicates it is ready to install
the drivers. A window displays. Keep the option « install automatically the software» and click on « Next ».
WARNING:
Insert the Sopro Imaging software into the CD driver in order to install the drivers.
• During the installation of the drivers and hardware, a dialog box displays, click on « Continue » to continue
installing the system without taking into consideration the Windows message.
• After a few moments, the installation is completed. A window opens. Click on « Finish ».
The Sopix² system is ready to receive the sensor.
NOTE:
Please, refer to the use instructions of the used imaging software to determine know the installation mode
of Sopix² system inside it.
16
Sopix
²
• User manual
E N G L I S H
7
USE
7.1. ACQUISITION OF AN X-RAY IMAGE
First, switch on the PC on which the Sopix² system is installed and launch the imaging software (Sopro Imaging).
• Set your generator and the timer.
• Slip the sensor into a hygienic protector.
NOTE:
For further information, please refer to chapter 7.2 « Using sensor protectors ».
• Place the sensor in the patient’s mouth parallel to the long axis of the tooth with the active face against the tooth.
NOTE:
If using a positioning kit, refer to the instructions provided with this kit.
• Move the generator closer to the patient’s head. Make sure the generator cone is parallel to the sensor
positioning.
• Activate the timer trigger.
Once the exposure is finished, the imaging software downloads the x-ray image onto the screen.
Sopix
²
• User manual
17
E N G L I S H
7.2. USING SENSOR PROTECTORS
In order to ensure maximal hygienic safety for the patient, it is imperative to cover the Sopix² sensor with a
disposable sensor protector.
WARNING:
-
Place the sensor protector with gloves,
Change the sensor protector for each new patient,
Preferably use the sensor protectors especially designed for Sopix² sensors,
Keep the sensor protectors in a dry and clean place,
Dispose of the used sensor protectors with the other biologically and potentially hazardous infected
wastes,
- Do not use finger cots.
It is recommended to be far-sighted and have plenty of disposable hygienic protectors because the Sopix² system
should not be used without them.
NOTE:
If the sensor cap is torn when examining a patient or if the Sopix² sensor has been infected by withdrawing
the sensor protector, it is essential to totally disinfect the Sopix² sensor and the first 40cm of cable. In order
to do this, please refer to the table in chapter « sensor maintenance ».
18
Sopix
²
• User manual
E N G L I S H
8
MAINTENANCE
The Sopix² digital x-ray system does not need any maintenance if it is used according to the manufacturer use
and cleaning instructions.
Before first using any device from the Sopix² range, it is imperative to follow the complete disinfecting
procedure.
Any device from the Sopix² range returned to the manufacturer or distributor for servicing or maintenance
should have been carefully disinfected before shipping.
Any device of the Sopix² range coming back from servicing or maintenance operation should follow the complete
disinfecting procedure before being used.
8.1. CONTROLLER MAINTENANCE
USE INSTRUCTIONS AND PRECAUTIONS
DESCRIPTION
RECOMMENDATIONS
Decontamination
and disinfecting.
• Surface disinfectant
spray of Septol™
type Spray Surface
without Aldehyde –
Pierre Rolland.
Spray at 40 cm
from the surface
and allow to dry.
Do not
scrub.
• Surface cleaning
and disinfecting
wipes of Wipes
Septol™ type Pierre Rolland.
Take the wipe,
wring it, and then
scrub until
obtaining visible
cleanliness.
Allow to dry in the
open air.
Carefully close the
packaging box.
Do not
rinse.
Sopix
²
WARNING
Do not use products
containing:
• Ammoniac,
trichloroethylene
• Dichloroethylene
• Ammonium
hydrochlorid
• Chlorinated and
aromatic
hydrocarbon
• Ethylene
dichloride
• Methylene
chloride
• Ketones
Deterioration risks
of the plastic parts.
• User manual
19
E N G L I S H
8.2. SENSOR MAINTENANCE
DESCRIPTION
RECOMMENDATIONS
USE INSTRUCTIONS AND PRECAUTIONS
Decontamination
and disinfecting of
the sensor and of
the first 40 cm of
cable.
• Surface cleaning
and disinfecting
wipes of Wipes
Septol™ type Pierre Rolland.
Take the wipe,
wring it, and then
scrub until
obtaining visible
cleanliness.
Allow to dry in the
open air.
Carefully close the
packaging box.
Do not
rinse.
WARNING
• Do not immerse
the sensor in a
disinfecting liquid.
WARNING:
It is imperative to respect the sensor precautions for use. Please refer to chapter 3 of this manual «
Precautions for use ».
20
Sopix
²
• User manual
E N G L I S H
9
AFTER-SALES SERVICE
9.1. LIMITED LIABILITY
The Sopix² digital x ray system was designed to ensure the acquisition of dental x ray images, their transfer in
the form of computer data, as well as their storage. Nevertheless, SOPRO Company shall not be liable for
inappropriate use of this materiel or for any loss of stored data in the computer system due to a use issue or
any possible technical problem.
9.2. WARRANTIES
SOPRO Company ensures the absence of material and manufacturing defects for its products during a period
of one (1) year coming into force at the purchase date. This warranty does not apply to misused, modified,
untended, or accidentally damaged products, or products subject to abnormal use and handling conditions.
The distributors, other than ACTEON Group’s subsidiaries, are not authorized to apply a warranty further
extended on behalf of SOPRO.
The entire liability of SOPRO is limited to its convenience, either when replacing or when repairing, free of
charge, the defective product if it has been sent to SOPRO After-Sales Service. And this applies for the warranty
period.
Outside of France, access to the warranty is only possible if the product was bought in one of the points of sale
authorized by SOPRO in the country where it will be used.
THIS WARRANTY CONSTITUTES THE ONLY AND UNIQUE REMEDY. IT REPLACES ANY OTHER WARRANTY (FOR
EXAMPLE, WARRANTY OF ADEQUACY TO A PARTICULAR AIM) WHETHER IT BE EXPLICIT OR IMPLICIT. SOPRO SHALL
NOT BE LIABLE FOR ANY PARTICULAR DAMAGE, INDIRECT, ACCIDENTAL OR CONSEQUENTIAL, OR FOR ANY
DETERIORATION OR DATA LOSS ON A CONTRACTUAL, NON-CONTRACTUAL OR OTHER BASIS.
The liability exclusion or limitation for direct or indirect damages does not apply under the regulatory or legal
rules in force in some countries and the present exclusion may not apply to a purchaser in those countries.
Sopix
²
• User manual
21
E N G L I S H
9.3. IN CASE OF FAILURE
PROBLÈMES
After the timer was activated, no
image appears on the screen.
CAUSES
1. The sensor is incorrectly
positioned in relation to the
generator cone.
2. Exposure time is too short.
3. Failure of the generator.
4. Sensor or Controller.
5. USB cable.
The TWAIN window has a red spot. Wire connection problem.
Some white areas appear on the
image.
The image is blurry, stretched or
scratched.
The sensor is incorrectly positioned
in relation to the generator cone.
1. The sensor is incorrectly
positioned.
2. The patient moved when the
image was taken.
3. The generator head was not
stabilized when the timer was
activated.
SOLUTIONS
1. Use a KERR type positioning kit
for the sensor.
2. Slightly increase the exposure
time.
3. Check for proper generator
operation.
4. Check the sensor is correctly
connected to the computer.
5. Avoid using a port on the front
plate.
1. Check the sensor is correctly
connected to the computer.
2. The USB port may be put in
standby by Windows.
Use a KERR type positioning kit for
the sensor.
1. Use a KERR type positioning kit
of the sensor.
2. The patient should be still when
the image is taken.
3. Stabilize the generator head.
In case of failure not mentioned above, please send back the Sopix2 system to the SOPRO dealer or after-sales
department.
WARNING:
No maintenance should be performed by a third party.
22
Sopix
²
• User manual
E N G L I S H
10
TECHNICAL FEATURES
USB CONTROLLER
Power supply:
Consumption:
USB cable length:
Dimensions:
Total weight:
Liquid penetration:
Non-power-fed via the USB port / 5V
200 mA
3m
27.5 x 98 x 13 mm
118 g
IPX0 (protection index)
Size 1 SENSOR
Resolution:
Pixel size:
Technology:
Liquid penetration:
Cable length:
External dimensions:
Active area dimensions:
Pixel number:
25 pl / mm
20 x 20 µm
CMOS + Optical-fiber scintillator
IP67 (temporal immersion)
70 cm
38.9 x 24.9 x 5.3 mm
20 x 30 mm (600 mm²)
1.5 Million (1000 x 1500)
System operation environment
Temperature:
from + 5 to + 40°C
Humidity rate:
from 20 to 60% RH
Atmospheric pressure:
no noticeable influence of the environmental conditions
System transport and/or storage environment
Storage temperature:
from - 40 to + 70°C
Humidity rate:
from 10 to 95% RH
Atmospheric pressure:
500 hPa to 1060 hPa
• Not protected against water chutes (IPXO).
• Not adapted for use in presence of a flammable anaesthetic mixture with air, oxygen or dinitrogen monoxide.
• Complies with the European directive 93/42/EEC relative to medical devices.
• Complies with the standard IEC60601-1.
Sopix
²
• User manual
23
Non contractual document - Ref. 011271 B - Copyright © 2008 SOPRO. All rights reserved. No information or part of this document may be reproduced or transmitted in any form without the prior permission of SOPRO.
0459
Z A C A t h é l i a I V • Av e n u e d e s G e n é v r i e r s • 1 3 7 0 5 L A C I O TAT c e d e x • F R A N C E
Tél +33 (0) 442 98 01 01 • Fax +33 (0) 442 71 76 90 • E-mail: [email protected] • www.sopro.acteongroup.com


