1
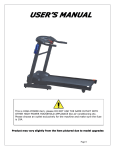
JS-4200 USER’S MANUAL
This is HIGH-POWER item; please DO NOT USE THE SAME OUTLET WITH
OTHER HIGH-POWER HOUSEHOLD APPLIANCE like air-conditioning etc.
Please choose an outlet exclusively for the machine and make sure the fuse
is 10A.
Product may vary slightly from the item pictured due to model upgrades
0
Contents
1. IMPORTANT SAFETY INSTRUCTIONS........................................................................................ 2
1.1 IMPORTANT ELECTRICAL INFORMATION ......................................................................... 3
1.2 IMPORTANT OPERATION INSTRUCTIONS ........................................................................ 3
2.BRIEF DESCRIPTION ................................................................................................................. 4
2. MAIN TECHNICAL FEATURES .................................................................................................... 5
4.OPERATION INSTRUCTIONS...................................................................................................... 6
4.1 Console keys .................................................................................................................... 6
4.2 Getting Started ................................................................................................................ 8
4.3 Self-Checking................................................................................................................... 8
4.4 Quick-Start Operation ...................................................................................................... 8
4.5 Incline Feature ................................................................................................................ 8
4.6 400 Metre Track............................................................................................................... 8
4.7 Pulse Grip Feature ........................................................................................................... 9
4.8 Calorie Display ................................................................................................................. 9
4.9 Folding and Unfolding Treadmill: ..................................................................................... 9
4.9.1 Folding.......................................................................................................................... 9
4.9.2 Unfolding ...................................................................................................................... 9
4.9.3 Transport ...................................................................................................................... 9
4.10 Programmable Operations ............................................................................................. 9
4.11 To Select a Program:...................................................................................................... 9
4.12 User Program............................................................................................................... 10
5. MAINTENANCE ....................................................................................................................... 17
5.1 General Cleaning............................................................................................................ 18
5.2 General Care .................................................................................................................. 18
5.3 Belt/Deck/Roller Lubrication......................................................................................... 18
5.4 How to check the running mat for proper lubrication..................................................... 19
5.5 Belt Adjustment Belt Tension Adjustment
5.6 Belt Tracking Adjustment .............................................................................................. 20
6. TROUBLE SHOOTING .............................................................................................................. 20
6.1 Alarm signals ................................................................................................................. 21
7. EXERCISE GUIDE .................................................................................................................... 22
8.SPARE PARTS LIST .................................................................................................................. 23
1
1. IMPORTANT SAFETY INSTRUCTIONS
WARNING - Read all instructions before using this treadmill.
It is important your treadmill receives regular maintenance to prolong its useful
life. Failing to regularly maintain your treadmill may void your warranty.
Danger–To reduce the risk of electric shock disconnect your treadmill from the electrical
outlet prior to cleaning and/or service work.
DO NOT USE AN EXTENSION CORD: DO NOT ATTEMPT TO DISABLE THE GROUNDED PLUG BY
USING IMPORPER ADAPTERS OR IN ANY WAY MODIFY THE CORD SET.
z
Install the treadmill on a flat level surface with access to a 220-240 volt (50/60Hz),
grounded outlet.
z
Do not operate treadmill on deeply padded, plush or shag carpet. Damage to both carpet
and treadmill may result.
z
Do not block the rear of the treadmill. Provide a minimum of 1 metre clearance between
the rear of the treadmill and any fixed object.
z
Place your unit on a solid, level surface when in use.
z
Never allow children on or near the treadmill.
z
When running, make sure the plastic clip is fastened on your clothing. It is for your safety,
should you fall or move too far back on the treadmill.
z
Keep hands away from all moving parts.
z
Never operate the treadmill if it has a damaged cord or plug.
z
Keep the cord away from heated surfaces.
z
Do not operate where aerosol spray products are being used or where oxygen is being
administered. Sparks from the motor may ignite a highly flammable environment.
z
Never drop or insert any object into any openings.
z
The treadmill is intended for in-home use only and not suitable for long time running.
z
To disconnect, turn all controls to the off position, remove the safety key, and then
remove the plug from the outlet.
2
z
The pulse sensors are not medical devices. Various factors, including the user’s movement,
may affect the accuracy of heart rate readings. The pulse sensors are intended only as
exercise aids in determining heart rate trends in general.
z
Use handrails provided; they are for your safety.
z
Wear proper shoes. High heels, dress shoes, sandals or bare feet are not suitable for use
on your treadmill. Quality athletic shoes are recommended to avoid leg fatigue.
z
Allowed temperature: 5 to 40 degrees.
Remove the safety key after use to prevent unauthorized treadmill operation.
1.1 IMPORTANT ELECTRICAL INFORMATION
WARNING!
z
NEVER use a ground fault circuit interrupt (GFCI) wall outlet with this treadmill. Route the
power cord away from any moving part of the treadmill including the elevation mechanism
and transport wheels.
z
NEVER remove any cover without first disconnecting AC power.
z
NEVER expose this treadmill to rain or moisture. This treadmill is not designed for use
outdoors, near a pool, or in any other high humidity environment.
1.2 IMPORTANT OPERATION INSTRUCTIONS
z
Be sure to read the entire manual before operating your machine.
z
Understand that changes in speed and incline do not occur immediately. Set your desired
speed on the computer console and release the adjustment key. The computer will obey
the command gradually.
z
Use caution while participating in other activities while walking on your treadmill; such as
watching television, reading, etc. These distractions may cause you to lose balance or
stray from walking in the centre of the belt; which may result in serious injury.
z
In order to prevent losing balance and suffering unexpected injury, NEVER mount or
dismount the treadmill while the belt is moving. This unit starts with a very low speed.
Simply standing on the belt during slow acceleration is proper after you have learned to
operate this machine.
z
Always hold on to handrail while making control changes.
3
z A safety key is provided with this machine. Remove the safety key will stop the walking
belt immediately; the treadmill will shut off automatically. Insert the safety key will reset
the display.
z Do not use excessive pressure on console control keys. They are precision set to function
properly with little finger pressure.
2.BRIEF DESCRIPTION
This motorized treadmill can help complete your goal of keeping fit. Together with the unique,
elegant and dignified shape, it takes a little space when folded by gasoline spring. Its speed
range is 1-16km/h.
console display
safety key
heart rate
upright
handrail
power switch
footpad
running belt
4
2.
MAIN TECHNICAL FEATURES
Main use: exercise, keeping fit
This treadmill is only for home use
Constant running time: < 2 hours, it can’t be less than 1 hour between two running times
Once the machine runs for one month or 40 hours, please add 20ml silicone oil on the deck
Parameters: speed, time, distance, heart rate and calorie
Display: LED
Frequency: 50Hz
DC motor: 2.0HP(continuous)
Input current: ≤10A
Temperature for running: 5∽40 degrees
Speed range: 1∽16km/h
Auto incline: 1-16levels
Program: 12 pre-set programs, 3 setting programs
Time display range:0:00∽99:59(minutes : seconds)
Distance display range:0.00~9.99km
Calorie display range: 0.00~999 calorie
Machine size (L*W*H): 1640X740X1250mm
5
4.OPERATION INSTRUCTIONS
4.1 Console keys
(3)time
(4)speed
(1)incline
(5)cal/pro
(2)distance
(6)pulse
(11)speed down
(7)incline up
(8)incline down
(9)shortcut key
(10)clear/set
(12)speed up
(13)shortcut key
(14)mode
(15)start/stop
(16)safety key
(1)“incline” window
It shows auto incline (range:0-16%)
(2)“distance” window
It shows the distance.(range:0 km-9.99km)
(3)“time” window
It shows time.(range:00:00 -99:99)
(4)“speed” window
It shows speed. (range:1km/h-16km/h)
(5)“cal/pro” window
6
It shows calorie. (range:0-999 calorie)
(6)“pulse” window
It shows heart rate.
(7)“incline up” key
Press this key, you can choose the incline you need, except for the alarm condition.
(8)“incline down” key
Press this key, you can choose the incline you need, except for the alarm condition.
(9)“incline shortcut key”
Press this key, you can choose the incline you need directly.
(10)“clear/set” key
Under ready condition, press this key, it will clear all the operation
Under ready condition, press this key for 3 seconds continuously, time, distance and
calorie can be set. Press “speed up” and “speed down” keys, the values of time, distance
and calorie can be set. Then press “start/stop” key, the machine will run at 1.0km/h. And
the set figures will be counted down, when it comes to “0”,machine stops.
Under running situation, press “reset/set”, all the figures will be kept to “0” except for speed.
Then hand model comes.
(11)“speed down” key
Under running condition, press this key, speed can be speeded down to the ones you
need.
(12)“speed up” key
Under running condition, press this key, speed can be speeded up to the ones you need.
(13)“speed shortcut key”
Under running condition, press this key, speed can be set to the values directly.
(14)“mode” key
Under ready condition, press this key, you can choose program for running.
(15)“start/stop” key
Under ready condition, press this key, it runs at 1.0km/h speed. Under running condition,
if it runs at speed more than 3km/h, it will slow down then stop. During this stopping process,
other keys don’t take use. If it runs at speed less than 3km/h,it stops immediately.
(16)“safety key”
If the urgent condition occurs, pull this key, the machine stops immediately.
7
4.2 Getting Started
Power the treadmill on by plugging it into an appropriate wall outlet, then turn on the power
switch located at the front of the treadmill below the motor shield. Ensure that the safety
key is installed, as the treadmill will not power on without it. When the power is turned on, all
the lights on the display will light for a short time.
4.3 Self-Checking
When using for the first time, it is necessary to make the machine carry on
self-check:
z
Remove the safety key, press MODE and hold, then insert the
safety key again, the machine enters into self-checking state. During this state, pressing
START/STOP can terminate the self-checking.
4.4 Quick-Start Operation
1. Press and release the START/STOP to wake display up (if not already
on). Note: Installing the safety key will also wake up the console.
2. Press and release the START/STOP to begin belt movement, at 1.0 Km/hr, then adjust to
the desired speed using the ‘+’ or ‘-’. You may also use the rapid speed keys (3, 6 and 9)
to adjust the speed. The speed range is from 1.0km/h to 16.0km/h. You can also use ‘+’
or ‘-’to adjust the speed on handrail.
3. To slow the treadmill down, press and hold the ‘-’ key to desired speed. You may also
press the rapid speed adjust keys: 3, 6, 9.
4. In a state of running, single press START/STOP, the walking belt will gradually slow down
if the speed is above 3.5km/h, if under 3.5km/h, then it will stop immediately.
5. In the state of running, single press CLEAR will reset all number except the speed. Then
enter into manual mode.
6. To stop the tread-belt press and release the START/STOP.
4.5 Incline Feature
z
Incline may be adjusted anytime after belt movement.
z
Incline Range is 1-16levels
4.6 400 Metre Track
The 400 Meters Track will be displayed on the simulation running track. The flashing dot
indicates your progress, but only to show an approximate speed of effort. Once the 400 meter
is complete, the buzzer will sound three times, this feature will begin again.
8
4.7 Pulse Grip Feature
The Pulse (Heart Rate) console window will display your current heart rate in beats per
minute during the workout. You must use both stainless steel sensors to display your pulse.
Pulse value displays anytime the upper display is receiving a Grip Pulse signal.
4.8 Calorie Display
Displays the cumulative calories burned at any given time during your workout.
Note: This is only a rough guide used for comparison of different exercise
sessions, which cannot be used for medical purposes.
4.9 Folding and Unfolding Treadmill:
4.9.1 Folding
First, lift the back part of the frame board with your hand till you hear a light sound, which
means the folding system has been locked. Running board can’t be turned to the opposite
direction now.
4.9.2 Unfolding
Place the folded treadmill in a spacious area. Then pull down the footplate till it is unlocked.
Please stand back for more than 1.5 meters and release it, then it will open automatically.
4.9.3 Transport
Carefully lift the treadmill at the rear roller area, grasping the two side end caps, and roll the
treadmill away.
4.10 Programmable Operations
This treadmill offers 3 user programs (C1, C2, C3) and 12 preset programs (P1,P2,P3……P12,
see attachment). The 12 preset programs (P1 to P12) are for speed and incline.
Each preset program has a maximum speed level that is displayed when a desired workout is
chosen. The speed that the particular program will achieve will be displayed in the Speed
window. Each program has various speed changes throughout.
4.11 To Select a Program:
z
Make sure the machine is in the stop position, single press ‘clea/setr’ to enter into
resetting state. Press ‘MODE’ to choose desired program (P1,P2, …..P12), then press and
release ‘START/STOP’ to begin the program with default values.
z
The speed window will now be showing the preset speed of the selected program.
9
z
Each program will continue 30 minutes. After every one minute program and speed can be
altered manually or automatically. 3 Seconds before the ending of program a buzzer will
sound three times, then the running belt will come to a stop.
This unit offers a unique function: memorizing the accumulative distance of each user
achieving. In resetting state, press ‘select’ to choose user 1, user 2, user 3, then Press
‘START/STOP’ to begin the belt movement. During this state, you can adjust the speed and
incline as per your desire. Press the key can display the time, distance and calorie you have
achieved. To end this, press ‘START/STOP’, then the belt will come to a stop. Press the
‘clear/set’ button to display total distance you achieve each time.
4.12 User Program
In the resetting state, select C1, C2 and C3 by pressing the ‘mode’ key once. Then press
‘clear/set’ simultaneously, the display for ‘time’ and ‘speed’ will be flashing at the same time.
(Note: the incline window will show the time temporally).
Press ‘mode’ to adjust the time with default value of 30 minutes (the time will vary every two
minutes).
Press “+” or “-” to adjust speed contrary to the selected time period.
Repeat the above two processes until all the parameters have been programmed.
Press and release the “START/STOP” key, the running belt will then start to run according to
the workout created. (NOTE: THIS PROGRAM WILL BE SAVED TO THE TREADMILL MEMORY
FOREVER).
P1
TIME
(mins)
1
2
3
4
5
6
7
8
9
10
11
12
13
14
15
16
17
18
19
20
21
22
23
24
25
26
27
28
29
30
1
2
2
2
3
3
3
4
4
4
4
5
5
5
5
5
6
6
6
6
7
7
7
7
8
8
8
9
9
9
1
2
3
4
5
6
7
8
9
10
11
12
13
14
15
16
17
18
19
20
21
22
23
24
25
26
27
28
29
30
9
9
9
8
8
8
8
8
7
7
7
7
6
6
6
6
5
5
5
5
4
4
4
4
3
3
2
2
1
1
1
2
3
4
5
6
7
8
9
10
11
12
13
14
15
16
17
18
19
20
21
22
23
24
25
26
27
28
29
30
4
4
4
5
5
5
6
6
6
6
7
7
7
8
8
8
8
9
9
8
8
8
7
7
7
6
5
4
4
4
SPEED
(Km/h)
P2
TIME
(mins)
SPEED
(Km/h)
P3
TIME
(mins)
SPEED
(Km/h)
10
P4
TIME
(mins)
1
2
3
4
5
6
7
8
9
10
11
12
13
14
15
16
17
18
19
20
21
22
23
24
25
26
27
28
29
30
4
4
4
5
5
5
6
6
6
6
7
7
6
6
6
7
7
7
8
8
8
9
9
9
8
8
8
6
5
4
1
2
3
4
5
6
7
8
9
10
11
12
13
14
15
16
17
18
19
20
21
22
23
24
25
26
27
28
29
30
4
5
5
5
6
6
6
8
8
8
5
5
5
6
6
6
9
9
9
5
5
5
5
9
9
9
6
6
5
5
1
2
3
4
5
6
7
8
9
10
11
12
13
14
15
16
17
18
19
20
21
22
23
24
25
26
27
28
29
30
6
6
7
7
7
8
8
8
8
9
9
9
9
9
8
8
8
8
9
9
9
8
8
8
9
9
9
8
8
8
1
2
3
4
5
6
7
8
9
10
11
12
13
14
15
16
17
18
19
20
21
22
23
24
25
26
27
28
29
30
4
4
4
5
5
5
6
6
6
6
7
7
7
7
8
8
8
9
9
9
8
8
8
7
7
6
6
6
5
5
1
2
3
4
5
6
7
8
9
10
11
12
13
14
15
16
17
18
19
20
21
22
23
24
25
26
27
28
29
30
3
3
3
4
4
5
5
6
6
7
7
9
9
9
8
8
7
7
6
6
8
8
9
9
9
9
8
8
7
7
1
2
3
4
5
6
7
8
9
10
11
12
13
14
15
16
17
18
19
20
21
22
23
24
25
26
27
28
29
30
4
4
5
5
6
7
7
9
9
8
3
3
9
9
4
4
8
8
9
9
5
5
5
8
8
7
5
5
4
4
1
2
3
4
5
6
7
8
9
10
11
12
13
14
15
16
17
18
19
20
21
22
23
24
25
26
27
28
29
30
3
4
5
6
5
6
6
5
4
2
1
2
3
6
7
6
6
5
4
2
6
5
3
6
4
3
6
5
4
2
3
4
5
6
3
4
5
6
5
4
3
4
5
6
3
4
5
6
3
4
3
4
5
6
3
4
5
6
5
4
1
2
3
4
5
6
7
8
9
10
11
12
13
14
15
16
17
18
19
20
21
22
23
24
25
26
27
28
29
30
5
5
5
5
5
5
5
5
5
5
5
5
5
5
5
5
5
5
5
5
5
5
5
5
5
5
5
5
5
5
2
4
6
8
10
12
10
8
6
4
2
4
6
8
10
12
10
8
6
4
2
4
6
8
10
11
10
8
6
4
SPEED
(Km/h)
P5
TIME
(mins)
SPEED
(Km/h)
P6
TIME
(mins)
SPEED
(Km/h)
P7
TIME
(mins)
SPEED
(Km/h)
P8
TIME
(mins)
SPEED
(Km/h)
P9
TIME
(mins)
SPEED
(Km/h)
P10
TIME
(mins)
SPEED
(Km/h)
INCLINE
(%)
P11
TIME
(mins)
SPEED
(Km/h)
INCLINE
(%)
P12
11
TIME
(mins)
1
2
3
4
5
6
7
8
9
10
11
12
13
14
15
16
17
18
19
20
21
22
23
24
25
26
27
28
29
30
5
5
3
3
3
9
9
9
9
7
7
7
6
6
9
9
9
9
5
5
5
7
7
7
7
6
6
6
6
6
3
7
7
9
11
9
7
7
3
3
3
7
7
9
11
9
7
7
3
3
3
7
7
9
11
9
7
7
3
3
SPEED
(Km/h)
INCLINE
(%)
Program1
10
9
8
7
KM/H 6
5
SPEED
4
3
2
1
0
1
2
3
4
5
6
7
8
9 10 11 12 13 14 15 16 17 18 19 20 21 22 23 24 25 26 27 28 29 30
Program 2
10
9
8
7
KM/H
6
5
SPEED
4
3
2
1
0
1
2
3
4
5
6
7
8
9 10 11 12 13 14 15 16 17 18 19 20 21 22 23 24 25 26 27 28 29 30
12
Program 3
10
9
8
7
KM/H
6
5
SPEED
4
3
2
1
0
1
2
3
4
5
6
7
8
9 10 11 12 13 14 15 16 17 18 19 20 21 22 23 24 25 26 27 28 29 30
Program 4
10
9
8
7
KM/H
6
5
SPEED
4
3
2
1
0
1
3
5
7
9
11
13
15
17
13
19
21
23
25
27
29
Program 5
10
9
8
7
KM/H
6
SPEED
5
4
3
2
1
0
1
2
3
4
5
6
7
8
9 10 11 12 13 14 15 16 17 18 19 20 21 22 23 24 25 26 27 28 29 30
Program 6
10
9
8
7
KM/H
6
5
SPEED
4
3
2
1
0
1
2
3
4
5
6
7
8
9 10 11 12 13 14 15 16 17 18 19 20 21 22 23 24 25 26 27 28 29 30
14
Program 7
10
9
8
7
KM/H
6
5
SPEED
4
3
2
1
0
1
2 3 4
5 6 7
8 9 10 11 12 13 14 15 16 17 18 19 20 21 22 23 24 25 26 27 28 29
Program 8
10
9
8
7
KM/H
6
5
SPEED
4
3
2
1
0
1
2
3
4
5
6
7
8
9 10 11 12 13 14 15 16 17 18 19 20 21 22 23 24 25 26 27 28 29 30
15
Program9
10
9
8
7
KM/H
6
5
SPEED
4
3
2
1
0
1
2
3
4
5
6
7
8
9 10 11 12 13 14 15 16 17 18 19 20 21 22 23 24 25 26 27 28 29 30
program 10
8
7
6
5
speed
incline
4
3
2
1
0
1
2
3
4
5
6
7
8
9 10 11 12 13 14 15 16 17 18 19 20 21 22 23 24 25 26 27 28 29 30
16
program 11
14
12
10
8
speed
incline
6
4
2
0
1 2 3 4 5 6 7 8 9 10 11 12 13 14 15 16 17 18 19 20 21 22 23 24 25 26 27 28 29 30
program 12
12
10
8
speed
6
incline
4
2
0
1 2 3 4 5
6 7 8 9 10 11 12 13 14 15 16 17 18 19 20 21 22 23 24 25 26 27 28 29 30
5. MAINTENANCE
Reasonable cleaning/lubricating should be made to extend the life time of this unit.
Performance is maximized when the belt and mat are kept as clean as possible.
17
WARNING: THE MAT/DECK FRICTION MAY PLAY A MAJOR ROLE IN THE FUNCTION
AND LIFE OF YOUR TREADMILL AND THAT IS WHY WE RECOMMEND YOU
CONSTANTLY LUBRICATE THIS FRICTION POINT TO PROLONG THE USEFUL LIFE OF
YOUR TREADMILL. FAILING TO DO THIS MAY VOID YOUR WARRANTY.
WARNING: UNPLUG POWER CORD BEFORE MAINTENANCE.
WARNING: STOP TREADMILL BEFORE FOLDING.
5.1 General Cleaning
z
Use a soft, damp cloth to wipe the edge of the belt and the area between the belt edge
and frame. A mild soap and water solution along with a nylon scrub brush will clean the
top of the textured belt. This task should be done once a month. Allow to dry before
using.
z
On a monthly basis, vacuum underneath your treadmill to prevent dust build up. Once a
year, you should remove the black motor shield and vacuum out dirt that may
accumulate.
5.2 General Care
•
•
•
Check parts for wear before use.
Always replace the mat if worn and any other defective parts.
If in doubt do not use the treadmill and contact our helpline.
TAKE CARE TO PROTECT CARPETS AND FLOOR in case of leakages. This product is a machine
that contains moving parts which have been greased / lubricated and could leak.
5.3 Belt/Deck/Roller Lubrication
The mat/deck friction may play a major role in the function and life of your treadmill and that
is why we recommend you constantly lubricate this friction point to prolong the useful life of
your treadmill.
18
Lubrication is provided with this unit. You should apply the enclosed lubrication after
approximately the first 40 hours of operation. We recommend lubrication of the deck
according to the following timetable:
Light use (less that 3 hours per week) every 6 months
Medium use (3-5 hours a week) every 3 months
Heavy use (more than 5 hours per week) every 6-8 weeks.
See below procedures for lubricating:
1. Use a soft, dry cloth to wipe the area between the belt and deck.
2. Spread lubricant onto the inside surface of belt and deck evenly (make sure the machine
is turned off and power is disconnected).
3. Periodically lubricate the front and rear rollers to keep them at there peak performance.
If the treadmill belt/deck/roller is kept reasonably clean it is possible to expect over 1200
hours before additional re-lubing is necessary.
5.4 How to check the running mat for proper lubrication
1. Disconnect the main power supply.
2. Fold the treadmill up into the storage position.
3. Feel the back surface of the running mat.
If the surface is slick when touched, then no further lubrication is needed.
If the surface is dry to the touch, apply a suitable silicone lubricant.
We recommend you use a silicone based spray to lubricate your Lifespan Treadmill.
This Can be purchased from your local sports Retailer or a local hardware store.
5.5 Belt Adjustment
Belt Tension Adjustment-It is very important for joggers and runners in order to provide a
smooth, steady running surface. Adjustment must be made from the right and left rear roller
in order to adjust tension with the Hexagonal Wrench provided in the parts package. The
adjustment bolt is located at the end of the rails as noted in diagram below:
19
Right bolt
Left bolt
Note: Adjustment is thru the small hold on the end caps.
Tighten the rear roller only enough to prevent slippage at the front roller. Turn both the right
and left bolt clockwise reasonably and inspect for proper tension. When an adjustment is
made to the belt tension, you must also make a tracking adjustment to compensate for the
change in belt tension.
DO NOT OVERTIGHTEN - Over tightening will cause belt damage and premature bearing
failure.
5.6 Belt Tracking Adjustment
This treadmill is designed to keep the belt reasonably centred while in use. It is normal for
some belts to drift near one side while the belt is running with no one on it. After a few
minutes of use, the belt should have a tendency to centre itself. If during use, the belt
continues to move toward one side, adjustments are necessary. The procedures are as
below:
▲ First set speed at lowest position.
▲ Second check the belt shifts to which side.
If the belt shifts to right, tighten the right bolt and loosen the left bolt by using 6mm
Hexagonal Wrench, until the belt is centered itself; If belt shifts to left, tighten the left bolt
and loosen the right bolt by using 6mm Hexagonal Wrench, until the belt is centered. When
adjusting the belt using the 6 mm Hexagonal Wrenches, it is important to adjust the belt in
half turn increments. Over adjusting the belt can cause damage to the mat.
6. TROUBLE SHOOTING
This treadmill is designed in a way that in the event of an electrical fault, the machine will
turn off automatically to prevent any injuries to the user and to prevent damage to the
machine (i.e. motor).
When the treadmill behaves erratically, simply reset the treadmill by turning the power
switch off, waiting for 1 minute then turning the power button back on.
20
If, after you have reset the treadmill, it is still not running correctly, please run the selfchecking analyse (please refer to 4.3 Self-Checking) to distinguish what type of error
problem the machine is encountering.
6.1 Alarm signals
Before attempting any work on the treadmill, ensure that the power is off and the
plug is removed from the power point.
Do not use extension leads as it may lead to power decrease and failure.
E1: No feedback from controller or speed sensor
1. Check the condition of cables and ensure that all plugs are connected between the
motor controller and display.
2. Check that the speed sensor and magnet are in correct alignment and that there are no
obstructions on the magnet. (The magnet can be found on the front roller near the
motor belt).
3. If the running belt moves then displays the E1 error replace the speed sensor.
4. If the running belt does not move replace the controller.
E2: Controller problem
1. Replace the controller
2. Check the wire connection
E3: Over speed protection. (Sudden increase of running belt speed).
1. Check the speed sensor and magnet are in correct alignment and that there are no
obstructions on the magnet.
2. Check wire connections on the controller.
3. Replace the speed sensor.
4. Replace the controller.
E4: Incline fault
1. Replace incline motor.
2. If problem remains replace controller.
When alarm signals are displayed, single press ‘CLEAR’ to reset the displays and try again.
21
No Power
1. Check fuses (They are located on the controller under the motor cover next to the on/off
switch.
2. Check power outlet (Plug something else into the power outlet to ensure that the power
outlet is working correctly).
3. Check Power Cable (You may need to take it to an electrician).
7. EXERCISE GUIDE
PLEASE NOTE: Before beginning any exercise program, consult you physician. This is
important especially if you are over the age of 35 or individuals with pre-existing
health problems.
The pulse sensors are not medical devices. Various factors, including the user’s
movement, may affect the accuracy of heart rate readings. The pulse sensors are
intended only as an exercise aid in determining heart rate trends in general.
Exercising is great way to control your weight, improving your fitness and reduce the effect of
aging and stress. The key to success is to make exercise a regular and enjoyable part of your
everyday life.
The condition of your heart and lungs and how efficient they are in delivering oxygen via your
blood to your muscles is an important factor to your fitness. Your muscles use this oxygen to
provide enough energy for daily activity. This is called aerobic activity. When you are fit, your
heart will not have to work so hard. It will pump a lot fewer times per minute, reducing the
wear and tear of your heart.
So as you can see, the fitter you are, the healthier and greater you will feel.
22
8.SPARE PARTS LIST
SPARE PARTS LIST
Item
No.
1
Description
Unit
Quantity
Motor
set
1
2
Pillars(right and left)
set
1for each
3
Crooked handrail
set
2
4
Panel
piece
1
5
Safe key
piece
1
6
Silicone oil
bottle
1
7
Operating instructions
book
1
8
Screw M8x16
piece
6
9
Screw M8X60
piece
2
10
Screw M8X100
piece
2
11
Bolt M8X95
piece
4
12
Φ8 saddle washer
piece
2
13
Φ8 plain washer
piece
10
14
6mm spanner
piece
1
15
5mm spanner
piece
1
23
24
We have checked the words carefully in the manual. If there is something wrong in printing, please kindly
consider it.
If the pictures are different from the product, please take the product as the final and correct one.
Please note: If there are changes in function and specification due to technical improvement, we will not
keep you informed.
25