1
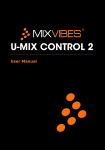
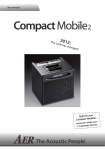
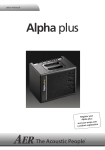
USER MANUAL LED 81cm TELEVISION ENGLISH CAUTION! CAUTION! RISK OF ELECTRIC SHOCK! DO NOT OPEN! WARNING IN ORDER TO PREVENT FROM ELECTRIC SHOCK, DO NOT OPEN THE DEVICE. THERE ARE NO SPARE PARTS INSIDE THE DEVICE. IN CASE OF TROUBLE, CALL QUALIFIED SERVICE PERSONELL. The lightening flash with arrowhead symbol, within an equilateral triangle is intended to alert the user to the presence of un-insulated “dangerous voltage” within the products enclosure that may be of sufficient magnitude to constitute a risk of electric shock to the persons. The exclamation point within an equilateral triangle is intend to alert the user to the presence of important operating and maintenance (servicing) instructions in the literature accompanying the appliance. Produced after 13 August 2005. Waste electrical should not be disposed of with household waste. Please recycle where facilities exist. Check with your local authority or retailer for recycling advice. Batteries should not be disposed of with household waste. Please recycle where facilities exist. Check with your local authority or retailer for recycling advice. This product complies with European safety and electrical interference directives. 2 CONTENTS QUICK START 5 CONNECTIONS Contents Safety Information 3 4 In the Box TV Control Panel Remote Controller Installation & First Start 5 5 5 7 TV Connectors Panel Input Source Menu 8 8 Using TV menu 9 8 TV MENU 9 ADVANCED FUNCTIONS Channel Menu Picture Menu Sound Menu Time Menu Option Menu Lock Menu 9 10 10 11 11 12 Electronic Program Guide (EPG) DVB-T Recording USB Multimedia Player 13 14 15 Technical Specification 18 14 ADDITIONAL INFORMATION 22 3 SAFETY INFORMATION Before using the device, read the manual carefully. Keep it handy for further reference. Do not place the device in the room so that the light shine directly on the screen. Viewing in total darkness or watching the highlights on the screen can cause eyestrain. It is advised to use weak, indirect light for a pleasant watching. Make sure that the device does not adhere to the wall to ensure adequate heat dissipation. Insufficient heat dissipation can cause damage to the device. Do not place near other heat sources (e.g. radiators). Make sure the ventilation holes are not obstructed during the operation. Never attempt to insert any objects inside the unit! The LED panel is made of glass, so it can be easily physically destroyed. In case of damage to the panel, please note the risk of injury to the glass panel. Before cleaning, always unplug the TV power cord. Cleaning with liquids can damage the device. During the storm, unplug both the power cord and antenna cable to avoid the risk of damage to the unit after being hit by lightning. All TVs work under high voltage. For this reason, all repairs and other operations carried out on open device must be performed by qualified service personnel. The TV set should only be connected to a mains supply which matches that stated on the label on the mains adaptor To prevent overload, don't share the same mains supply socket with too many other items of equipment. Do not place any connecting wires where they may be stepped on or tripped over. Do not place heavy items on the TV. It may cause damage. Hold the Mains plug, not the wires, when removing from a socket. Do not allow water or moisture to enter the TV or mains adaptor. Do NOT use in wet or moist areas such as Bathrooms, steamy kitchens or near swimming pools. Pull the plug out immediately, and seek profession al help if: - the mains plug or cable is damaged - liquid is spilt onto the set, or if it is accidentally exposed to water or moisture - anything accidentally penetrates the ventilation slots - the set doesn't work normally. Do NOT remove the safety covers. There are no user serviceable parts inside. You may invalidate the warranty. Qualified personnel must only service this apparatus. To avoid battery leakage, remove exhausted batteries from the remote control handset, or when not using for a long period. Do NOT break open or throw exhausted batteries into the fire. Do NOT block ventilation slots in the back cover. You may place the TV in a cabinet, but ensure at least 10cm clearance all around. With stand: Wall mount: Do NOT tap or shake the TV screen, you may damage the internal circuits. Take good care of the remote control, do not drop it. To clean the TV and avoid scratching it, use a soft dry cloth. Do NOT use solvents or petrol based fluids. For stubborn stains, you may use a damp soft cloth with dilute detergent. 4 QUICK START In the Box LED TELEVISION + detachable stand REMOTE CONTROLLER 2x AAA BATTERIES* USER MANUAL Make sure that following items are included into your Gift Box. If any item is missing, please contact your dealer. Images above are only for illustrative purpose and may not represent actual item. Items marked with (*) are optional and may not be included in your Gift Box. TV Control Panel VOL- - Decrease volume level VOL+ - Increase volume level CH- - Change channel in descending order. CH+ - Change channel in ascending order. MENU - Display TV Menu. SOURCE - Display Input Source menu. POWER - Turn the TV Set on/off. Remote Controller Precautions when using the remote controller: Do not drop the remote control unit. Do not subject the remote control unit to physical shocks. Keep the remote control unit dry. Wetting it may cause the unit to malfunction. Replace the batteries with new ones when operation of the unit deteriorates. Do not use old and new batteries together. Do not use different types of batteries (for example, Manganese and Alkaline batteries) together. Note that there are chargeable and non-chargeable batteries. Do not mix them together. Remove the batteries from the remote control unit if you do not intend to use the TV for a long time. 5 1. 2. 3. 4. 5. 6. 7. 8. 9. 10. 11. 12. 13. 14. 15. 16. 17. 18. 19. 20. 21. 22. 23. 24. 25. 26. 27. 28. 29. 30. 31. 32. 33. 34. 35. 36. Turn the TV Set on/off. Mute the sound. Choose audio language. Use repeatedly to set Sleep Time. Choose channel number, Teletext page, enter password and other digits. Display TV Menu Display Input Source menu. Change channel in ascending order. Navigate through lists and menus. Confirm selection in menus. Display info in TV Mode. Decrease volume level. Navigate through lists and menus. Increase volume level. Navigate through lists and menus. Change channel in descending order. Navigate through lists and menus. Go back to previous channel. Exit menus and functions. ECO Mode (optional) Change screen contrast level. Change screen brightness level. Change Aspect Ratio. Change Picture Mode. Change Sound Mode. Automatic screen adjustment in PC Mode. Teletext Mode. Hold on/off for current page display in Teletext Mode. Display Index page in Teletext Mode. Display channel list. Switch between radio and TV channels. Skip forward/backward. Fast rewind/fast forward. Display Electronic Program Guide (EPG). Choose subtitle language for DVB-T. Display list of favourite channels. Change Teletext page size. Start TimeShift. Display PVR Recordings List. Stop playback. Reveal hidden text in Teletext mode. Start recording immediately. Installing batteries: 1. Remove battery cover. 2. Insert two 1,5V (AAA size) batteries making sure that polarity (+ or -) of the batteries matches the polarity marks inside the unit. 3. Replace the battery cover until you hear a click sound. 6 Installation & First Start 1. Make sure that the TV Set is situated on a firm surface and is not exposed to any danger. 2. Make sure that antenna signal cable has been properly connected. Connect power cable to the power supply. Power LED on the front should turn RED. 3. Press POWER button on a remote controller or on the right side of the TV set. Power LED on the front should turn GREEN. Wait a short while for picture to be shown. 4. Choose appropriate Home Mode and Press OK. Confirm selection by pressing ◄. 5. You will be given the Installation Guide screen. You may configure and start your Tune Mode. - OSD Language – choose appropriate OSD Language - Country – choose your country - Tune Type – choose tuning mode - ATV – analogue TV channels only - DTV – digital TV/Radio channels only - ATV+DTV – both analogue and digital channels 6. When configuration is finished, press OK to start searching for channels. It may take a while. 7. After searching is finished, the TV Set will automatically enter TV Mode. 7 CONNECTIONS TV Connectors Panel Precautions when connecting to other equipment Please read carefully the instruction manual of the external equipment before connecting it to the TV Set. Switch off all power supplies to the equipment and TV Set before connection. Always ensure that the input and output terminals are correctly connected. Input Source Menu Input Source Menu allows you to choose Signal Source (ATV, DTV, HDMI, SCART, USB etc.) 1. While watching TV, press INPUT button on the Remote Controller to display list of available sources. 2. Use ▲ and▼ buttons to choose source. 3. Press OK to confirm. 8 TV MENU Using TV Menu Press MENU button (1) to display TV Menu. Use ► and ◄ buttons (3) to choose category of settings. Use ▲ and▼ buttons (2) to choose a setting. Depending on a setting, use ▲,▼, ► and ◄ to adjust. To confirm, press OK (4). To exit menu, press EXIT button (5). Channel Menu Auto Scan Press OK to enter Auto Scan submenu. Choose country and search mode (ATV, DTV or ATV+DTV) and press OK. TV Set will automatically search for any available TV and radio channels. This may take a while. DTV Manual Tuning Press OK to enter DTV Manual Tuning submenu. Choose channel and press OK. TV Set will search for any available TV and radio channels. This may take a while. ATV Manual Tuning Press OK to enter ATV Manual Tuning submenu. TV Set will automatically switch to ATV Mode. Choose a destination place and sound system. Highlight Search option and use ► and ◄ buttons to scan. Highlight Fine-Tune and use ► and ◄ buttons to fine tune channel. Press RED button to save channel. Programme Edit Press OK to enter Programme Edit submenu. o DELETE CHANNEL - Highlight a channel you want to delete and press RED button. Press RED button again to confirm. Press MENU button to leave delete mode. o MOVE CHANNEL – Highlight a channel you want to move to another place and press YELLOW button. Use ▲ and▼ buttons to choose a new place and press YELLOW button again (or OK) to confirm. o SKIP CHANNEL – Highlight a channel you want to skip while browsing through channel list (using CH▲ and CH▼ buttons) and press BLUE button. The channel will be marked as SKIPPED. To undo this operation, press BLUE button again. o ADD TO FAVOURITES – Highlight a channel you want to add to favourites and press FAV button. The channel will be marked as FAVOURITE. To undo this operation, press FAV button again. Press MENU to come back to main menu. Signal Information Press OK to display information about a channel. CI Information Press OK to display information about Common Interface module. 9 Record Start Press OK to start recording. Proper USB 2.0 device must be plugged in. o You can start recording by pressing RECORD button on the remote controller. Recorded List Press OK to display a list of recordings. o You can display the list by pressing PVR.LIST button on the remote controller. Recorded Mode Press OK to enter the submenu. This option allows you to schedule your recordings. o Use ► and ◄ buttons to choose a channel and recording mode. o Use ▲,▼, ► and ◄ buttons to set Start and End Time of a recording. o Press OK to confirm. Schedule List Press OK to display a recordings schedule list. You can browse through and delete scheduled recordings. PVR File System Press OK to enter PVR File System Submenu. You may check the USB device Picture Menu Picture Mode Use ► and ◄ buttons to change Picture Mode. Contrast, Brightness, Color, Sharpness, Tint Use ► and ◄ buttons to adjust settings. Color Temperature Use ► and ◄ buttons to change Color Temperature. Red, Green, Blue Use ► and ◄ buttons to adjust color intensity. Aspect Ratio Use ► and ◄ buttons to change screen aspect ratio. Noise reduction Use ► and ◄ buttons to change noise reduction intensity. Sound Menu Sound Mode Use ► and ◄ buttons to change Sound Mode. Treble, Bass Use ► and ◄ buttons to adjust trebles and bass intensity. Balance Use ► and ◄ buttons to adjust sound balance. o -50 – sound in left channel only o 0 – sound in both channels o +50 – sound in right channel only 10 Auto Volume Use ► and ◄ buttons to on/off Auto Volume function. Surround Sound Use ► and ◄ buttons to on/off Surround Sound. SPDIF Mode Use ► and ◄ buttons to change digital sound output mode. o OFF – digital sound output is off o PCM – select this setting if the TV Set is connected to a 2-channel digital stereo amplifier. Dolby Digital and MPEG audio signals will be modulated into a 2channel PCM signal. o Auto - select this setting if the TV Set is connected to a mutli-channel (Dolby Digital, MPEG) amplifier. Time Menu Off Time This option allows you to set time the TV Set will automatically turn off. On Time This option allows you to set time the TV Set will automatically turn on. Sleep Timer This option allows you to set in what time the TV Set will automatically turn off. Time Zone This option allows you to set Time Zone. Option Menu OSD Language This option allows you to change the language of menus and OSD. Audio Language 1st This option allows you to set the first default language for audio. Audio Language 2nd This option allows you to set the second default language for audio. Subtitle Language 1st This option allows you to set the first default language for subtitles. Subtitle Language 2nd This option allows you to set the second default language for subtitles. OSD Duration This option allows you to set the duration time of menus and OSD. Country This option allows you to change the country. Restore Factory Default This option allows you to restore factory defaults. Caution! Every change that has been made, will be restored. 11 Home Mode This option allows you to change the mode your TV Set operates. Lock Menu To enter Lock Menu, you need to enter the password. Default password is 0000. Set Password Press OK to set a new password. o Enter old password o Enter new password o Enter new password once again to confirm Block Program Press OK to display Programme Edit screen. o Use ▲ and▼ buttons to choose a channel you want to block. o Press GREEN button. The channel will be marked as BLOCKED. o To unblock the channel, press GREEN button again. When channel is BLOCKED, you need to enter the password every time you want to watch it. Default password is 0000. Parental Guidance Press OK to enter Parental Guidance screen. Then use ▲ and▼ buttons to choose operating mode. Hotel Setting Press OK to enter Hotel Setting screen. Hotel Setting is a function that allows to configure TV Set to work in public places like hotels, stores, cafes etc. 12 ADVANCED FUNCTIONS Electronic Program Guide (EPG) EPG allows you to browse through television programs info (title, description, beginning and ending time etc.), set reminders and add recordings to the schedule. Electronic Program Guide (EPG) operates in two modes: Time – shows info about programs that are broadcasted in the same time on different channels o Highlight date/hour and use ► and ◄ buttons to change date. (+/-24h) Channel – shows info about programs that are broadcasted on one channel o Highlight channel name and use ► and ◄ buttons to change channel. Electronic Program Guide (EPG) allows to set reminders to your favourite programs. Highlight the program title and press GREEN button. The reminder screen will be displayed. Press OK to confirm. If everything is OK, a notification screen will be displayed. The reminder screen will automatically appear before the program starts. Electronic Program Guide (EPG) allows to add a recording to the schedule. Highlight the program title and press RECORD button. The recording screen will be displayed. Press OK to confirm. If everything is OK, a notification screen will be displayed and the recording will be added to the schedule. 13 DVB-T Recording Before you start recording, make sure that USB 2.0 memory storage device has been properly plugged in to the socket at the back of the TV Set. To ensure that, check PVR File System in TV Main Menu (MENU->CHANNEL->PVR File System->Check PVR File System). Make sure that there is enough free memory space on the device. Approximate size of recorded file (size may vary depending on actual channel bitrate): MPEG-2 SD – 1 hour is ~ 2,2GB MPEG-4 SD – 1 hour is ~ 1GB MPEG-4 HD – 1 hour is ~ 4,5GB TV Real Time Recording While watching TV, press RECORD button on the remote controller. Recording will start. You may also start recording using TV Menu (MENU->CHANNEL->Record Start). A control bar will be displayed at the bottom of the screen. o The control bar shows actual info about recording: Recording Time Max Recording Time (depending on free memory space) Channel name/Program name Actual recording status o While Recording is in progress, highlight Play option and press OK to start playback of the recorded file. You will be able to watch recorded material with real time recording in the background (TimeShift). Press to come back to traditional recording. o To stop recording, press (you may also highlight Stop function and press OK) Press PVR.LIST on the remote to display the list of recorded material. Recording Schedule Make sure that the date has been properly set. Press MENU button and go to CHANNEL->Recorded Mode function. Using ▲ and▼ buttons choose appropriate setting and use ► and ◄ buttons to adjust it. o Set recording CHANNEL o Set recording MODE (Once, Everyday, Weekly, Auto) o Set start date/hour of a recording o Set end date/hour of a recording o Press OK to confirm. The recording will be added to the schedule. In order to display recording schedule, press MENU button and go to CHANNEL->Schedule List option. To delete scheduled recording, highlight it and pres RED button. CAUTION! TV Set may display an error screen while adding a recording to the schedule when: Beginning/Ending Time has been incorrectly set Recording Time is in the past Scheduled recording collides with another one that has been already in the schedule. CAUTION! Ensure that a proper USB 2.0 memory storage device is plugged in for the time of recording and that there is enough of free space. TV Set will automatically start recording even if it is in Standby Mode. 14 TimeShift TV Set allows to watch TV using TimeShift function. Ensure that a proper USB 2.0 memory storage device is plugged in and that there is enough of free space. While watching TV, press button to pause broadcasted channel. A control bar will be displayed at the bottom of the screen and the recording will start in the background. o The control bar shows actual info about recording: Shift Time (time difference between paused and the real time) Max Shift Time (depending on free memory space) Press button to resume playback. Real time recording will still be in progress in the background. o You may press button again to pause. o You may rewind and fast forward recorded material. Use and . To stop TimeShift, press button. USB Multimedia Player Full list of supported file formats you may find in specification at the end of this manual. Press INPUT button on the remote. Choose USB source and press OK. A player main screen will be displayed. Use ► and ◄ buttons to choose file category (PHOTO/MUSIC/MOVIE/TEXT). Category icon will be displayed in the middle of the screen. Use ▲ and▼ buttons to choose appropriate device and press OK. Use ▲,▼, ► and ◄ buttons to browse through folders and files. To enter folder, highlight it and press OK. To go up one level, highlight Up Folder and press OK. To leave to the main screen, highlight Return and press OK (or press EXIT). PHOTO Browsing Use ▲,▼, ► and ◄ buttons to browse through folders and files. Highlight a file. You will see its preview and description on the right. To delete a file, highlight it and press RED button. To view a file, highlight it and press . The file will be displayed in Full Screen mode. To watch many files in slide show, you need to add files to the list: o Highlight a file you want to add and press OK. The file will be marked (to unmark it, press OK again). o To add all files from a folder, press GREEN button. All files will be marked (to unmark all files, press GREEN button again). o After adding is finished, press button to start Slide Show. While slide show is in progress, press OK button to get access to the control bar. o Repeat – set repeat mode None – shows all pictures from the list 1 – shows only one picture ALL - shows all pictures from the list and starts from the beginning o Music – plays music in the background Music files must be stored in the same folder as pictures. Press OK to start playing. Press OK again to stop playing. o Playlist – shows list of files o Info – shows file info 15 o o o Rotate – rotates picture Zoom In/Out – enlarge/reduce the displayed size of a picture Move View – function allows to watch details of a picture while zoom in using ▲,▼, ► and ◄ buttons. Use and buttons to skip files. To stop slideshow, press button. Listening to MUSIC Use ▲,▼, ► and ◄ buttons to browse through folders and files. Highlight a file. It will be played in preview mode and its description will be shown on the right. To delete a file, highlight it and press RED button. To play a file, highlight it and press . The file will be played in music player mode. To play many files, you need to add them to the playlist. o Highlight a file you want to add and press OK. The file will be marked (to unmark it, press OK again). o To add all files from a folder, press GREEN button. All files will be marked (to unmark all files, press GREEN button again). o After adding is finished, press button to start playing. Use ▲ and▼ buttons to choose a file from the list. Press REPEAT button to set repeat mode o None – plays all files from the list o 1 – plays only one file o ALL – plays all files from the list and starts playing from the beginning Use and buttons to skip files. To stop playing, press button. HINT! Multimedia Player supports karaoke *lrc file format. Place *lrc file in the same folder as the music file (ensure that file names are the same e.g. music.mp3 & music.lrc). While playback, lyrics will be automatically displayed on the screen. For more info about *.lrc files read in external sources. Watching MOVIES Use ▲,▼, ► and ◄ buttons to browse through folders and files. Highlight a file. It will be played in preview mode and its description will be shown on the right. To delete a file, highlight it and press RED button. To watch a file, highlight it and press . The file will be displayed in Full Screen mode. To watch many files, you need to add files to the list: o Highlight a file you want to add and press OK. The file will be marked (to unmark it, press OK again). o To add all files from a folder, press GREEN button. All files will be marked (to unmark all files, press GREEN button again). o After adding is finished, press button to start watching. While watching, press OK button to get access to the control bar. o REPEAT - set repeat mode None – plays all files from the list 1 – plays only one file ALL – plays all files from the list and starts playing from the beginning o SET – set a fragment to play in a loop SET A – set a beginning point SET B – set an ending point (loop will now start automatically) None – turn off SET function o Playlist – shows list of files 16 o o o o o o Info – shows file info Slow – slow motion playback Step – frame by frame playback Goto Time – enables to enter specific time of playback to go to Zoom In/Out – enlarge/reduce the displayed size of a movie screen Move View – function allows to watch details of a movie screen while zoom in using ▲,▼, ► and ◄ buttons. Use and buttons to skip files. Use and buttons to fast forward/rewind playback. To stop playback, press button. Reading TEXT Use ▲,▼, ► and ◄ buttons to browse through folders and files. Highlight a file. It will be displayed in preview mode and its description will be shown on the right. To delete a file, highlight it and press RED button. To view a file, highlight it and press . The file will be displayed in Full Screen mode. To read many files, you need to add files to the list: o Highlight a file you want to add and press OK. The file will be marked (to unmark it, press OK again). o To add all files from a folder, press GREEN button. All files will be marked (to unmark all files, press GREEN button again). o After adding is finished, press button to start reading. While watching, press OK button to get access to the control bar. and buttons on the remote o Prev/Next Page – skip pages (you may also use controller) o Prev/Next File – skip files (you may also use and buttons on the remote controller) o Stop - stop reading, go back to the file tree o Music – plays music in the background Music files must be stored in the same folder as pictures. Press OK to start playing. Press OK again to stop playing. o Playlist – shows list of files o Info – shows file info 17 ADDITIONAL INFORMATION Technical Specification Screen diagonal Technology Resolution Aspect Ratio Power Supply Power Consumption System Frequency Channels Natural Colors Contrast Brightness Response Time 81 cm LED 1366x768 (HD Ready) 16:9 Widescreen AC 100V-240V 50/60Hz <45W / <0,7W (standby mode) PAL – B/G, D/K, I, SECAM – B/G, D/ K, L, L’ ; NTSC, NTSC 4.43 DVB-T MPEG-2/MPEG-4 H.264 AVC 47 - 870MHz 200 16.7M 1.000.000:1 550 cd/m2 8ms Antenna 75 ohm coaxial Sound 8W×2 @ 4ohm VESA wall mount standard Dimensions Weight 200x100mm 779x215x545 mm 9,2 kg (10,6kg) Supported file formats MOVIE: AVI, MOV, MKV, MP4, PS, TS, (USB multimedia player) ASF, FLV, (subtitles: TXT, SRT, SUB) PHOTO: JPEG, BMP, PNG MUSIC: LPCM, MP3 (+LRC), AC3, AAC, HE-AAC, WMA, WAV, TEXT: TXT, 18