1
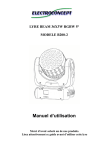
LED BEAM MOVING HEAD FL-101 36x3W
User Manual
www.flash-butrym.pl
Page 1
1. Preface
1.1 Packing list
Product name
quantity
moving head light
1 pcs
Power -line
1 base
User manual
1 pcs
1.2 Unpacking instructions
On receiving a fixture, carefully unpack the carton, check the contents to ensure
that all parts are presented, and have been received in a good condition. Notify
the shipper immediately and retain packing material for inspection if any parts
appear damaged from shipping or the carton itself shows,sign of mishandling.
Save the carton and all packing materials. In the event that a fixture must be
returned to the factory , it is important that the fixture should be returned in
original factory box and packing.
1.3 AC Power
To determine the power requirements for a particular fixture, see the label affixed
to the back plate of the fixture or referred to the fixtures specification chart. A
fixture listed current rating is its average current draw under normal conditions.
All fixtures must be directly powered off a switched circuit and cannot be run off a
rheostat(variable resist) or dimmer circuit, even if the rheostat or dimmer source
voltage matches the fixtures requirement. Check the fixture or device carefully to
make sure that if a voltage selection switch exits that it is set to the correct line
voltage you will use.
Warning! Verify that the voltage select switch on your unit matches the line
voltage applied. Damage to your fixture may result if the line voltage applied
does not match the voltage indicated on the voltage selector switch. All
fixtures must be connected to circuits with a suitable Earth ground.
www.flash-butrym.pl
Page 2
1.4 Safety instructions
Please read these instructions CV, it includes important information about the
installation, usage and maintenance of this product.
Please keep this user guide for future consultation. If you sell the unit to another
user, be sure that they also receive this instruction booklet.
Always make sure that you are connecting to the proper voltage, and that the line
voltage you are connecting to is not higher than that stated on the decal or rear
panel of the fixture.
This product is intended for indoor use only!
To prevent risk of fire or shock, do not expose fixture to rain or moisture. Make
sure that there are no flammable materials close to the unit while operating.
The unit must be installed in a location with adequate ventilation, at least
20in(50cm) from adjacent surfaces. Be sure that no ventilation slots are blocked.
Always disconnect from power source before servicing or replacing fuse and be
sure to replace with same fuse size and type.
Secure fixture to fastening device using a safety chain. Never carry the fixture
solely by its head. Use its carrying handles.
Maximum ambient temperature (Ta) is 104℉(40℃). Do not operate fixture at
temperatures higher than this.
In the event of a serious operating problem, stop using the unit immediately.
Never try to repair the unit by yourself. Repairs carried out by unskilled people
can lead to damage or malfunction. Please contact the nearest authorized
technical assistance center. Always use the same type spare parts.
Don’t connect the device to a dimmer device.
Make sure the power cord never crimped or damaged.
Never disconnect the power cord by pulling or gagging on the cord.
Avoid direct eye exposure to the light source while it is on.
www.flash-butrym.pl
Page 3
2. Technical Specification
•
•
•
•
•
•
•
Extremely small, fast and powerful LED Moving Beam,
DMX Channels: 9/12/16CH
Pan/ Tilt: 650*/ 240* speed adjustable
Smooth electronic dimming: 0-100%
Electronic strobe with pulse and random effects
High efficiency, low power consumption
Super compact, low weight
Weight: 5,7kg
Voltage: 100V-240V, 50/60Hz
Fuse: T6.3A
Power Consumption: 150W
Light source: 3W LED x36 (R8, G10, B10, W8)
Dimension: 375x322x445mm
3. Display
To show the various menus and the selected functions
LED
DMX
MASTER
SLAVE
SOUND
ON
ON
ON
Flashing
Button
MENU
DOWN
UP
ENTER
To select the programming functions
To go backwardin the selected functions
To go forward in the selected functions
To confirm the selected functions
DMX Input Present
Master Mode
Slave Mode
Sound Activation
Mains Input
Connect to supply power.
Mains Output
Connect to supply power to the next unit.
DMX Input/ Output
For DMX512 link, use 3/5-pin XLR cable to link the unit together.
4. Main Function
To select any of the given functions, Press the MENU buton up to when the required
one is showing on the display. Select the function by ENTER buton and the display
www.flash-butrym.pl
Page 4
will blink. Use DOWN and UP buton to change the mode. Once the required mode
has been selected, press the ENTER buton to setup, to go back to the functions
whitout any change press the MENU buton again. Hold and press the MENU buton
about one secondo or wait for one minute to exit the menu mode.
The main functions are showing below:
DMX Address
Channel Set
Show Mode
Slave Mode
Black Out
Sound State
Sound Sense
PAN Inverse
MENU
Tilt Inverse
Back Light
White Balance
Menu Test
Auto Test
Temp.
Defaults
www.flash-butrym.pl
001
512
9ch
12ch
16ch
Show 1
Show 2
Show 3
Show 4
Slave 1
Slave 2
Yes
No
On
Off
0
100
Yes
No
Yes
No
On
Off
Red
Green
Blue
PAN
Tilt
Red
Green
Blue
White
Dimmer
Strobe
31*C
No
Yes
125
….
255
0
…….
255
Pro Defaults
Auto Defaults
Page 5
DMX Address
Select DMX Address, press the ENTER buton to confirm, the present address will
blink on the display. Use the UP and DOWN buton to adjust the address from 1 to
512. Once the address has been selected, press the ENTER buton to setup, to go
back to the functions without any change press the MENU buton again. Hold and
press the MENU buton about one secondo or wait for one minute to exit the menu
mode.
Channel Set
Select Channel Set, press the ENTER buton to confirm, the present set will blink on
the display. Use the UP and DOWN buton to select channel 9/12/16. Once the set
has been selected, press the ENTER buton to setup, to go back to the functions
without any change press the MENU buton again. Hold and press the MENU buton
about one secondo or wait for one minute to exit the menu mode.
Show Mode
Select Show Mode. Press the ENTER buton to confirm, present mode will blink on
the display. Use the DOWN and UP buton to select the Show 1 or Show 2 or Show 3
or Show 4 mode. Once the mode has been selected, press the ENTER bitton to
setup, to go back to the functions without any change press the MENU buton again.
Hold and press the MENU buton about one secondo or wait for one minute to exit the
menu mode.
Slave Mode
Select Slave Mode, Press the Enter buton to confirm, present mode will blink on the
display. Use the DOWN and UP buton to select the Slave 1 (normal) or Slave 2 (2
light show) mode. Once the mode has been selected, press the ENTER buton to
setup, to go back to the functions without any change press the MENU buton again.
Hold and press the MENU buton about one secondo or wait for one minute to exit the
menu mode.
Black Out
Select Slave Mode, Press the ENTER buton to confirm, present mode will blink on
the display. Use the DOWN and UP buton to select the Yes (yes blackout) or No (no
blackout) mode. Once the mode has been selected, press the MENU buton again.
Hold and press the MENU buton about one secondo or wait for one minute to exit the
menu mode.
Sound State
Select Sound State, Press the ENTER buton to confirm, present mode will blink on
the display. Use the DOWN and UP buton to select the ON (sound on) or Off (sound
off) mode. Once the mode has been selected, press the ENTER buton to setup, to go
back to the functions without any change press the MENU buton again. Hold and
www.flash-butrym.pl
Page 6
press the MENU buton about one secondo or wait for one minute to exit the menu
mode.
Sound Sense
Select Sound Sense, Press the ENTER buton to confirm, present mode will blink on
the display. Use the DOWN and UP buton to select the 0…1000 mode. Once the
mode has been selected, press the ENTER buton to setup, to go back to the
functions without any change press the MENU buton again. Hold and press the
MENU buton about one secondo or wait for one minute to exit the menu mode.
Pan Inverse
Select Pan Inverse, Press the ENTER button to confirm, present mode will blink on
the display. Use the DOWN and UP buton to select the Yes (Pan Inversion) or No
(Normal) mode. Once the mode has been selected, press the ENTER buton to setup,
to go back to the functions whitout any change press MENU buton again. Hold and
press the MENU buton about one secondo or wait for one minute to exit the menu
mode.
Tilt Inverse
Select Tilt Inverse, Press the ENTER buton to confirm, present mode will blink on the
display. Use the DOWN and UP buton to select the Yes (Tilt Inversion) or No
(Normal) mode. Once the mode has been selected, press the ENTER buton to setup,
to go back to the functions without any change press the MENU buton again. Hold
and press the MENU buton about one secondo or wait for one minute to exit the
menu mode.
Back Light
Select Back Light, Press the ENTER buton to confirm, present mode will blink on the
display. Use the DOWN and UP buton to select the On (LED On) or Off (LED Off)
mode. Once the mode has been selected, press the ENTER bbutonto setup, to go
back to the functions without any change press the MENU buton again. Hold and
press the MENU buton about one secondo or wait the MENU buton again. Hold and
press the MENU buton about one secondo or wait for one minute to exit the menu
mode.
Function Delay
Select Function Delay, press ENTER buton to confirm, present mode will blink on the
display. Use DOWN and UP buton to select the No Delay or 1S/2S/3S Delay (Wait
for 1/2/3 seconds before these Functions of 12CH are activated/ deactivated) mode.
Once the mode has been selected, press the ENTER buton to setup, to go back to
the functions whitout any 9-change press the MENU buton again. Hold and press the
MENU buton about one secondo or wait for one minute to exit the menu mode.
www.flash-butrym.pl
Page 7
White Balance
Select White Balance, press the ENTER buton to confirm, present mode will blink on
the display. Use DOWN and UP buton to select the Red or Green or Blue. Once the
mode has been selected, press the ENTER buton to setup, use the DOWN and UP
buton to change the value (125~255). Once the mode has been selected, press the
ENTER buton to setup, go back to the functions whitout any change press the MENU
buton again. Hold and press the MENU buton about one secondo or wait for one
minute to exit the menu mode.
Manu Test
Select Manu Test, press the ENTER buton to confirm, present mode will blink on the
display.
Use
DOWN
and
UP
buton
to
select
the
Pan/Tilt/Red/Green/Blue/White/Dimmer or Strobe. Once the mode has been
selected, press the ENTER buton to setup, use the DOWN and UP buton to change
the value (0~255). Once the mode has been selected, press the ENTER buton to
setup, go back to the functions whitout any change press the MENU buton again.
Hold and press the MENU buton about one secondo or wait for one minute to exit the
menu mode.
Auto Test
Press the MENU buton up to when the Auto-Test is blinking on the display. Pressing
ENTER buton and the unit will run self-test by built-in program. To go back to the
functions press the MENU buton again. Hold and press the MENU buton about one
secondo or wait for one minute to exit the menu mode.
Temperature
Press the MENU buton up to when the Temperature Test is blinking on the display.
Pressing ENTER buton and the unit will run self-test by built-in program. To go back
to the functions press the MENU buton again. Hold and press the MENU buton about
one secondo or wait for one minute to exit the menu mode.
Defaults Setting
Press the MENU buton to show Defaults on the display. Press the ENTER buton and
the display will blink. Use the DOWN and UP buton to select the YES or No. Once
the Yes has been selected, press the ENTER buton and use the UP and Down buton
to select the PRO Defaults or AUTO Defaults.
PRO Defaults: For professional users, detailed explanation as followings:
• Slave Mode – Slave 1
• Black Out – Yes
• Sound State – Off
• Pan Inverse – No
• Tilt Inverse – No
www.flash-butrym.pl
Page 8
•
•
Back Light – Off
Function Delay – 3s Delay
Auto Defaults: Mostly automatic mode, for non professional users, detailed
explanation as followings:
• Slave Mode – Slave 1
• Black Out – No
• Sound State – On
• Pan Inverse – No
• Tilt Inverse – No
• Back Light – On
(Notice: Other settings are NOT changed while choosing Defaults Setting!).
Press the ENTER and the corresponding functions will set to defaults setting, to go
back to the functions without any change press the MENU buton again. Hold and
press the MENU buton about one secondo or wait for one minute to exit the menu
mode.
Reset
Press the MENU buton up to when the Rest is blinking on the display. Pressing
ENTER buton and all channels of the unit will return to their standard position.
5. Home Position Adjust
Offset
Pan Offset
Tilt Offset
127
-127
In the main functions, hold ENTER buton for at least 3 seconds into offset mode, use
DOWN and UP buton up to chose Pan Offset or Tilt Offset, Pressing ENTER buton
and the display will blink. Use Down and UP buton to adjust the home position of the
Pan, Tilt, Once the opposition has been selected, press the ENTER buton to setup,
to go back to the functions without any change press the MENU buton again. Hold
and press the MENU buton about one secondo r wait for one minute to exit the menu
mode.
6. How to Control The Unit
You can operate the unit in two ways:
1. Master/ Slave built-in preprogram function
2. Universal DMX controller
No need to turn the unit off when you change the DMX address, as new DMX
address setting will be effect a tonce. Every time you turn the unit on, it will show
www.flash-butrym.pl
Page 9
„M108RGBW” on the display and move all the motors to their „HOME” position and
you may hear some noises for about 20 seconds. After that the unit will be ready to
receive DMX signal or run the built in programs.
7. Master/ Slave Built In preprogrammed Function
By lining the units in master/ slave connection, the first unit will controll the other units
to give an automatic, sound activated, synchronized light show. This function is good
when you want an instant show. You have to set the first unit in master mode Show
Mode and select Show 1 or Show 2 or Show 3 ors Show 4 mode. Its DMX input jack
will have nothing plugged into it, and its master LED will be constantly on and sound
LED will flash to the music. The other units will have to set in Slave mode and select
Slave 1 (normal) or Slave 2 (2 light show) mode, Their DMX cables plugged into the
DMX input jacks (daisy chain) and the slave led lights will constantly on.
2-light show
In Slave mode, Slave 1 means the unit works normally and Slave 2 means 2-light
show. In order to create a great light show, you can set Slave 2 on the second unit to
get contrast movement to each other, even if you have two units only.
8. DMX Controller
By using a universal DMX Controller to control the units, you will need to set DMX
address from 1 to 512 so that the units can recive DMX signal.
Press the MENU buton up to when the DMX Adress is showing on the display.
Pressing ENTER buton and the display will blink. Use DOWN and UP buton to
change the DMX512 address. Once the address has been selected, press the
ENTER buton to setup, to go back to the functions without any change press the
MENU buton again. Hold and press the MENU buton about one secondo r wait for
one minute to exit the menu mode.
Please refer to the following diagram to address your DMX512 channel for the first 4
units.
Channel Mode
9 channels
12 channels
16 channels
Unit 1 Address
1
1
1
Unit 2 Address
10
13
17
Unit 3 Address
19
25
33
Unit 4 Address
28
37
49
9. DMX512 Configuration
9 Channel Mode:
Channel List
CH1
CH2
www.flash-butrym.pl
Value
000-255
000-255
Function
Pan (0-630*)
Tilt (0-240*)
Page 10
CH3
CH4
CH5
CH6
CH7
CH8
CH9
12 Channel Mode:
Channel List
CH1
CH2
CH3
000-255
000-255
000-255
000-255
000-255
000-255
000-255
Strobe
RED (0%-100%)
GREEN (0%-100%)
BLUE (0%-1000%)
WHITE (0%-100%)
Dimmer (0%-100%)
Sound Active
Value
000-255
000-255
000-255
Function
Strobe Effect
Dimmer (0%-100%)
Pan (0-630*)
Pan Fine (Least significant
bit)
Tilt (0-240*)
Tilt Fine (Least significant
bit)
Sound Activation
Color Effect
RED (0%-100%)
GREEN (0%-100%)
BLUE (0%-1000%)
WHITE (0%-100%)
CH4
000-255
CH5
000-255
CH6
000-255
CH7
CH8
CH9
CH10
CH11
CH12
000-255
000-255
000-255
000-255
000-255
000-255
16 Channel Mode:
Channel List
CH1
Value
000-255
CH2
000-255
CH3
000-255
CH4
000-255
CH5
CH6
CH7
CH8
CH9
CH10
CH11
CH12
CH13
CH14
CH15
CH16
000-255
000-255
000-255
000-255
000-255
000-255
000-255
000-255
000-255
000-255
000-255
000-255
www.flash-butrym.pl
Function
Pan (0-630*)
Pan Fine (Least significant
bit)
Tilt (0-240*)
Tilt Fine (Least significant
bit)
Pan & Tilt Speed
Pan & Tilt Auto Run
Auto Run Speed
Auto Run Color Open
Dimmer (0%-100%)
Strobe
Red (0%-100%)
Green (0%-100%)
Blue (0%-100%)
White (0%-100%)
Color Auto Run
Color Auto Run Speed
Page 11
10. DMX512 Connection
1. If you usign a controller with 5 pins DMX output, you need to use a 5 to 3 pin
adapter-cable.
2. At last unit, the DMX cable has be terminated with a terminator. Solder a
120ohm 1/4W resistor between pin 2(DMX - ) and pin 3(DMX +) into a 3-pin
XLR-plug and plug it in the DMX-output of the last unit.
3. Connect the unit together in a daisy chain by XLR plug from the output of the
unit to the input of the next unit. The cable can not branched or split to a ‘Y’
cable. DMX512 is a very high-speed signal. Inadequate or damaged cables,
soldered joints or corroded conectors can easily distort the signal and shut
down the system.
4. The DMX output and input connectors are pass-through to maintain the DMX
circuit, when one of the units power is disconnected.
5. Each lighting unit needs to have an address set to receive the data sent by the
controller. The address numer is between 0-511 (usualy 0 & 1 are equal to 1).
6. The end of the DMX512 system should be terminated to reduce signal errors.
7. 3 pin XLR connector are more popular than 5 pin XLR
3 pin XLR: Pin 1: GND, Pin 2: Negative signal (-), Pin 3: Positive signal (+)
5 pin XLR: Pin 1: GND, Pin 2: Negative signal (-), Pin 3: Positive signal (+),
Pin 4/Pin 5: not used
11. Troubleshooting
Following are a few common problems that may occur during operation. Hear are
some suggestions for easy troubleshooting.
A. The unit does not work, no light and the fan does not work.
• Check the connection of power and main fuse
• Measure the mains voltage on the main connector
• Check the power on LED
B. Not responding to DMX controller
• DMX LED should be on. If not, check DMX connectors, cables to see if
link properly
• If the DMX LED is on and no response to the channel, check the
address setting and DMX polarity.
• If you have intermittent DMX signal problems, check the pins on
connectors or on PCB of the unit or the previous one.
• Tryt to us another DMX controller
• Check if the DMX cables run near or run alongside to high voltage
cables that may cause damage or interference to DMX interface circuit.
C. Some units don’t’s respond to the easy controller
www.flash-butrym.pl
Page 12
You may have a break in the DMX cabling. Check the LED for the
response of the Master/ Slave mode signal.
• Wrong DMX address in the unit. Set the proper address.
D. No response to the sound
• Make sur the unit dose not receive DMX Signal
• Check microphone to see if it is good by tapping the microphone
E. One of the channels is not working well
• The stepper motor might be damaged or cable connected to PCB is
broken
• The motor’s drive IC on the PCB might be out of conditio
•
12. Fixture Cleaning
The cleaning of internal and external optical lenses and/or mirrors must be carried
out periodically to optimize light output. Cleaning frequency depends on the
environment in which the fixture operates: damp, smoky or particularly dirty
surrounding can cause greater accumulation of dirt on the unit’s opyics.
•
•
•
Clean with soft cloth using normal glass cleaning fluid
Always dry the parts carefully
Clean the external optics at least every 20 days. Clean the internal optics at
least every 30/60 days.
www.flash-butrym.pl
Page 13