1
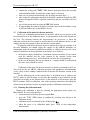
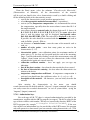
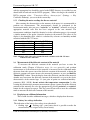
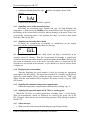
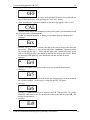
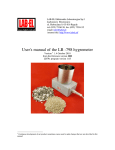
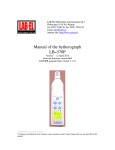
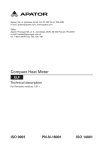
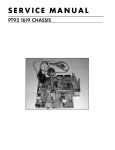
LAB- EL Laboratory Electronics SJ
ul. Herbaciana 9, 05-816 Reguły
tel: (022) 7536130, fax: (022) 7536135
email: [email protected]
internet site: http://www.label.pl/
User manual hygrometer LB -797
Version 1 1.6 October 2012
from the firmware version 3R0
LB79x program version 1.05
1
Continuous development of our products causes sometimes need to make changes that are not described in this
manual
User manual hygrometer LB -797
2
CONTENTS
1.
DESCRIPTION HYGROMETER ............................................................. 4
1.1 Elements of the hygrometer ........................................................................... 5
1.2 Start of a measurement – short description .................................................. 7
2.
OPERATION OF THE HYGROMETER .................................................. 7
2.1 Switching on and off....................................................................................... 7
2.2 Description of the keyboard........................................................................... 8
2.3 Menu mode ..................................................................................................... 8
2.3.1 Menu options ............................................................................................ 9
2.4 Measurement of humidity and conductivity of the material ........................ 9
2.4.1 Measurement of material moisture ............................................................ 9
2.4.2 Conductivity measurement of the material .............................................. 10
2.4.3 The method for placing the electrodes in the material.............................. 10
2.5 Temperature measurement of the material ................................................ 11
2.6 Audible signal of the humidity level ............................................................ 11
2.7 Calibration of the meter for the new materials........................................... 12
2.7.1 Entering the calibration mode.................................................................. 12
2.7.2 Performance of calibration measurements ............................................... 13
2.7.3 Processing of measurement results .......................................................... 13
2.7.4 Entering the characteristics of the material to the meter memory –
operation of the LB79x software ............................................................ 14
2.7.5 Checking the meter readings for the new material ................................... 17
2.8 Measurement of the dielectric constant of the material ............................. 17
2.9 Displaying an additional information.......................................................... 17
2.9.1 Battery low voltage indication................................................................. 17
2.9.2 Signalling excess of the measuring range ................................................ 18
2.9.3 Signaling an electrodes short circuit........................................................ 18
2.9.4 Displaying the serial number................................................................... 18
2.9.5 Signaling the automatic temperature compensation ................................. 18
2.9.6 Signaling the operation mode of LB- 796 as a reading panel ................... 18
2.9.7 Other messages ....................................................................................... 18
2.10 Validation hygrometer readings .................................................................. 20
2.10.1 Resetting the probe to zero ..................................................................... 20
LAB-EL Elektronika Laboratoryjna (Laboratory Electronics)
2
User manual hygrometer LB -797
3
2.11 Notes on use .................................................................................................. 20
3.
OUTPUT VOLTAGE 0…10V................................................................. 20
4.
CONNECT THE LB - 797C PROBE TO PC VIA S300 INTERFACE DESCRIPTION OF THE LBX PROGRAM ............................................ 22
4.1 Description of the LB -375 converter .......................................................... 23
4.2 Configuring the LBX program .................................................................... 24
5.
MEASUREMENT SPECIFICATIONS ................................................... 26
6.
TECHNICAL SPECIFICATIONS........................................................... 27
LAB-EL Elektronika Laboratoryjna (Laboratory Electronics)
3
User manual hygrometer LB -797
4
1. Description hygrometer
LB -797 materials hygrometer is designed to measure soil moisture and other bulk
materials with a grain diameter up to several millimeters. You can save to the memory
the characteristics of the materials of any user (up to 50 characteristics) using the
LB79x. Calibration of the meter for the new material may be performed by an User or
the LAB- EL lab after delivery of material samples.
The operating principle of hygrometer is based on the measurement of dielectric
constant of material by a capacitive method. Two needle electrode, with which the
probe is equipped, should be placed in the measured material. The dielectric constant
of a dry material such as sand is about 4, while the dielectric constant of water is 80.
Wet sand has intermediate dielectric constant values – on this basis the moisture is
calculated. Moisture is measured four parameters of the soil:
• humidity,
• temperature
• conductivity,
• dielectric constant.
The probe LB -797 is available in two versions:
• LB- 797A - with handle,
• LB- 797C - without handle - designed to be buried in the soil.
The probe LB -797 is not a stand-alone device and to read the results of
measurements the reading panel LB- 796 is required. In addition, the probe is
equipped with the following interfaces:
• Interface S300 - two-wire transmission over long distances,
• Output voltage 0.. 10V
• Modbus-RTU (EIA-232 or EIA-485) with 8-channel concentrator LB-473,
• Ethertnet - by 4-channel data acquisition LB-489 or 8-channel LB-487.
The probe also works with a meteorological station LB-741. Read the measurement
is also possible with a computer by using a S300/USB – LB-375 converter and the
LBX software.
Additional equipment:
• Drill to the soil,
• Tube for introducing the probe into the hole in the soil – for LB- 797C.
The main characteristics of hygrometer LB- 796P + LB -797 set are as follows:
• easy to read LCD display, energy-efficient measuring microprocessor
• meter, that can be calibrated for any material supplied by the user to the lab the calibration parameters are stored in non-volatile memory of the meter (it is
possible to store up to 50 types of materials),
• temperature sensor with built-in meter in the range of -20...70°C, it is also
possible temperature measurement using the optional external sensor
TL- 2\ 796 \ DB9, which is connected to the panel LB- 796,
• battery powered,
LAB-EL Elektronika Laboratoryjna (Laboratory Electronics)
4
User manual hygrometer LB -797
5
measuring the dielectric constant of the material,
ability to measure the conductivity of the material,
sound signaling of humidity level after crossing preset humidity threshold
hygrometer switch off automatically after 3 minutes of inactivity,
signaling of the measuring range crossing,
remembering of the last selected material,
short circuit signaling of the meter electrodes - this way we obtain an
unambiguous measurement of humidity,
• low battery indication,
• auto-zero function when you turn on the meter, it is possible to reset the
request.
•
•
•
•
•
•
•
Elements of the hygrometer
Location of elements on the LB- 796P panel, which are accessible for the user, is
presented one the Figure 1.
• A - 3.5 digit LCD display,
• B – keyboard,
• C – multifunction socket for connecting:
o hygrometer LB -797,
o external thermometer TL-2/796/DB9,
1.1
LB- 797C - Place the entire probe the material
LB- 797A - Place in material the electrodes only
LAB-EL Elektronika Laboratoryjna (Laboratory Electronics)
5
User manual hygrometer LB -797
6
C
M
%
12.4
A
B
Wilgotnościomierz materiałów - material
hygrometer
Sonda pojemnościowa - capaticance probe
Sonda rezystancyjna - resistance probe
materiał - material
wył - off
pomiar - measurement
TAK – OK
NIE – ESC, NO
Figure 1 Panel LB-796P – view from the keyboard
From the bottom there is an access to the battery.
The hygrometer set includes:
• hygrometer LB -797,
• reading panel LB- 796P (or LB- 796A) - optional,
• converter LB -375 - an option together with the program LBX,
• converter LB – 376C - optional with the program LB79x,
• communication cable LB- 79XRS with power supply - as an option together
with the LB79x calibration program.
• drill to the soil - optional,
• pipe for guiding the probe LB - 797C in a hole in the ground - optional.
LAB-EL Elektronika Laboratoryjna (Laboratory Electronics)
6
User manual hygrometer LB -797
7
Start of a measurement – short description
This chapter presents a short description of the material moisture measurement,
the conductivity of the material and the temperature of the material. More details
regarding the operation of the meter is presented in the Chapter 2, you should be aware
of them.
To measure the moisture content one should perform the following activities:
• connect hygrometer LB -797 and reading panel LB-796 (to the socket labeled
as C on Figure 1), attach it to the socket with the screws included in the probe
plug
• press any button to turn the meter on except the "wył" (off) button. - wait for
the appearance of the "797" inscription and press the "Pomiar POJ" (moisture
measurement) button,
• the display will show the "CAL" inscription, which indicates auto-zeroing of
the meter and then the symbol of recently selected material, the symbol
shown on the screen will inform, that the moisture measurement mode is on.
• choose the right material by pressing the "materiał+" or "materiał-" (material+
or material- ), the a three-character code will be displayed. The list of
materials and the corresponding codes are stored in the meter memory, they
can be found in an additional annex to the manual,
• Press the "Pomiar POJ" (moisture measurement) button again - the character
% with the measurement of humidity will be displayed on the screen,
• put the meter electrodes in the measured material and read the measured result
of humidity (electrodes should be completely immersed in the measured
material for the probe LB- 797A, for the probe LB- 797C the entire probe
should be submerged in the material). The electrodes should not be driven
into the hard materials - it can lead to the damage of the probe,
• If the measurement result is blinking, it means exceeding the measuring range,
• when you press the "Pomiar REZ." (resistance measurement) button, the
conductivity of the material will be displayed in mS / m (miliSimens / meter) on
about the resistance measurement activity will inform you the symbol
the screen,
• after pressing the "T/TH" button the temperature of the material will be
displayed, the active temperature mode will be indicated by temperature
symbol ° C.
1.2
2. Operation of the hygrometer
Switching on and off
Before switching on the device should be connected to the reading panel LB- 796
and to the LB -797 probe (to the socket labeled as C in Figure 1).
Turning the panel on may be done with any button other than the "wył" (off)
button, which is for the switching off. After you turn the display moisture meter on, for
a moment internal firmware version of panel LB- 796 will display with a single letter
version of the meter, for example:
2.1
LAB-EL Elektronika Laboratoryjna (Laboratory Electronics)
7
User manual hygrometer LB -797
8
2.2P
and then the firmware version of the connected probe will be for example:
1.2
and after a moment the symbol of connected probe:
797
While viewing these inscriptions an initial testing of the instrument is carried out. The
meter is equipped with auto off function - it activates after 3 minutes after the last
pressing of any key on the keyboard, and when the result of the humidity measurement
has not changed in that time by more than 10% of the measuring range (auto off will
switch off after 10 minutes regardless of this condition). If the hygrometer does not
react for attempt to switch off with the keyboard, remove the batteries and re-insert
them back.
Description of the keyboard
The reading panel LB- 796 is equipped with a 6- button keypad. There are two
modes of operation:
• measurement mode - button functions are described in black,
• menu mode - button functions are described in blue (see Menu Mode).
In the measurement mode buttons have the following meanings
• Pomiar POJ. - Starts measuring humidity
• Pomiar REZ. - Starts measuring the conductivity,
• T/RH - starts measuring temperature,
• materiał+ - material selection (scroll forward by one material)
• materiał- - material selection (scroll back by one material)
• wył. - turns off the device.
2.2
Menu mode
From version 2.0 software, the meter is equipped with a 6 press button keyboard
with the menu mode. Button functions in the menu mode are marked in blue:
• MENU (2sek.) - to start the menu mode, you may press it and hold for 2
seconds until the menu mode starts, release of the button earlier than 2 seconds
will turn off the meter (the function of this button is shared with a button, which
turns off the meter).
• ↑ up arrow is used to select menu options or to set various parameters in the
menu (increasing parameter)
• ↓ down arrow is used to select menu options, or to set various parameters in the
menu (decreasing parameter)
• TAK (YES) - enter the selected menu item or approval of an adjustable
parameter in menu,
2.3
LAB-EL Elektronika Laboratoryjna (Laboratory Electronics)
8
User manual hygrometer LB -797
9
• NIE (NO) - exit from the menu (or go up one level in the menu).
2.3.1 Menu options
• bu - threshold activation for audible signals
• Pro - calibration mode, selecting this mode will input in calibration mode (you
cannot exit this mode by pressing the "NIE" (NO) button - you have to turn off
the meter).
• nr - (no) displays serial number of probe LB -797.
Measurement of humidity and conductivity of the material
2.4
2.4.1 Measurement of material moisture
Material moisture measurement should be carried out as follows:
• connect hygrometer LB -797 and LB- reading panel 796 (to the socket labeled
C in Figure 1), attached to the socket with the screws included in the plug
probe,
• after turning the hygrometer display, when the 797 inscription shows, press
"Pomiar POJ" button - Display will briefly read for a moment:
CAL
•
•
•
•
•
indicating the auto-zeroing of capacitance probe (at the time do not touch the
probe electrode) and the symbol for the last selected material will show. The
displayed symbol
, informs that an activity of humidity measurement
mode is on.
by pressing the "materiał+" button or "materiał+" button - select the material
code, which moisture has to be measured. This code will show up on the
display. The list of available materials and corresponding codes may be found
in an additional annex to the manual,
Press the "Pomiar POJ" button again - the character % will show on the
display with some humidity measurement result (lower measurement range),
put the meter electrodes in the measured material (see the chapter How to place
electrodes in the material), and read the result of humidity measurement
(electrodes should be completely immersed in the measured material for
the LB- 797A probe, a for the LB- 797C probe the entire probe should be
submerged in the material ) the electrodes should not be hammered hard into
materials - it can lead to irreparable damage of the probe, the probe should also
be protected against falling, which can cause breakage of electrodes.
If the measurement result is blinking, it means exceeding the measuring range,
when the display shows alternately with the measurement of humidity message
like this:
%
ErL
LAB-EL Elektronika Laboratoryjna (Laboratory Electronics)
9
User manual hygrometer LB -797
10
it indicates a short circuit of the electrode probe (too high conductivity of the
material caused by salinity), you should be aware, that in this situation the
measurement result is erroneous.
• during the measurement of the moisture flashes ° C, this means that the active
temperature compensation for material moisture is on.
• it is possible to set the moisture threshold, from which the system beeps (see
chapter Sound signal of the moisture level).
2.4.2 Conductivity measurement of the material
Conductivity measurement of the material should be carried out as follows:
• connect hygrometer LB -797 and LB- reading panel 796 (to the socket labeled
C in Figure 1), attached to the socket with the screws included in the plug
probe,
• after turning the hygrometer on, when the display will show 797 inscription
press Pomiar REZ button. - the display will read for a moment:
CAL
indicating the auto-zeroing capacitance probe (do not touch at the time the
probe electrode) and then some conductivity measurement result in mS / m
(miliSimens / meter) will display,
• put the meter electrodes in the measured material (see the chapter How to place
electrodes in the material), and read the result of conductivity measurement
(electrodes should be completely immersed in the measured material for
the LB- 797A probe) the electrodes should not be hammered hard into
materials - it can lead to irreparable damage of the probe, the probe should
also be protected against falling, which can cause breakage of electrodes.
• when the display shows alternately with the measurement of conductivity
message like this:
%
ErL
this means that the probe electrodes short circuit (too high a conductivity of the
material caused by salinity).
• conductivity of the material should not be confused with the conductivity of
water in the material.
2.4.3 The method for placing the electrodes in the material
The method of electrodes placing in the material has a decisive influence on the
accuracy of the measurement of humidity and conductivity of the material. First of all,
the electrodes should be placed entirely in the measured material for the LB797A probe and for the LB- 797C probe the entire probe should be submerged in
the material. There are two ways to place the electrodes in the material:
• with manual compaction of the material,
• without compaction.
LAB-EL Elektronika Laboratoryjna (Laboratory Electronics)
10
User manual hygrometer LB -797
11
It is important that the material does not create air bubbles that cause a downward
deviation of the measurement result. Generally, the electrode should be placed in the
material initially compacted by hand, unless the material is in the form of defined
pellets and does not form air bubbles - in this situation the electrode can be placed
without initial compacting of the material. Initial compaction of the material should be
performed for the following materials: sand, soil, coal dust, copper sulphate.
Additional remarks, which are aplicable during the measurement:
• during the humidity measurement (conductivity) one should select the sample
of the material for the measurement to be hygro representative of the entire
sample, or it is necessary to perform several measurements and average them,
• after the measurement the probe should be washed, especially the electrodes
need to be cleaned.
• All metal parts located near the probe electrodes disturb the measurement
(result increasement), especially one should not measure humidity in metal
containers (unless they are sufficiently large).
Temperature measurement of the material
The probe LB -797 has a built-in thermistor temperature sensor, which is located
in the cap between the measuring electrodes. You can also purchase TL-2/796/DB9
external temperature sensor connected to the LB- 796 panel.
Temperature measurement of the material should be carried out as follows:
• connect hygrometer LB -797 and reading panel LB-796 (to the socket labeled
C in Figure 1), attach it to the socket with the screws included in the plug
probe,
• after switching the hygrometer on, when the 797 shows up, press T/TH, the
display will briefly read:
2.5
CAL
indicating the auto-zeroing of the capacitance probe (do not touch at the time
the probe electrode). Then the symbol ° C and temperature measurement results
display for example:
°C
23.4
• place the probe in the measured material, wait for the temperature to stabilize
and read the temperature result,
• If the measurement result is blinking it means exceeding the measuring range.
Audible signal of the humidity level
The meter can be set for the humidity threshold alarm sounds. The default
threshold is 50 %, if you need a different threshold it can be set in the range 0..199.5 %
in increments of 0.5 %. This may be done in the following way:
• start the menu mode and select the bu menu option,
2.6
LAB-EL Elektronika Laboratoryjna (Laboratory Electronics)
11
User manual hygrometer LB -797
12
• confirm the setting with "TAK" (YES) button, the display shows the currently
set threshold humidity, by which the sound signal is activated,
• Now you can change the threshold value by using the arrow keys ↑ ↓,
• after setting the appropriate threshold it should be confirmed by pressing YES
button, the approval will be signaled acoustically and you exit to the one level
above,
• you exit the menu mode by using the NIE (NO) button,
• by approaching the hand to the probe electrode you can check whether a beep
is generated when the set threshold is exceed.
Calibration of the meter for the new materials
In the case of humidity measurement of materials, which are not present on the
list of materials for in the additional annex, an interpretation of the result depends on
the User. The relations between the measurements are preserved i.e. when the
indicated result on the first sample is smaller than the result indicated on the second
sample, then the first sample is more dry than the second sample.
To properly calibrate the moisture meter to indicate the result, for example % of
the mass humidity, one should supply the samples to the LAB-EL laboratory (or
information about the material production methods) to calibrate the meter for a new
material. Guidelines for the preparation of specimens are as follows:
• the material sample should have a maximum expected moisture (if you cannot
soak the material and the water content in the material results from
manufacturing processes), and it should be enclosed in a sealed package,
• in the case of materials that can be soaked in, a sample should be in absolutely
dry state, also it should be sealed,
2.7
Calibration of the meter for the new material can also be performed by the User.
You need for this the LB79x calibration program and appropriate instrumentation
(scales, drier) or have another standard meter to measure the moisture content of the
material.
In the following part of the manual there is described how to calibrate the
LB-797 probe in order to adapt it to measure the humidity of new materials and the
procedure for writing in the characteristics of the materials to the memory using the
LB79x software. Prior to calibration, refer to the operating instructions describing the
measurement of moisture in order to properly perform calibration measurements.
2.7.1 Entering the calibration mode
Entering the calibration is done by selecting the appropriate menu option (see
Menu Mode). It is necessary therefore:
• run menu mode and select the menu option Pro
• press the "TAK" (YES) button to confirm the selection, you will go to the
calibration mode,
,
• calibration mode is indicated by the flashing sign,
• when the meter is in calibration mode press T/RH to start temperature
measurement,
LAB-EL Elektronika Laboratoryjna (Laboratory Electronics)
12
User manual hygrometer LB -797
13
• exit the calibration mode is performed only by pressing the "wył" (off)
hygrometer button..
In the calibration mode, the display shows the value of the parameter that will be
measured during the calibration measurements. This parameter should be interpreted
as the square root of the dielectric constant of material (referred to as sqrteps), the
measurement should be made keeping all the tips that are given for the
measurement of moisture (especially for placing the electrodes in the material).
2.7.2 Performance of calibration measurements
Meter calibration for the new material is based on performance of the parameter
measurement with the LB-797 meter (in the calibration mode) and the measurement of
moisture material with the other device, which is considered by the User as a model
device (for example by the drying-weighing method according to the PN-EN ISO
12570 standard – for construction materials and products , PN-ISO 11465 or PN-ISO
11461 for soil, or with any other standard meter) for at least two different moisture
material measurements, which would create a measurement range. Ideally, the
humidity measured values are separated, i.e. once the material, which is considered to
be almost dry, is measured, then we measure the material, which is considered as a wet
one. The calibration results consists of a table with moisture material values and
material parameter values, as it is presented in the Table 1.
Humidity [%]
0
10.8
18.1
25.3
33.6
SqrtEps
2.32
3.42
4.03
4.84
5.45
Table 1 Sample calibration table for the new material
The greater the number of measurement points , the better the later accuracy.
The calibration should be performed for the material temperature as close as possible
to 20 degrees because of the correctness of automatic temperature compensation .
The measurement of parameter with averaging is recommended , i.e. for a
specific material moisture the several measurements should be performed and the
average calculated.
If measurements are made using drying-weighing method, the best way would
be to dry material completely (0 % humidity) to measure the value of the parameter
sqtreps for dry material ( the first calibration point ) and then gradually add water
while stirring the material - this way new calibration points will be created up to full
saturation of the material with water.
2.7.3 Processing of measurement results
After the calibration measurements there should be drawn characteristics of the
material i.e. the function of humidity (parameter ), for example in Excel. This function
should be increasing . In general, the large part of it should be a straight line, with the
LAB-EL Elektronika Laboratoryjna (Laboratory Electronics)
13
User manual hygrometer LB -797
14
curvature on the endings for the measuring ranges (for small and large humidities)
may be higher. The shape should be visually assessed and, for example, the measures,
which indicate their error during measurement, reject (or if the data points are more
than 15). You may calculate the approximating function by, for example, polynomials
and with its help generate points evenly to write to the device. An extrapolation of
characteristics is acceptable when at the end of the range the a clear saturation (fold of
the line) but during the extrapolation, it should be taken into account that the range of
the parameter is:
• sqrteps - 1.0...10.0 - when parameter increases, the humidity increases too.
In general extrapolation (extending beyond the measured characteristics of humidity)
should be made so that the end of the measuring range for the characteristic values
would be equal to the characteristic values, for example, for 100 % humidity.
2.7.4 Entering the characteristics of the material to the meter memory –
operation of the LB79x software
Using the LB79x calibration software enter the characteristics of the material to the
memory of the meter. To do this, perform the following steps while maintaining the
specified order:
• install LB79x software (if it was not already installed)
o run the software installer located on the CD, which is supplied with
the device a and sequentially perform the installer instructions,
o if the installation program started automatically, turn it off.
• LB -797 connection to the computer (the LB79x software should be off):
o when the LB- 79xRS communication cable is included to the set connect the cable to the LB-797 probe, on the other side of the
computer (COM port), turn on power supply to the grid,
o when the LB- 376C converter is included to the set - connect the
converter to the meter LB-797 on the other hand to the computer
(USB port) using the USB cable that is supplied with the converter
set,
after connection of the LB- 376c to the computer, the
operating system should detect and automatically install the
appropriate drivers for the converter - the correct operation of
the LB- 376c converter will be indicated by a red LED
(PWR) on,
if for some reason the system does not recognize the correct
converter LB-376c, the proper driver should be installed
manually. The driver is located in the USB directory of
LB79x software (typically this is C:\ Program Files \ LB79x \
USB). To do this, use the Windows Device Manager to find
improperly installed the USB device and update the driver by
indicating the position previously described.
the above described configuration of LB-376c converter
should be done only once on the first use - every the next
connection of the converter (to the same USB port) should be
LAB-EL Elektronika Laboratoryjna (Laboratory Electronics)
14
User manual hygrometer LB -797
15
automatically detected by the operating system without any
messages from of the operating system.
• start the LB79x software and select:
o COM port number (menu Settings- serial port), to which the meter
will be connected to,
for the LB- 376c converter the port will be named (USB
Serial Port)
o the LB79x program stores the original settings of the port and if the
device is connected to the same port as before, you may skip this
step.
in
the
window
of the LB79x program the temperature display should show
•
up - it proves the correctness of communication processes. When working
with LB79x do not disconnect the LB -797 probe from the computer - it
may lead to the loss of materials characteristics, which are recorded in the
meter. The meter can be disconnected from the computer after turning off
the LB79x program .
Figure 2 Sample window of the LB79X software after connecting the probe LB -797
Figure 3 Figure LB - 376c converter - to be connected to the probe to the computer via the
USB interface
LAB-EL Elektronika Laboratoryjna (Laboratory Electronics)
15
User manual hygrometer LB -797
16
From the Panel menu, select the submenu "Charakterystyki Materiałów"
(Characteristics of Materials), all the characteristics of the material
will be read, you should select a free characteristics record by a double clicking and
fill the following fields of the characteristics record:
• activate the characteristics record (mark an appropriate box),
• select the appropriate method of measurement – (capacitance),
• activate (or not) temperature compensation - it is recommended to activate
the compensation, especially when the water volume is more than 10 % of
the sample material,
• enter a three characters material code, the shown digits are 0...9, letters: A,
B, C, D, E, F, G, H, I, L, N, O, P, R, T, U, U, Y, V, J, a space, when other
letter is used the minus sign will be displayed; unacceptable codes:
Er0...Er9, bAt 0FF, ERL, CAL. The code will be displayed on the meter.
If possible, the code should be associated with the type of material such as
sand (in Polish - piasek) - PIA etc..
• ten characters of material name - enter the name of the material such as
sand, etc.
• number of active points - enter how many points are active in the
characteristics (2...15)
• characteristic points - enter calibration points, the maximum number of
points pairs is 15, the first and last point mark the end of the measuring
range - it will be indicated by flashing a result of the measurement, using the
"wykres" (chart) button you can see how the characteristics looks visually
and whether the points are entered correctly,
• calibration certificate number - does not apply, you can type any
indication,
• date of the sheet creation - date when the characteristic has been created,
• the date of characteristic entering - the date when the characteristic was
written to the device,
• temperature compensation coefficients - if temperature compensation is
activated, you should enter the coefficients values: d = 1, a = b = c = 0,
• description of the material - 40 characters, you can briefly describe the
material.
After entering the characteristics to the meter, you should
record characteristics on the disk with the "eksportuj" (export) command, this way you
can easily restore the recorded characteristic in case of system failure (using the
"importuj" (import) command).
2.7.4.1 Authorization keys.
For each copy of LB -797 there is assigned authorization key provided by the
manufacturer, together with the LB79x program (on request). The key is related to the
type of device and its serial number. The keys are stored in the directory: KEYS of the
LB79x program (for example C:\Program Files\LB79x\KEYS). If the user
does not have an authorization key for your his/her of the LB79x meter, the program
only will operate in a demo mode (you can not make setting characteristics, etc.). File
LAB-EL Elektronika Laboratoryjna (Laboratory Electronics)
16
User manual hygrometer LB -797
17
with the appropriate key should be copied to the KEYS directory (to read the key you
should turn off and turn on the LB79x program). When selecting in the window of
LB79x program select "Ustawienia→Klucze Autoryzacyjne" (Settings → Key
Certificate Authority), you can read the current key.
2.7.5 Checking the meter readings for the new material
After entering the characteristics to the memory of the meter it is recommended to
perform test measurements. The measurements should be performed in the
measurement mode, after you press "materiał+" or "materiał-" (material) to select an
appropriate material code that has been assigned to the new material. The
measurement conditions should be identical as in the calibration process, for example
a similar manner of the probe electrodes location in the material. The effect of test
display is the humidity table, which is calculated by reference or humidity method
measured with the LB -797 meter.
Standard Humidity [%]
6,4
11,8
18,9
29,9
42,7
Humidity LB-797[%]
6,2
12,0
19,2
29,4
42,3
Table 2 Example table of the values obtained from the validation of the LB -797 meter
indications after calibration
Measurement of the dielectric constant of the material
To measure the dielectric constant of the material you have to enter the
calibration mode (Chapter Calibration meter for new materials) and perform
measurement as if the moisture in the material is measured. In the calibration mode,
the meter shows the square root of the dielectric constant of the material, to obtain the
dielectric constant you square increase the measured parameter, or press and hold the
"Pomiar POJ." button - then the display shows the dielectric constant of the material.
Another way to measure the dielectric constant of the material is to save to the device
characteristics of the material type 1:1 (two pairs of points are sufficient humidity parameter (0,0), (10,10), do not activate the temperature compensation !). After
creating the characteristic parameter measurement sqrteps (square root of the dielectric
constant of the material) we selec the appropriate by pressing materiał+ or materiałbutton for the assigned to sqrteps. This way you will not need to enter the calibration
mode to measure the dielectric constant of the material.
2.8
2.9
Displaying an additional information
This section describes additional messages, which are displayed on the meter.
2.9.1 Battery low voltage indication
The indication of the battery low voltage is two threshold:
• flashing sign
– flashing sign - poor battery but it is possible to make the
measurements, it is a signal to buy a new battery,
LAB-EL Elektronika Laboratoryjna (Laboratory Electronics)
17
User manual hygrometer LB -797
• continuous illumination of the sign
display:
18
and the inscription shown on the
bAt
indicates that the battery should be replaced.
2.9.2 Signalling excess of the measuring range
Exceeding the measuring range (bottom and top), for both humidity and
temperature, is indicated by the flashing of the measurement result. In special cases,
the flashing of the measurement result may indicate damage to the meter. In the case
of measuring conductivity there is not signaling the range - it is only a short signal
electrodes short circuit- ErL.
2.9.3 Signaling an electrodes short circuit
If during the measurement of humidity or conductivity on the display
alternately with the result of humidity shows the message:
%
ErL
this means that the probe electrodes short circuit (too high a conductivity of the
material caused by salinity). Then the measurement of humidity is significantly
erroneous and its interpretation should be performed with caution. Note: This message
may mean an erroneous reset of the meter (especially when it is displayed and the
electrodes are not located in the material), so you should try to reset to zero the meter
as instructed.
2.9.4 Displaying the serial number
Entering displaying the serial number is done by selecting the appropriate
menu option (see Menu Mode). The menu item is named "nr" (number) may be used to
display the serial number. Please confirm the menu selection with the "TAK" (yes)
button, then the serial number will be displayed. The menu is left by using the "NIE"
(NO) button.
2.9.5 Signaling the automatic temperature compensation
Automatic temperature compensation is indicated by a flashing sign °C.
2.9.6 Signaling the operation mode of LB- 796 as a reading panel
When LB- 796 works as a reading panel there is flashing colon ":" on the display.
Then all measurements, which are displayed are related to the probe, not to the
LB- 796 panel, which also has its own measuring functions. Their starting is similar to
the LB -797.
2.9.7 Other messages
• When you turn off the meter the following message displays briefly:
LAB-EL Elektronika Laboratoryjna (Laboratory Electronics)
18
User manual hygrometer LB -797
19
0FF
meaning that after a while the meter will switch off. If it does not switch off you
have to turn the device off by pressing the "wył" (off) button.
• After switching the capacitive method on, the message appears after several
CAL
seconds: which means the automatic zeroing of the probe (you should not touch
the electrode probe at that moment).
• If after you turn on the meter or during its operation the meter displays the
message:
Erx
where x = 0, 1, 2, 3 or 7, it means, that this is the time to deliver the meter for
the service. When x = 2 - you can try to hold the "materiał+" button for about
10 seconds till the sign '---' shows up and wait a few seconds after that. If you
still see the Er2 message you should be deliver the meter to the service. When
the message OFF shows up, you should turn off and turn on the meter.
• message:
Er4
indicates that there is not stored in the meter any material characteristic.
• message:
Er5
means that there is not stored in the meter any characteristics of the material in
the resistive method - the message is related to the LB- 796 panel.
• message:
Er6
indicates a communication error between the LB- 796 and LB -797 probe.
Generally, this error occurs if you disconnect the probe and the panel LB- 796
during measurements.
• message:
Er8
LAB-EL Elektronika Laboratoryjna (Laboratory Electronics)
19
User manual hygrometer LB -797
20
means that the reset has not been properly carried out. You should turn off the
meter and try to reset again.
2.10 Validation hygrometer readings
• Validate meter readings to be made in calibration mode, so be sure to enter this
mode (see the Chapter Meter calibration for new materials). The hygrometer, if
the electrodes are dry and clean, should indicate the parameter value 1.00±0.2,
otherwise you should reset the probe. After immersion in water the hygrometer
should indicate the sqrteps parameter value equal to 9.0±0.3 for water at 20 °C.
2.10.1 Resetting the probe to zero
To reset the probe to zero:
• Clean and dry the probe electrodes, the electrodes can not be placed in the
material,
• activate the temperature measurement mode with the T/TH button (above the
button there is the inscription ZERO (2sek.)). Then hold the button for about
two seconds, and after a few seconds a sign will show up on the display:
--and the meter returns to the temperature measurement, this means the end of
reset to zero. During the zeroing you may not touch the probe electrodes. Resetting to
zero should be carried out every few weeks after validation of the readings.
2.11 Notes on use
1. In the case of longer periods of the device inactivity, it is recommended to remove
the battery from the LB- 796 panel in order to avoid pouring out of the electrolyte.
2. It is recommended to use good quality batteries (alkaline, lithium).
3. You should not unplug the LB- 796 panel during device operation. Before the
battery removal the keyboard should be switched off.
4. Do not allow water to splash on the LB- 796 panel or dew to condensate on it.
5. Protect your hygrometer against exposure to strong sunlight, which can lead to
overheating of the device.
6. The hygrometer does not require maintenance.
3. Output voltage 0…10V
The LB -797 probe is equipped with a voltage output of 0..10V. Before
permanent placing the probe on the solid material such as soil, the probe should
be properly configured (save the appropriate characteristics of the material). In
the output mode the voltage corresponds to the humidity calculated on the basis of the
characteristics of position 1. 0.1V voltage corresponds to 1% relative humidity.
To start voltage output mode, connect the gray wire (RxD) to the white wire
(GND). Wiring diagram is shown in the figure below.
LAB-EL Elektronika Laboratoryjna (Laboratory Electronics)
20
User manual hygrometer LB -797
21
Voltmeter
+
V–
Pink (Vwy)
White (GND)
Grey (RxD)
Black (Screen) (*)
Brown (S300)
LB-797C
–
+
Power
Suply
12V
(*) Screen (black) should be connected to ground if the device is connected to the weather station, eg in the open air
Figure 4 Connection of the LB - 797C probe in voltage output mode
10
9
8
Voltage [V]
7
6
5
4
3
2
1
0
0
10
20
30
40
50
60
70
80
90
100
Humidity [%]
Figure 5 Output characteristics of the LB - 797C probe in voltage output mode
LAB-EL Elektronika Laboratoryjna (Laboratory Electronics)
21
User manual hygrometer LB -797
22
4. Connect the LB - 797C probe to PC via S300 interface - description of
the LBX program
The LB-797C probe is equipped with an interface of S300 digital current loop,
which allows measurements transmission over long distances. This interface, except
the data transmission, is also used for power supply to the probe. It uses for that the
two-wire line, the polarity of attaching the interface cable is arbitrary (the maximum
length of the interface wire is 2 km). It is a one-way interface - for data read-only.
There are no options for device configuring by this interface. Before placing the
probe in the material such as soil, it should be configured (save the appropriate
characteristics of the material). Humidity read via S300 is calculated on the base
of the characteristics with the number 1.
Via the S300 probe can be connected to a superior system of data collection such
as:
• LB- 473 – 8-channel hub with Modbus -RTU interface (EIA -232 or EIA- 485)
• LB -489 – 4-channel data acquisition with the Ethertnet interface,
• LB -489 – 8-channel data acquisition with the Ethertnet interface,
• LB-741 – meteorological station.
The S300/USB LB -375 converter is applied for the direct connection of the sensor
to the computer. The computer program can read measurements with LBX program.
Install this program from the supplied media (updates are available on the
http://www.label.pl/po/lbx_program.html) – run the program setup and follow the
instructions of the installer.
The LBX program has many additional features, about which learn after the
assistance starting. The LBX program displays four parameters red from the LB -797:
• moisture content in the material (calculated on the basis of
characteristics number 1),
• temperature of the material,
• the dielectric constant of the material,
• conductivity of the material.
When the measurement of any parameter is incorrect, its field will be highlighted in
red.
No.
Function
Color
Description
1
S300
Green
S300
2
RxD
Grey
RxD
3
TxD
Yellow
TxD
5
GND
White
Common
6
S300
Brown
S300
8
Vwy
Pink
Voltage output
9
Screen
Black
screen
Table 3 Table Numbering and function of the wires in the DB9M plug of LB-797C probe
LAB-EL Elektronika Laboratoryjna (Laboratory Electronics)
22
User manual hygrometer LB -797
23
If you use only the S300 cables or voltage output without DB9M plug, the cables
must be insulated.
Computer
+
Program
LBX
Green (S300)
LB-797C
Brown (S300)
LB-375
USB
Black (Screen) (*)
(*) Screen (black) should be connected to the ground if the device is used outdoors
Figure 6 Connection of the LB - 797C probe to PC via LB -375
Description of the LB -375 converter
The following figure shows the LB -375 converter.
4.1
Figure 7 LB-375 converter
NOTE: It is recommended that you install LBX before the first connection of the
LB -375 converter to your computer.
The LB -375 converter provides galvanic isolation between the probe LB-797C
and USB computer interface circuits. The converter LB-375 is equipped with two LED
indicators:
• PWR red LED - when this LED lights up it indicates a proper converter
connection to PC (proper installation of drivers),
- blinking LED indicates the correct sensor
• TX/RX green LED
communication with the computer.
Using the USB cable included in the converter set, connect the LB -375 converter
to your computer (marks on the converter housing). Windows system should report
and recognize the new USB LB-375 device (only at the first time after you connect).
LAB-EL Elektronika Laboratoryjna (Laboratory Electronics)
23
User manual hygrometer LB -797
24
The red PWR LED should light up on the converter LB-375. The S300 LB-797C
sensor should be connected to the converter on the side of inscription.
If for some reason the system does not recognize correctly the LB-375 converter
(dimmed red light after connection to a computer), you have to manually install the
driver (before that you may try to restart your computer). The driver is located in the
LBX (for example C:\Program Files\LAB
EL\LBX\drivers\usb_lb375_lb487). To do this, use the Windows Device
Manager to find improperly installed the USB device and update the driver by
indicating the previously described directory, as the location from which you wish to
download a new driver.
Note: Regardless of the number of owned converters, the driver installation is
performed only once and it should not be repeated for each of your converter.
Configuring the LBX program
After you install the LBX program on your computer, you need to properly set it
up (this is also possible at the stage of the installation). All the features of LBX
program are described in the "Pomoc" (Help) menu.
The configuration consists of adding two device to the LBX program server: the
LB-375 converter (as an intermediary device) and LB-797C probe. Run the menu
"Serwer → Konfiguracja Podstawowa" (Server → Basic Setup). The window
"Konfiguracja serwera – ustawienia podstawowe" (Server Configuration - Basic
Settings) will appear, where you may select the "Urządzenia"(Devices) tab.
4.2
Press the button
- another window will appear where you may
select the device from the drop-down type list: LB -375 ( enter a descriptive name, for
example the same as the name of the instrument). As a point of attachment please
select USB. Accept the changes by pressing "Zakończ" (Finish).
Once again, press the button
to add the LB-797 device (for
example, enter a descriptive name, which may be the same, as the name of the
LAB-EL Elektronika Laboratoryjna (Laboratory Electronics)
24
User manual hygrometer LB -797
25
instrument). This time select, as a point of attachment, "Urządzenie z serwera"
(device from the server) (from the drop-down list select the LB -375, as an input S300). Accept the changes by pressing "Zakończ" (Finish).
In the "Konfiguracja serwera – ustawienia podstawowe" (Server Configuration basic settings) you should see two devices: the LB -375 and LB -797.
Press the OK button to confirm the addition of these devices. The LBX program
should establish communication with the devices in seconds - they are shown in the
left LBX window or in the "Urządzenia" (Devices) menu. To view the current
measurements, run the menu "Urządzenia → LB-797→ Dane" (Devices → LB-797 →
Data). The window displays as on the figure below. For more information about LBX
and its capabilities view the help for LBX ("Pomoc" (Help) menu).
Figure 8 Sample LBX program window after connecting the LB -797 sensor
LAB-EL Elektronika Laboratoryjna (Laboratory Electronics)
25
User manual hygrometer LB -797
26
5. Measurement Specifications
This chapter presents the metrological parameters of the instrument for measuring
temperature, humidity and conductivity. Measuring range of materials available in the
meter is shown on the additional annex to this manual.
The hygrometer tends to show a mass humidity, which is defined as follows:
w[%]=
water mass contained in the material
• 100
mass of the absolutely dry material
If humidity is defined otherwise, it is indicated in the additional annex to the
manual (kg / kg - mass moisture, m3/m3 - volume moisture). It is possible to scale the
meter to indicate the humidity defined in other method.
PERFORMANCE DATA FOR MATERIAL MOISTURE
Measuring range
depending on the type of material (shown in the table
with a list of materials)
Resolution of
measurement
uncertainty of
measurement
0.1%
1% for moisture density in a dedicated calibration,
3% without calibration
3 % of the value measured for mass moisture
PERFORMANCE DATA FOR MATERIAL CONDUCTIVITY
Measuring range
0... 200mS / m
Resolution of
0.1 mS / m
measurement
Uncertainty of
10 % of measured value
measurement
PERFORMANCE DATA FOR TEMPERATURE
Measuring range
-20..70 °C
Resolution of
0.1 °C
measurement
Uncertainty of
± 0.2 °C
measurement
LAB-EL Elektronika Laboratoryjna (Laboratory Electronics)
26
User manual hygrometer LB -797
27
6. Technical specifications
OUTPUT VOLTAGE
Range
0...10V
Maximum load of the output
20 kohm
voltage
POWER
6F22 9V battery - for the panel LB-796P
When communicating with a computer, the
meter is powered by the computer
8 mA - temperature measurement
17... 22 mA - measurement of humidity and
conductivity
Battery
Other
Power consumption
LB -797
LB- 376c
OPERATING TEMPERATURE RANGE
device
range
0...+60°C
-20...50°C
DIMENSIONS
LB- 797A without electrodes diameter 40mm, length 240mm
LB- 797C without electrodes
LB- 376C
electrodes
drill
pipe for the probe inserting
diameter 40mm, length 160mm
56x31x24mm
diameter of 3 mm and a length of 60mm,
25mm distance
diameter of 65mm and a length of 1 meter
40mm diameter, 1 meter
density of LB -797 housing
density of housing LB- 376c
IP68 – not applicable for probe plug
IP30
Electrode material
Standard cable length
Maximum cable length
Life in the soil
OTHER PARAMETERS
stainless steel 1H18N9
1 meter LB-797A, 3.5 meters LB-797C
10 meters to communicate with LB-796, 2km
for the S300 interface, 50 meters for a
voltage output
about 10 years
LAB-EL Elektronika Laboratoryjna (Laboratory Electronics)
27